NIST SPECIAL PUBLICATION 1800-12C
Derived Personal Identity Verification (PIV) Credentials
Volume C:
How-to Guides
William Newhouse
National Cybersecurity Center of Excellence
Information Technology Laboratory
Michael Bartock
Jeffrey Cichonski
Hildegard Ferraiolo
Murugiah Souppaya
National Cybersecurity Center of Excellence
Information Technology Laboratory
Christopher Brown
Spike E. Dog
Susan Prince
Julian Sexton
The MITRE Corporation
McLean, Virginia
August 2019

DISCLAIMER
Certain commercial entities, equipment, products, or materials may be identified by name or company logo or other insignia in order to acknowledge their participation in this collaboration or to describe an experimental procedure or concept adequately. Such identification is not intended to imply special status or relationship with NIST or NCCoE; neither is it intended to imply that the entities, equipment, products, or materials are necessarily the best available for the purpose.
National Institute of Standards and Technology Special Publication 1800-12C, Natl. Inst. Stand. Technol. Spec. Publ. 1800-12C, 151 pages, (August 2019), CODEN: NSPUE2
FEEDBACK
As a private-public partnership, we are always seeking feedback on our practice guides. We are particularly interested in seeing how businesses apply NCCoE reference designs in the real world. If you have implemented the reference designs, or have questions about applying them in your environment, please email us at piv-nccoe@nist.gov.
All comments are subject to release under the Freedom of Information Act.
NATIONAL CYBERSECURITY CENTER OF EXCELLENCE
The National Cybersecurity Center of Excellence (NCCoE), a part of the National Institute of Standards and Technology (NIST), is a collaborative hub where industry organizations, government agencies, and academic institutions work together to address businesses’ most pressing cybersecurity issues. This public-private partnership enables the creation of practical cybersecurity solutions for specific industries, as well as for broad, cross-sector technology challenges. Through consortia under Cooperative Research and Development Agreements (CRADAs), including technology partners—from Fortune 50 market leaders to smaller companies specializing in information technology security—the NCCoE applies standards and best practices to develop modular, easily adaptable example cybersecurity solutions using commercially available technology. The NCCoE documents these example solutions in the NIST Special Publication 1800 series, which maps capabilities to the NIST Cybersecurity Framework and details the steps needed for another entity to re-create the example solution. The NCCoE was established in 2012 by NIST in partnership with the State of Maryland and Montgomery County, Maryland.
To learn more about the NCCoE, visit https://www.nccoe.nist.gov. To learn more about NIST, visit https://www.nist.gov.
NIST CYBERSECURITY PRACTICE GUIDES
NIST Cybersecurity Practice Guides (Special Publication 1800 series) target specific cybersecurity challenges in the public and private sectors. They are practical, user-friendly guides that facilitate the adoption of standards-based approaches to cybersecurity. They show members of the information security community how to implement example solutions that help them align more easily with relevant standards and best practices, and provide users with the materials lists, configuration files, and other information they need to implement a similar approach.
The documents in this series describe example implementations of cybersecurity practices that businesses and other organizations may voluntarily adopt. These documents do not describe regulations or mandatory practices, nor do they carry statutory authority.
Acronyms used in figures can be found in the Acronyms appendix.
ABSTRACT
Federal Information Processing Standards (FIPS) Publication 201-2, “Personal Identity Verification (PIV) of Federal Employees and Contractors,” establishes a standard for a PIV system based on secure and reliable forms of identity credentials issued by the federal government to its employees and contractors. These credentials are intended to authenticate individuals to federally controlled facilities, information systems, and applications as part of access management. In 2005, when FIPS 201 was published, authentication of individuals was geared toward traditional computing devices (i.e., desktop and laptop computers) where the PIV Card provides common multifactor authentication mechanisms through integrated or external smart card readers, where available. With the emergence of computing devices, such as tablets, hybrid computers, and, in particular, mobile devices, the use of PIV Cards has proved to be challenging. Mobile devices lack the integrated smart card readers found in laptop and desktop computers and require separate card readers attached to devices to provide authentication services. To extend the value of PIV systems into mobile devices that do not have PIV Card readers, NIST developed technical guidelines on the implementation and life cycle of identity credentials that are issued by federal departments and agencies to individuals who possess and prove control over a valid PIV Card. These NIST guidelines, published in 2014, describe Derived PIV Credentials (DPCs) that leverage identity proofing and vetting results of current and valid PIV credentials.
To demonstrate the DPC guidelines, the NCCoE at NIST built two security architectures using commercial technology to enable the issuance of a Derived PIV Credential to mobile devices that use Identity Credentialing and Access Management shared services. One option uses a software-only solution while the other leverages hardware built into many computing devices used today.
This project resulted in a freely available NIST Cybersecurity Practice Guide that demonstrates how an organization can continue to provide multifactor authentication for users with a mobile device that leverages the strengths of the PIV standard. Although this project is primarily aimed at the federal sector’s needs, it is also relevant to mobile device users with smart-card-based credentials in the private sector.
KEYWORDS
cybersecurity; Derived PIV Credential (DPC); enterprise mobility management (EMM); identity; mobile device; mobile threat; multifactor authentication; personal identity verification (PIV); PIV Card; smart card
ACKNOWLEDGMENTS
We are grateful to the following individuals for their generous contributions of expertise and time.
| Name | Organization |
|---|---|
| Walter Holda | MobileIron |
| Loay Oweis | MobileIron |
| Sean Frazier | MobileIron |
| Dan Miller | Entrust Datacard |
| Bryan Rosensteel | Entrust Datacard |
| Dror Shilo | Intel Corporation |
| Simy Cohen | Intel Corporation |
| Abhilasha Bhargav-Spantzel | Intel Corporation |
| Carlton Ashley | Intel Corporation |
| Alfonso Villasenor | Intel Corporation |
| Won Jun | Intercede |
| Alan Parker | Intercede |
| Allen Storey | Intercede |
| Iain Wotherspoon | Intercede |
| Andre Varacka | Verizon |
| Russ Weiser | Verizon |
| Emmanuel Bello-Ogunu | The MITRE Corporation |
| Lorrayne Auld | The MITRE Corporation |
| Sarah Kinling | The MITRE Corporation |
| Poornima Koka | The MITRE Corporation |
| Matthew Steele | The MITRE Corporation |
The Technology Partners/Collaborators who participated in this build submitted their capabilities in response to a notice in the Federal Register. Respondents with relevant capabilities or product components were invited to sign a Cooperative Research and Development Agreement (CRADA) with NIST, allowing them to participate in a consortium to build these example solutions. We worked with:
| Technology Partner/Collaborator | Build Involvement |
|---|---|
| Entrust Datacard | Entrust IdentityGuard, Entrust Managed Services Public Key Infrastructure (PKI) |
| Intel Corporation | Intel Authenticate Solution |
| Intercede | MyID Credential Management System |
| MobileIron | MobileIron Enterprise Mobility Management Platform |
| Verizon | Verizon Shared Service Provider PKI |
List of Figures
Figure 1-1 Lab Network Diagram
Figure 2-2 MobileIron Registration Confirmation Page
Figure 2-3 Derived Mobile Smart Credential QR Code Activation Page
Figure 2-6 Certificate Profile Attributes
List of Tables
Table 2-1 Identity Management Profiles
Table 2-2 MobileIron Core Settings
Table 2-3 SQL Server Components
1. Introduction
The following volumes of this guide show information technology (IT) professionals and security engineers how we implemented these example solutions. We cover all of the products employed in these reference designs. We do not re-create the product manufacturers’ documentation, which is presumed to be widely available. Rather, these volumes show how we incorporated the products together in our environment.
Note: These are not comprehensive tutorials. There are many possible service and security configurations for these products that are out of scope for these reference designs.
1.1. Practice Guide Structure
This National Institute of Standards and Technology (NIST) Cybersecurity Practice Guide demonstrates two standards-based reference designs and provides users with the information they need to replicate a Derived Personal Identity Verification (PIV) Credential (DPC) life-cycle solution. These reference designs are modular and can be deployed in whole or in part.
This guide contains three volumes:
- NIST SP 1800-12A: Executive Summary
- NIST SP 1800-12B: Approach, Architecture, and Security Characteristics – what we built and why
- NIST SP 1800-12C: How-To Guides – instructions for building the example solutions (you are here)
Depending on your role in your organization, you might use this guide in different ways:
Business decision makers, including chief security and technology officers, will be interested in the Executive Summary, NIST SP 1800-12A, which describes the following topics:
- challenges that enterprises face in issuing strong, multifactor credentials to mobile devices
- example solutions built at the NCCoE
- benefits of adopting an example solution
Technology or security program managers who are concerned with how to identify, understand, assess, and mitigate risk will be interested in NIST SP 1800-12B, which describes what we did and why. The following sections will be of particular interest:
- Section 3.5.3, Risk, provides a description of the risk analysis we performed.
- Section 3.5.4, Security Control Map, maps the security characteristics of these example solutions to cybersecurity standards and best practices.
You might share the Executive Summary, NIST SP 1800-12A, with your leadership team members to help them understand the importance of adopting a standards-based DPC solution.
IT professionals who want to implement an approach like this will find this whole practice guide useful. You can use this How-To portion of the guide, NIST SP 1800-12C, to replicate all or parts of the build created in our lab. This How-To portion of the guide provides specific product installation, configuration, and integration instructions for implementing the example solutions. We do not recreate the product manufacturers’ documentation, which is generally widely available. Rather, we show how we incorporated the products together in our environment to create example solutions.
This guide assumes that IT professionals have experience implementing security products within the enterprise. While we have used a suite of commercial products to address this challenge, this guide does not endorse these particular products. Your organization can adopt one of these solutions or one that adheres to these guidelines in whole, or you can use this guide as a starting point for tailoring and implementing parts of a DPC example solution. Your organization’s security experts should identify the products that will best integrate with your existing tools and IT system infrastructure. We hope that you will seek products that are congruent with applicable standards and best practices. Volume B, Section 3.6, Technologies, lists the products that we used and maps them to the cybersecurity controls provided by these reference solutions.
1.2. Build Overview
Unlike desktop computers and laptops that have built-in readers to facilitate the use of PIV Cards, mobile devices pose usability and portability issues because they lack a smart card reader.
NIST sought to address this issue by introducing the general concept of DPCs in NIST Special Publication (SP) 800-63-2, which leverages identity proofing and vetting results of current and valid credentials. Published in 2014, NIST SP 800-157, Guidelines for Derived Personal Identity Verification (PIV) Credentials, defined requirements for initial issuance and maintenance of DPCs. NIST’s Applied Cybersecurity Division then created a National Cybersecurity Center of Excellence (NCCoE) project to provide an example implementation for federal agencies and private entities that follows the requirements in NIST SP 800-157.
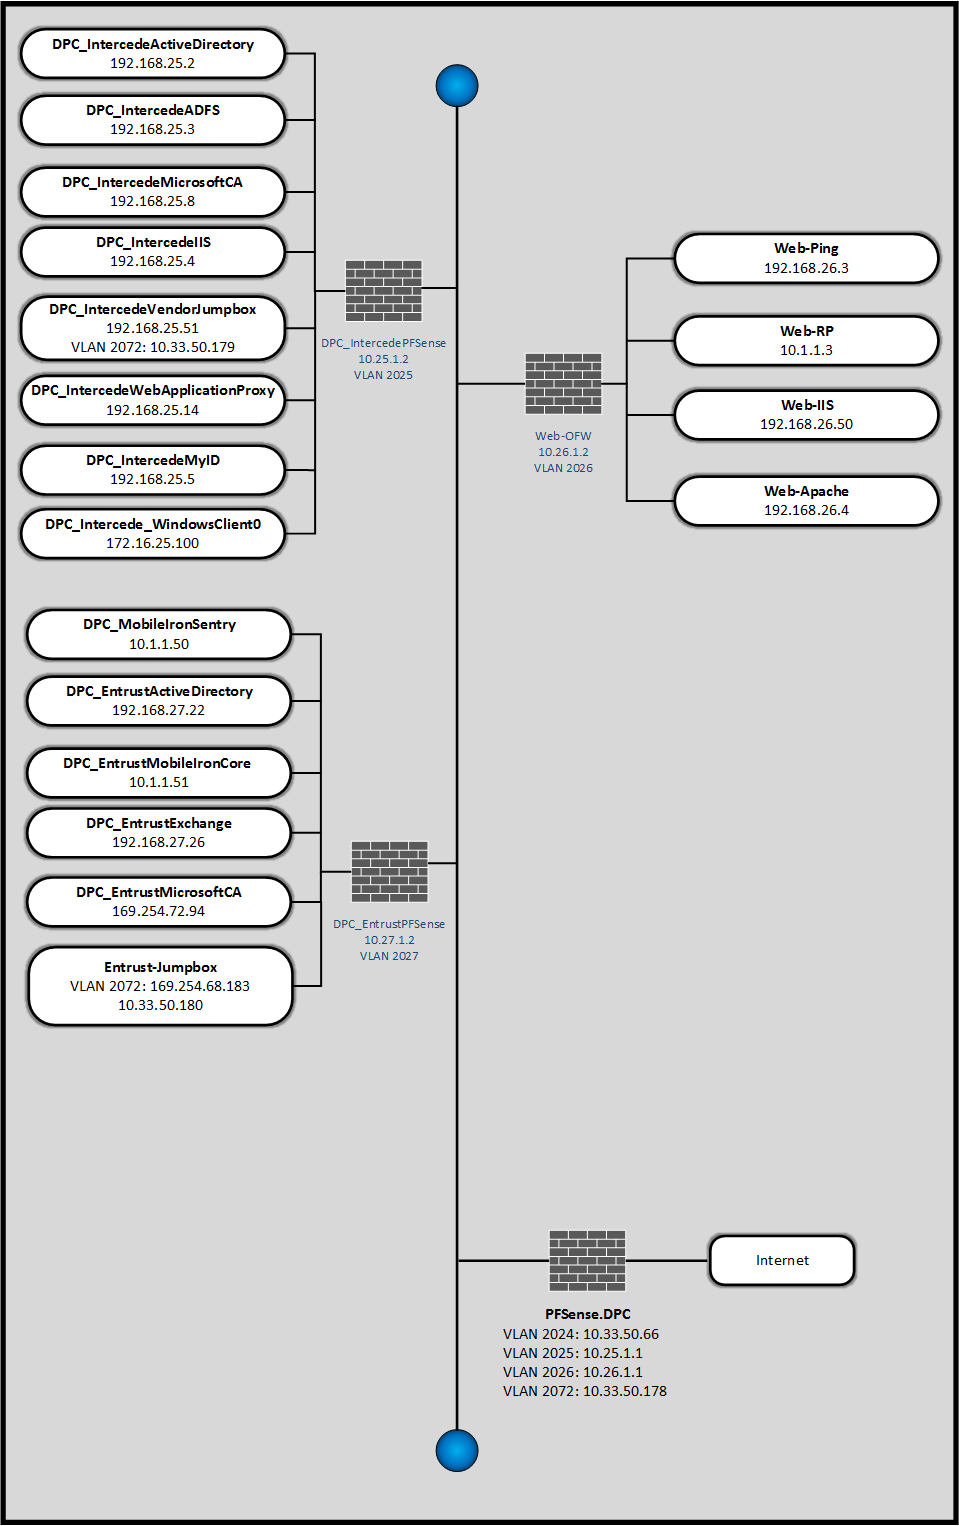
In the NCCoE lab, the team built an environment that resembles an enterprise network by using commonplace components such as identity repositories, supporting certificate authorities (CA), and web servers. In addition, products and capabilities were identified that, when linked together, provide two example solutions that demonstrate life-cycle functions outlined in NIST SP 800-157. Figure 1-1 depicts the final lab environment.
Figure 1-1 Lab Network Diagram
1.3. Typographic Conventions
The following table presents typographic conventions used in this volume.
| Typeface/Symbol | Meaning | Example |
|---|---|---|
| Italics | filenames and pathnames, references to documents that are not hyperlinks, new terms, and placeholders | For detailed definitions of terms, see the NCCoE Glossary. |
| Bold | names of menus, options, command buttons and fields | Choose File > Edit. |
Monospace
|
command-line input, on-screen computer output, sample code examples, status codes | mkdir
|
Monospace Bold
|
command-line user input contrasted with computer output | service sshd start
|
| blue text | link to other parts of the document, a web URL, or an email address | All publications from NIST’s National Cybersecurity Center of Excellence are available at https://www.nccoe.nist.gov. |
2. Product Installation Guides
This section of the practice guide contains detailed instructions for installing and configuring key products used for the depicted architectures documented below, as well as demonstration of the DPC life-cycle management activities of initial issuance and termination.
In our lab environment, each example implementation was logically separated by a virtual local area network (VLAN), where each VLAN represented a mock enterprise environment. The network topology consists of an edge router connected to a demilitarized zone (DMZ). An internal firewall separates the DMZ from internal systems that support the enterprise. All routers and firewalls used in the example implementations were virtual pfSense appliances.
As a basis, the enterprise network had an instance of Active Directory (AD) to serve as a repository for identities to support DPC vendors.
2.1. Managed Service Architecture with Enterprise Mobility Management (EMM) Integration
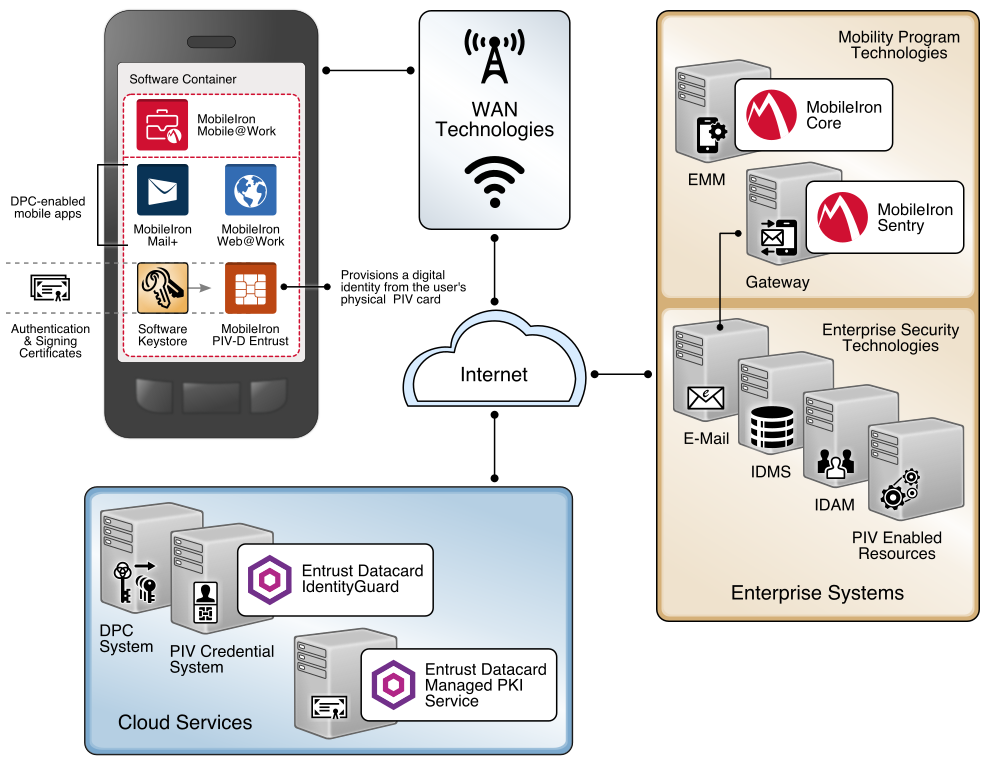
Figure 2-1 Architecture
2.1.1. Entrust Datacard IdentityGuard (IDG)
Entrust Datacard contributed test instances of its managed public key infrastructure (PKI) service and IdentityGuard products, the latter of which directly integrate with MobileIron to support the use of DPC with MobileIron Mobile@Work applications. Contact Entrust Datacard (https://www.entrust.com/contact/) to establish service instances in support of DPC with MobileIron (https://www.mobileiron.com/).
2.1.1.1. Identity Management Profiles
To configure services and issue certificates for DPCs that will work with the organizationʼs user identity profiles, Entrust Datacard will need information on how identities are structured and which users will use PKI services. For this lab instance, Entrust Datacard issued PIV Authentication, Digital Signature, and Encryption certificates for PIV Cards and DPCs for two test identities, as represented in Table 2-1.
Table 2-1 Identity Management Profiles
| Username | Email Address | User Principal Name (UPN) |
|---|---|---|
| Patel, Asha | asha@entrust.dpc.nccoe.org | asha@entrust.dpc.nccoe.org |
| Tucker, Matteo | matteo@entrust.dpc.nccoe.org | matteo@entrust.dpc.nccoe.org |
2.1.2. MobileIron Core
MobileIron Core is the central product in the MobileIron suite. The following sections describe the steps for installation, configuration, and integration with Active Directory and the Entrust Datacard IdentityGuard managed service. Key configuration files used in this build are listed in Table 2-2 and are available from the NCCoE DPCs Project website.
Table 2-2 MobileIron Core Settings
| File Name | Description |
|---|---|
| core.dpc.nccoe.org-Default AppConnect Global Policy-2017-08-14 16-48-36.json | Configures policies such as password strength for the container |
| core.dpc.nccoe.org-Default Privacy Policy-2017-08-14 16-52-33.json | Configures privacy settings for each enrolled device |
| core.dpc.nccoe.org-DPC Security Policy-2017-08-14 16-51-07.json | Configures device-level security management settings |
| shared_mdm_profile.mobileconfig | iOS Mobile Device Management (MDM) profile used when issuing DPC to devices |
2.1.2.1. Installation
Follow the steps below to install MobileIron Core:
- Obtain a copy of the On-Premise Installation Guide for MobileIron Core, Sentry, and Enterprise Connector from the MobileIron support portal.
- Follow the MobileIron Core predeployment and installation steps in Chapter 1 for the version of MobileIron being deployed in the organization’s environment. In our lab implementation, we deployed MobileIron Core 9.2.0.0 as a Virtual Core running on VMware 6.0.
2.1.2.2. General MobileIron Core Setup
The following steps are necessary for mobile device administrators or users to register devices with MobileIron, which is a prerequisite to issuing DPCs.
- Obtain a copy of MobileIron Core Device Management Guide for iOS Devices from the Mobile-Iron support portal.
- Complete all instructions provided in Chapter 1, Setup Tasks.
2.1.2.3. Configuration of MobileIron Core for DPC
The following steps will reproduce this configuration of MobileIron Core.
2.1.2.3.1. Integration with Active Directory
In our implementation, we chose to integrate MobileIron Core with Active Directory by using lightweight directory access protocol (LDAP). This is optional. General instructions for this process are covered in the Configuring LDAP Servers section in Chapter 2 of On-Premise Installation Guide for MobileIron Core, Sentry, and Enterprise Connector. The configuration details used during our completion of selected steps (retaining original numbering) from that guide are given below:
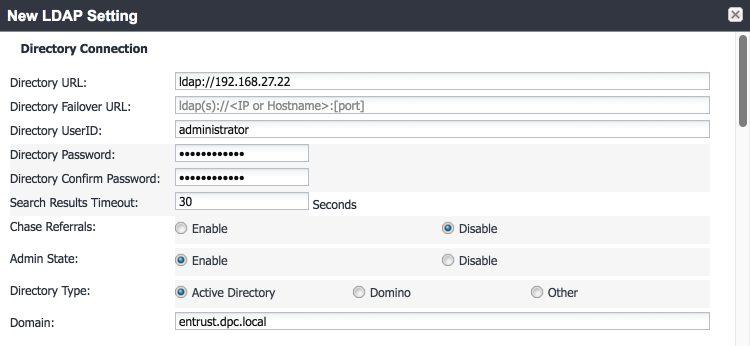
From Step 4 in the MobileIron guide, in the New LDAP Server dialogue:
Directory Connection:
Directory Configuration—Organizational Units (OUs):

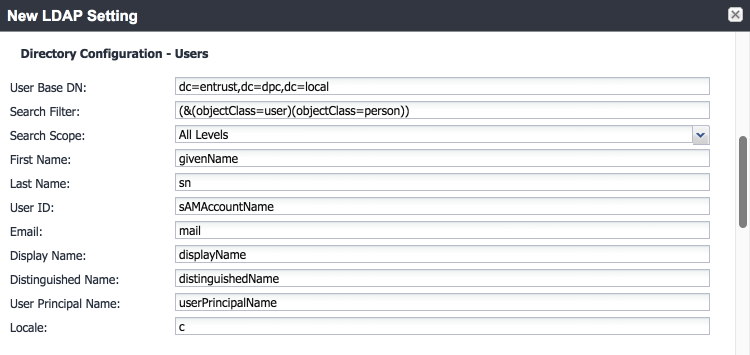
Directory Configuration—Users:
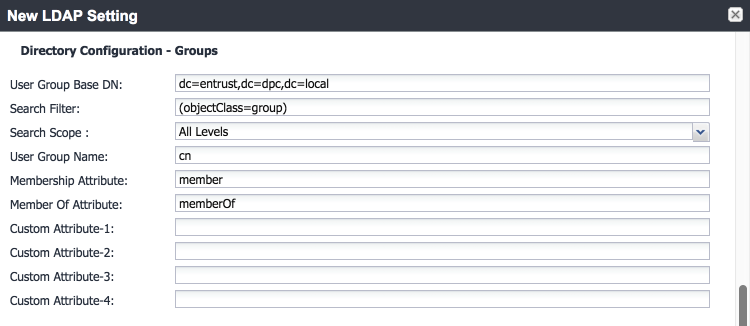
Directory Configuration—Groups:
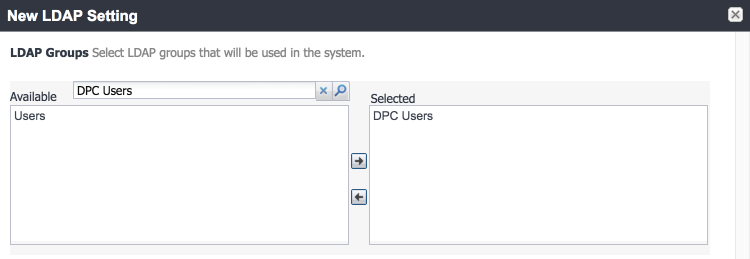
LDAP Groups:
As a prerequisite step, we used Active Directory Users and Computers to create a new security group for DPC-authorized users on the Domain Controller for the entrust.dpc.local domain. In our example, this group is named DPC Users.
In the search bar, enter the name of the LDAP group for DPC-authorized users, and click the magnifying glass button; the group name should be added to the Available list.
In the Available list, select DPC Users, and click the right-arrow button to move it to the Selected list.
In the Selected list, select the default Users group, and click the left-arrow button to move it to the Available list.
Custom Settings: Custom settings were not specified.
Advanced Options:
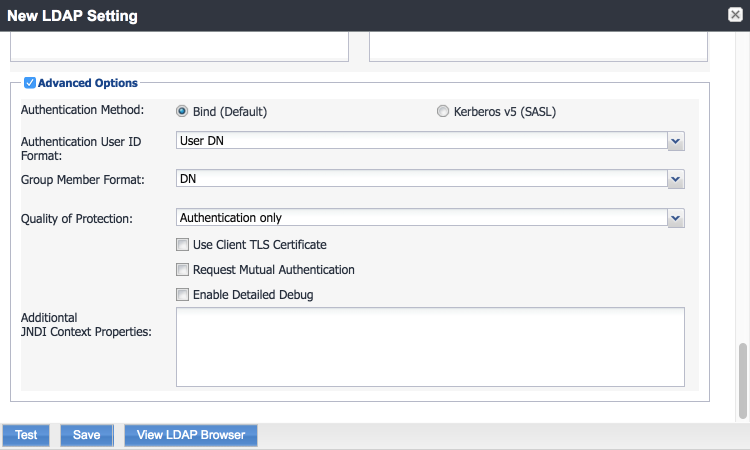
Note: In our lab environment, we did not enable stronger Quality of Protection or enable the Use Client TLS Certificate or Request Mutual Authentication features. However, we recommend that implementers consider using those additional security mechanisms to secure communications with the LDAP server.
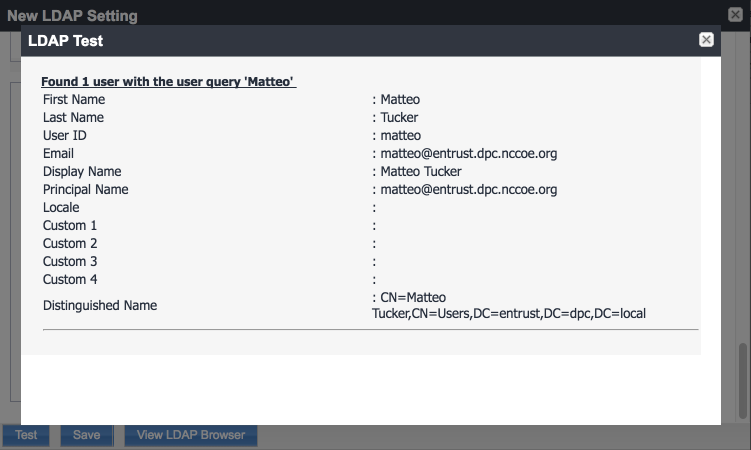
From Steps 19 to 21 from the MobileIron guide, we tested that MobileIron can successfully query LDAP for DPC Users.
In the New LDAP Setting dialogue, click the Test button to open the LDAP Test dialogue.
In the LDAP Test dialogue, enter a User ID for a member of the DPC Users group, then click the Submit button. A member of the DPC Users group in our environment is Matteo.
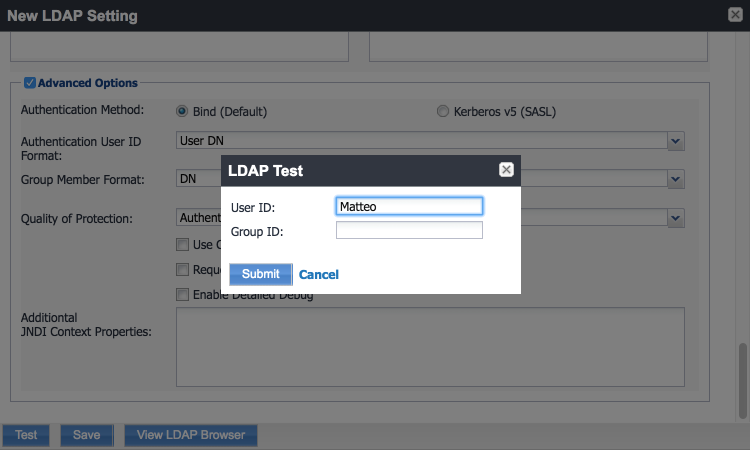
The LDAP Test dialogue indicates the query was successful:
2.1.2.3.2. Create a DPC Users Label
MobileIron uses labels to link policies and device configurations with users and mobile devices. Creating a unique label for DPC users allows mobile device administrators to apply controls relevant for mobile devices provisioned with a derived credential specifically to those devices. We recommend applying DPC-specific policies and configurations to this label, in addition to any others appropriate to an organization’s mobile device security policy.
In the MobileIron Core Admin Portal, navigate to Devices & Users > Devices.
Select Advanced Search (far right).
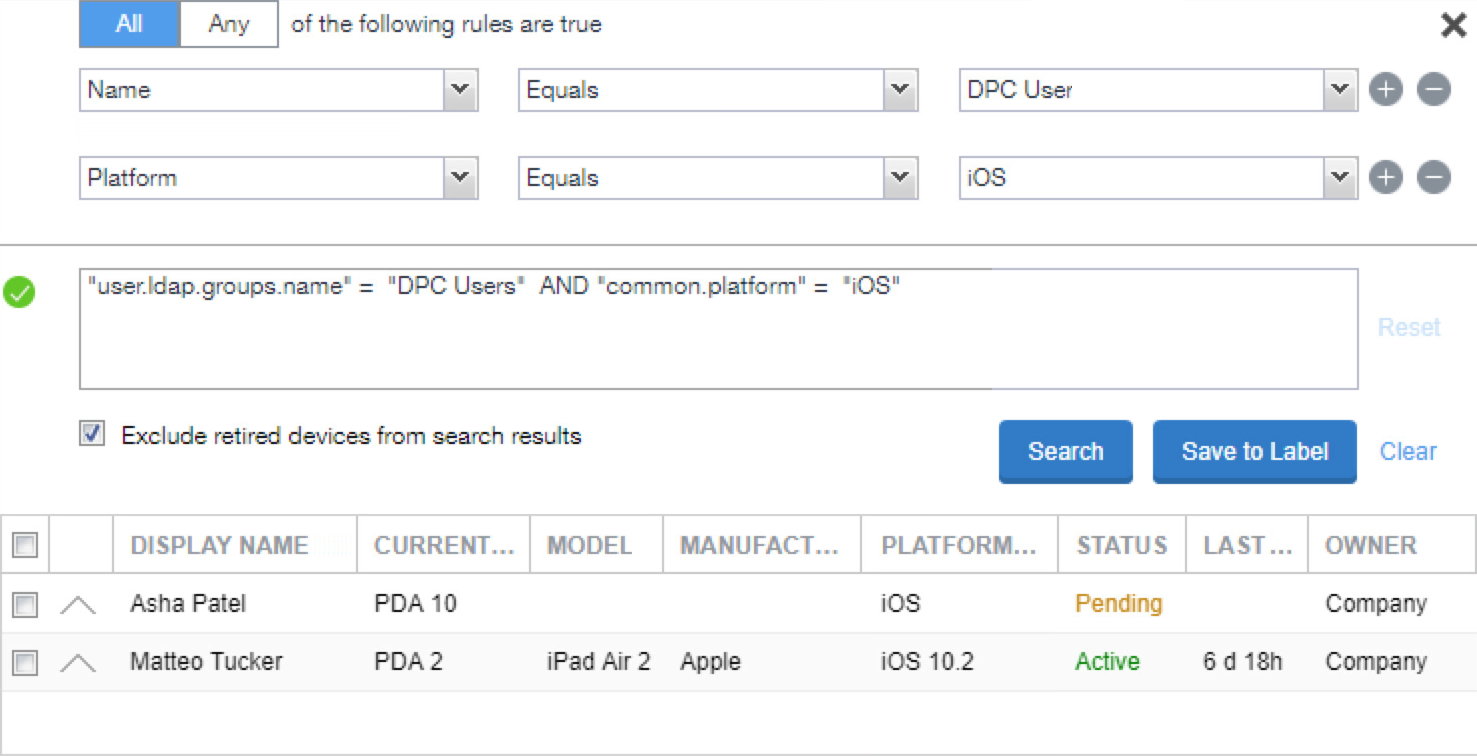
In the Advanced Search pane:
In the blank rule:
- In the Field drop-down menu, select User > LDAP > Groups > Name.
- In the Value drop-down menu, select the Active Directory group created to support DPC-specific MobileIron policies (named DPC Users in this example).
Select the plus sign icon to add a blank rule.
In the newly created blank rule:
- In the Field drop-down menu, select Common > Platform.
- In the Value drop-down menu, select iOS.
Optionally, select Search to view matching devices.
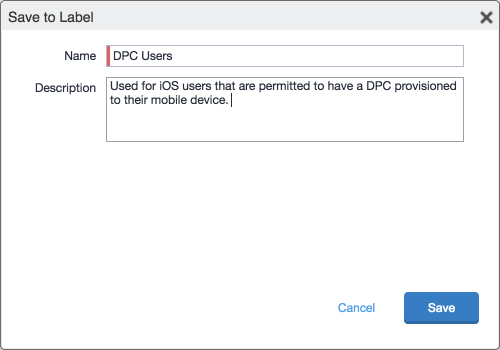
Select Save to Label.
In the Save to Label dialogue:
- In the Name field, enter a descriptive name for this label (DPC Users in this example).
- In the Description field, provide additional information to convey the purpose of this label.
- Click Save.
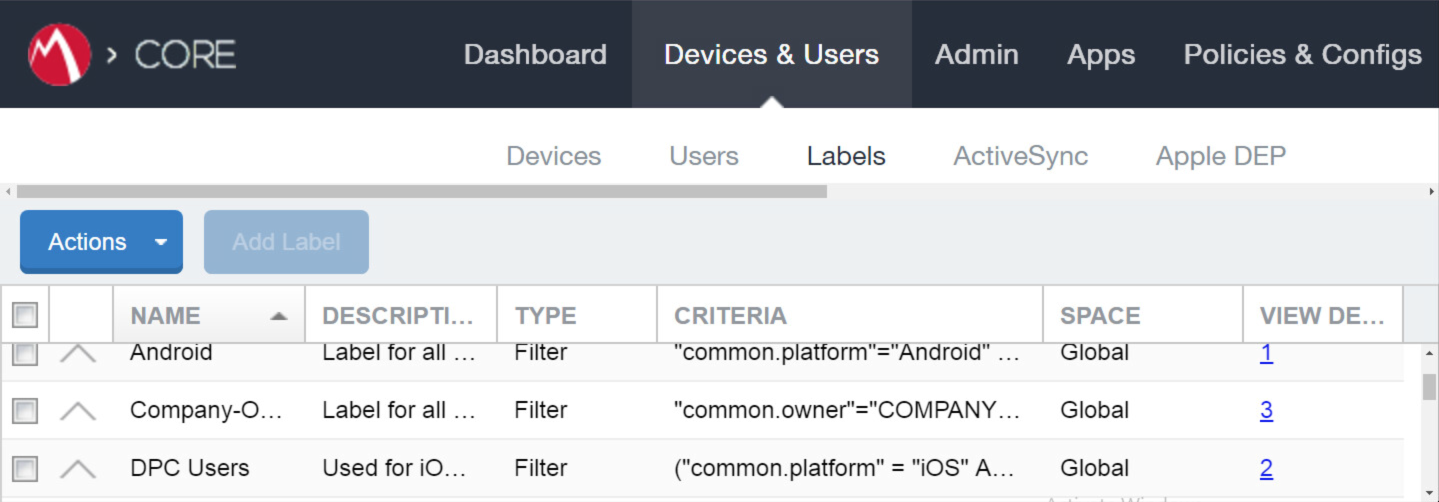
Navigate to Devices & Users > Labels to confirm that the label was successfully created. It can be applied to DPC-specific MobileIron policies and configurations in future steps.
2.1.2.3.3. Implement MobileIron Guidance
The following provides the sections from the MobileIron Derived Credentials with Entrust Guide that were used in configuring this instance of MobileIron DPC. For sections for which there may be configuration items tailored to a given instance (e.g., local system host names), this configuration is provided only as a reference. We noted any sections in which the steps performed to configure our systems vary from those in the MobileIron Derived Credentials with Entrust Guide.
Complete these sections in Chapter 2 of the MobileIron Derived Credentials with Entrust Guide:
Before beginning:
Configure client certificate authentication to the user portal.
Note: The root CA certificate or trust chain file can be obtained from Entrust Datacard.
Configure the Entrust IdentityGuard Self-Service Module universal resource locator.
Note: The URL will be specific to the organization’s instance of the IDG service and can be obtained from Entrust Datacard.
Configure PIN-based registration.
Configure user portal roles.
Add the PIV-D Entrust application to the App Catalog and add Web@Work for iOS.
Configure Apps@Work.
- Set authentication options.
- Send the Apps@Work web clip to devices.
Configure AppConnect.
- Configure AppConnect licenses.
- Configure the AppConnect global policy. The AppConnect Passcode policy settings for our implementation are presented below.
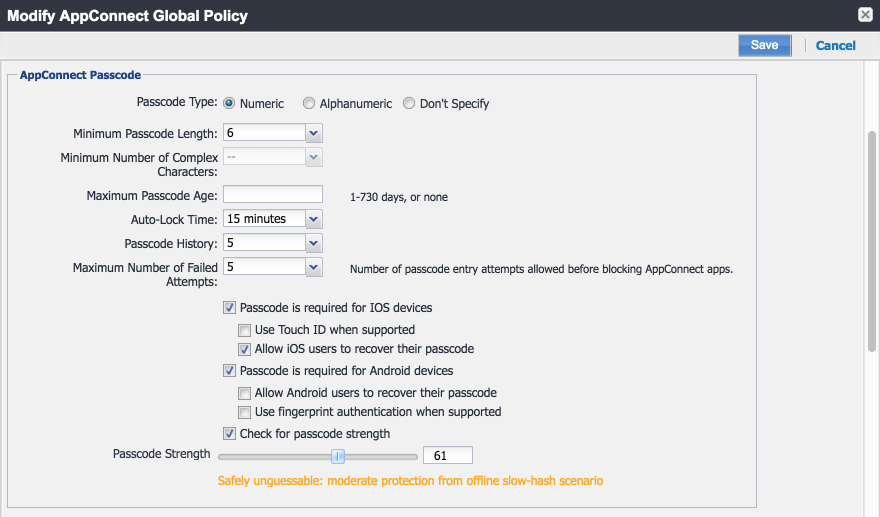
Note: Based on our testing, a Passcode Strength of 61/100 or higher prevents easily guessable derived credential passcode combinations (e.g., abc123) from being set by a DPC Applicant.
Configure the PIV-D Entrust application.
Configure client-provided certificate enrollment settings. Note that the configuration items created by completing this section will be used in the following section. Replace Step 2 in this section of the MobileIron Derived Credentials with Entrust Guide with the following step:
Select Add New > Certificate Enrollment > SCEP.
Configure Web@Work to use DPC:
Require a device password.
Configure a Web@Work setting. The Custom Configurations key-value pairs set for our instance in Step 4 are presented below.
Note: The value for
idCertificate_1is the descriptive name we applied to the Simple Certificate Enrollment Protocol (SCEP) certificate enrollment configuration for derived credential authentication created in the MobileIron Derived Credentials with Entrust Guide section referenced in Step 8.
2.1.3. DPC Life-Cycle Workflows
This section describes how to perform the DPC life-cycle activities of initial issuance, maintenance, and termination.
2.1.3.1. DPC Initial Issuance
This section provides the steps necessary to issue a DPC onto a target mobile device.
2.1.3.1.1. Register Target Device with MobileIron
The following steps will register the target mobile device with MobileIron, which will create the secure Mobile@Work container into which a DPC is later provisioned.
Insert a valid PIV Card into the card reader attached to or integrated into your laptop or computer workstation.
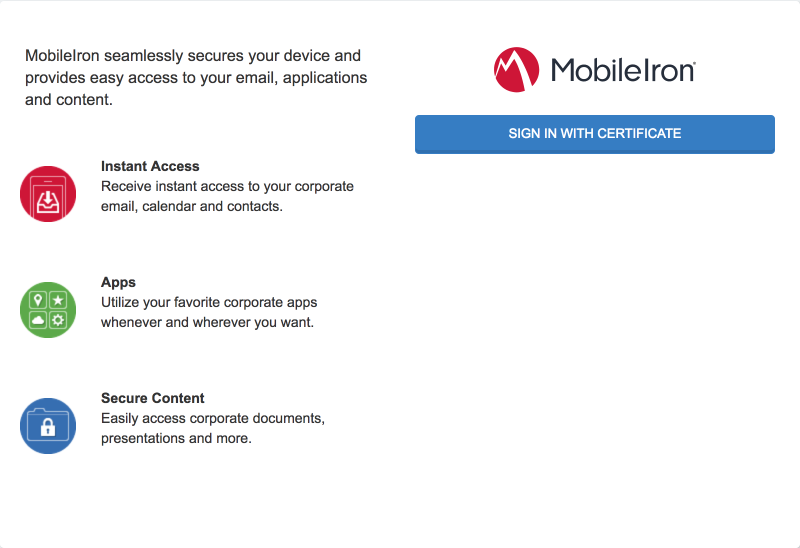
Using a web browser, visit the MobileIron Self-Service Portal URL provided by the administrator.
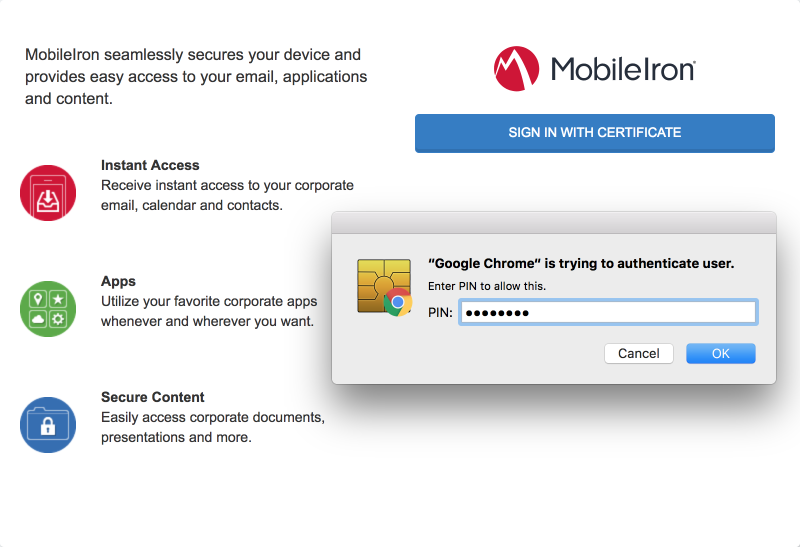
In the MobileIron Self-Service Portal, click Sign in with certificate.
In the certificate selection dialogue:
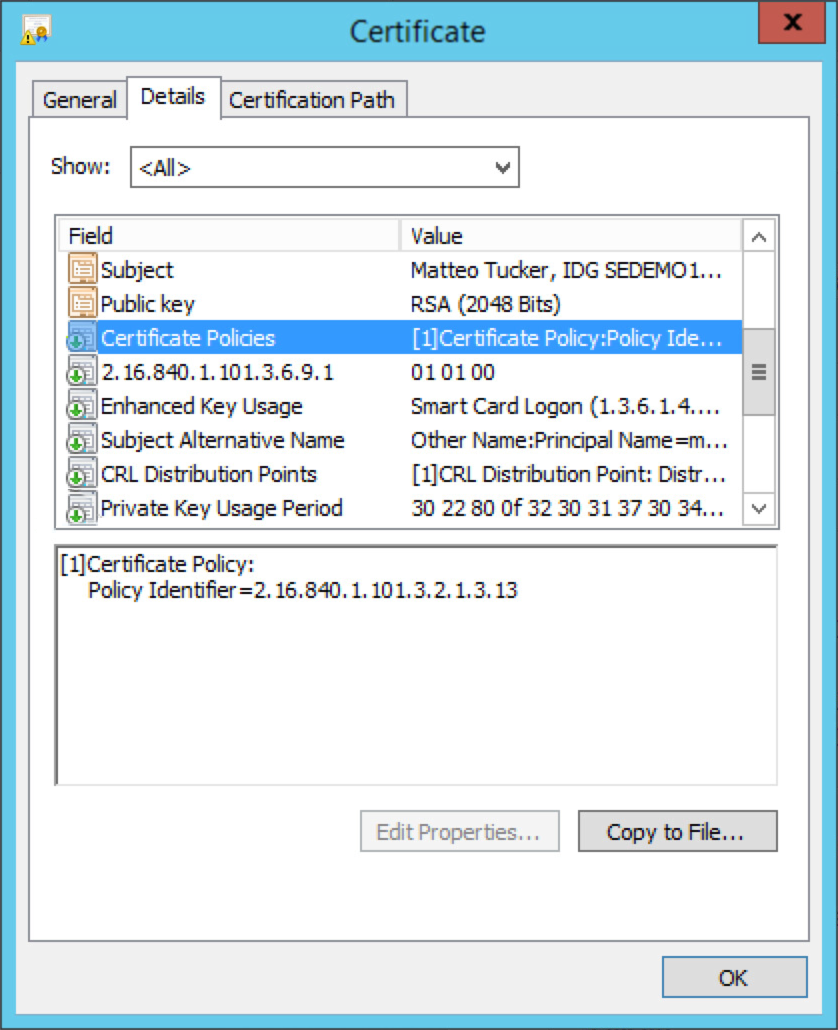
If necessary, identify your PIV Authentication certificate:
Highlight a certificate.
Select Show Certificate.
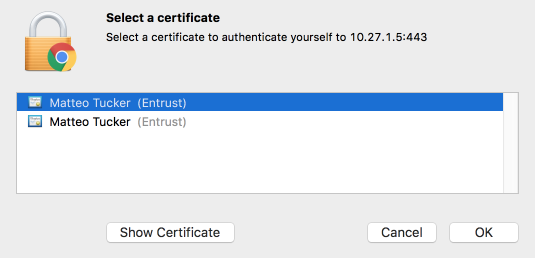
Navigate to the Details tab.
The PIV Authentication certificate contains a Field named Certificate Policies with a Value that contains Policy Identifier=2.16.840.1.101.3.2.1.3.13.
Repeat Steps i–iii above as necessary.
Select your PIV Authentication certificate in the list of available certificates.
Click OK.
In the authentication dialogue:
- In the PIN field, enter your PIV Card PIN.
- Click OK.
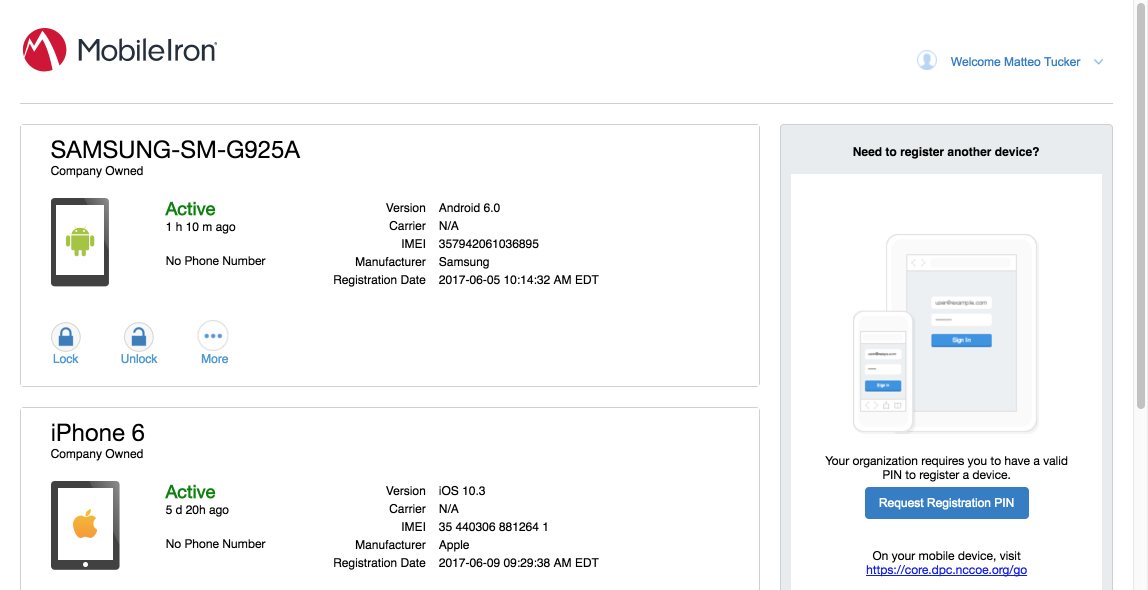
In the right-hand sidebar of the device summary screen, click Request Registration PIN.
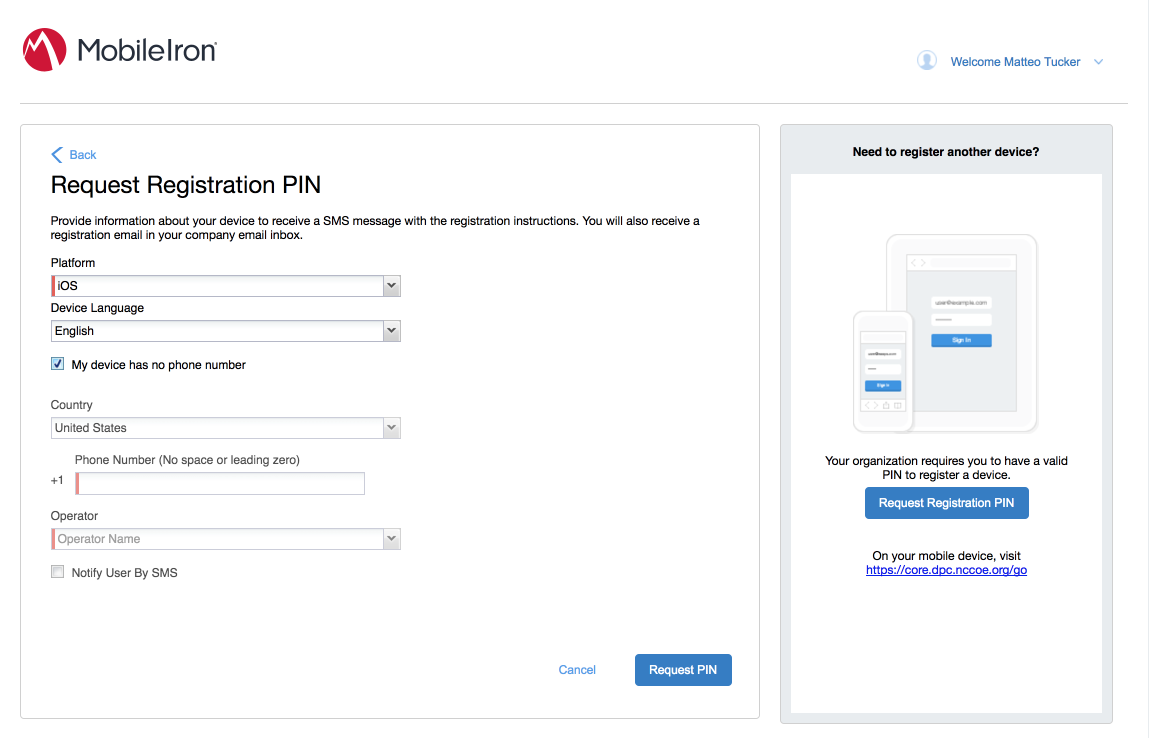
In the Request Registration PIN page:
Select iOS from the Platform drop-down menu.
If your device does not have a phone number, check My device has no phone number.
If your device has a phone number, enter it in the Phone Number field.
Click Request PIN.
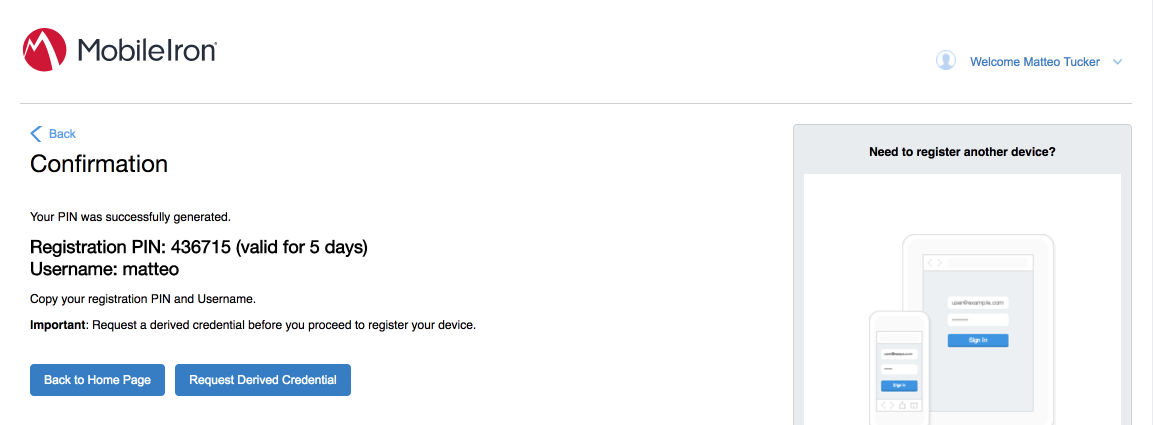
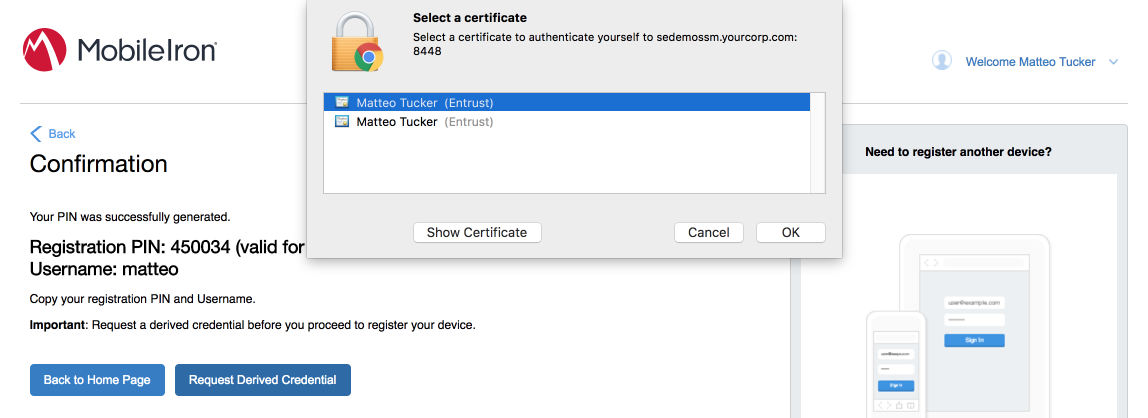
The Confirmation page, shown in Figure 2-2, displays a unique device Registration PIN. Leave this page open while additional registration steps are performed on the target mobile device.
Note: This page may also facilitate the workflow for initial DPC issuance, covered in Section 2.1.3.1.2.
Figure 2-2 MobileIron Registration Confirmation Page
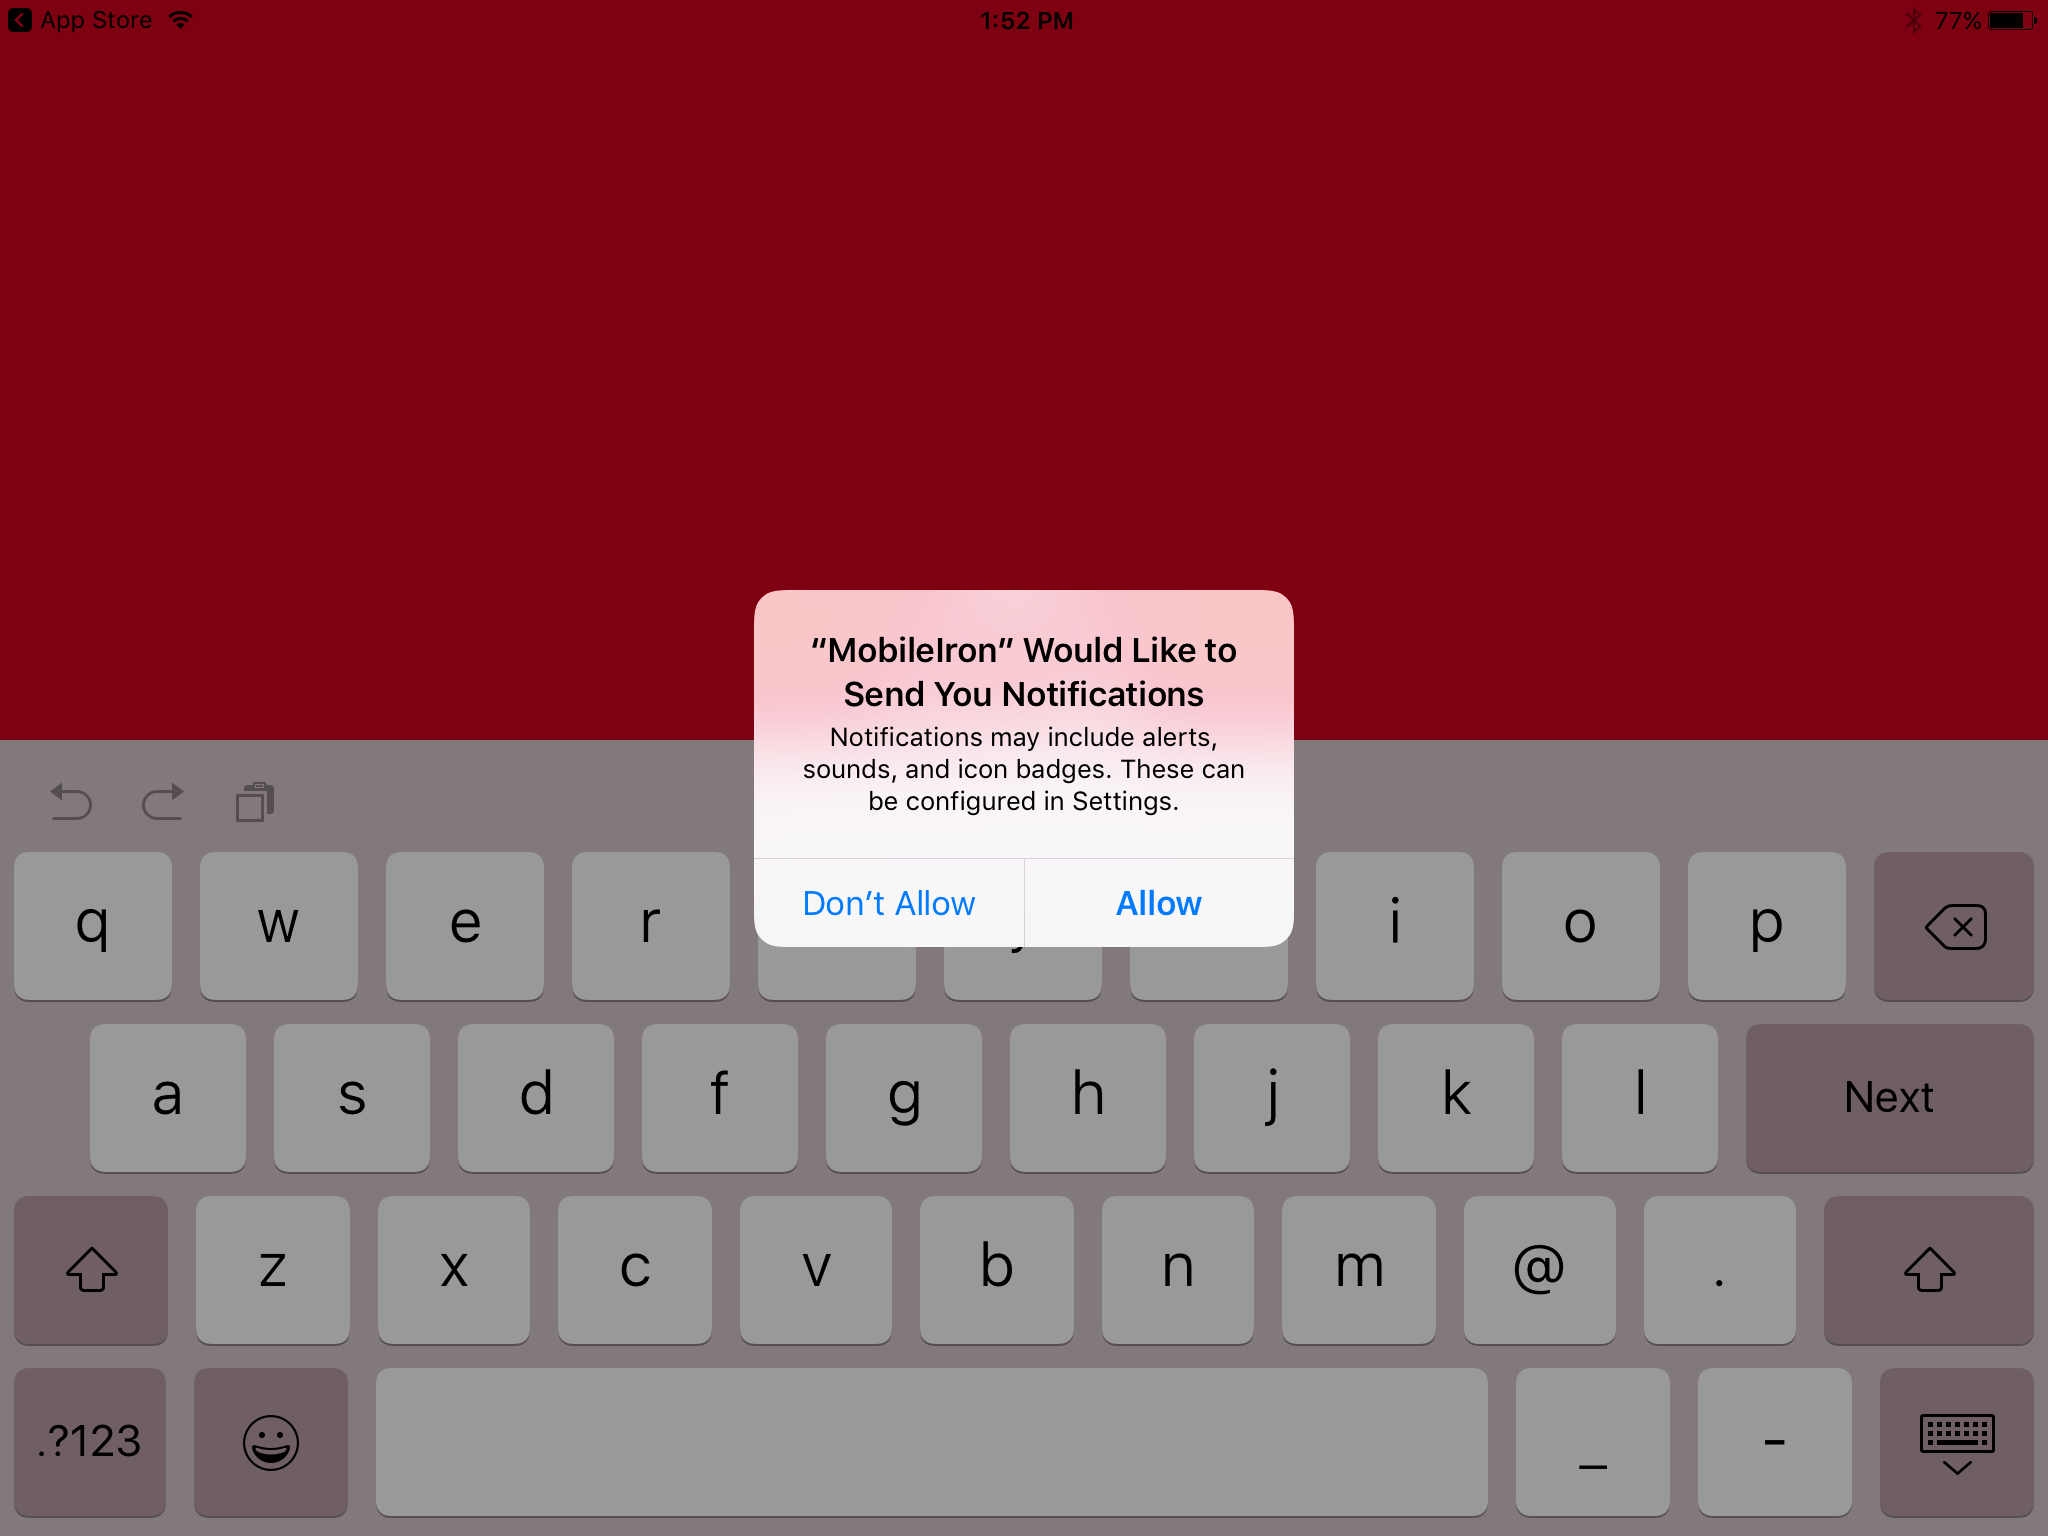
Using the target mobile device, launch the MobileIron Mobile@Work application.
In the request to grant MobileIron permission to receive push notifications, tap Allow.
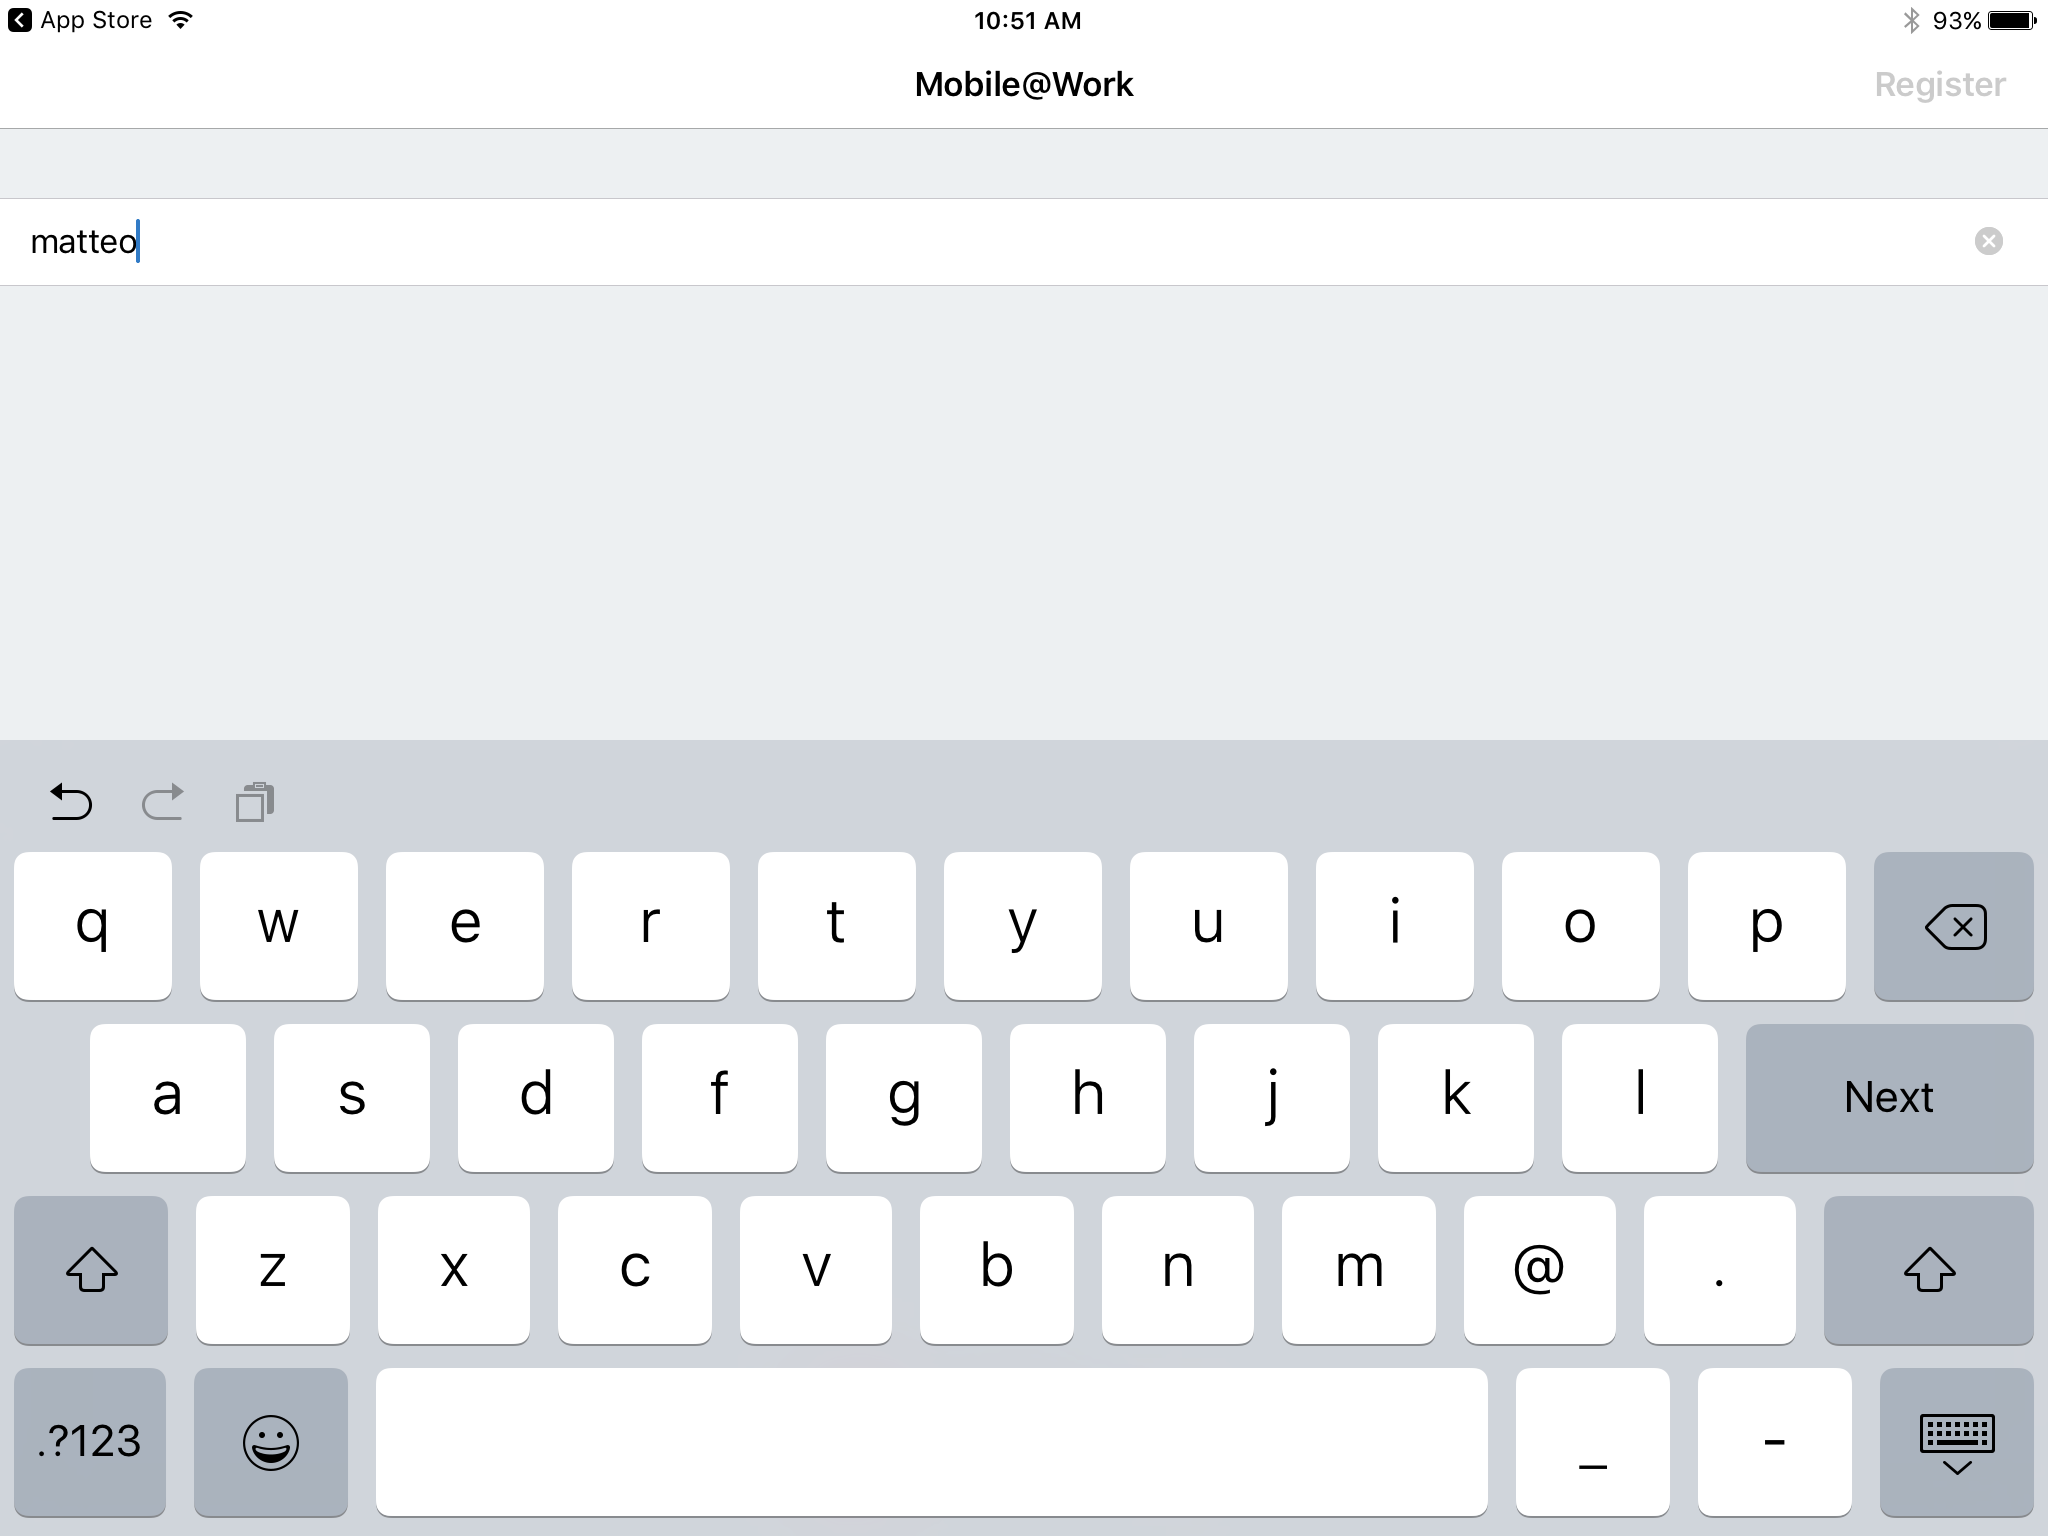
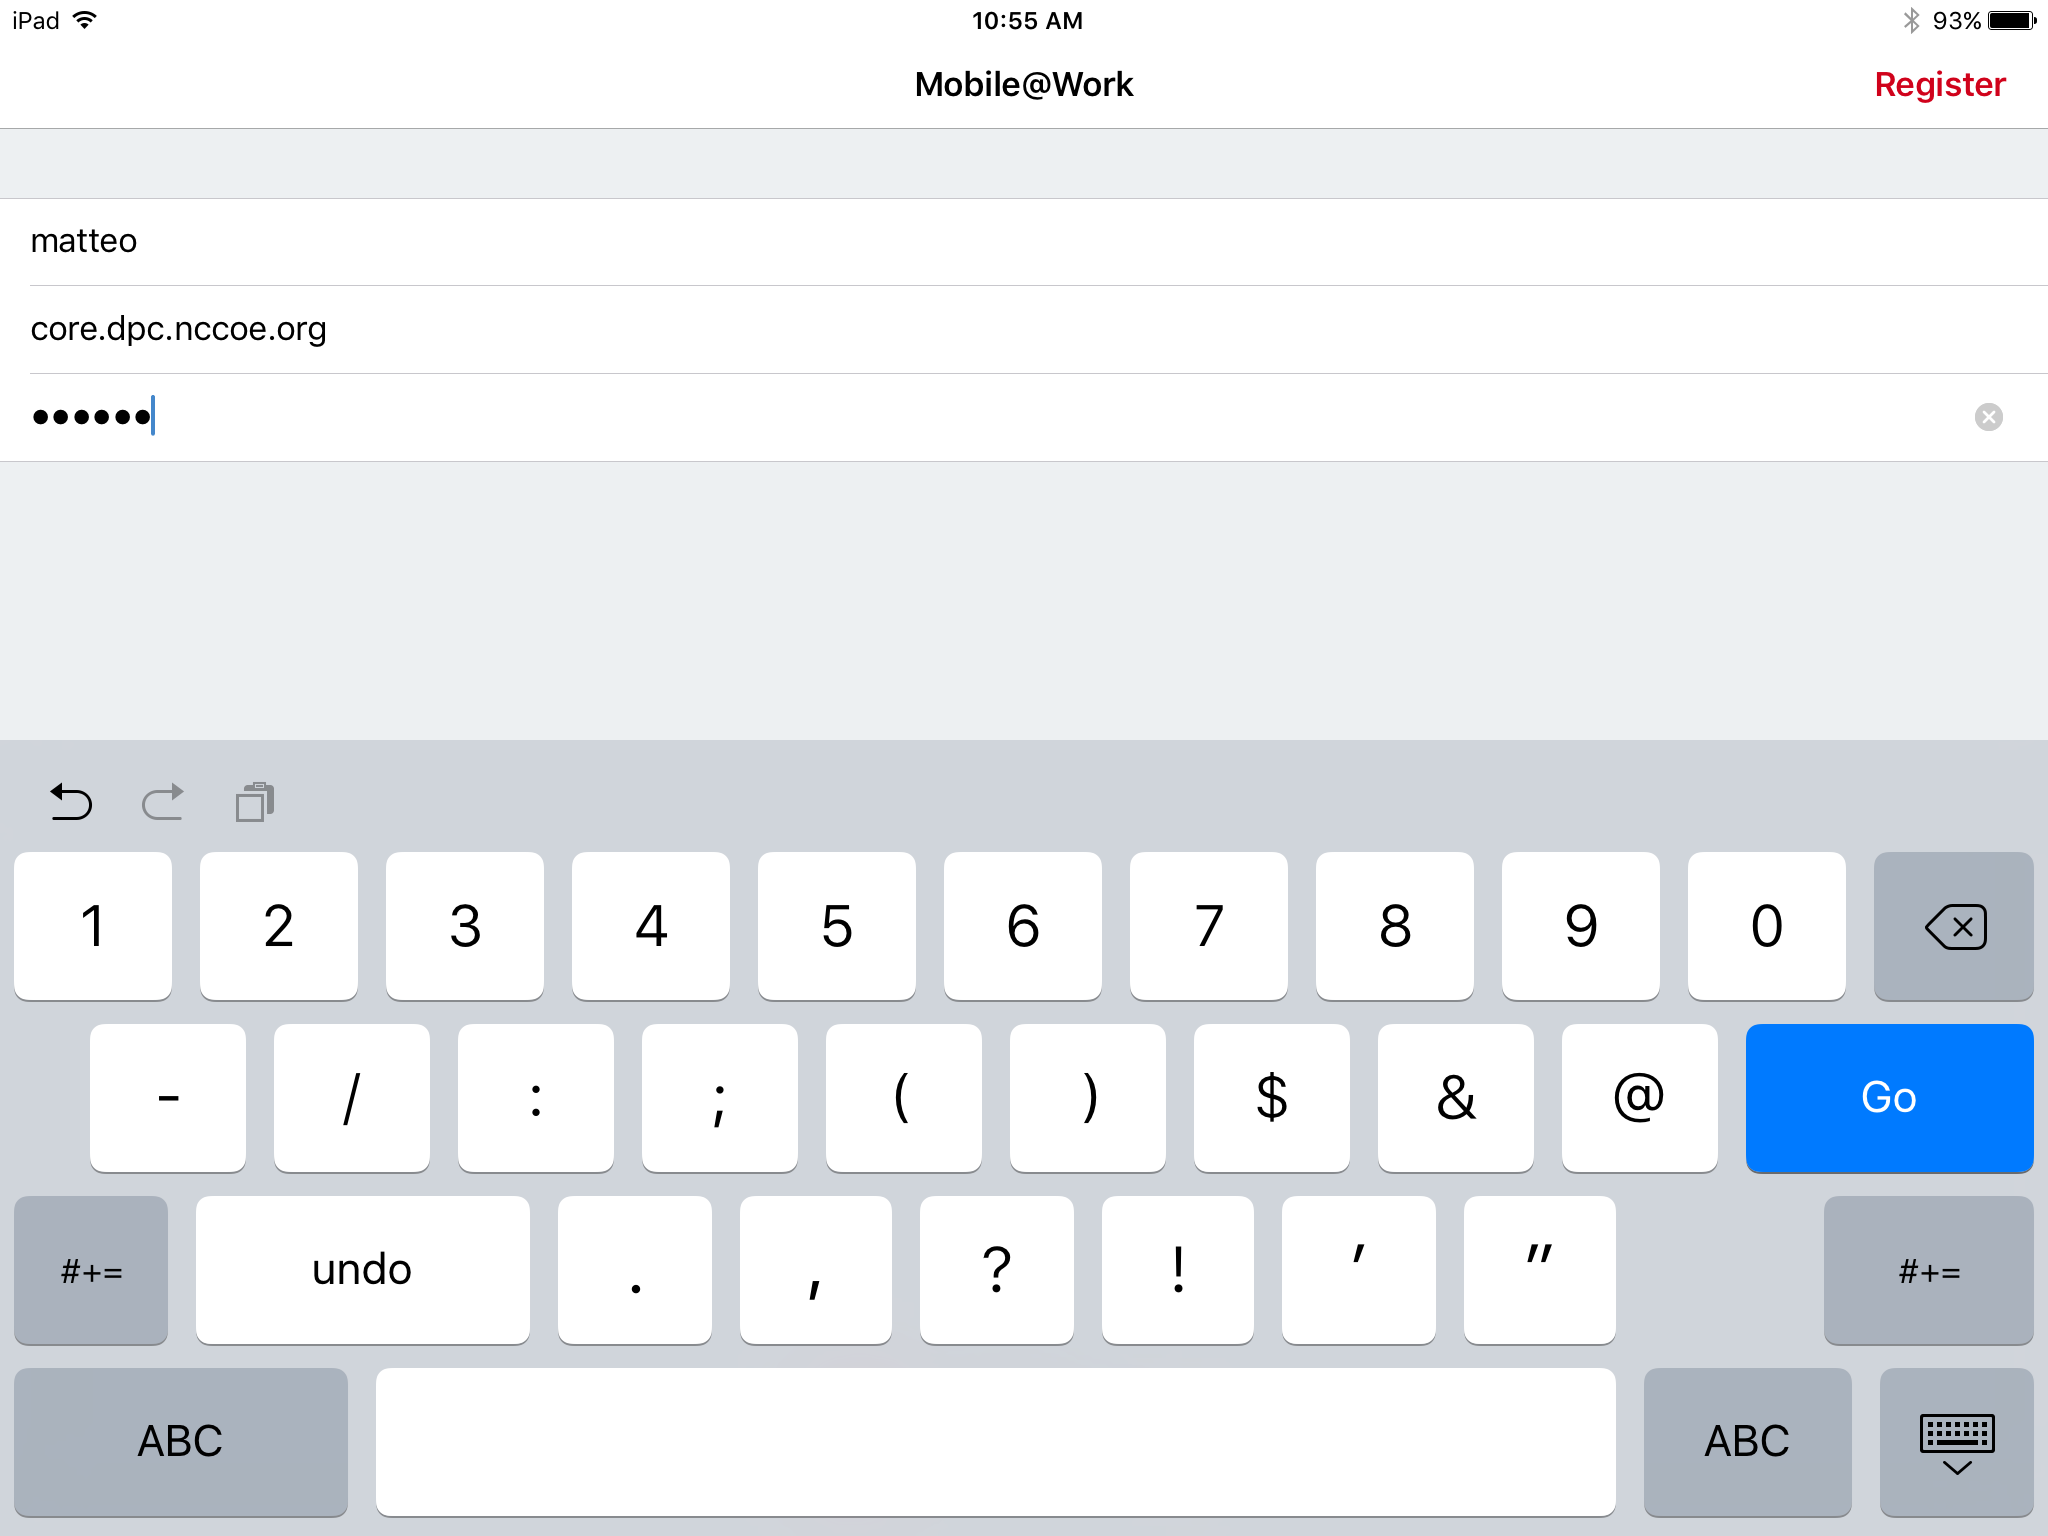
In Mobile@Work:
In the User Name field, enter your LDAP or MobileIron user ID.
Tap Next.
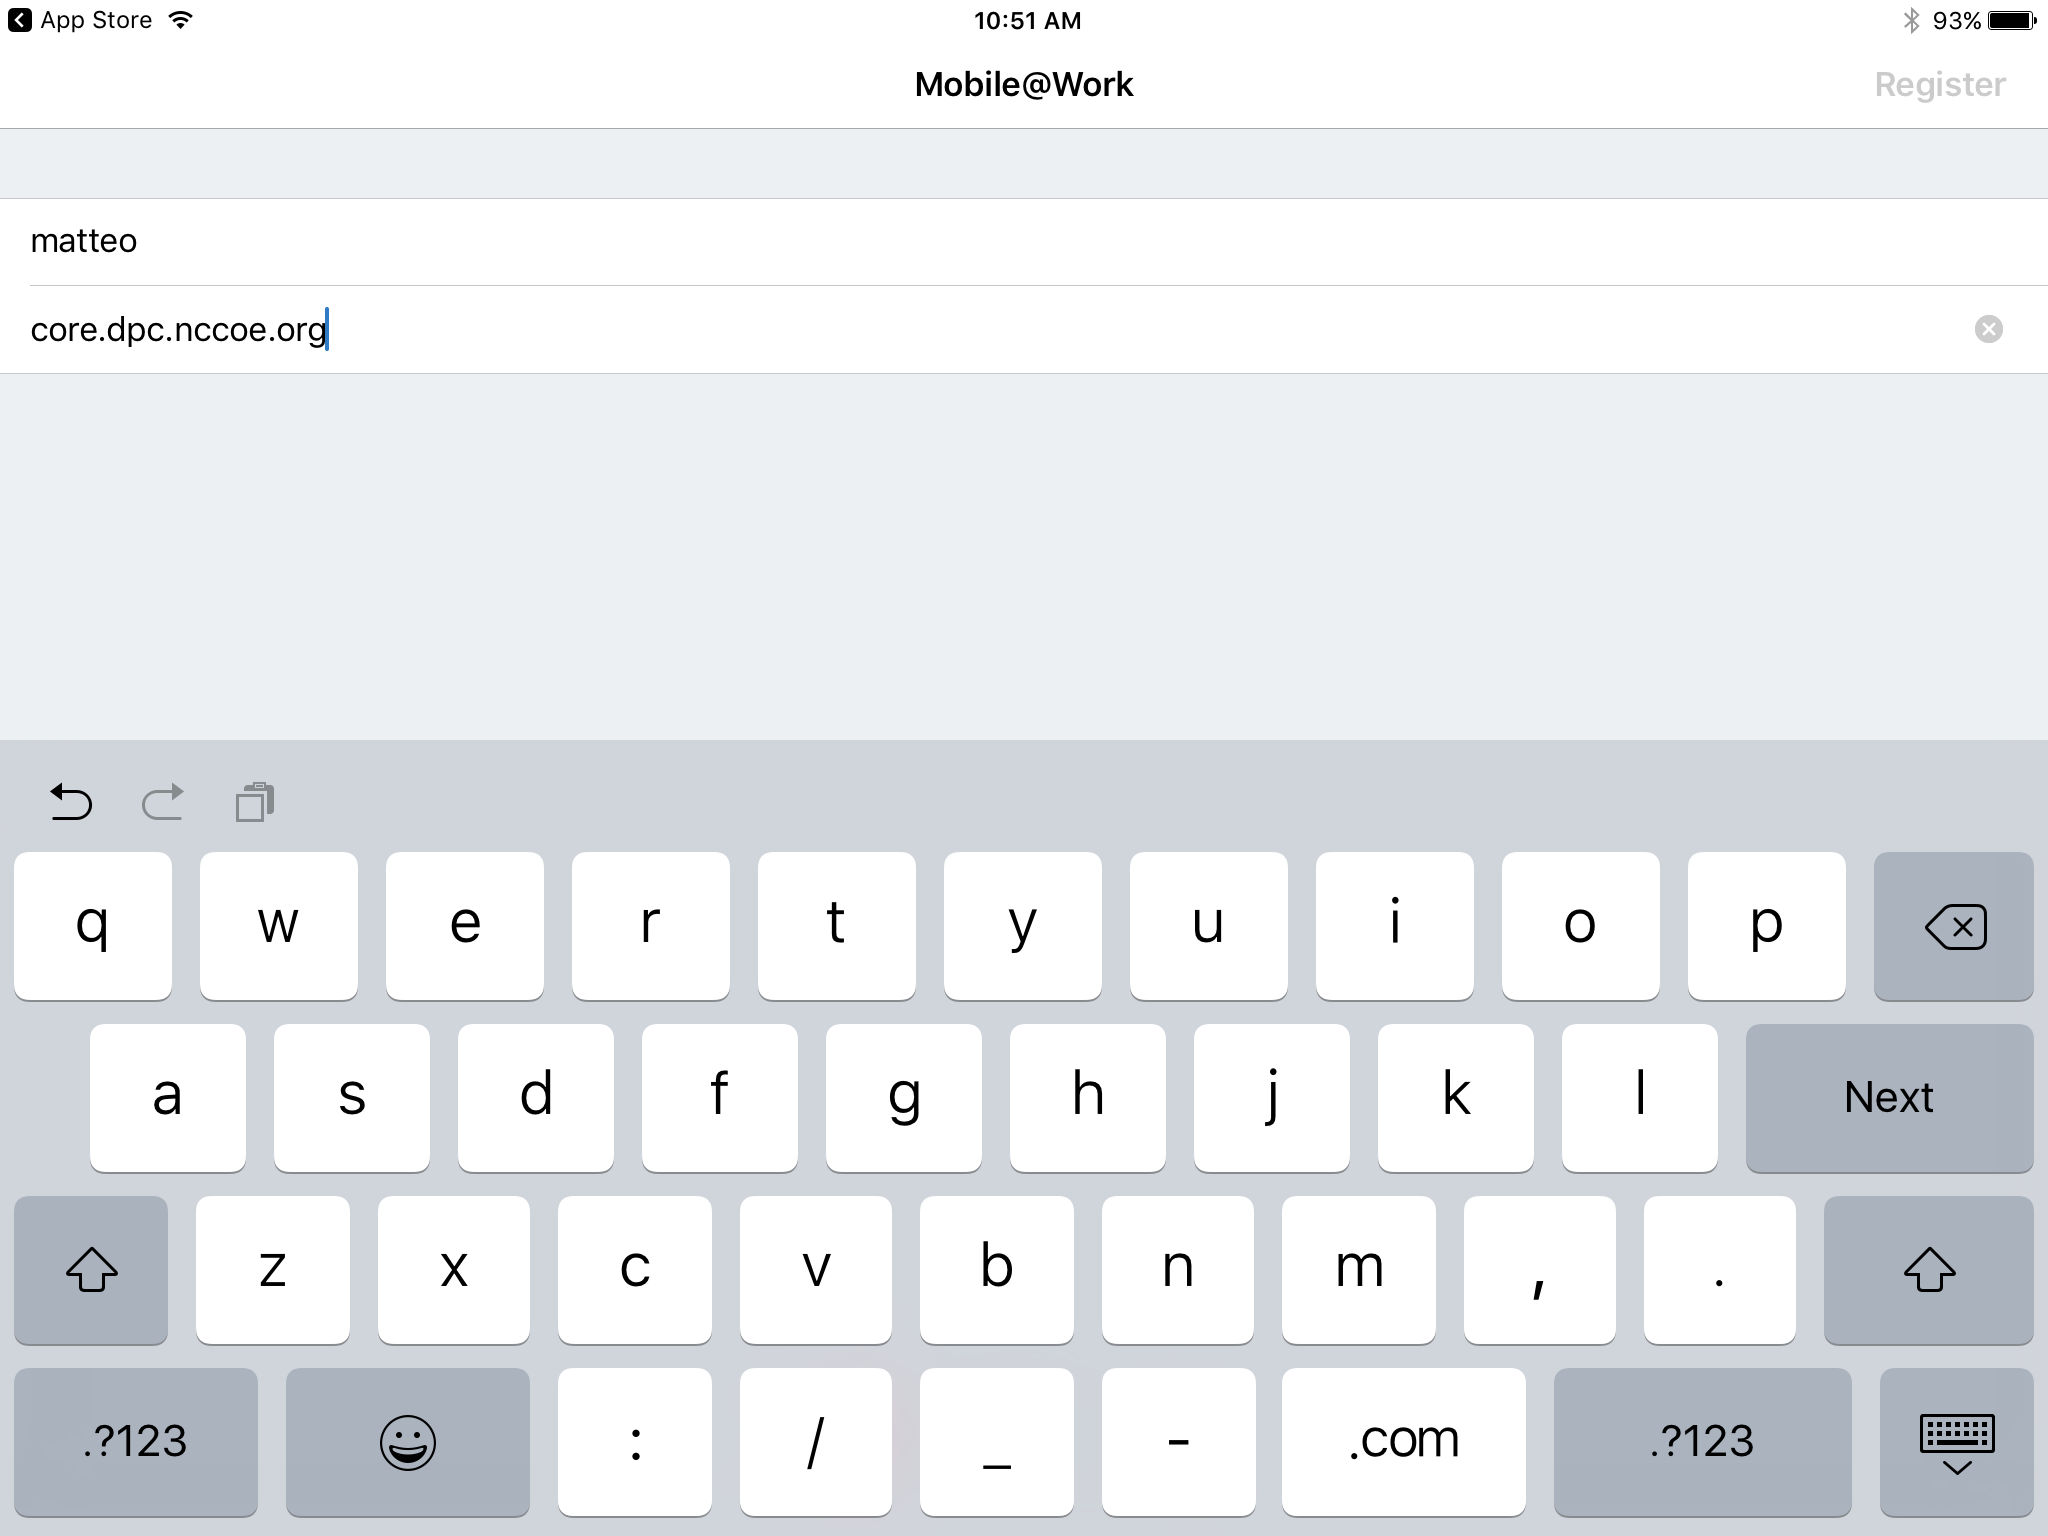
In the Server field, enter the URL for the organizationʼs instance of MobileIron Core as provided by a MobileIron Core administrator.
Tap Next.
In the PIN field, enter the Registration PIN displayed in the Confirmation page (see Figure 2-2) of the MobileIron Self-Service Portal at completion of Step 7e.
Tap Go on keyboard or Register in Mobile@Work.
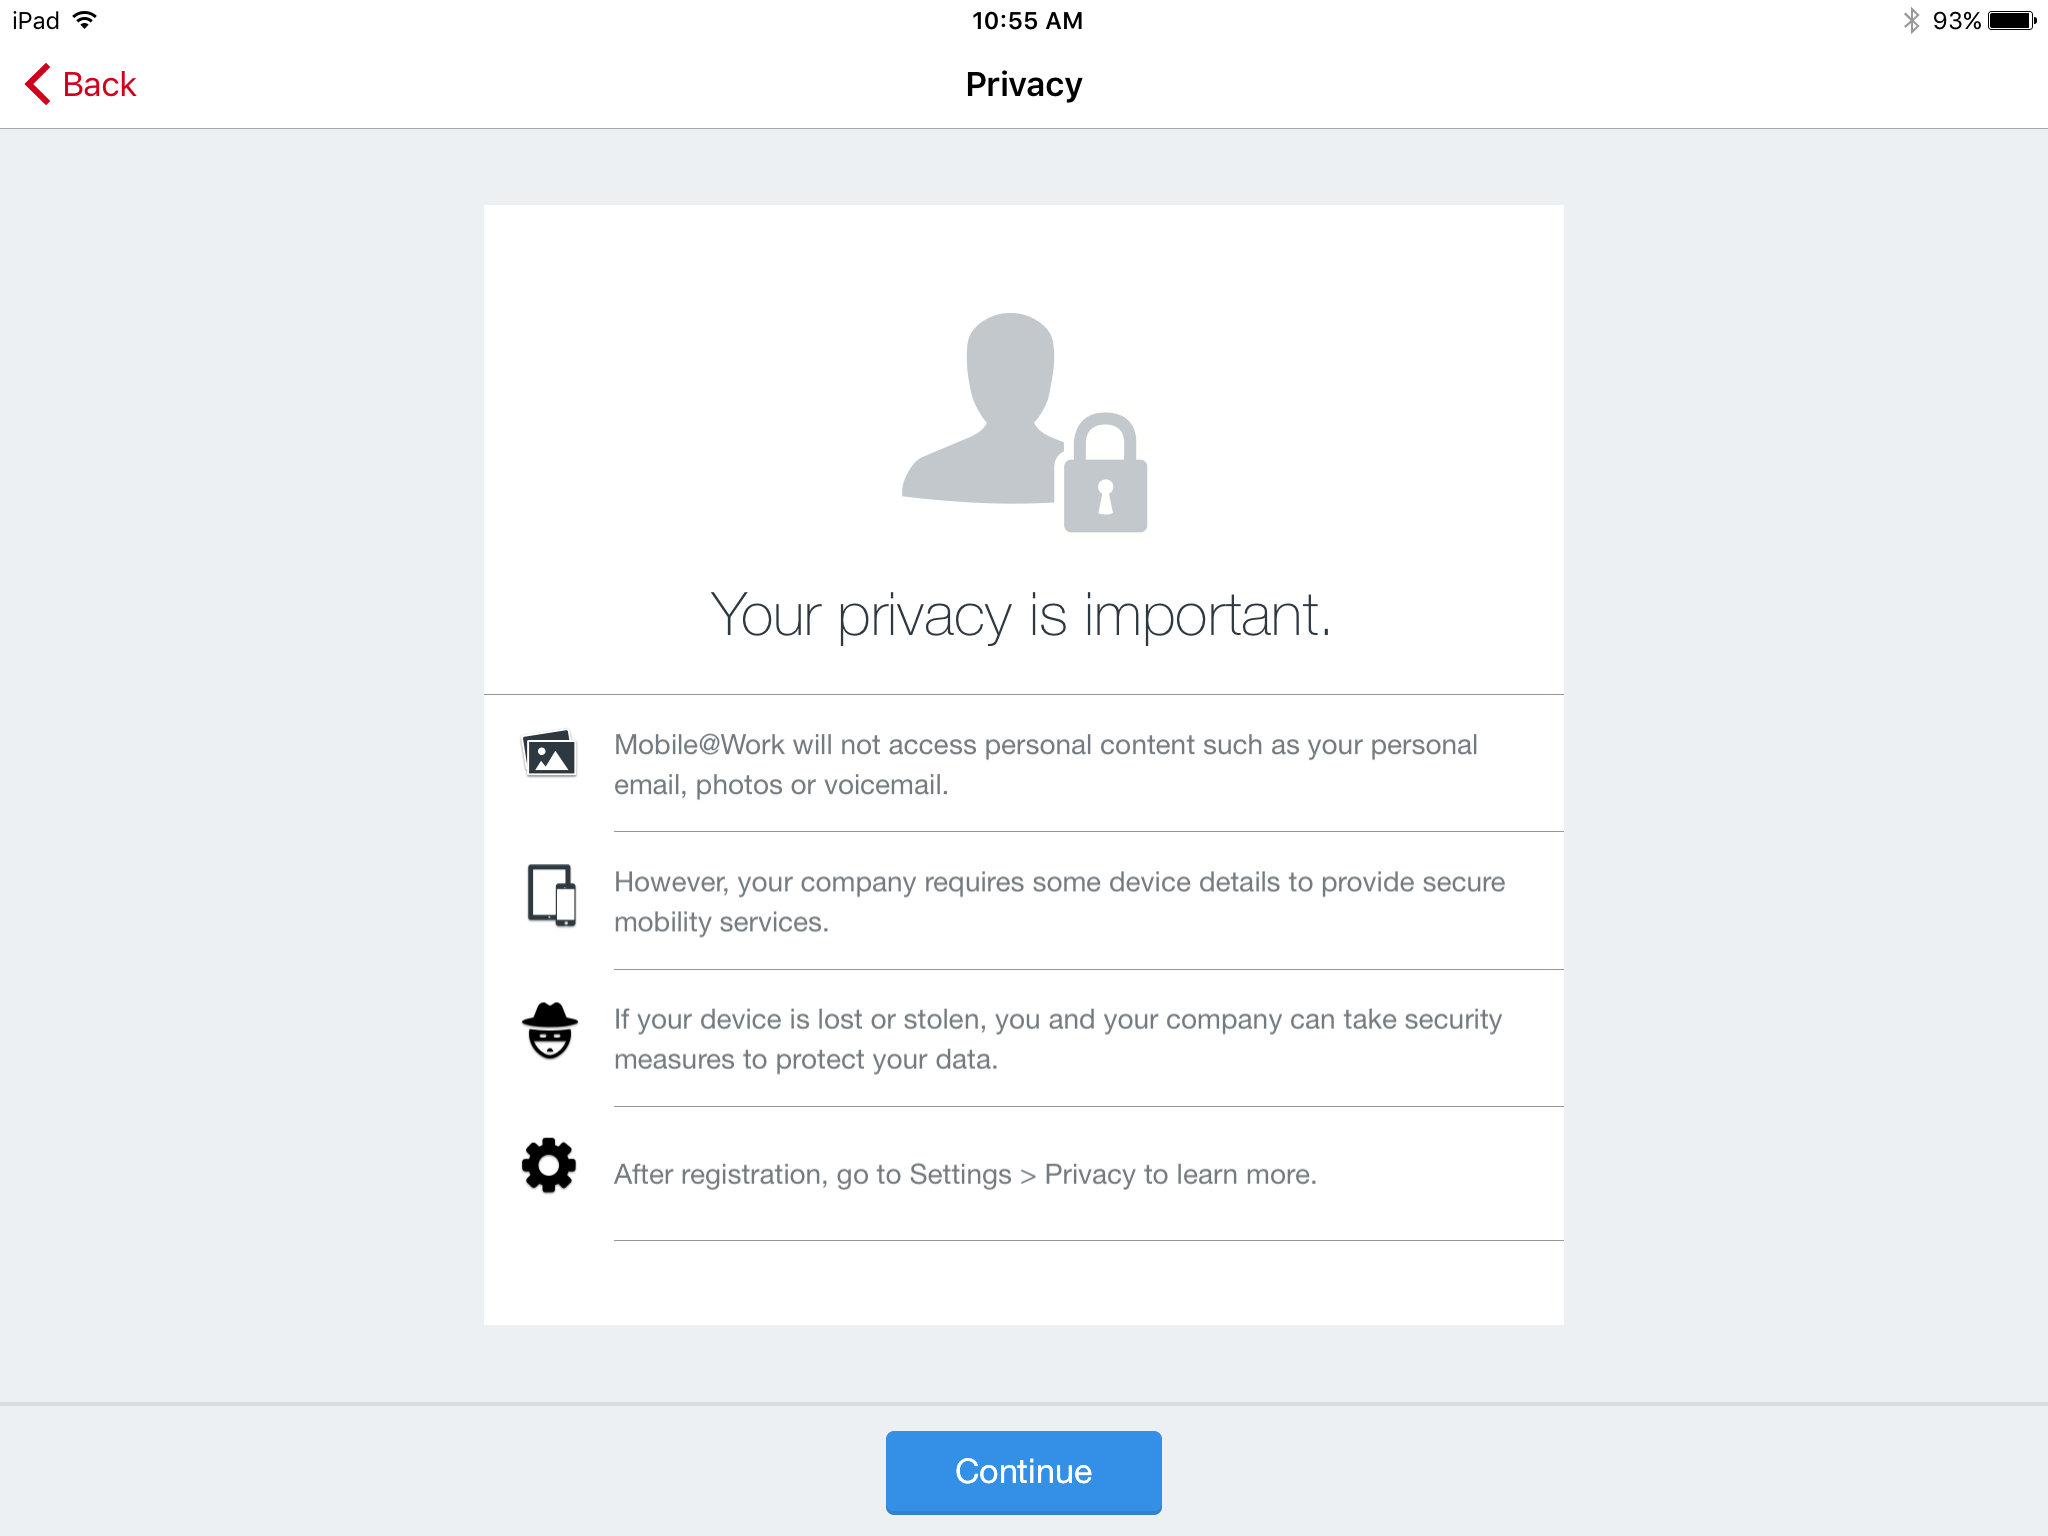
In the Privacy screen, tap Continue.
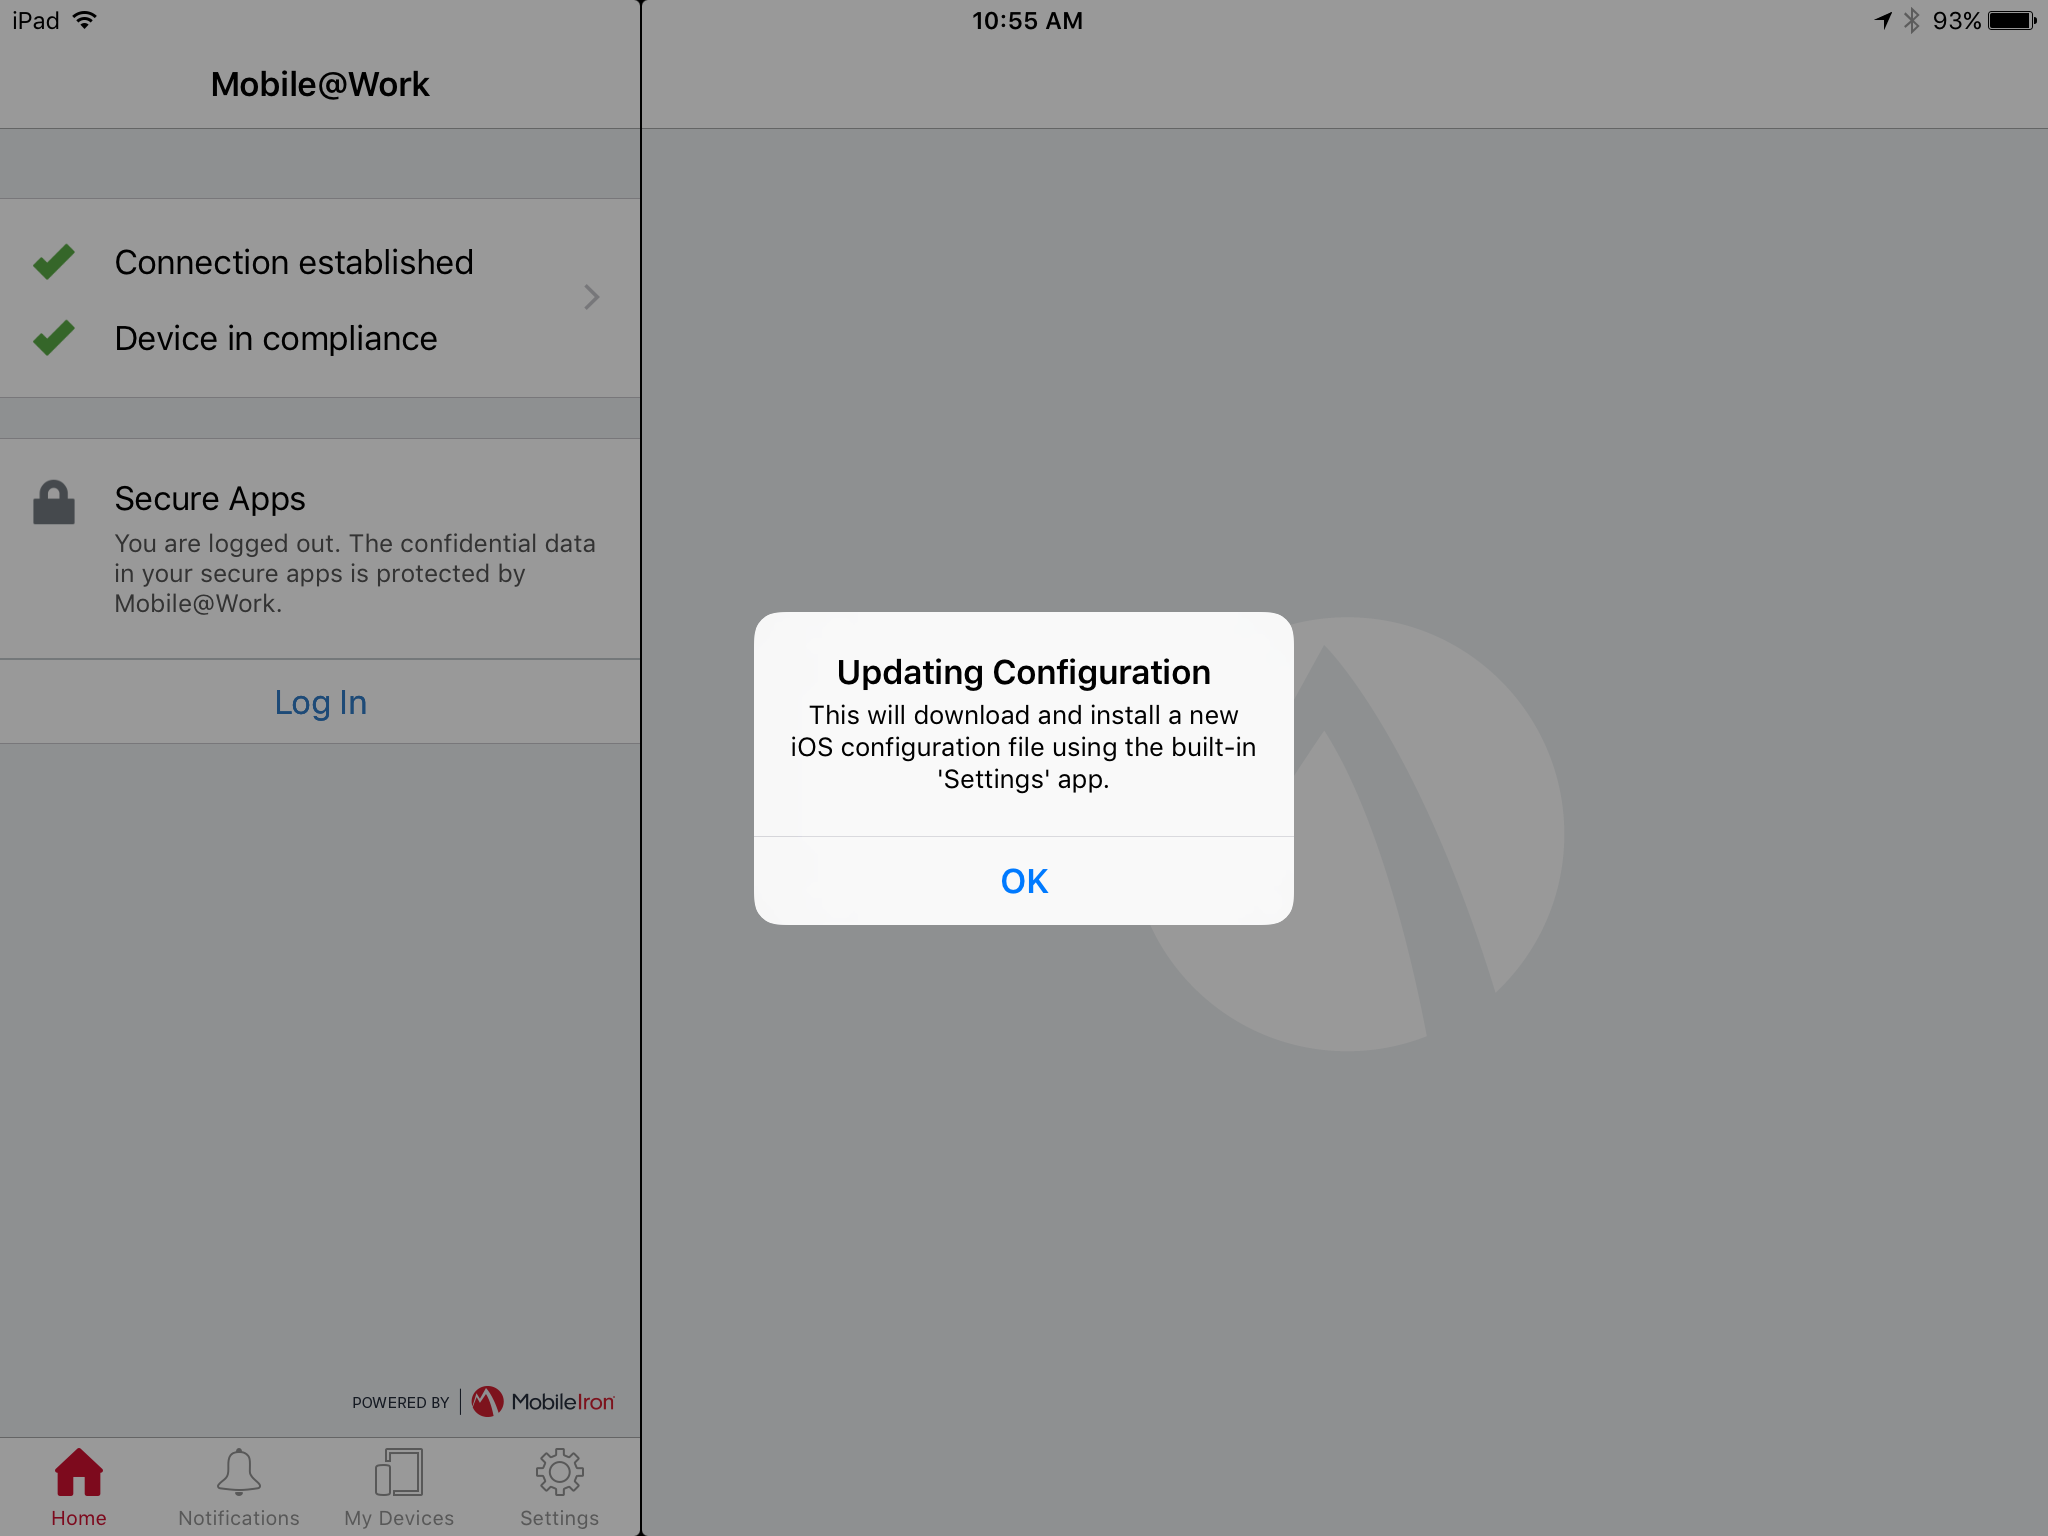
In the Updating Configuration dialogue, tap OK; this will launch the built-in iOS Settings application.
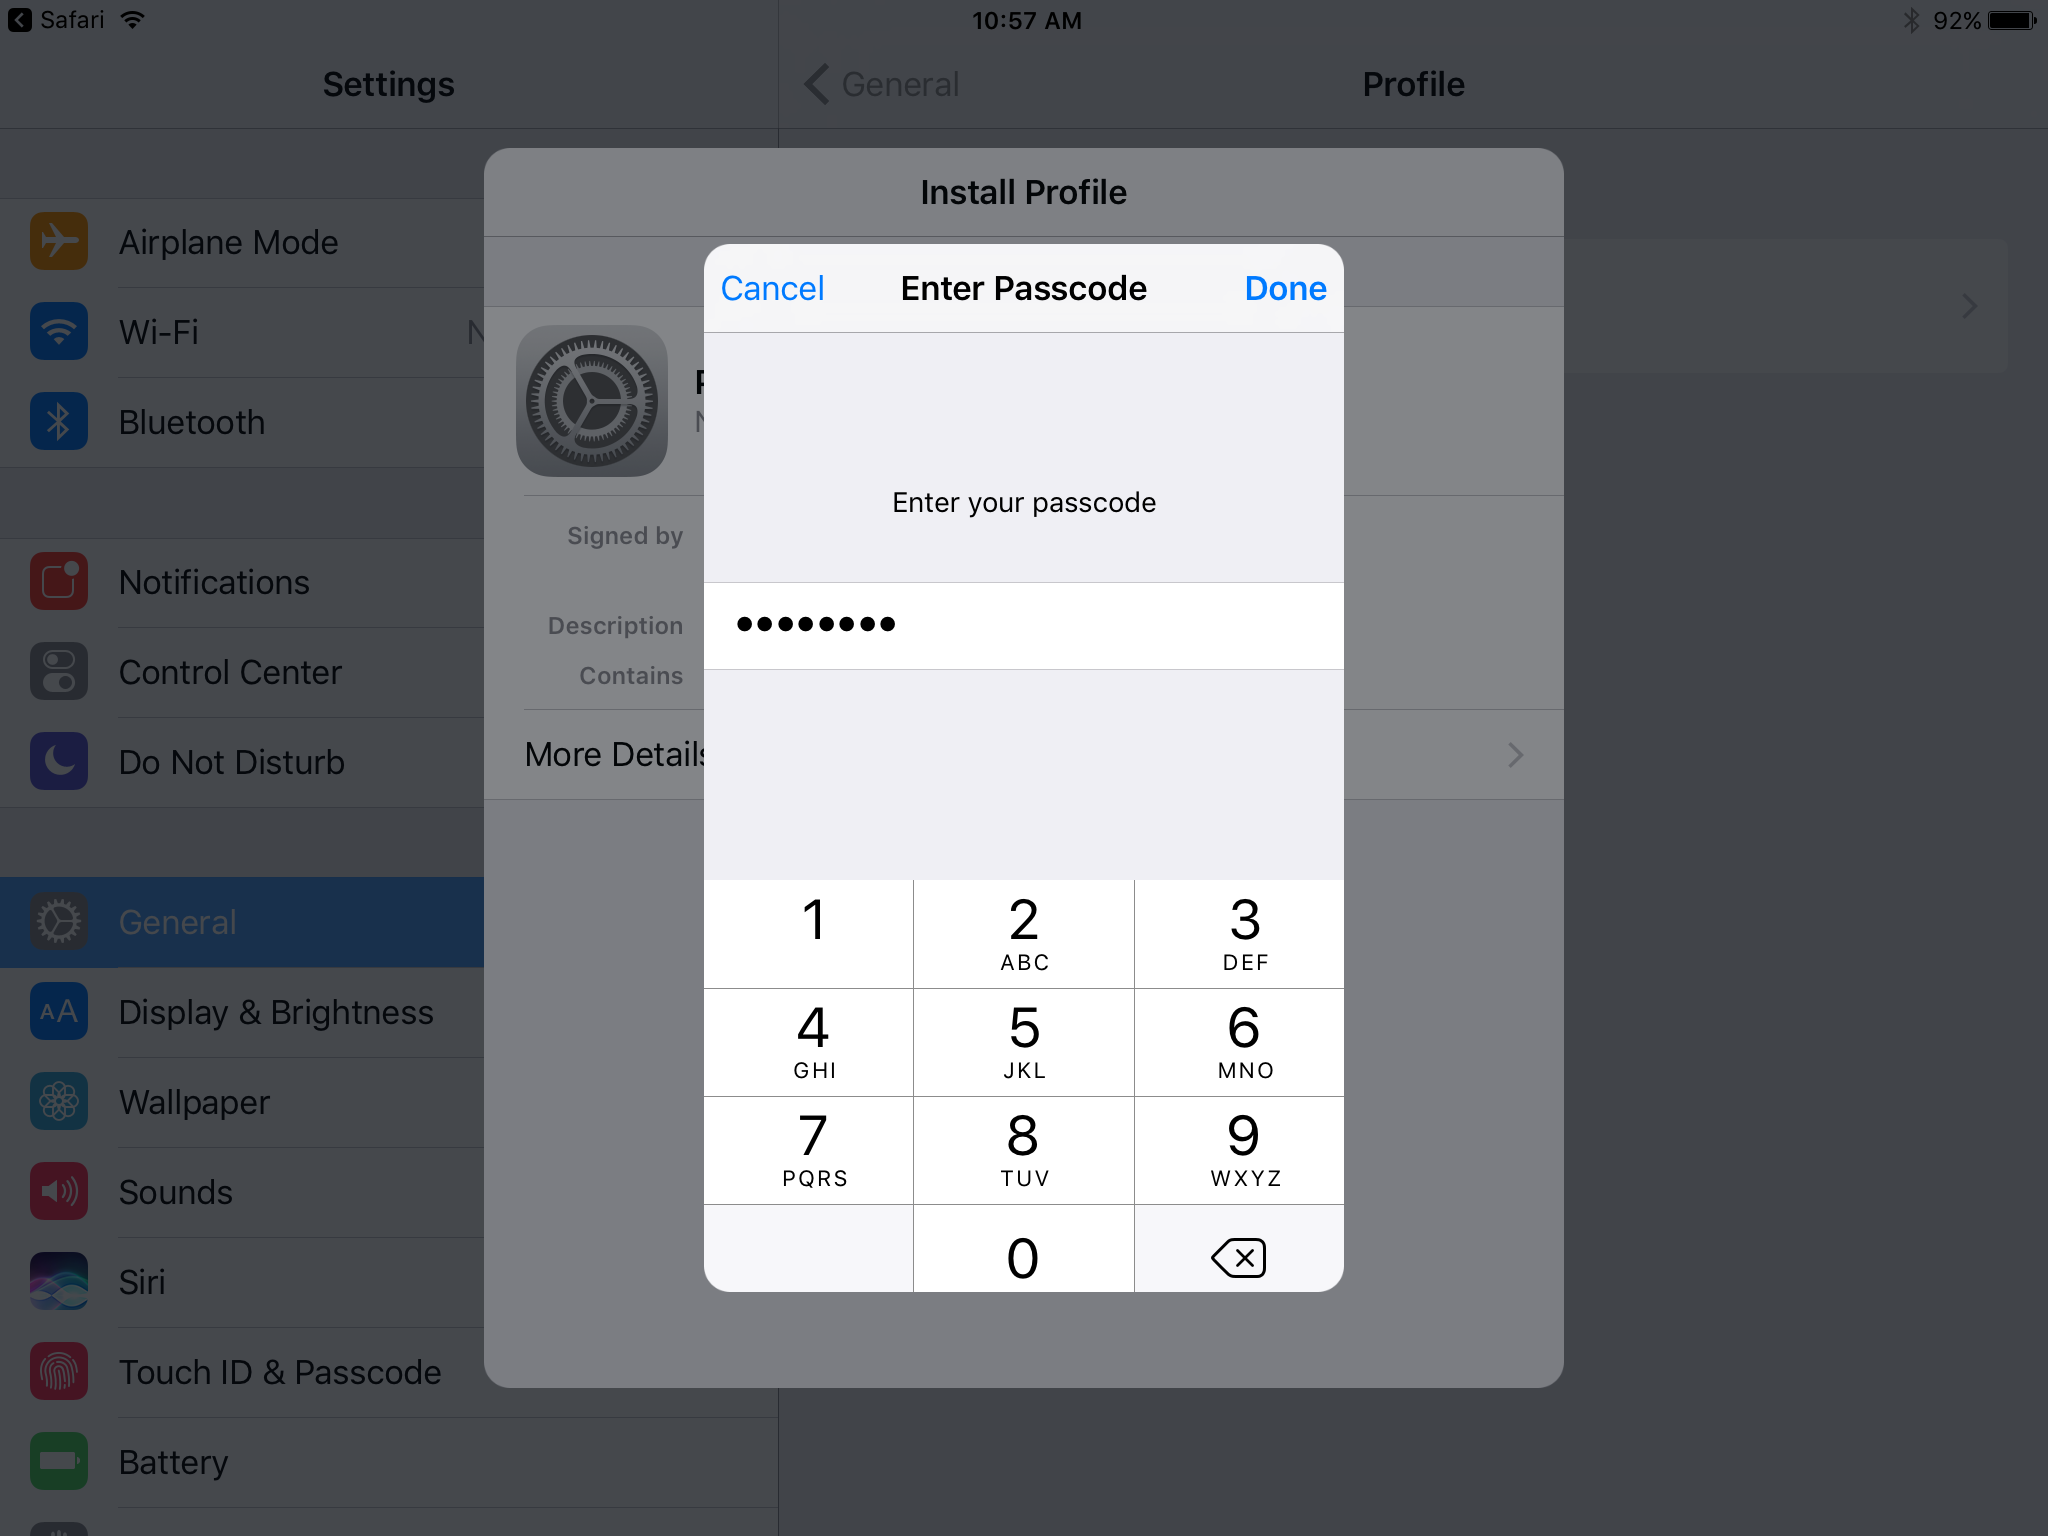
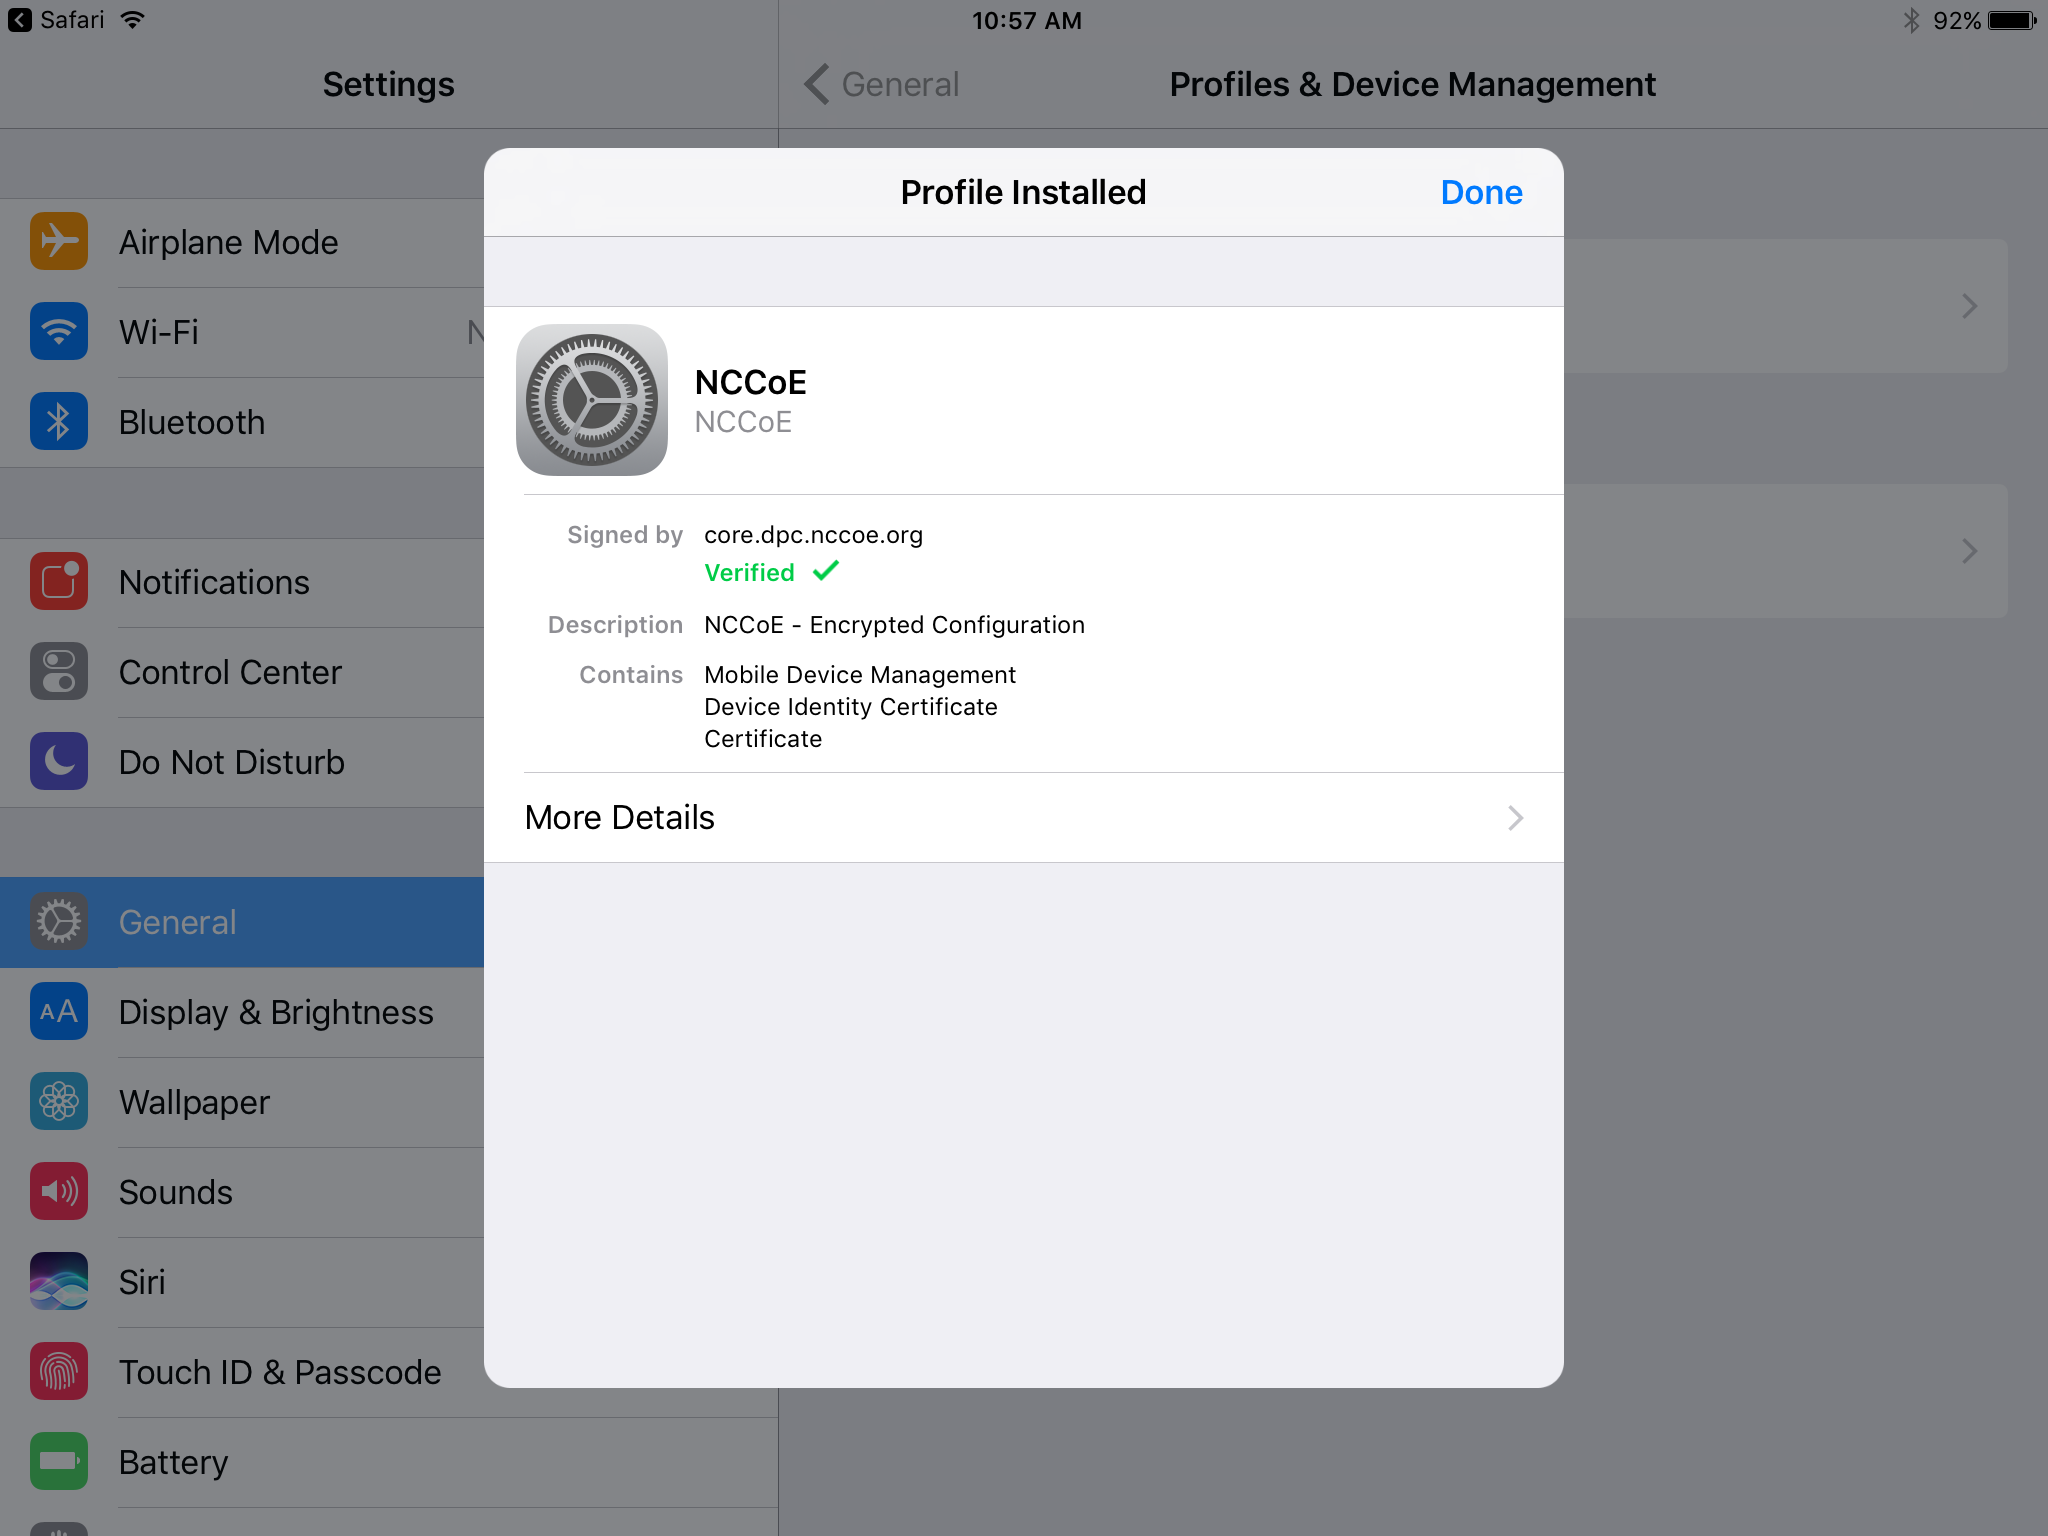
In the Settings application, in the Install Profile dialogue:
In the Signed by field, confirm that the originating server identity shows as Verified.
Note: If verification of the originating server fails, contact your MobileIron administrator before resuming registration.
Tap Install.

In the Enter Passcode dialogue:
Enter your device unlock code.
Tap Done.
In the Install Profile dialogue, tap Install.
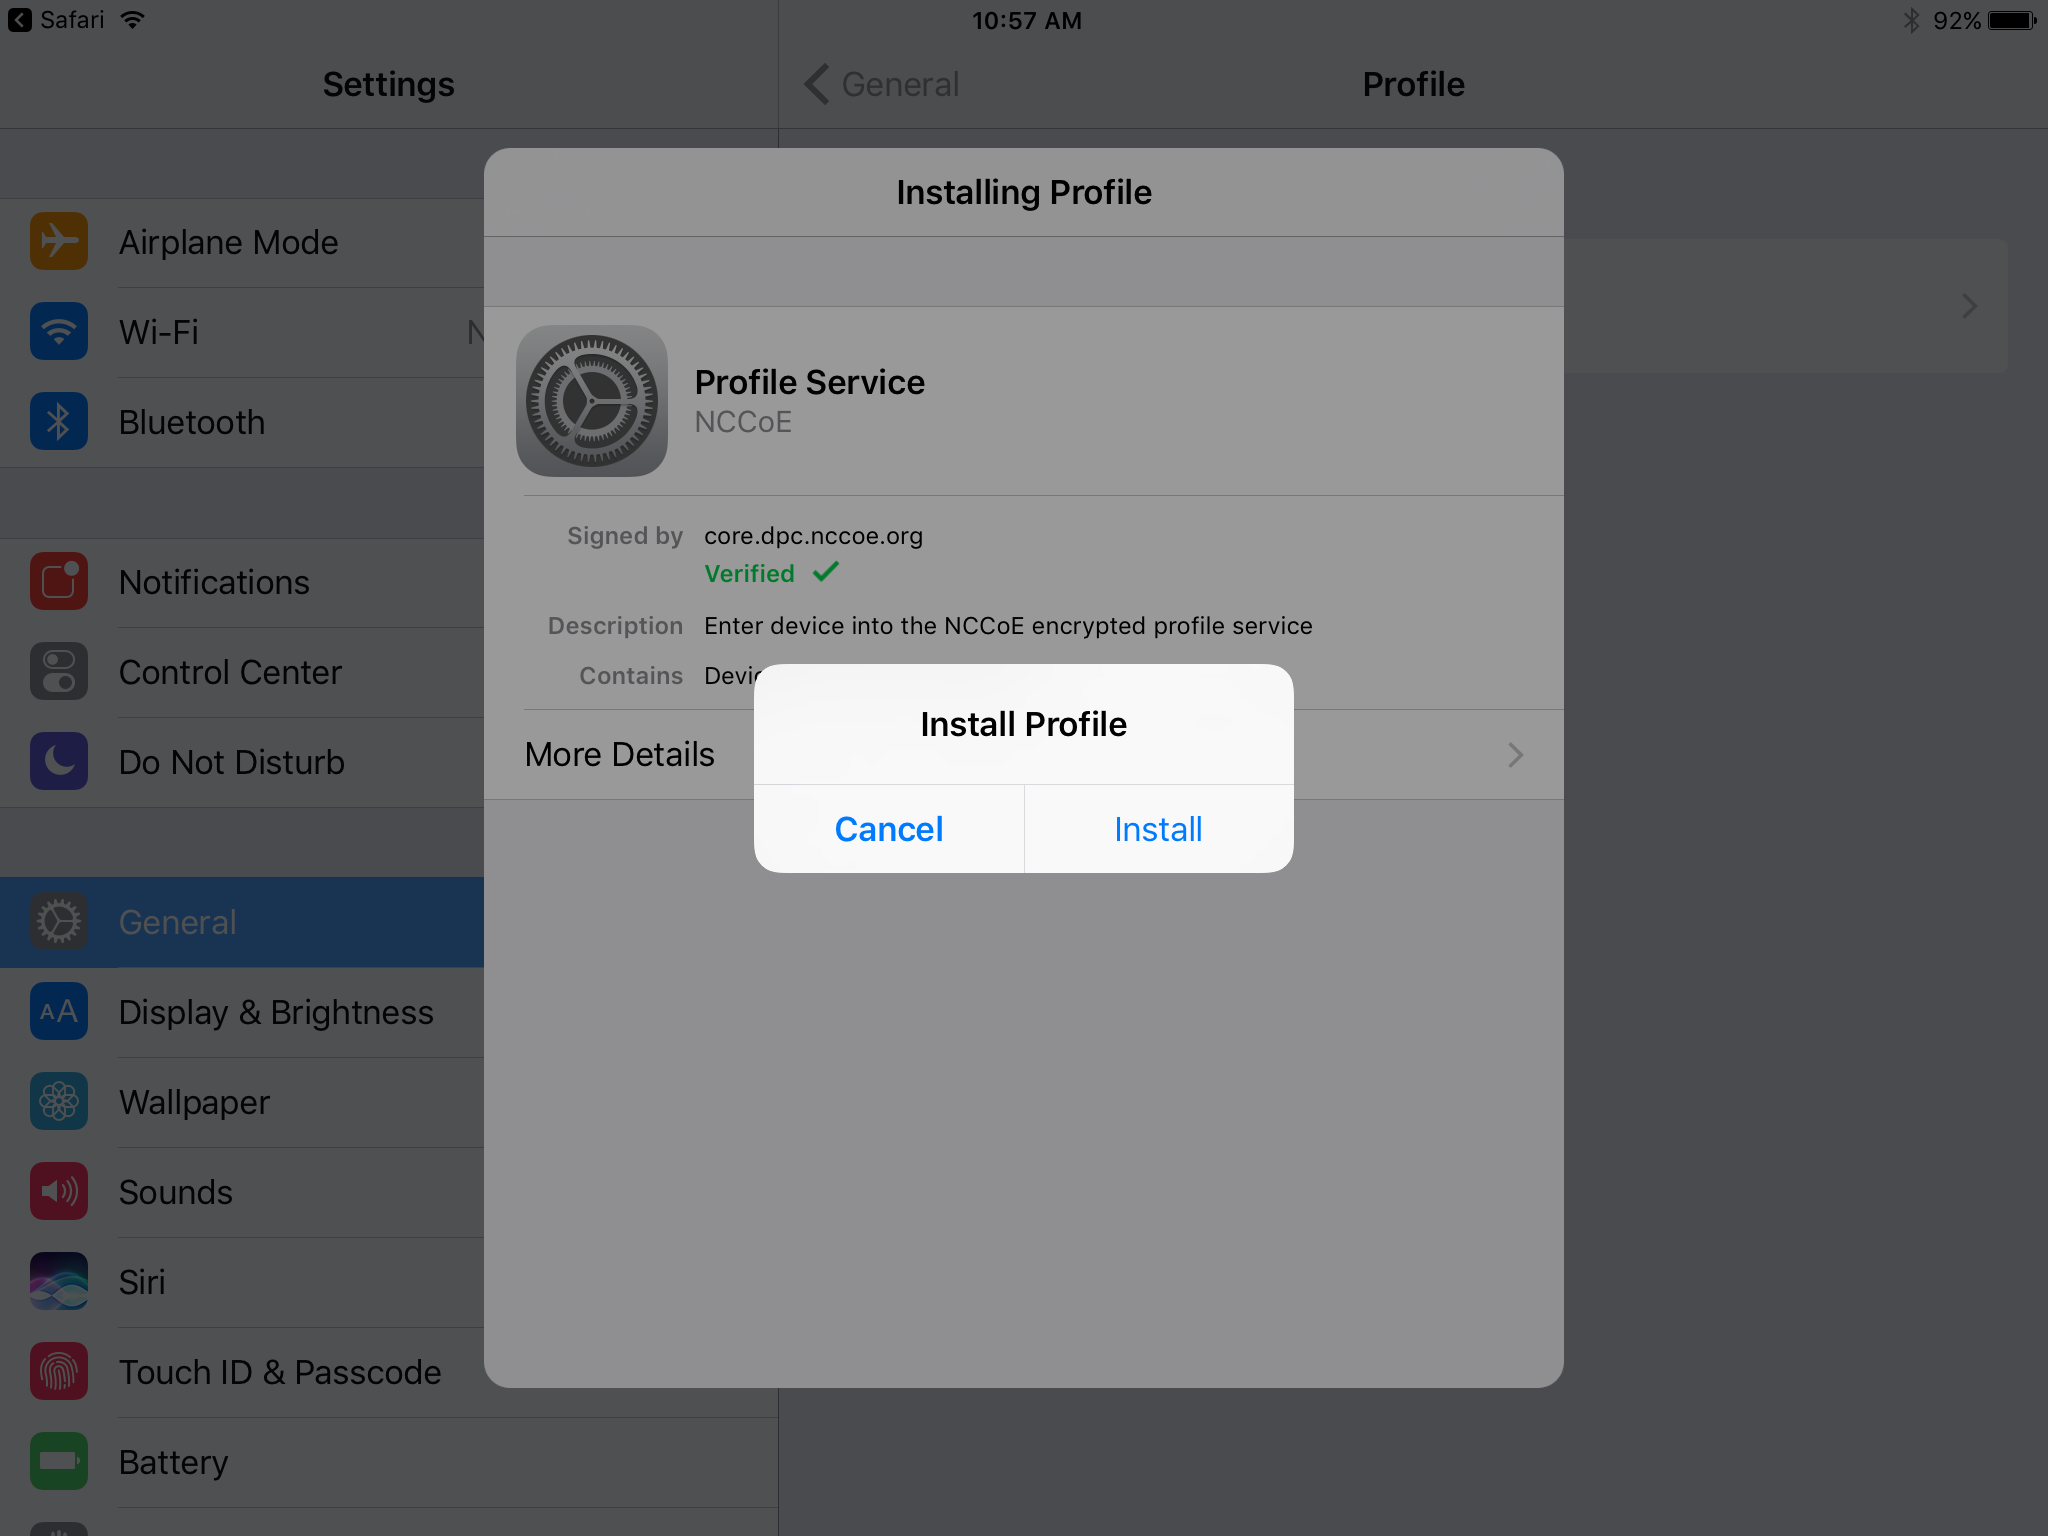
In the Warning dialogue, tap Install.
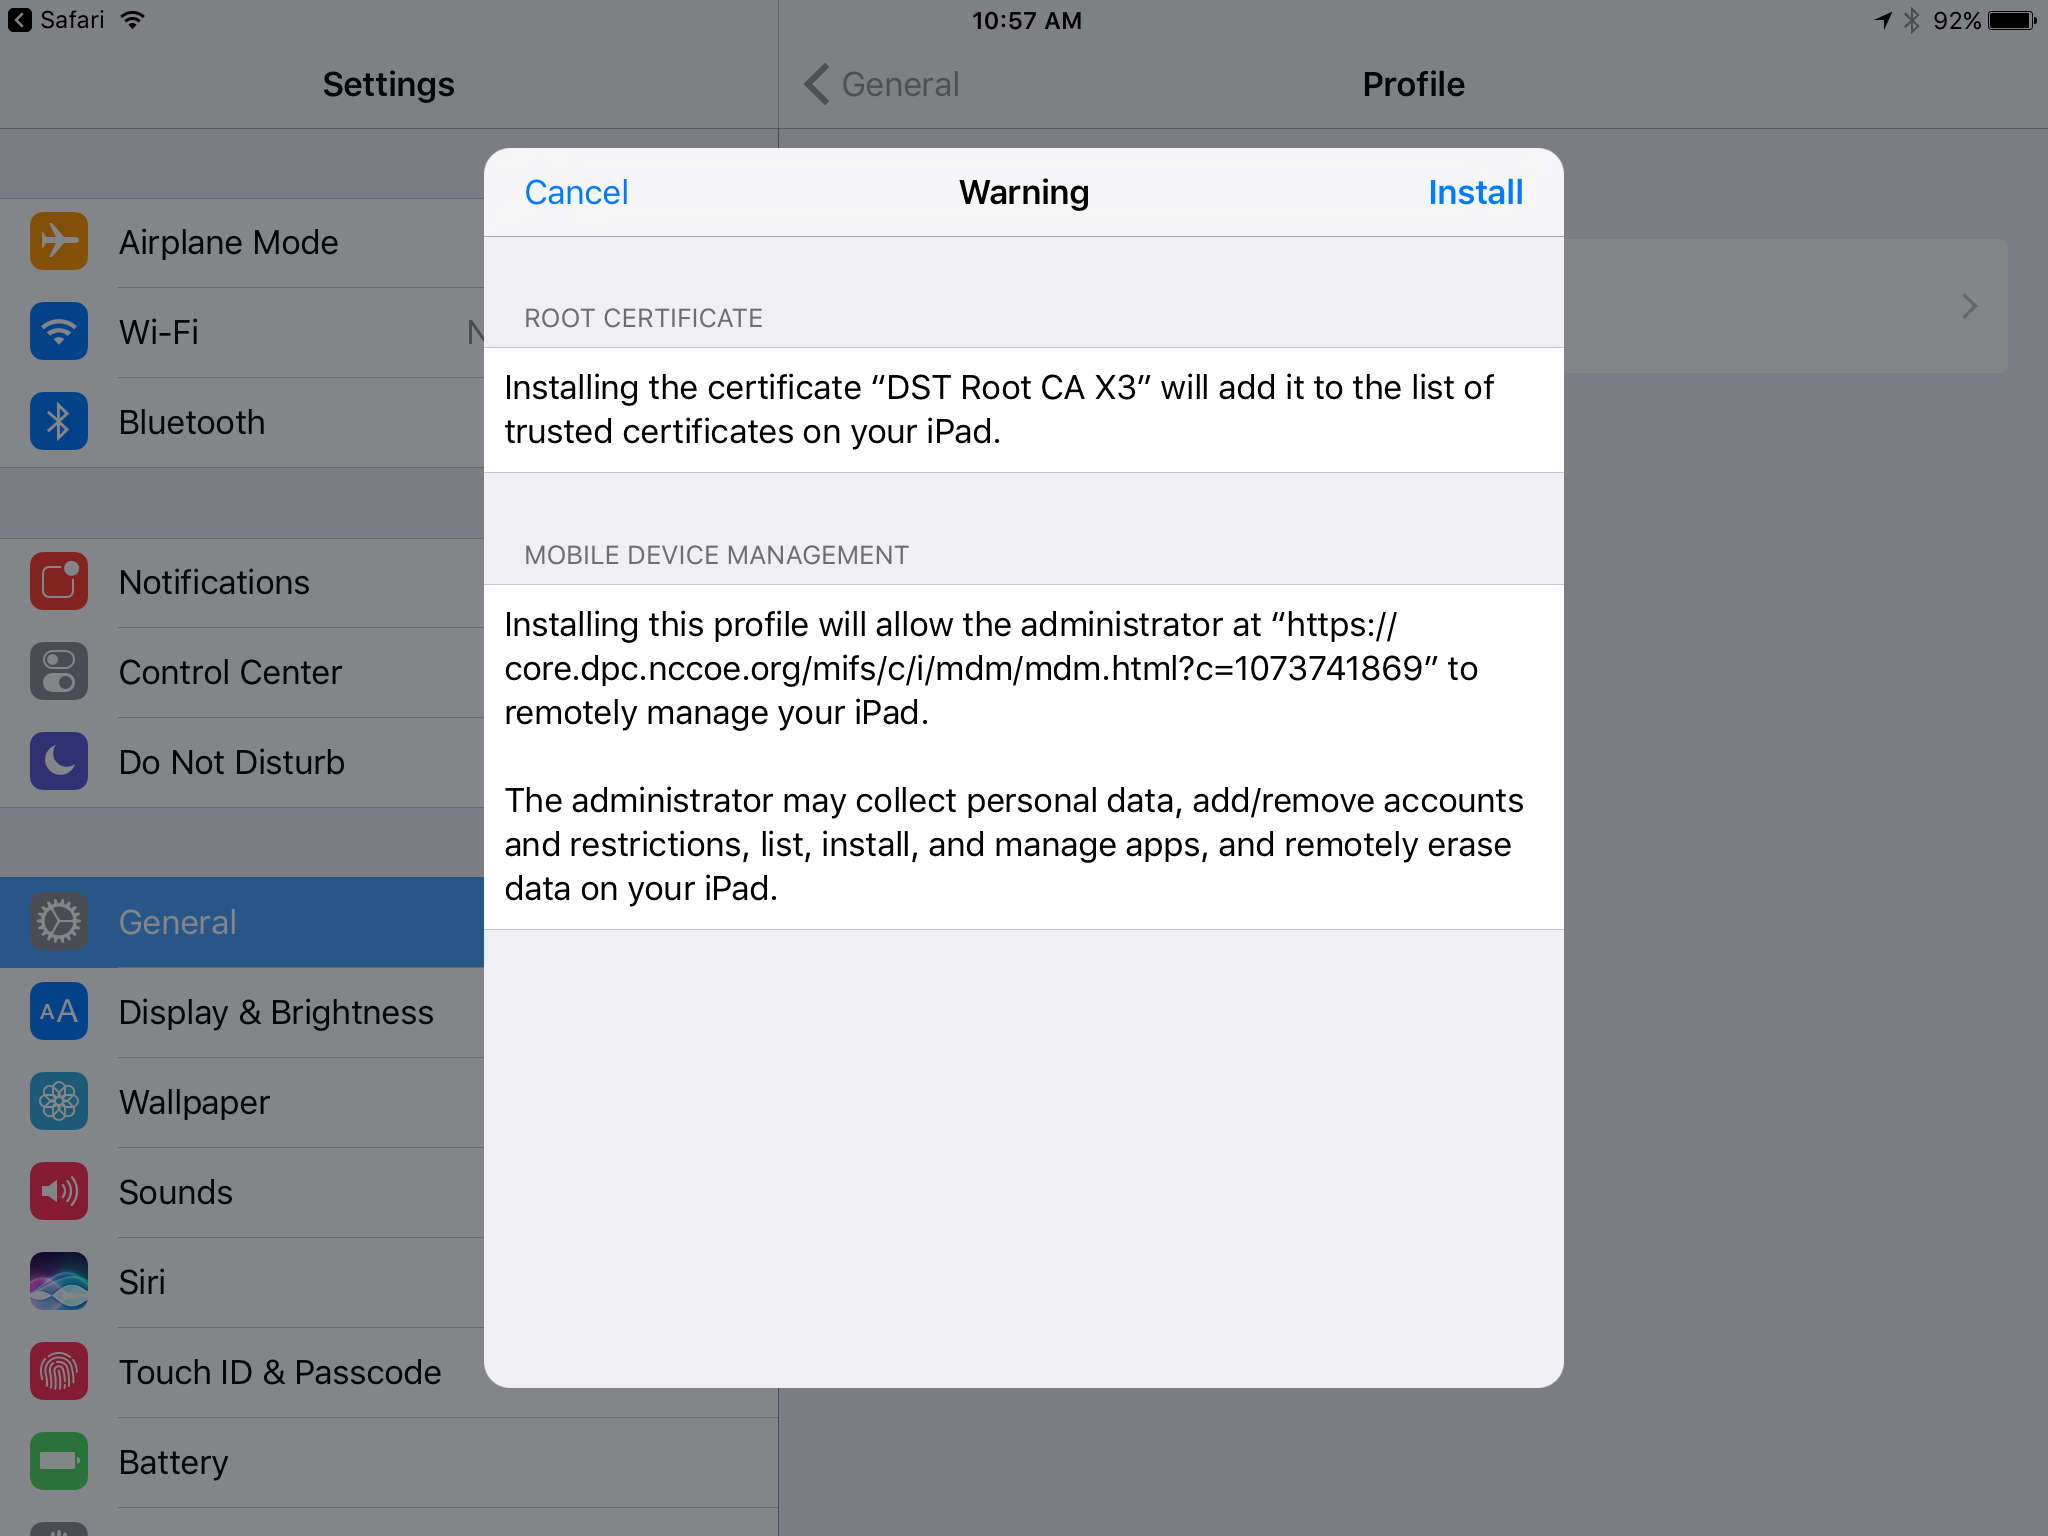
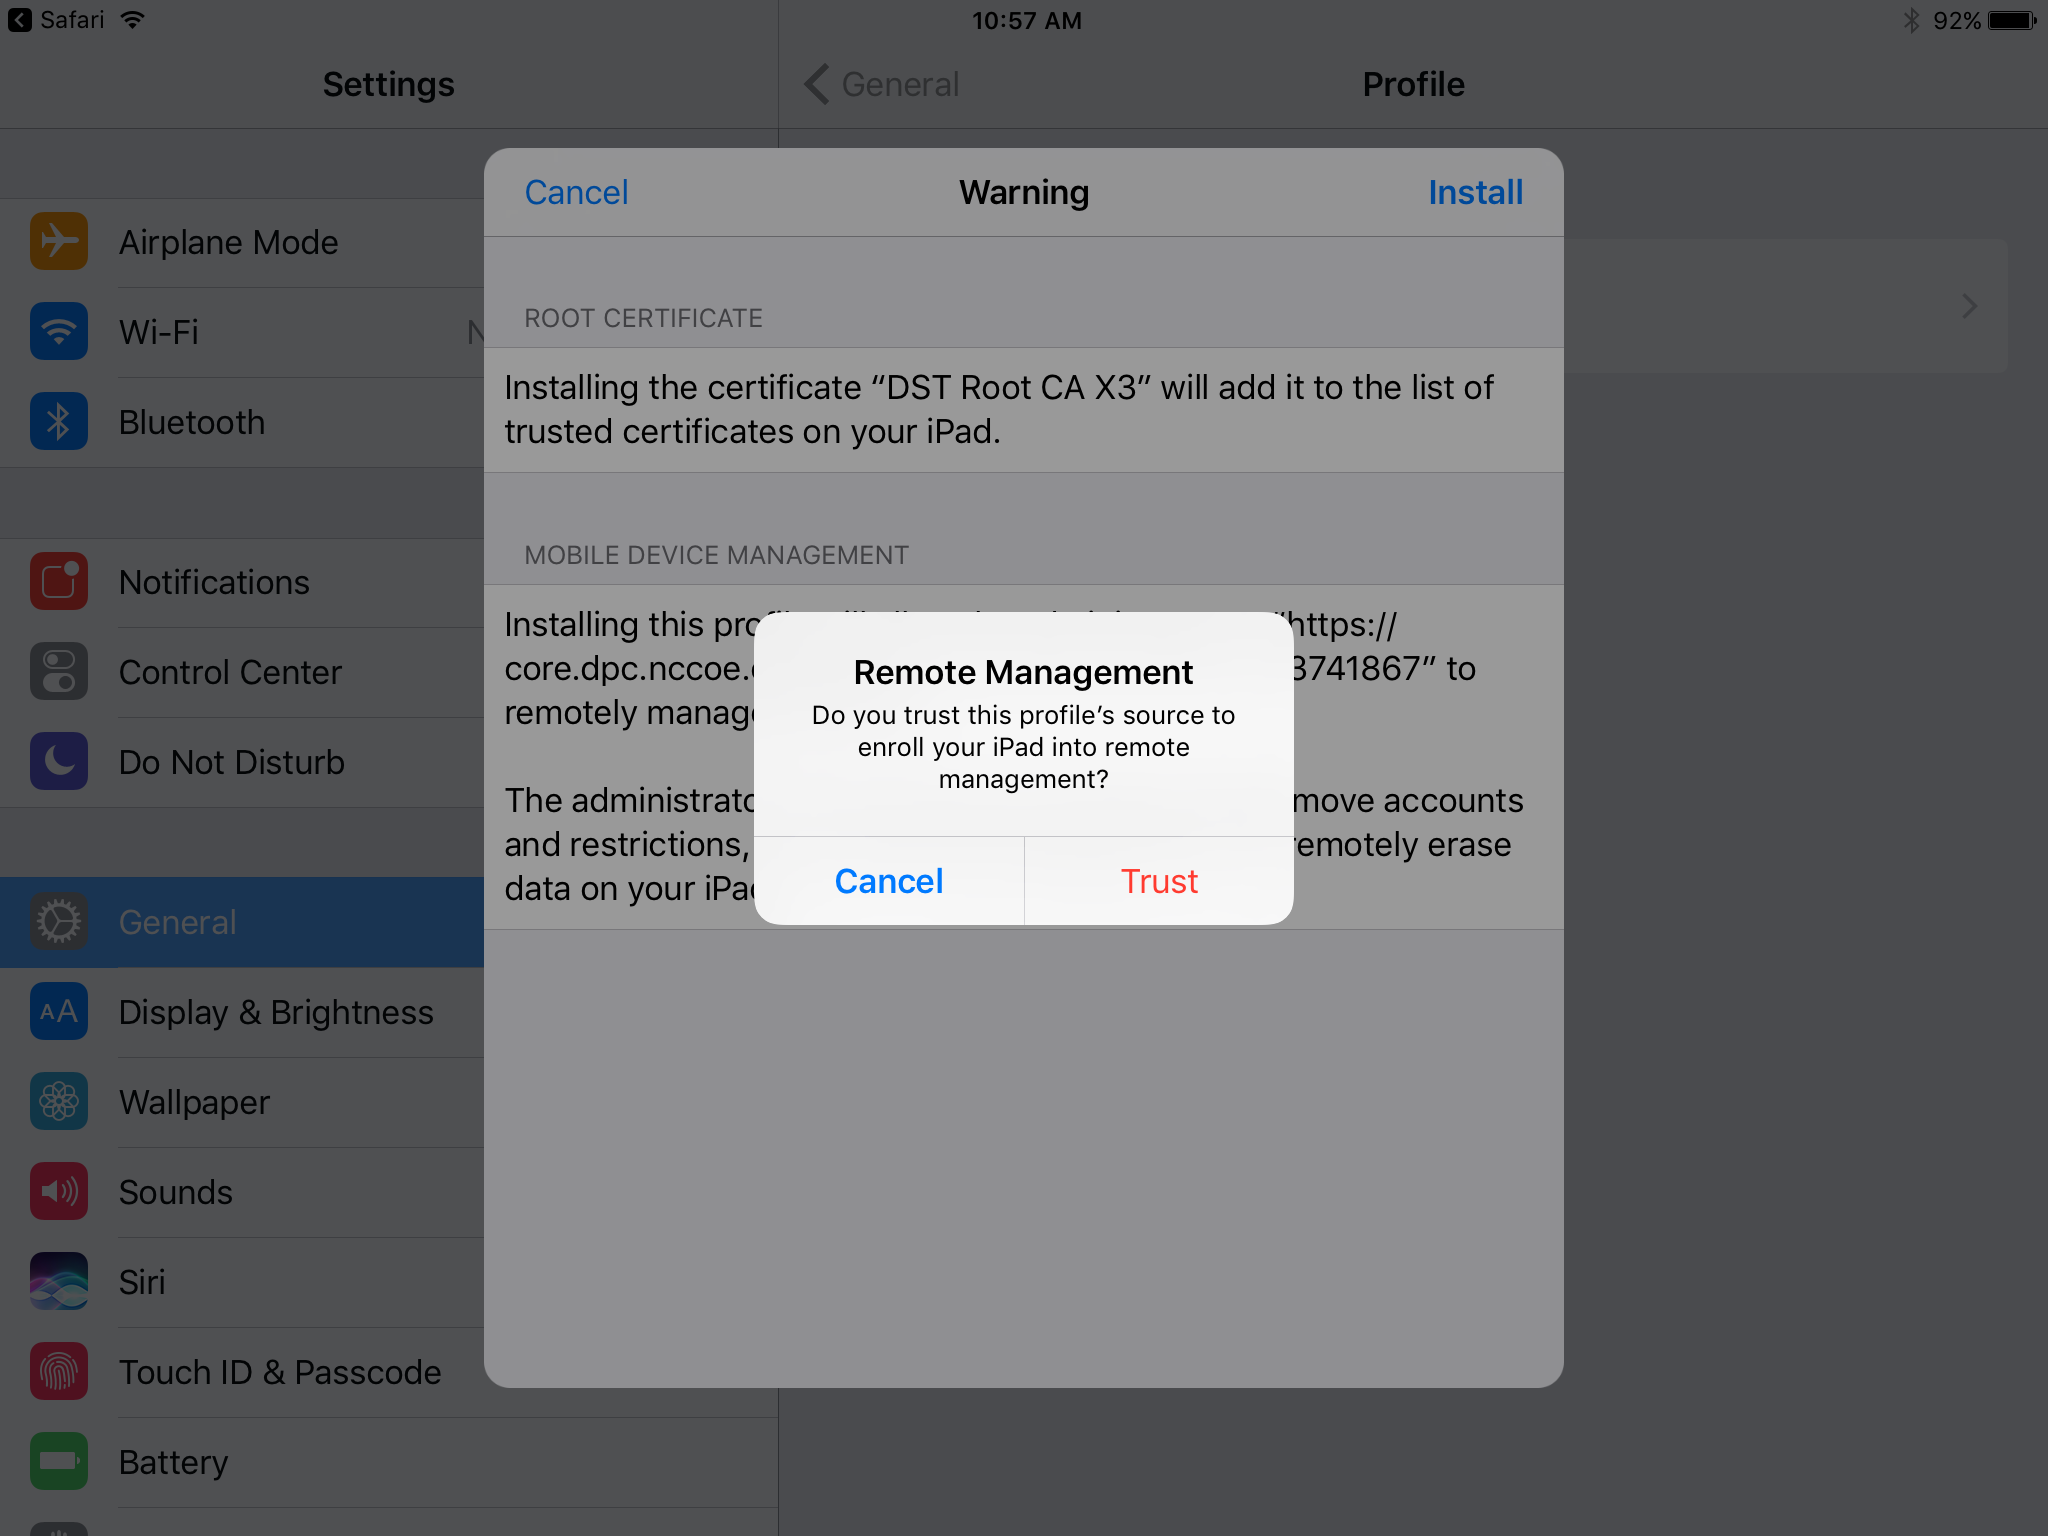
In the Remote Management dialogue, tap Trust.
Note: The root certificate presented in this step may vary based on the CA used to sign the MDM profile. This build uses the Let’s Encrypt certificate authority.
In the Profile Installed dialogue, tap Done.
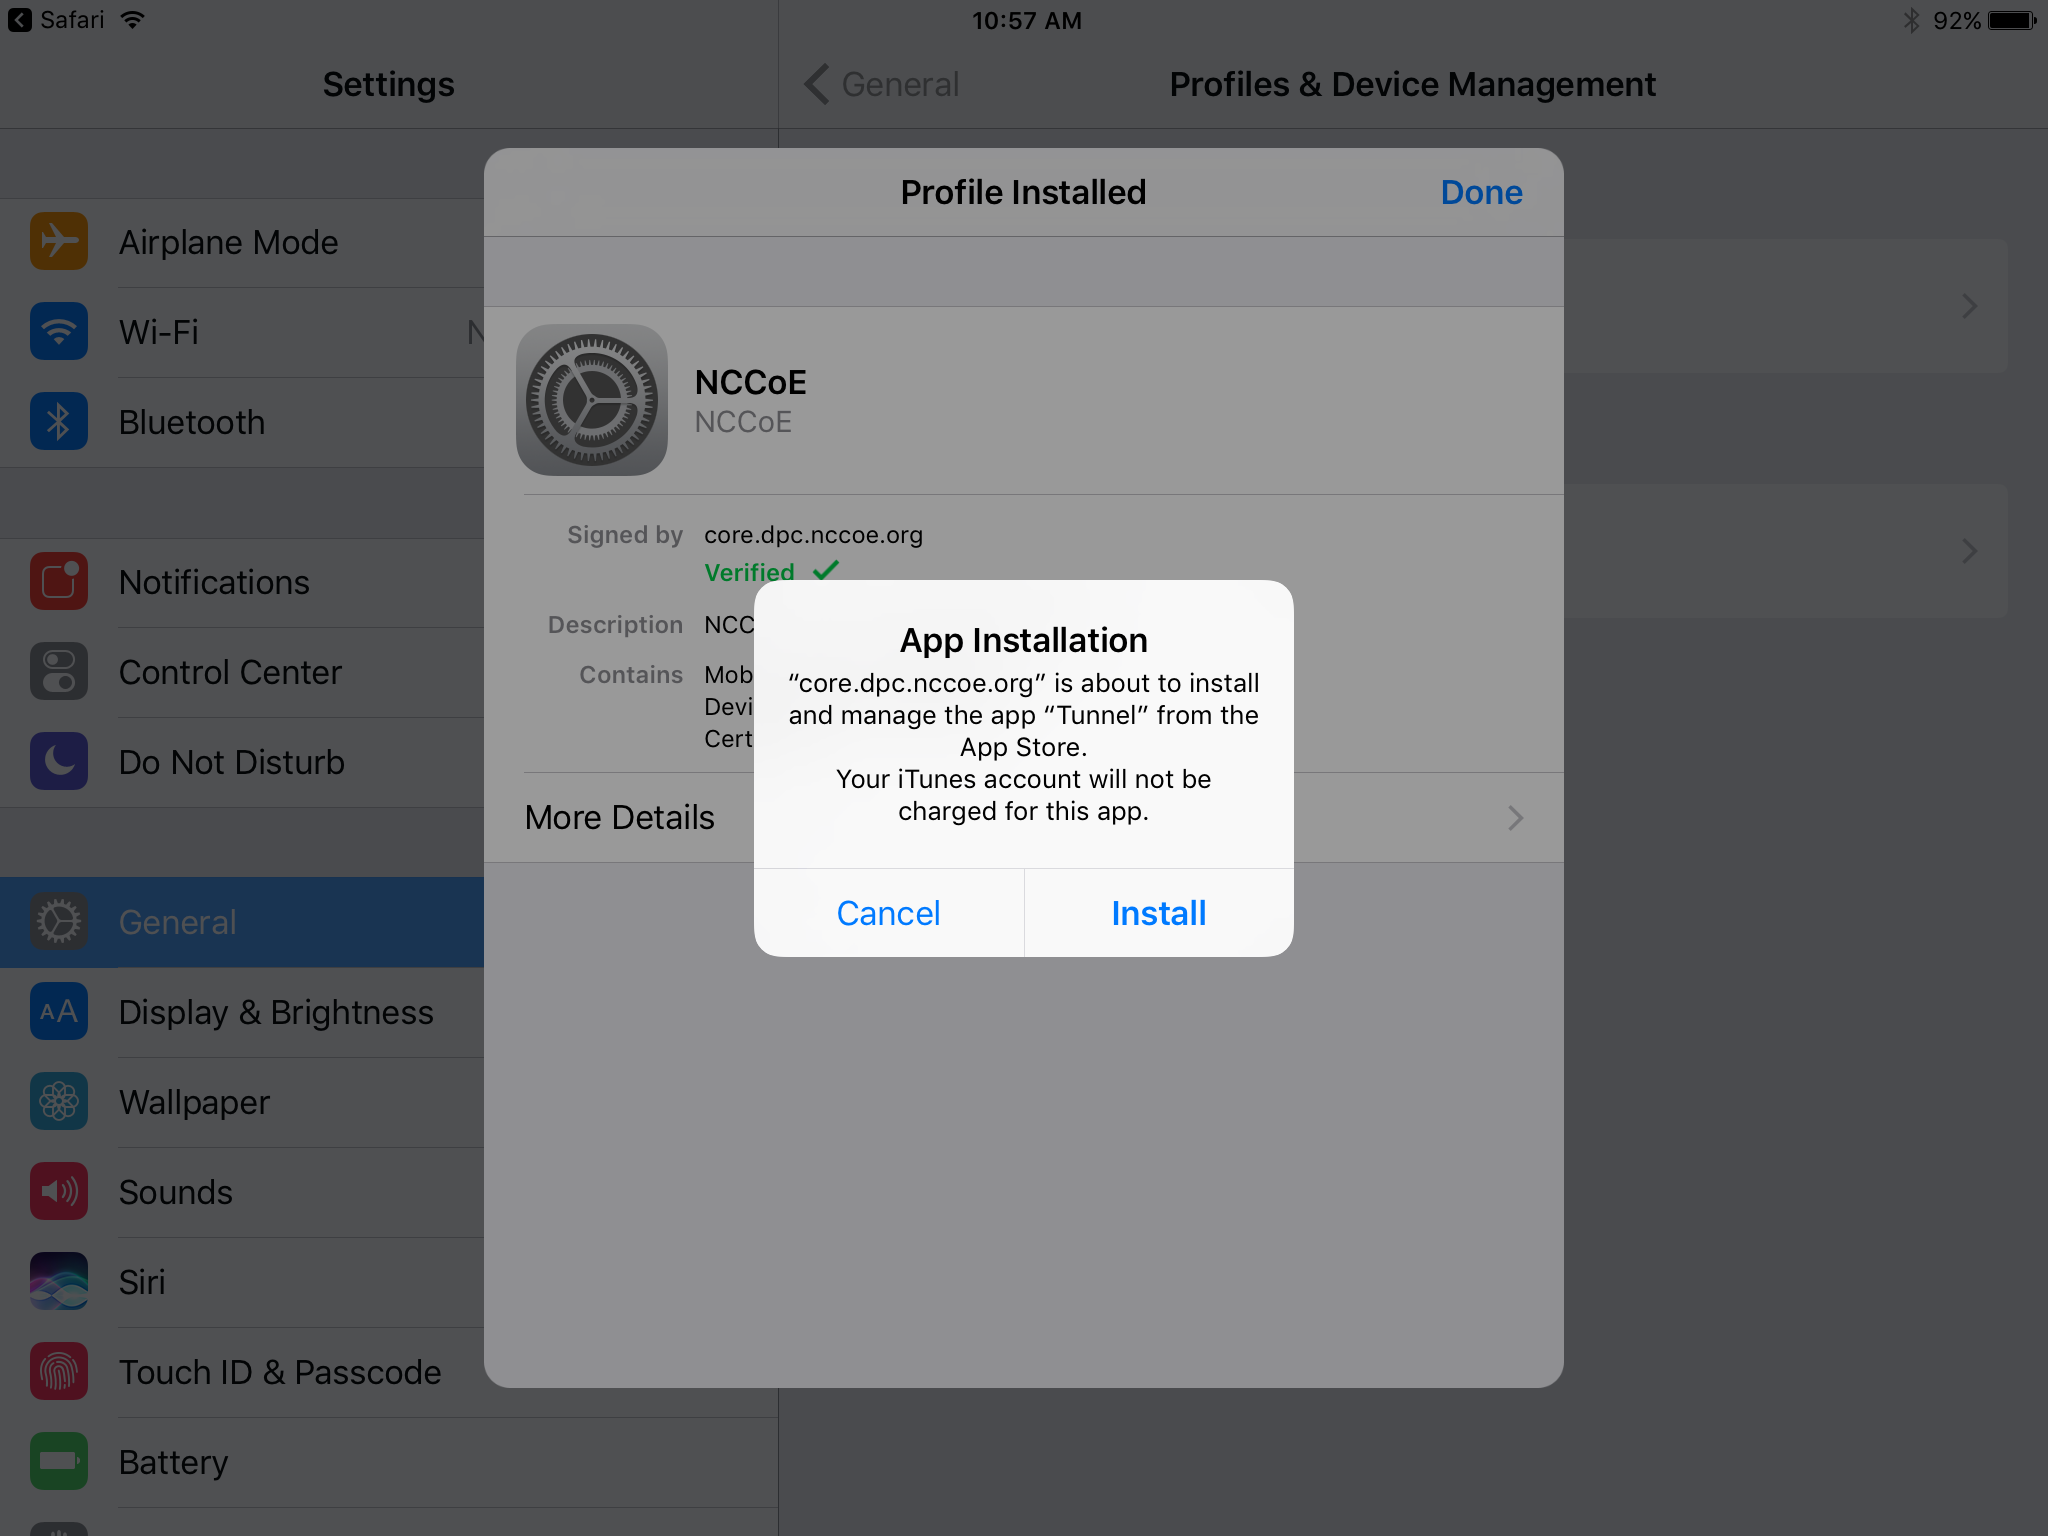
In the App Management Change dialogue, tap Manage.
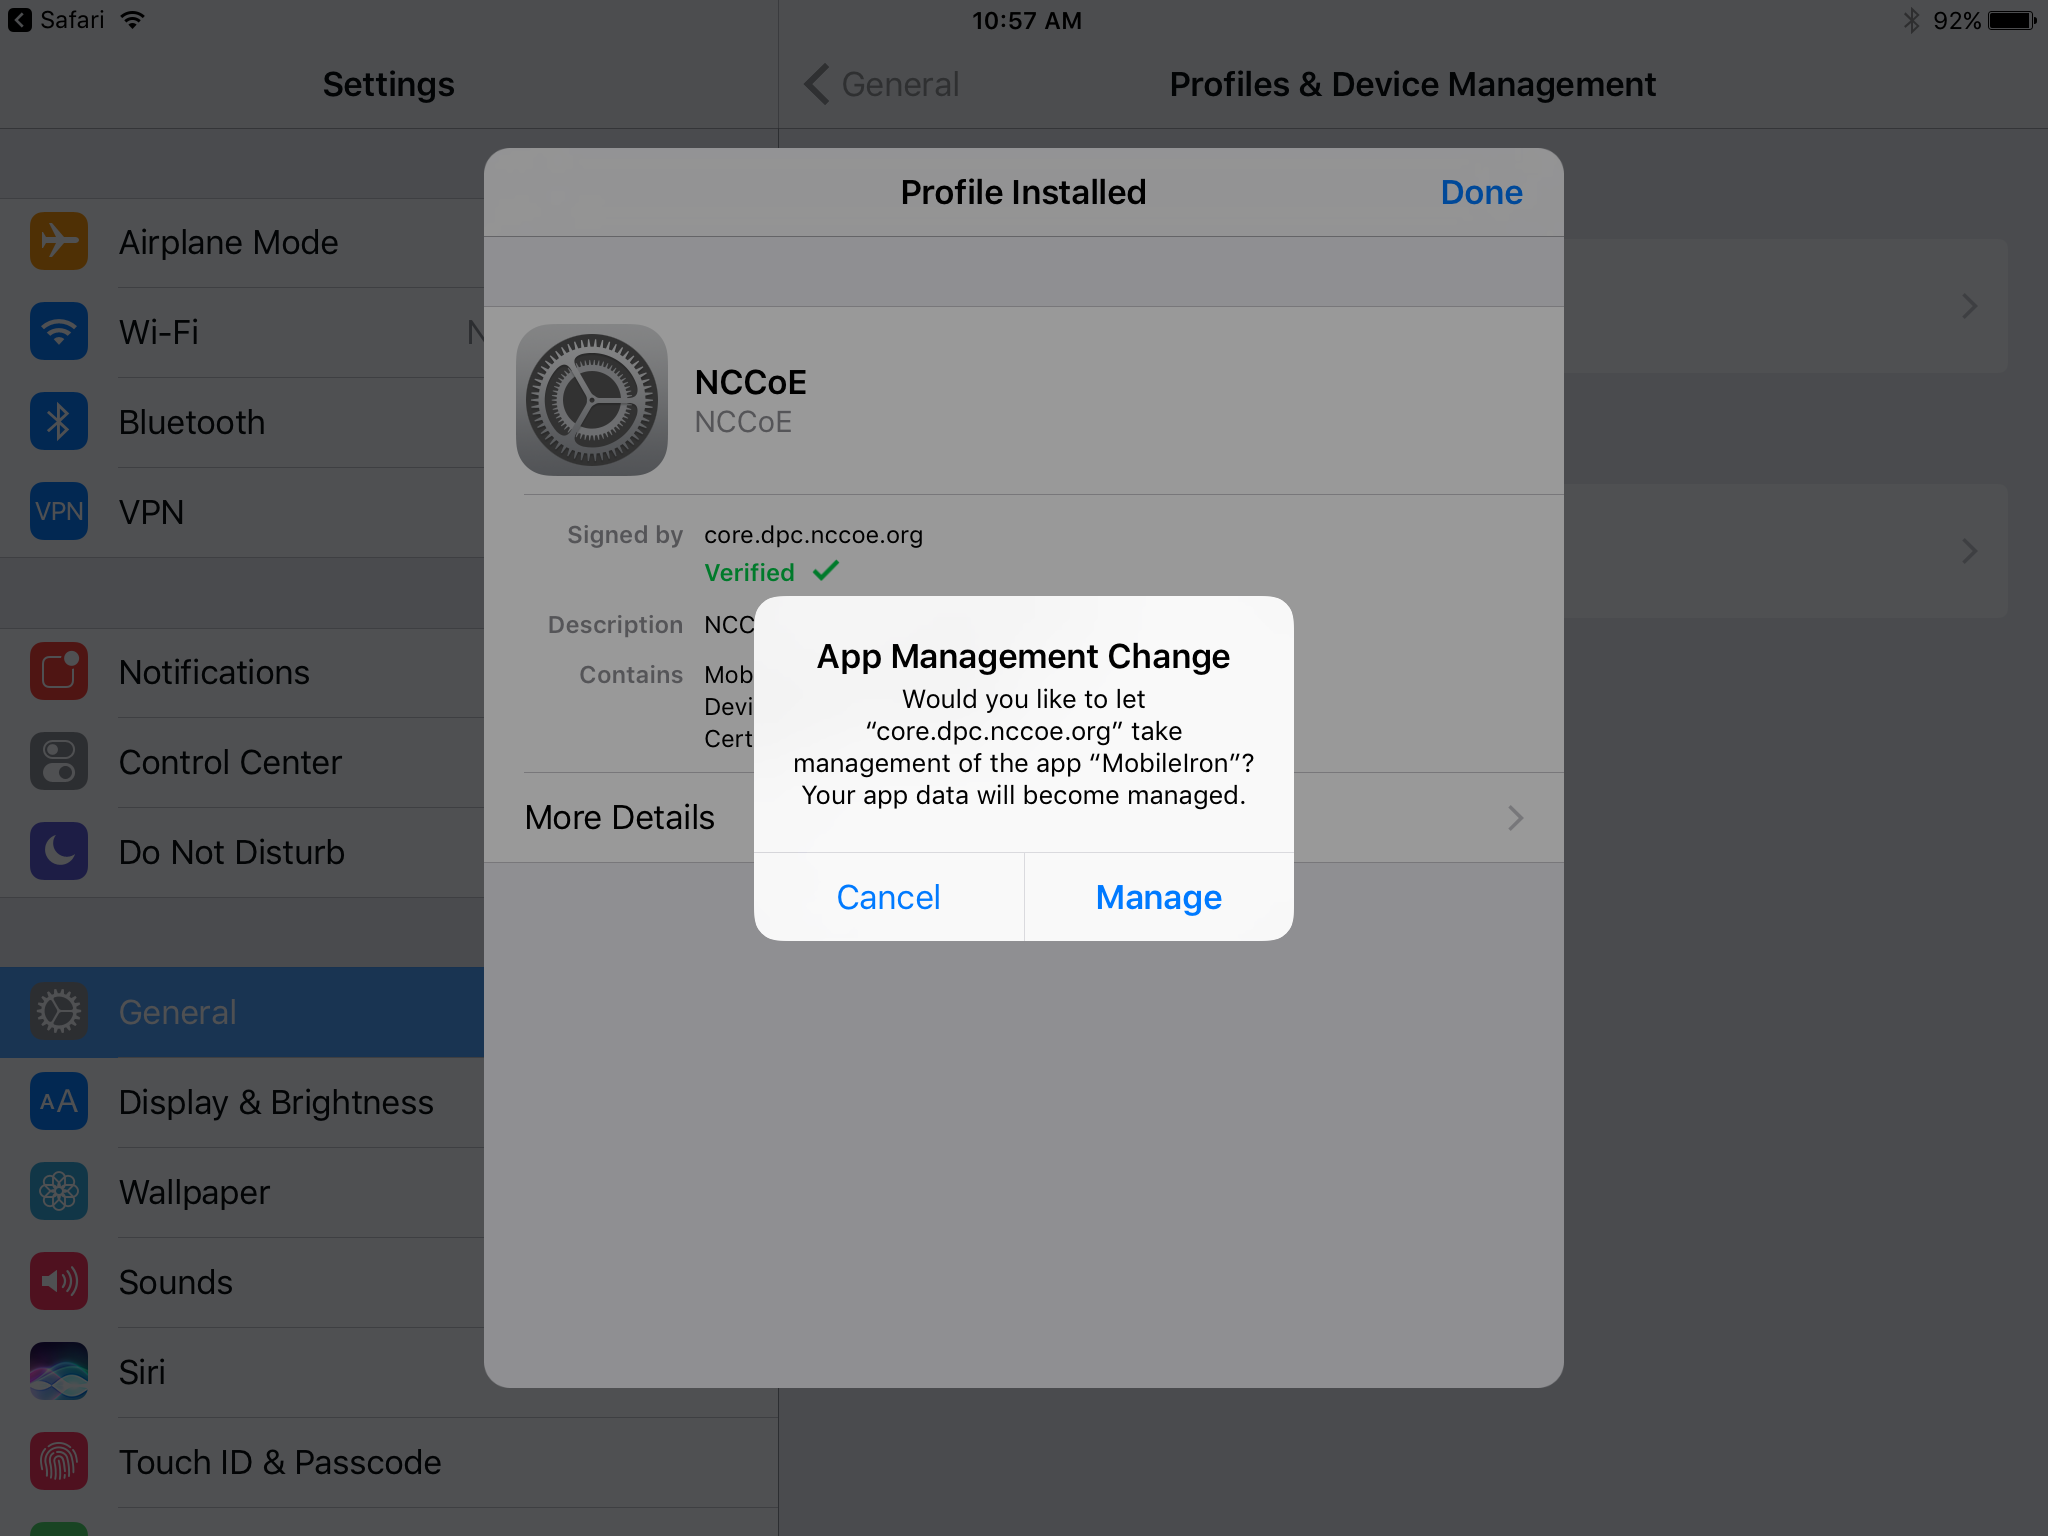
If additional Mobile@Work applications (e.g., Email+) are installed as part of the MobileIron management profile (based on your organizationʼs use case), an App Installation dialogue will appear for each application. To confirm, tap Install.
In the Profile Installed dialogue, tap Done.
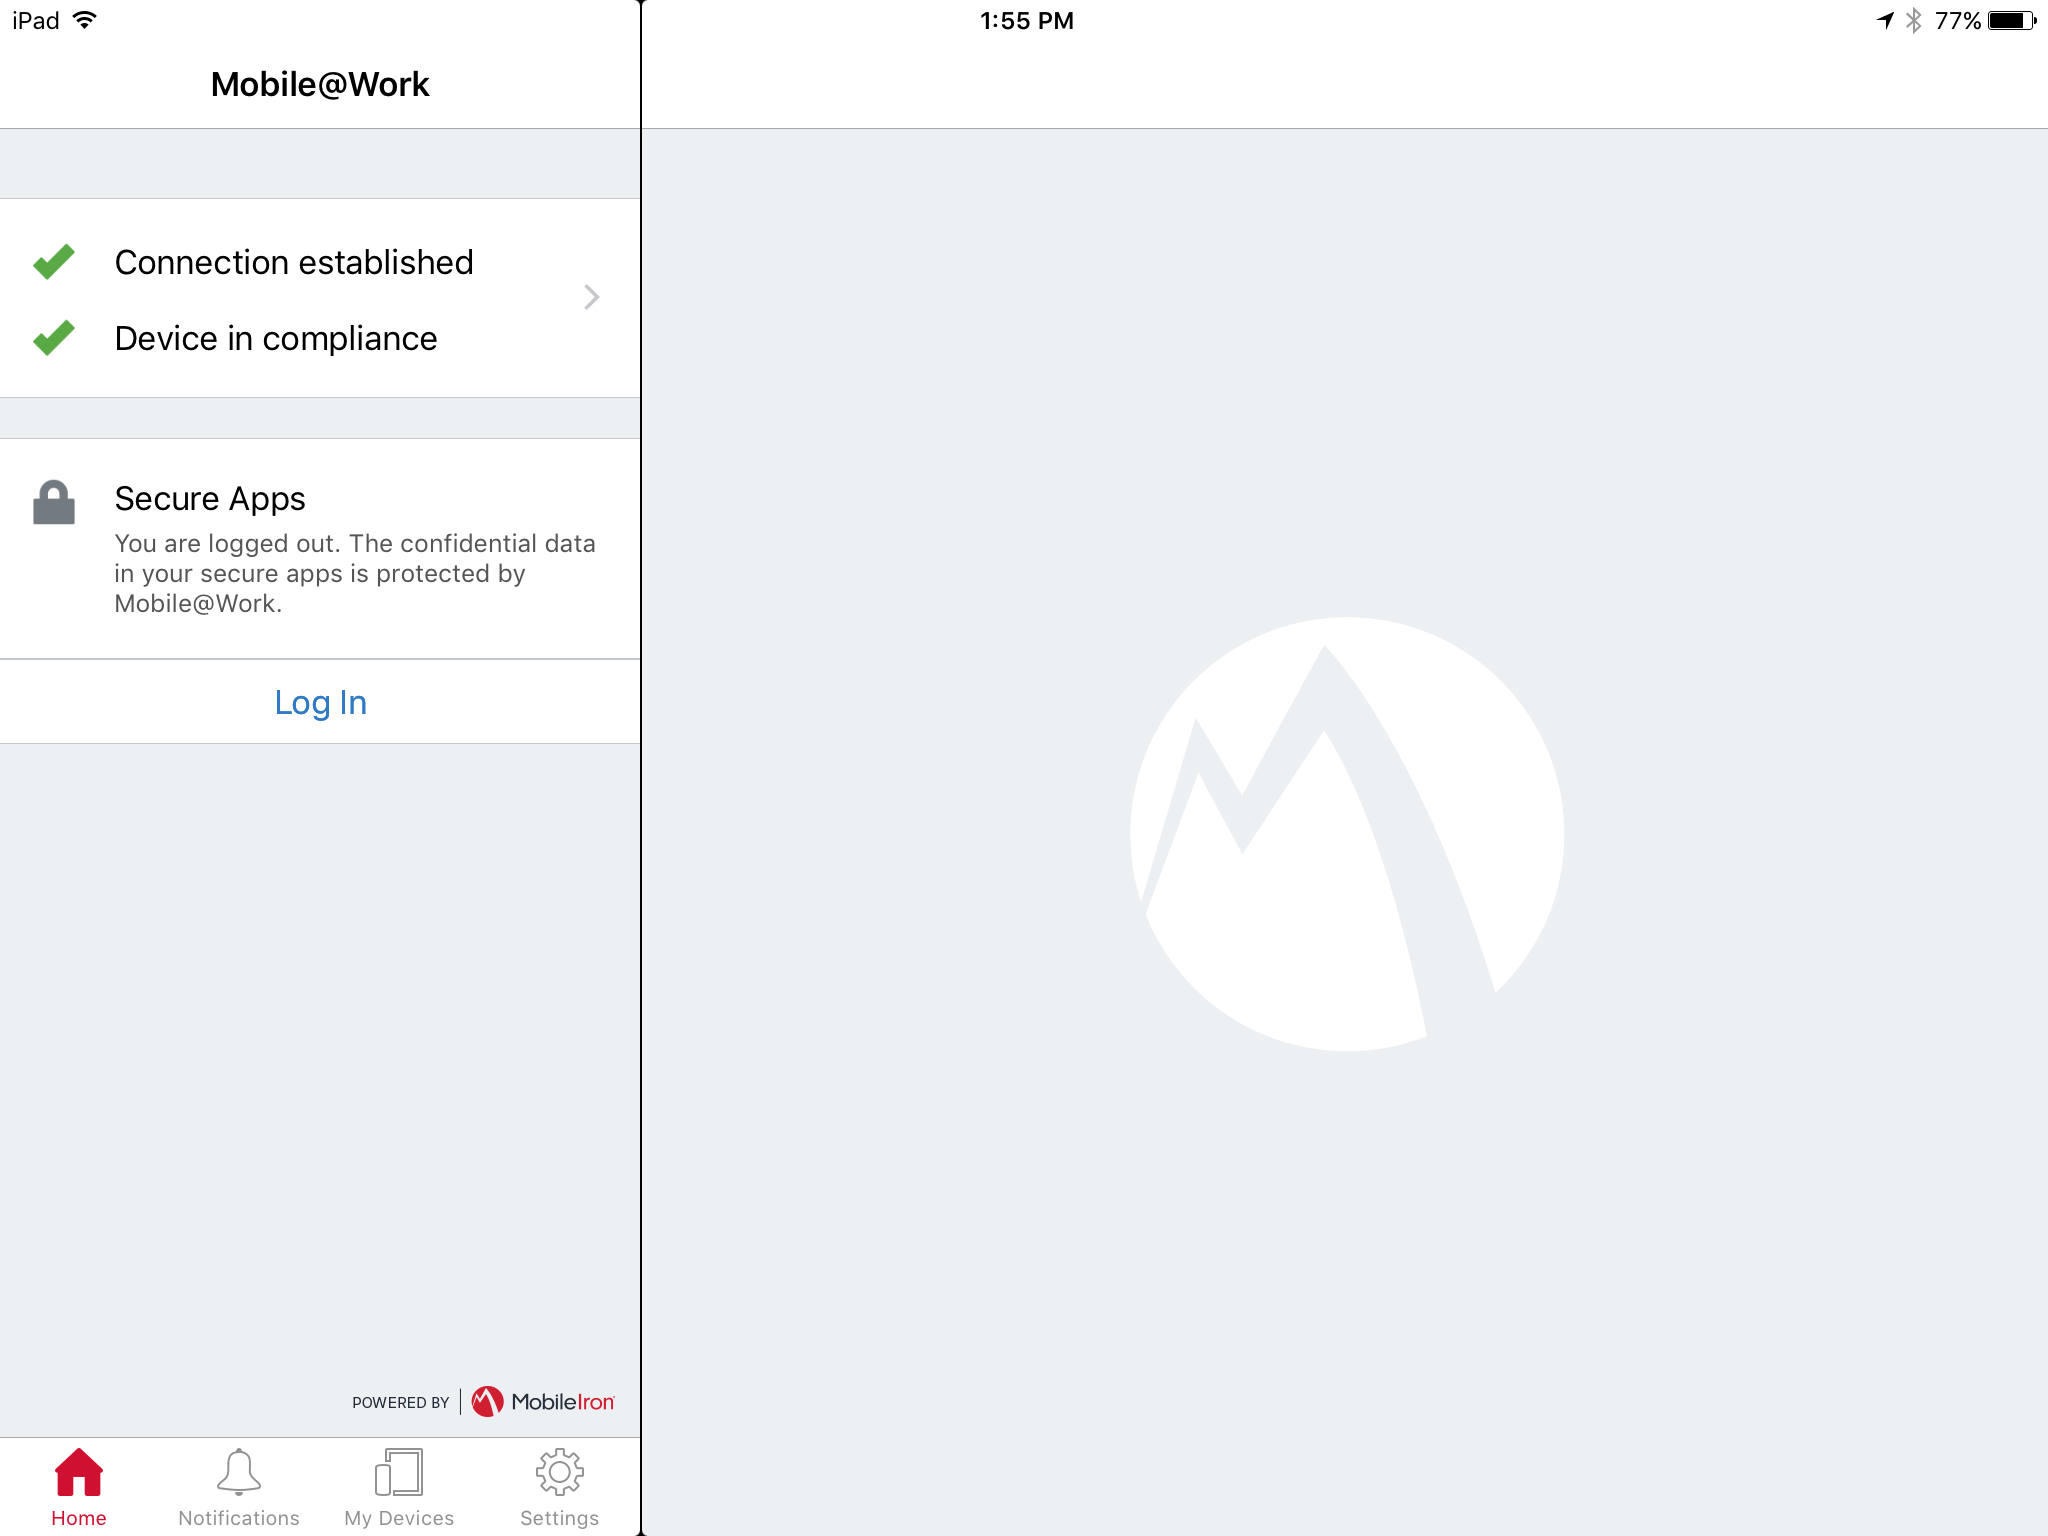
The Mobile@Work > Home screen should now display check marks for both status indicators of Connection established (with MobileIron Core) and Device in compliance (with the MobileIron policies that apply to your device).
2.1.3.1.2. DPC Initial Issuance
The following steps demonstrate how a DPC is issued to an applicantʼs mobile device. It assumes the target mobile device is registered with MobileIron (see Register Target Device with MobileIron) and the MobileIron PIV-D Entrust application is installed (see Implement MobileIron Guidance). These steps are completed by the mobile device user who is receiving a DPC.
Launch the MobileIron PIV-D Entrust application on the target mobile device.
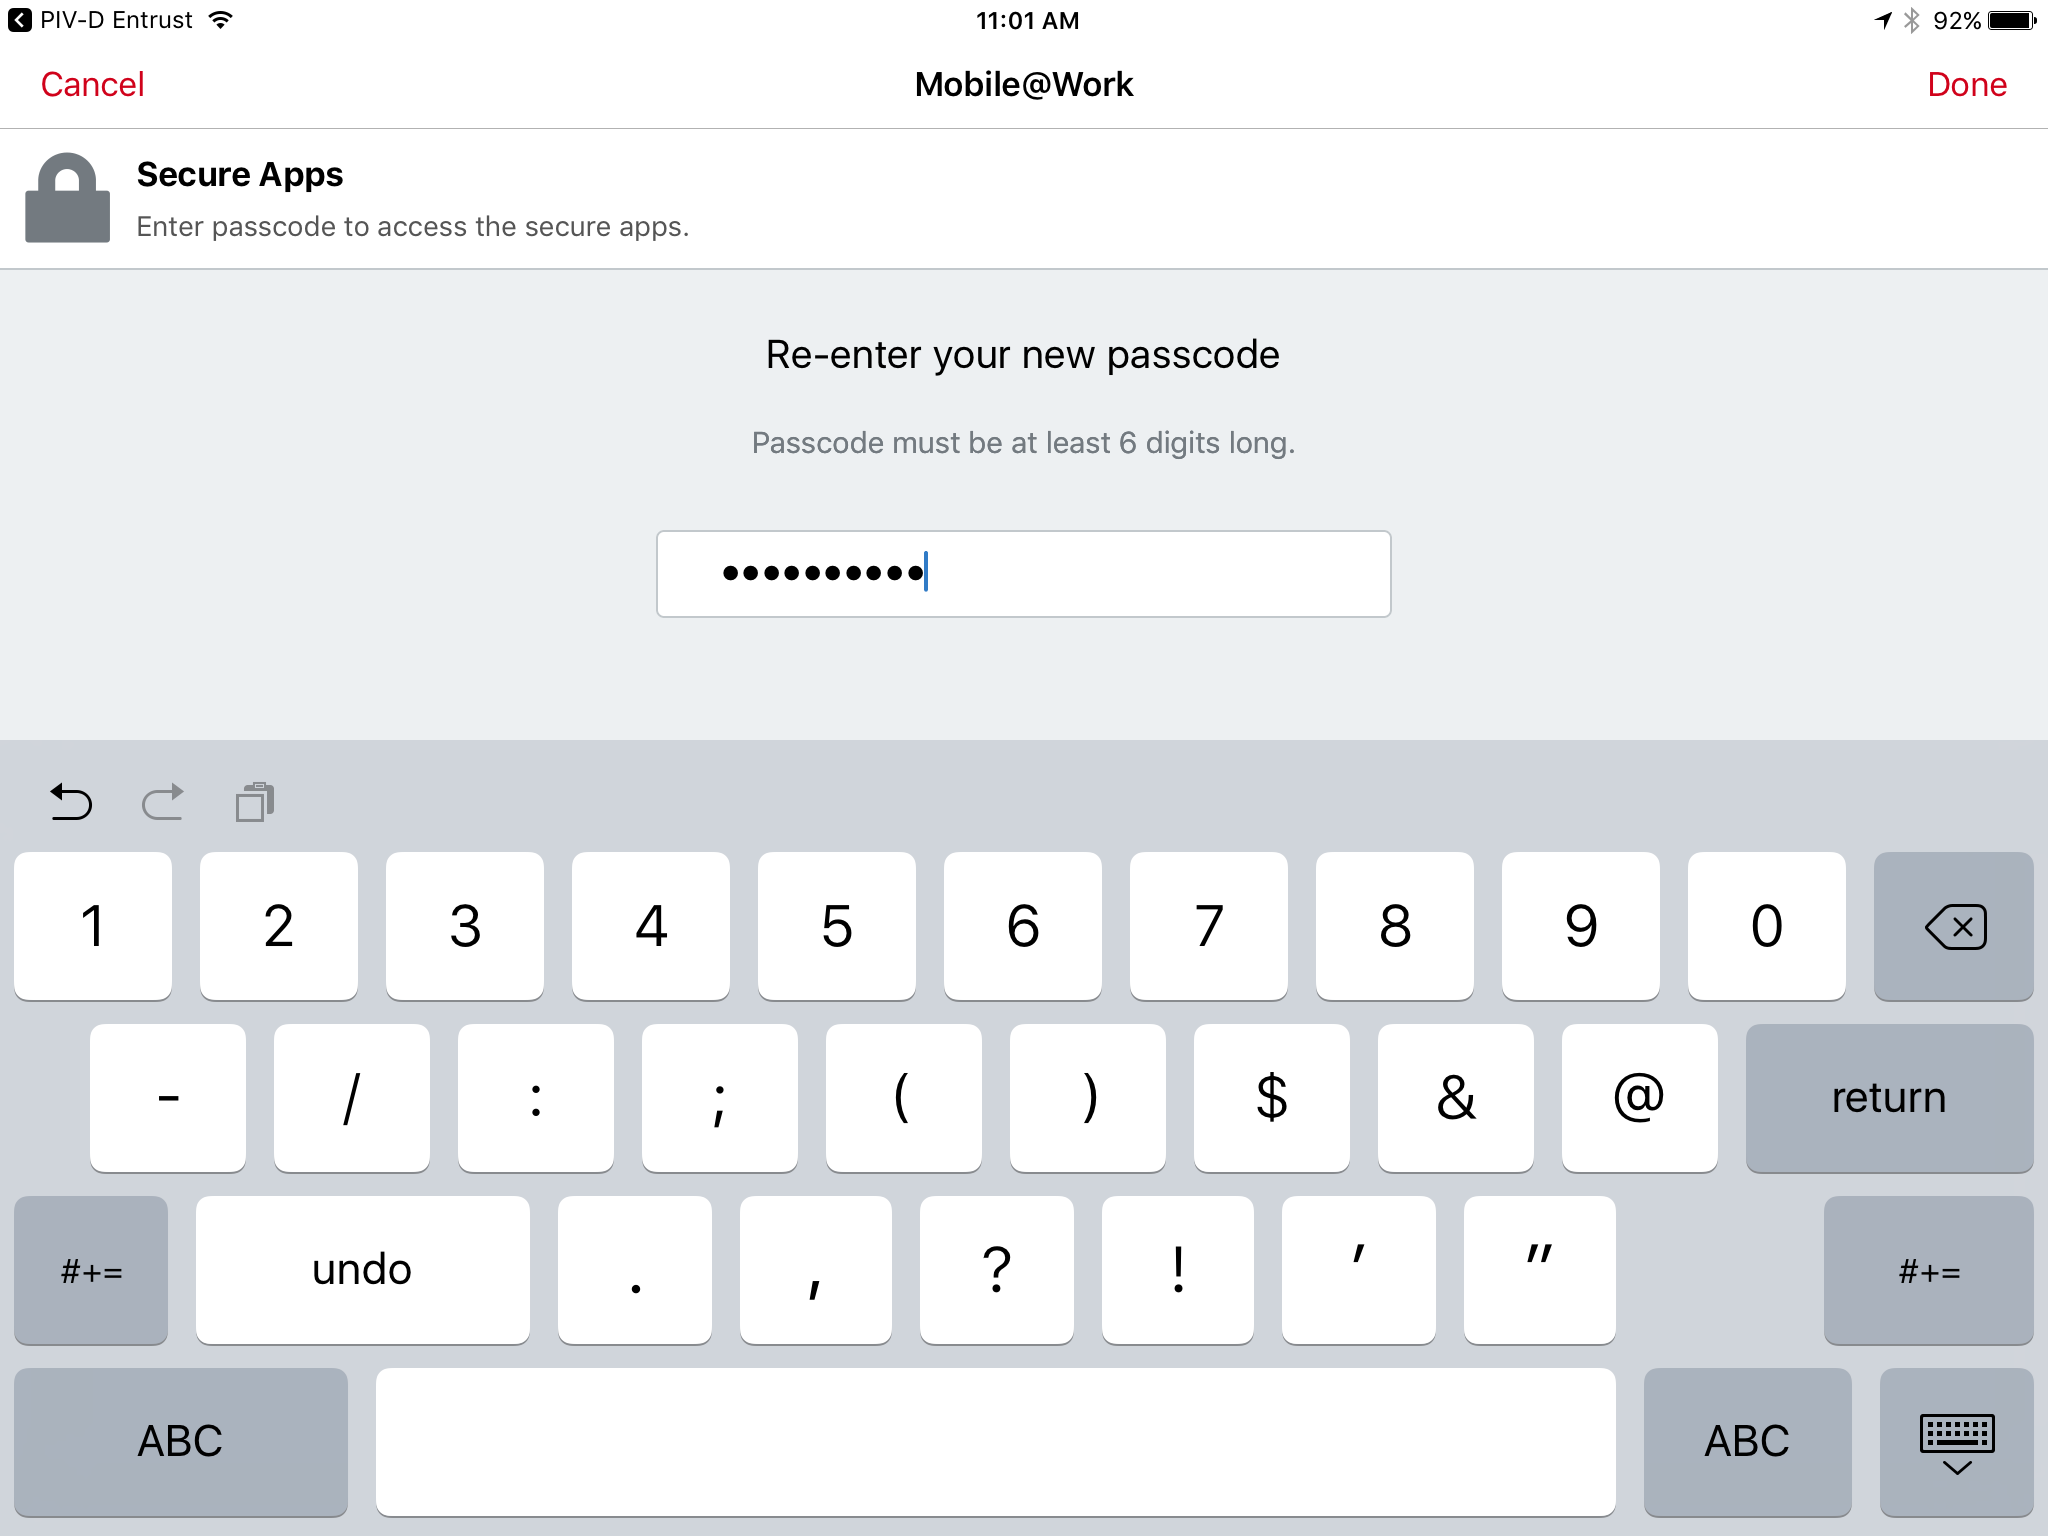
If a Mobile@Work Secure Apps passcode has not been set, you will be prompted to create one. In the Mobile@Work Secure Apps screen:
In the Enter your new passcode field, enter a password consistent with your organizationʼs DPC password policy. This password will be used to activate your DPC (password-based subscriber authentication) for use by Mobile@Work secure applications.
Note: NIST SP 800-63-3 increased the minimum DPC password length to eight characters.
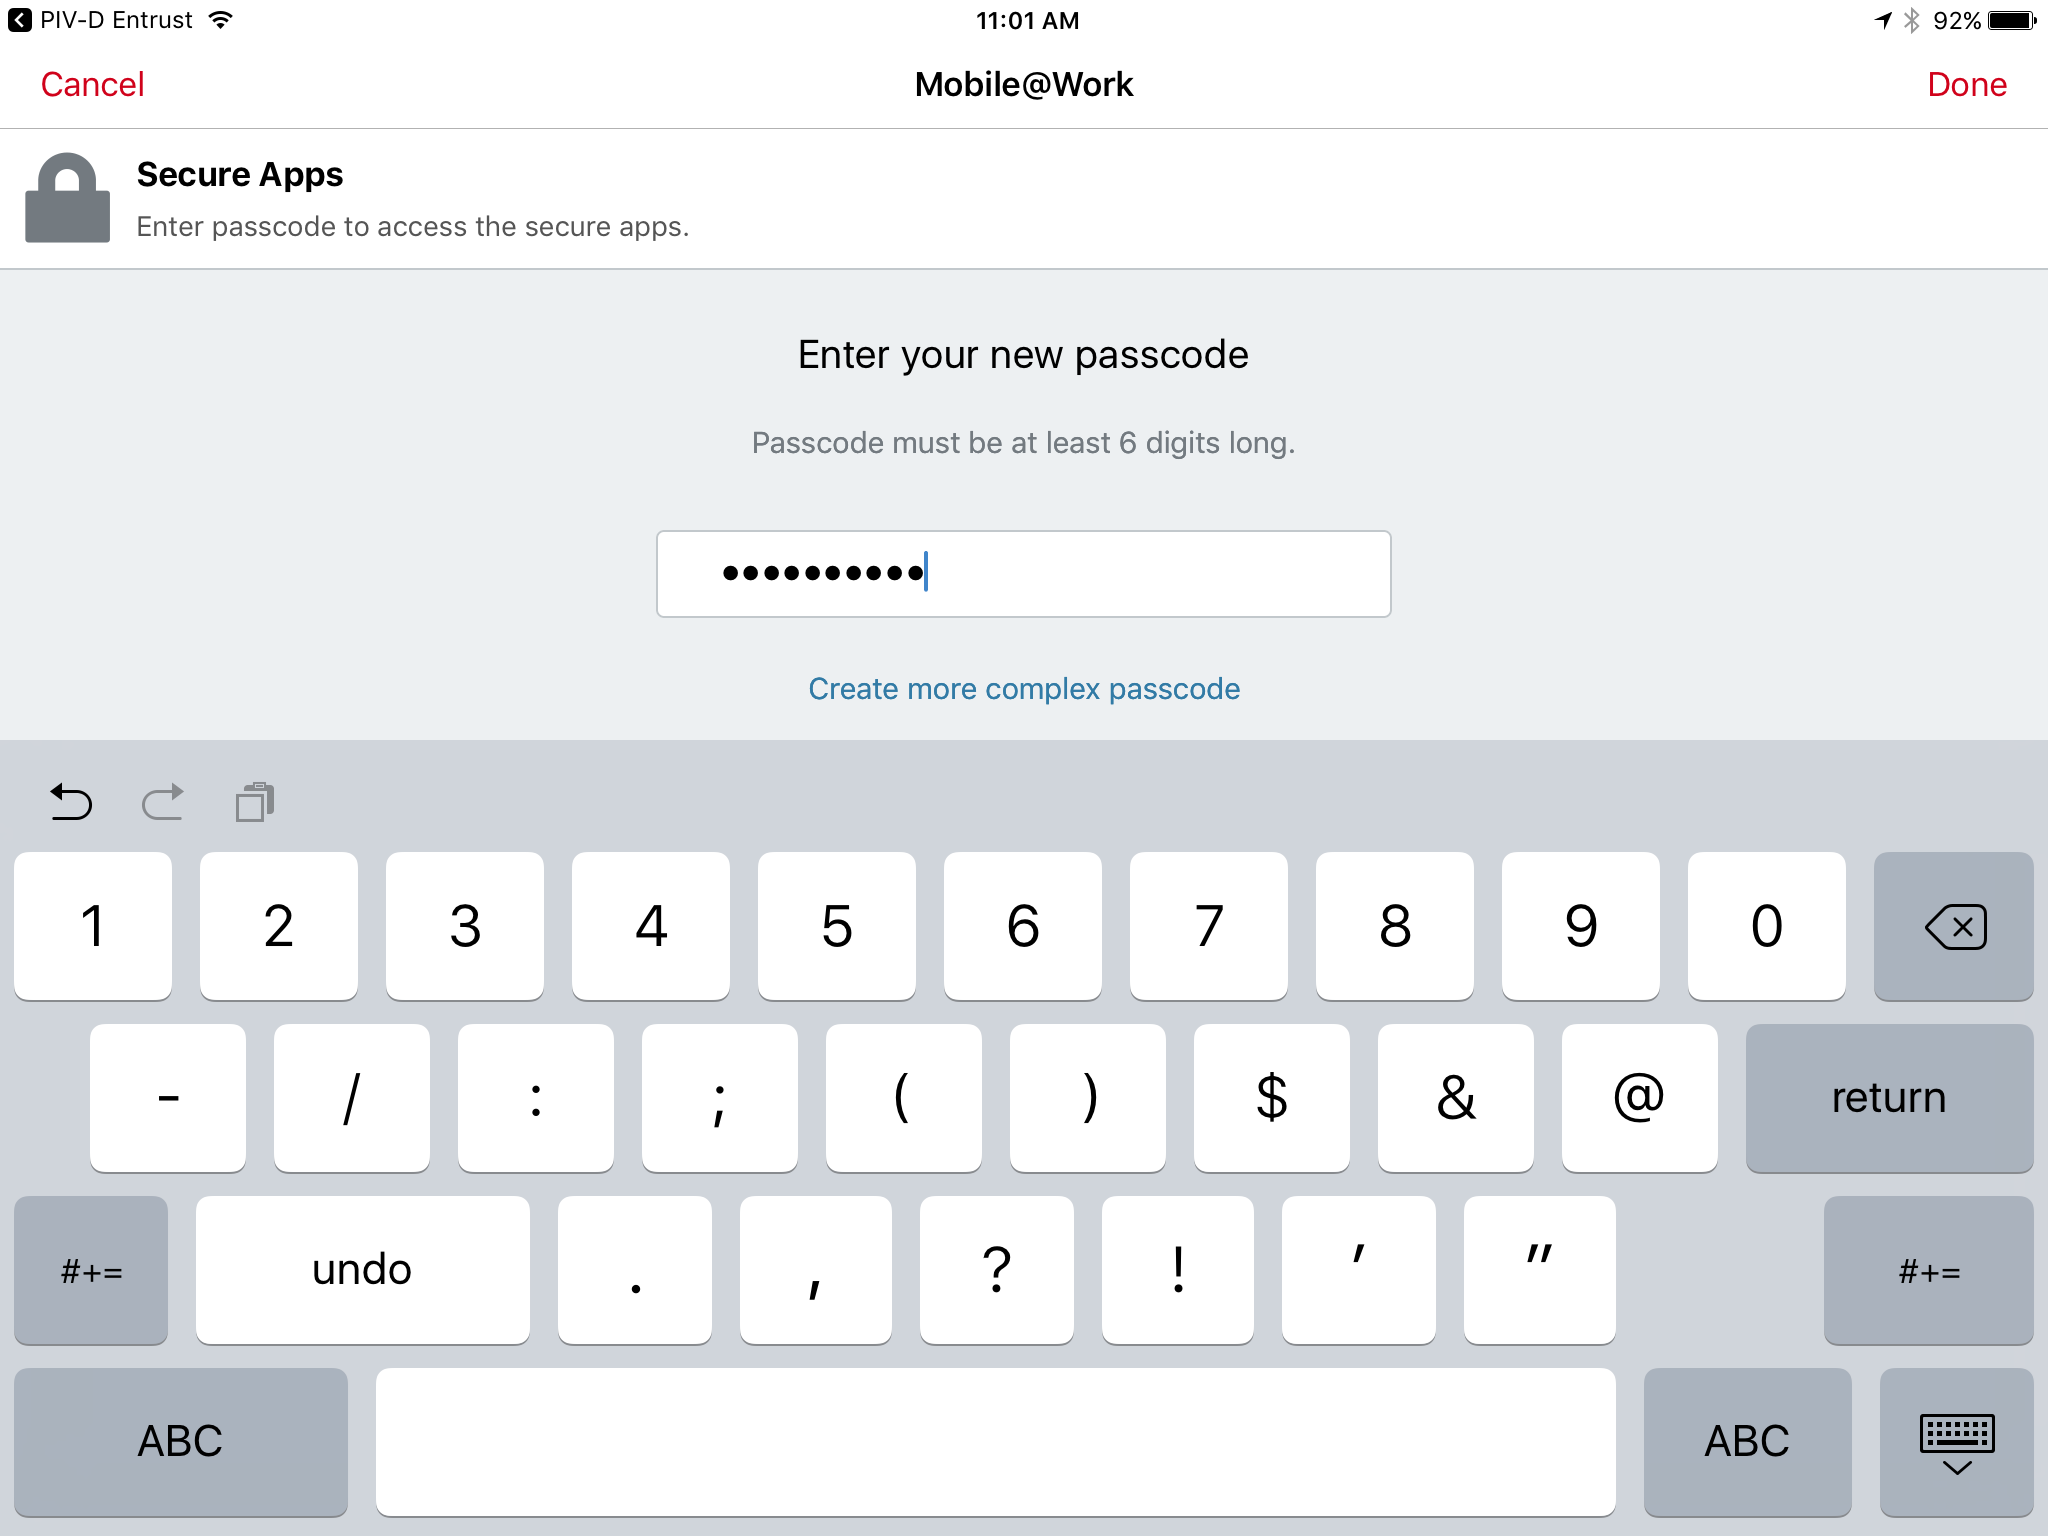
In the Re-enter your new passcode field, reenter the password you entered in Step 2b.
Tap Done.
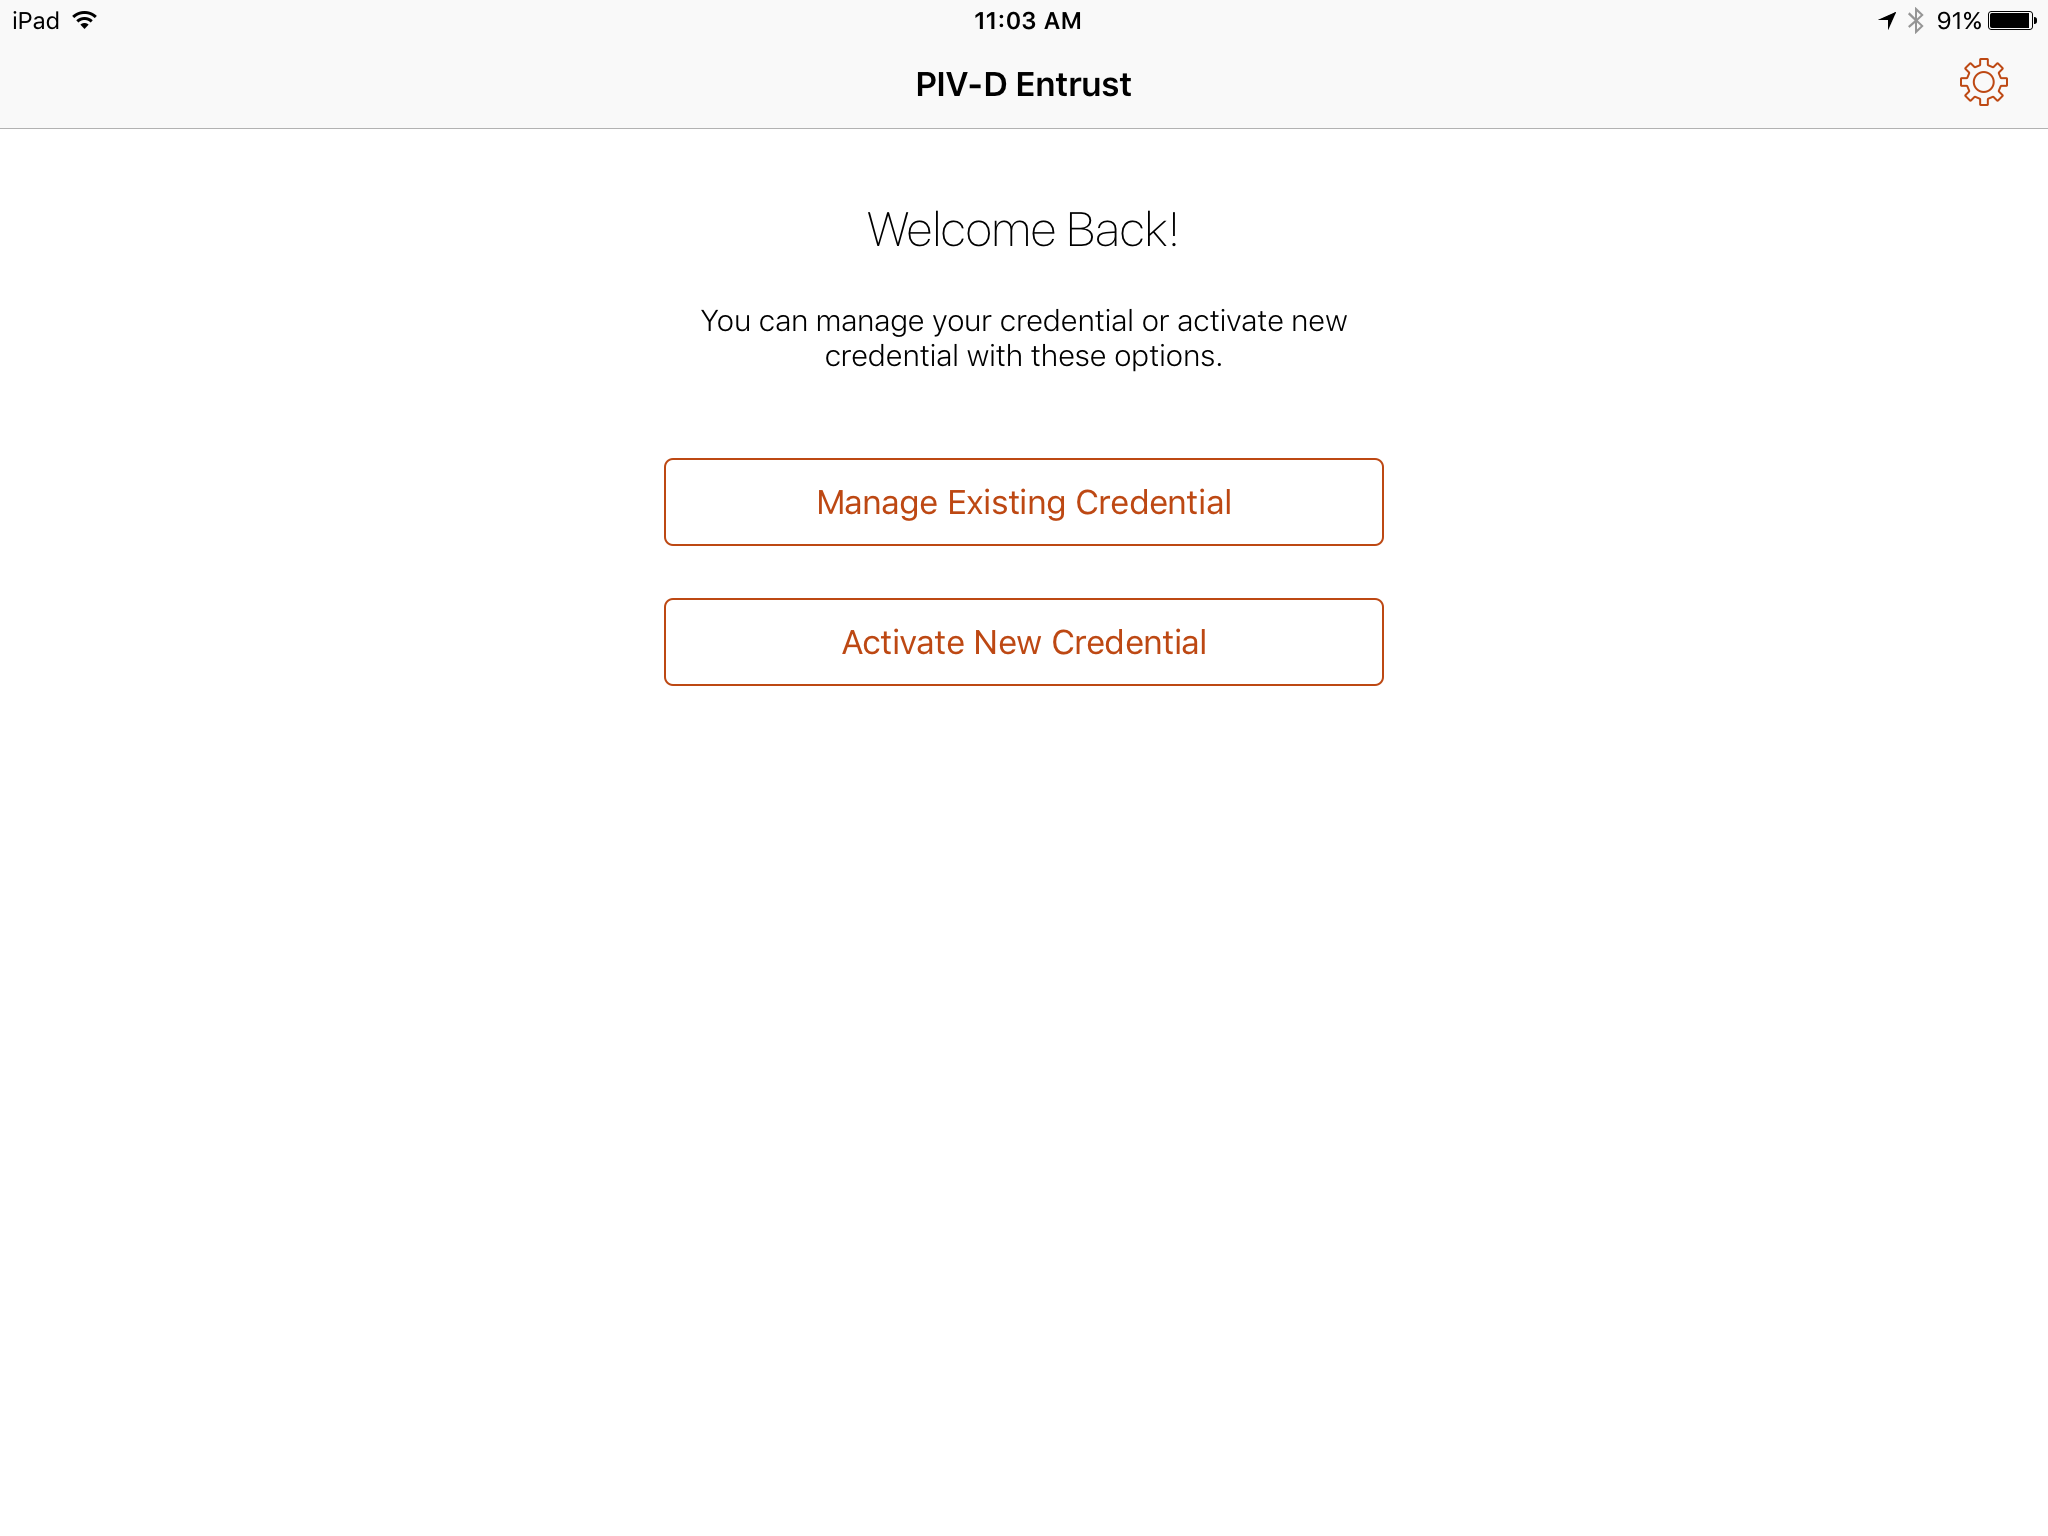
Following registration with MobileIron Core and when no DPC is associated with Mobile@Work, PIV-D Entrust displays a screen for managing your DPC. You will return to this application in a later step.
Insert your valid PIV Card into the reader attached to your laptop or computer workstation.
To request a DPC during the same session as registration with MobileIron:
In the MobileIron Self-Service Portal Confirmation page (see Figure 2-2), click Request Derived Credential.
In the certificate selection dialogue:
Select your PIV Authentication certificate from the list of available certificates. See Step 4 of Section 2.1.3.1.1 for additional steps to identify this certificate, as necessary.
Click OK.
Continue with Step 6.
To request a DPC in a new session:
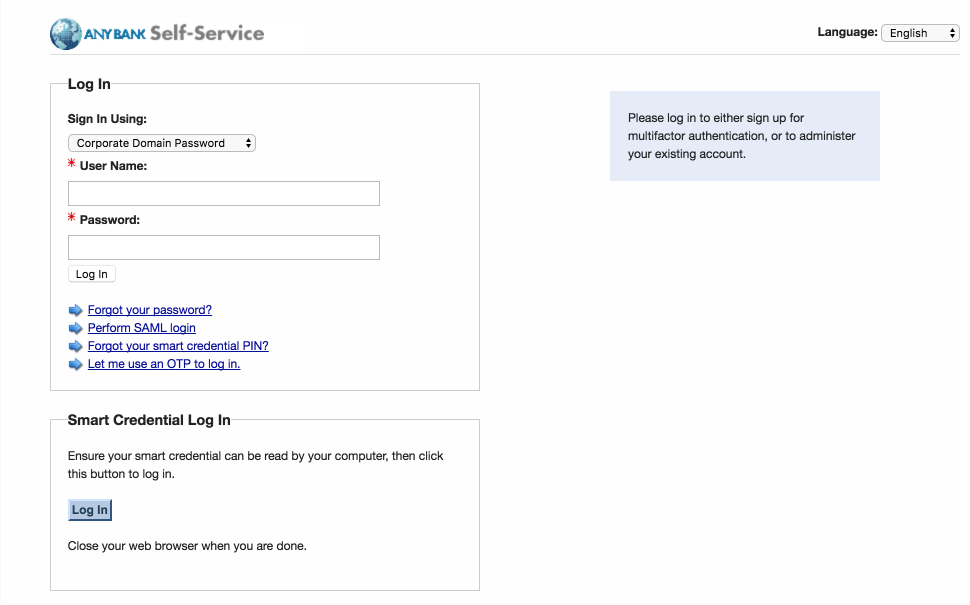
Using a web browser, visit the Entrust IDG Self-Service Portal URL provided by an administrator.
In the Entrust IDG Self-Service Portal, under Smart Credential Log In, click Log In.
Note: The portal used in our test environment is branded as a fictitious company, AnyBank Self-Service.
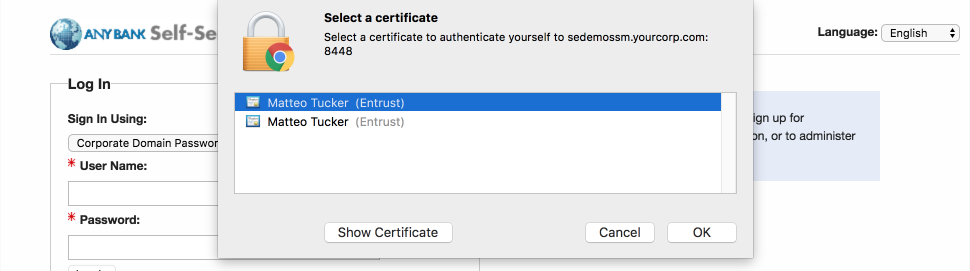
In the Select a certificate dialogue:
Select your PIV Authentication certificate from the list of available certificates. See Step 4 of Section 2.1.3.1.1 for additional steps to identify this certificate, as necessary.
Click OK.
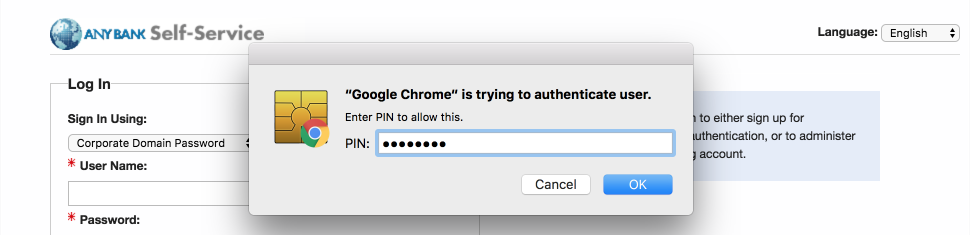
In the authentication dialogue:
In the PIN field, enter the password to activate your PIV Card.
Click OK.
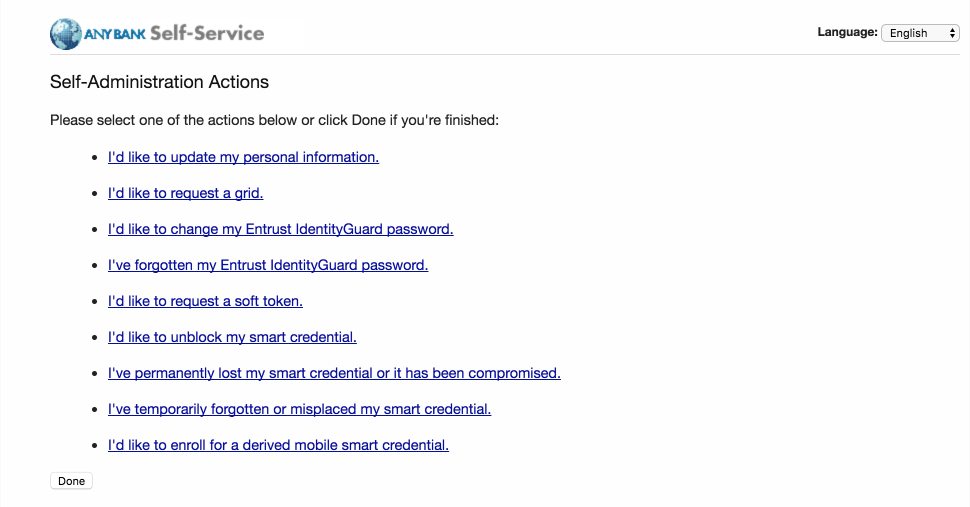
On the Self-Administration Actions page, follow the I’d like to enroll for a derived mobile smart credential link (displayed below as the last item; this may vary based on which self-administration actions your Entrust IDG administrator enabled).
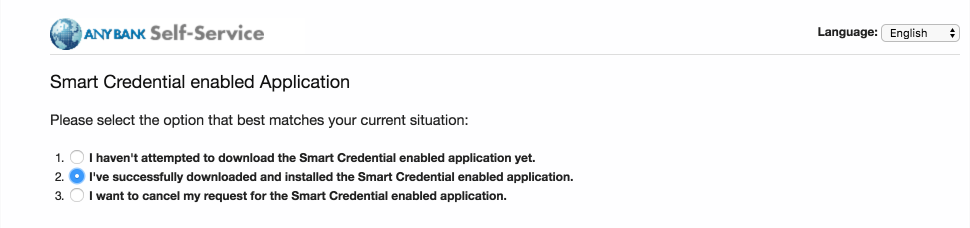
On the Smart Credential enabled Application page, select Option 2: I’ve successfully downloaded and installed the Smart Credential enabled application.
On the Derived Mobile Smart Credential page:
In the Identity Name field, enter your LDAP or MobileIron user ID.
Click OK.
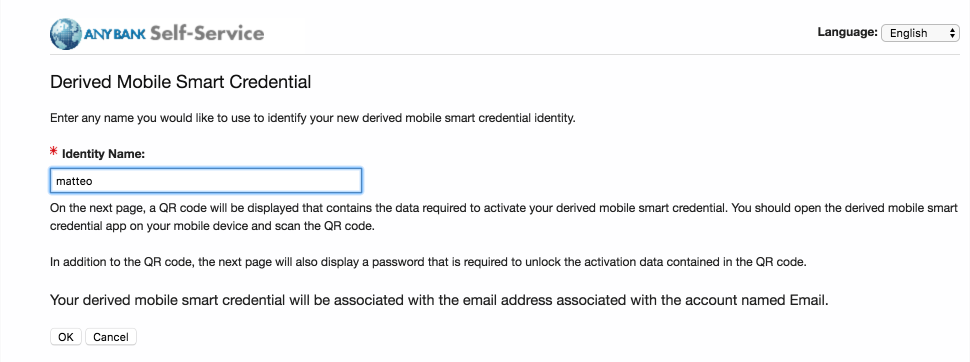
The Derived Mobile Smart Credential Quick Response (QR) Code Activation page displays information used in future steps; keep this page displayed. The workflow resumes using the MobileIron PIV-D Entrust application that is open on the target mobile device.
Note: Steps 11–13 must be completed by using the target mobile device within approximately three minutes, otherwise Steps 7–10 must be repeated to generate new activation codes.
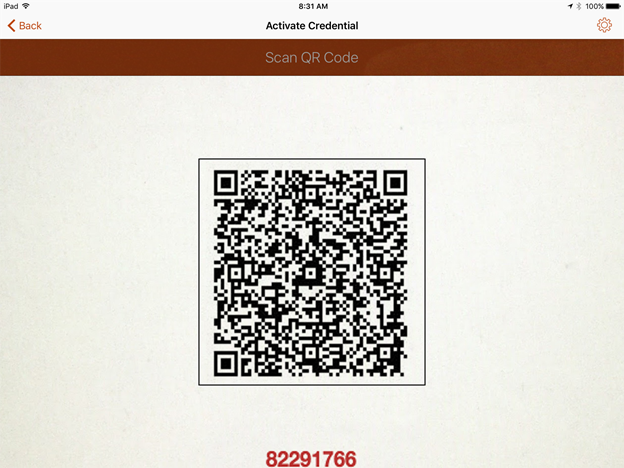
Figure 2-3 Derived Mobile Smart Credential QR Code Activation Page

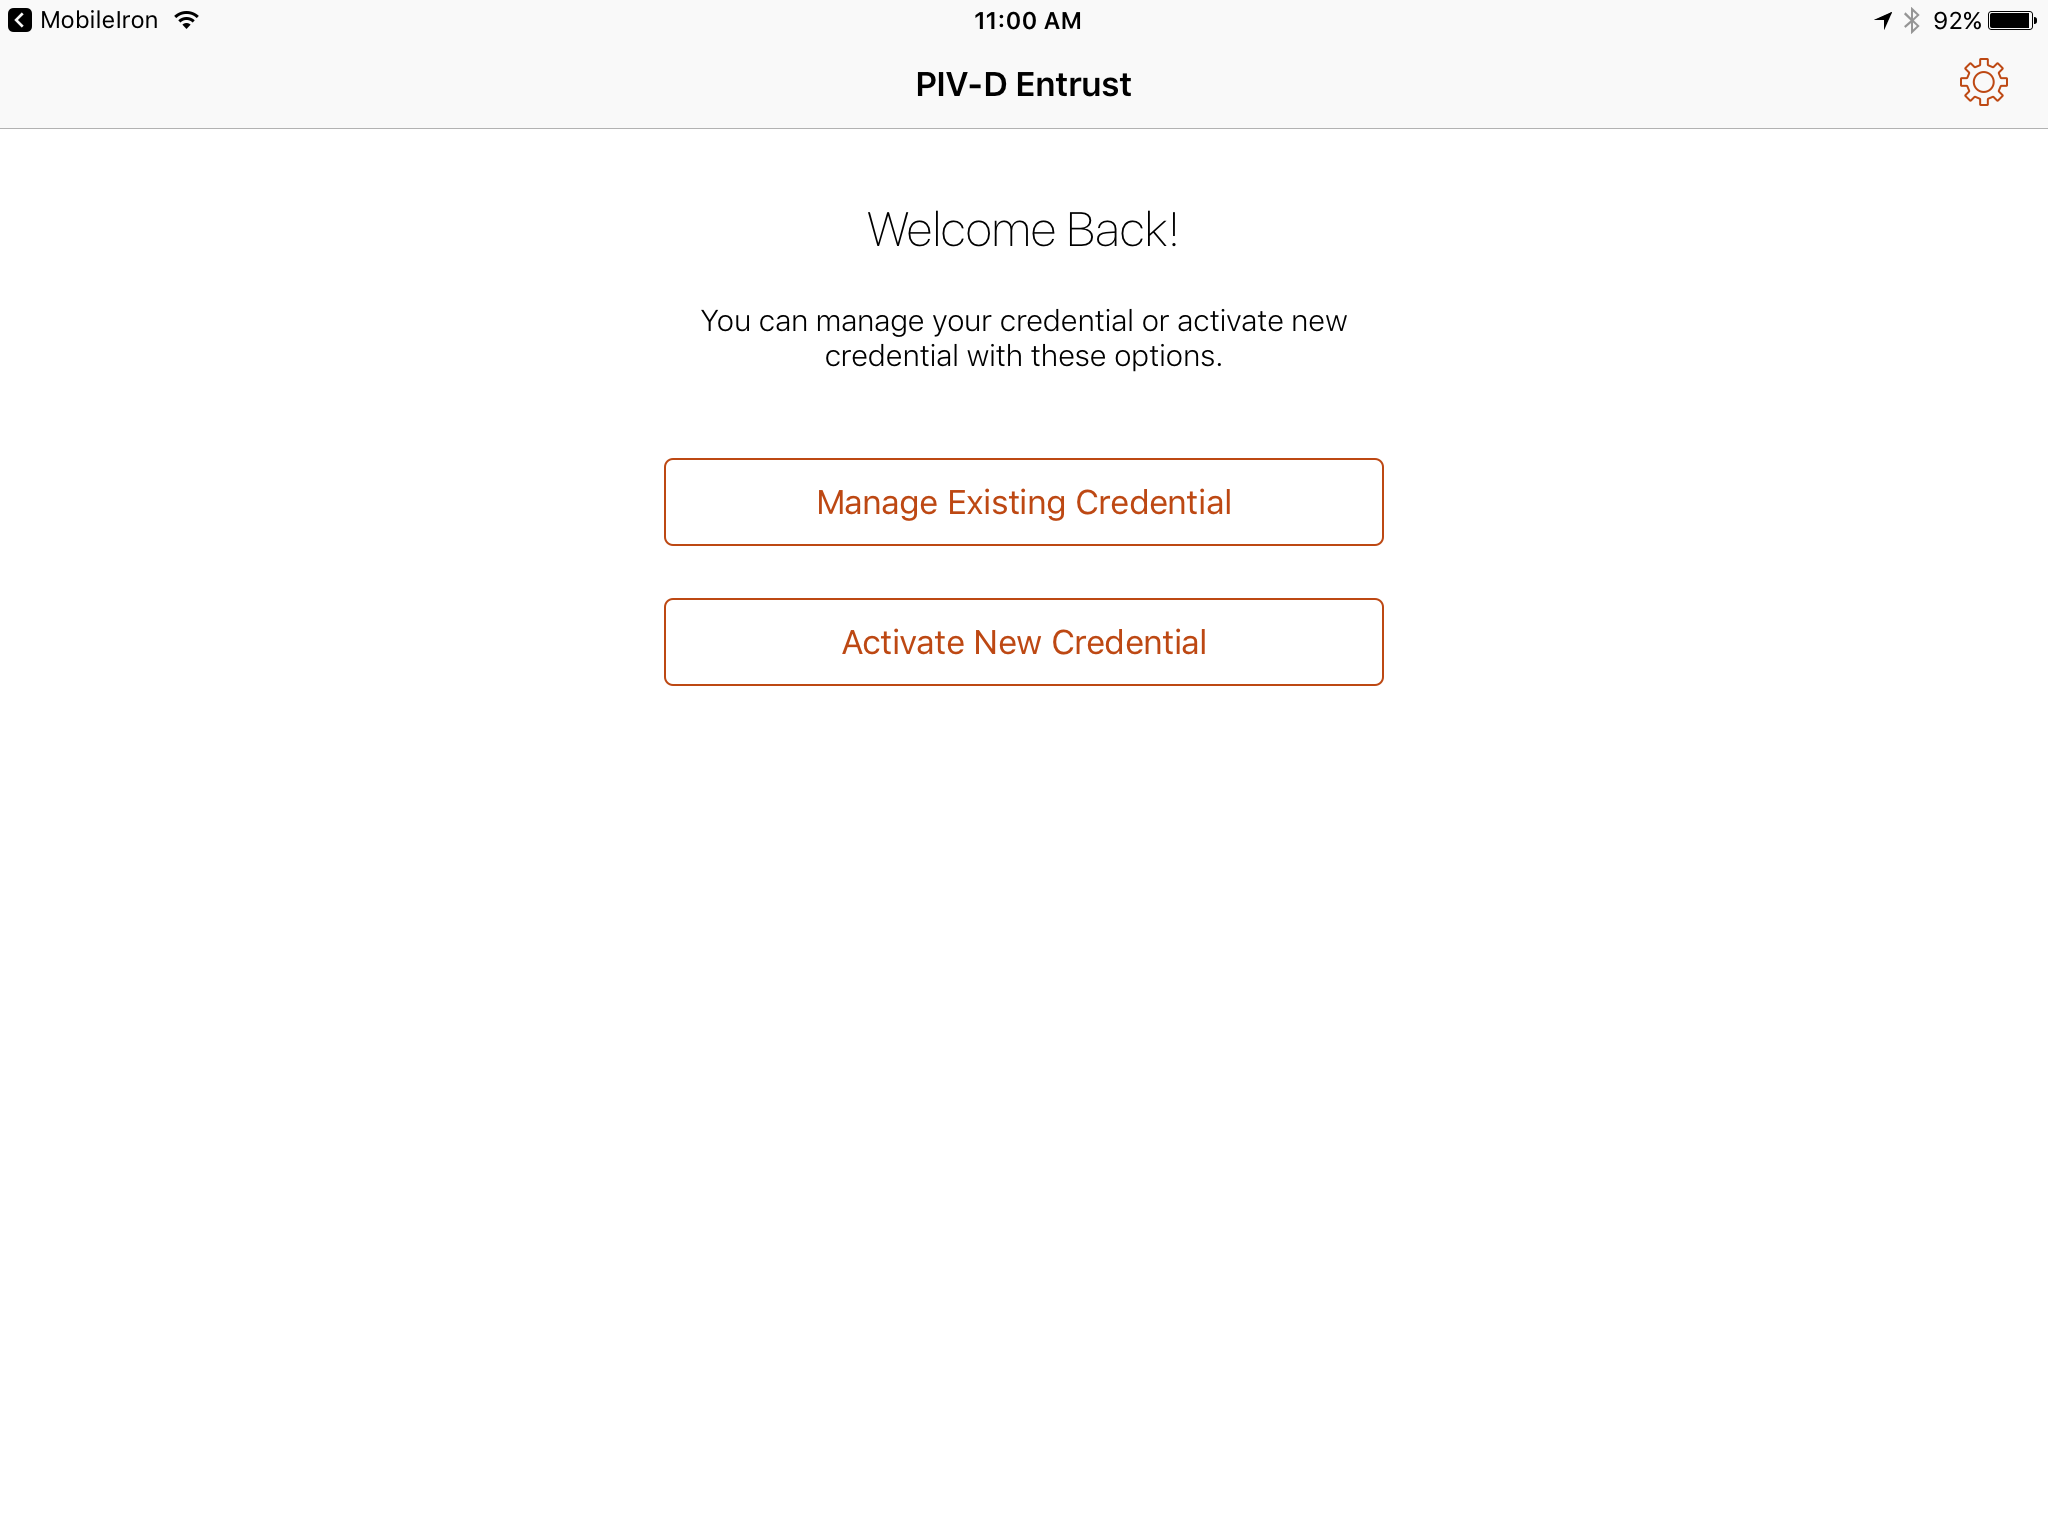
In the PIV-D Entrust application that is running on the target mobile device, tap Activate New Credential.
Use the device camera to capture the QR code displayed on the Derived Mobile Smart Credential QR Code Activation page as represented in Figure 2-3.
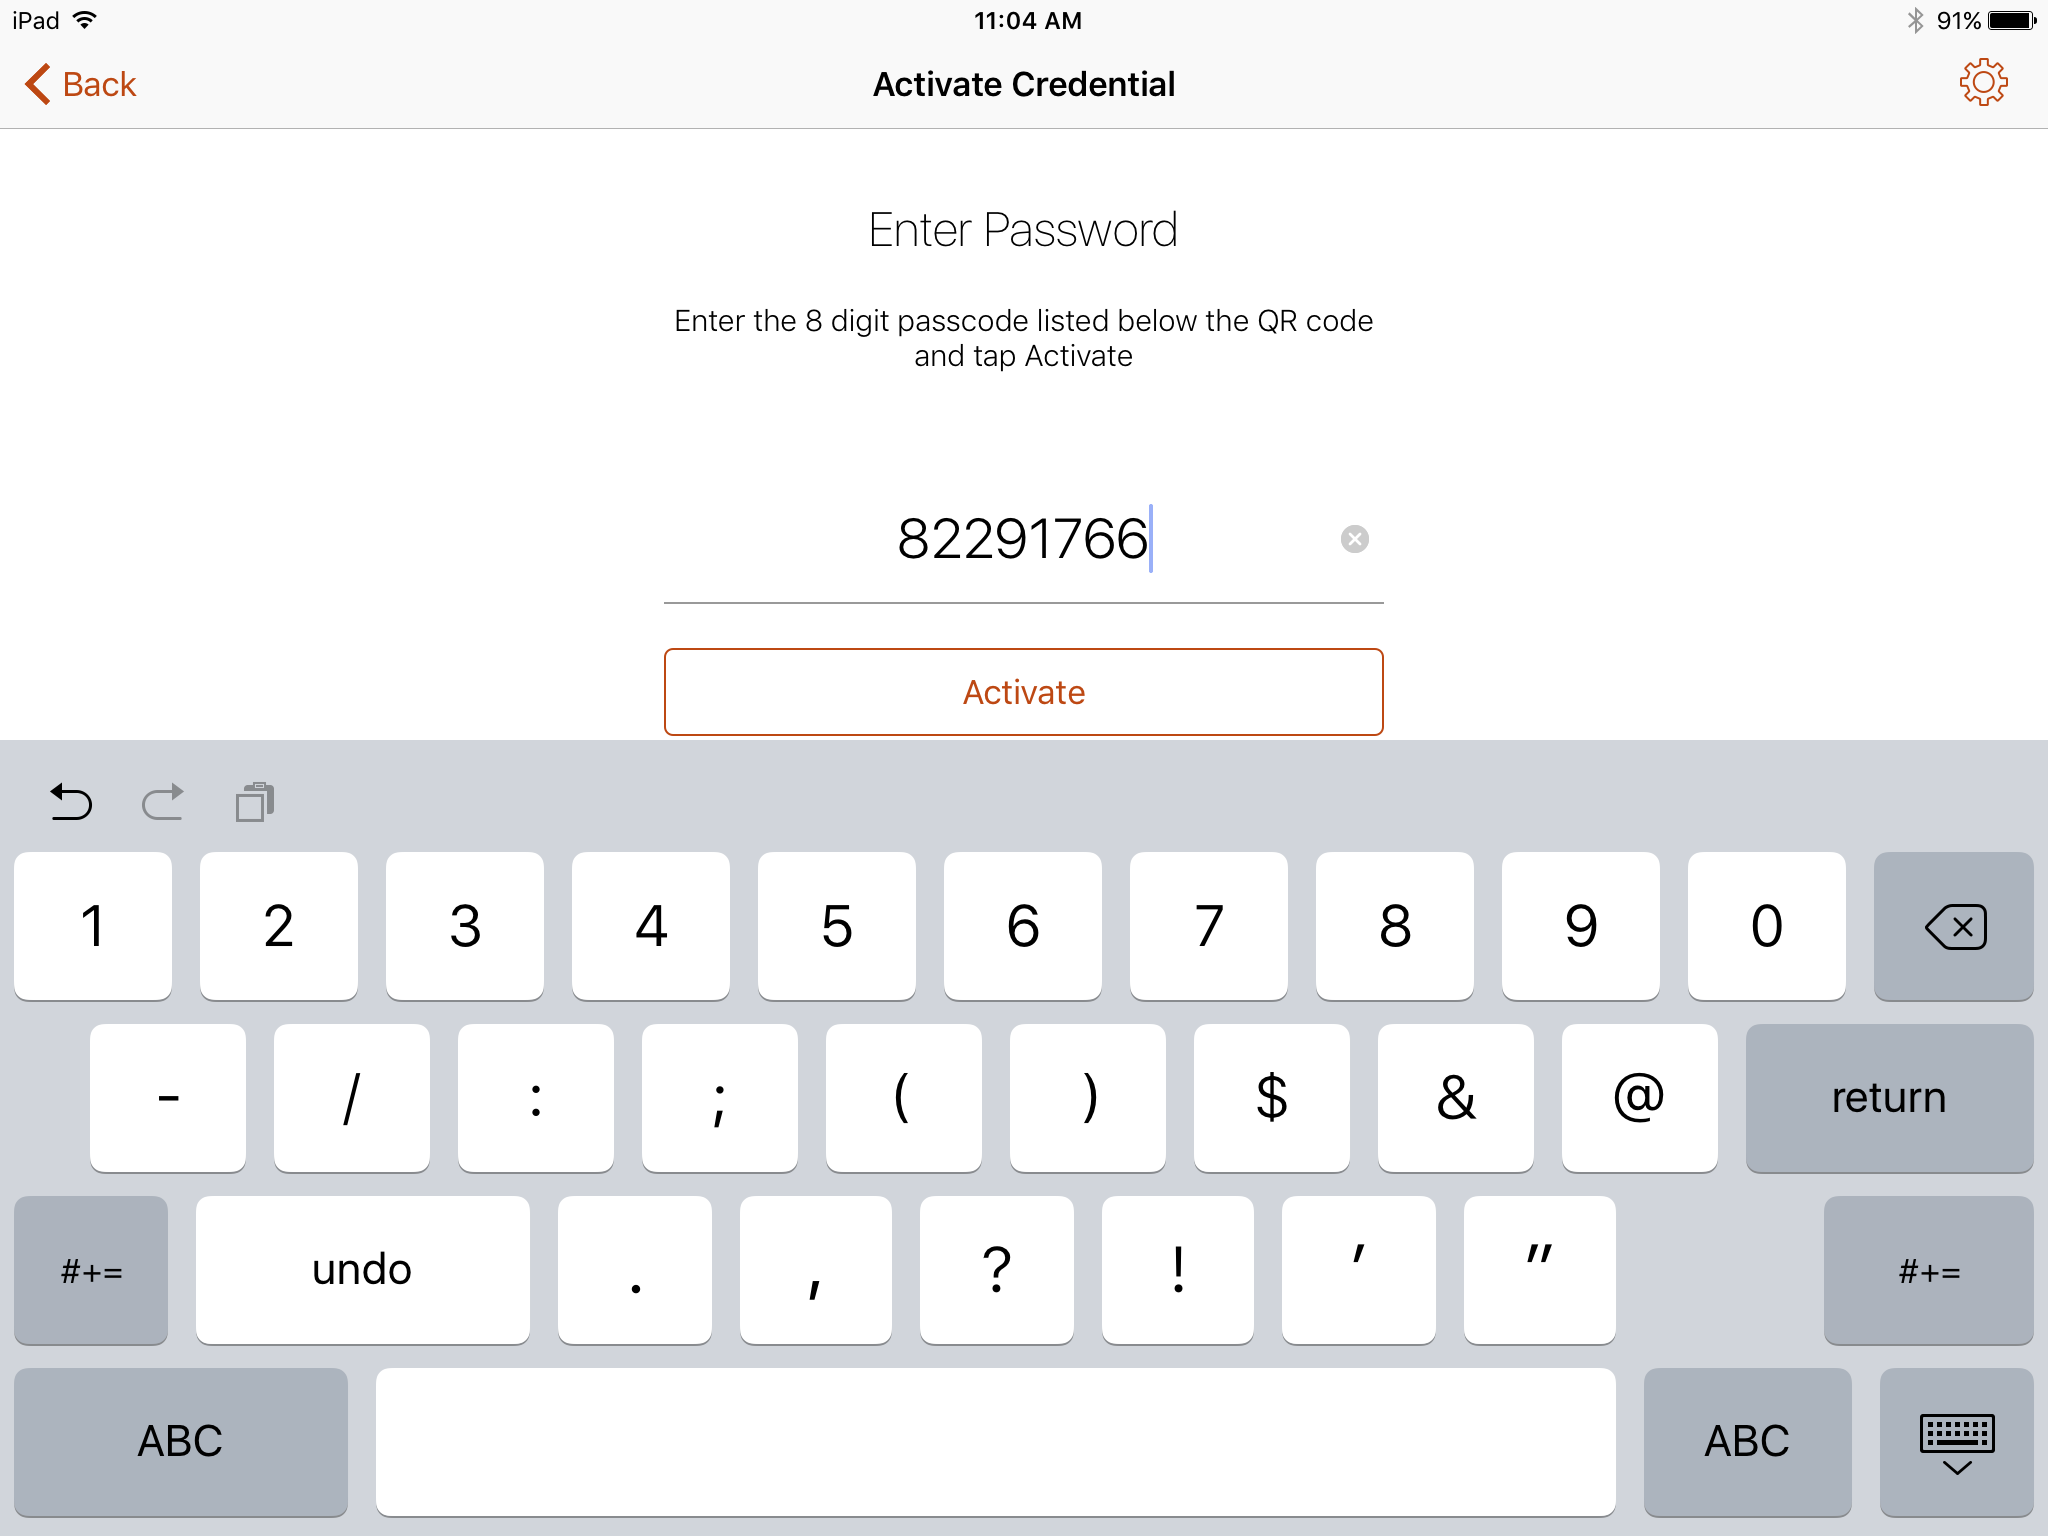
On the Activate Credential screen:
Enter the password below the QR code that is displayed on the Derived Mobile Smart Credential QR Code Activation page (displayed by the same device used to perform Steps 4–10) as represented in Figure 2-3.
Tap Activate.
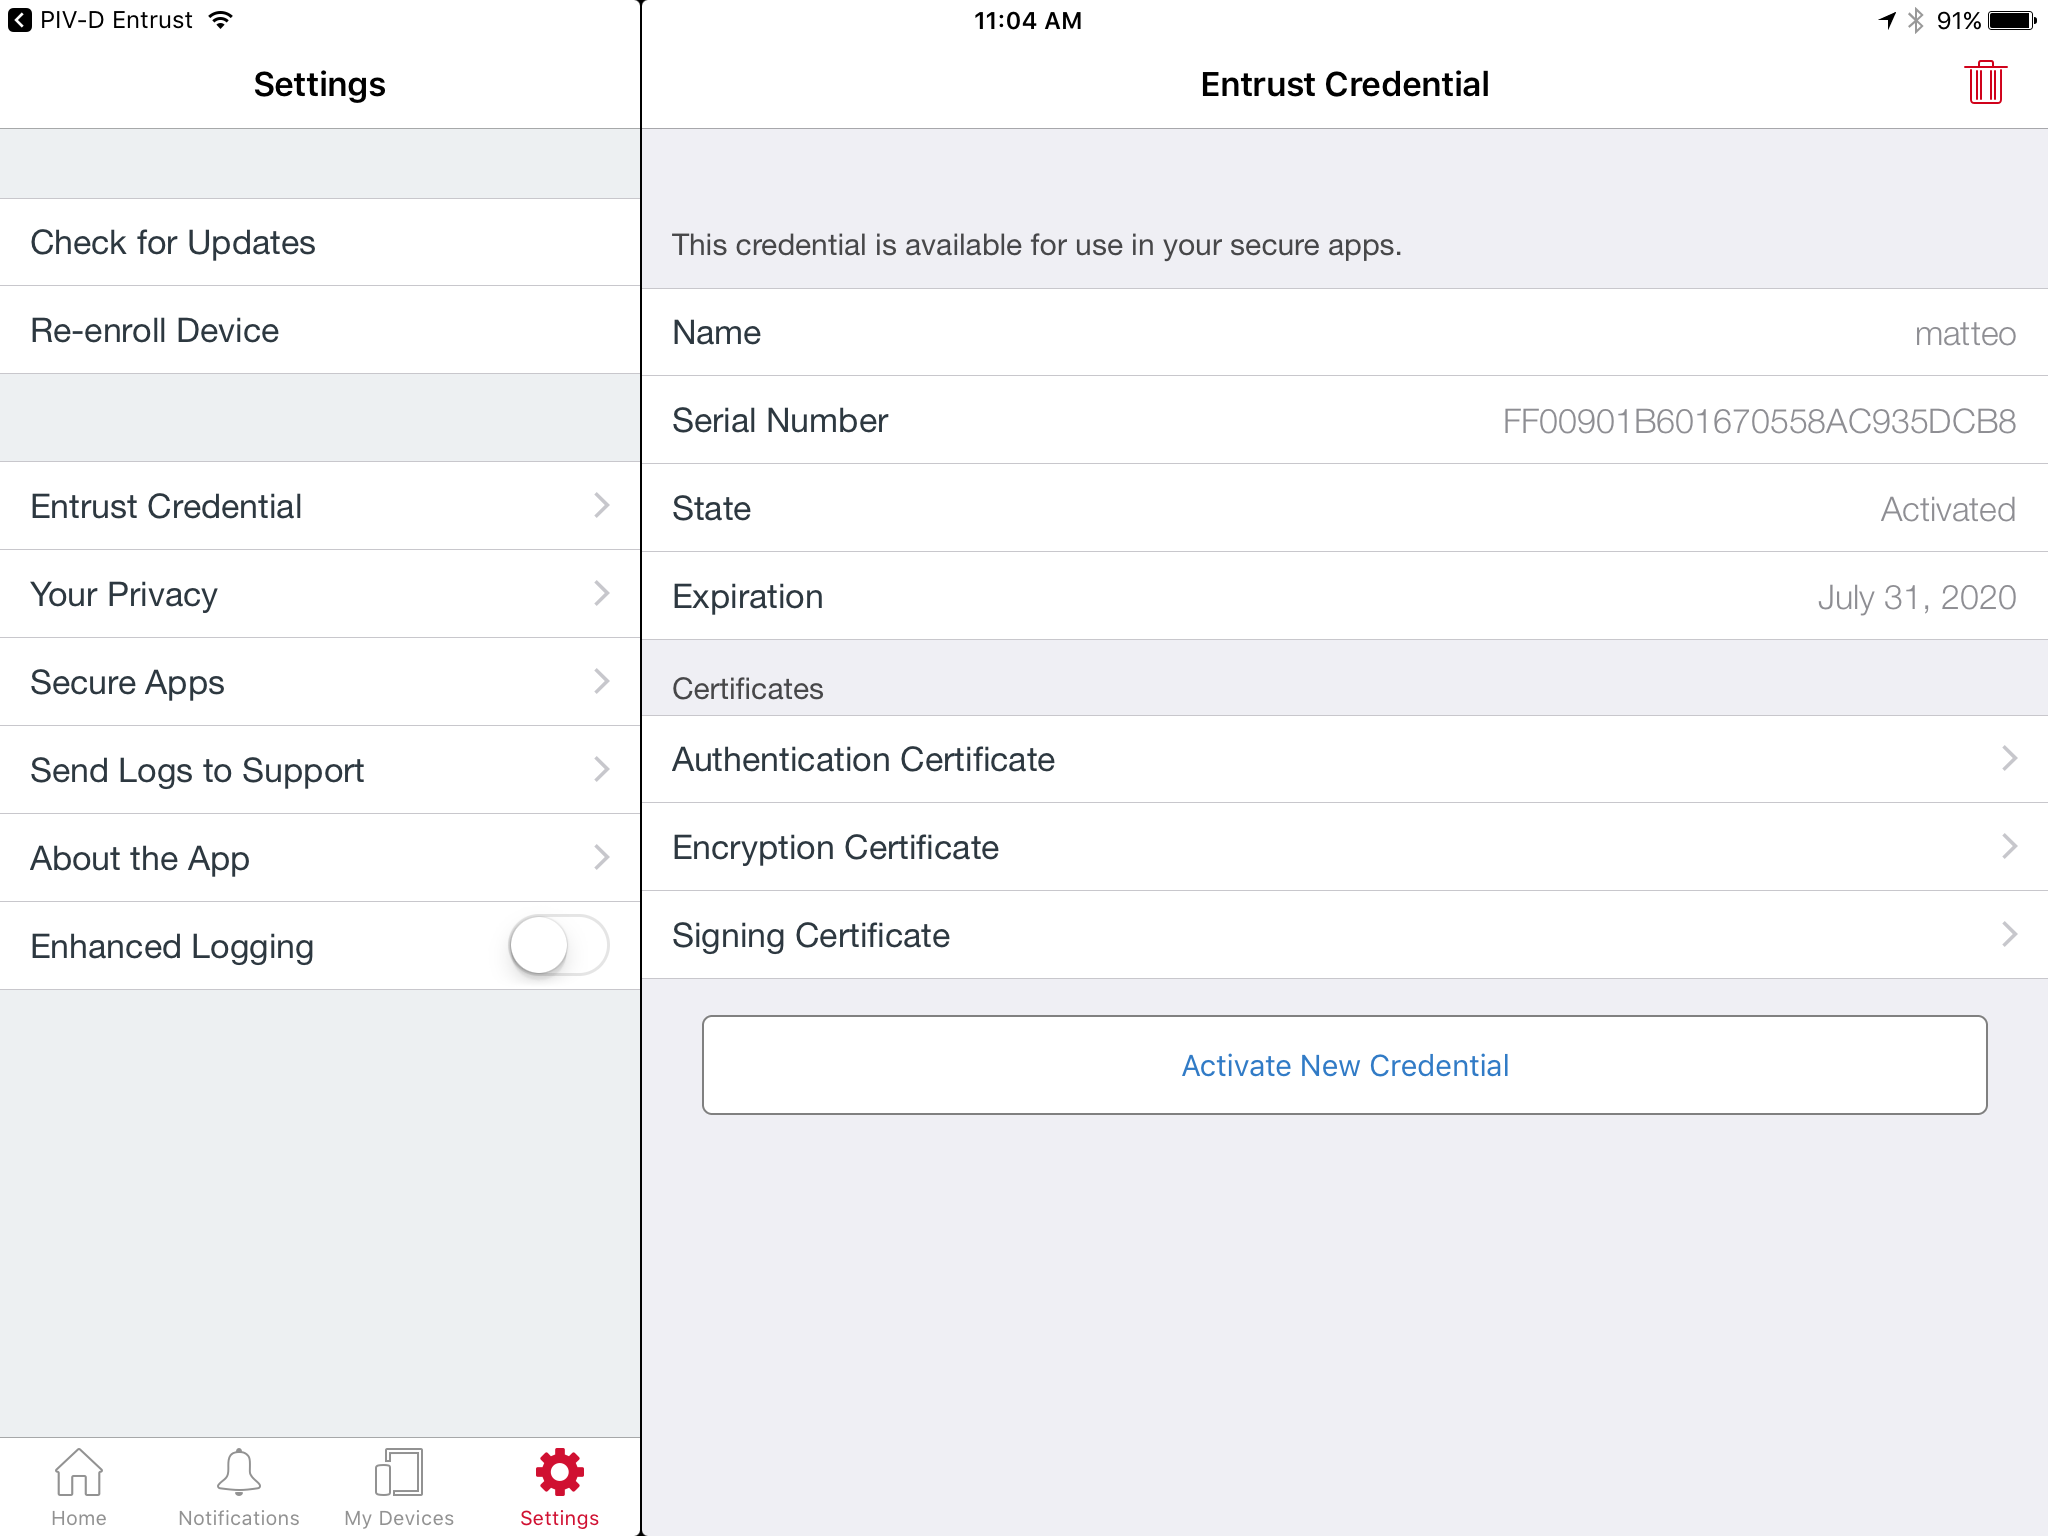
If issuance was successful, the PIV-D Entrust application should automatically launch Mobile-Iron. Go to Mobile@Work > Settings > Entrust Credential to view its details.
2.1.3.2. DPC Maintenance
Changes to a DPC subscriberʼs PIV Card that result in a rekey or reissuance (e.g., official name change) require the subscriber to repeat the initial issuance workflow as described in the previous section. The issued DPC will replace any existing DPC in the MobileIron Apps@Work container.
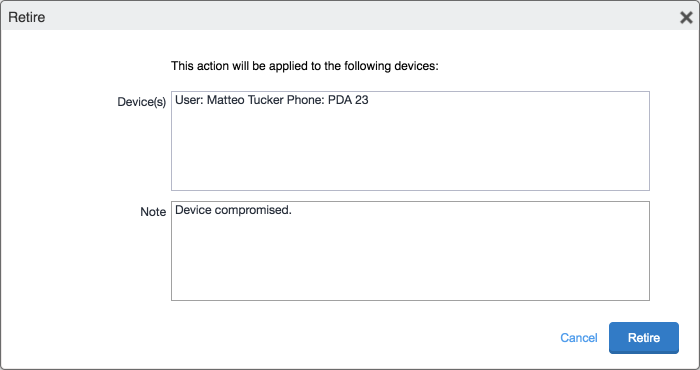
2.1.3.3. DPC Termination
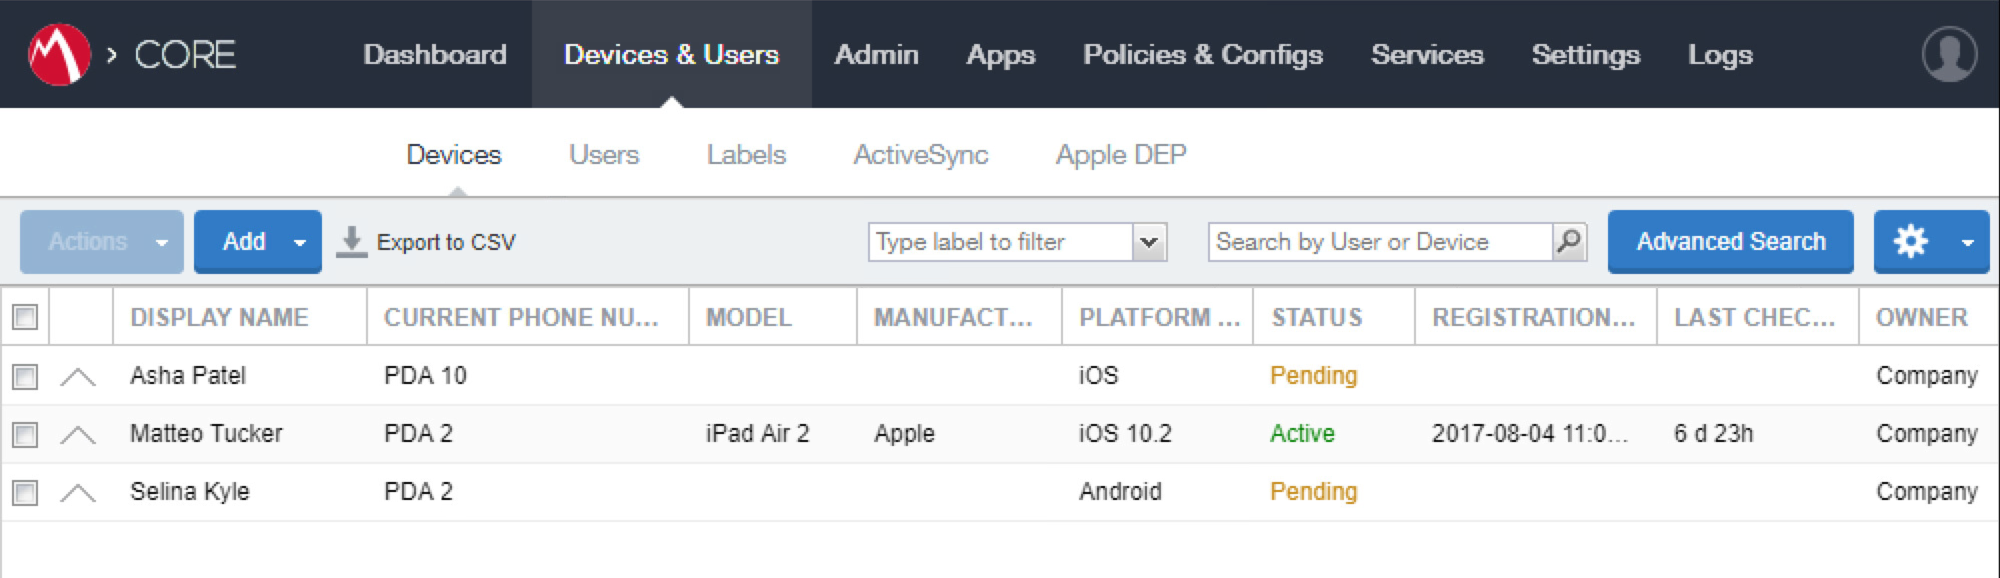
Termination of a DPC can be initiated from the MobileIron Admin Console. Upon completion of this workflow, the DPC stored in the MobileIron Apps@Work container will be cryptographically wiped (destroyed). These steps are performed by a MobileIron Core administrator.
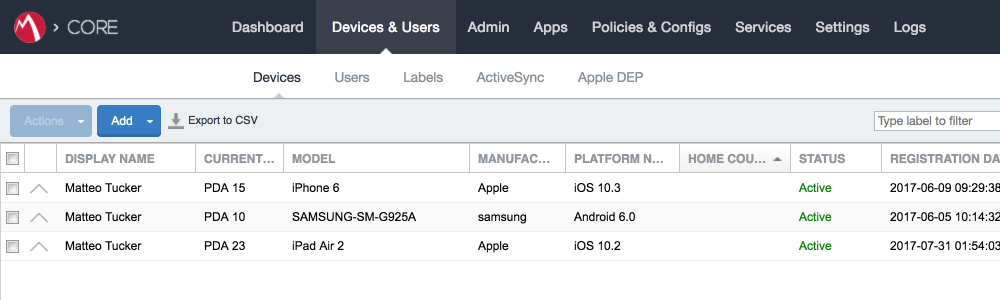
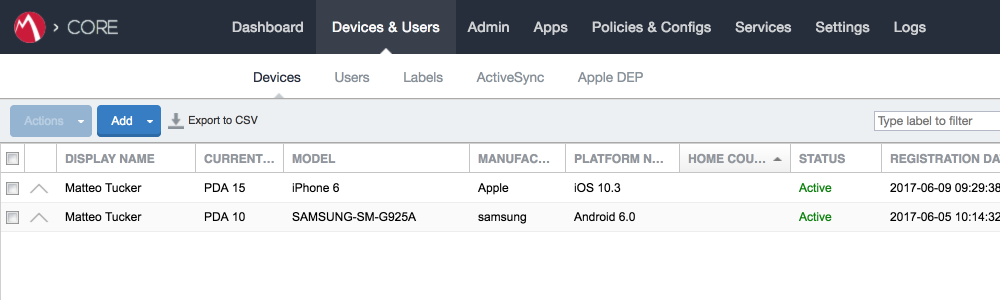
In the MobileIron Admin Console, navigate to Devices & Users > Devices.
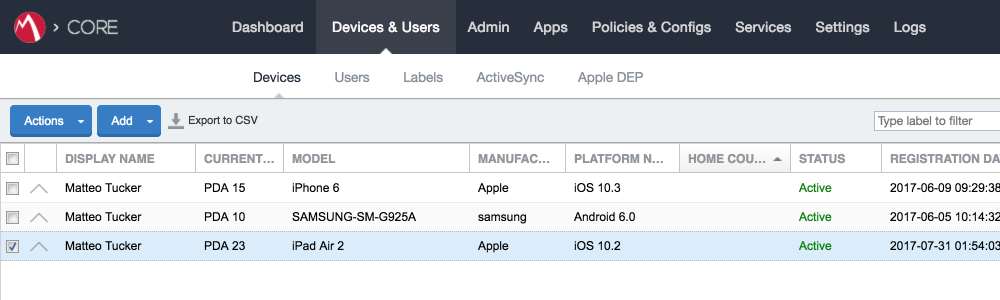
Select the checkbox in the row identifying the mobile device to be retired.
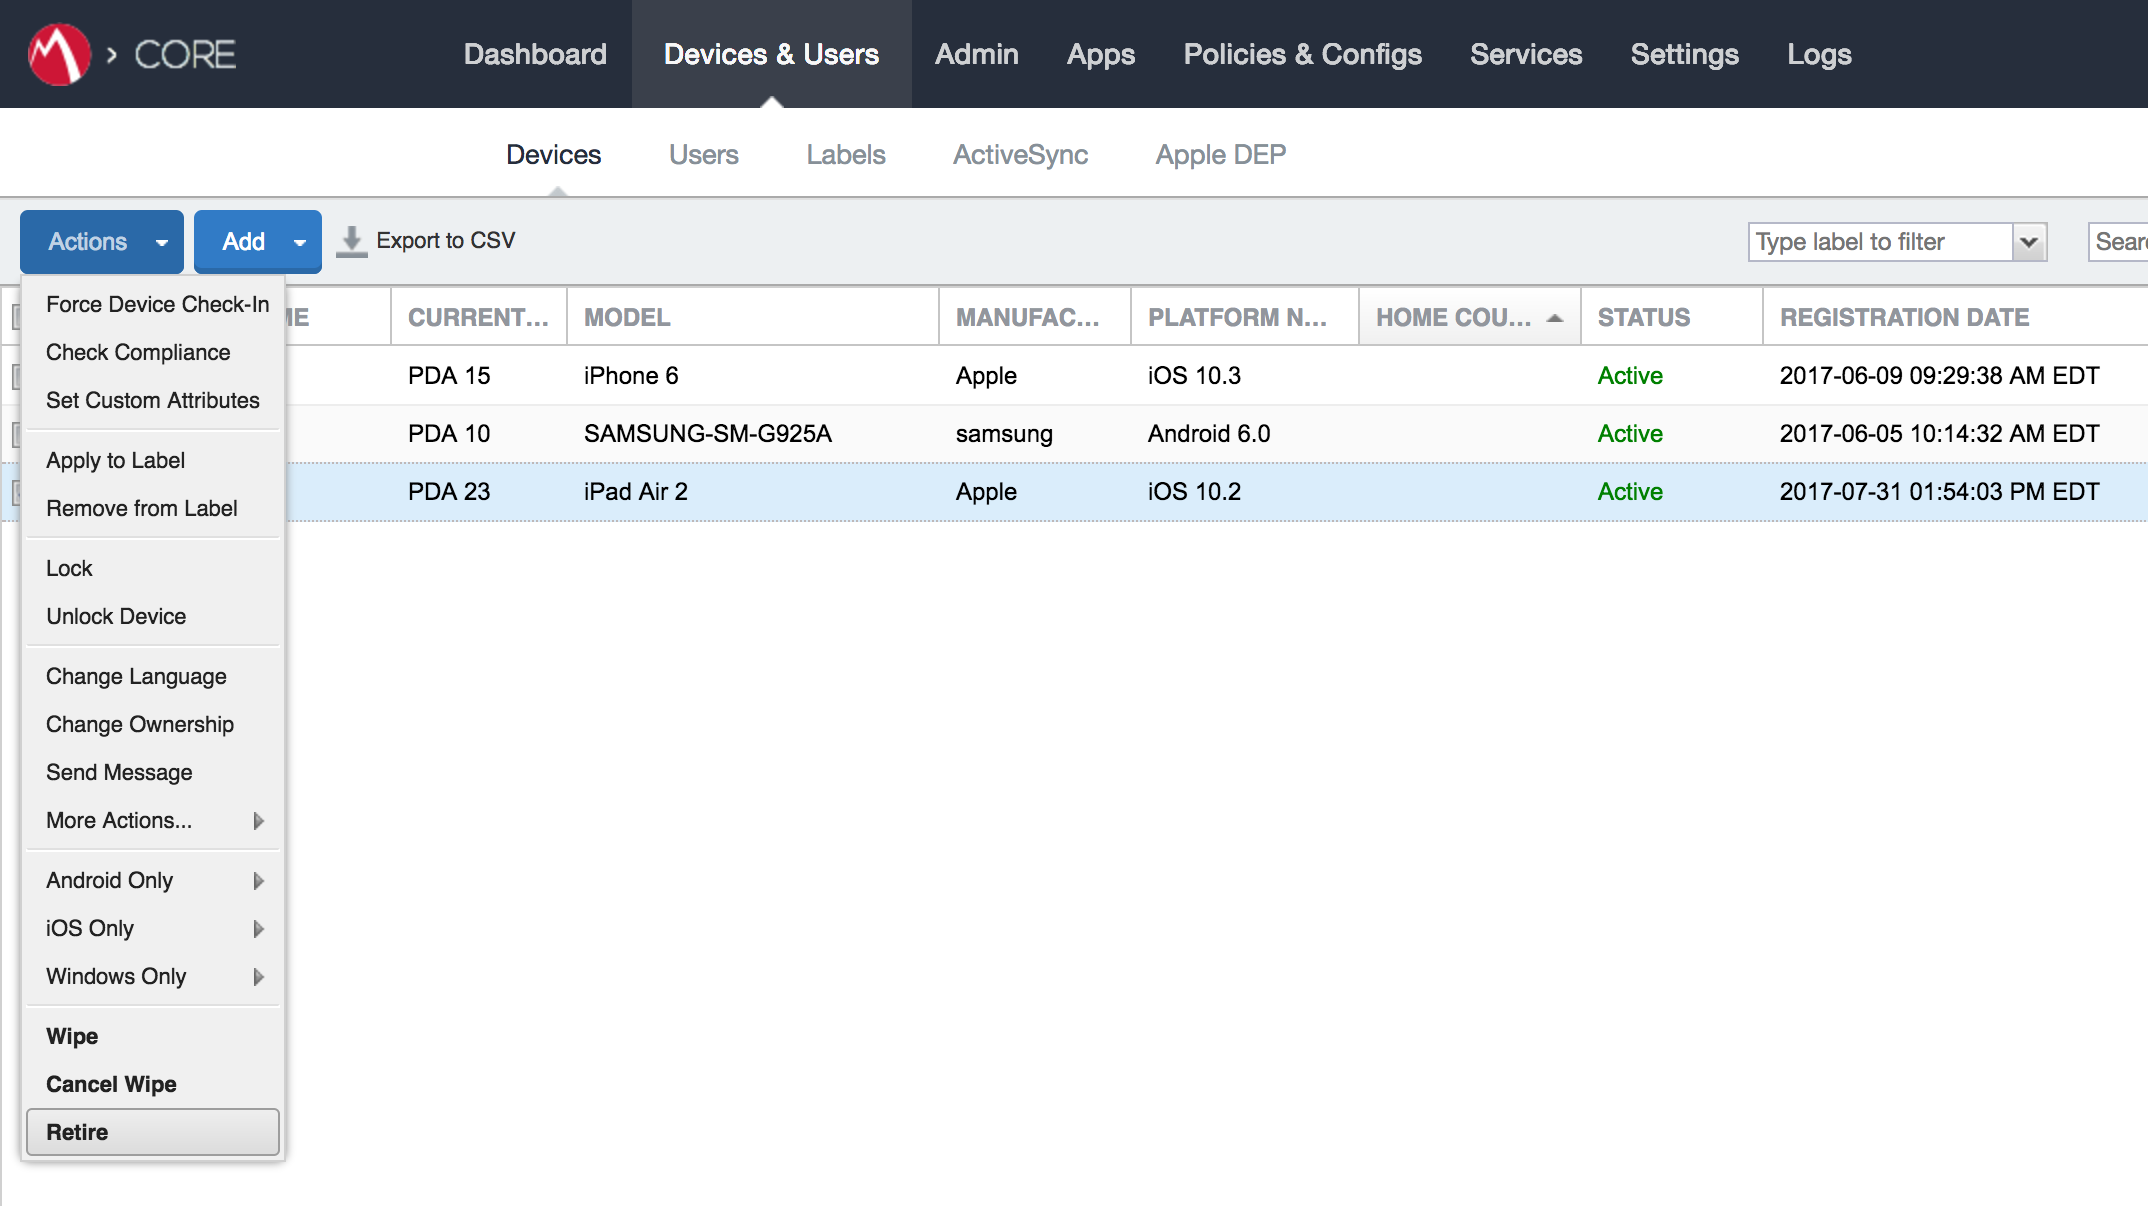
Select Actions > Retire.
In the Retire dialogue that appears:
In the Note text box, enter the reason(s) the device is being retired from MobileIron.
Select Retire.
The Devices tab no longer displays the retired mobile device in the list of the devices.
The MobileIron PIV-D Entrust application now no longer reflects management by MobileIron. As a result, the DPC has been cryptographically wiped (destroyed) and its recovery is computationally infeasible.
2.2. Hybrid Architecture for PIV and DPC Life-Cycle Management
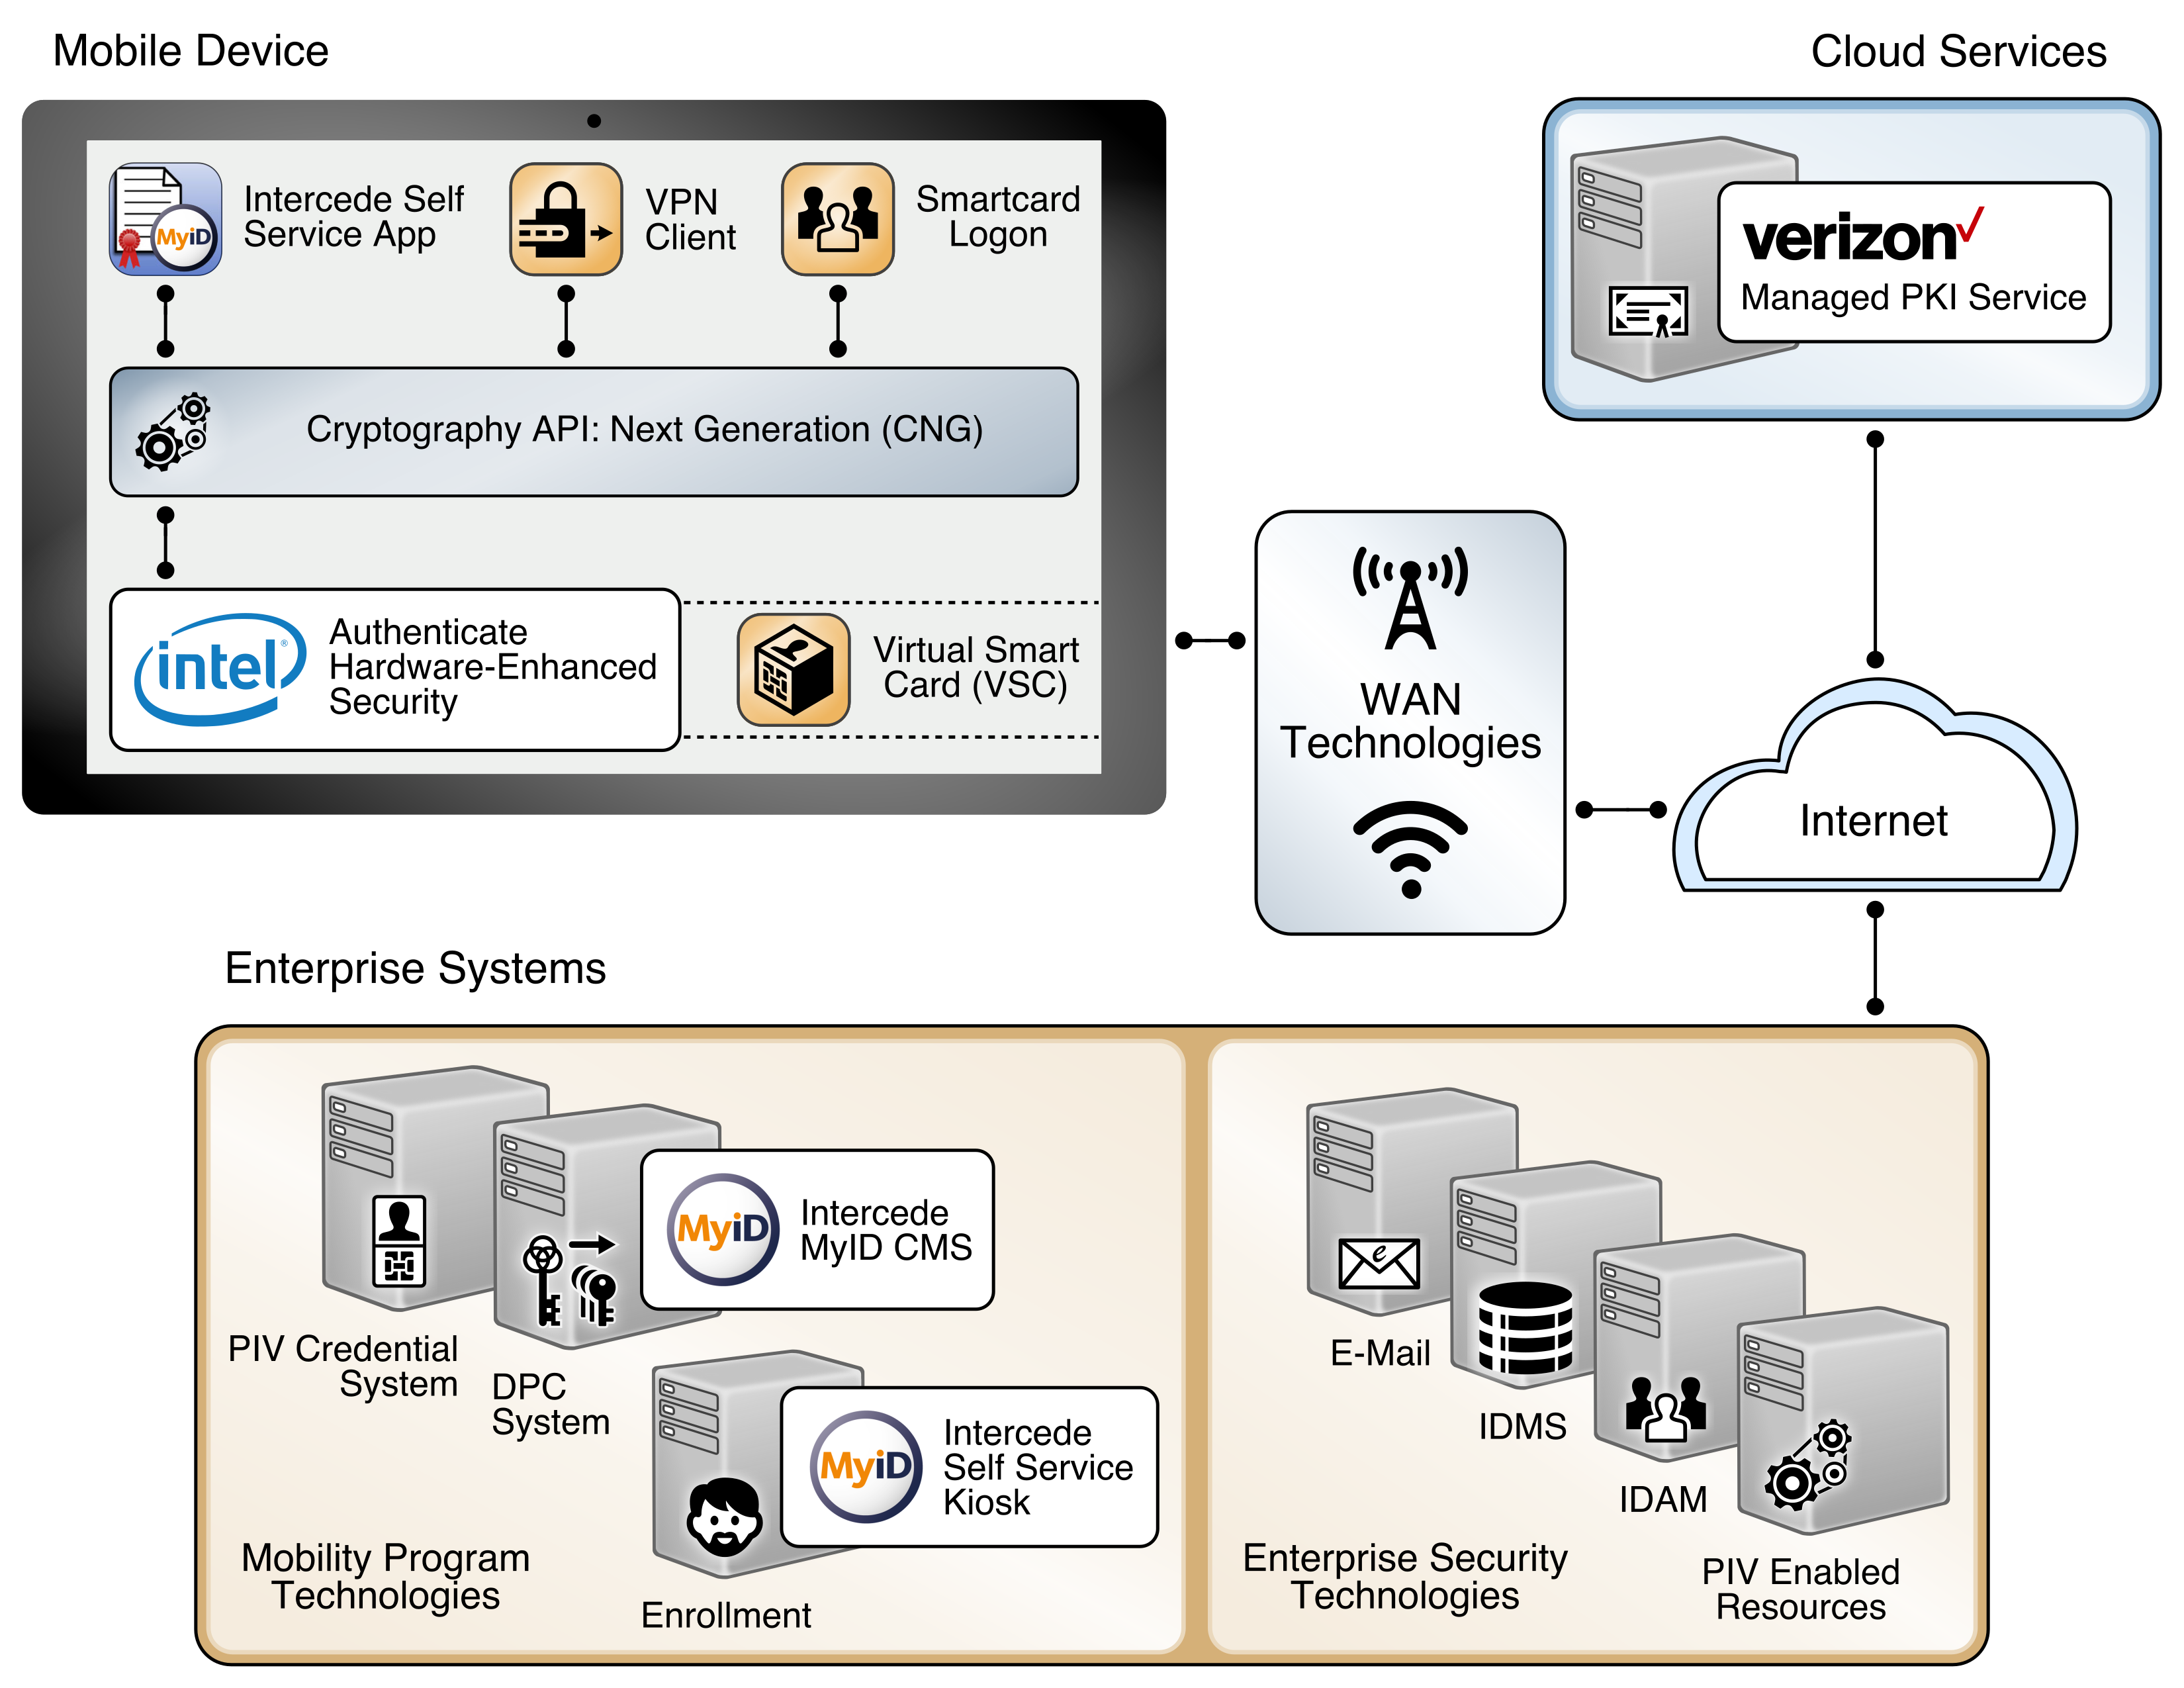
This section describes installation and configuration of key products for the architecture depicted in Figure 2-4 and Figure 2-5, as well as demonstration of the DPC life-cycle management activities of initial issuance and termination. Figure 2-4 focuses on the mobile device implementation. Here, the Identity Agent application is used to manage the DPC. The DPC authentication key is stored in a software keystore within the secure container. The supporting cloud and enterprise systems as described above are also shown. Figure 2-5 depicts the architecture when an Intel-based device that supports Intel Authenticate is used to store the DPC.
Figure 2-4 Mobile Device Hybrid Architecture for PIV Card and DPC Life-Cycle Management (Software Keystore)
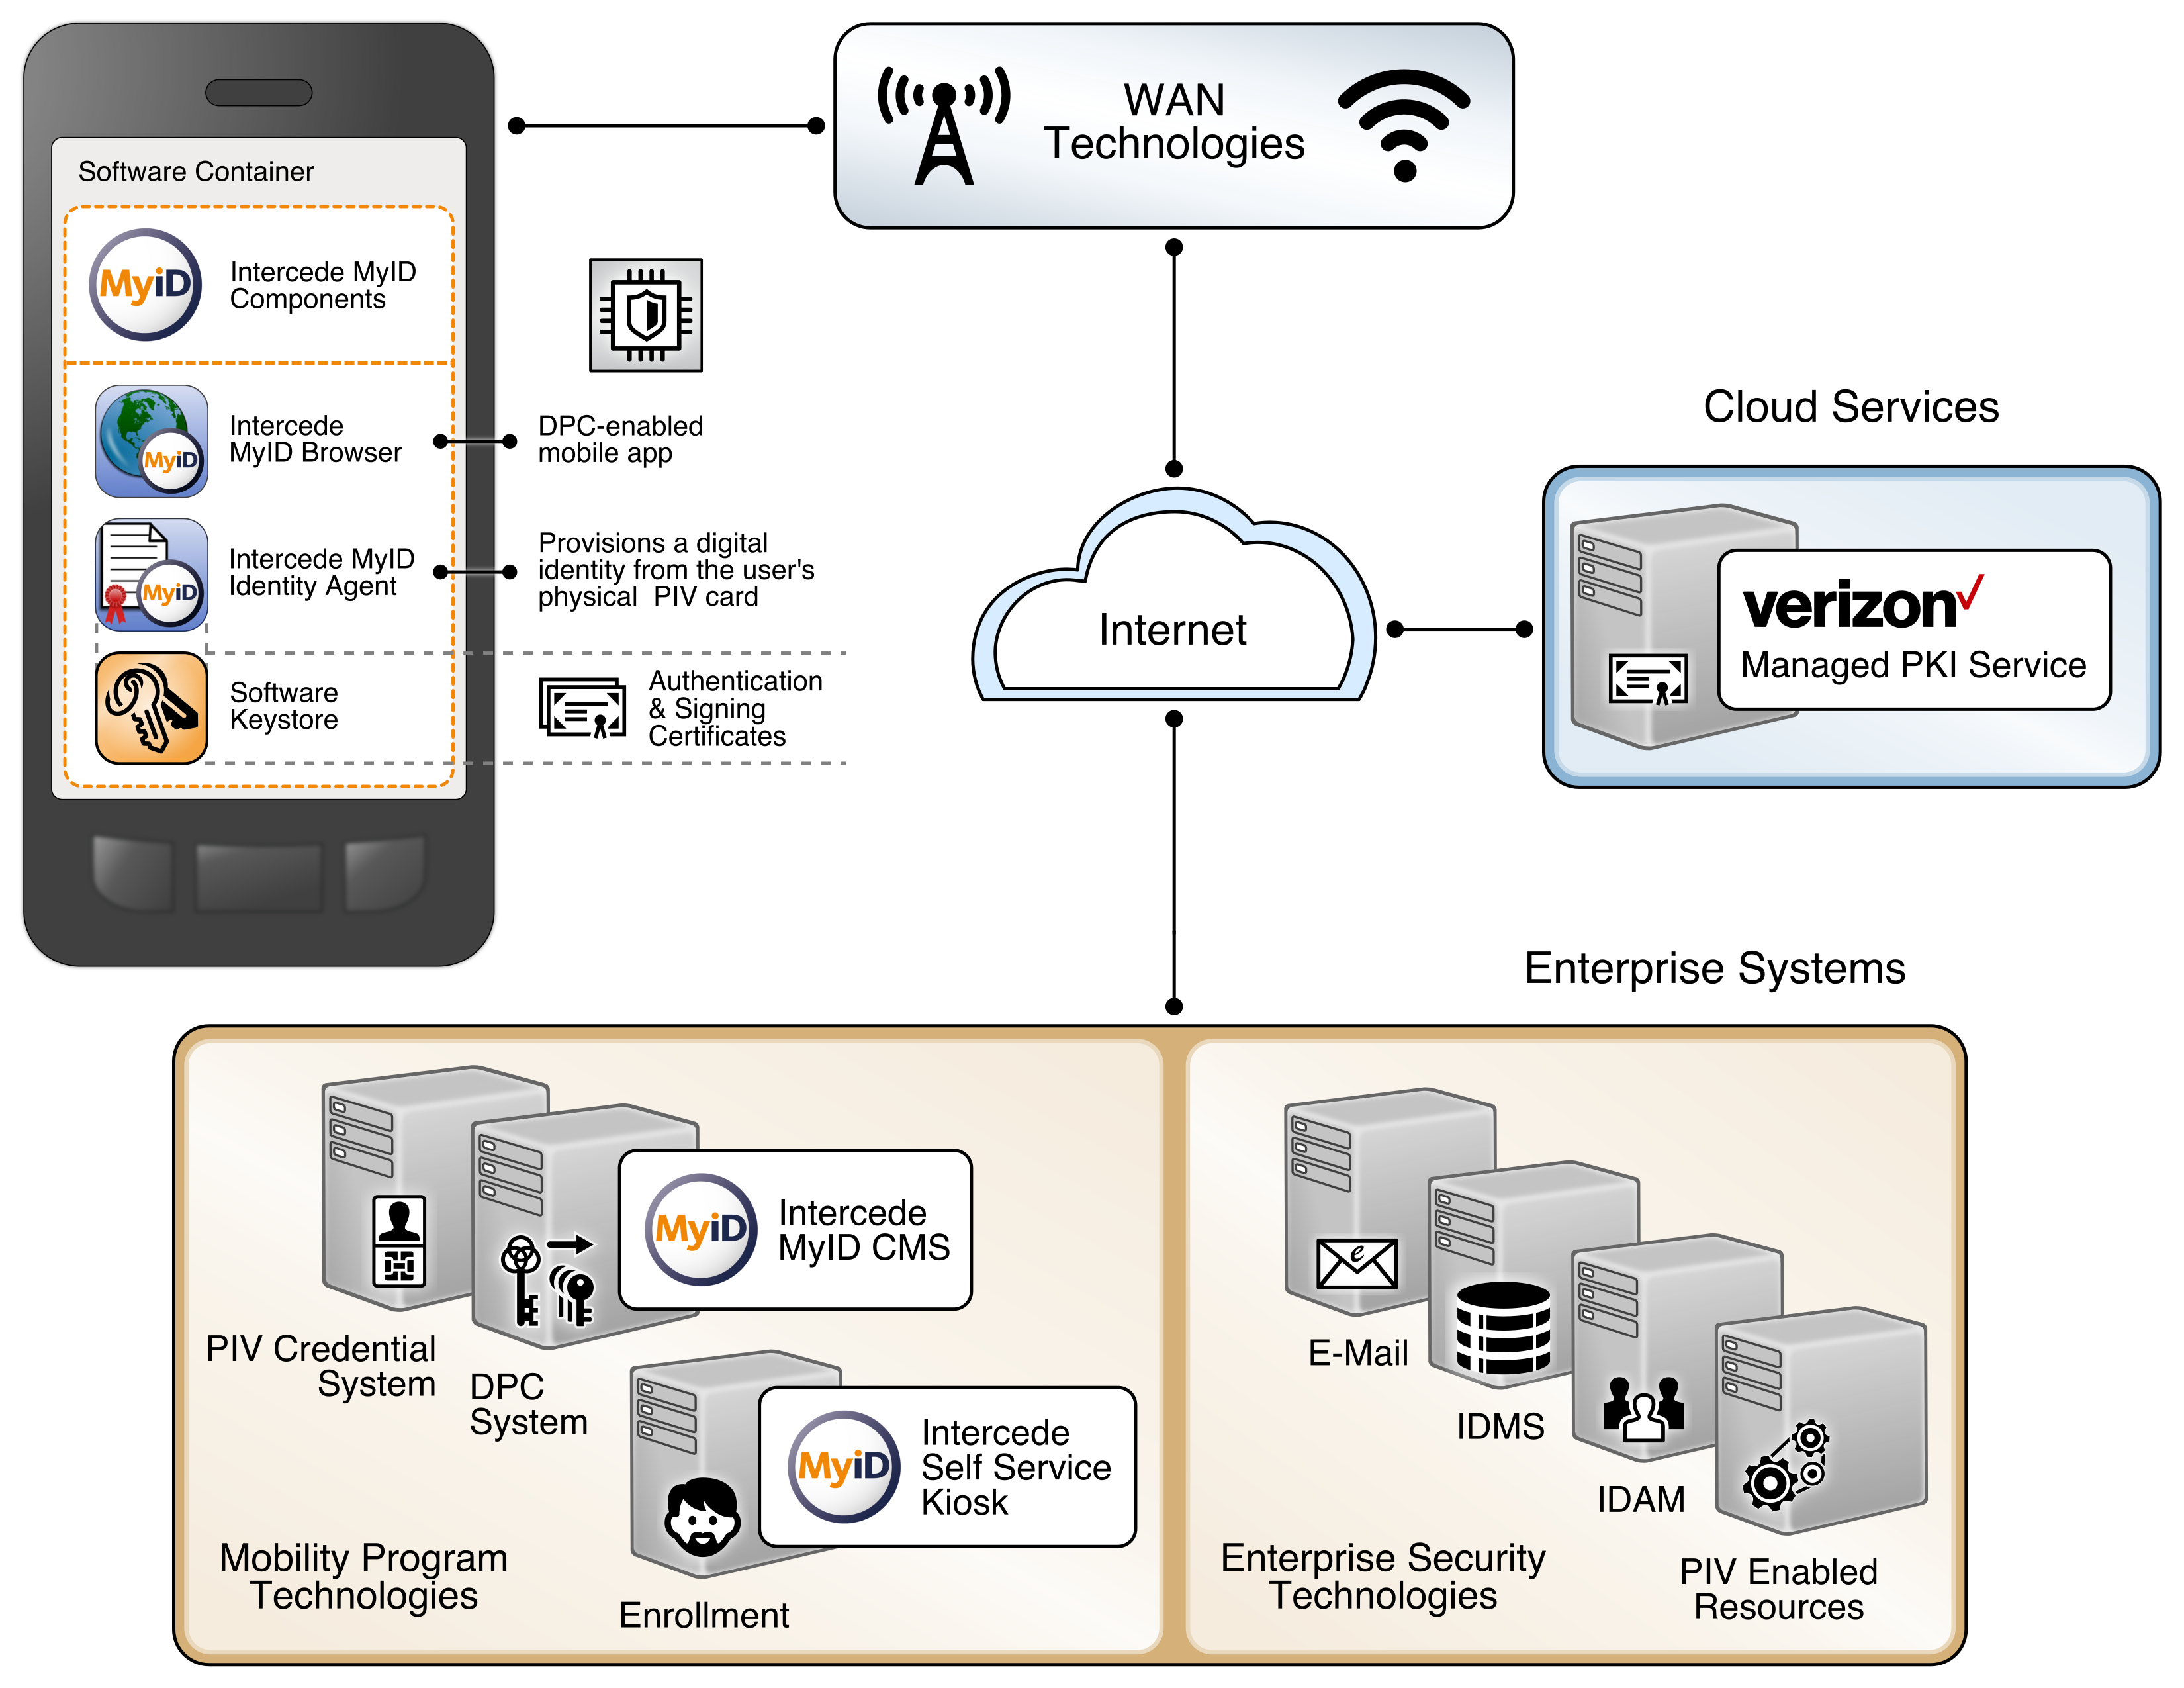
Figure 2-5 Mobile Device Hybrid Architecture for PIV Card and DPC Life-Cycle Management (Intel Authenticate)
2.2.1. Intercede MyID CMS
Intercede offers its identity and credential management system (CMS) product, MyID, as a software solution that can be hosted in the cloud or deployed on premises. The MyID server platform is composed of an application server, database, and web server. It provides connectors to infrastructure components such as directories and PKIs, and application programming interfaces to enable integration with the organization’s identity and access management system. The MyID CMS is the core component for the architecture; as such, it should be fully configured and operational before other components.
2.2.1.1. Installation
Detailed instructions to install an instance of the MyID CMS are in the Intercede document MyID Version 10.8 Installation and Configuration Guide. Here, we document specific installation instructions for our environment.
The MyID system is modularly designed with web, application, and database tiers. In a production environment, it is likely that these tiers are separated onto multiple systems depending on performance and disaster recovery requirements. However, in our architecture, all tiers were installed on a Windows Server 2012 system due to resource constraints. Finally, role separation within the MyID system is not addressed here but should be considered before any deployment.
- Install a supported version of Microsoft Structured Query Language (SQL) Server on the target MyID server. Our environment uses SQL Server 2012 with the SQL Server Database Engine and SQL Server Management Tools. See Table 2-3 SQL Server Components for specific component versions. A full settings document (Exported-2017-07-27.vssettings) is available from the NCCoE DPC Project website. Refer to Microsoft’s online documentation for specific installation procedures.
Table 2-3 SQL Server Components
| Microsoft SQL Server Management Studio | 11.0.5058.0 |
| Microsoft Analysis Services Client Tools | 11.0.5058.0 |
| Microsoft Data Access Components | 6.3.9600.17415 |
| Microsoft Extensible Markup Language | 3.0 6.0 |
| Microsoft Internet Explorer | 9.11.9600.18739 |
| Microsoft .NET Framework | 4.0.30319.42000 |
| Operating System (OS) | 6.3.9600 |
2.2.1.2. Verizon Shared Service Provider (SSP) PKI Integration
Detailed instructions to integrate Verizon SSP with MyID are in Intercede’s UniCERT UPI Certificate Authority Integration Guide. Here, we document the specific configurations used within our builds.
- Install the following prerequisites on the MyID server:
| Component | Comment |
|---|---|
| Java Runtime Environment 8.0 | Download and install the latest update from the Oracle website. This build uses 8u121. |
| Java Cryptography Extension Unlimited Strength Jurisdiction Policy Files 8 | Download and install from the Oracle website. |
- Obtain the following configuration settings from your managed PKI instance:
| Setting | Comment |
|---|---|
| Verizon SSP CA Path | Distinguished name to directory instance supplied by Verizon |
| Verizon SSP Enrollment Agent | Distinguished name for the Registration Authority supplied by Verizon |
| Verizon SSP Service Point | Universal Resource Indicator end point of the Verizon SSP web service supplied by Verizon |
| Verizon SSP Registration Authority Operator Public Key Cryptography Standards (PKCS)#12 | Credentials are supplied by Verizon SSP. |
| Verizon SSP Registration Authority Operator PKCS#12 Password |
Create a CA configuration by using the following procedures:
- In MyID Desktop, select the Configuration category.
- Select Certificate Authorities from the Configuration menu.
- Select New from the Select a CA drop-down menu.
- From the CA Type drop-down menu, select Entrust JTK. A form with a setting specifically for the Entrust Datacard CA will appear.
- Fill in the Certificate Authority form with the following settings from Step 2:
| CA Name | Enter a short name to identify the Verizon SSP. |
| CA Description | Optional long description |
| CA Type | Leave this setting UniCERT. |
| Retry Delays | Leave the defaults. |
| CA Path | Retrieve setting from Step 2. |
| Service Point | Retrieve setting from Step 2. |
| Enrollment Agent | Retrieve setting from Step 2. |
| Directory | Select the Entrust directory configured from Step 2.2.1.2 |
| Certificate Store | Retrieve setting from Step 2–enter fully qualified file path. |
| Certificate Password | Retrieve setting from Step 2. |
| Enable CA | Select this option. |
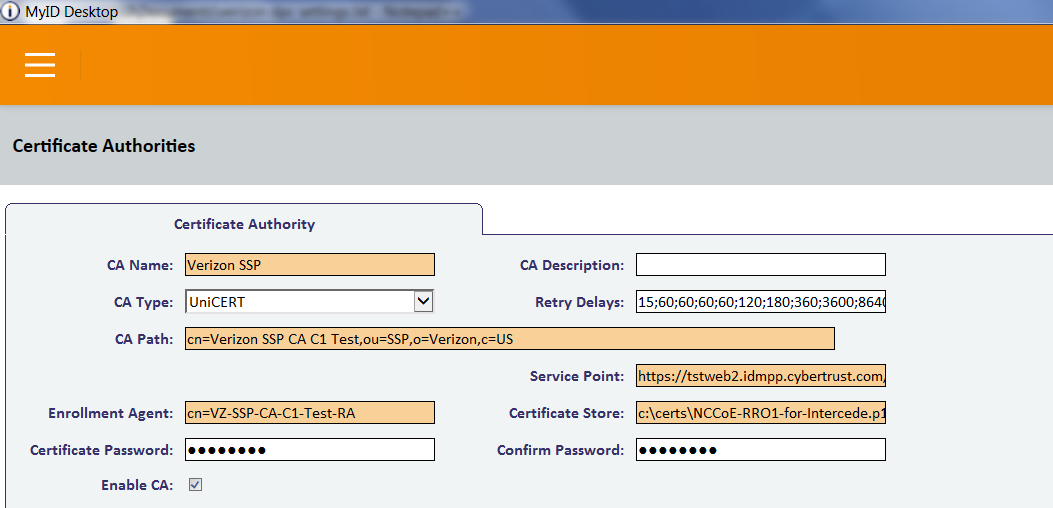
- Click Save.
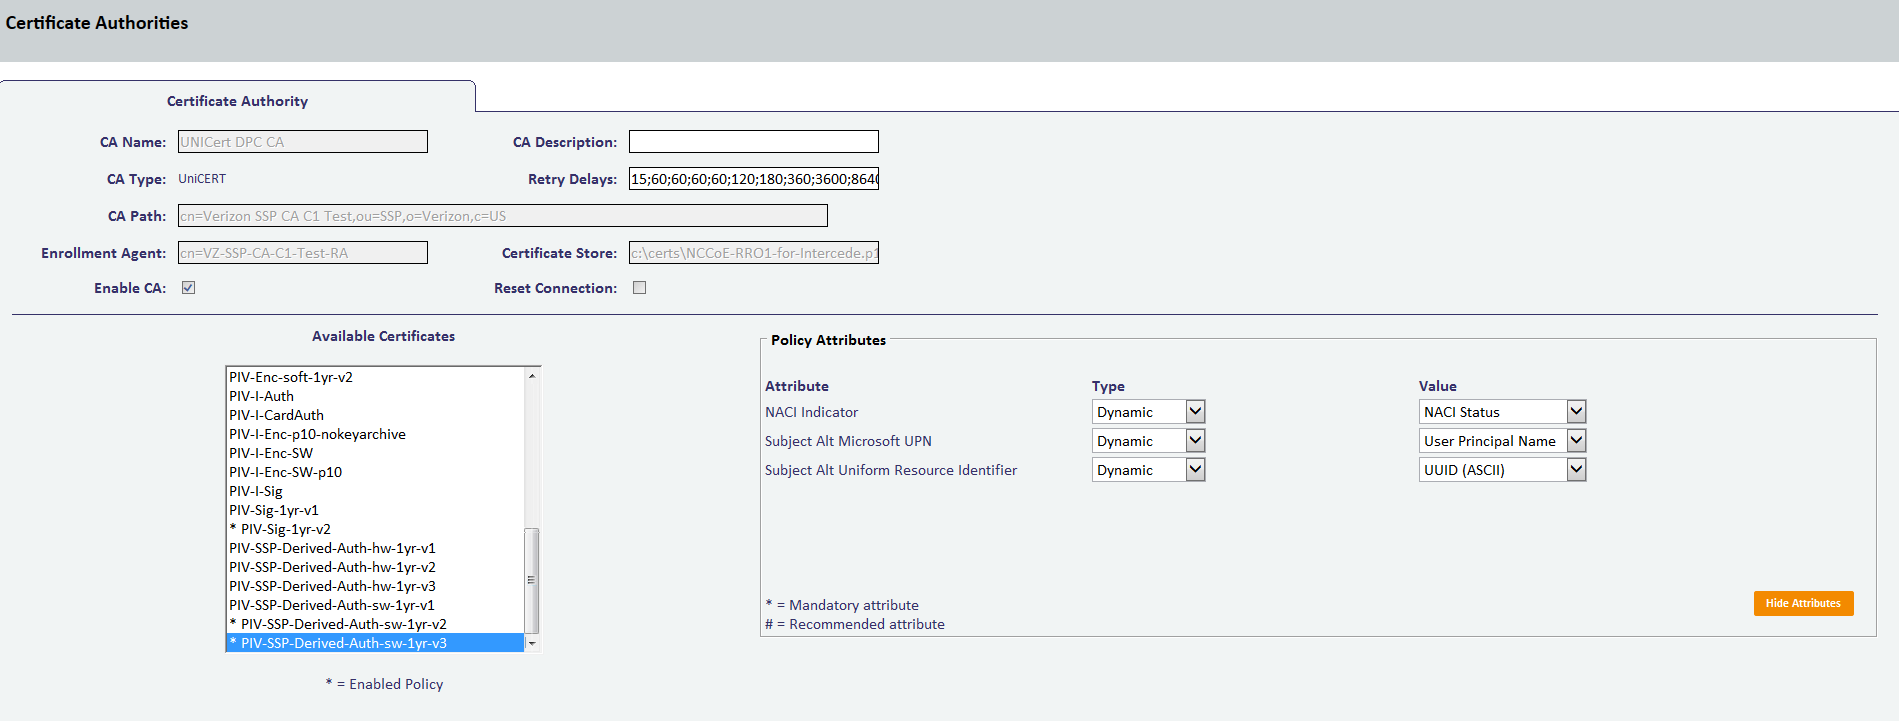
Enable Verizon SSP CA policies by using the following procedures.
- Within MyID Desktop, click the Configuration category and choose Certificate Authorities.
- From the CA Name drop-down, select the Verizon SSP CA configured in Step 3.
- Click Edit.
- In the Available Certificates list, select PIV-SSP-Derived-Auth-sw-1yr-v3 to enable it for DPC issuance.
- Click the Enabled (Allow Issuance) checkbox.
- Set the following options for the policy.
| Setting | Value |
|---|---|
| Display Name | Arbitrary name for this policy |
| Description | Optional description for this policy |
| Allow Identity Mapping | Unchecked |
| Reverse DN | Checked |
| Archive Keys | Unchecked |
| Certificate Lifetime | 365 |
| Automatic Renewal | Unchecked |
| Certificate Storage | Both |
| Recovery Storage | Both |
| Cryptographic Service Provider Name | Microsoft Enhanced Cryptographic Provider 1.0 |
| Requires Validation | Unchecked |
| Private Key Exportable | Unchecked |
| User Protected | Unchecked |
| Key Algorithm | RSA 2048 |
| Key Purpose | Signature |
- Click Edit Attributes and set the following values:
| Attribute | Type | Value |
|---|---|---|
| NACI Indicator | Dynamic | NACI Status |
| Subject Alt Microsoft UPN | Dynamic | User Principal Name |
| Subject Alt Uniform Resource Identifier | Dynamic | Universal Unique Identifier |
Figure 2-6 Certificate Profile Attributes
- Repeat Step 4 for the PIV-Auth-1-yr-v2, PIV-CardAuth-1yr-v1, and PIV-Sig-1yr-v1 certificate profiles.
2.2.1.3. Configuration for DPC
Detailed instructions to configure an instance of the MyID CMS for DPC are in Intercede’s Derived Credentials Installation and Configuration Guide. Here, we document the specific configurations used within our builds. Before you begin, you need the Test Federal Common Policy CA root certificate file, which can be downloaded from the Federal PKI test repository. Also obtain the intermediate certificates for the Verizon SSP certificate chain (Verizon SSP CA A2 Test and Verizon SSP CA C1 Test) from the Verizon certificate test repositories.
The first step in configuration is to create a content signing certificate that is used to sign data stored on the DPC mobile container. This certificate (and associated private key) must be made available to MyID through the Windows Cryptographic Application Interface store on the same server where the MyID server is installed. There are various ways to generate a certificate; in our environment we chose to create a certificate authority on a separate instance of Windows Server 2012.
Install Microsoft Certificate Services. There are a few online resources that can assist in the installation process. We suggest the Adding Active Directory Certificate Services to a Lab Environment tutorial from the Microsoft Developer Network.
Add a certificate template. For reference, we have exported the certificate template (PIVContentSigning) that we used for the content signing certificate. The configuration file (CertificateTemplates.xml) is available for download from the NCCoE DPC Project website. A script to import the certificate template can be found at the Microsoft Script Center.
Request a content signing certificate from the MyID system by using the procedures noted in the “Request a Certificate” TechNet article.
Save the content signing certificate in binary format to the Components folder of the MyID installation folder.
Edit the system registry with the following procedures:
From the Start menu:
- Select Run.
- Type
regeditin the dialogue displayed. - Click OK.
Navigate to HKEY_LOCAL_MACHINE\SOFTWARE\wow6432Node\Intercede\Edefice\ContentSigning.
Check that the value of the following string is set:
Active–set to WebService.
Set the value of the following string to the full path of the certificate on the application server:
For example: C:\Program Files (x86)\Intercede\MyID\Components\contentcert.cer
Set the location of the MyID web service that allows a mobile device to collect the DPC by using the following procedures within MyID Desktop:
From the Configuration category, select the Operation Settings workflow.
Click the Certificates tab.
Set the Mobile Certificate Recovery Service URL option to the location of the MyID Process Driver web service host.
For example: https://<replace-with-your-hostname>
Click Save Changes.
Set which PIV Cards are available for DPC by using the following procedures within MyID Desktop:
- From the Configuration category, select the Operation Settings workflow.
- Click the Certificates tab.
- To allow eligibility for all PIV Federal Agency Smart Card Number values, set Cards allowed for derivation to .+ (dot plus).
- Click Save Changes.
Configure the system to check the revocation status of the PIV Authentication certificate to seven days by using the following procedures within MyID Desktop:
- From the Configuration category, select Operation Settings.
- On the Certificates tab, set Derived credential revocation check offset to 7.
- Click Save Changes.
Grant access to the following workflows by using the MyID Desktop: Request Derived Credentials, Cancel Credential, Enable/Disable ID, Request Replacement ID, Unlock Credential, Collect My Updates.
- From the Configuration category, select the Edit Roles workflow.
- Select the checkbox for each of the roles to which you want to grant access. In our environment, Startup User was selected for all workflows.
- Click Save Changes.
Edit the workflows from Step 8 with the appropriate permissions.
- From the Configuration category, select the Edit Roles workflow.
- Click Show/Hide Roles.
- Select the checkboxes for Mobile User, Derived Credential Owner, and PIV Applicant.
- Click Close.
- Select the corresponding roles:
| Role | Permission |
|---|---|
| Mobile User | Console Logon, Request Derived Credentials (part 1), Mobile Certificate Recovery, Collect My Updates, Issue Device |
| Derived Credential Owner | Console Logon, Request Derived Credentials (part 2), Collect My Updates, Issue Device |
| PIV Applicant | Request Derived Credentials (part 2), Collect My Updates |
Import the Test Federal Common Policy CA certificate into the MyID application server by using the following command as an administrator. This enables the administrator to control the PKI hierarchy that is trusted when verifying PIV Cards:
certutil -addstore -f -Enterprise DerivedCredentialTrustedRoots RootCA.cerConfigure the MyID system with the PIV Authentication and Digital Signature certificate policy Object Identifiers (OIDs) by using the following procedures. The values shown below are production values, so they may need to be changed for your organization:
- From the MyID Desktop Configuration category, select Operation Settings.
- On the Certificates tab, set the following values:
| Setting | Value |
|---|---|
| Derived credential certificate OID | 2.16.840.1.101.3.2.1.3.13 |
| Derived credential signing certificate OID | 2.16.840.1.101.3.2.1.3.6; 2.16.840.1.101.3.2.1.3.7; 2.16.840.1.101.3.2.1.3.16 |
Create an Identity Agent credential profile for the DPC by using the following procedures:
- From the MyID Desktop Configuration category, select Credential Profiles.
- Click New.
- In the Name field, enter a descriptive name for the profile.
- In Card Encoding, select Identity Agent (Only) and Derived Credential.
- In Services, leave default selections MyID Logon and MyID Encryption.
- In Issuance Settings, in the Mobile Device Restrictions drop-down, select Any.
- In Issuance Settings, Require Facial Biometrics, select Never Required.
- In PIN Settings, configure the following settings:
| Setting | Value |
|---|---|
| Authentication Mode | PIN |
| Maximum PIN Length | 12 |
| Minimum PIN Length | 6 |
| Repeated Characters Allowed | 1 |
| Sequential Characters Allowed | 1 |
| Logon Attempts | 5 |
| PIN Inactivity Time | 180 |
| PIN History | 0 |
| Issue With | User specified PIN (default) |
| Email PIN | Unselect |
| Length | 0 |
- In Device Profiles, select PIVDerivedCredential.xml from the Card Format drop-down.
- Click Next.
- In the Select Certificates tab, check PIV-SSP-Derived-Auth-sw-1yr-v3 along with Signing under Certificate Policy Description. Choose Authentication Certificate in the Container drop-down.
- Click Next.
- Select the roles that receive, issue, and validate DPCs. All was chosen in this example.
- Click Next.
- Select PIV_CON in the Select Card Layout tab.
- Click Next.
- Enter text into the Comments and click Next, then Finish.
2.2.2. Intercede MyID Identity Agent
The MyID Identity Agent runs as an application and interfaces with the MyID CMS and supports a wide range of mobile devices and credential stores, including the device native keystore, software keystore, and microSD. The MyID Identity Agent mobile application is required to issue and manage DPCs. No special configuration is necessary after installing the application; scanning the QR code during the initial enrollment directs the Identity Agent to your instance of MyID CMS. MyID Identity Agent is supported for both iOS and Android platforms.
2.2.2.1. Installation
MyID Identity Agent is available on the Google Play Store and the Apple App Store. Detailed installation procedures are found on the Google Play Store and Apple App Store support sites.
2.2.3. Intercede Desktop Client
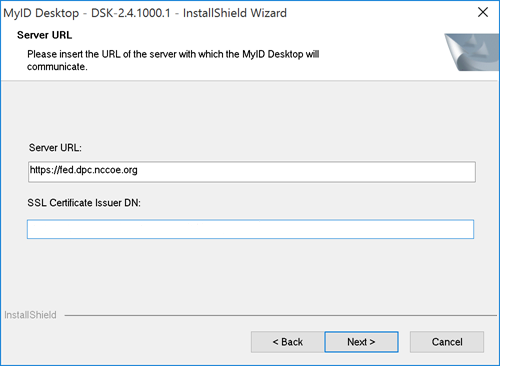
The Intercede Desktop component of this example solution serves as the main point of administration of the MyID CMS. It was installed on a Dell Latitude E6540 laptop running Windows 7. The procedures below are adapted from the Installation and Configuration Guide Version 10.8, Section 7.4.
2.2.3.1. Installation
Before installation, have available the host name and the distinguished name (DN) of the issuer of the Transport Layer Security (TLS) certificate used to communicate with the MyID application server.
Run the provided .msi file as an administrator.
Select the destination location, then click Next.
Select the desired shortcuts to be installed.
Click Next.
In the MyID Desktop InstallShield Wizard:
In the Server URL field, enter the URL for your instance of MyID Server.
In the SSL Certificate Issuer DN field, leave empty as this prompt is applicable only when mutual TLS is implemented.
Click Next.
Click Install.
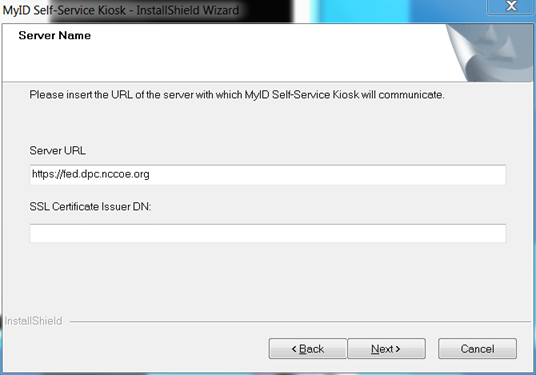
2.2.4. Intercede Self-Service Kiosk
The MyID Self-Service Kiosk serves as a DPC issuance station for eligible PIV holders. While the software is designed to run on a shared Windows system as a kiosk in public space, in this example it is installed on a Dell Latitude E6540 laptop running Windows 7. The procedures below are adapted from Self-Service Kiosk Installation and Configuration and Derived Credentials Installation and Configuration Guide.
2.2.4.1. Installation
Before installation, have available the host name and the issuer distinguished name of the TLS certificate used to communicate with the MyID application server.
Click Next.
Accept default and click Next.
In the MyID Self-Service Kiosk InstallShield Wizard:
In the Server URL field, enter the URL of your instance of MyID Server.
In the SSL Certificate Issuer DN field, leave empty as this prompt is applicable only when mutual TLS is implemented.
Select Next.
Select Install.
Select Finish.
2.2.4.2. Configuration
Use the following procedures to configure the MyID Self-Service Kiosk for DPC issuance:
Set the time-out for the PIN entry screen by using the following procedures:
Open \Program Files (x86)\Intercede\MyIDSelfServiceKiosk\MyIDKiosk.exe.config by using a text editor.
Edit the value parameter in the following line:
<add key="DerivedCredentialsPageTimeoutSeconds" value="120"/>Edit the value parameter in the following line with the MyID application server address:
<add key="Server" value="http://myserver.example.com/"></add>Save changes to the file.
2.2.5. Windows Client Installation for MyID and Intel Authenticate
The Intel Authenticate Integration Guide for Active Directory Policy Objects provides instructions on how to set up Group Policy Objects for various functions of the Intel Authenticate installation process. The following instructions are primarily repurposed from the Intel Authenticate Integration Guide.
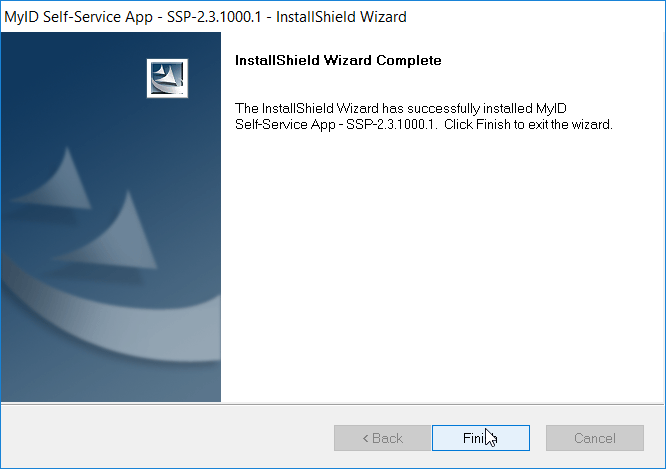
2.2.5.1. Installing the MyID Self-Service Application
Run SSP-2.3.1000.1_E.msi on the client computer.
Click Next.
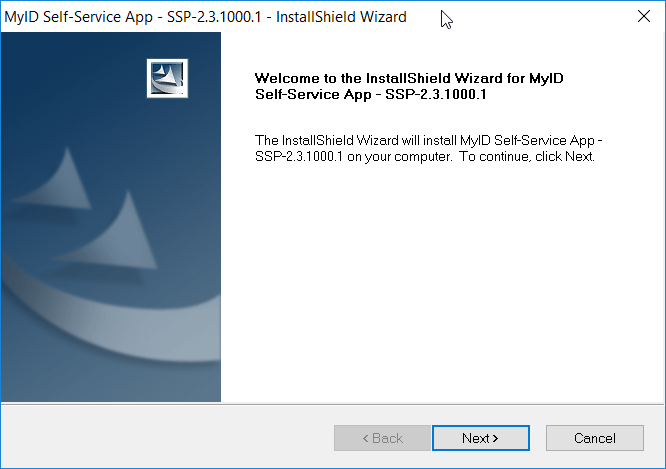
Click Next.
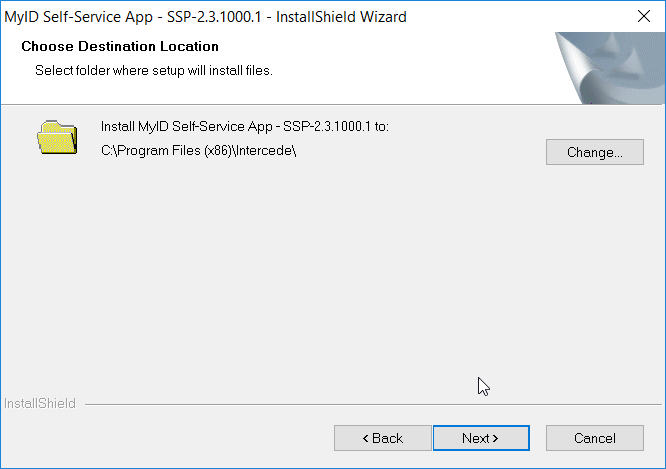
Enter the Server URL for your organization’s MyID server. Leave the SSL Certificate Issuer DN field empty, as this prompt is applicable only when mutual TLS is implemented.
Click Next.
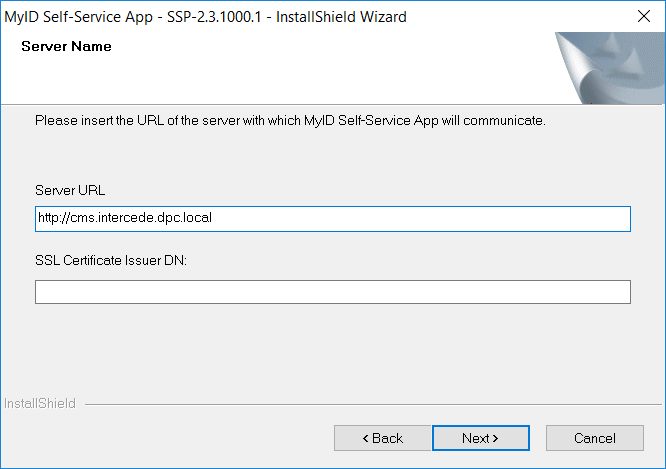
Click Install.
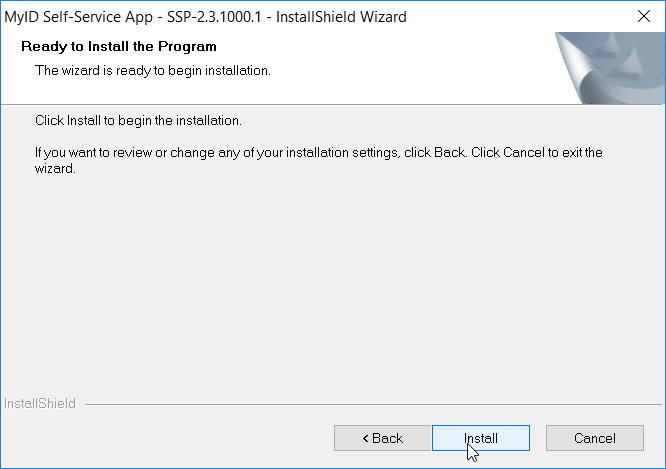
Click Finish
2.2.5.2. Installing the WSVC Service
Run WSVC-1.6.1000.1_B.msi.
Click Next.
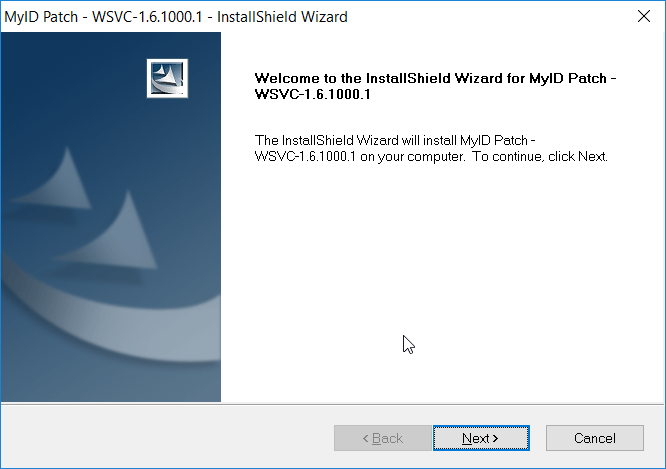
Enter the username and password for the account that will install the service.
Click Next.
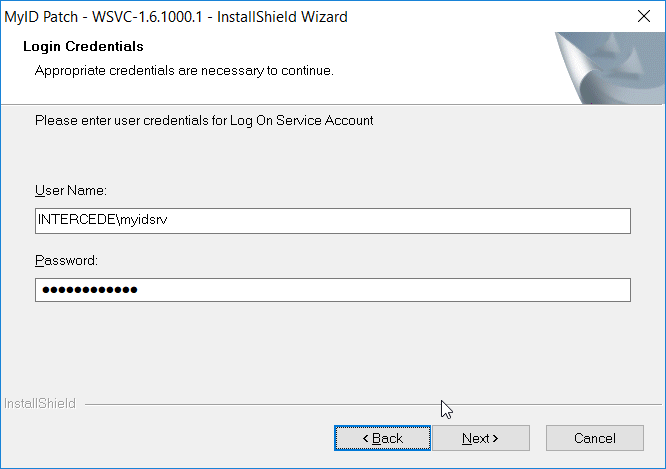
Click Next.
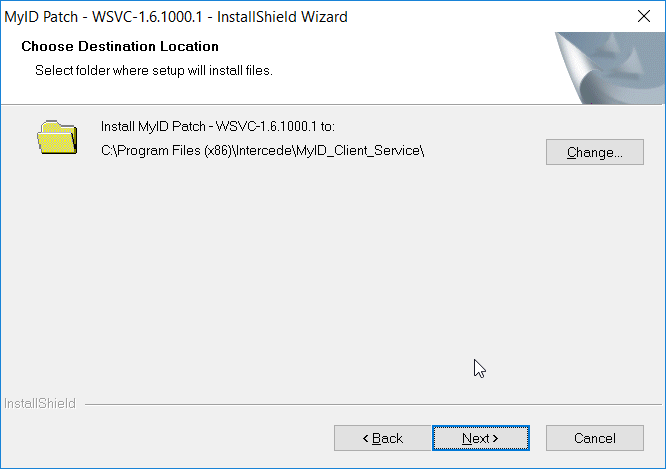
Click Install.
Click Finish.
2.2.5.3. Installing Prerequisites for Intel Authenticate
This process may differ depending on the client system. Primarily, it is important that the Intel Management Engine is installed and that any Intel drivers are up-to-date so that the Intel Authenticate Precheck is successful.
Run n1cra26w.exe. (The name may differ based on your system—this is the Intel Management Engine.)
Click Next.
Select I accept the agreement.
Click Next.
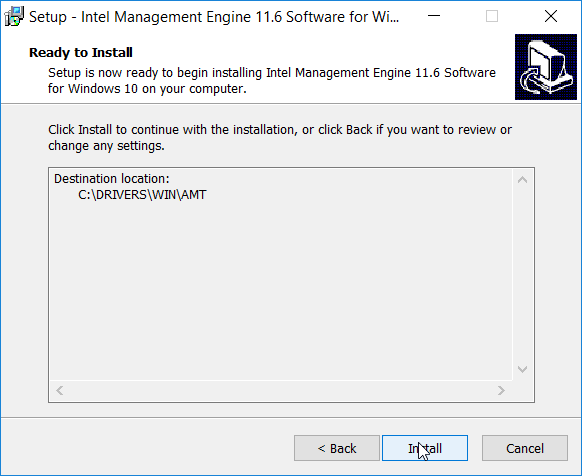
Click Next.
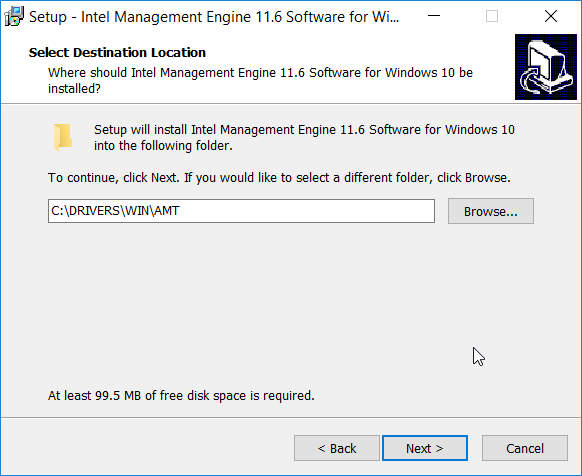
Click Install.
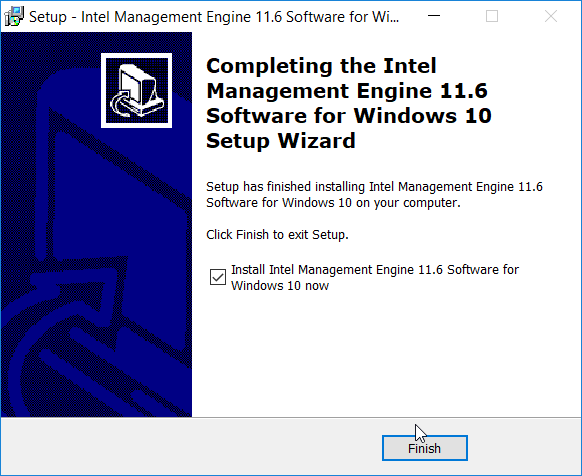
Check the box next to Install Intel Management Engine 11.6 Software for Windows 10 now.
Click Finish.
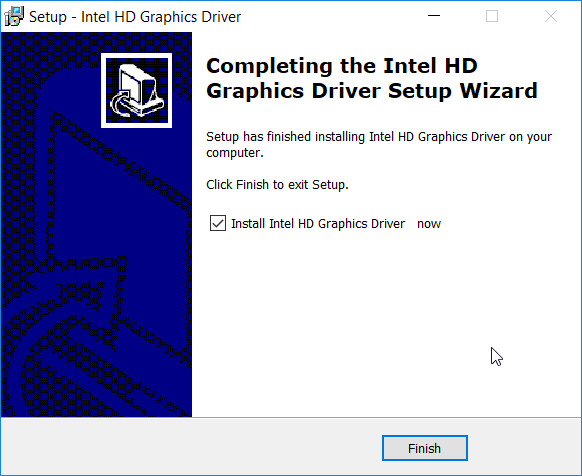
Run u2vdo22us14avc.exe. (The name may differ based on your system—this is the graphics driver update.)
Click Next.
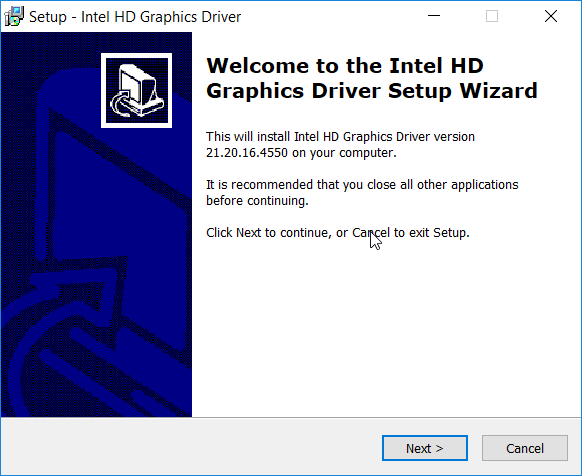
- Select I accept the agreement.
- Click Next.
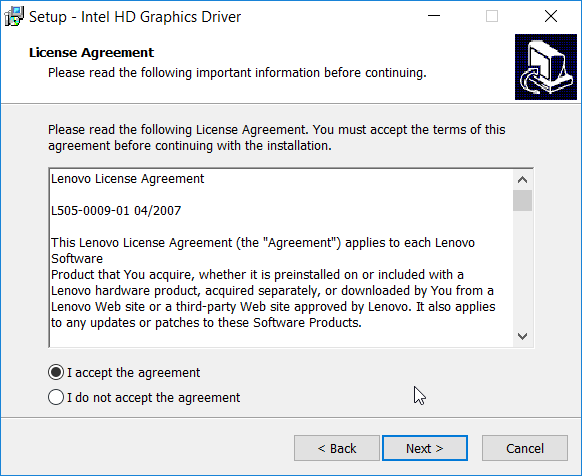
- Click Next.
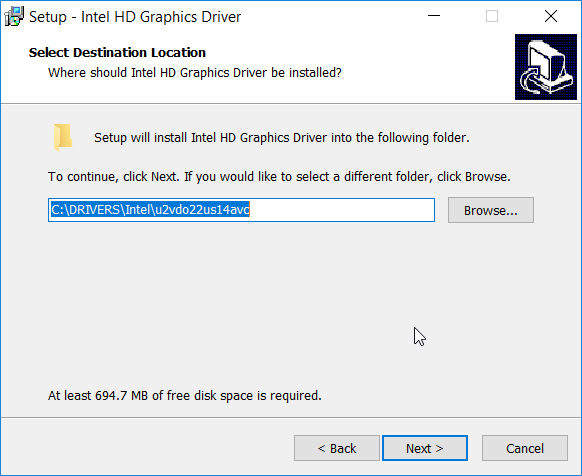
- Click Install.
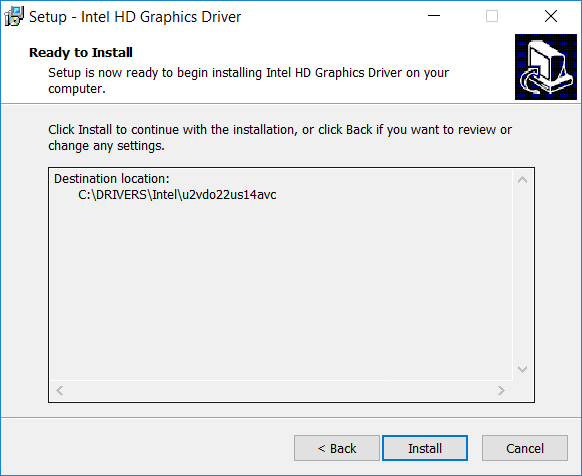
- Check the box next to Install Intel HD Graphics Driver now.
- Click Finish.
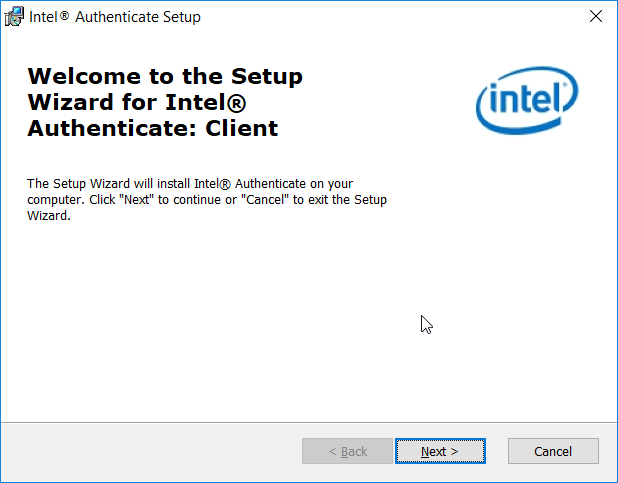
2.2.5.4. Installing the Intel Authenticate Client
The Intel Authenticate Client should be installed automatically by the Group Policy Object (GPO), but it can also be installed manually by running IAx64-2.5.0.68.msi.
Run IAx64-2.5.0.68.msi.
Click Next.
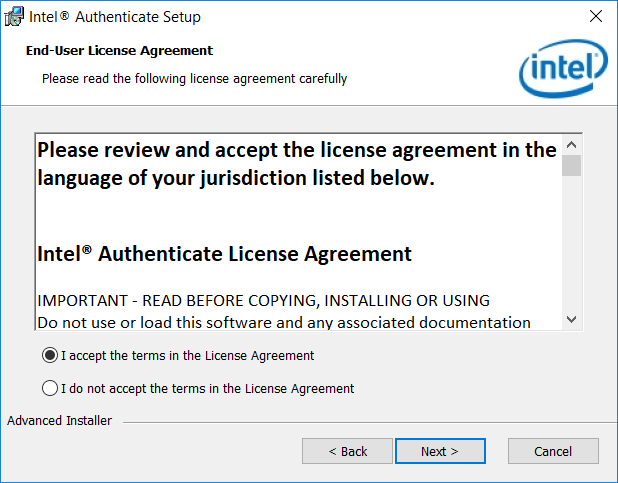
Select I accept the terms in the License Agreement.
Click Next.
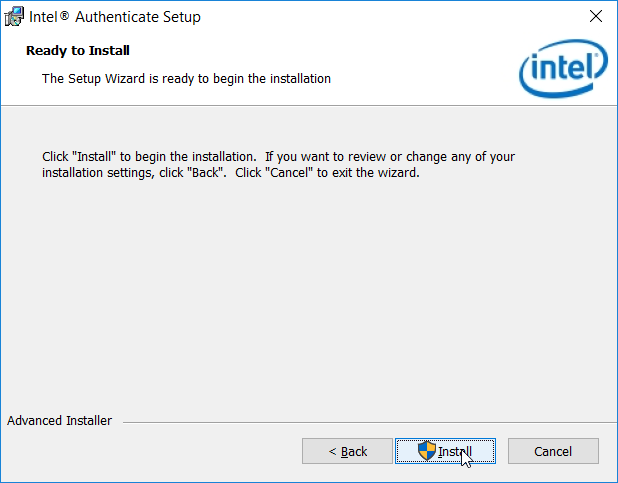
Click Install.
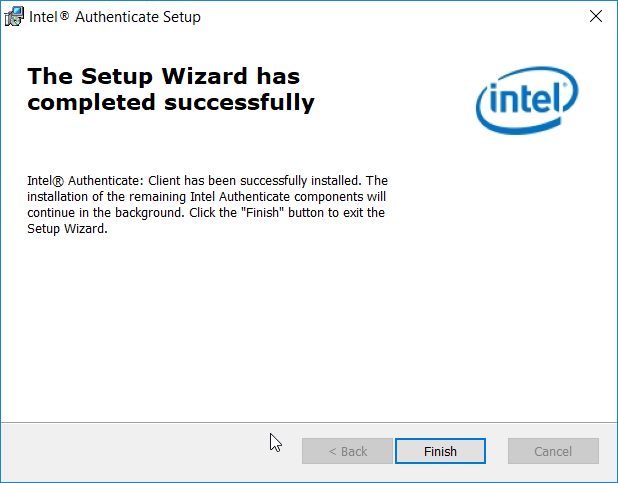
Click Finish.
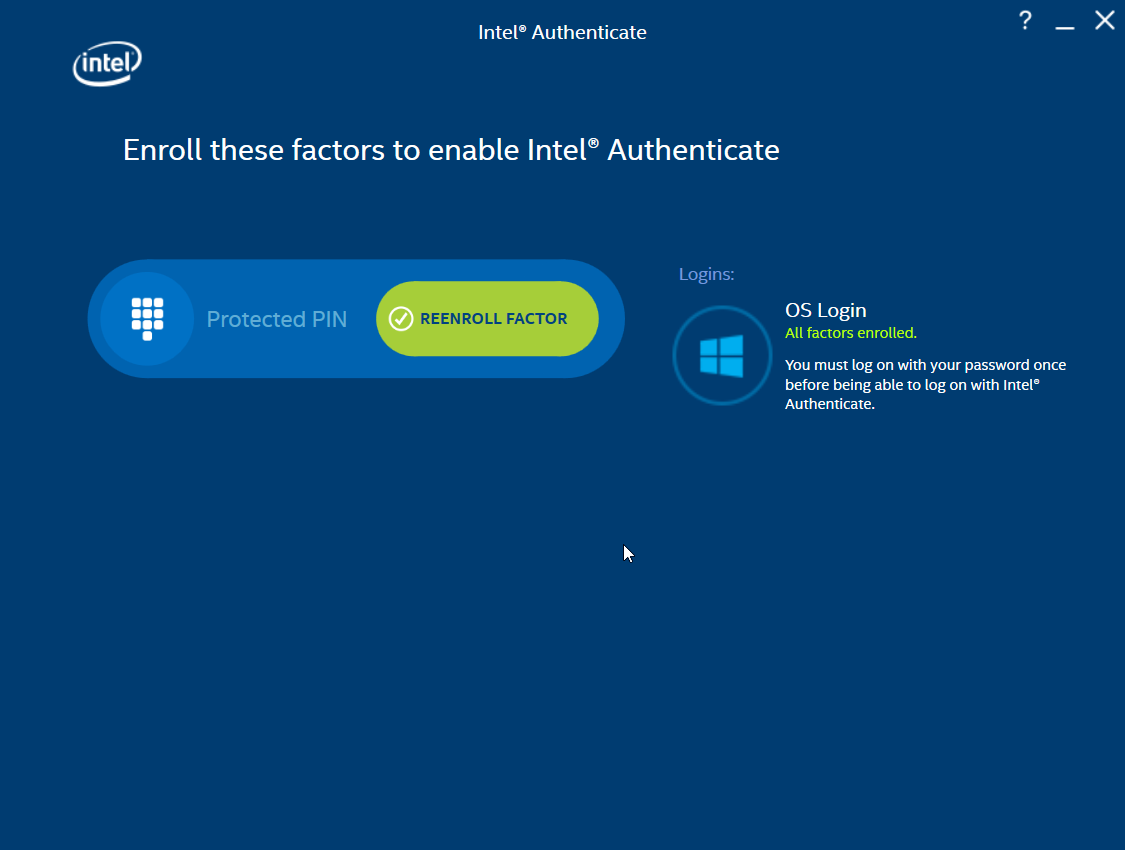
2.2.5.5. Configuring Intel Authenticate
Once the Enforce Policy GPO is run, the window for configuring Intel Authenticate will open on the client machine. You can also open this manually by searching for Intel Authenticate in the Start Menu.
Click the right arrow button.
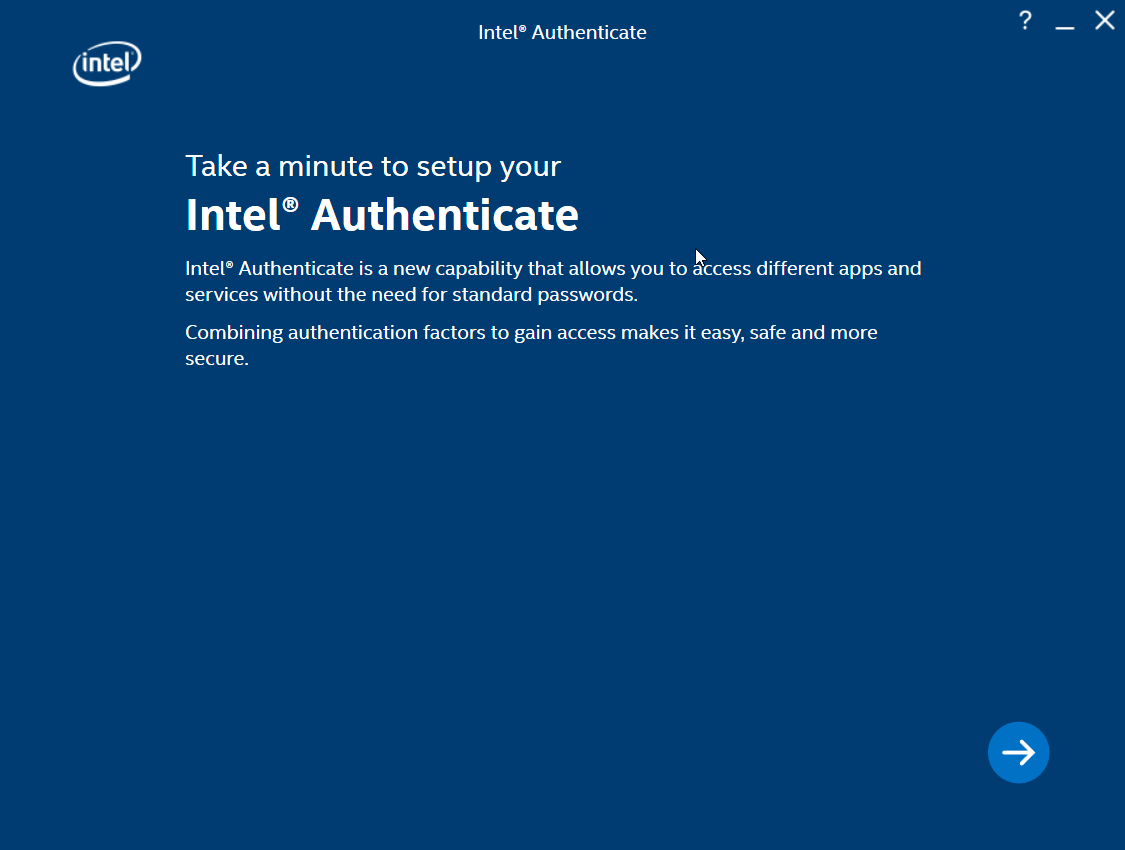
Click the right arrow button.
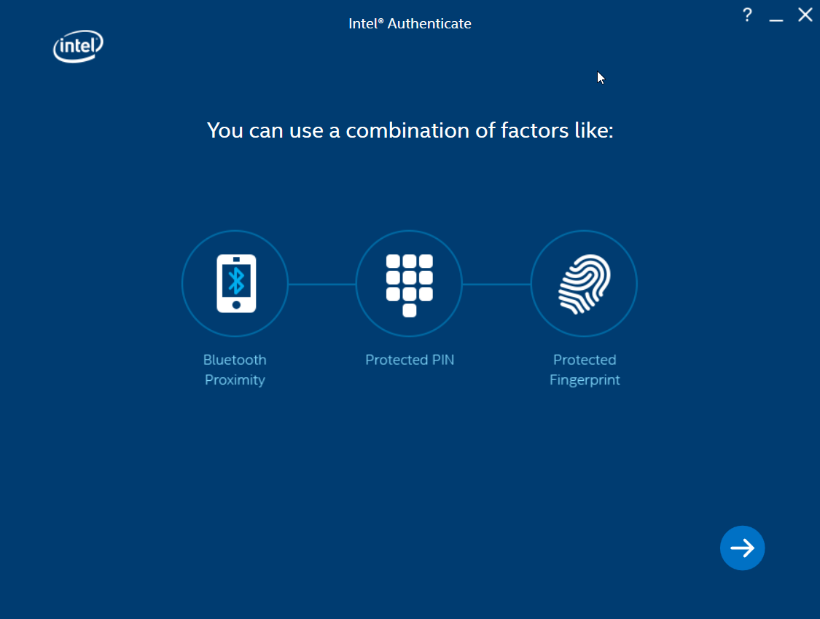
Click Enroll Factor.
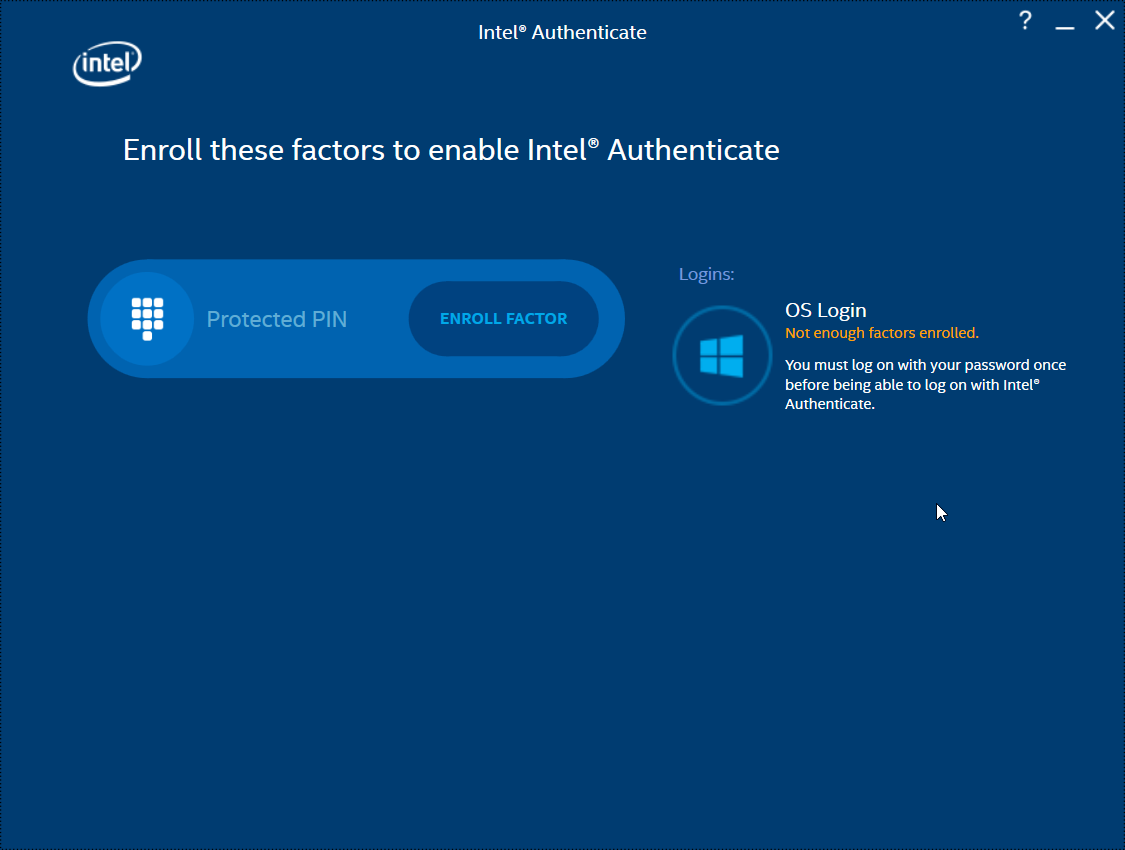
Click Proceed.
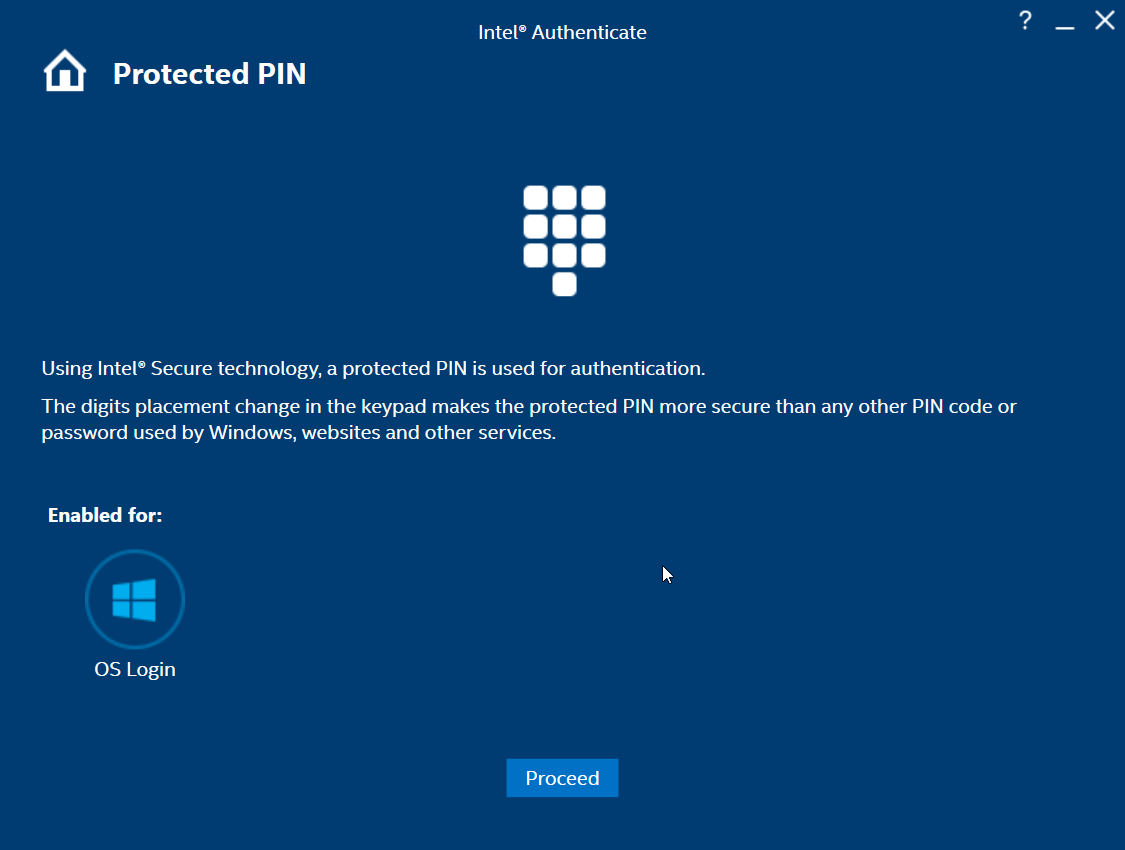
Enter a PIN for Intel Authenticate, which will be used for any certificates issued to the device.
Reenter the PIN.
Click Return to home.

2.2.6. Intel Authenticate GPO
The Intel Authenticate Integration Guide for Active Directory Policy Objects provides instructions on how to set up GPOs for various functions of the Intel Authenticate installation process. The following instructions are primarily repurposed from the Intel Authenticate Integration Guide.
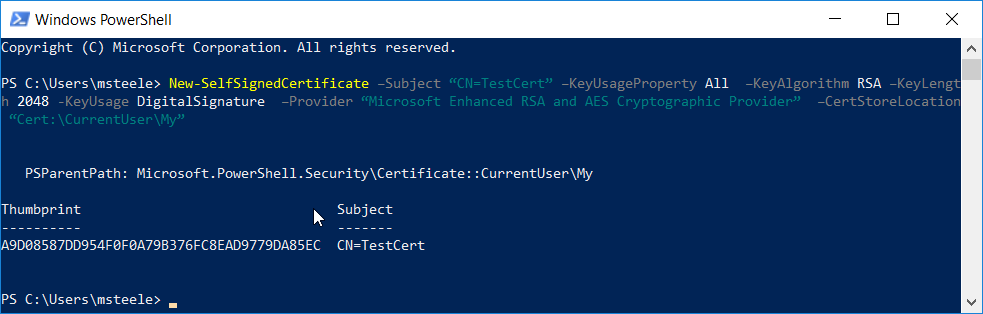
2.2.6.1. Preparing a Digital Signing Certificate
In a new PowerShell window, generate a new self-signed certificate to sign the Intel Policy. Enter the command:
New-SelfSignedCertificate –Subject “CN=TestCert” –KeyUsageProperty All –KeyAlgorithm RSA –KeyLength 2048 -KeyUsage DigitalSignature -Provider “Microsoft
Enhanced RSA and AES Cryptographic Provider” –CertStoreLocation “Cert:\CurrentUser\My”
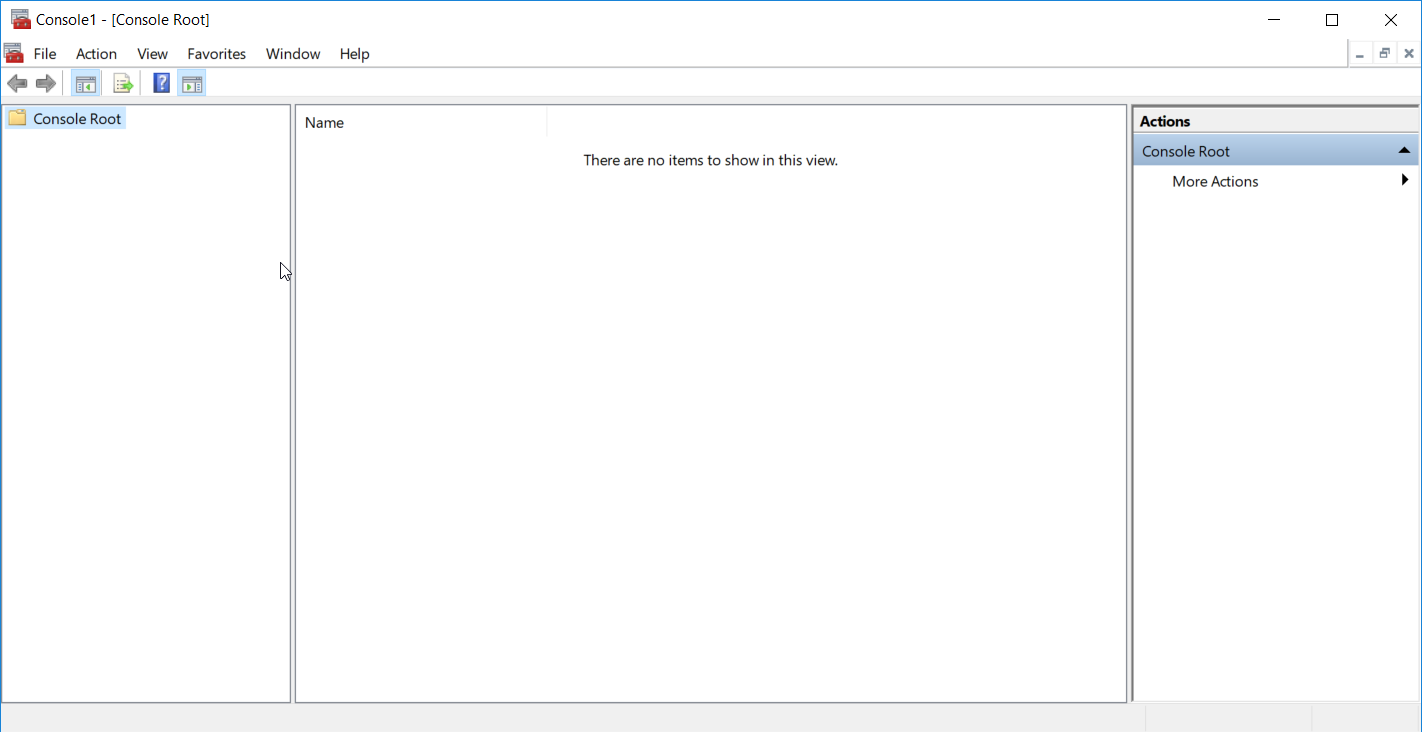
Run mmc.exe from the Start menu to open the Microsoft Management Console window.
Select File > Add/Remove Snap-In. Add the Certificates snap-in.
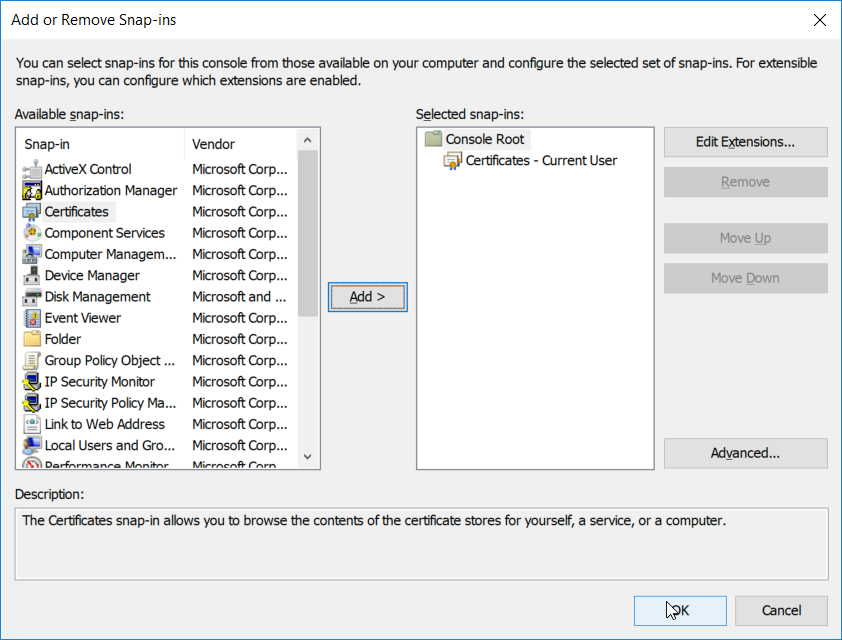
The newly created certificate should be in the Certificates – Current User > Personal > Certificates store.
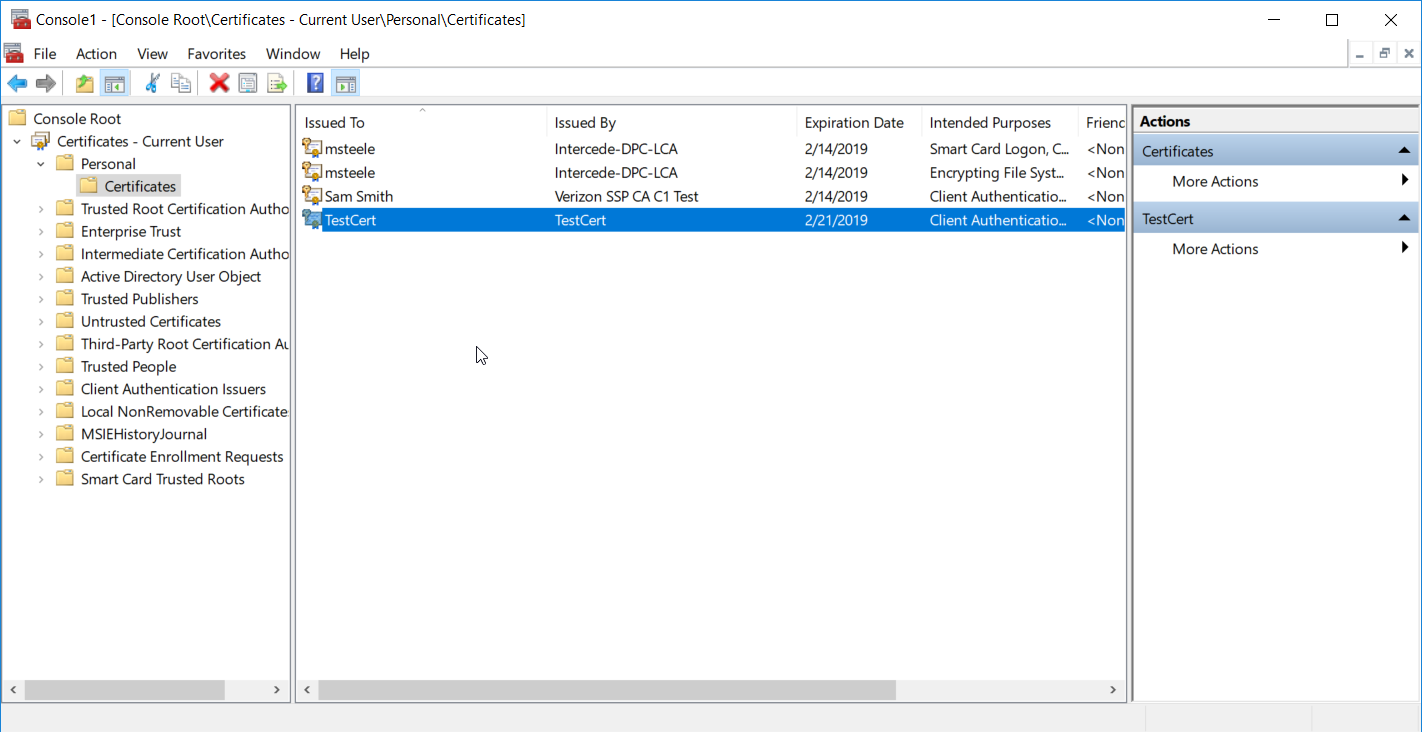
Right-click the newly created certificate and select Copy.
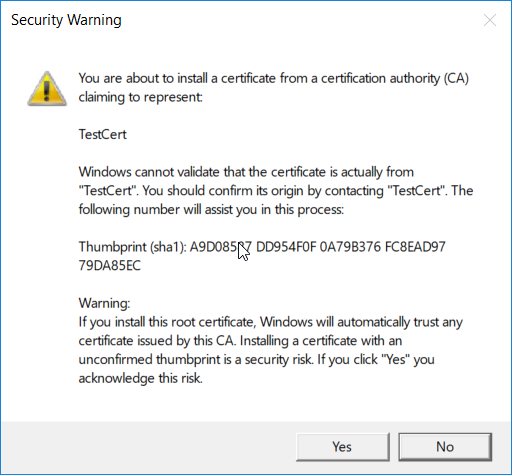
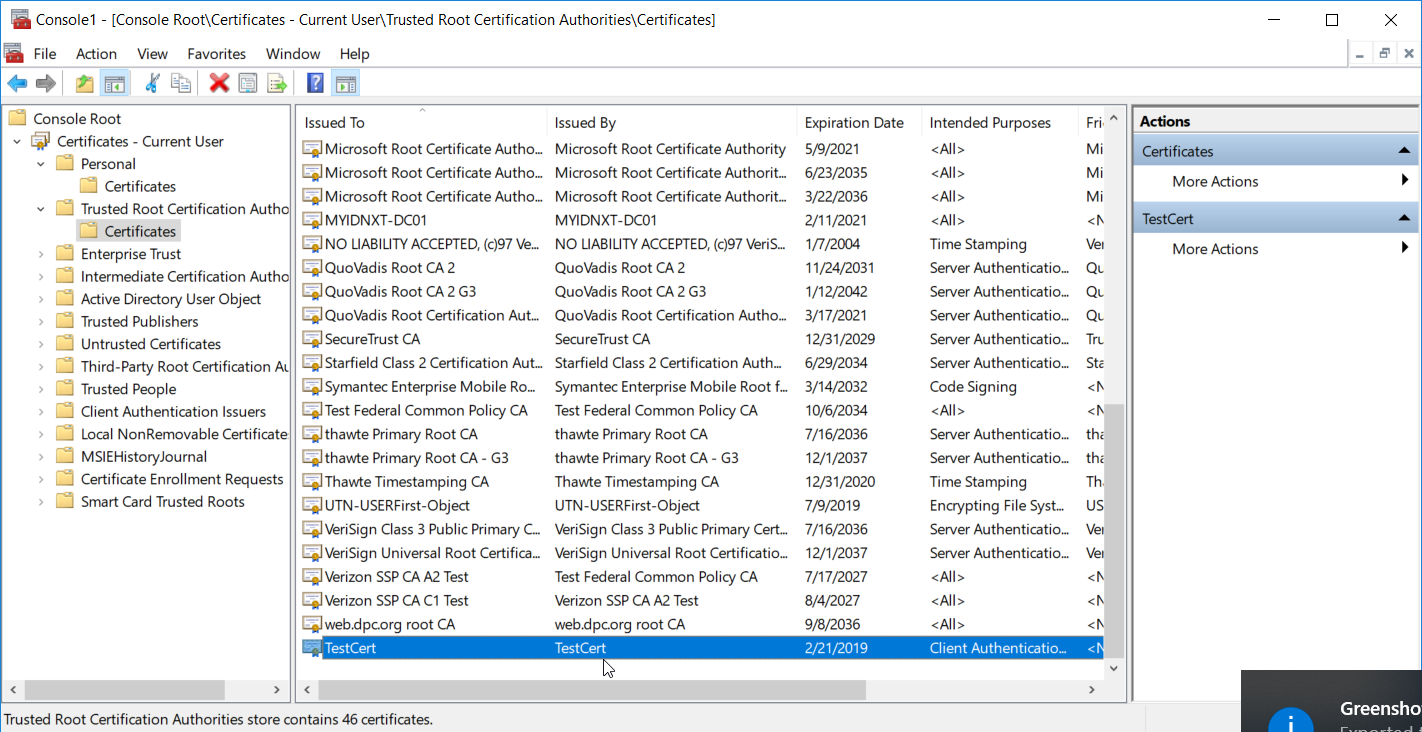
Navigate to Certificates – Current User > Trusted Root Certification Authorities > Certificates and paste the certificate there.
Click Yes when a warning message appears.
2.2.6.2. Creating a Profile
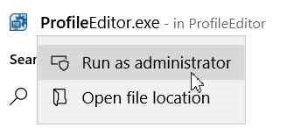
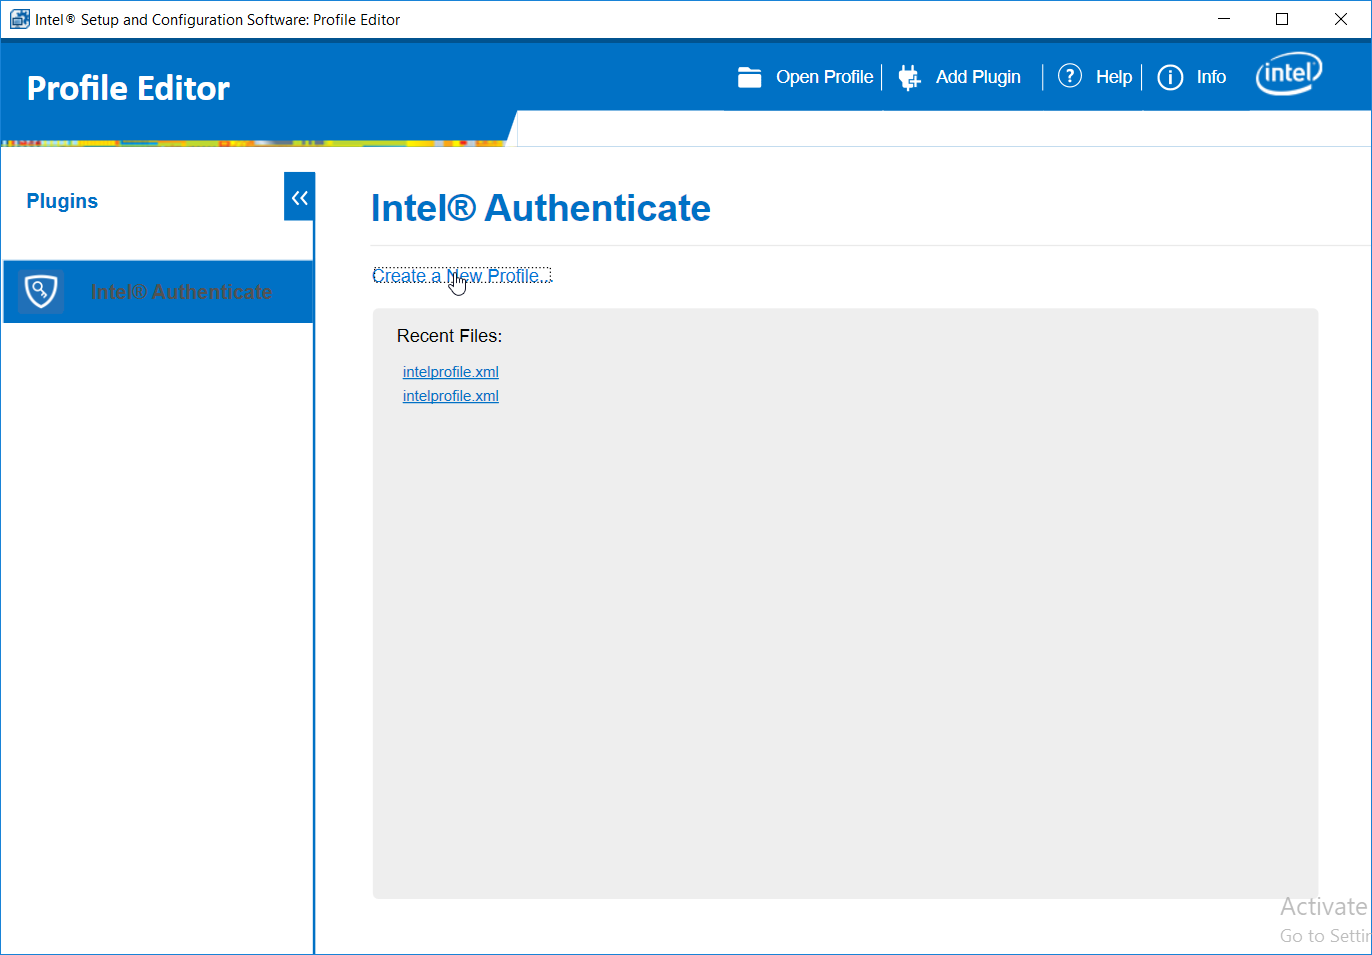
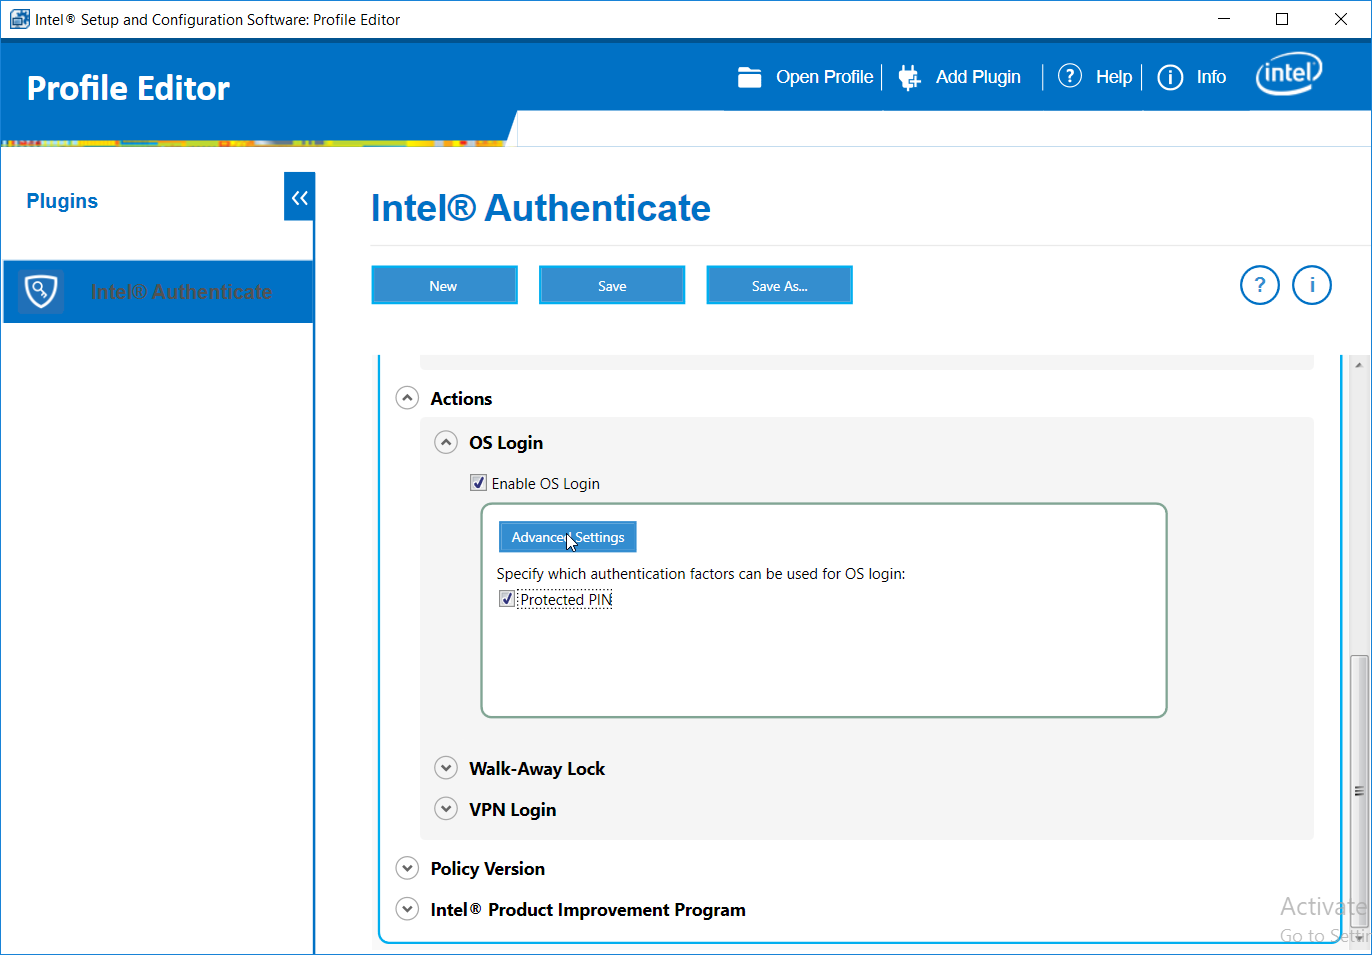
Run the ProfileEditor.exe file as an administrator.
Click Create a New Profile….
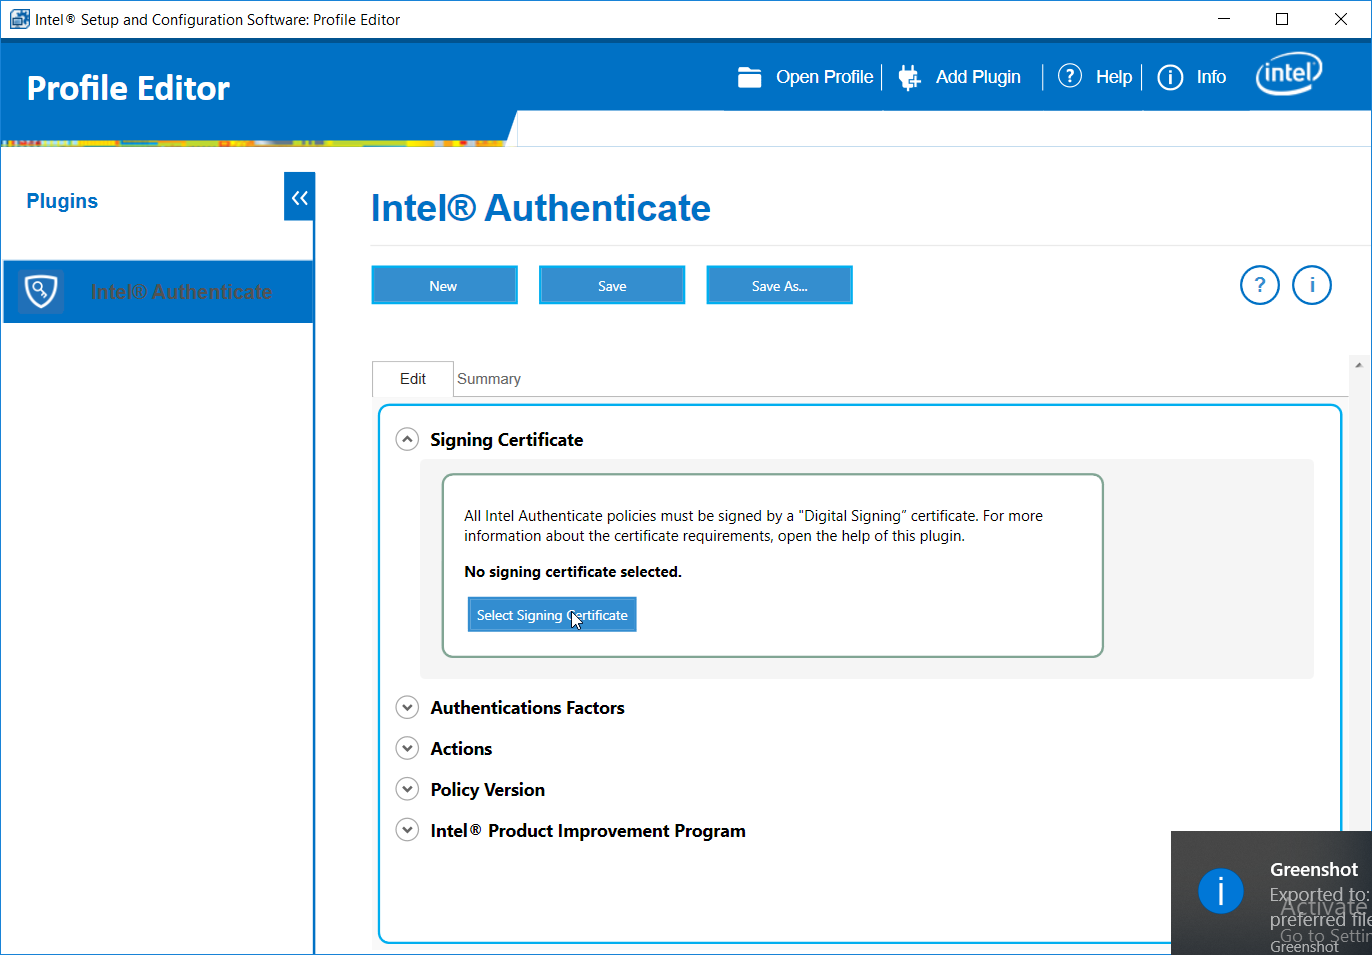
Click Select Signing Certificate.
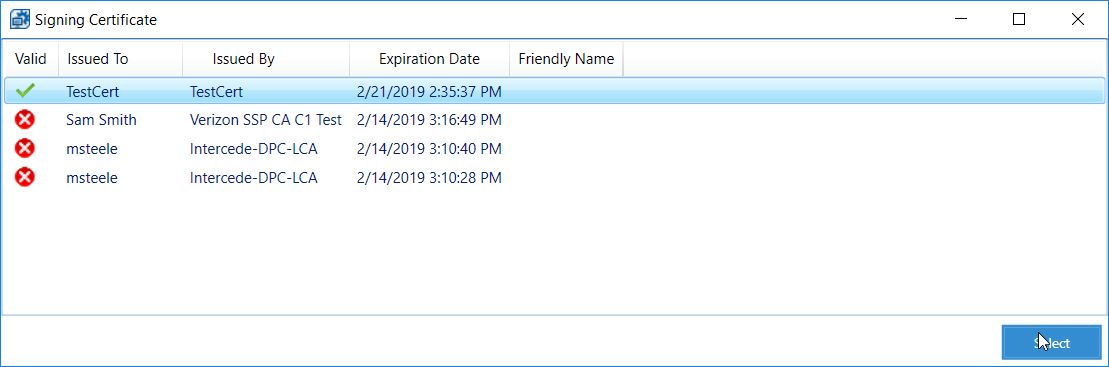
Select the newly created certificate and click Select.
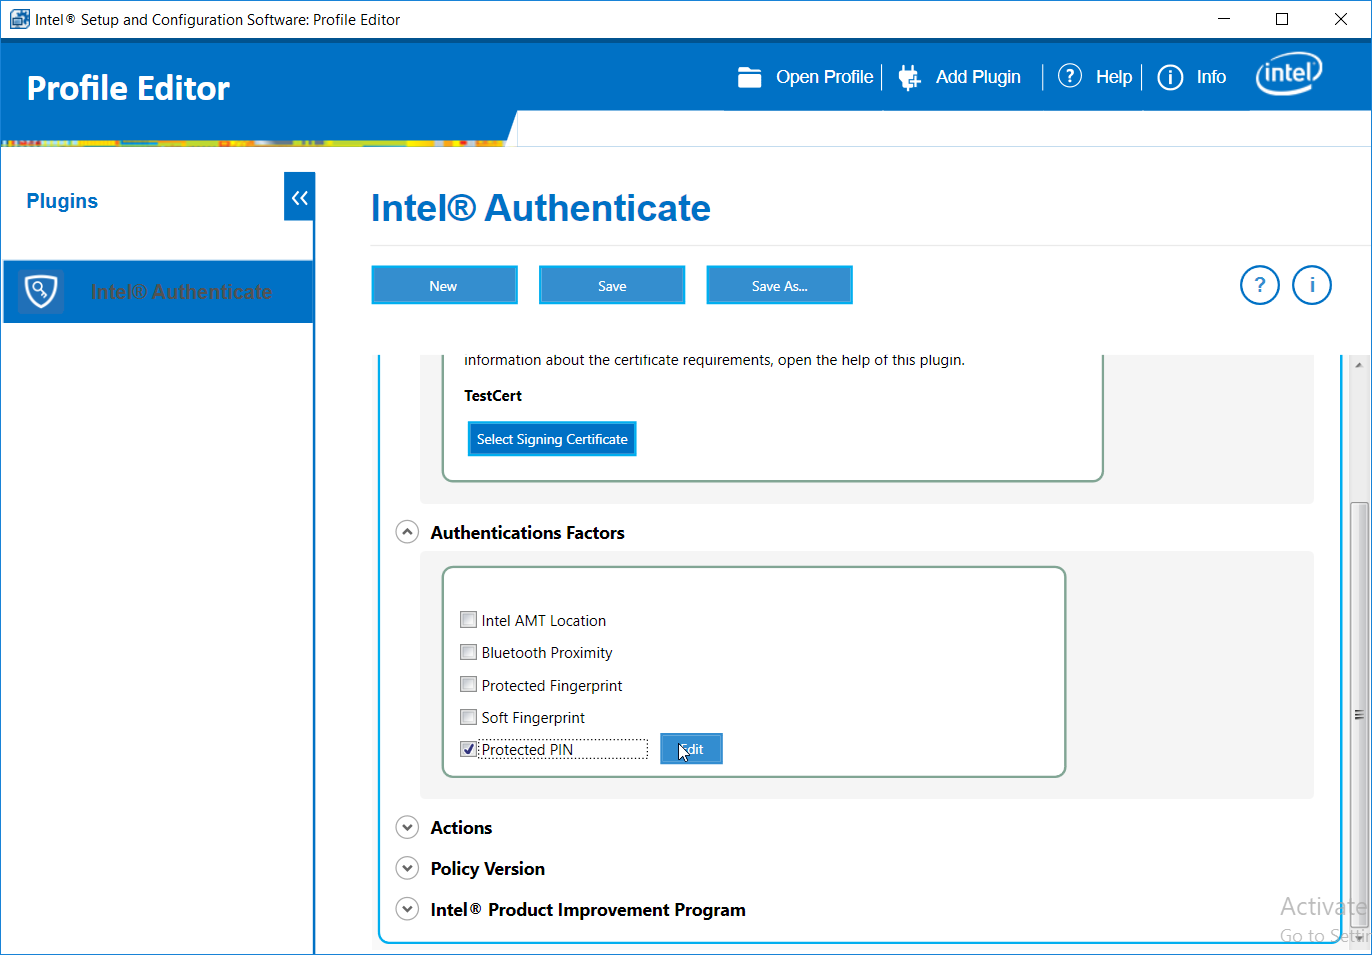
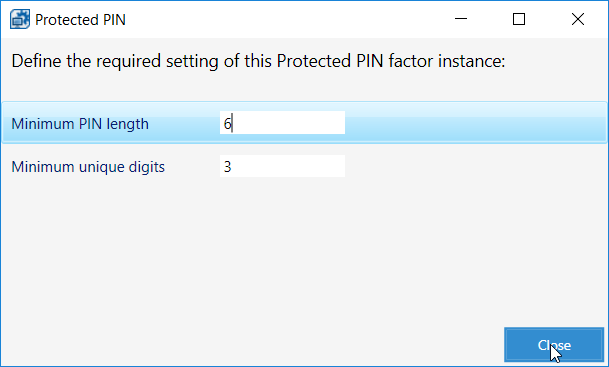
Under Authentications Factors, check the box next to Protected PIN.
Click the Edit button.
Set the PIN length and the minimum number of unique digits.
Click Close.
Under Actions > OS Login, check the box next to Enable OS Login.
Check the box next to Protected PIN.
Click Advanced Settings.
Uncheck the box next to Require the system drive to be encrypted.
Click Close.
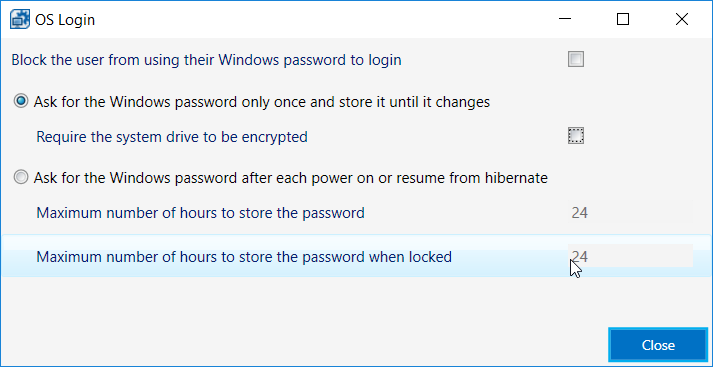
Click the Save As… button and save the profile.
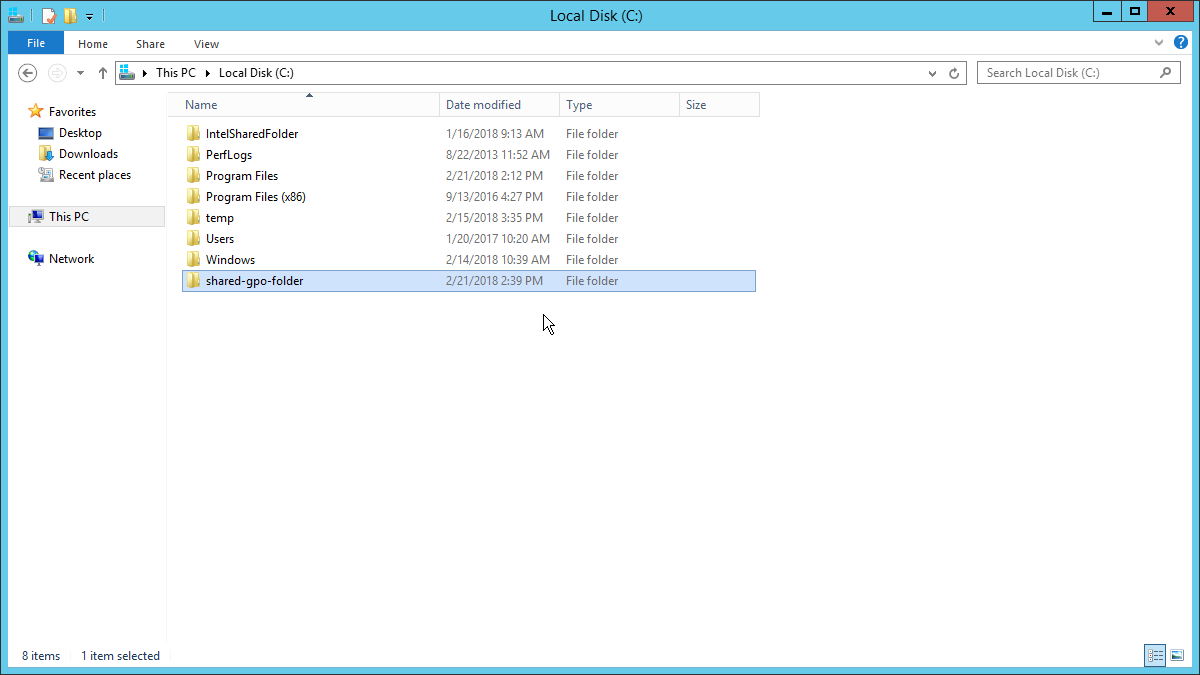
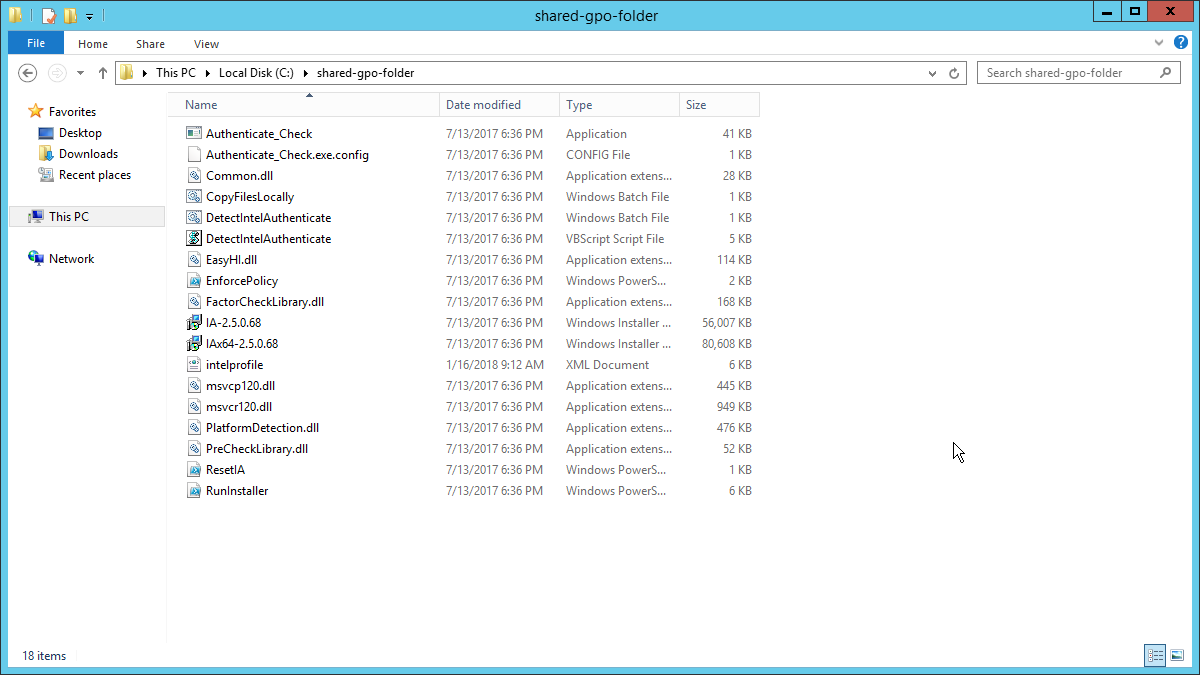
2.2.6.3. Creating a Shared Folder
Create a new folder on the network.
Give it a name such as shared-gpo-folder.
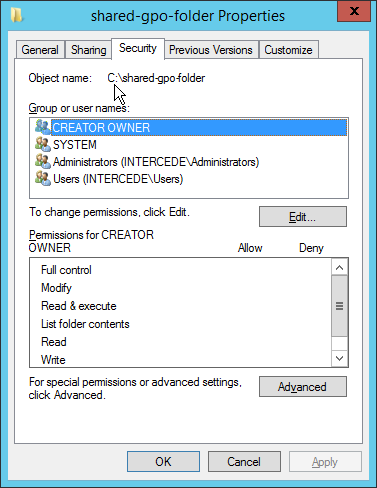
Right-click the folder and select Properties.
Go to the Security Tab.
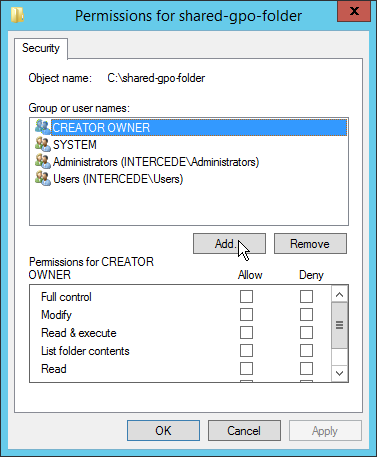
Click Edit.
Click Add.
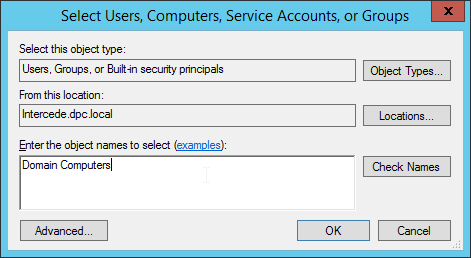
Enter Domain Computers in the text box.
Click OK.
Ensure that the Domain Computers have read permissions on this folder.
Click OK.
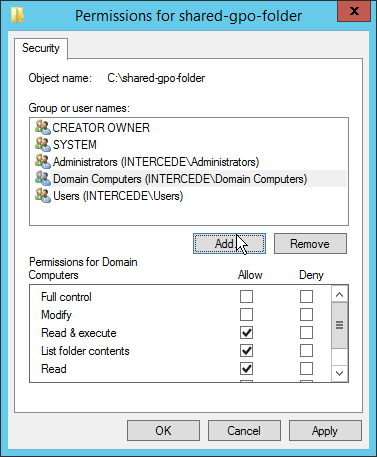
Click OK.
Copy all the files from the HostFiles folder, as well as the Intel Profile you created, into this shared folder.
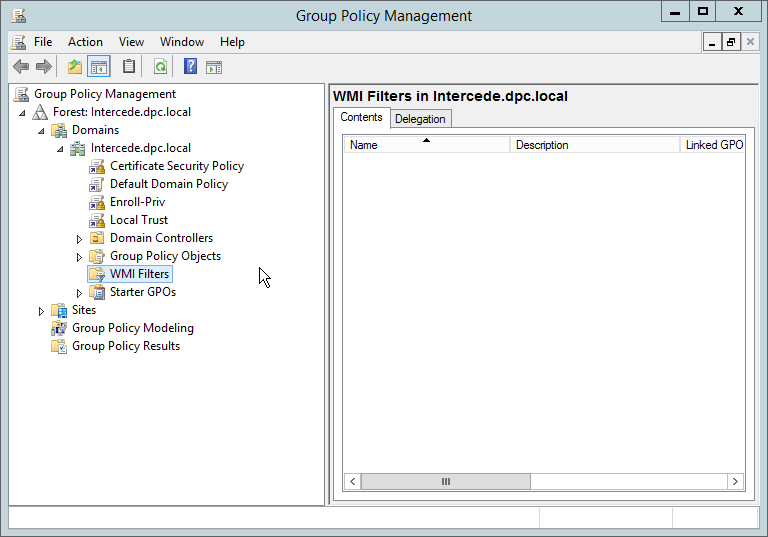
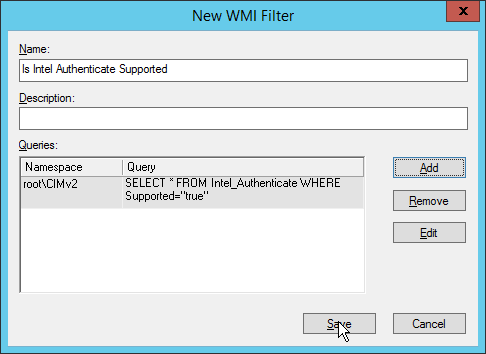
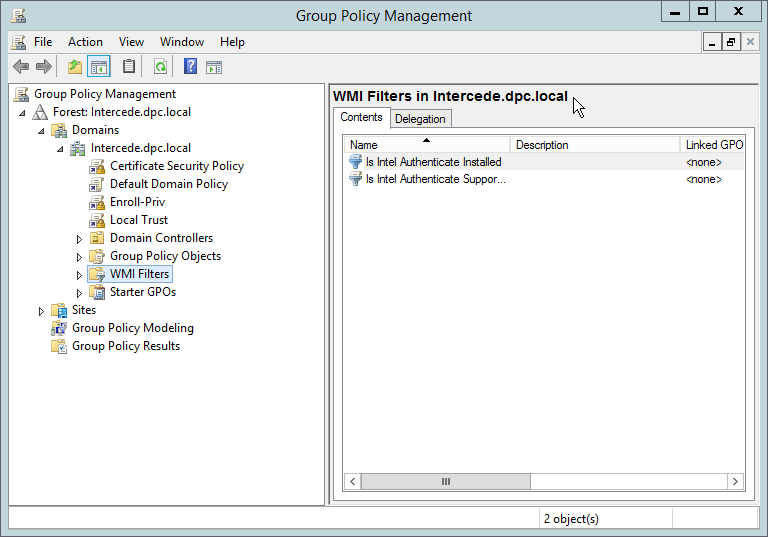
2.2.6.4. Creating Windows Management Instrumentation (WMI) Filters for the GPOs
Open the Group Policy Management window by running gpmc.msc from the Start menu.
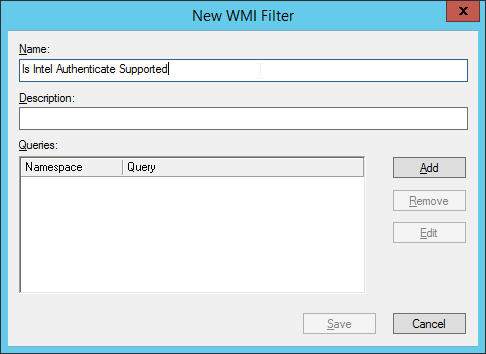
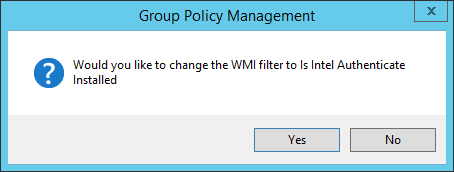
Right-click WMI Filters and select New….
Enter a name such as Is Intel Authenticate Supported and click Add.
In the Query field, enter SELECT * FROM Intel_Authenticate WHERE Supported=“true”.
Click OK.
Click Save.
Right-click WMI Filters and select New….
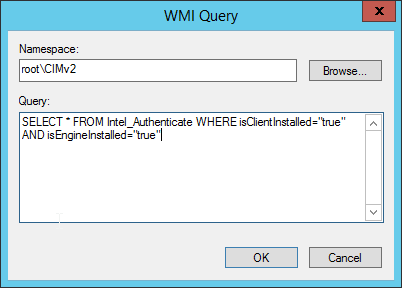
Enter a name such as Is Intel Authenticate Installed and click Add.

In the Query field, enter SELECT * FROM Intel_Authenticate WHERE isClientInstalled=“true” AND isEngineInstalled=“true”.
Click OK.
Click Save.
2.2.6.5. Creating a GPO to Discover Intel Authenticate
Open Group Policy Management.
In the Group Policy Management tree, right-click the domain and select Create a GPO in the domain and Link it here.
Enter a name for this GPO.
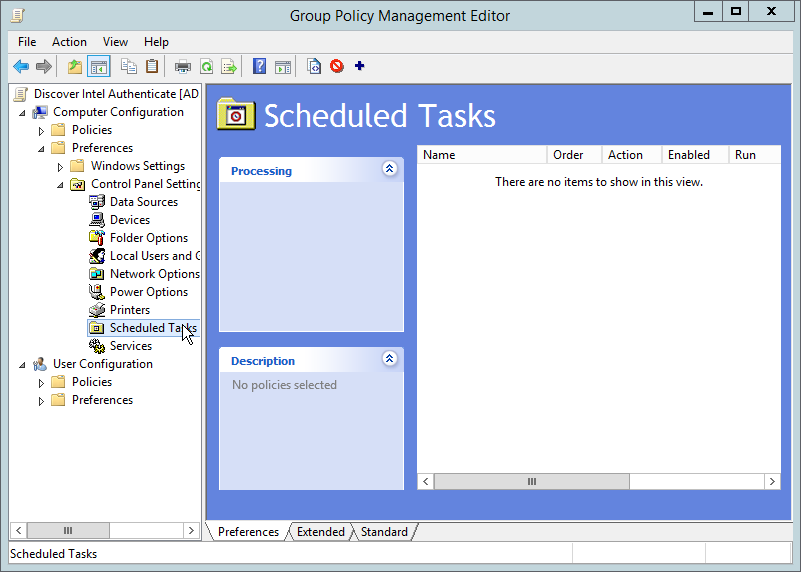
Right-click the GPO just created and select Edit.
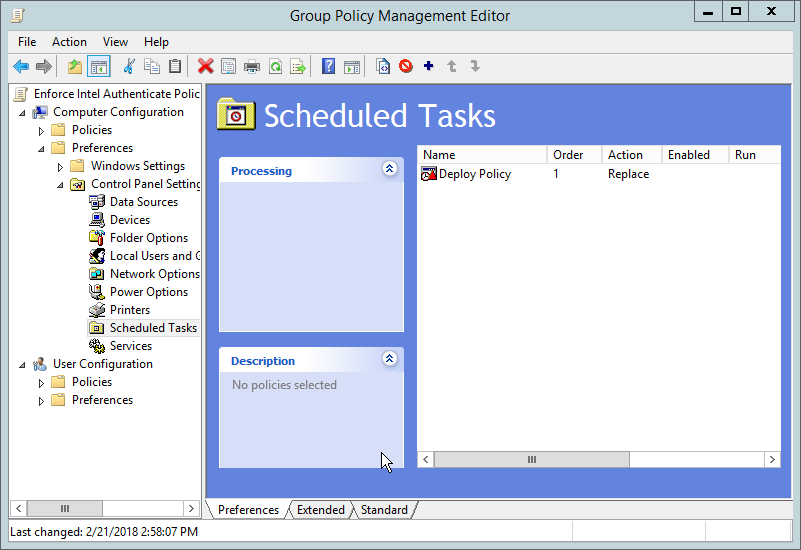
Right-click Computer Configuration > Preferences > Control Panel Settings > Scheduled Tasks and select New > Scheduled Task (At least Windows 7).
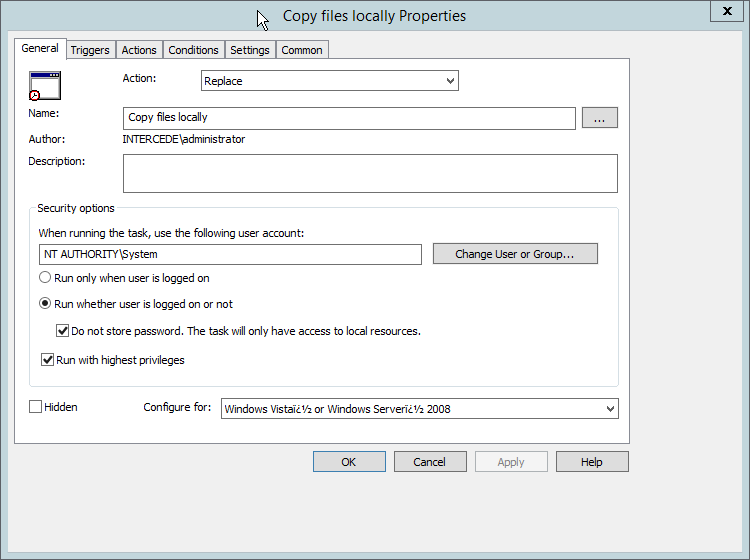
Select Replace from the drop-down list for Action.
Enter a descriptive name.
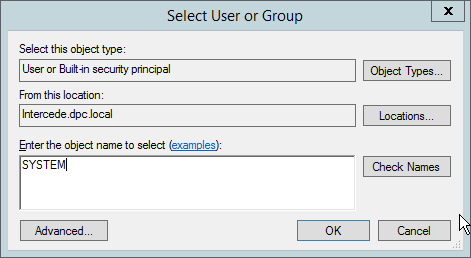
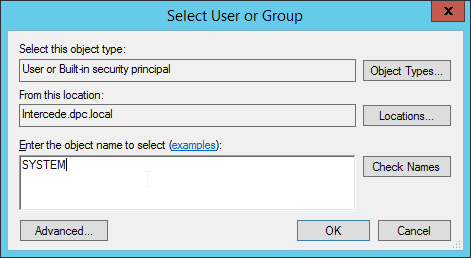
Click Change User or Group.
Enter SYSTEM and click OK.
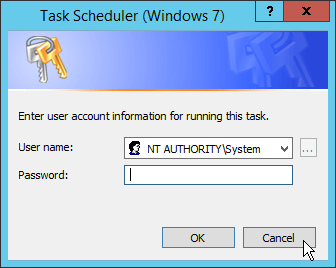
Check the box next to Run whether user is logged on or not.
A window will open asking for a password. Click Cancel.
Check the box next to Do not store password. The task will only have access to local resources.
Check the box next to Run with highest privileges.
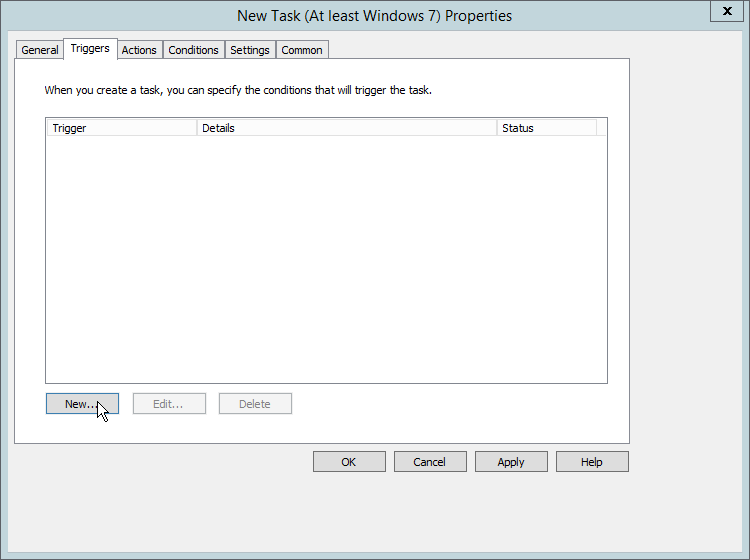
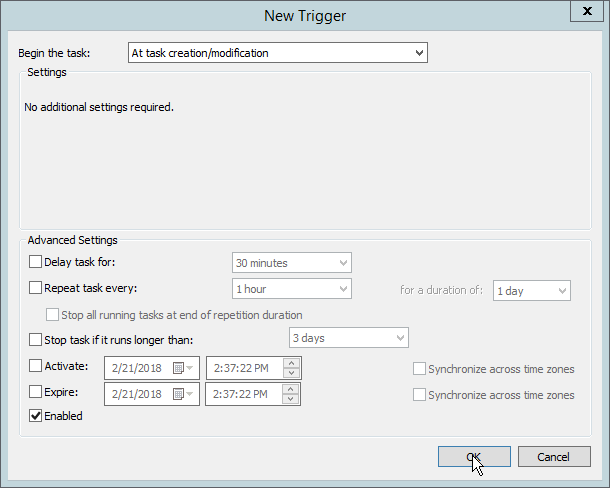
Select the Triggers tab.
Click New….
Select At task creation/modification for Begin the task.
Click OK.
Select the Actions tab.
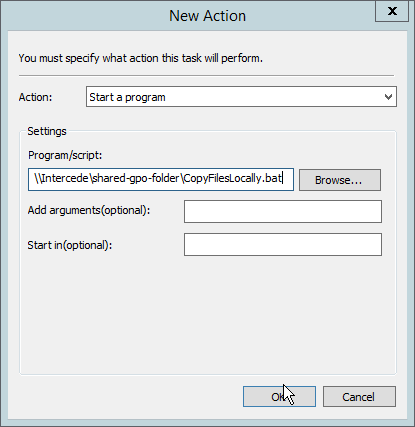
Click New….
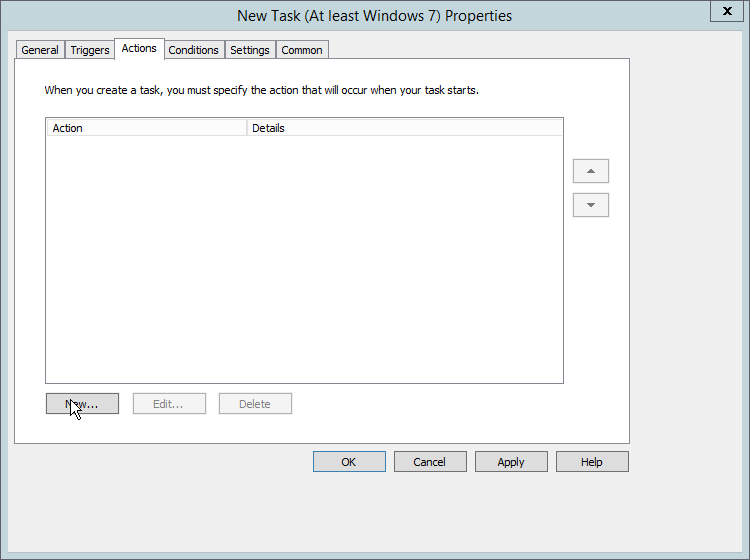
Select Start a program.
For Program/script, enter the network location of the CopyFilesLocally.bat file.
Click OK.
Click OK.
Right-click Computer Configuration > Preferences > Control Panel Settings > Scheduled Tasks and select New > Scheduled Task (At least Windows 7).
Select Replace from the drop-down list for Action.
Enter a descriptive name.
Click Change User or Group.
Enter SYSTEM and click OK.
Check the box next to Run whether user is logged on or not.
A window will open asking for a password. Click Cancel.
Check the box next to Do not store password. The task will only have access to local resources.
Check the box next to Run with highest privileges.

Select the Triggers tab.
Click New….
Select At task creation/modification for Begin the task.
Click OK.
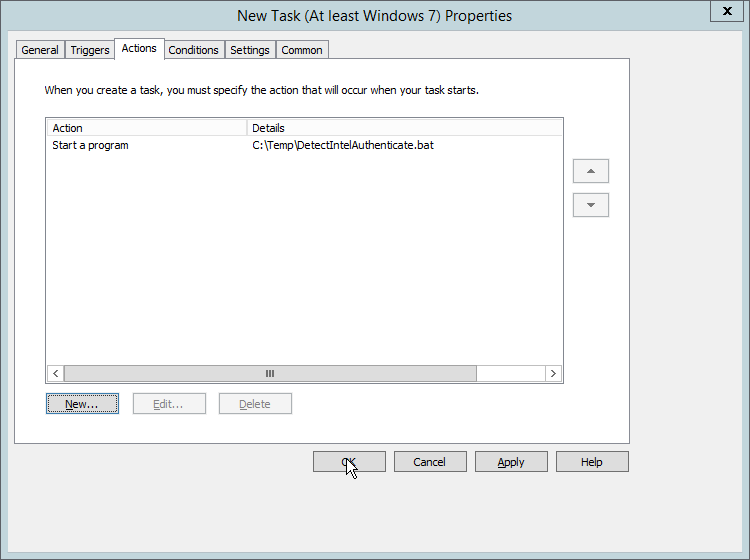
Select the Actions tab.
Click New….
Select Start a program.
For Program/script, enter C:\Temp\DetectIntelAuthenticate.bat.
For Start In, enter C:\Temp.
Click OK.

Click OK.
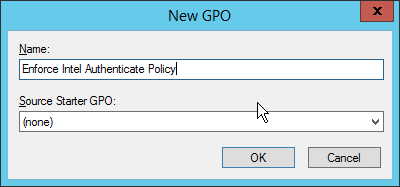
2.2.6.6. Creating a GPO to Install Intel Authenticate
Open Group Policy Management.
In the Group Policy Management tree, right-click the domain and select Create a GPO in the domain and Link it here.
Enter a name for this GPO.
Click OK.
Select the GPO you just created and select Is Intel Authenticate Supported in the WMI Filtering section.
Click Yes.

Right-click the GPO just created and select Edit.
Right-click Computer Configuration > Preferences > Control Panel Settings > Scheduled Tasks and select New > Scheduled Task (At least Windows 7).
Select Replace from the drop-down list for Action.
Enter a descriptive name.
Click Change User or Group.
Enter SYSTEM and click OK.
Check the box next to Run whether user is logged on or not.
A window will open asking for a password. Click Cancel.
Check the box next to Do not store password. The task will only have access to local resources.
Check the box next to Run with highest privileges.

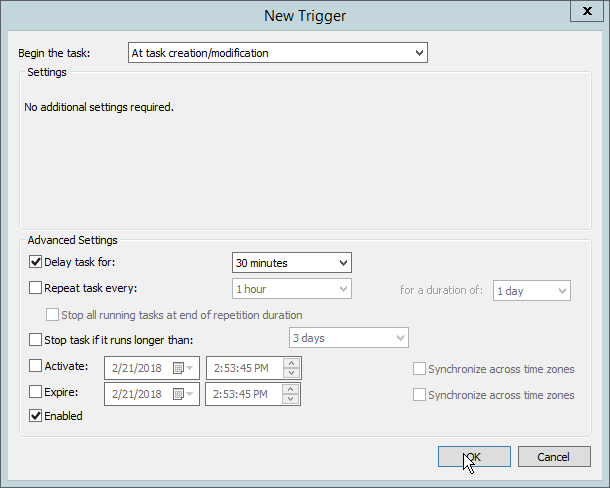
Select the Triggers tab.
Click New….
Select At task creation/modification for Begin the task.
Check the box next to Delay task for.
Select 30 minutes.
Ensure Enabled is selected and click OK.
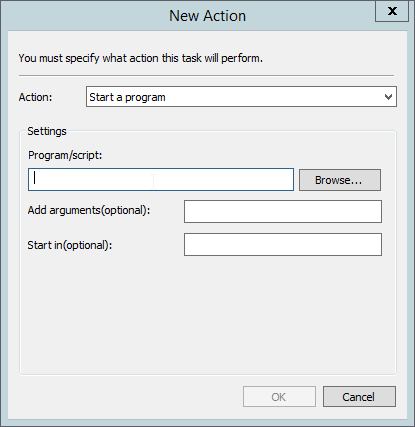
Select the Actions tab.
Click New….
Select Start a program.
For Program/script, enter C:\Windows\System32\WindowsPowerShell\v1.0\powershell.exe.
For Add arguments, enter -executionpolicy unrestricted C:\Temp\RunInstaller.ps1.
For Start In, enter C:\Temp.
Click OK.

Click OK.
Right-click Computer Configuration > Preferences > Control Panel Settings > Scheduled Tasks and select New > Scheduled Task (At least Windows 7).
Select Replace from the drop-down list for Action.
Enter a descriptive name.
Click Change User or Group.
Enter SYSTEM and click OK.
Check the box next to Run whether user is logged on or not.
A window will open asking for a password. Click Cancel.
Check the box next to Do not store password. The task will only have access to local resources.
Check the box next to Run with highest privileges.
Select the Triggers tab.
Click New….
Select At task creation/modification for Begin the task.
Check the box next to Delay task for.
Select 30 minutes.
Ensure Enabled is selected and click OK.
Select the Actions tab.
Click New….
Select Start a program.
For Program/script, enter C:\Temp\DetectIntelAuthenticate.bat.
For Start In, enter C:\Temp.
Click OK.
Click OK.
2.2.6.7. Creating a GPO to Enforce the Policy
Open Group Policy Management.
In the Group Policy Management tree, right-click the domain and select Create a GPO in the domain and Link it here.
Enter a name for this GPO.
Click OK.
Select the GPO you just created and select Is Intel Authenticate Installed in the WMI Filtering section.
Click Yes.
Right-click the GPO just created and select Edit.
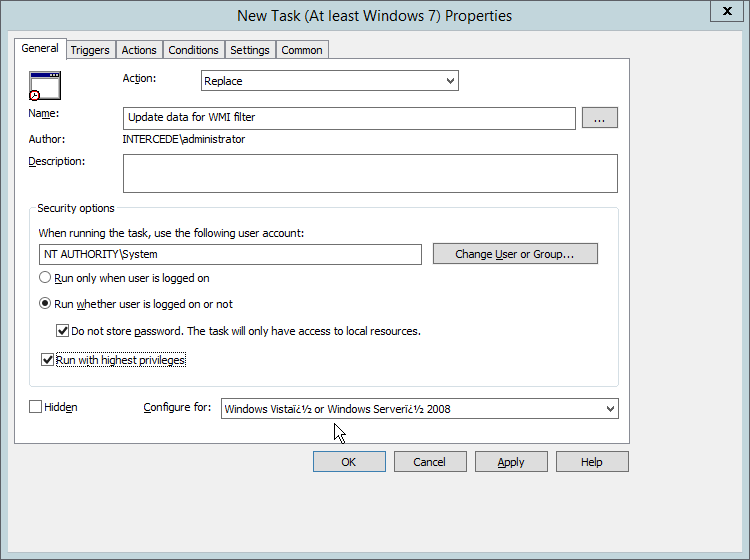
Right-click Computer Configuration > Preferences > Control Panel Settings > Scheduled Tasks and select New > Scheduled Task (At least Windows 7).
Select Replace from the drop-down list for Action.
Enter a descriptive name.
Click Change User or Group.
Enter SYSTEM and click OK.
Check the box next to Run whether user is logged on or not.
A window will open asking for a password. Click Cancel.
Check the box next to Do not store password. The task will only have access to local resources.
Check the box next to Run with highest privileges.
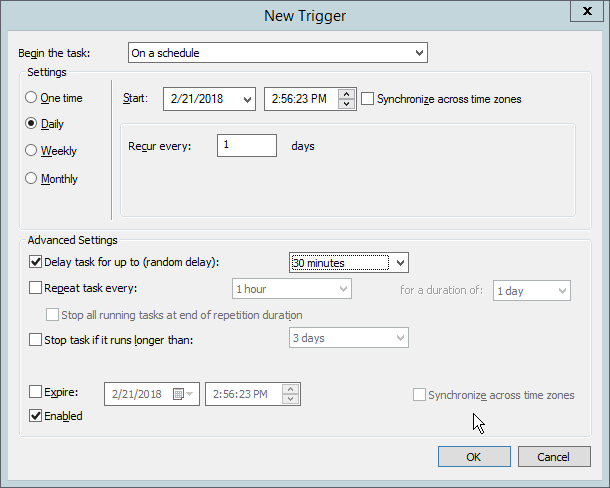
Select the Triggers tab.
Click New….
Select On a schedule for Begin the task.
Select Daily.
Check the box next to Delay task for.
Select 30 minutes.
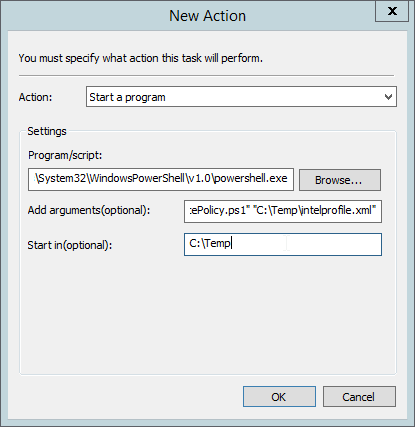
Ensure Enabled is selected and click OK.
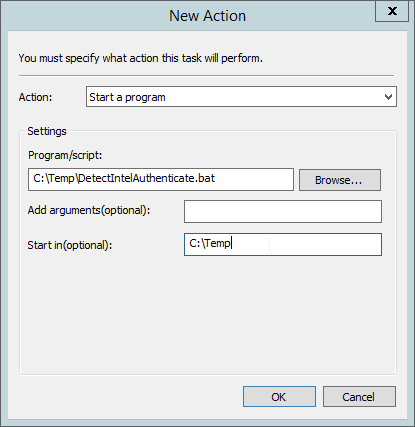
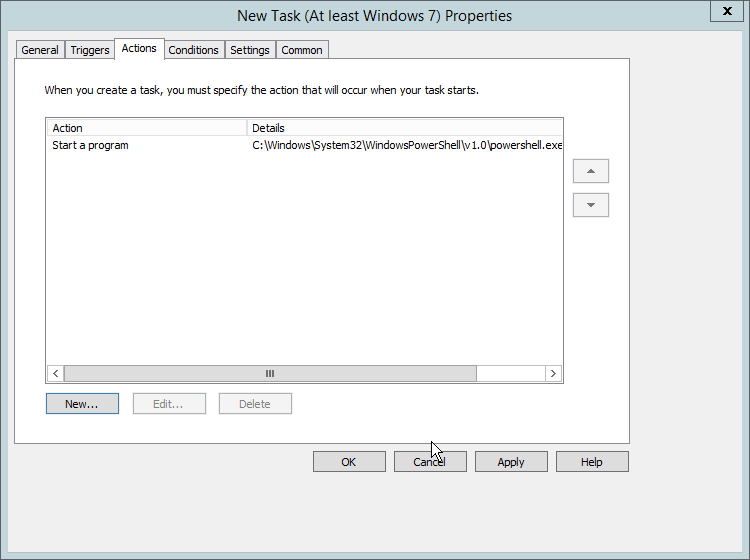
Select the Actions tab.
Click New….
Select Start a program.
For Program/script, enter C:\Windows\System32\WindowsPowerShell\v1.0\powershell.exe.
For Add arguments, enter -executionpolicy unrestricted “C:\Temp\EnforcePolicy.ps1” “C:\Temp\intelprofile.xml”.
For Start In, enter C:\Temp.
Click OK.
Click OK.
2.2.7. Intel Virtual Smart Card (VSC) Configuration
The Intel Authenticate Integration Guide for Active Directory Policy Objects provides instructions on how to set up GPOs for various functions of the Intel Authenticate installation process. The following instructions are primarily repurposed from the Intel Authenticate Integration Guide.
2.2.7.1. Configuring MyID for Intel VSC
Open MyID Desktop.
Click New Action.
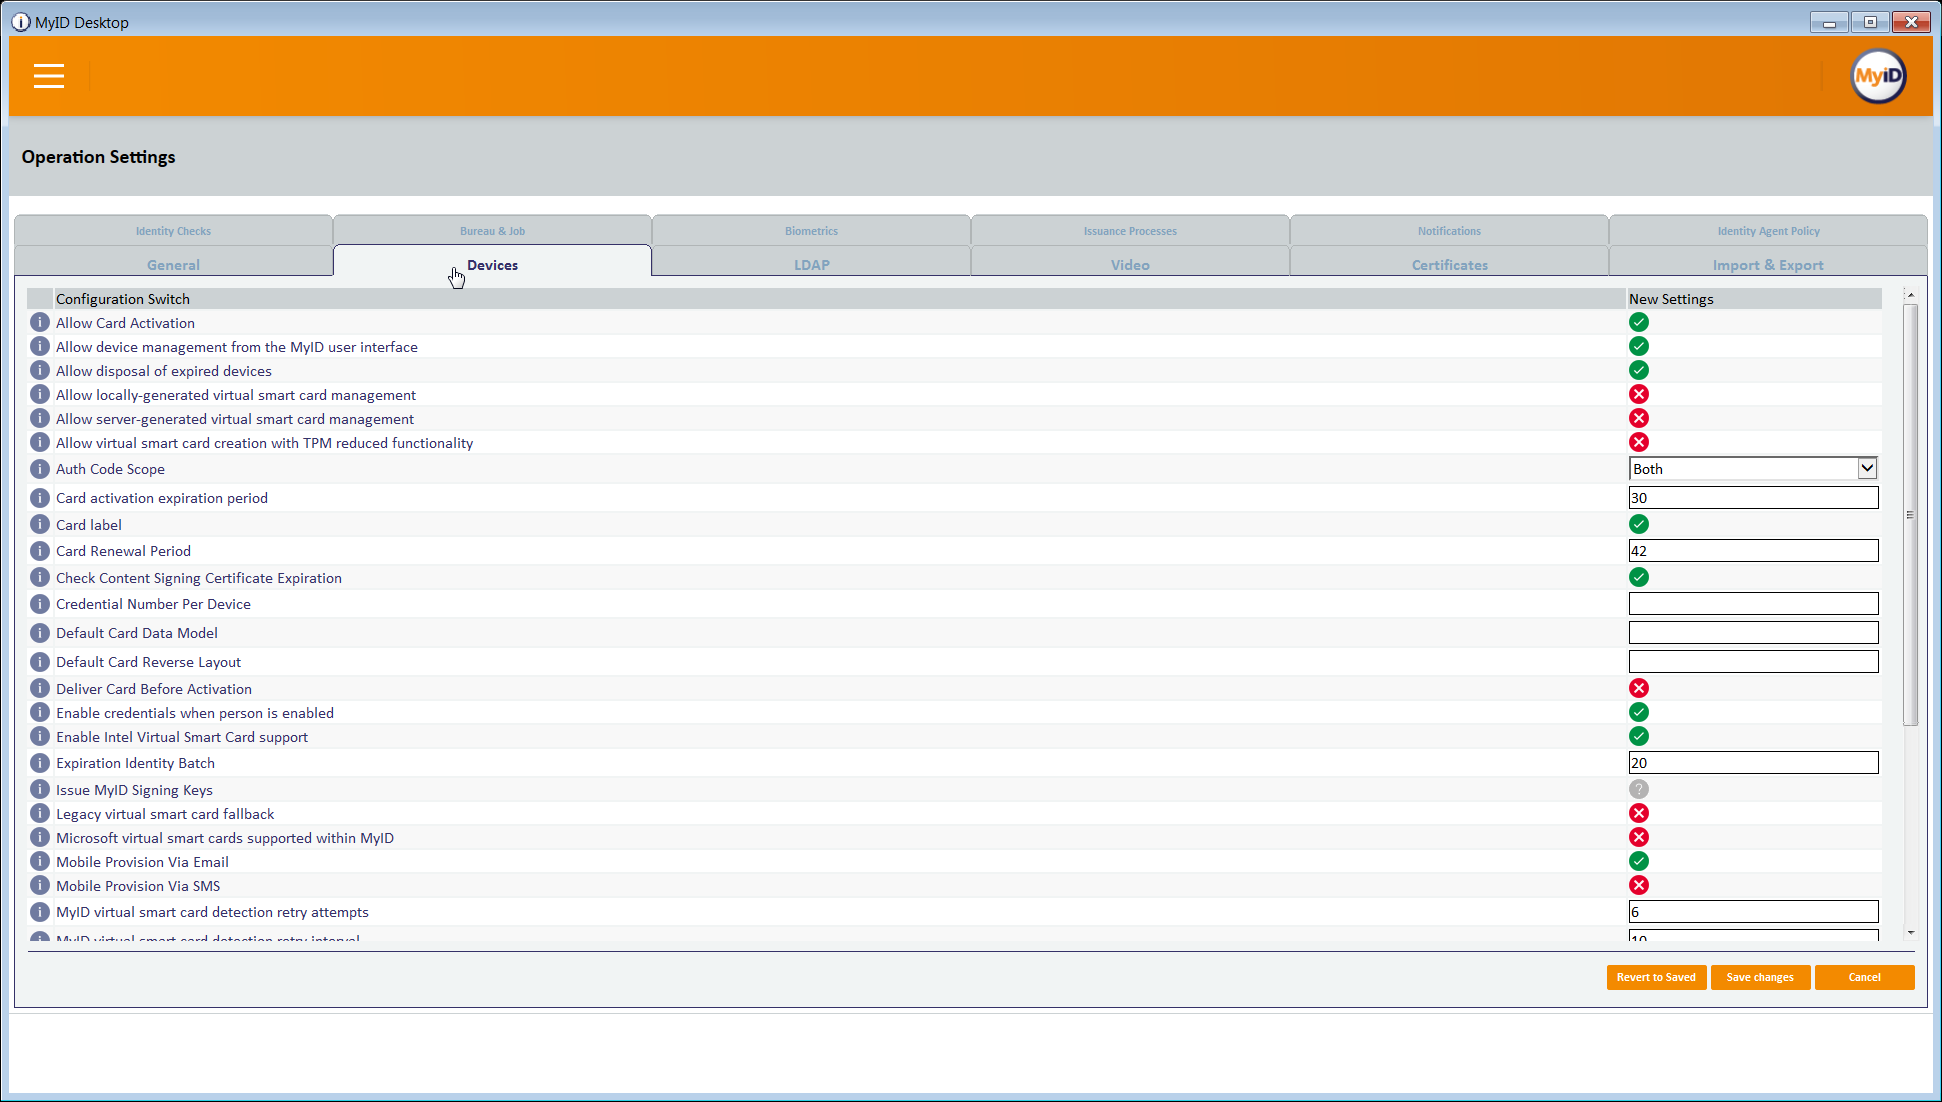
Click Configuration > Operation Settings.

Go to the Devices tab.
Delete the value in Default Card Data Model.
Set Enable Intel Virtual Smart Card support to Yes.
Click Save changes.
2.2.7.2. Setting Up a PIN Protection Key
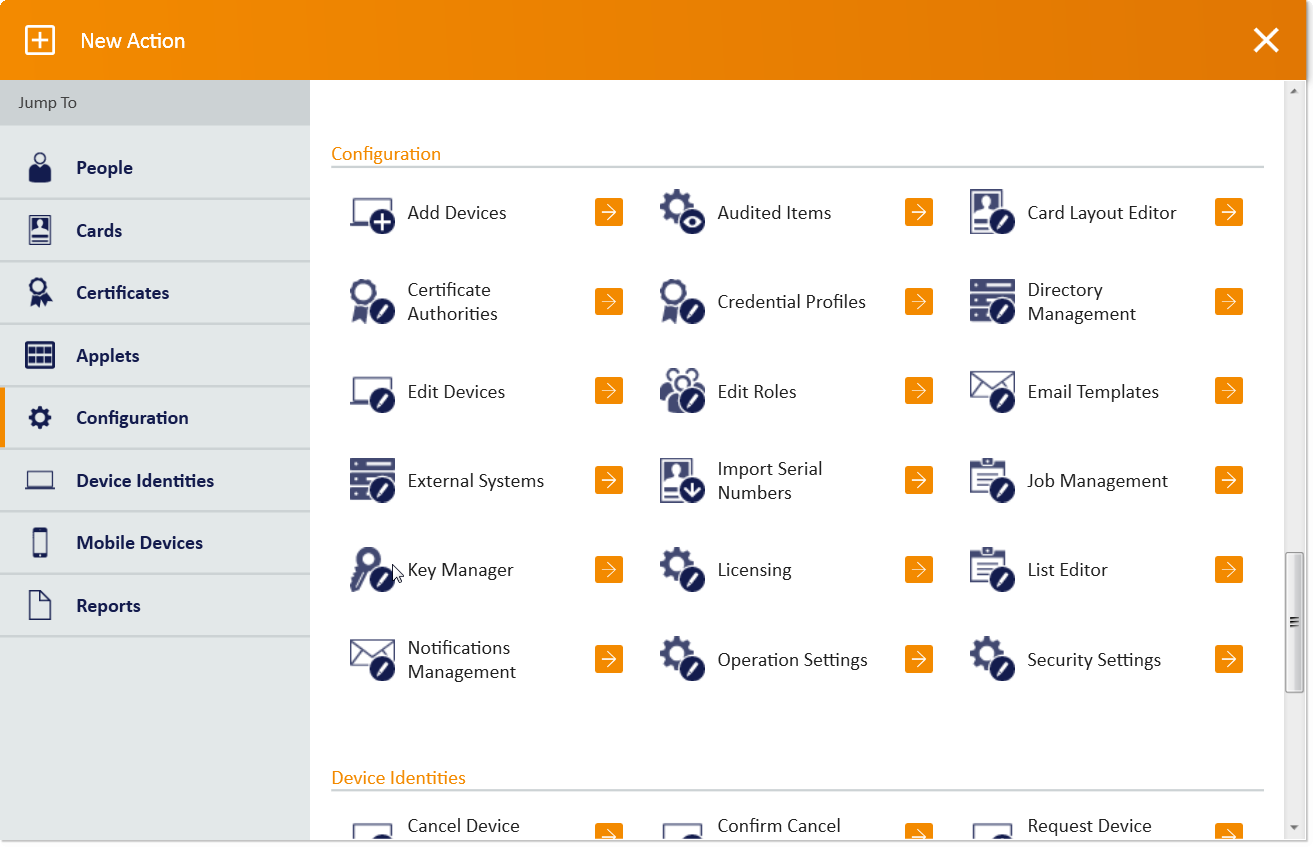
Click New Action.
Click Configuration > Key Manager.
For Select Key Type to Manage, select PIN Generation Key.
Click Next.
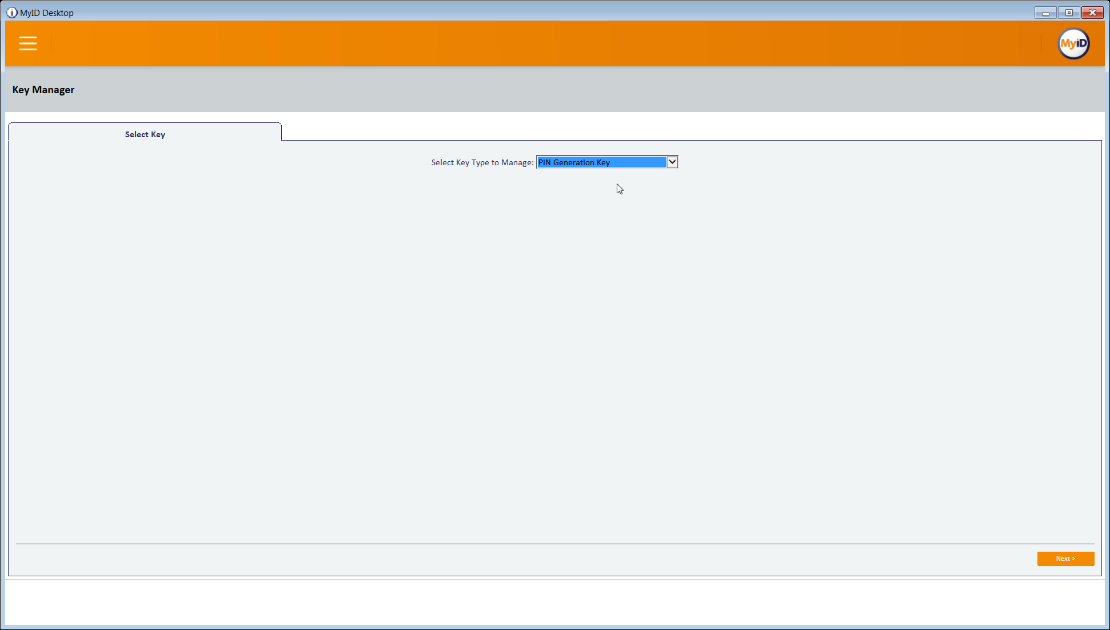
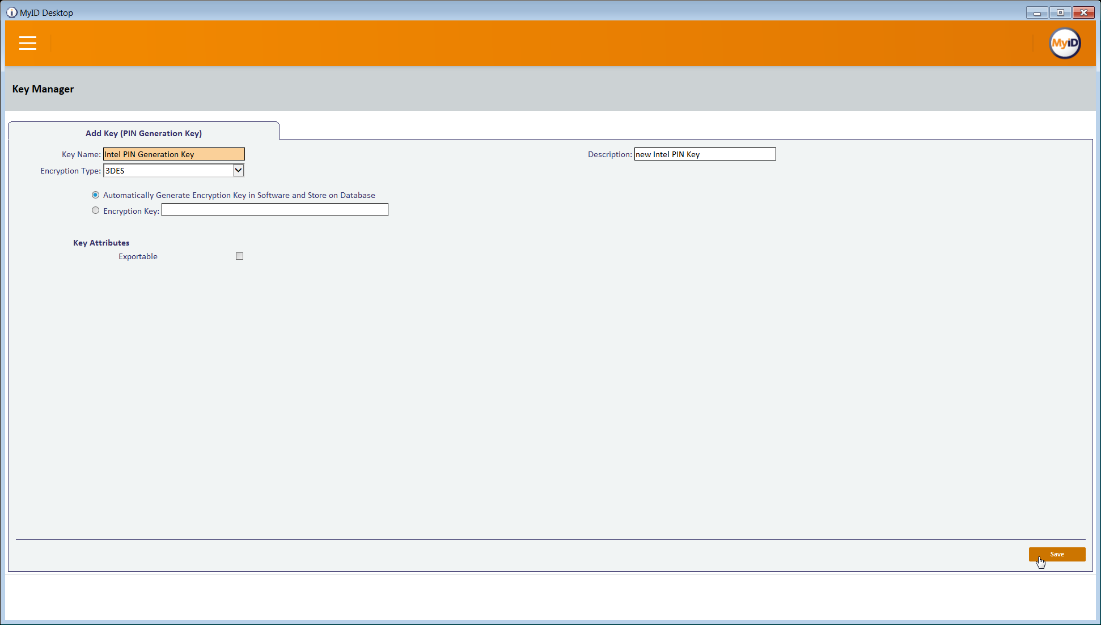
Click Add New Key.
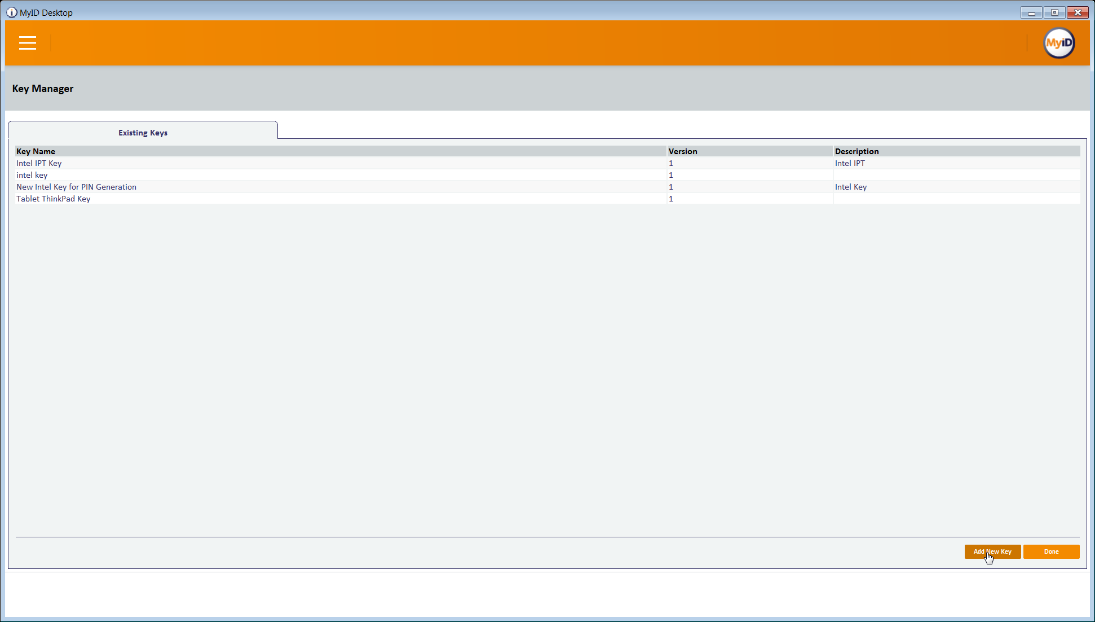
Enter a name and a description.
For Encryption Type, select 3DES.
Select Automatically Generate Encryption Key in Software and Store on Database.
Click Save.
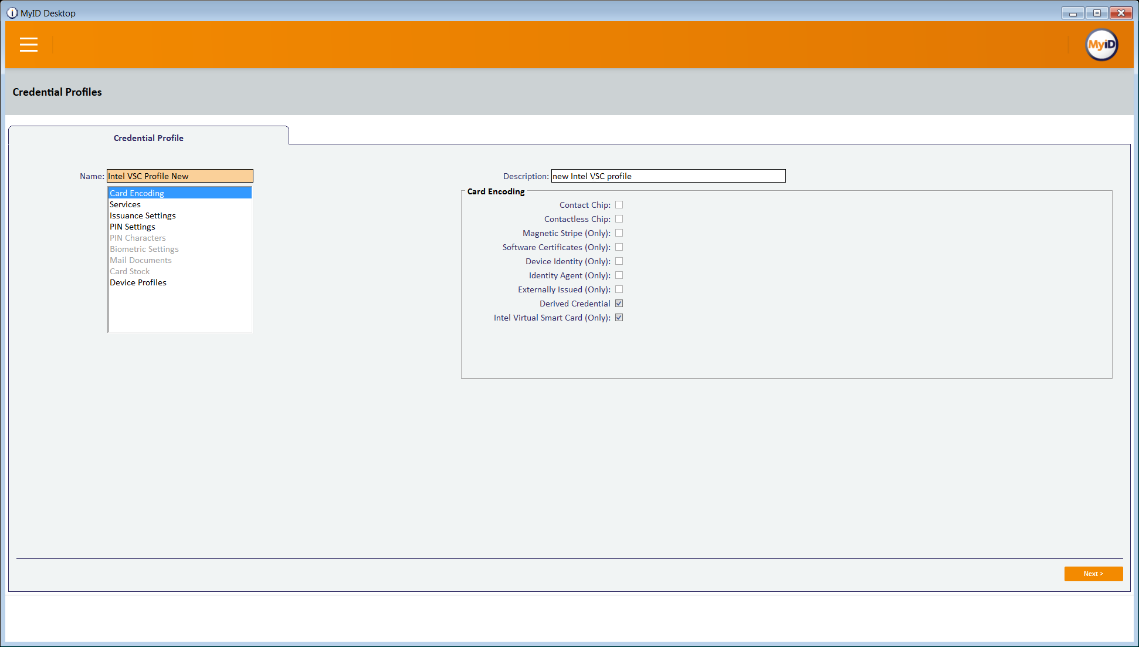
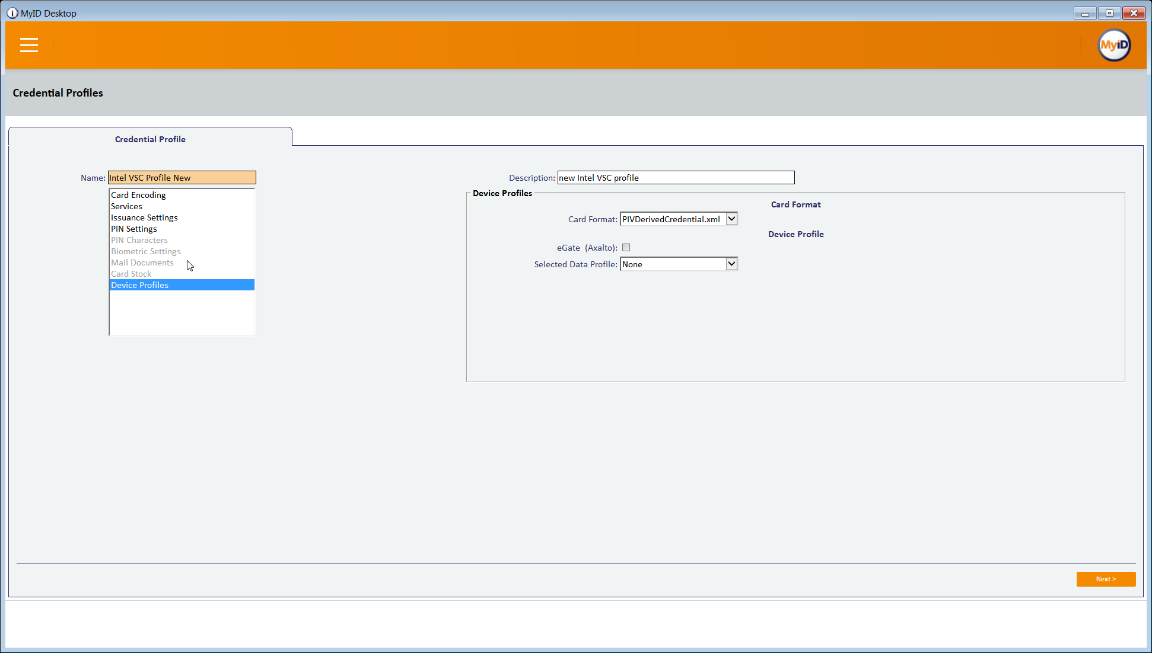
2.2.7.3. Creating a Credential Profile
Click New Action.
Click Configuration > Credential Profiles.
Click New.
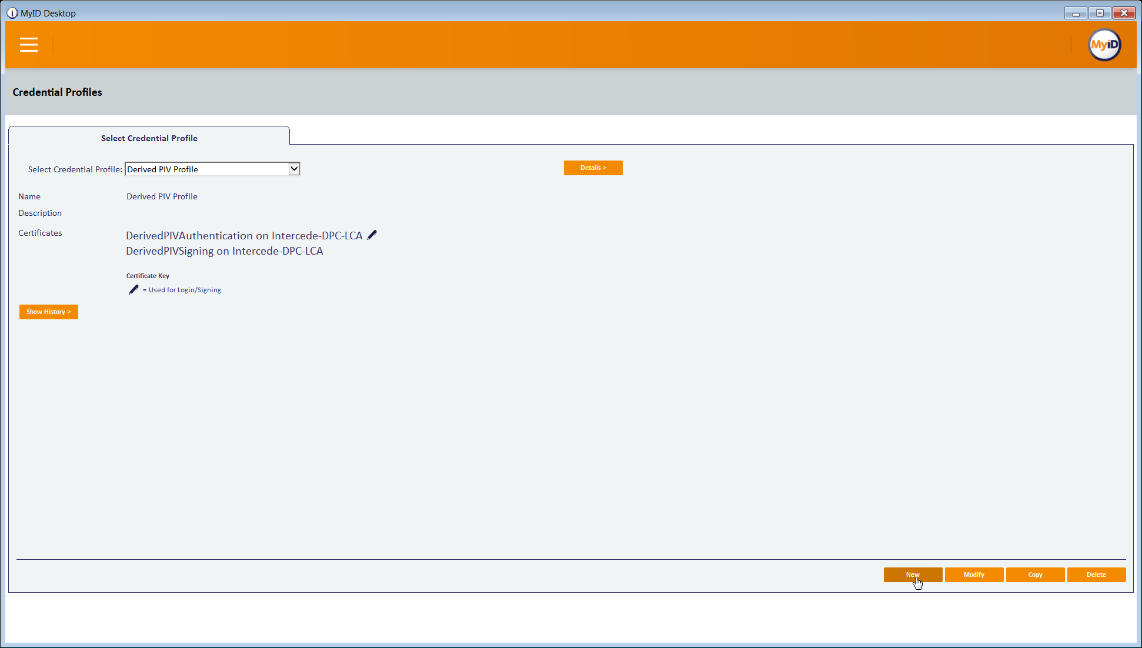
Enter a name and a description.
Check the box next to Derived Credential.
Check the box next to Intel Virtual Smart Card (Only).
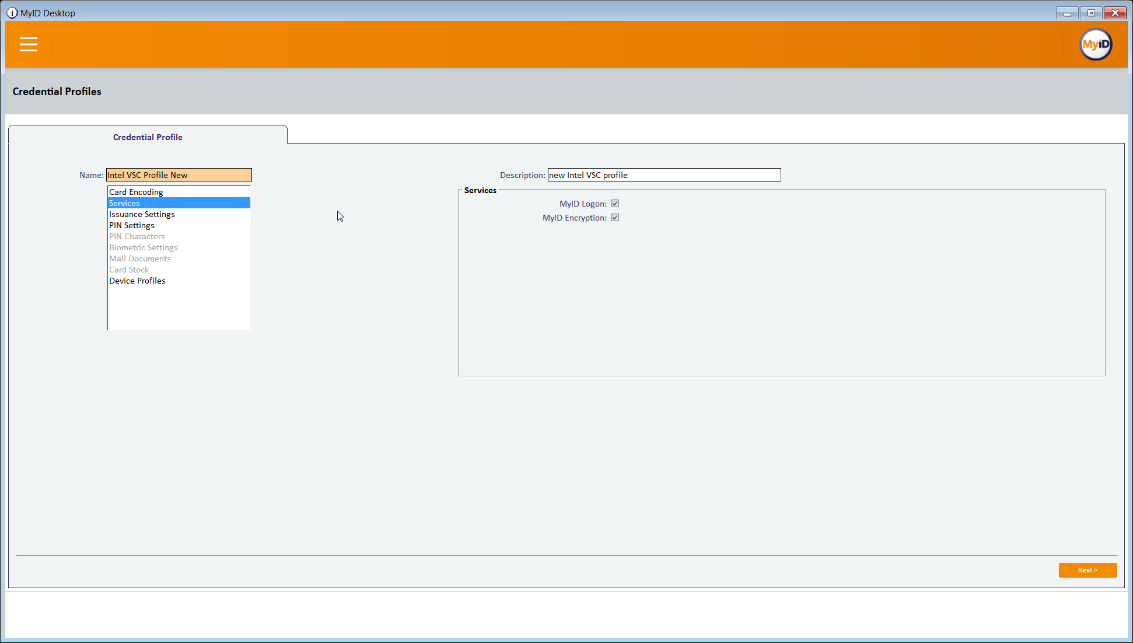
Select the Services tab.
Check the box next to MyID Logon.
Check the box next to MyID Encryption.
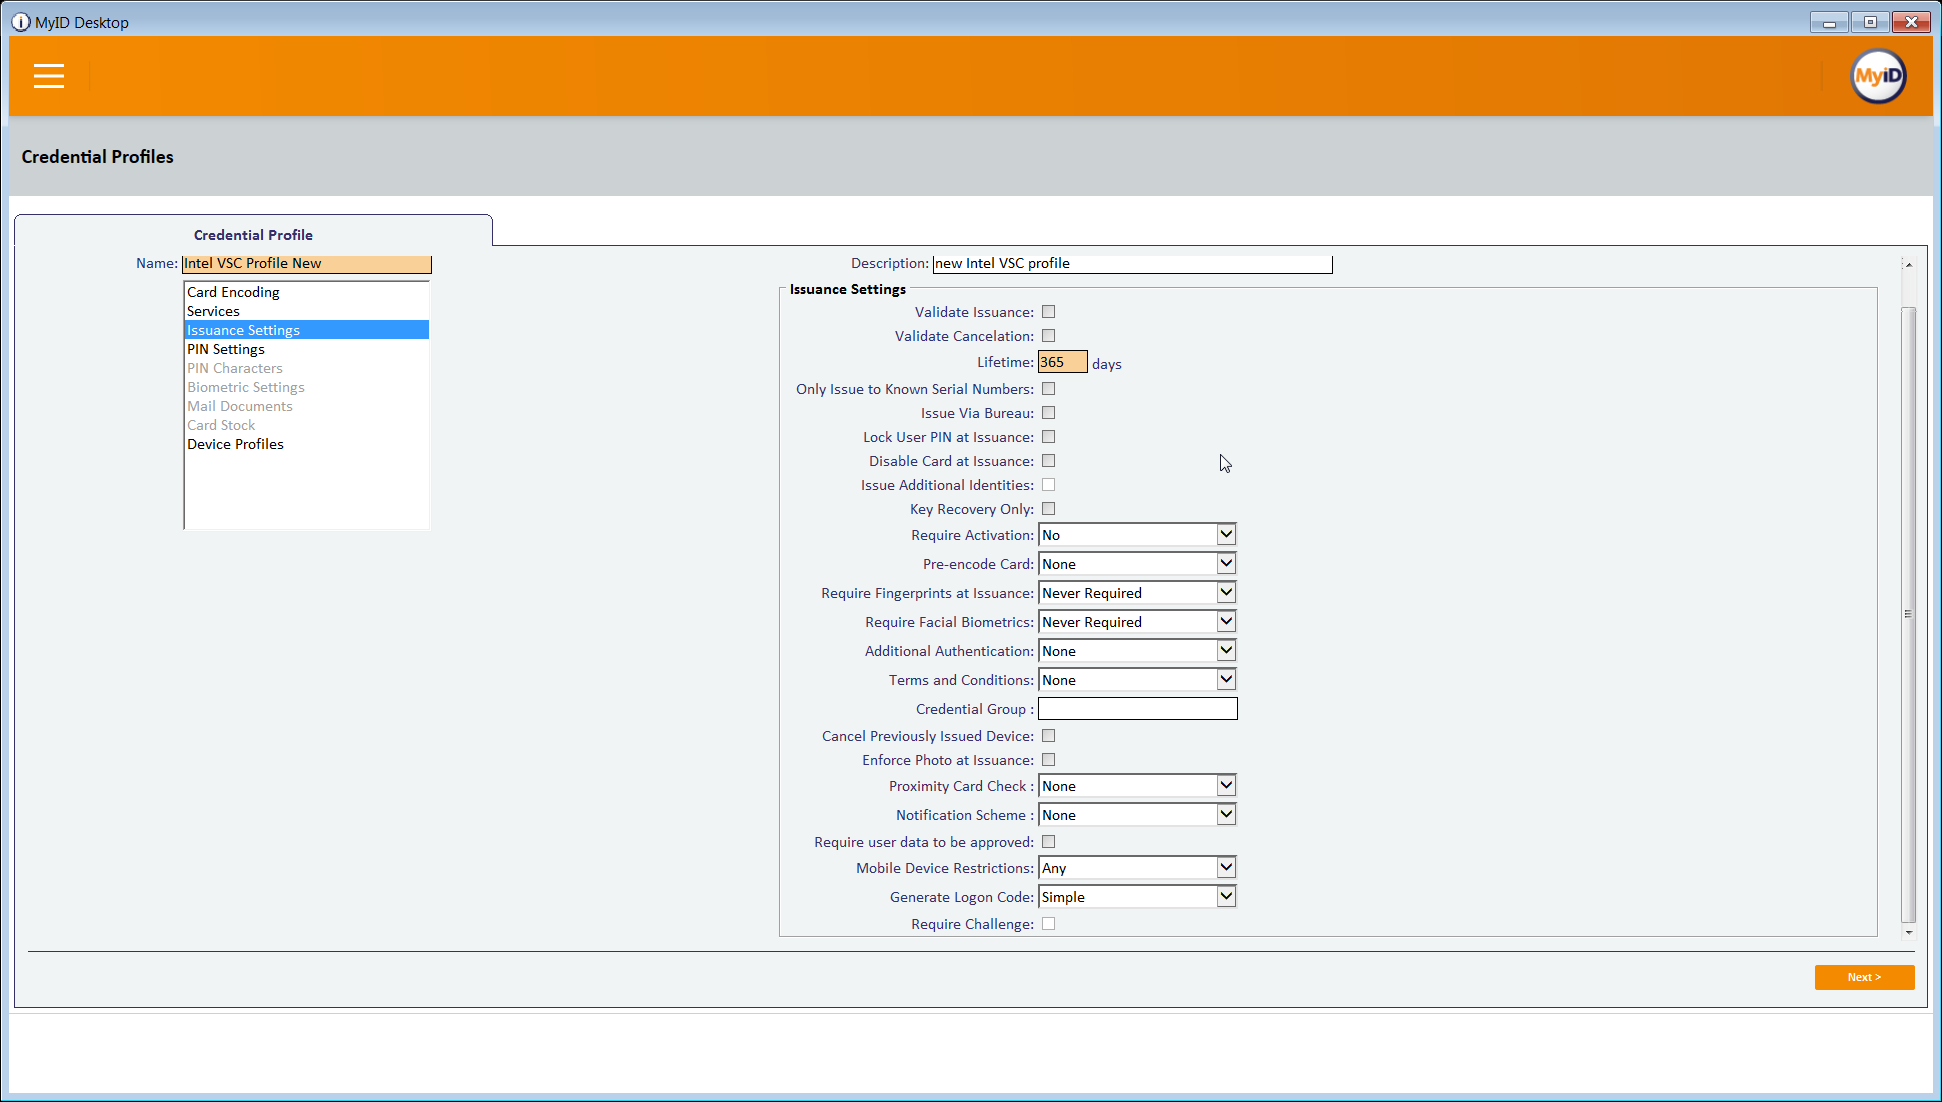
Select the Issuance Settings tab.
Set Require Activation to No.
Set Pre-encode Card to None.
Set Require Fingerprints at Issuance to Never Required.
Set Require Facial Biometrics to Never Required.
Set Additional Authentication to None.
Set Terms and Conditions to None.
Set Proximity Card Check to None.
Set Notification Scheme to None.
Uncheck all boxes.
Set Mobile Device Restrictions to Any.
Set Generate Logon Code to Simple.
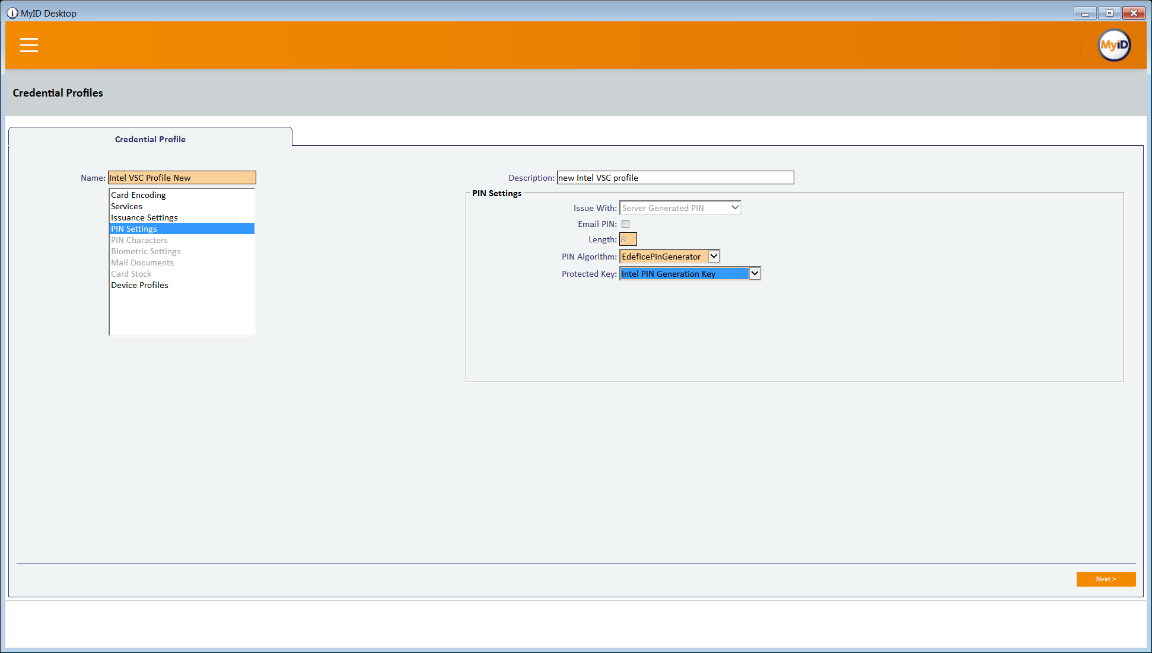
Select the PIN Settings tab.
For PIN Algorithm, select EdeficePinGenerator.
For Protected Key, select the PIN generation key created earlier.
Select the Device Profiles tab.
For Card Format, select PIVDerivedCredential.xml.
Click Next.
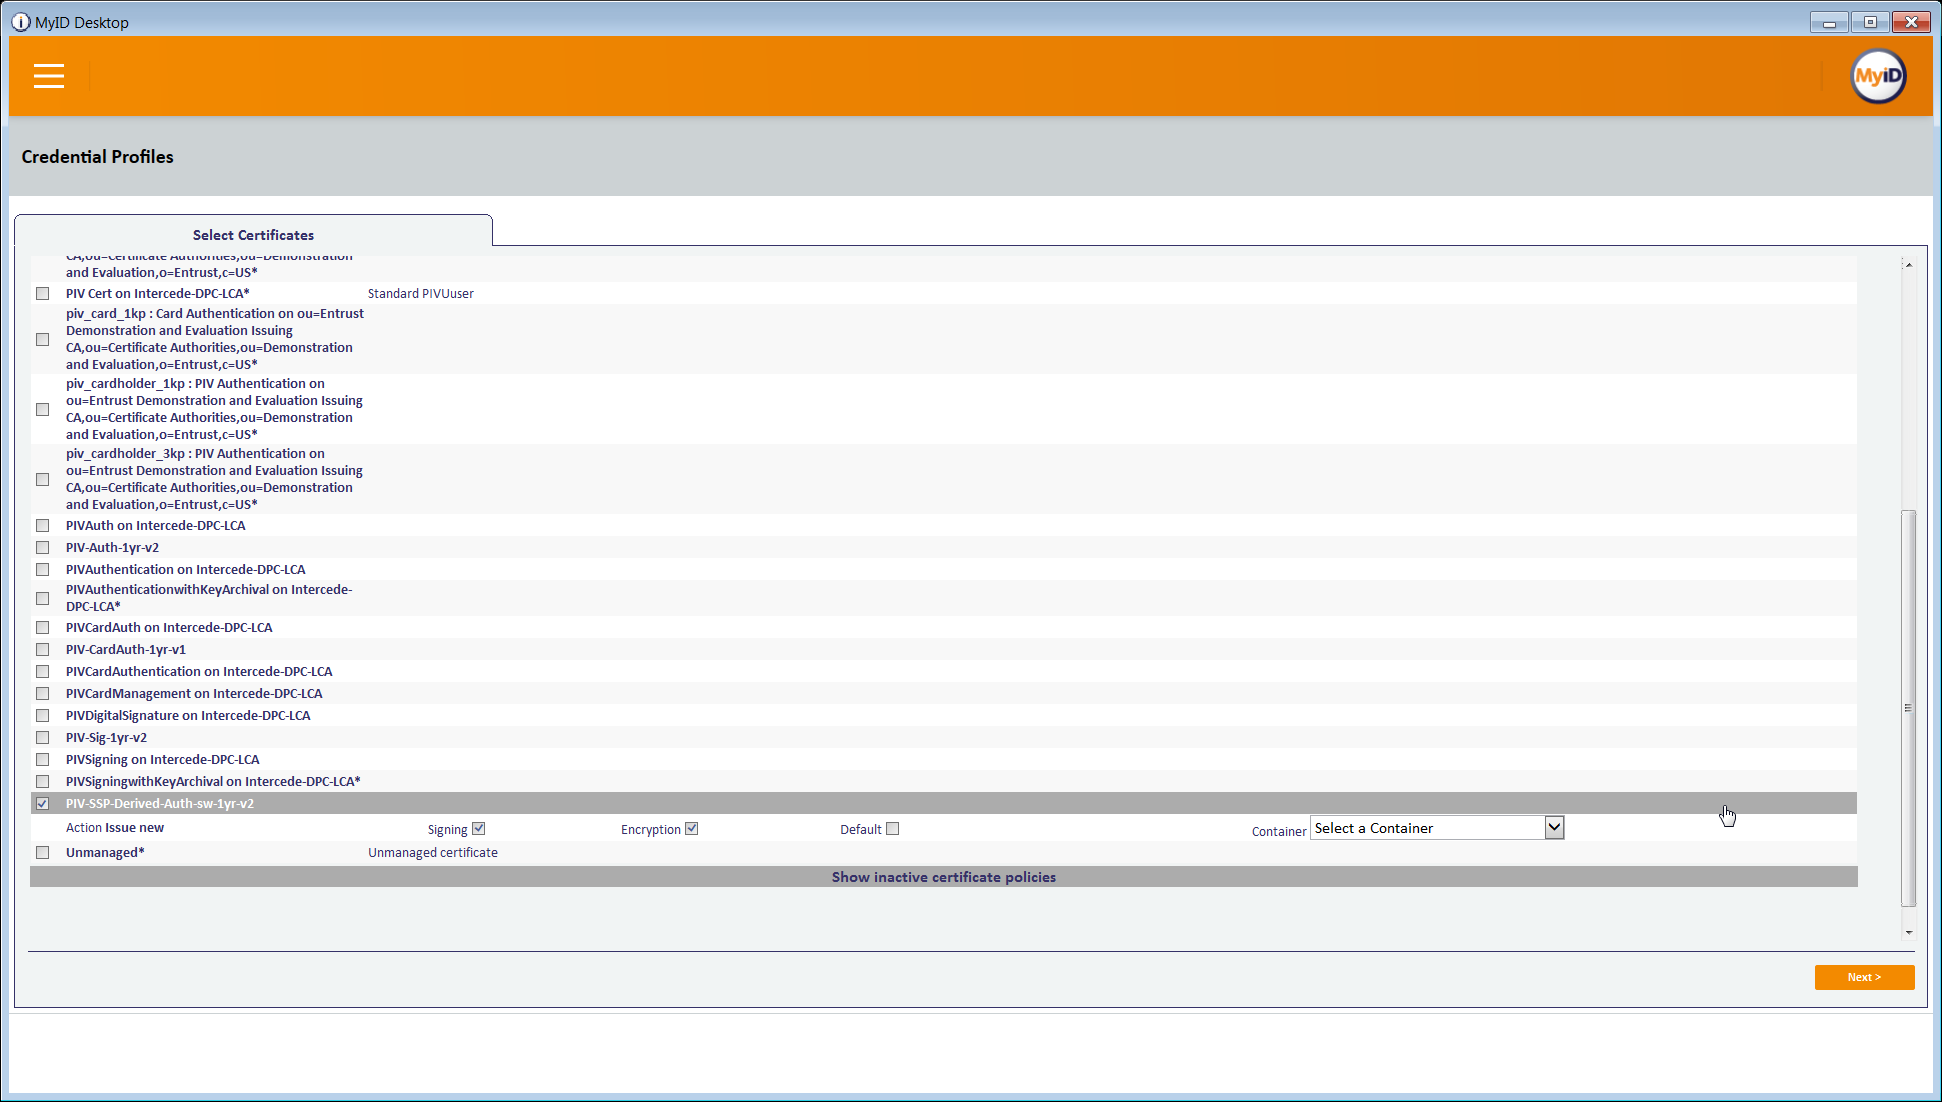
Select the certificates to be issued with the VSC.
Click Next.
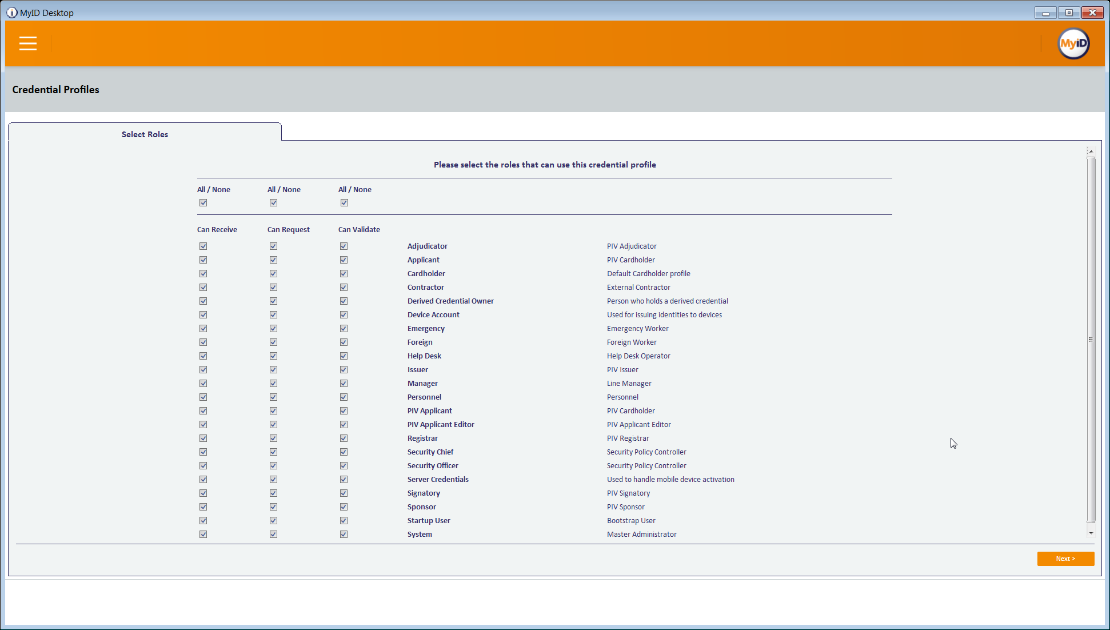
Select the roles that are allowed to use this profile.
Click Next.
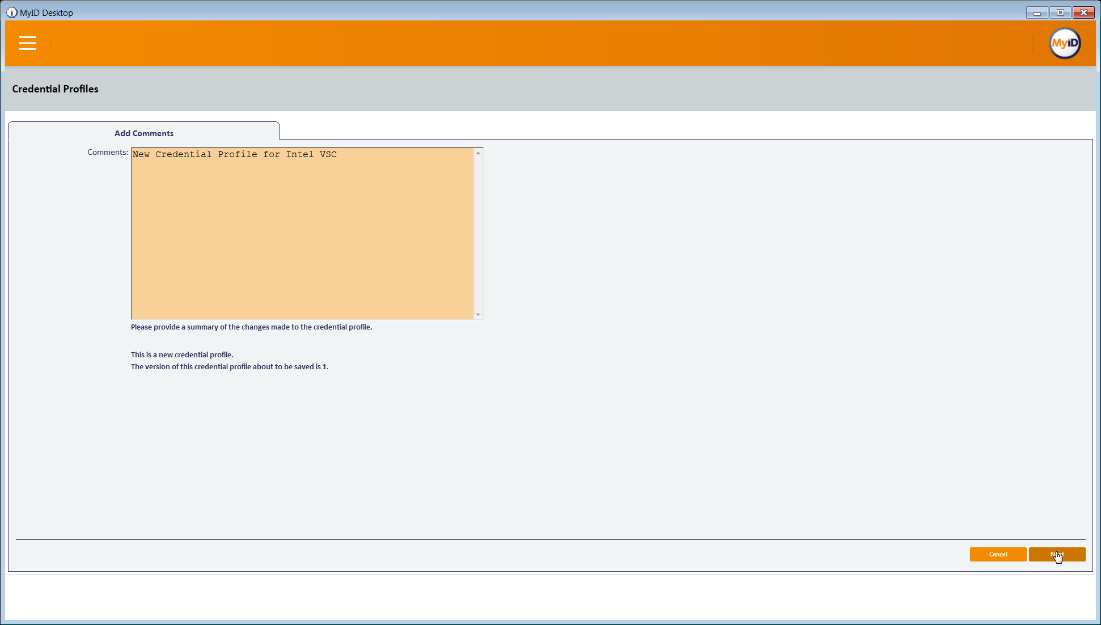
Enter a description and click Next.
2.2.8. DPC Life-Cycle Workflows
This section details the steps to perform issuance and termination of the DPC by using the MyID CMS. Issuance is started from the MyID Self-Service Kiosk application, while termination uses the MyID Desktop administration application.
2.2.8.1. Mobile Device Issuance Workflow
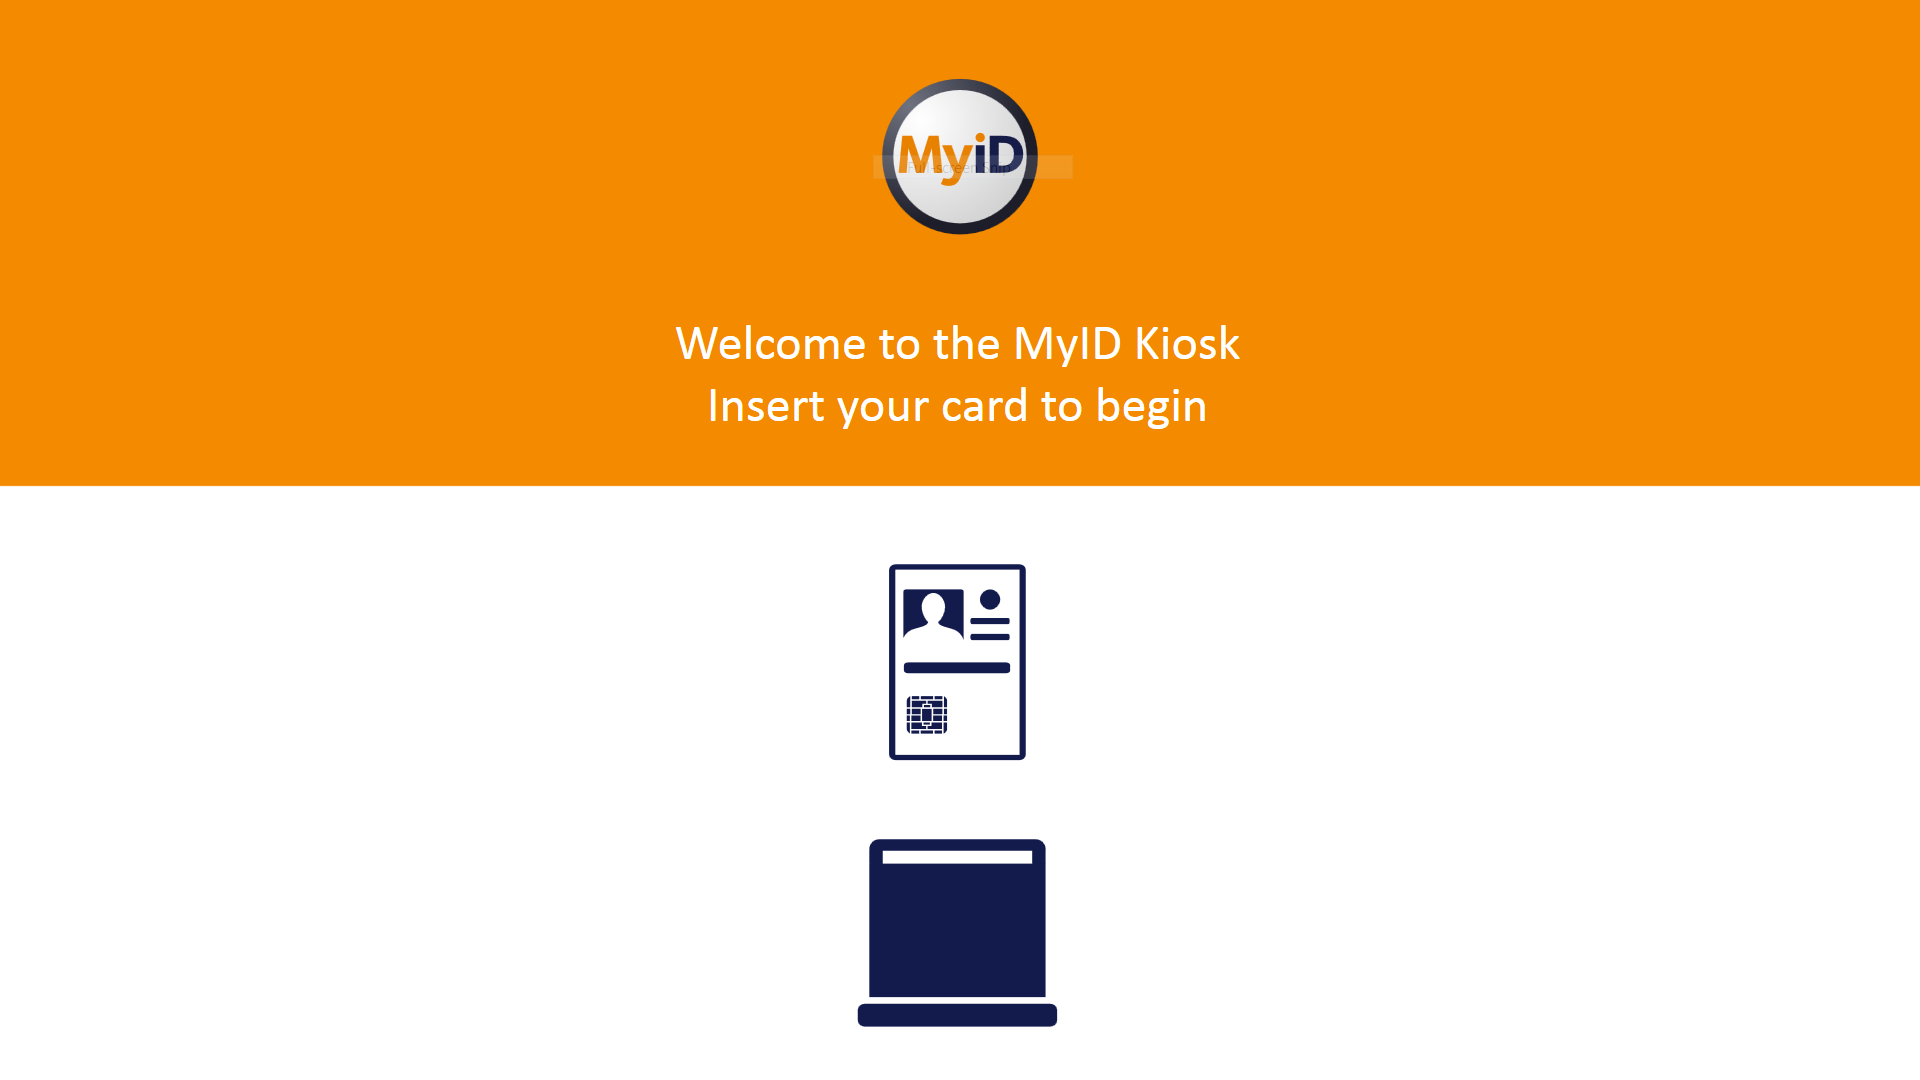
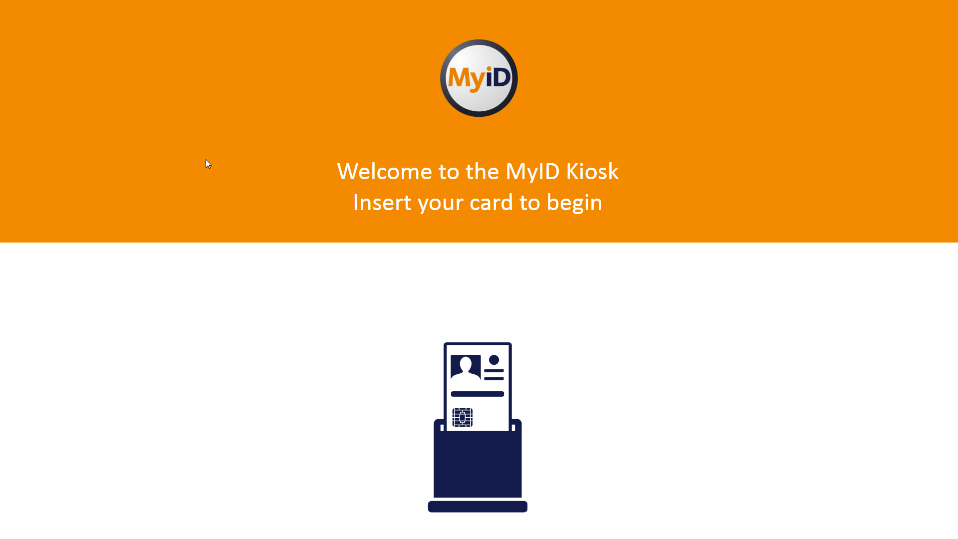
The following steps are performed by the DPC Applicant by using the MyID Self-Service Kiosk and the MyID Identity Agent application on the target mobile device.
At the Welcome screen of the MyID Self-Service Kiosk, insert your PIV Card into the card reader.
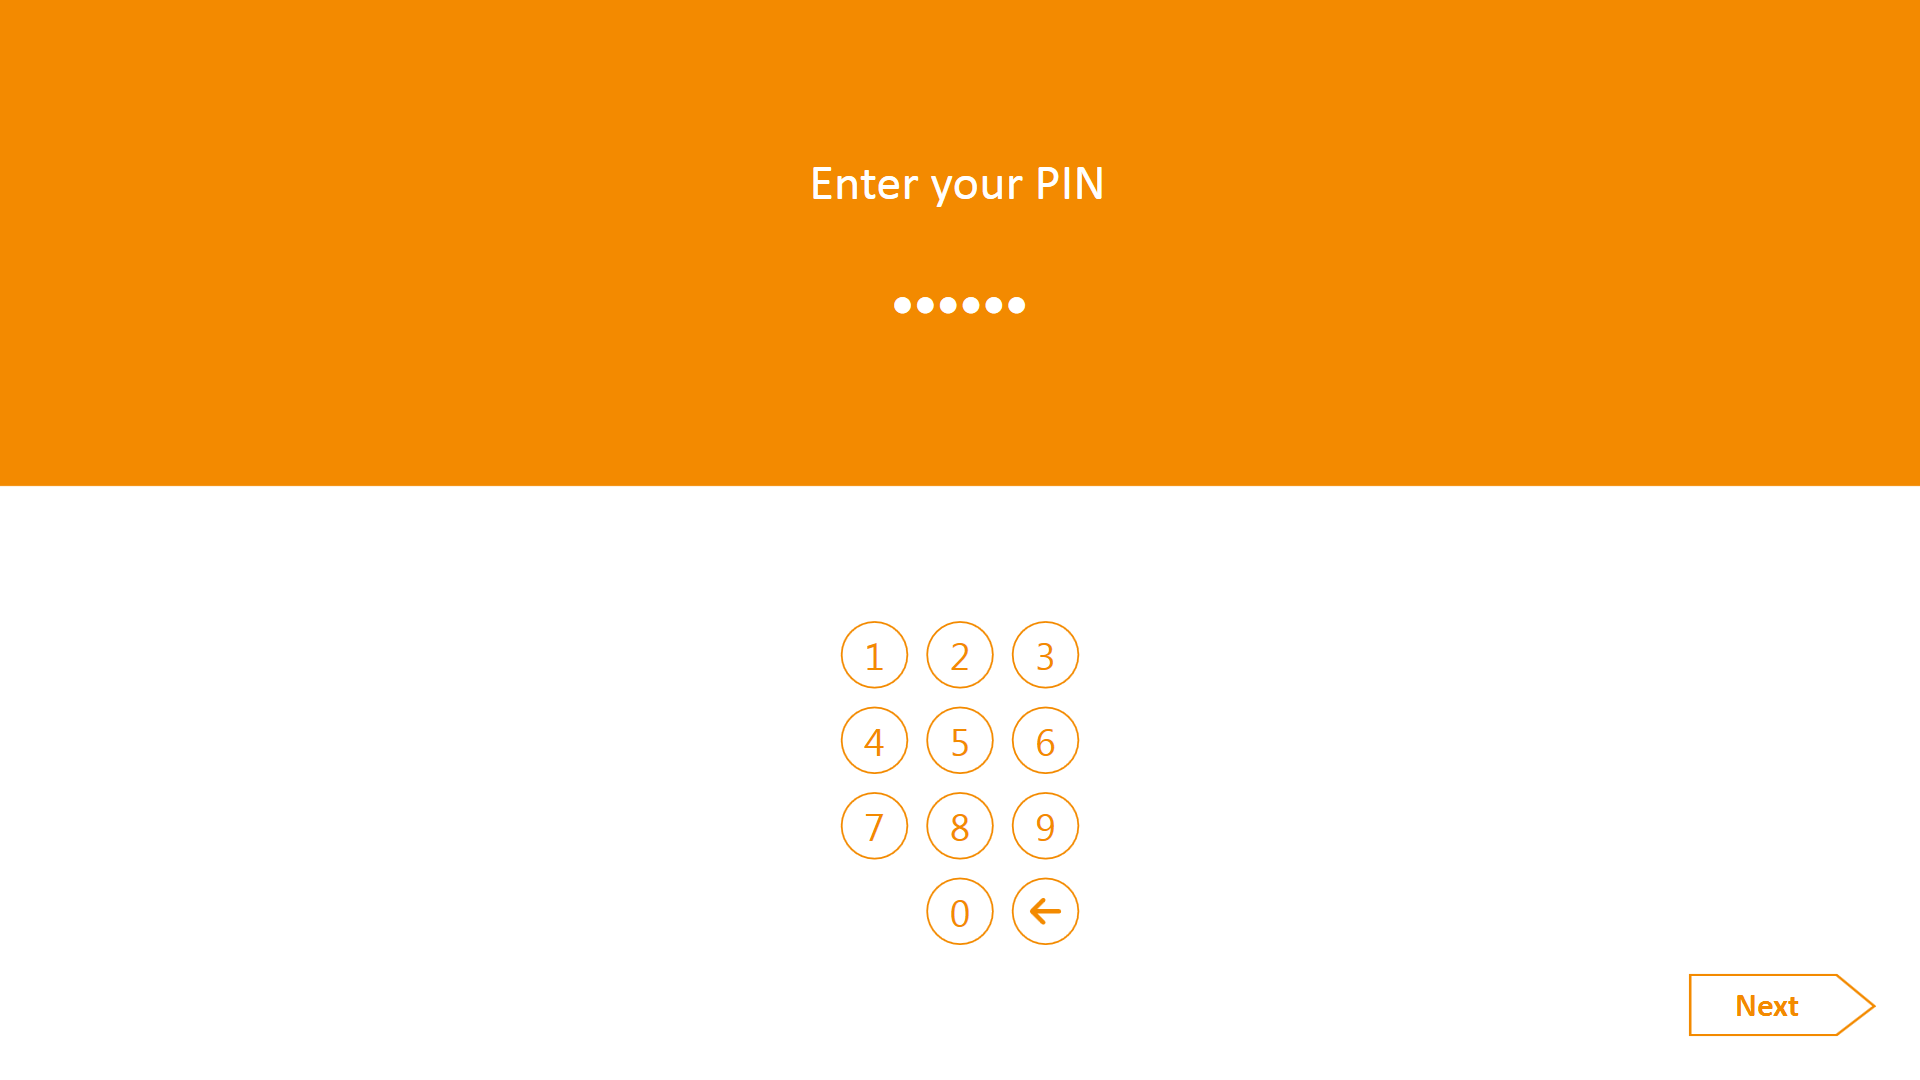
On the Enter your PIN screen:
Enter the PIN used to activate the inserted PIV Card.
Select Next.
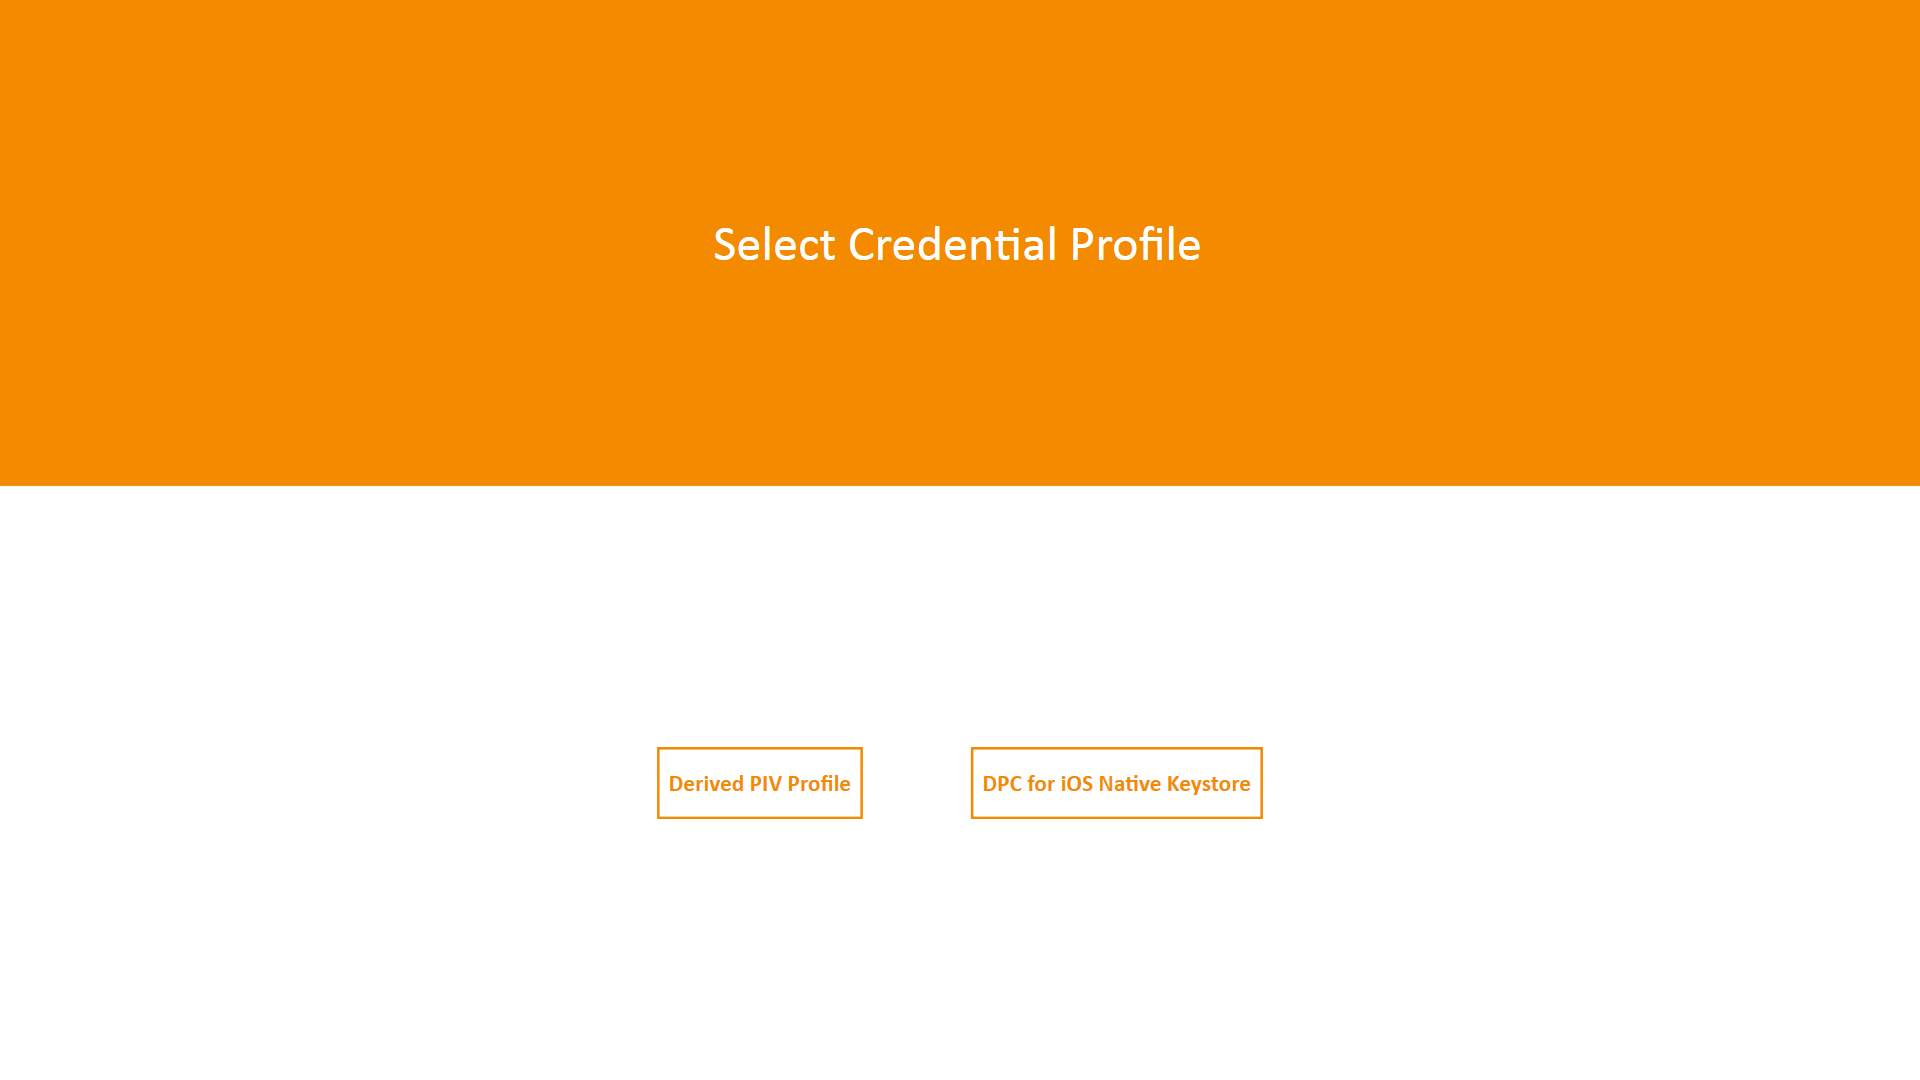
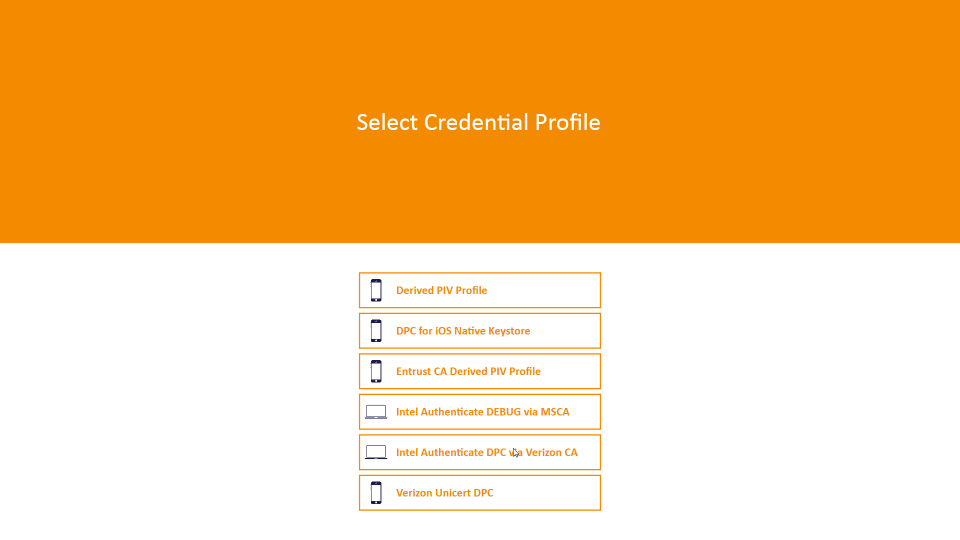
On the Select Credential Profile screen:
To provision the DPC to the MyID software token, select Derived PIV Profile.
To provision the DPC to the iOS Secure Enclave hardware-backed token, select DPC for Native iOS Keystore.
The MyID Self-Service Kiosk will display a QR code; the remaining steps are completed by using the MyID Identity Agent application on the target mobile device.
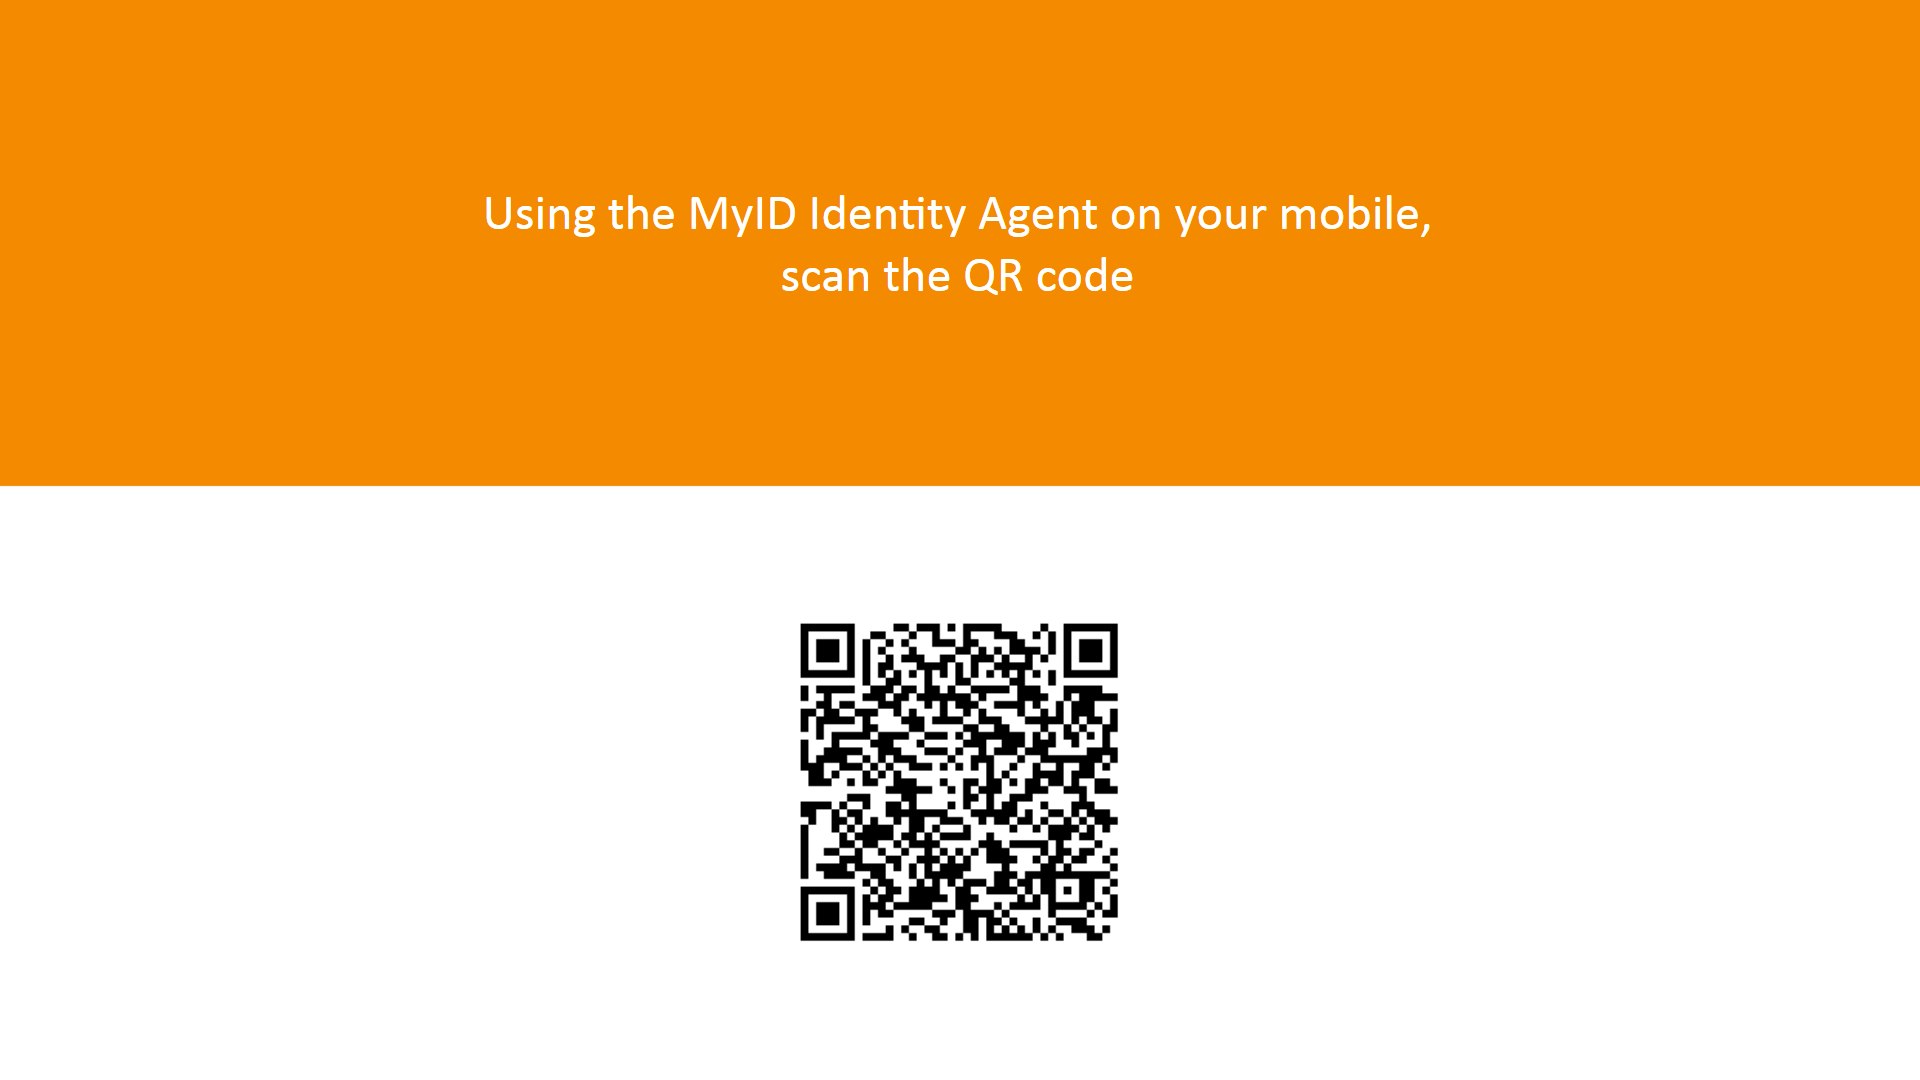
Launch MyID Identity Agent.
On the initial screen, under Actions, tap Scan QR Code.
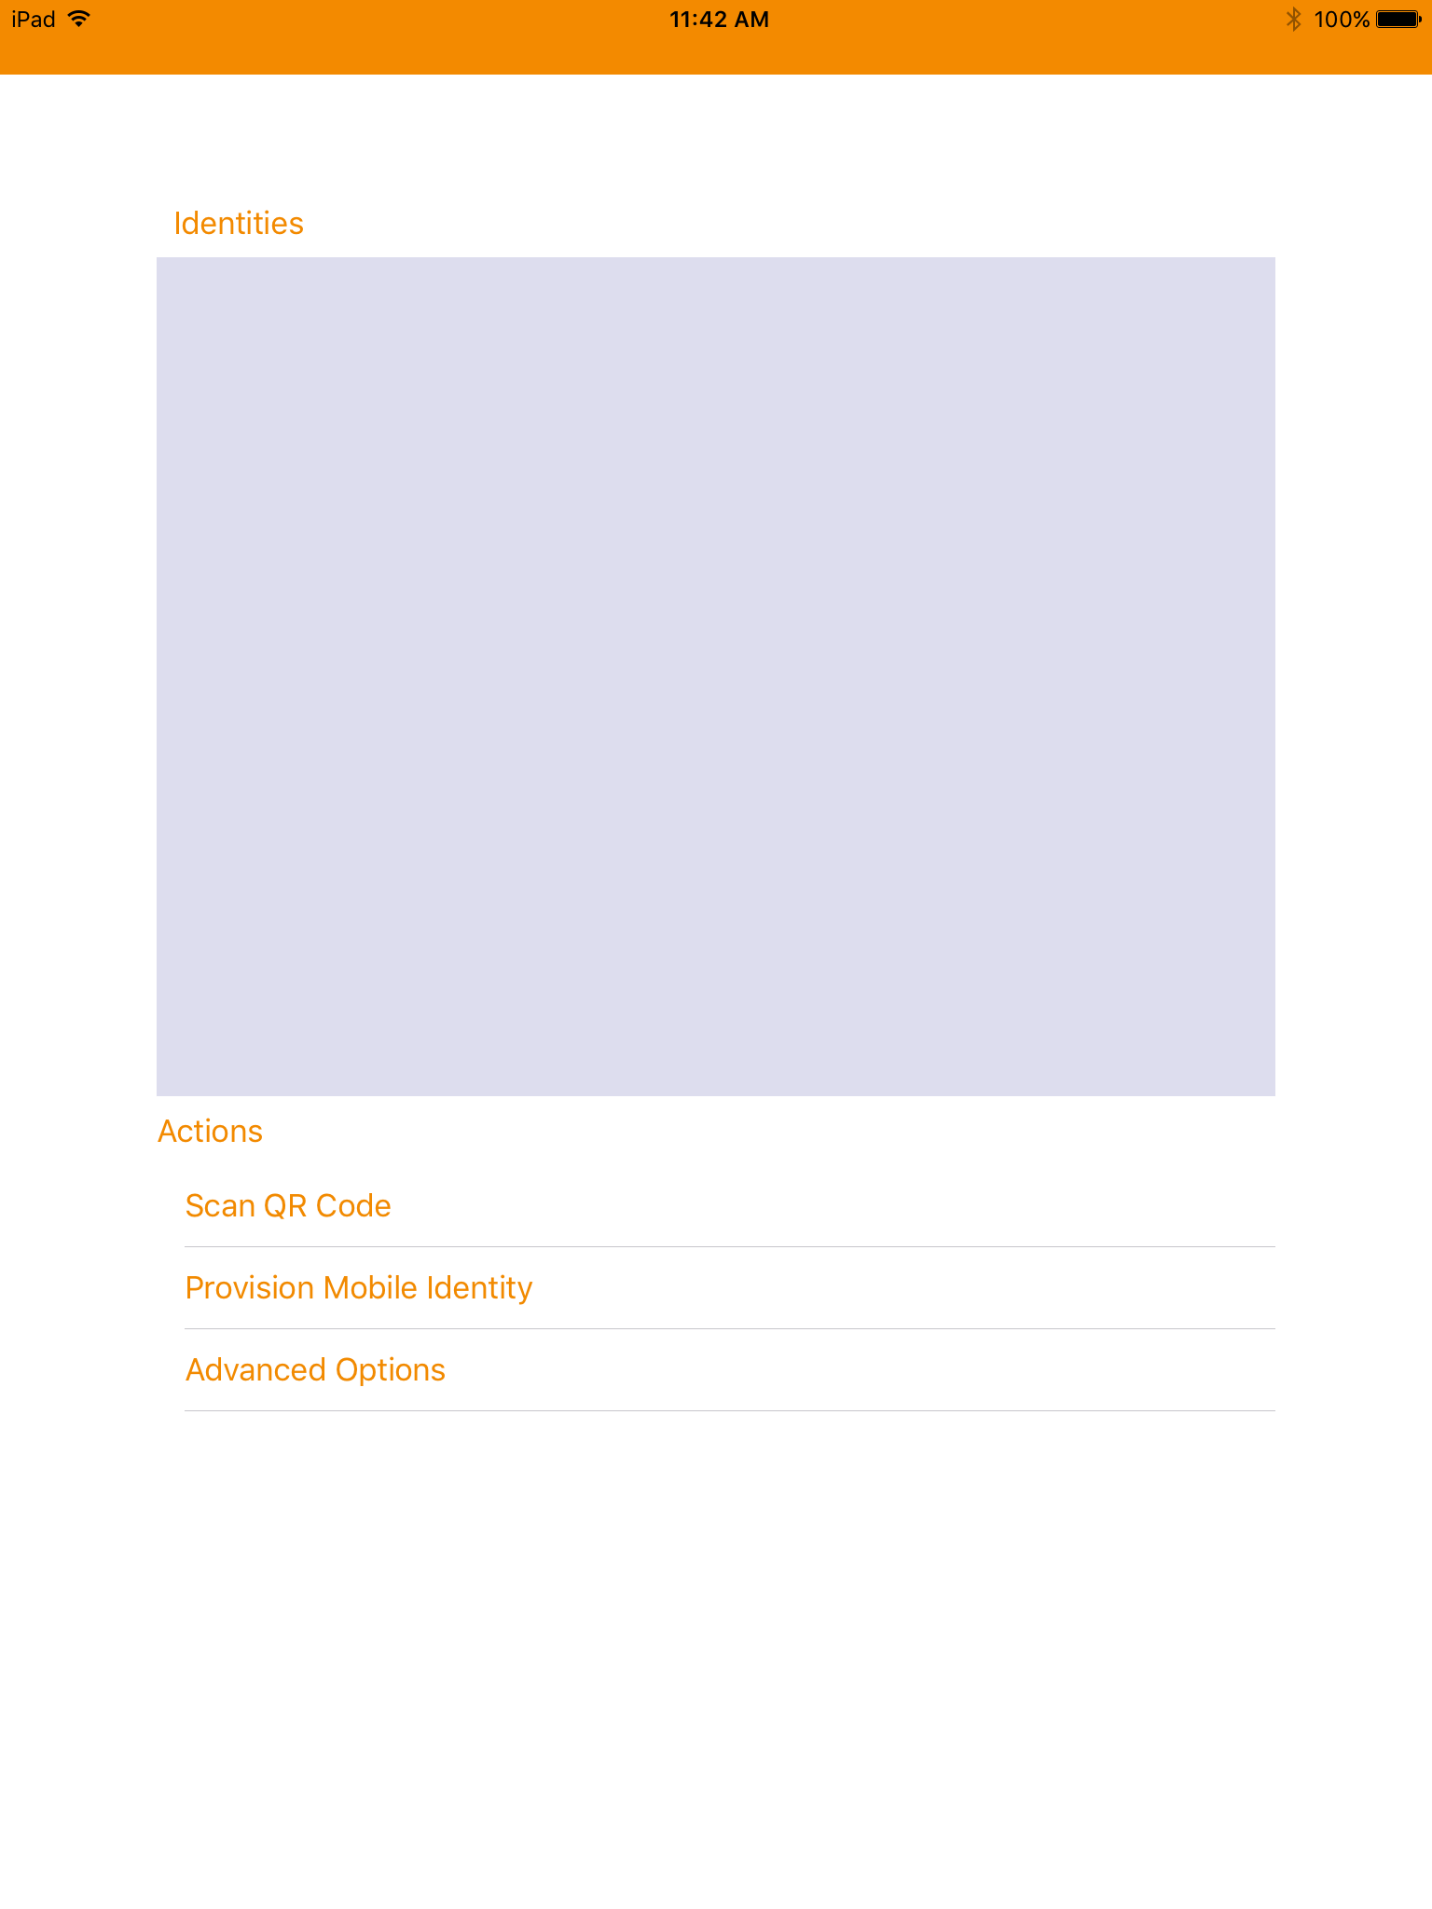
Use the device camera to capture the QR code displayed by the MyID Self-Service Kiosk.

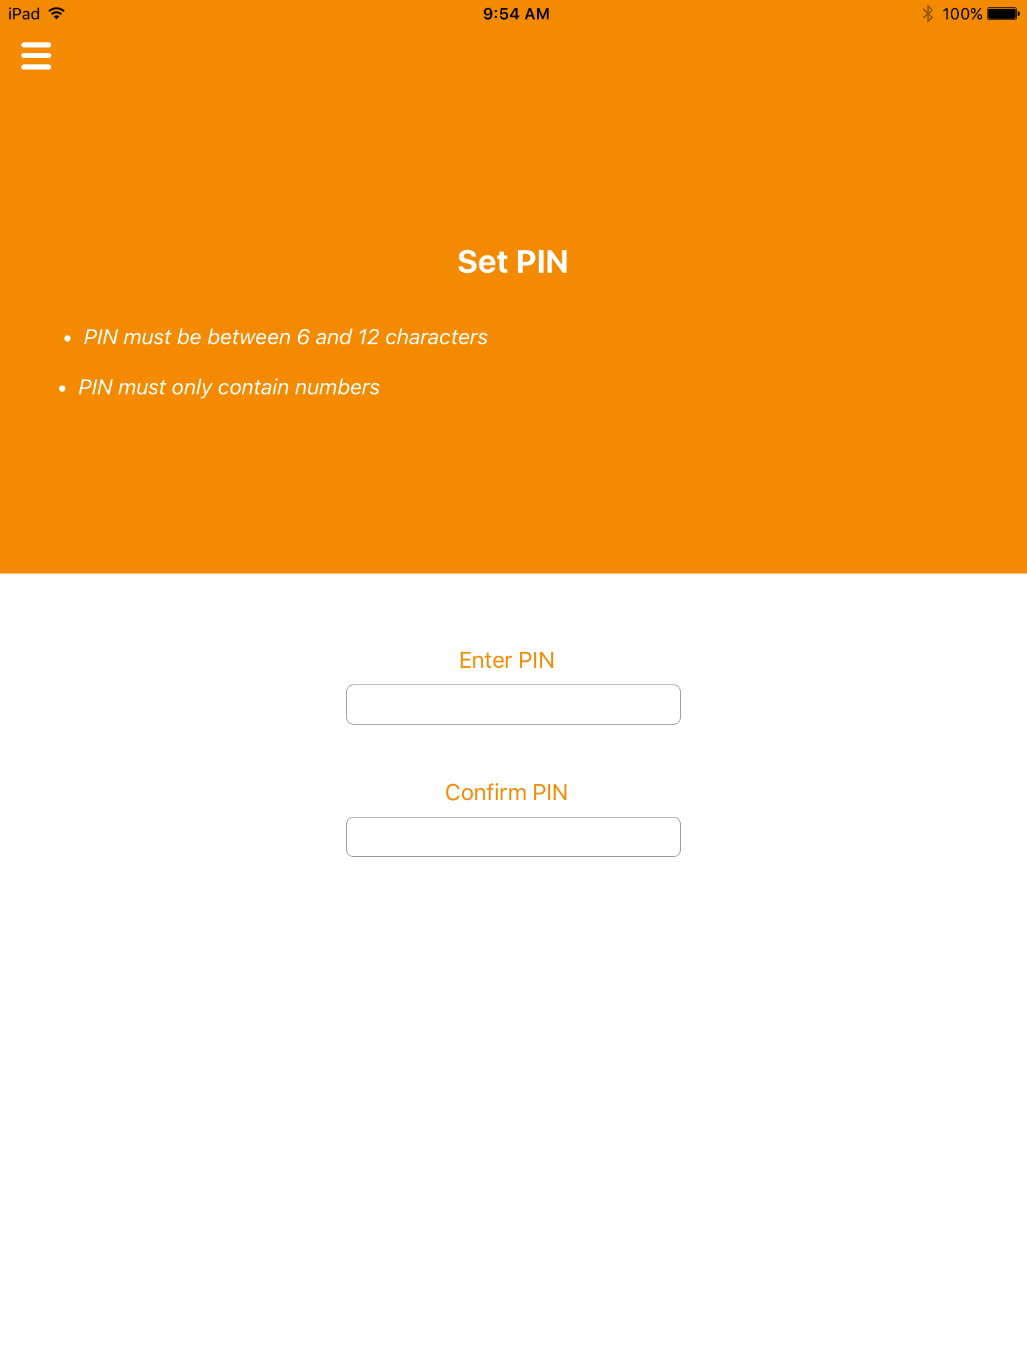
On the Set PIN screen:
In the Enter PIN field, enter a numeric PIN that will be used to activate the DPC.
In the Confirm PIN field, enter the same numeric PIN.
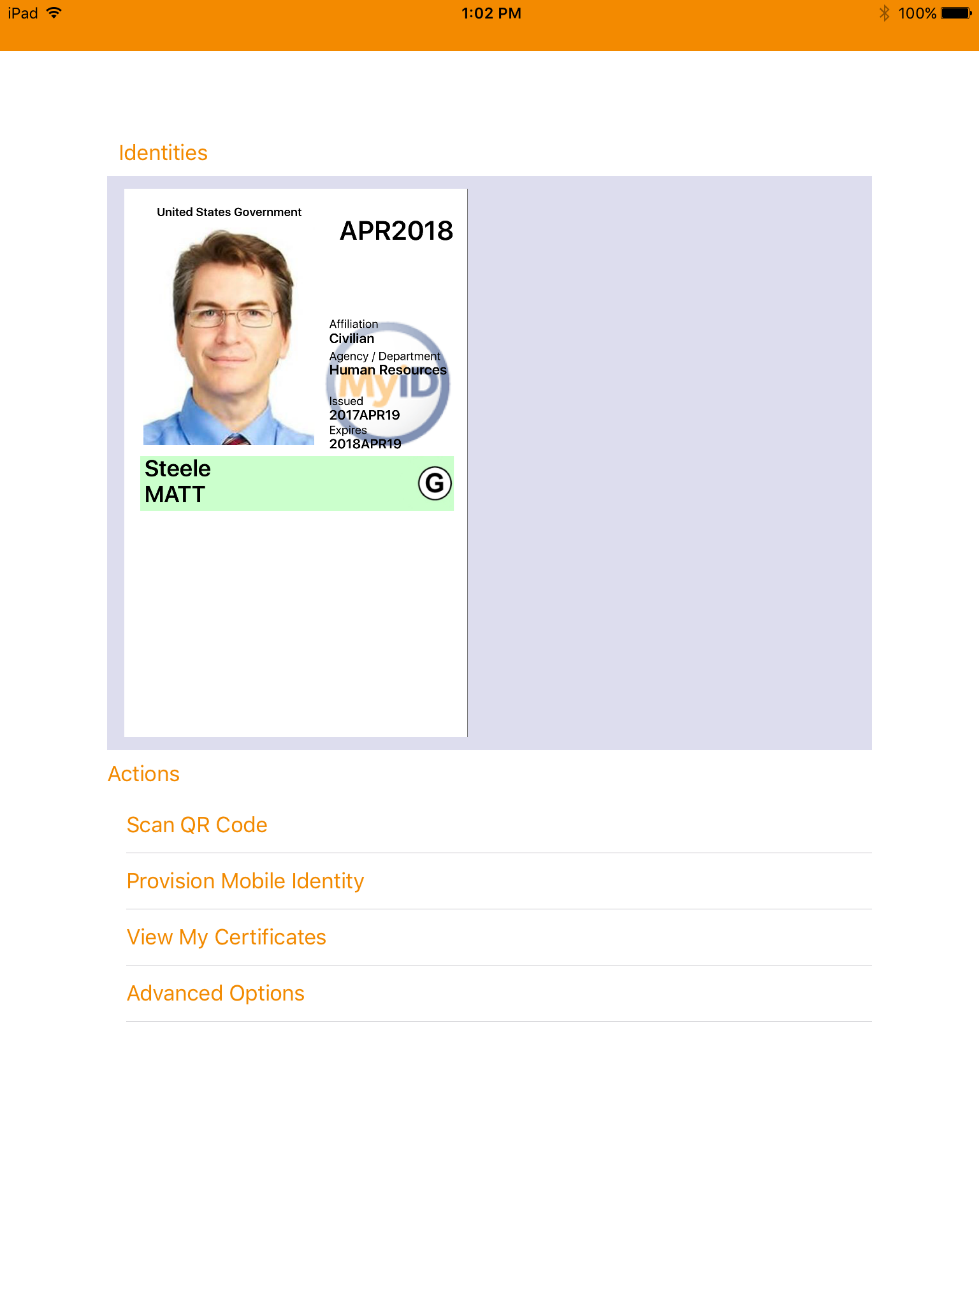
If DPC provisioning was successful, the Identities screen will provide a visual representation of information for the DPC subscriberʼs linked PIV Card.
2.2.8.2. Intel Authenticate Issuance Workflow
2.2.8.2.1. Requesting a DPC for Intel VSC
Go to a MyID Kiosk.
Insert a PIV Card.
Enter the PIN for the PIV Card.

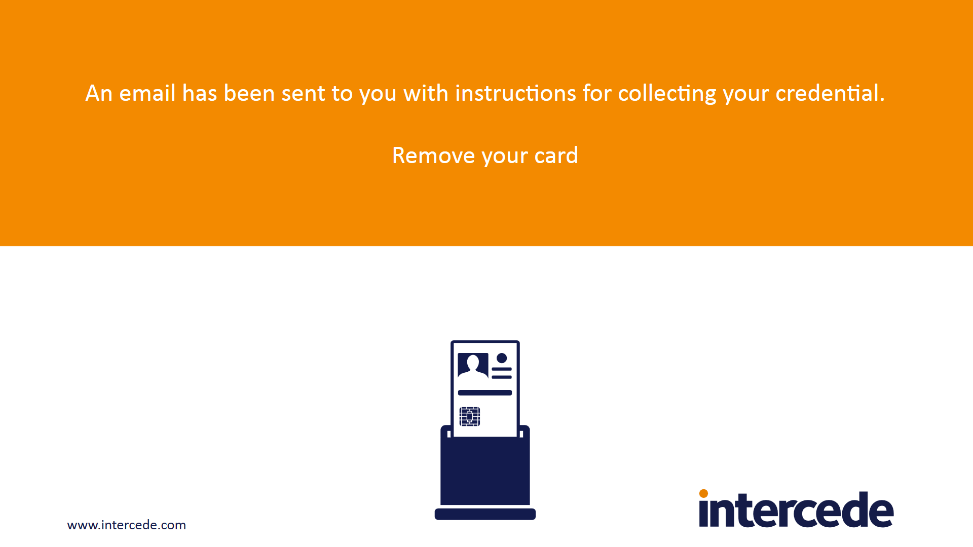
Select the profile created for Derived PIV. An email will be sent to the user with a onetime code for collection.
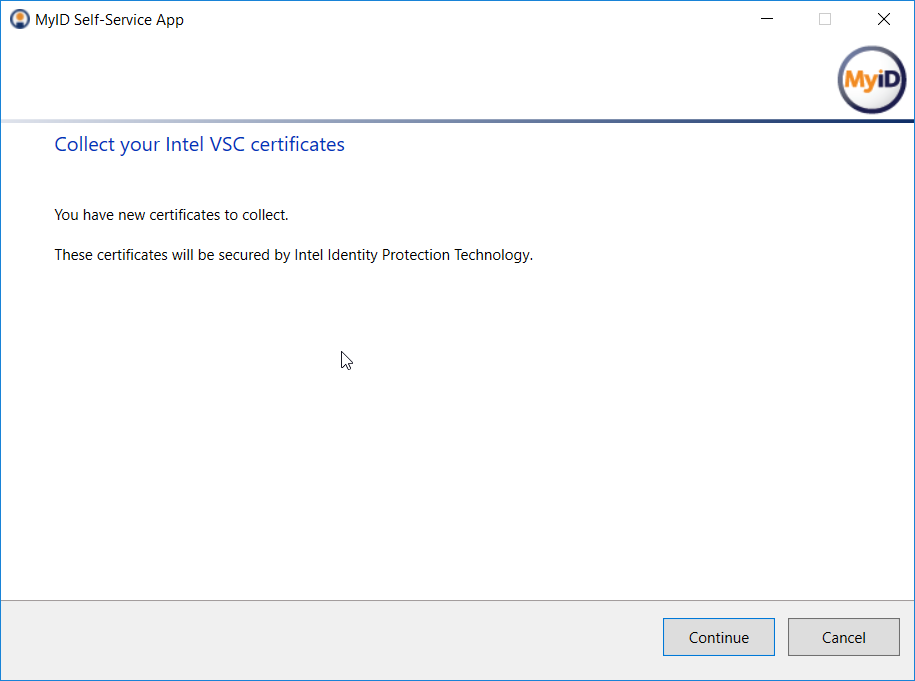
2.2.8.2.2. Collecting the DPC
The following procedures will request and install the DPC in the Intel Authenticate protected token. Note that the DPC will be protected by the enrollment factors set in Section 2.2.5.5.
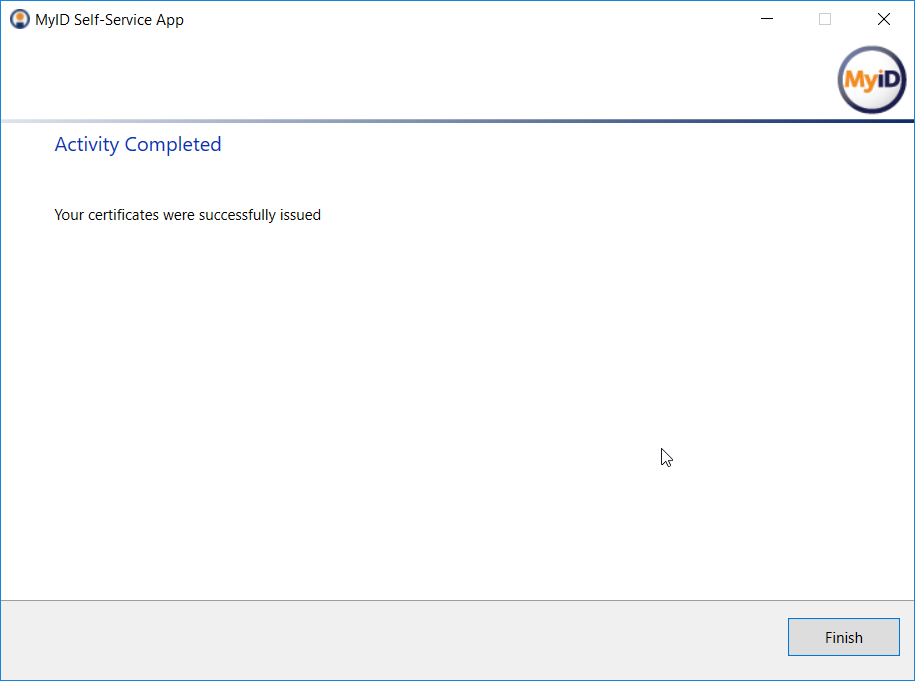
On the client machine, open the MyID Self-Service Application with the parameters
/nopopupand/iptonly.$ MyIDApp.exe /nopopup /iptonlyClick Continue.
Enter the Logon Code from the email.
Click Continue.
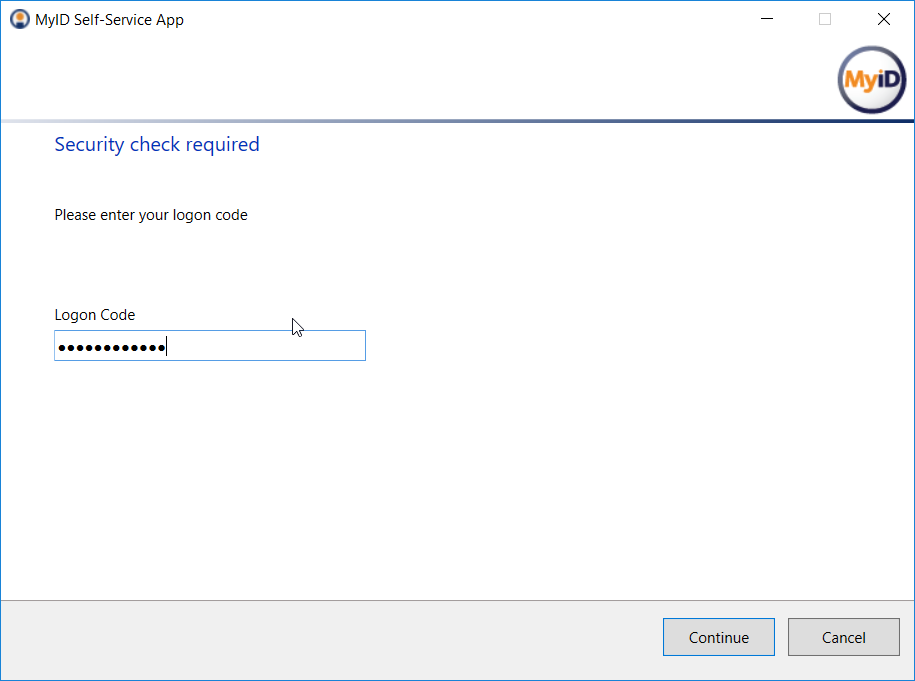
Click Finish after the certificates are successfully collected.
2.2.8.3. Maintenance Workflow
Changes to a DPC subscriberʼs PIV Card that would result in a rekey or reissuance (e.g., official name change) require the subscriber to repeat the initial issuance workflow as described in the previous section. The issued DPC will replace any existing DPC in the Identity Agent container.
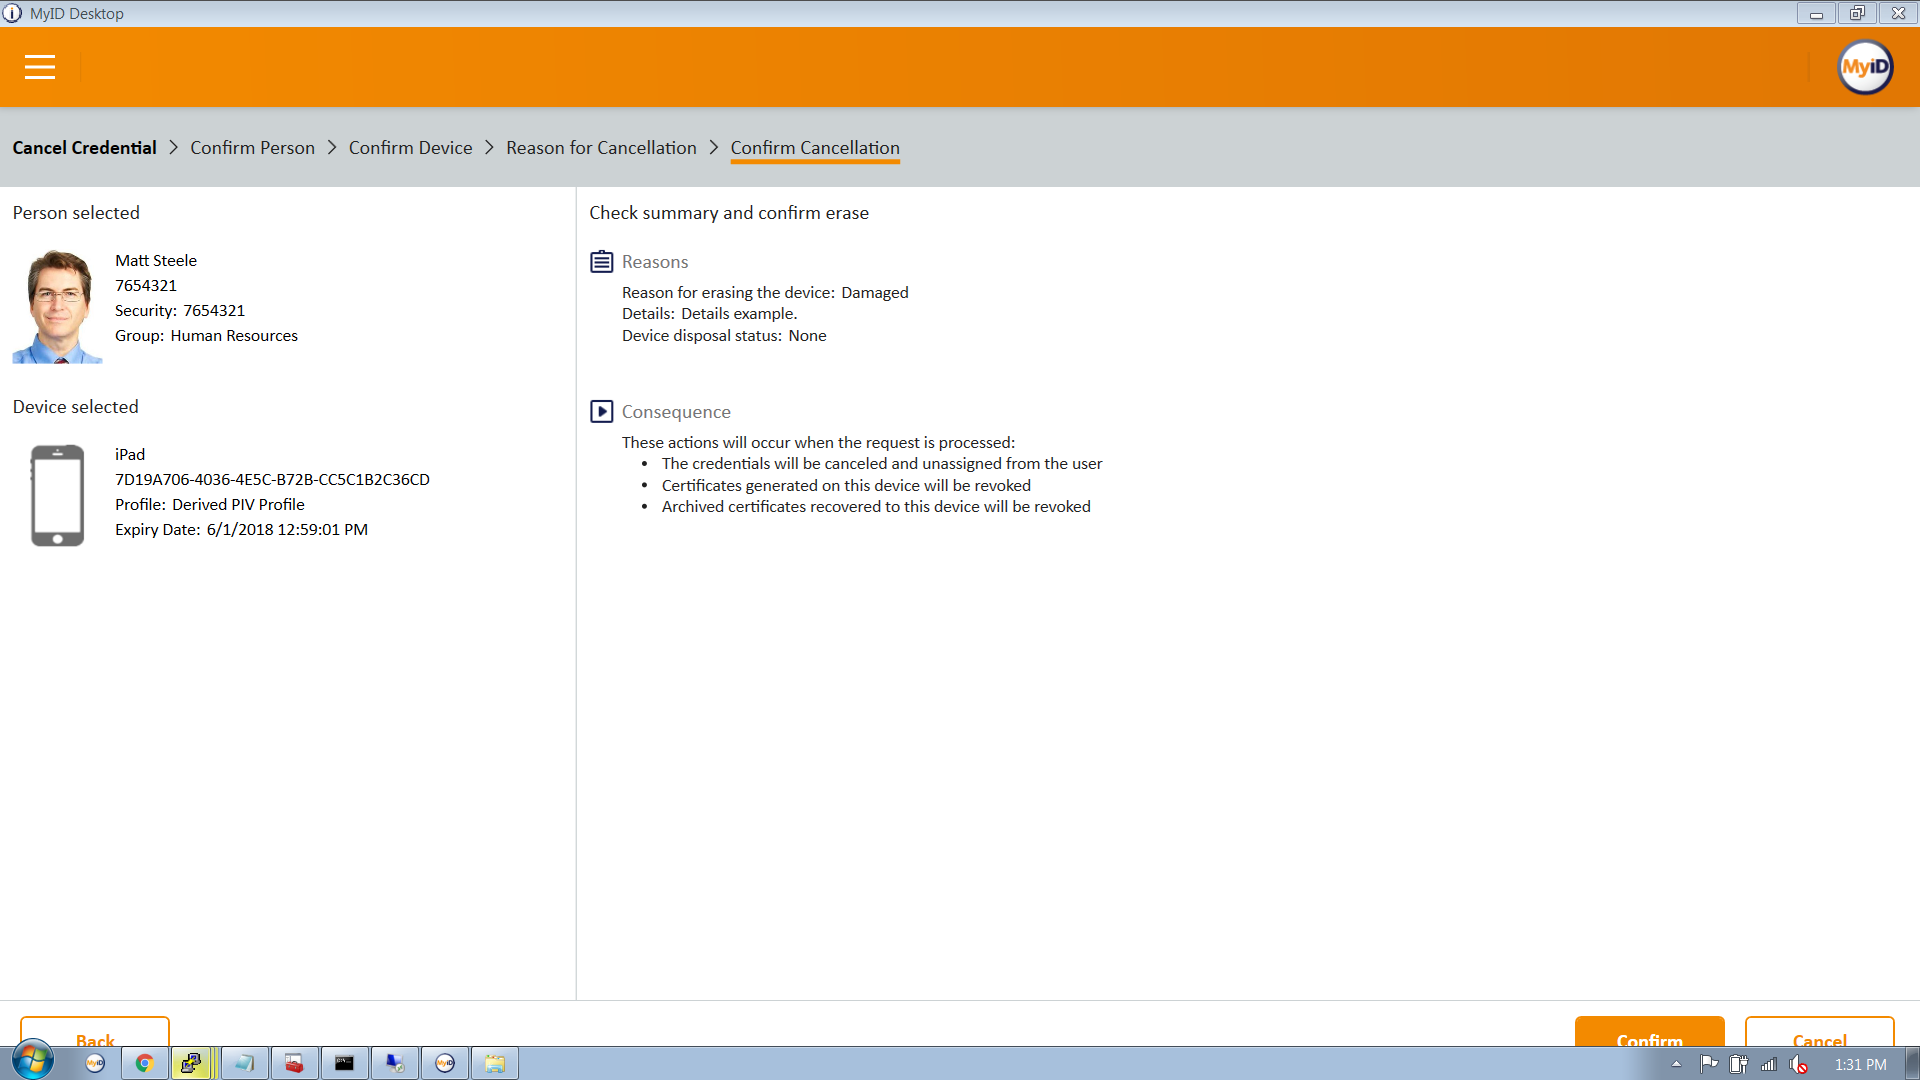
2.2.8.4. Termination Workflow
Select the target device associated with the DPC subscriber that will be terminated.
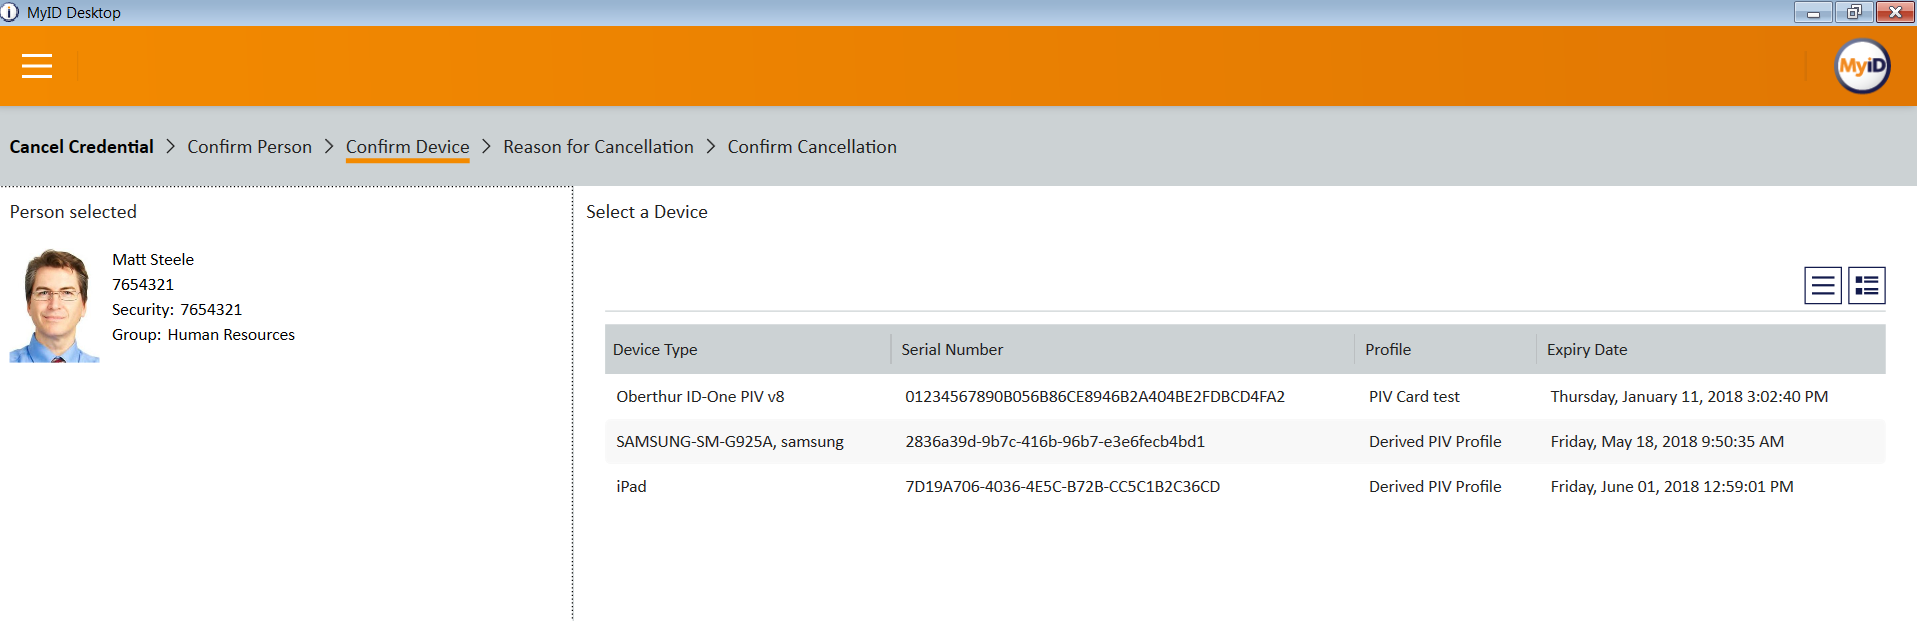
Select a reason for termination, and enter any other required information for policy compliance.
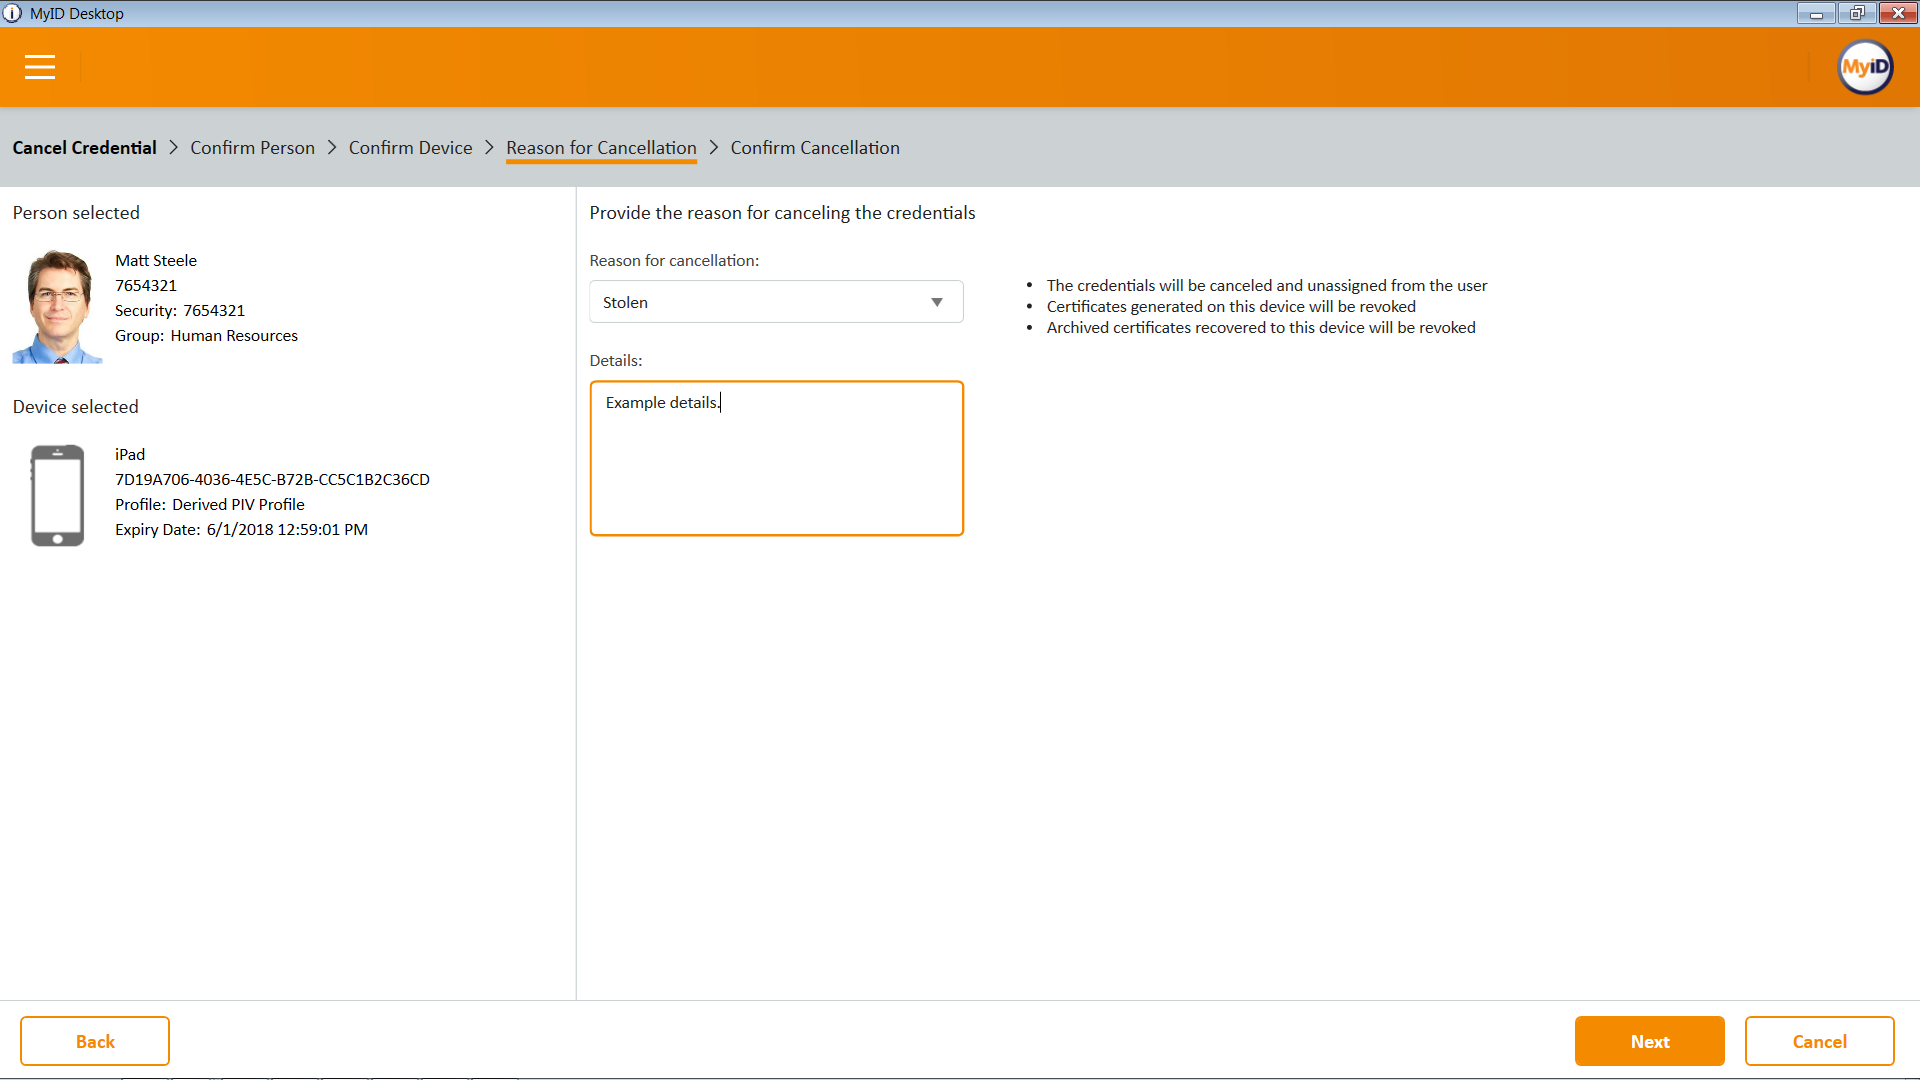
Click Next.
Confirm the termination of the DPC.
Appendix A List of Acronyms
| AD | Active Directory |
| ADFS | Active Directory Federation Services |
| CA | Certificate Authority |
| CMS | Credential Management System |
| DMZ | Demilitarized Zone |
| DN | Distinguished Name |
| DPC | Derived PIV Credential |
| EMM | Enterprise Mobility Management |
| GPO | Group Policy Object |
| IDAM | Identity and Access Management |
| IDG | Identity Guard |
| IDMS | Identity Management System |
| IIS | Internet Information Services |
| IT | Information Technology |
| JTK | Java Tool Kit |
| LDAP | Lightweight Directory Access Protocol |
| NACI | National Agency Check with Inquiries |
| NCCoE | National Cybersecurity Center of Excellence |
| NIST | National Institute of Standards and Technology |
| OFW | Outer Firewall |
| OID | Object Identifier |
| OS | Operating System |
| OU | Organizational Unit |
| PIN | Personal Identification Number |
| PIV | Personal Identity Verification |
| PKCS | Public Key Cryptography Standards |
| PKI | Public Key Infrastructure |
| QR | Quick Response (code) |
| RSA | Rivest-Shamir-Adleman |
| SCEP | Simple Certificate Enrollment Protocol |
| SP | Special Publication |
| SQL | Structured Query Language |
| SSL | Secure Sockets Layer |
| SSP | Shared Service Provider |
| TLS | Transport Layer Security |
| UPI | UniCERT Programmatic Interface |
| UPN | User Principal Name |
| URL | Universal Resource Locator |
| VLAN | Virtual Local Area Network |
| VSC | Virtual Smart Card |
| WAN | Wide Area Network |
| WMI | Windows Management Instrumentation |
| WSVC | World Wide Web Publishing Service |