NIST SPECIAL PUBLICATION 1800-11C
Data Integrity
Recovering from Ransomware and Other Destructive Events
Volume C:
How-to Guides
Timothy McBride
National Cybersecurity Center of Excellence
National Institute of Standards and Technology
Michael Ekstrom
Lauren Lusty
Julian Sexton
Anne Townsend
The MITRE Corporation
McLean, VA
September 2017
DRAFT
DISCLAIMER
Certain commercial entities, equipment, products, or materials may be identified in this document in order to describe an experimental procedure or concept adequately. Such identification is not intended to imply recommendation or endorsement by NIST or NCCoE, nor is it intended to imply that the entities, equipment, products, or materials are necessarily the best available for the purpose.
National Institute of Standards and Technology Special Publication 1800-11c, Natl. Inst. Stand. Technol. Spec. Publ. 1800-11c, 384 pages, (September 2017), CODEN: NSPUE2
FEEDBACK
You can improve this guide by contributing feedback. As you review and adopt this solution for your own organization, we ask you and your colleagues to share your experience and advice with us.
Comments on this publication may be submitted to di-nccoe@nist.gov.
Public comment period: September 6, 2017 through November 6, 2017
All comments are subject to release under the Freedom of Information Act (FOIA).
NATIONAL CYBERSECURITY CENTER OF EXCELLENCE
The National Cybersecurity Center of Excellence (NCCoE), a part of the National Institute of Standards and Technology (NIST), is a collaborative hub where industry organizations, government agencies, and academic institutions work together to address businesses’ most pressing cybersecurity issues. This public-private partnership enables the creation of practical cybersecurity solutions for specific industries, as well as for broad, cross-sector technology challenges. Through consortia under Cooperative Research and Development Agreements (CRADAs), including technology partners—from Fortune 50 market leaders to smaller companies specializing in IT security—the NCCoE applies standards and best practices to develop modular, easily adaptable example cybersecurity solutions using commercially available technology. The NCCoE documents these example solutions in the NIST Special Publication 1800 series, which maps capabilities to the NIST Cyber Security Framework and details the steps needed for another entity to recreate the example solution. The NCCoE was established in 2012 by NIST in partnership with the State of Maryland and Montgomery County, Md.
To learn more about the NCCoE, visit https://nccoe.nist.gov. To learn more about NIST, visit https://www.nist.gov.
NIST CYBERSECURITY PRACTICE GUIDES
NIST Cybersecurity Practice Guides (Special Publication Series 1800) target specific cybersecurity challenges in the public and private sectors. They are practical, user-friendly guides that facilitate the adoption of standards-based approaches to cybersecurity. They show members of the information security community how to implement example solutions that help them align more easily with relevant standards and best practices and provide users with the materials lists, configuration files, and other information they need to implement a similar approach.
The documents in this series describe example implementations of cybersecurity practices that businesses and other organizations may voluntarily adopt. These documents do not describe regulations or mandatory practices, nor do they carry statutory authority.
ABSTRACT
Businesses face a near-constant threat of destructive malware, ransomware, malicious insider activities, and even honest mistakes that can alter or destroy critical data. These data corruption events could cause a significant loss to a company’s reputation, business operations, and bottom line.
These types of adverse events, that ultimately impact data integrity, can compromise critical corporate information including emails, employee records, financial records, and customer data. It is imperative for organizations to recover quickly from a data integrity attack and trust the accuracy and precision of the recovered data.
The National Cybersecurity Center of Excellence (NCCoE) at NIST built a laboratory environment to explore methods to effectively recover from a data corruption event in various Information Technology (IT) enterprise environments. NCCoE also implemented auditing and reporting IT system use to support incident recovery and investigations.
This NIST Cybersecurity Practice Guide demonstrates how organizations can implement technologies to take immediate action following a data corruption event. The example solution outlined in this guide encourages effective monitoring and detection of data corruption in standard, enterprise components as well as custom applications and data composed of open-source and commercially available components.
KEYWORDS
business continuity; data integrity; data recovery; malware; ransomware
ACKNOWLEDGMENTS
We are grateful to the following individuals for their generous contributions of expertise and time.
| Name | Organization |
|---|---|
| Steve Petruzzo | GreenTec USA |
| Steve Roberts | Hewlett Packard Enterprise |
| Dave Larimer | IBM Corporation |
| John Unthank | IBM Corporation |
| Jim Wachhaus | Tripwire |
| Donna Koschalk | Veeam Software Corporation |
| Brian Abe | The MITRE Corporation |
| Sarah Kinling | The MITRE Corporation |
| Josh Klosterman | The MITRE Corporation |
| Susan Urban | The MITRE Corporation |
| Mary Yang | The MITRE Corporation |
The Technology Partners/Collaborators who participated in this build submitted their capabilities in response to a notice in the Federal Register. Respondents with relevant capabilities or product components were invited to sign a Cooperative Research and Development Agreement (CRADA) with NIST, allowing them to participate in a consortium to build this example solution. We worked with:
| Technology Partner/Collaborator | Build Involvement |
|---|---|
| GreenTec USA | GreenTec WORMdisk, v151228 |
| Hewlett Packard Enterprise | HPE ArcSight ESM, v6.9.1 HPE ArcSight Connector, v7.4.0 |
| IBM Corporation | IBM Spectrum Protect, v8.1.0 |
| Tripwire | Tripwire Enterprise, v8.5 Tripwire Log Center, v7.2.4.80 |
| Veeam Software Corporation | Veeam Availability Suite, v9.5 |
1. Introduction
The following guides show IT professionals and security engineers how we implemented this data integrity solution example. We cover all the products employed in this reference design. We do not recreate the product manufacturers’ documentation, which is presumed to be widely available. Rather, these guides show how we integrated the products into our environment.
Note: These are not comprehensive tutorials. There are many possible service and security configurations for these products that are out of scope for this reference design.
1.1. Practice Guide Structure
This NIST Cybersecurity Practice Guide demonstrates a standards-based reference design and provides users with the information they need to replicate the data integrity solution. This reference design is modular and can be deployed in whole or in parts.
This guide contains three volumes:
- NIST SP 1800-11a: Executive Summary
- NIST SP 1800-11b: Approach, Architecture, and Security Characteristics – what we built and why
- NIST SP 1800-11c: How-To Guides – instructions for building the example solution (you are here)
Depending on your role in your organization, you may use this guide in different ways:
Business decision makers, including chief security and technology officers, will be interested in the Executive Summary (NIST SP 1800-11a), which describes the:
- challenges enterprises face in protecting their data from loss or corruption
- example solution built at the National Cybersecurity Center of Excellence (NCCoE)
- benefits of adopting the example solution
Technology or security program managers who are concerned with how to identify, understand, assess, and mitigate risk will be interested in this part of the guide, NIST SP 1800-11b, which describes what we did and why. The following sections will be of particular interest:
- Section 3.4.1, Assessing Risk Posture, provides a description of the risk analysis we performed.
- Section 3.4.2, Security Control Map, maps the security characteristics of the example solution to cybersecurity standards and best practices.
Consider sharing the Executive Summary (NIST SP 1800-11a) with your leadership team to help them understand the importance of adopting standards-based data integrity solutions.
IT professionals who want to implement an approach like this will find the whole practice guide useful. You can use the How-To portion of the guide (NIST SP 1800-11c) to replicate all or parts of the build created in our lab. The guide provides specific product installation, configuration, and integration instructions for implementing the example solution. We do not recreate the product manufacturers’ documentation, which is generally widely available. Rather, we show how we integrated the products in our environment to create an example solution.
This guide assumes that IT professionals have experience implementing security products within the enterprise. While we used a suite of commercial products to address this challenge, this guide does not endorse these particular products. Your organization can adopt this solution or one that adheres to these guidelines in whole, or you can use this guide as a starting point for tailoring and implementing parts of the data integrity solution. Your organization’s security experts should identify the products that will best integrate with your existing tools and IT system infrastructure. We hope you will seek products that are congruent with applicable standards and best practices.
A NIST cybersecurity practice guide does not describe “the” solution, but a possible solution. This is a draft guide. We seek feedback on its contents and welcome your input. Comments, suggestions, and success stories will improve subsequent versions of this guide. Please contribute your thoughts to di-nccoe@nist.gov.
1.2. Build Overview
The NCCoE built a hybrid virtual-physical laboratory environment to explore methods to effectively recover from a data corruption event in various Information Technology (IT) enterprise environments. NCCoE also explored the issues of auditing and reporting that IT systems use to support incident recovery and investigations. The servers in the virtual environment were built to the hardware specifications of their specific software components.
The NCCoE worked with members of the Data Integrity Community of Interest to develop a diverse (but non-comprehensive) set of use case scenarios against which to test the reference implementation. These are detailed in Volume B, Section 5.1. For a detailed description of our architecture, see Volume B, Section 4.
1.3. Typographical Conventions
The following table presents typographic conventions used in this volume.
| Typeface/Symbol | Meaning | Example | |
|---|---|---|---|
| Italics | filenames and pathnames references to documents that are not hyperlinks, new terms, and placeholders |
For detailed definitions of terms, see the NCCoE Glossary. | |
| Bold | names of menus, options, command buttons and fields | Choose File > Edit. | |
Monospace
|
command-line input, on-screen computer output, sample code examples, status codes | mkdir
|
|
Monospace Bold
|
command-line user input contrasted with computer output | service sshd start
|
|
| blue text | link to other parts of the document, a web URL, or an email address | All publications from NIST’s National Cybersecurity Center of Excellence are available at https://nccoe.nist.gov. | |
2. Product Installation Guides
This section of the practice guide contains detailed instructions for installing, configuring, and integrating all the products used to build an instance of the example solution.
The products presented in this document have the potential to quickly change both interfaces and functionality. This document aims to highlight the core configurations an organization could use along with visual representations of those configurations.
2.1. Active Directory and Domain Name System (DNS) Server
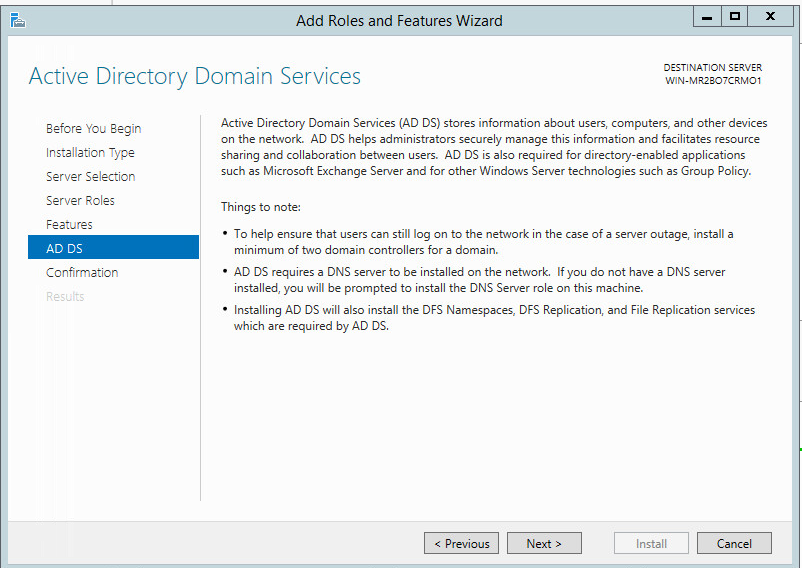
As part of our enterprise emulation, we included an Active Directory server that doubles as a DNS server. This section covers the installation and configuration process used to set up Active Directory and DNS on a Windows Server 2012 R2 machine.
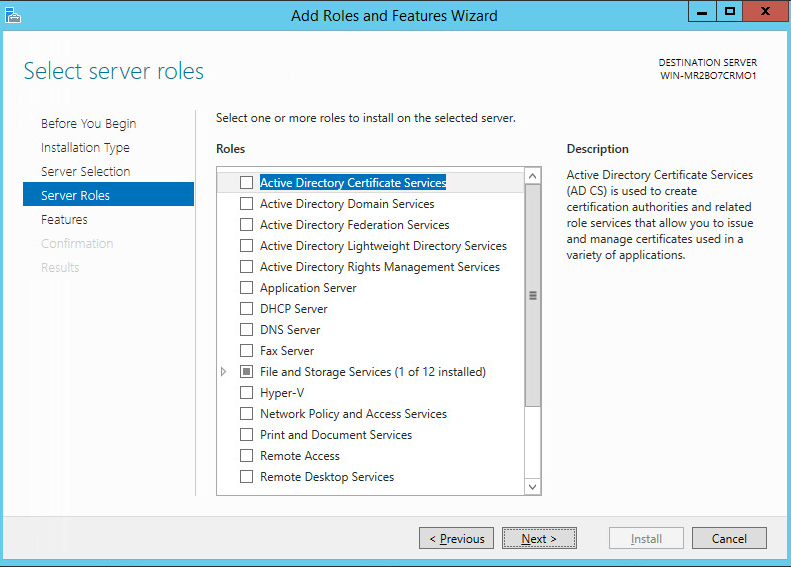
2.1.1. Installing Features
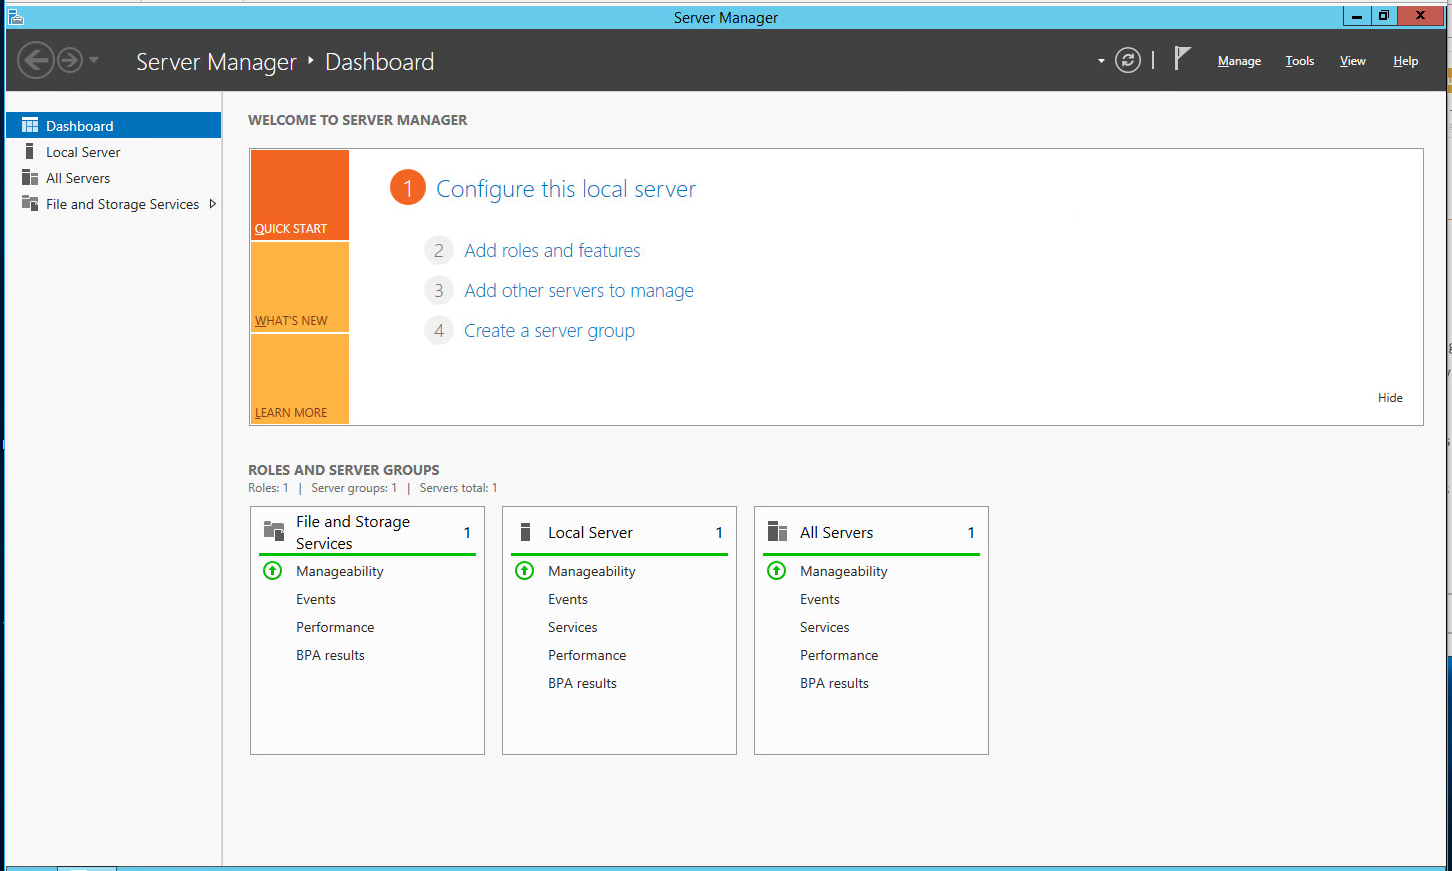
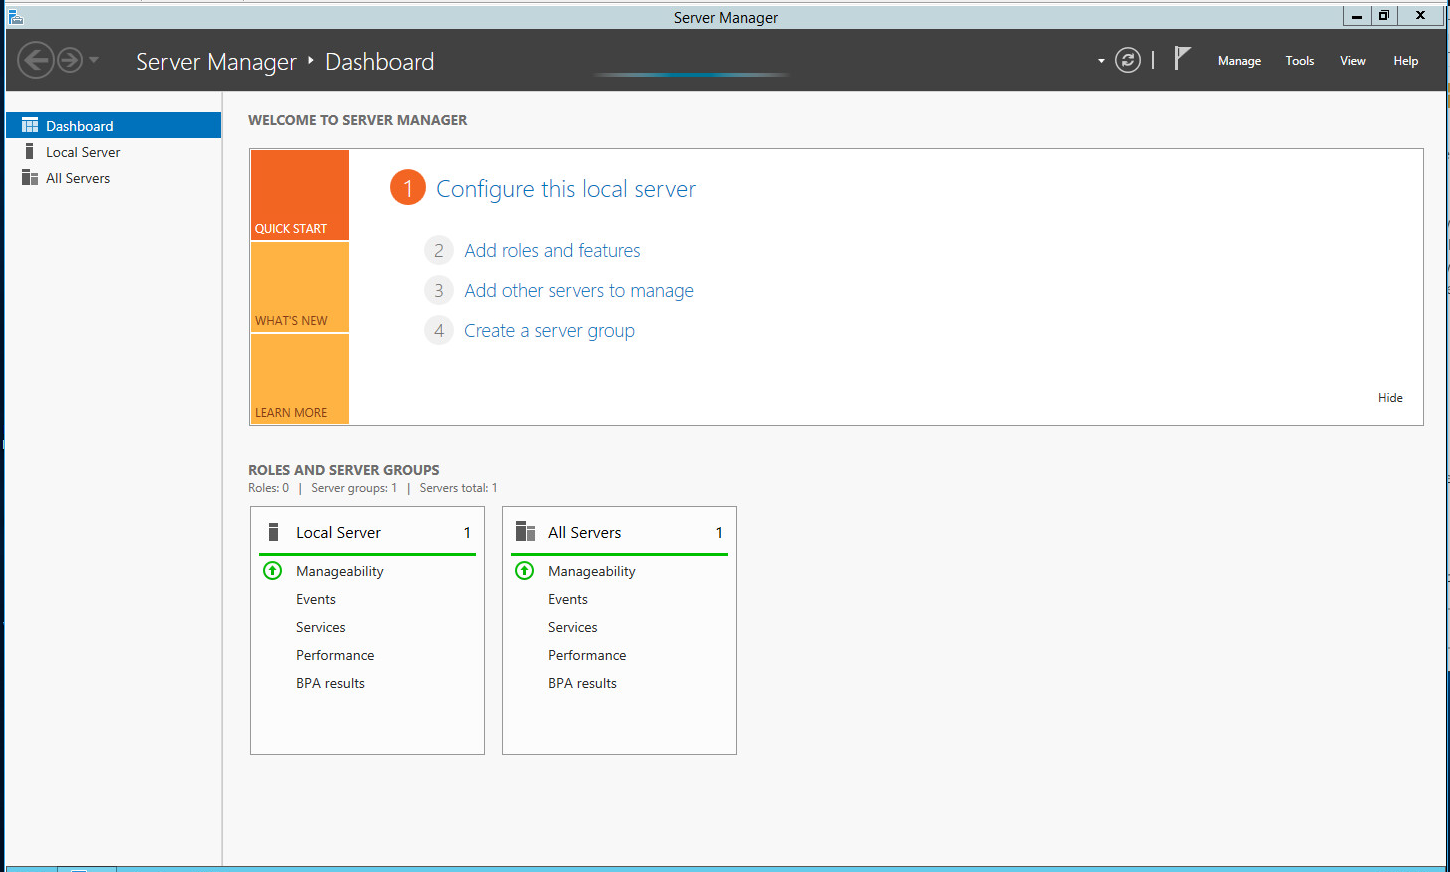
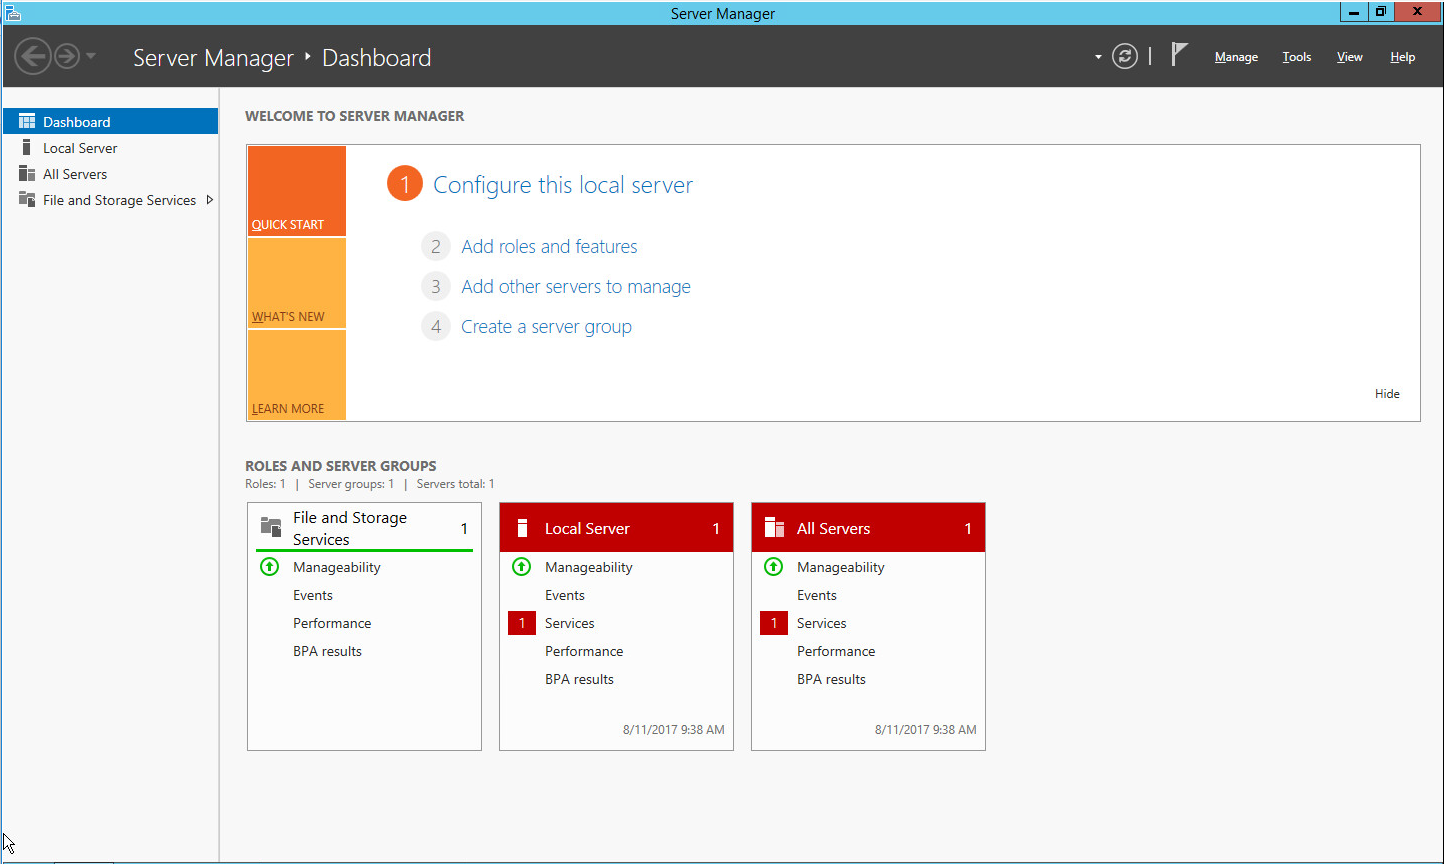
Click the link Add Roles and Features.
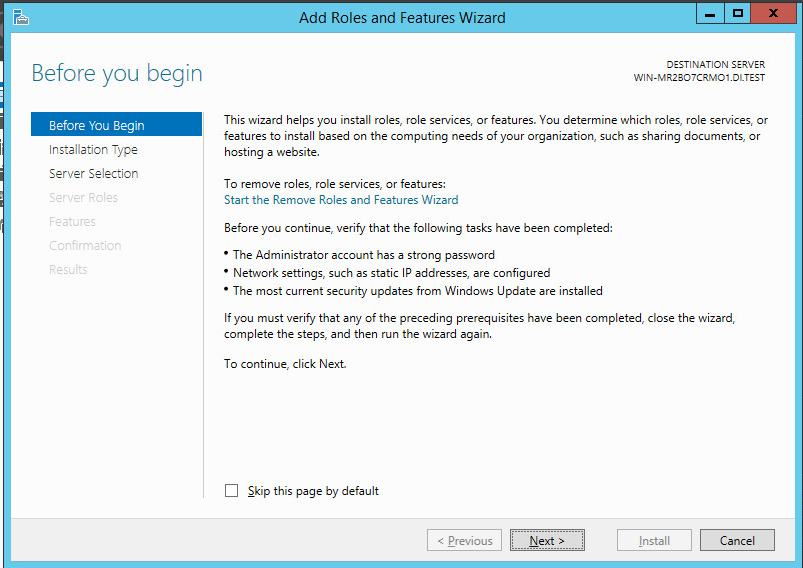
Click Next.
Click Next.
Select ADDNS (or the correct Windows Server name) from the list.
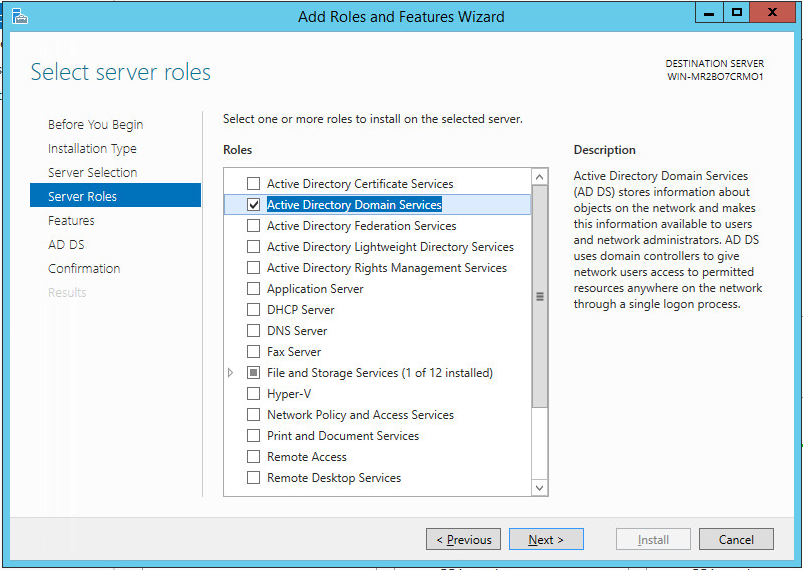
Click Next.
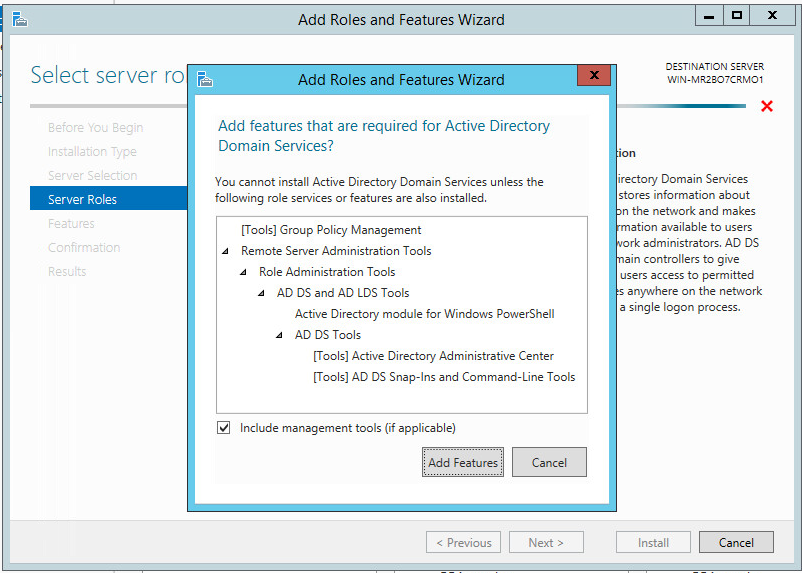
Click Add Features.
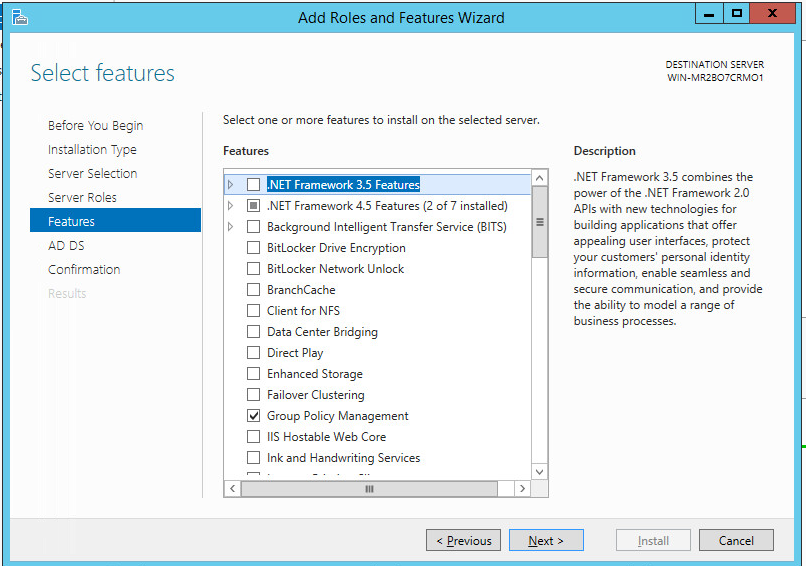
Click Next.
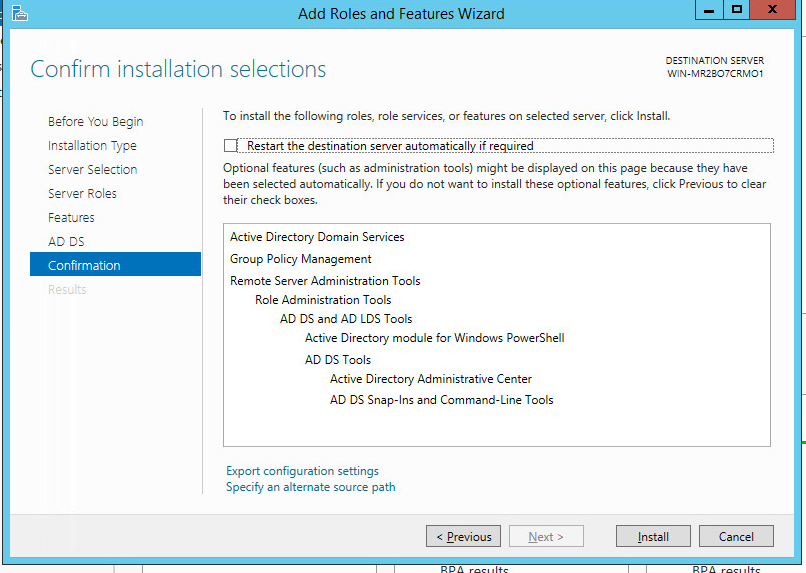
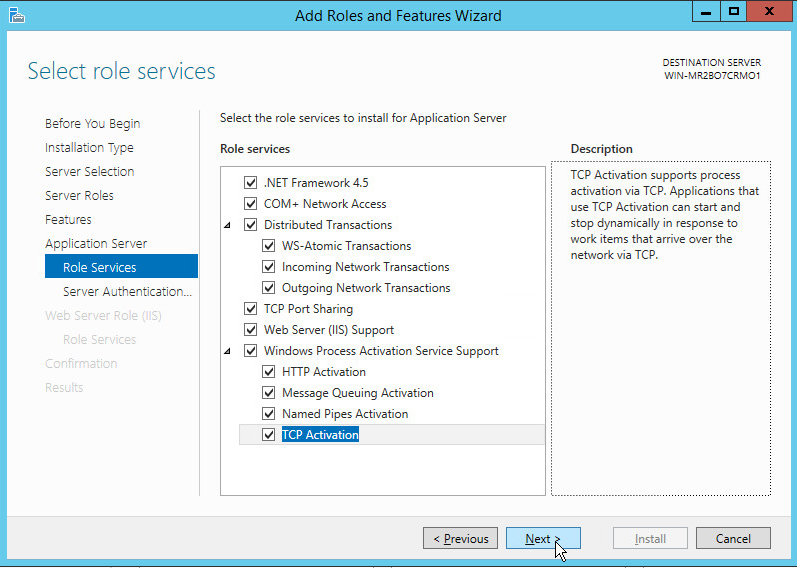
Ensure that Group Policy Management, .NET Framework 4.5, TCP Port Sharing, Remote Server Administration Tools, and Windows PowerShell are selected.
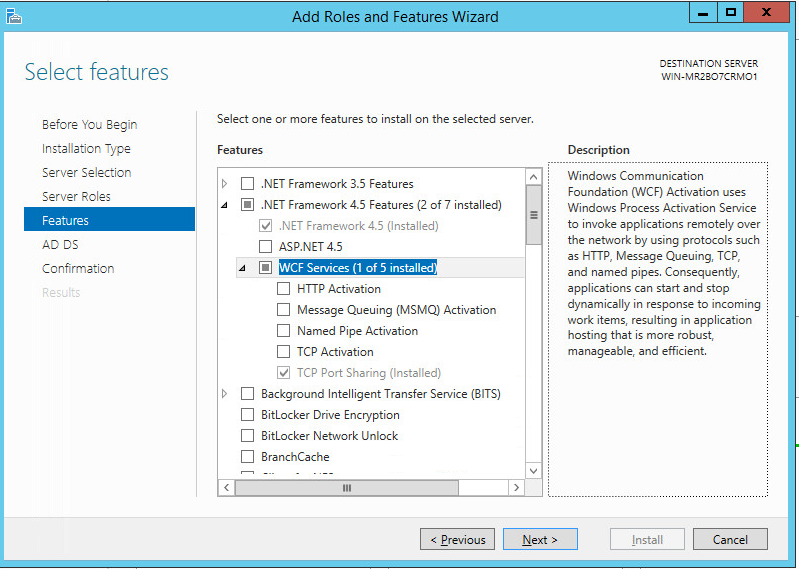
Select any additional features and click Add Features on the popup.
Click Next.
Click Next.
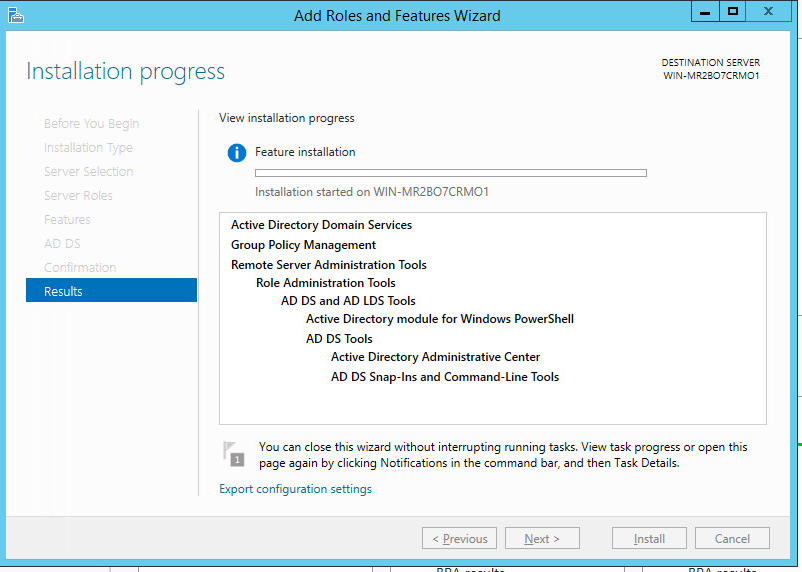
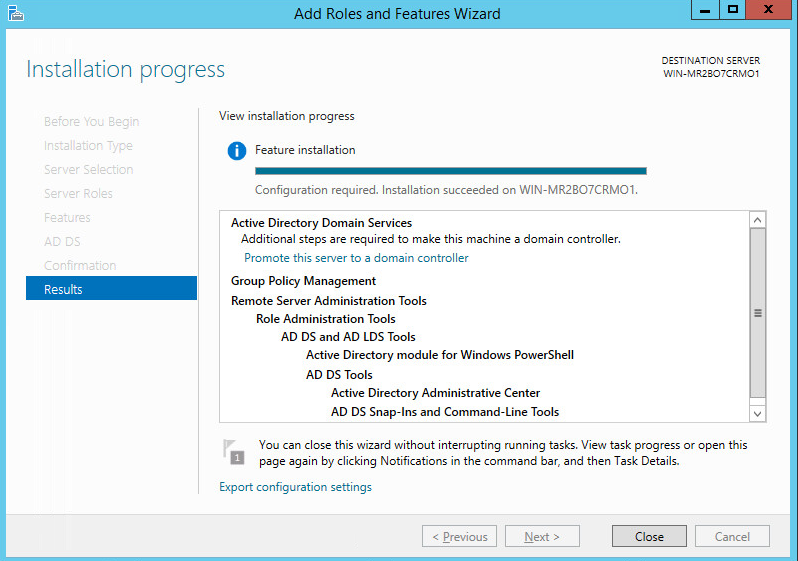
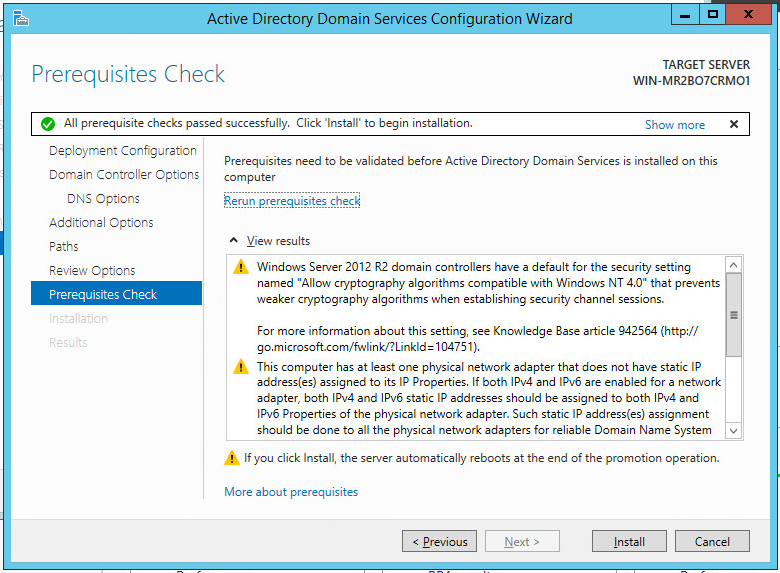
Click Install.
Select Post-Deployment Configuration or Promote this server to a domain controller.
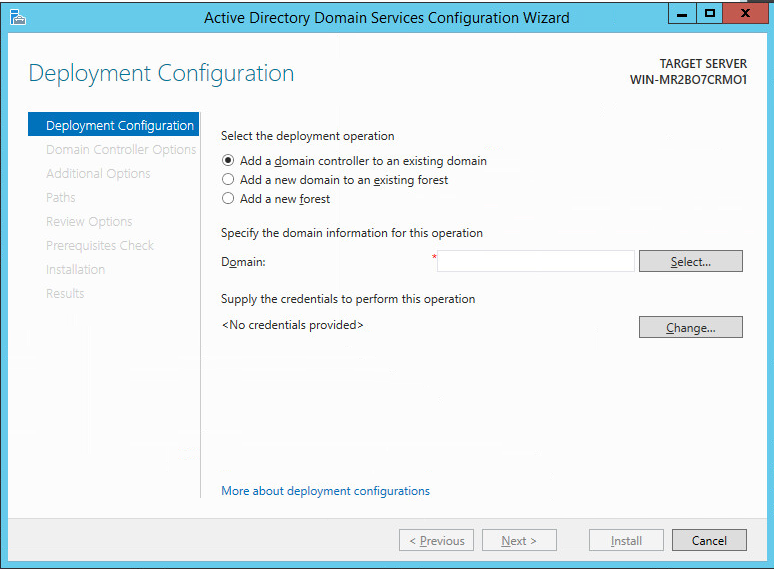
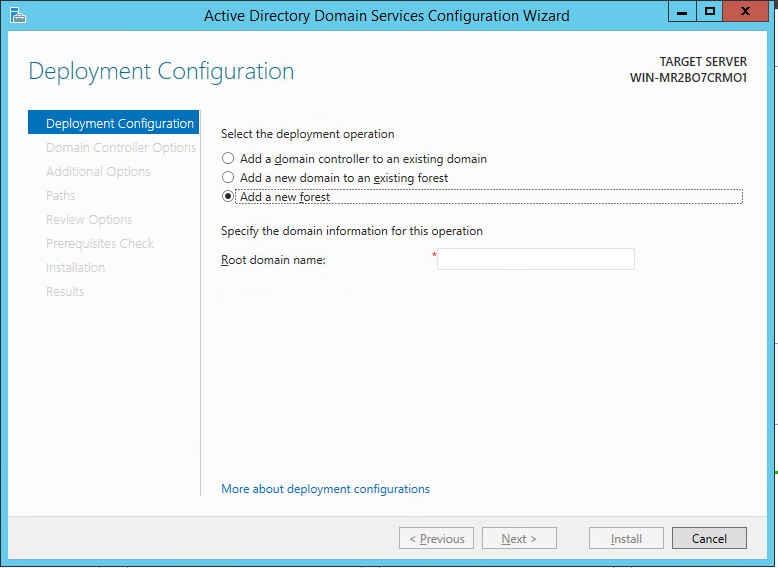
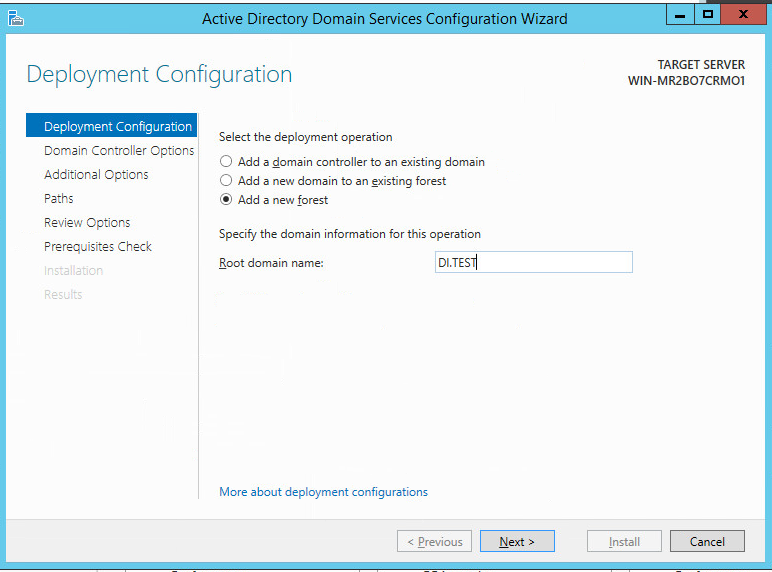
Select Add a new forest.
Click Next.
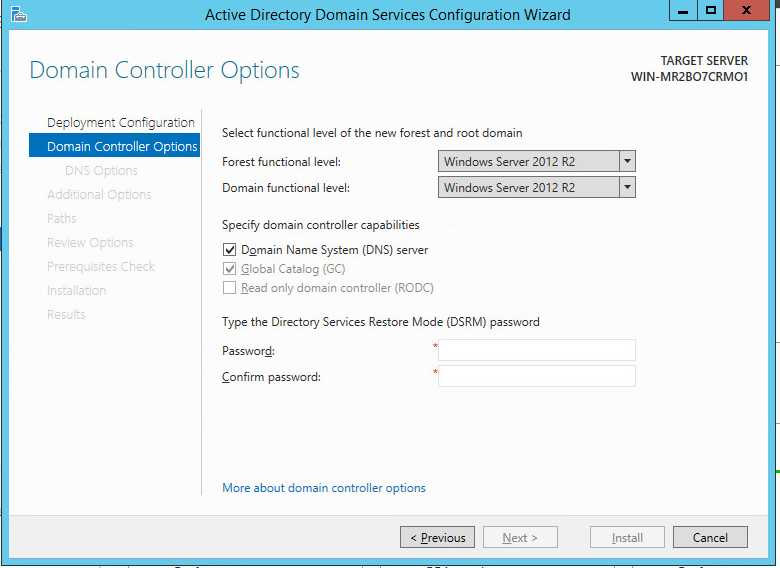
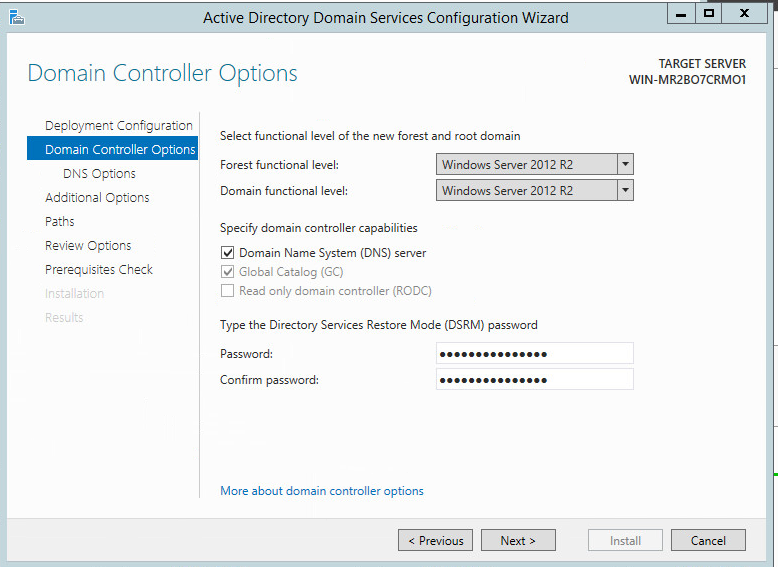
Select Windows Server 2012 R2 for the Forest Functional Level.
Select Windows Server 2012 R2 for the Domain Functional Level.
Check the box next to DNS server and Global Catalog.
Do not check the box next to read-only domain controller.
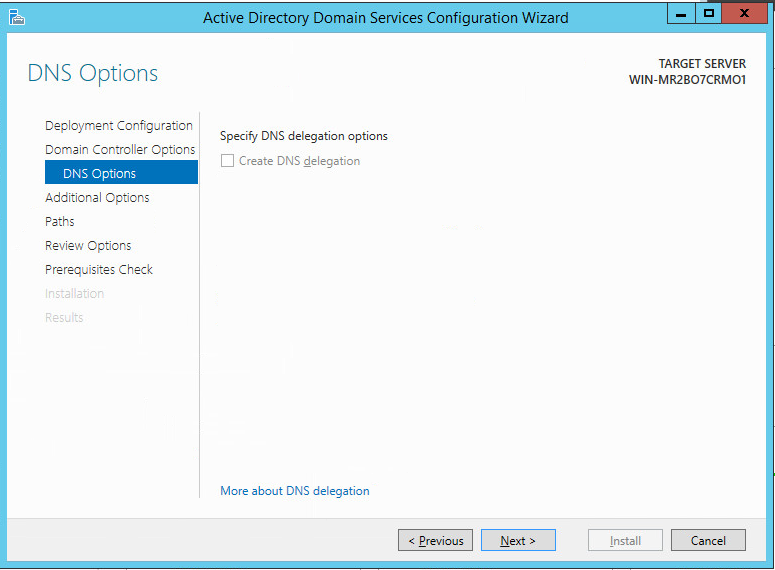
Click Next.
Click Next.
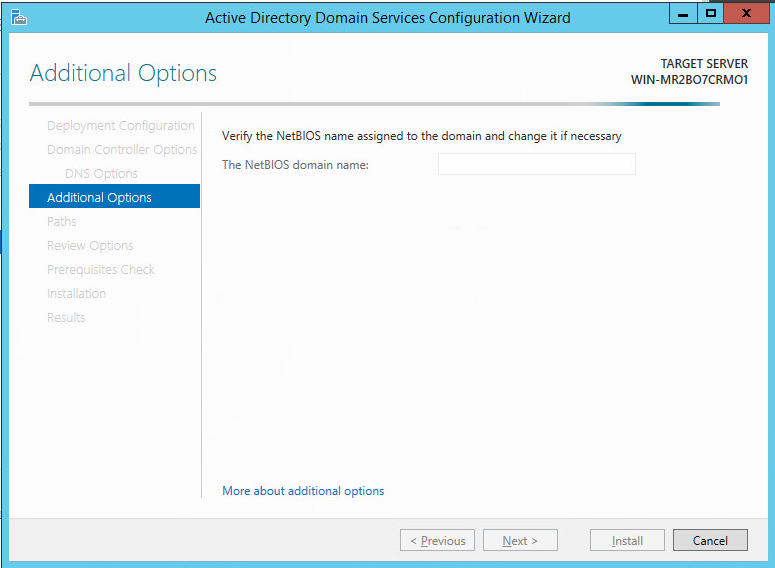
Verify the NetBIOS name.
Click Next.
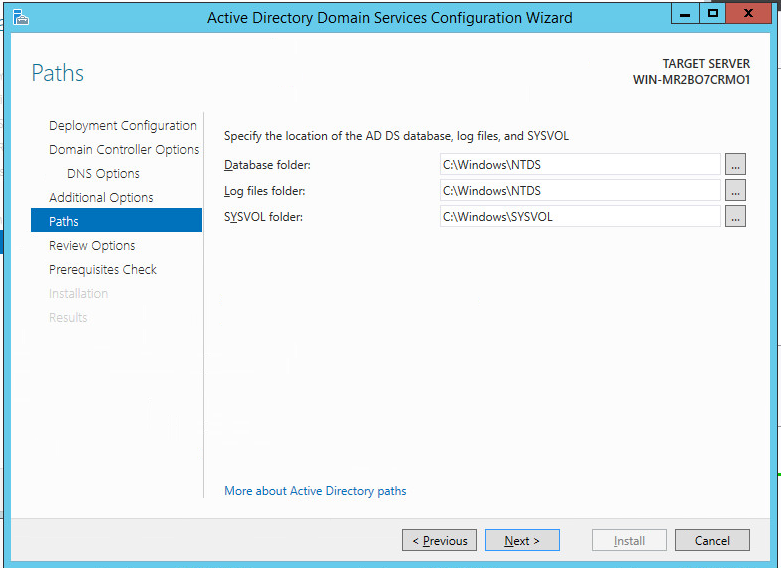
Click Next.
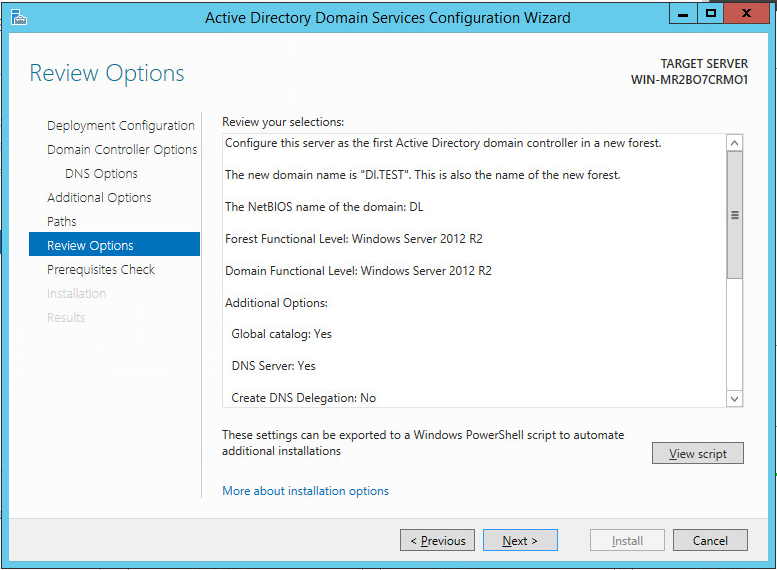
Click Next.
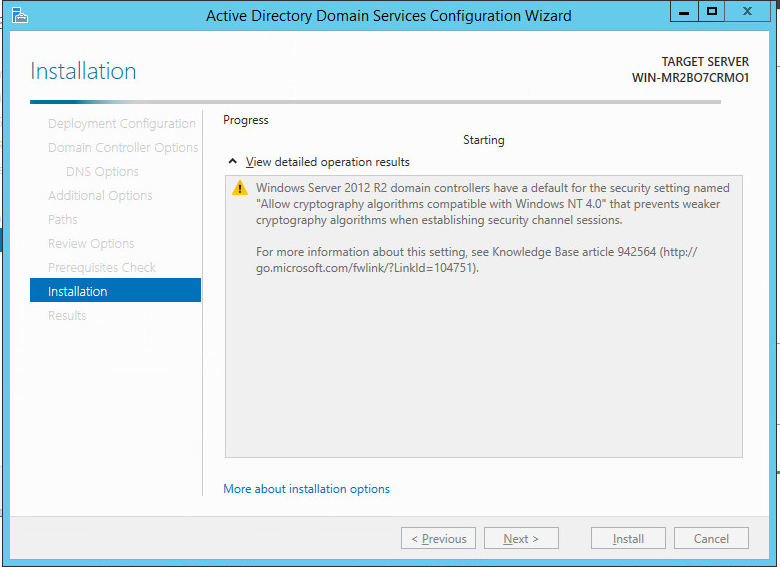
Click Install.
The server automatically reboots.
2.1.2. Creating a Certificate Authority
Click Next.
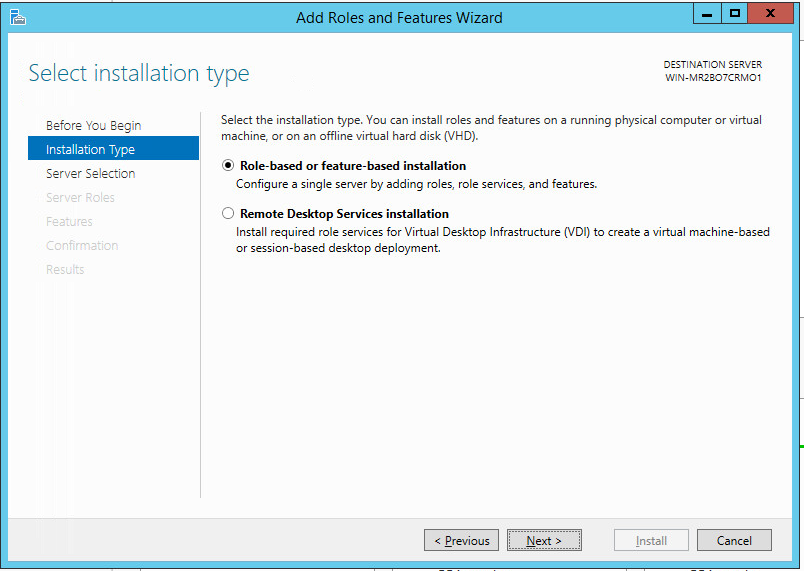
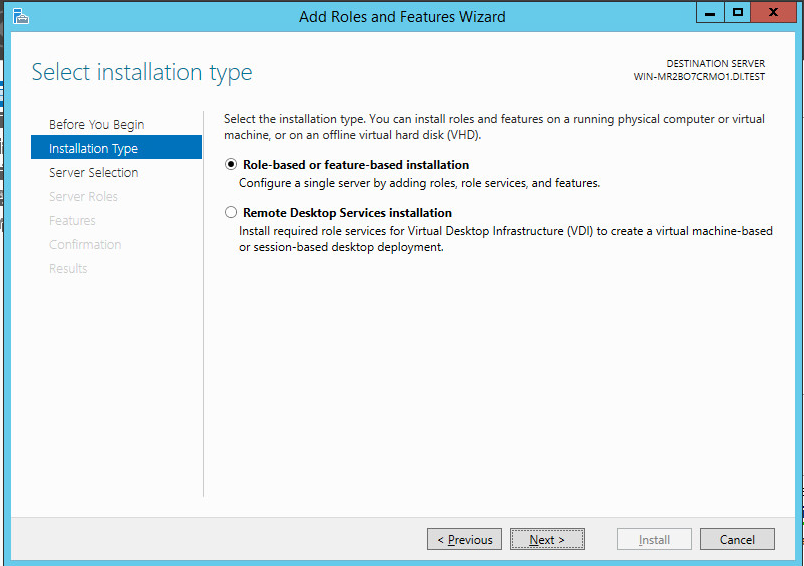
Select Role-based or feature-based installation.
Click Next.
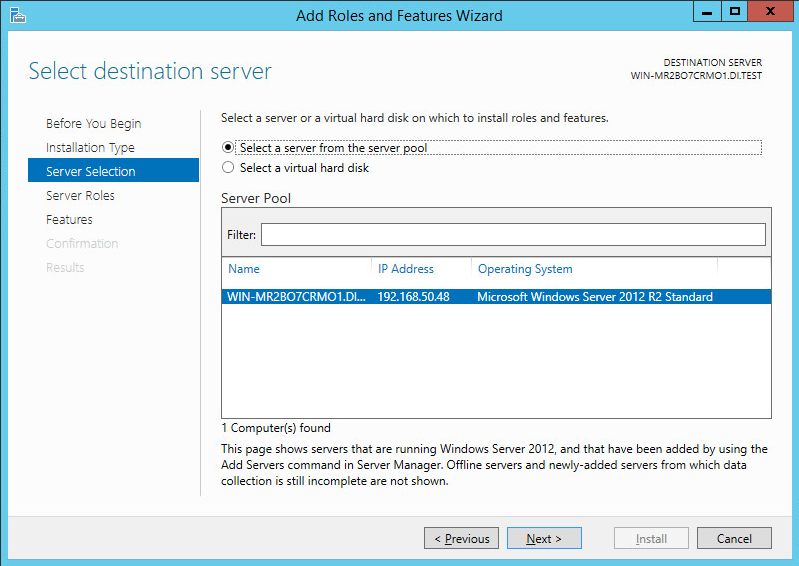
Select ADDNS (or the correct Windows Server name) from the list.
Click Next.
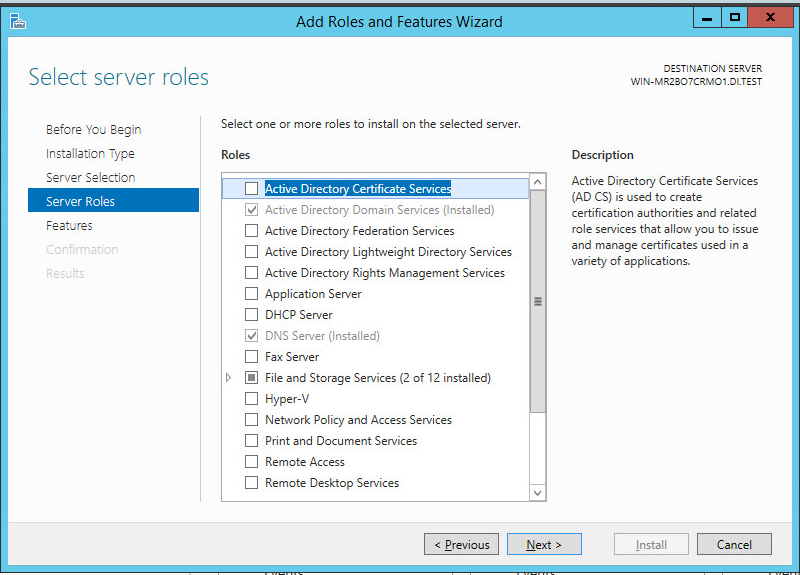
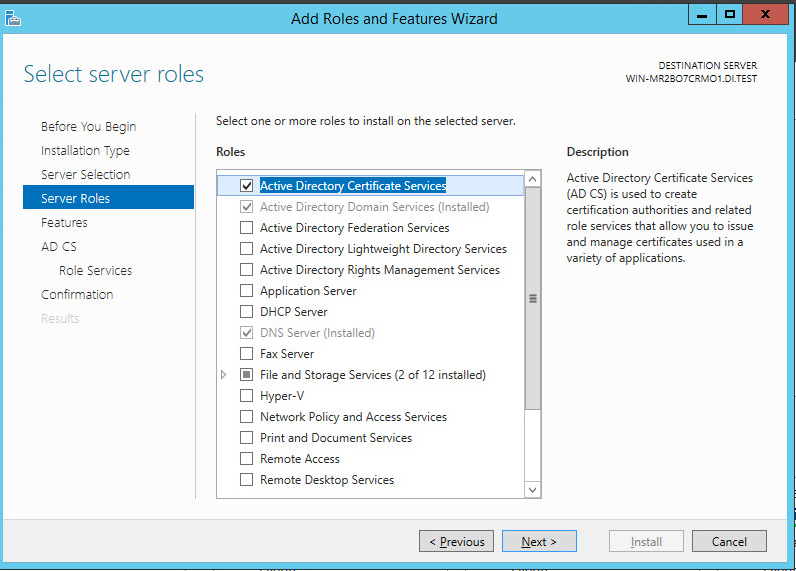
Check the box next to Active Directory Certificate Services
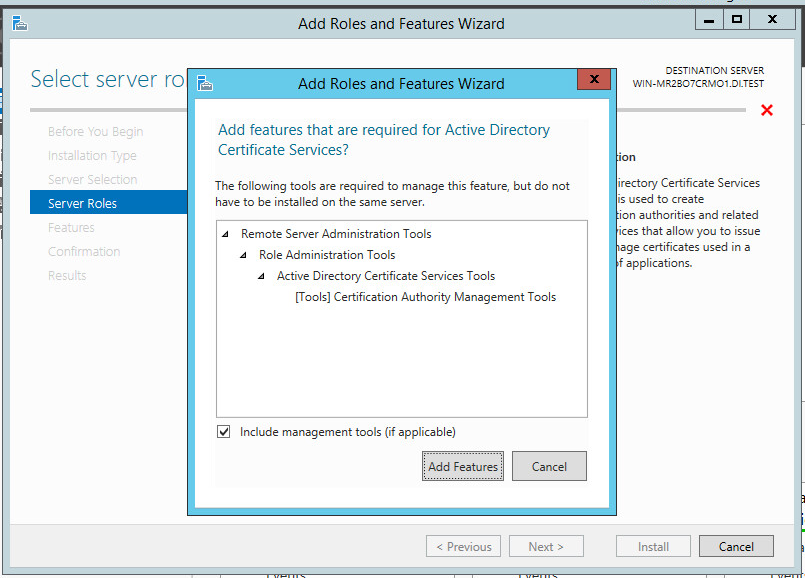
Click Add Features.
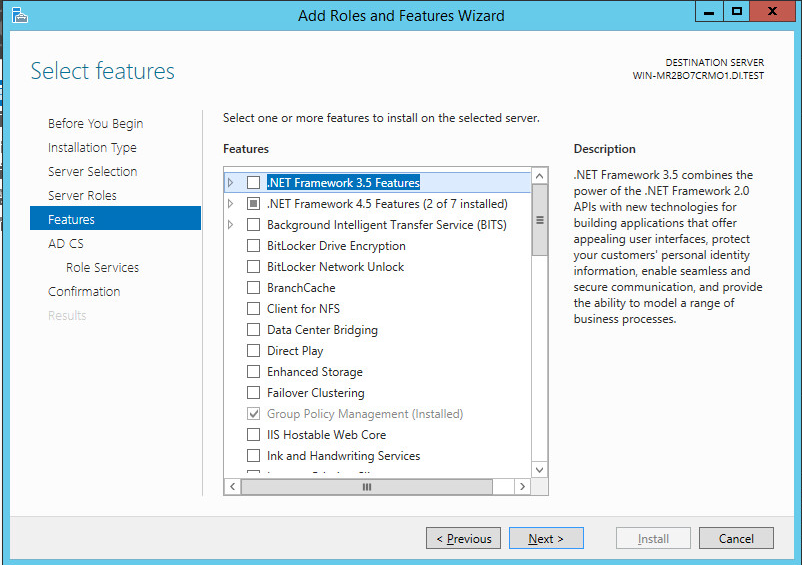
Click Next.
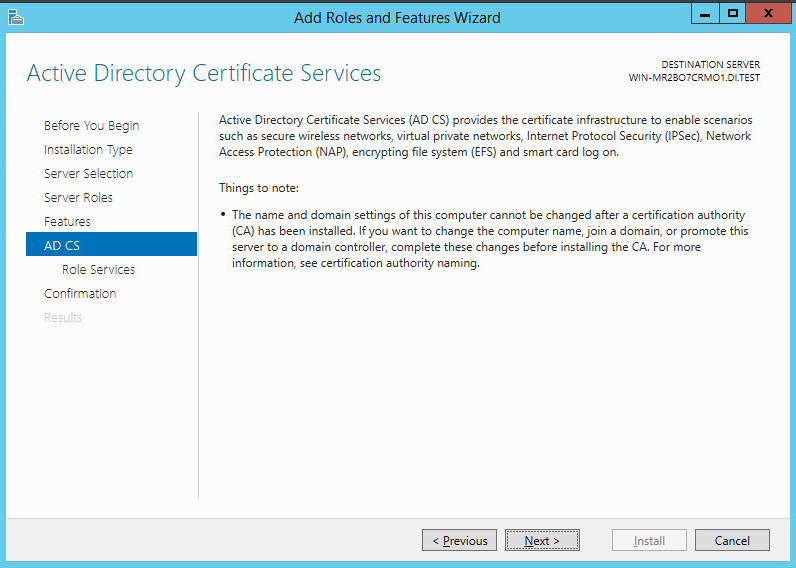
Click Next.
Click Next.
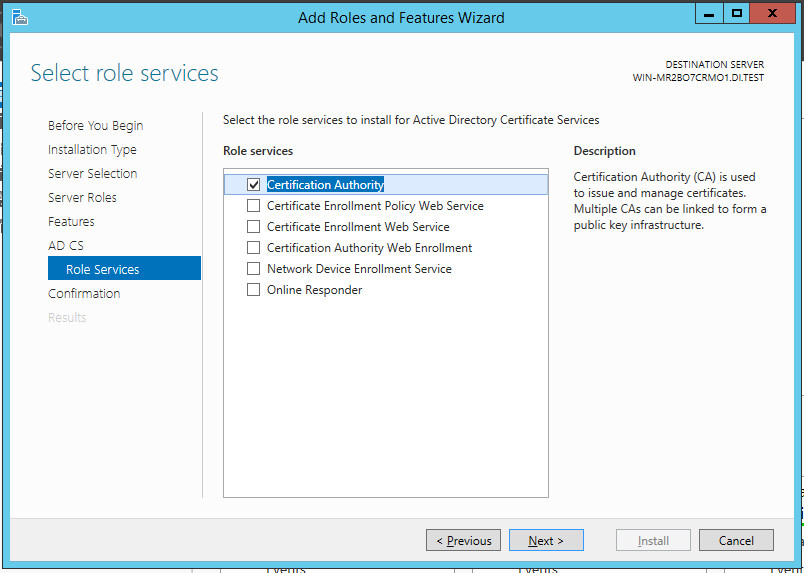
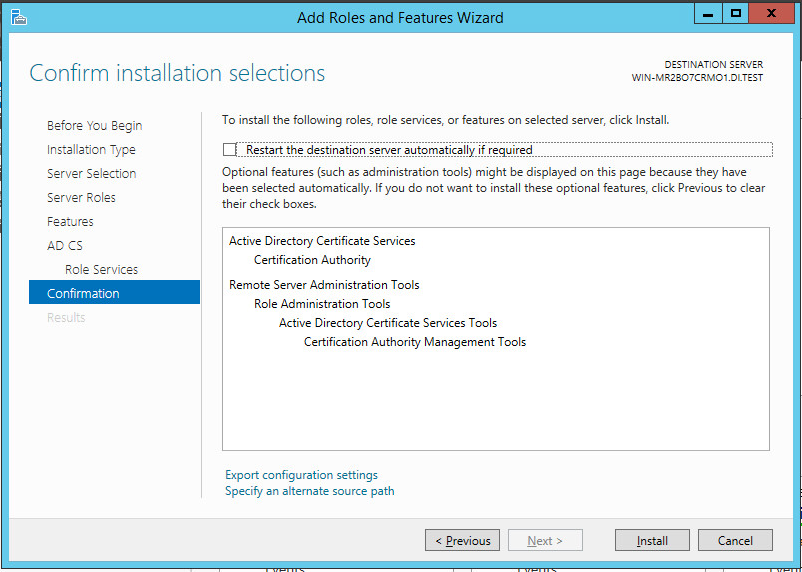
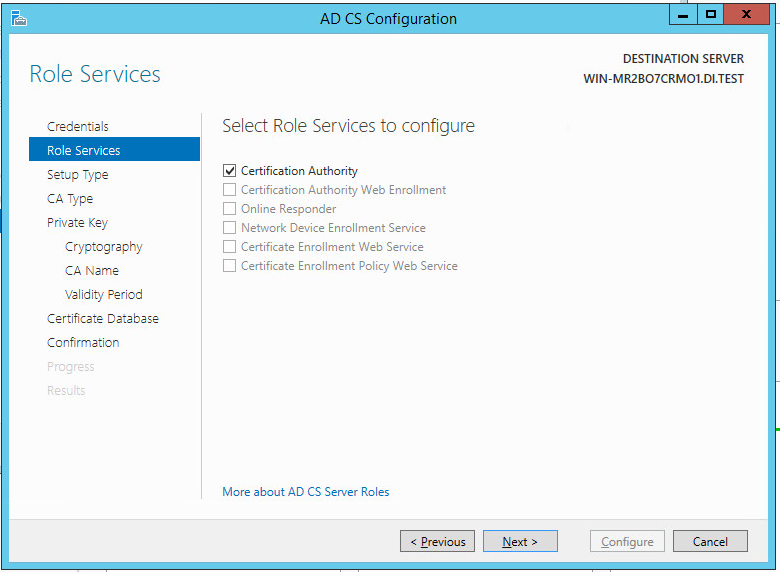
Select Certification Authority on the Role Services list.
Click Next.
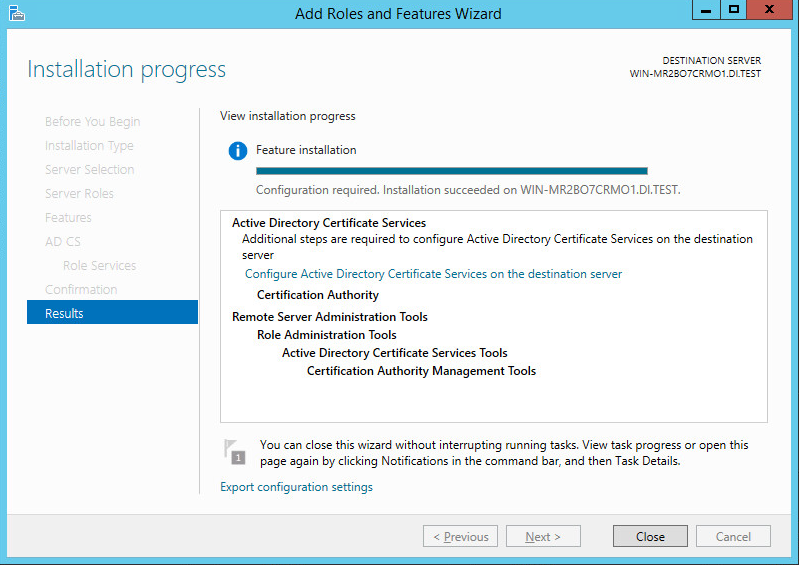
Click Install.
Select Configure Active Directory Certificate Services on the destination server.
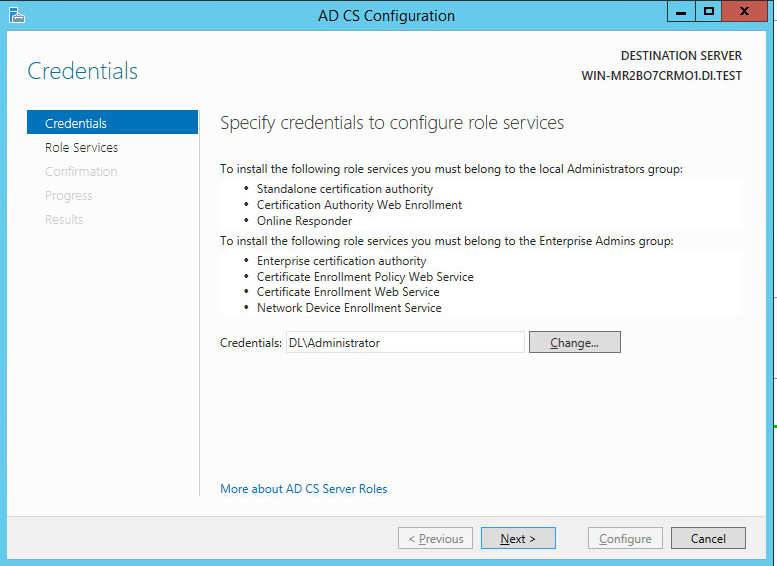
Click Next.
Click Next.
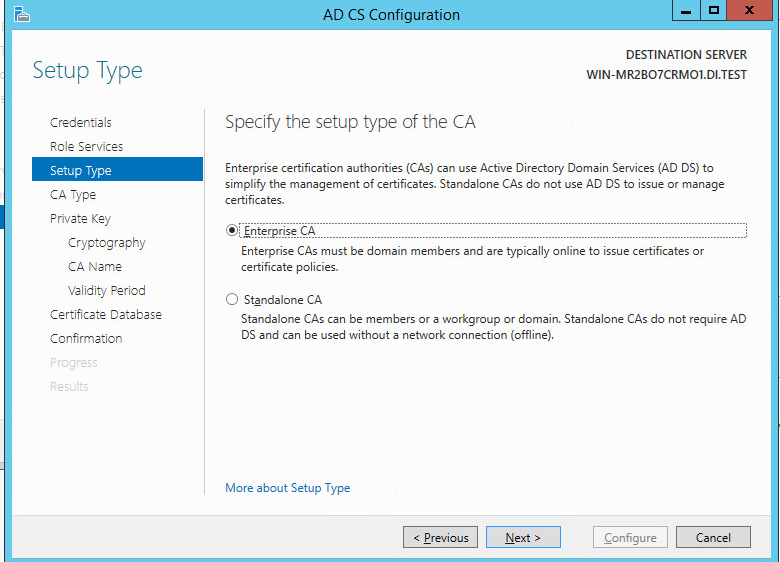
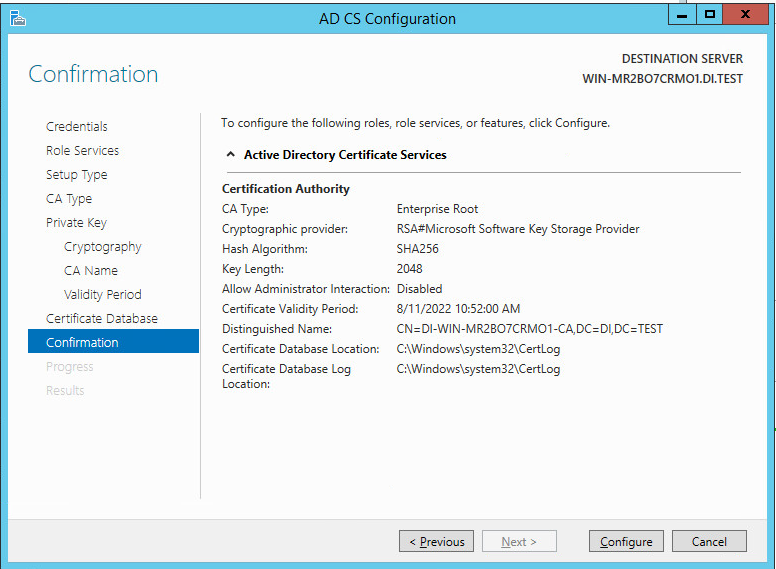
Select Enterprise CA.
Click Next.
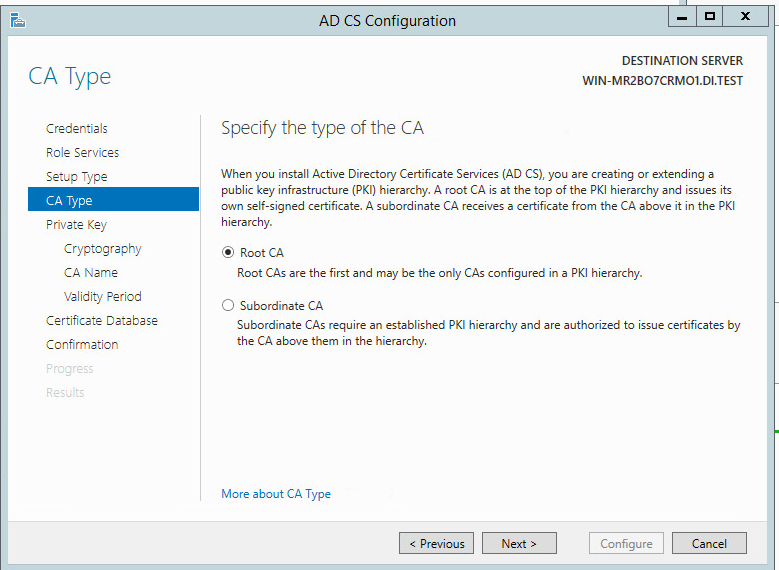
Select Root CA.
Click Next.
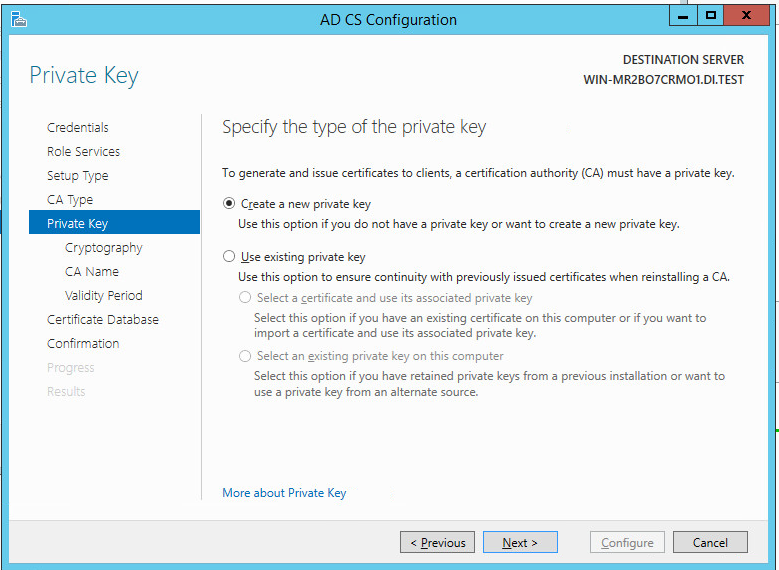
Select Create a new private key.
Click Next.
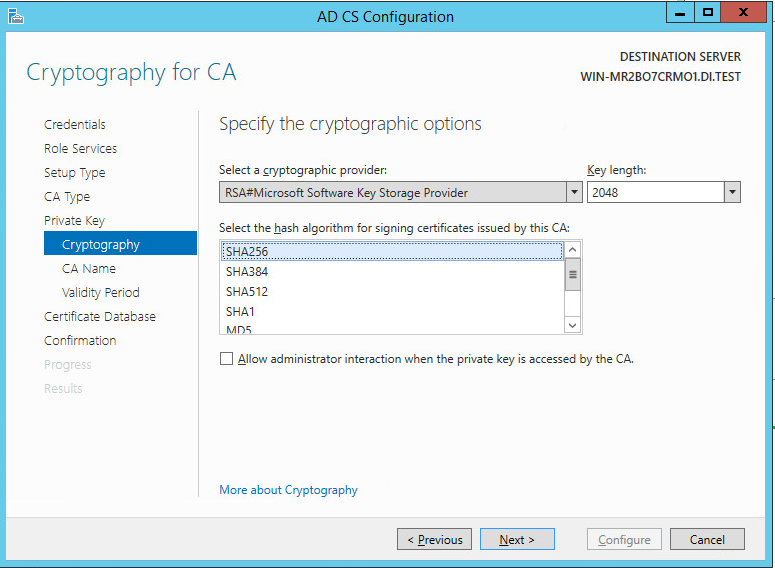
Select RSA#Microsoft Software Key Storage Provider.
Enter 2048 in the box.
Click Next.
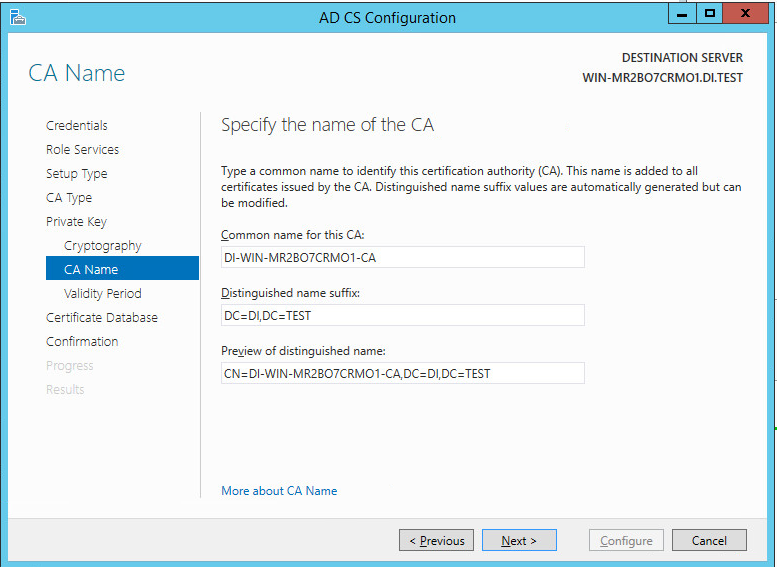
Click Next.
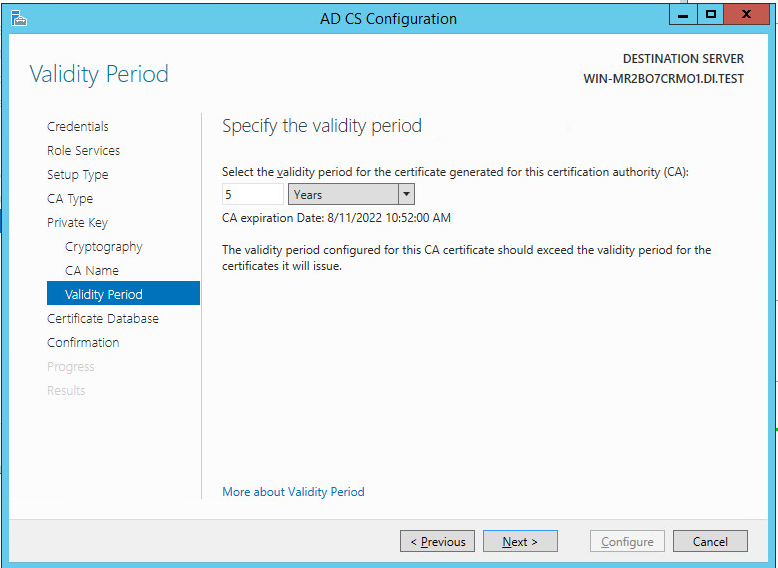
Set the time to 5 years.
Click Next.
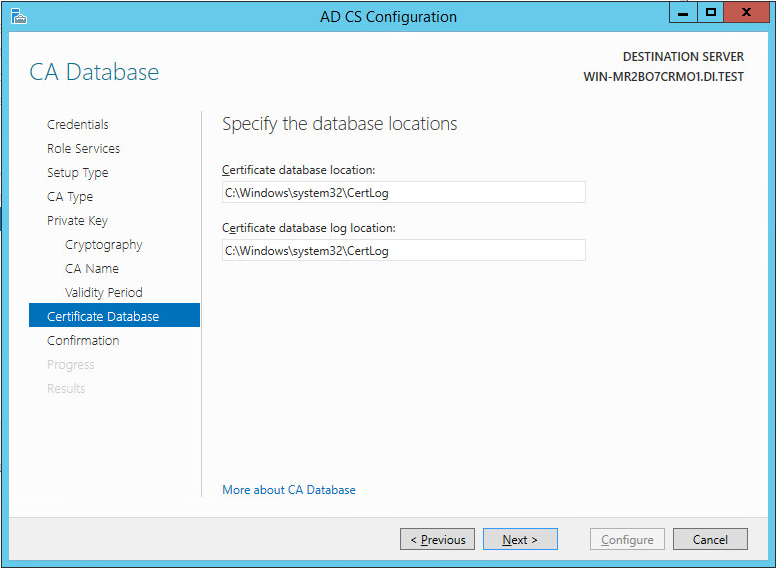
Click Next.
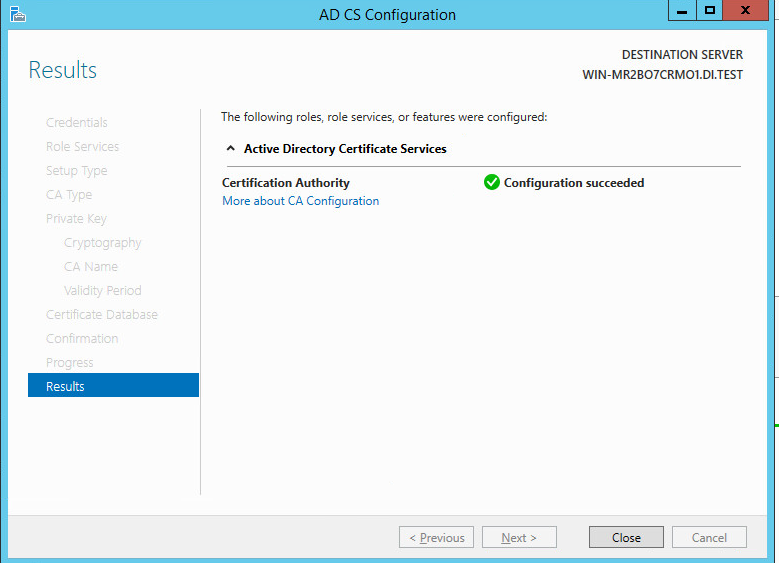
Click Configure.
2.1.3. Configure Account to Add Computers to Domain
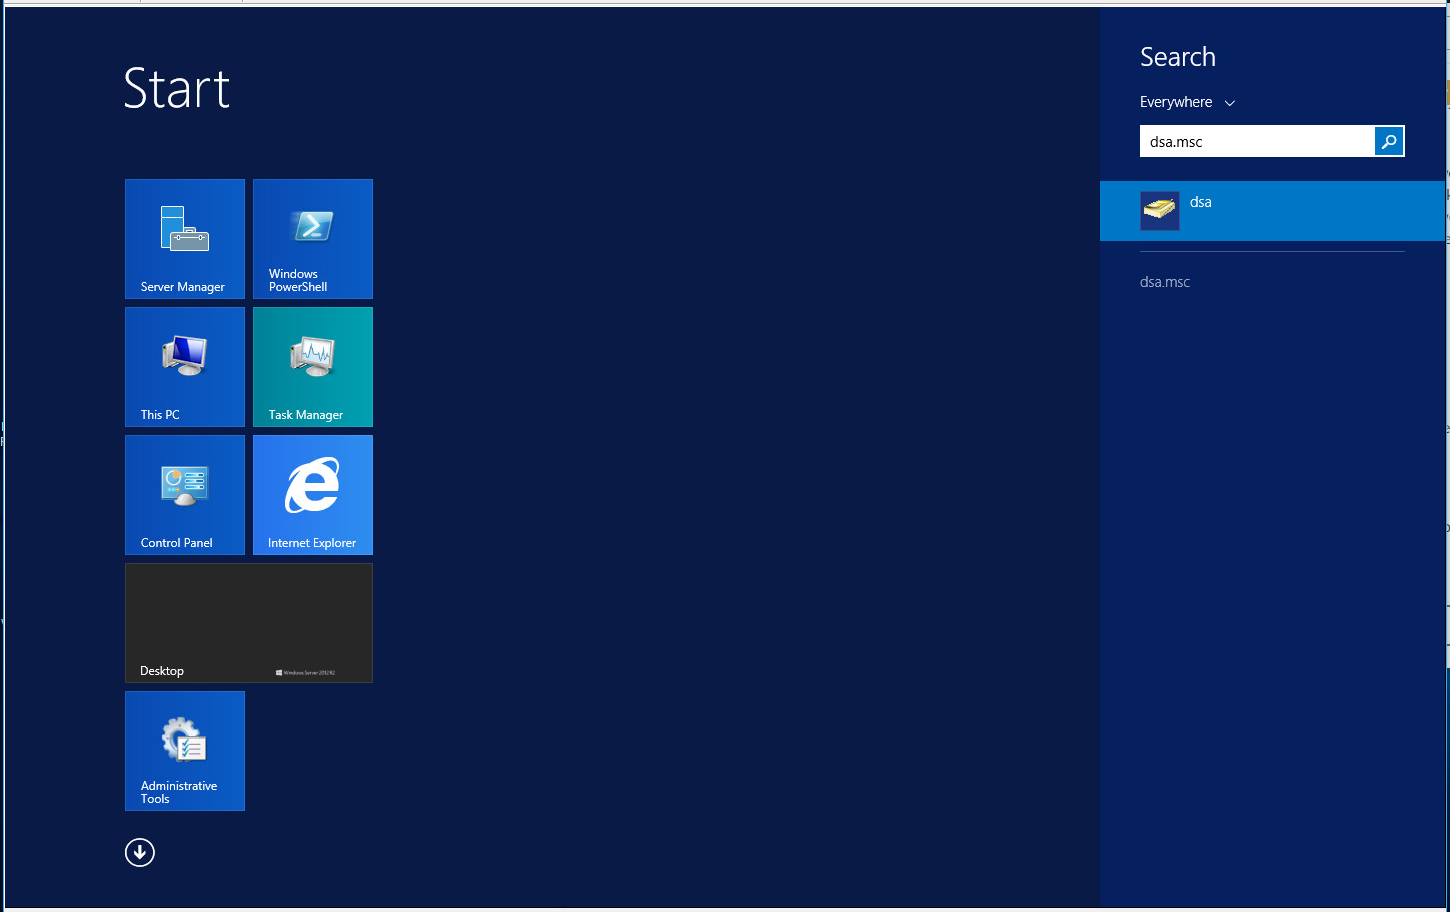
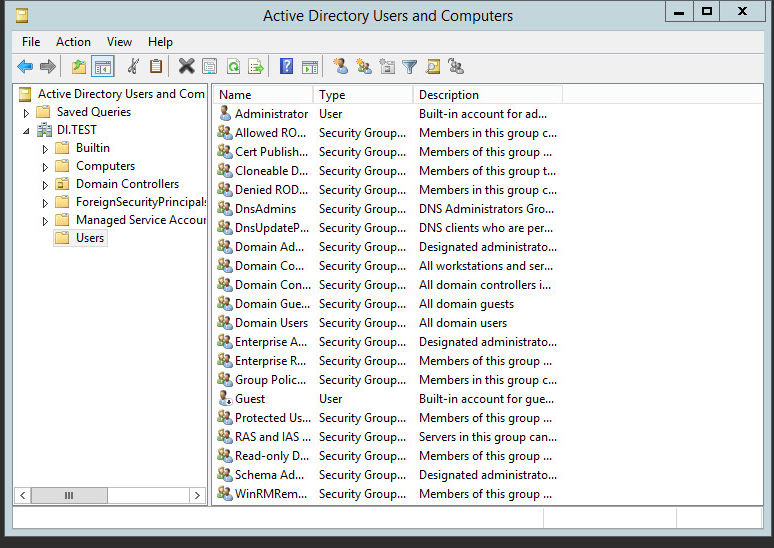
Open the start menu.
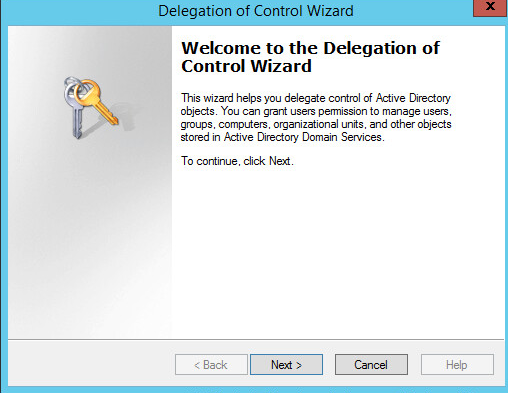
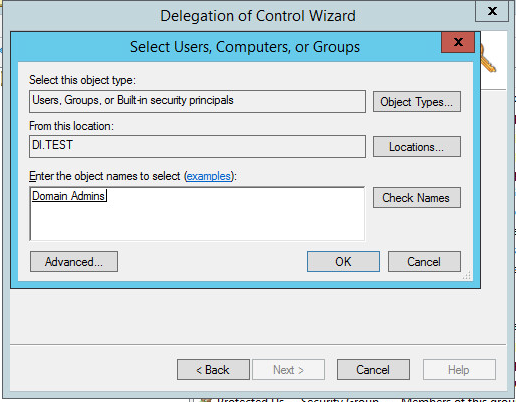
Click Delegate Control.
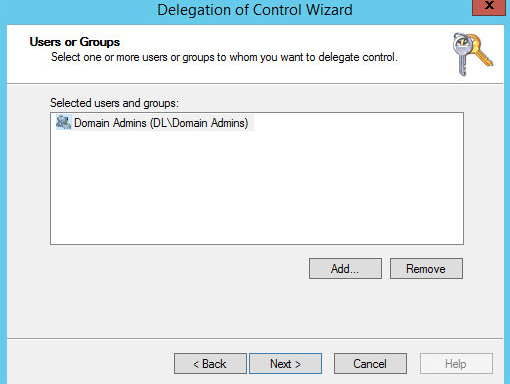
Click Next.
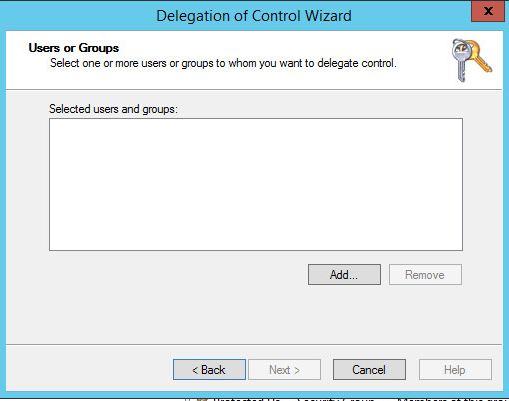
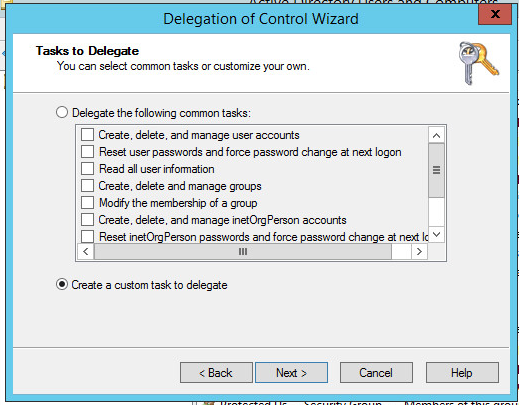
Click Next.
Click Next.
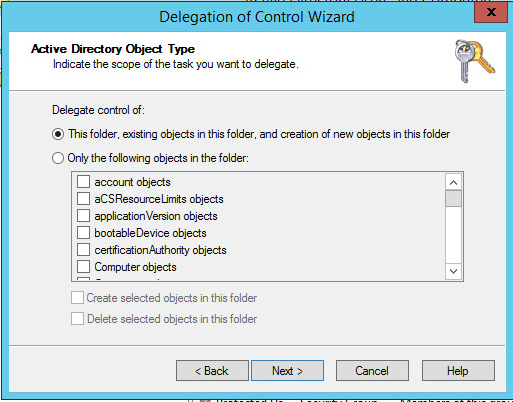
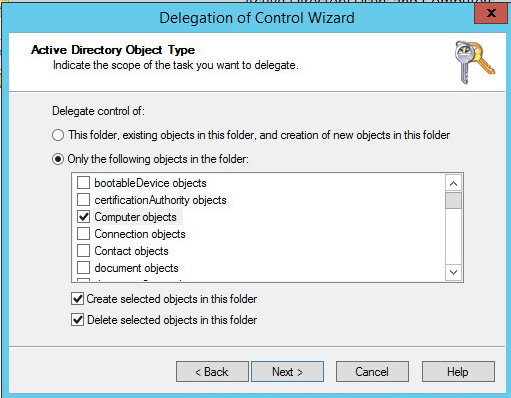
Choose Only the following objects in the folder.
Select the Computer Objects check box.
Check the box for Create selected objects in this folder.
Click Next.
In the Permissions List, choose Reset Password, Read and write Account Restrictions, Validated write to DNS host name, Validated write to service principal name.
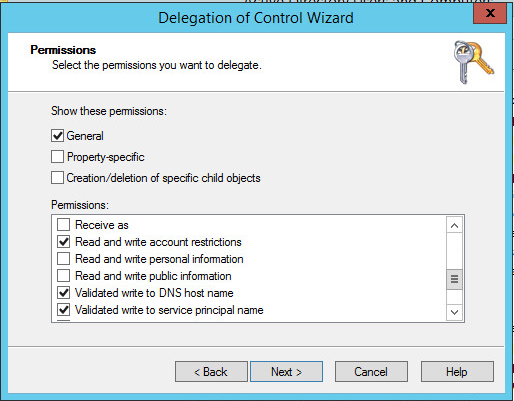
Click Next.
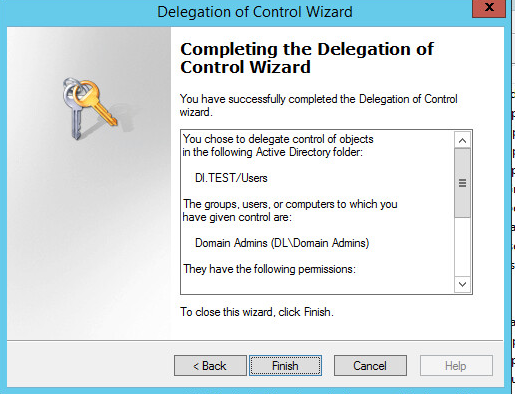
Observe the successful installation and click Finish.
2.1.4. Adding Machines to the Correct Domain
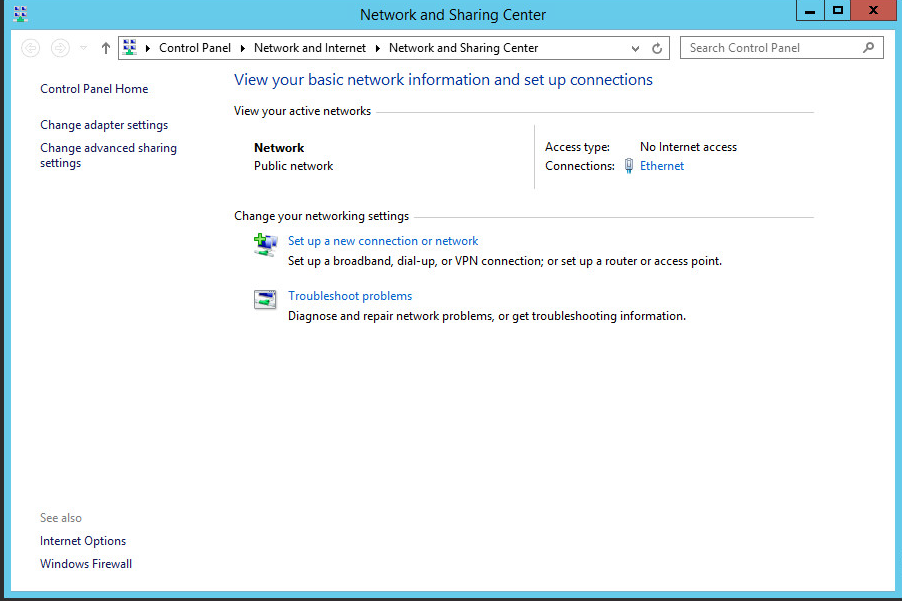
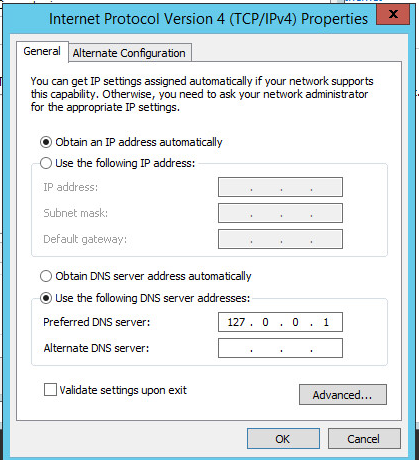
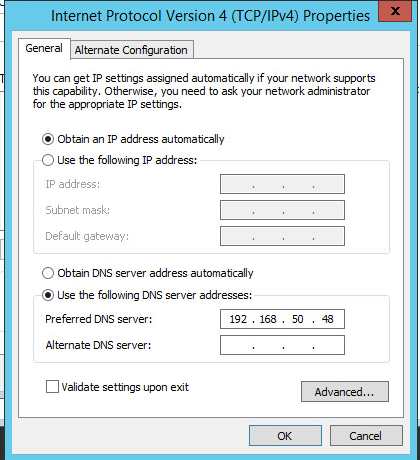
Right click network icon in task bar.
Click the link for editing the network interface under Connections.
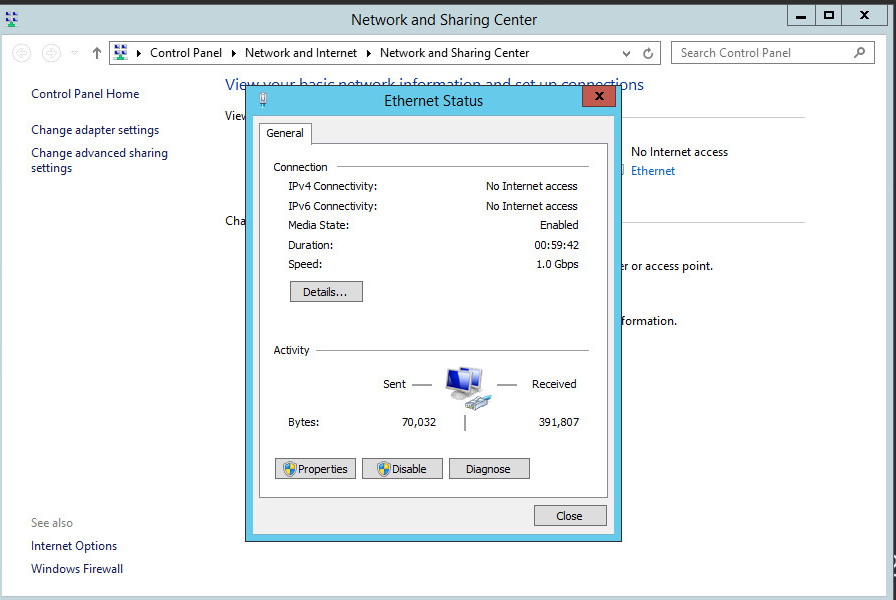
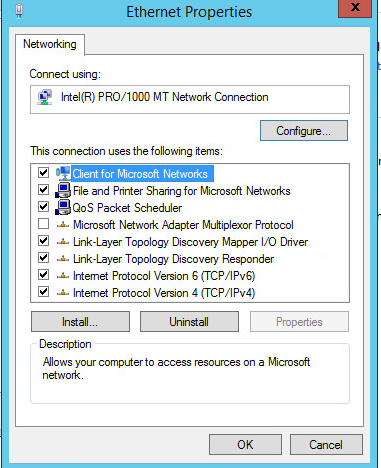
Click Properties.
Click Internet Protocol Version 4.
Click Properties.
Click OK.
Exit out of the Network and Sharing Center
Push the start menu button.
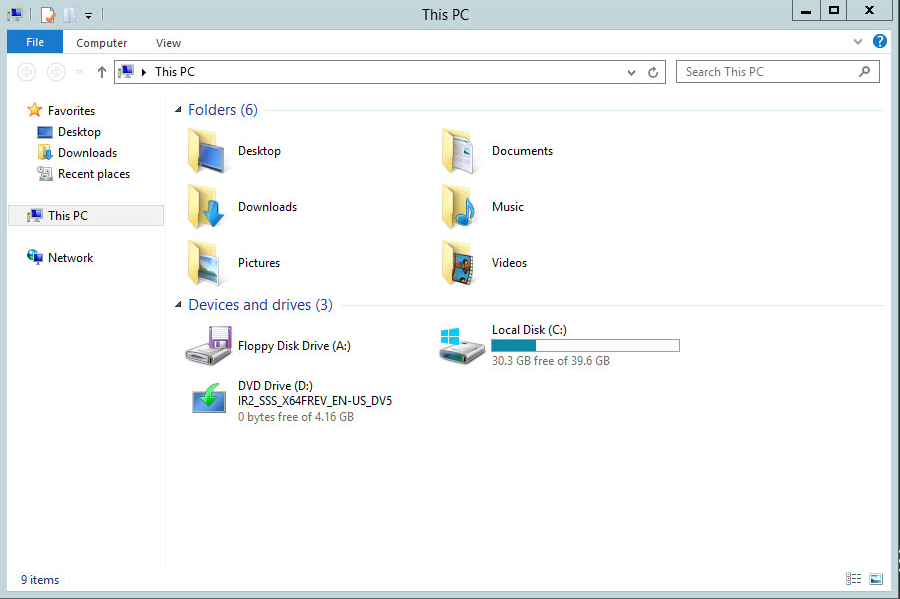
Go to This PC.
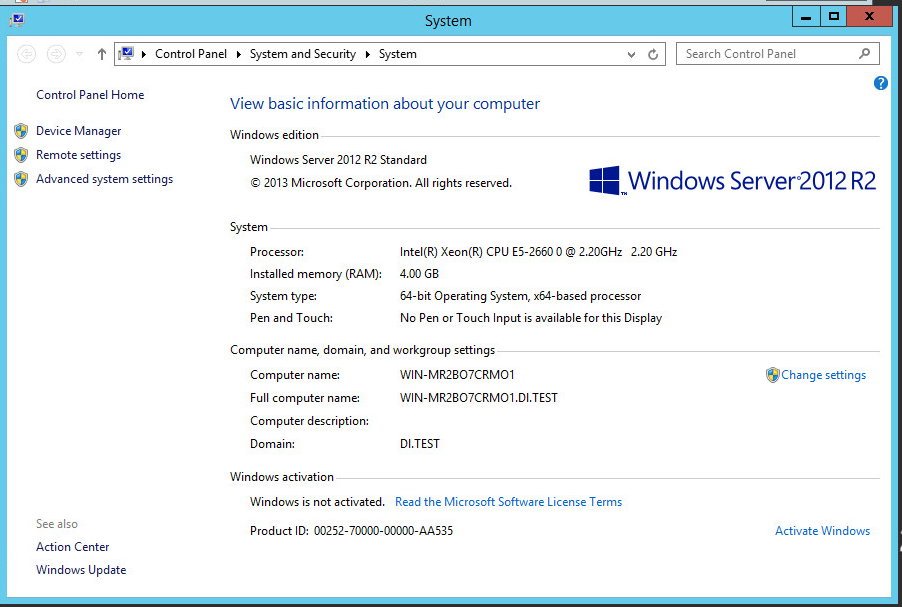
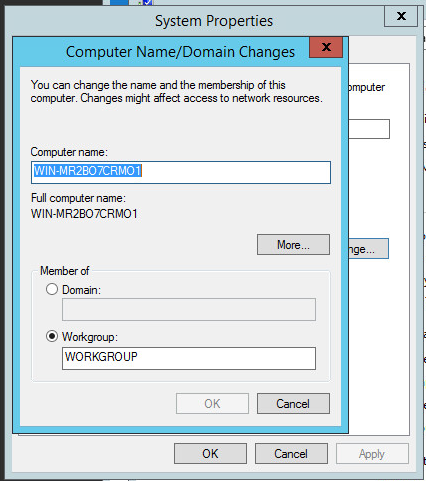
Under Name, domain, and workgroup settings, click Change settings.
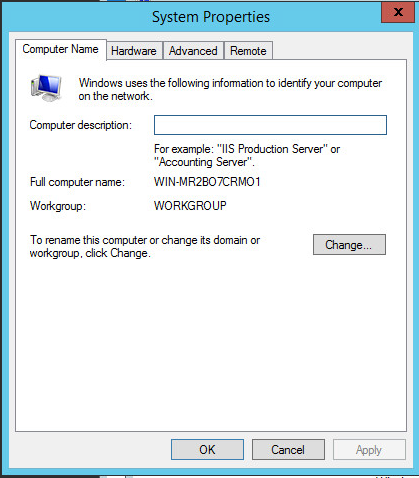
Click Change....
Select Domain and enter the domain specified on the AD/DNS server.
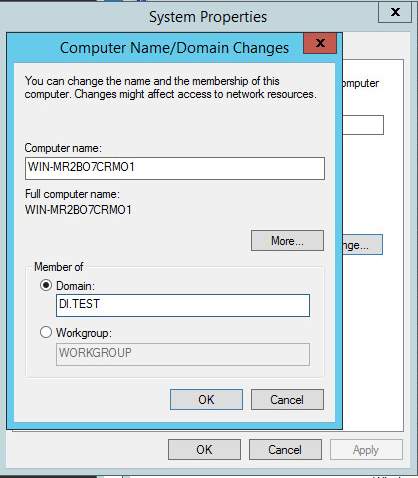
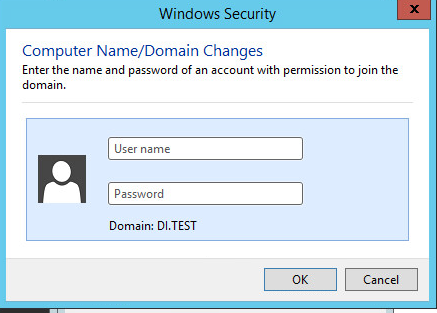
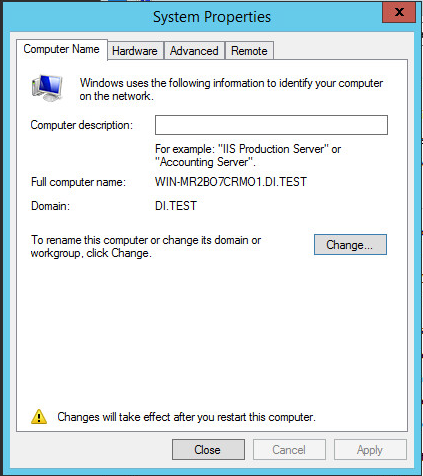
Click OK.
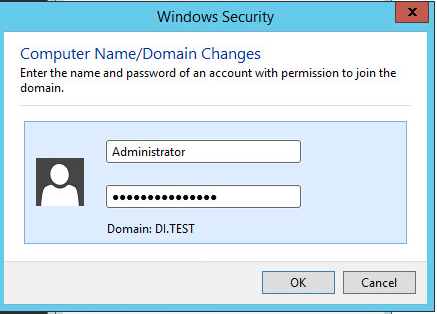
Enter the credentials of an account in AD which has the right permissions to add a group to the domain.
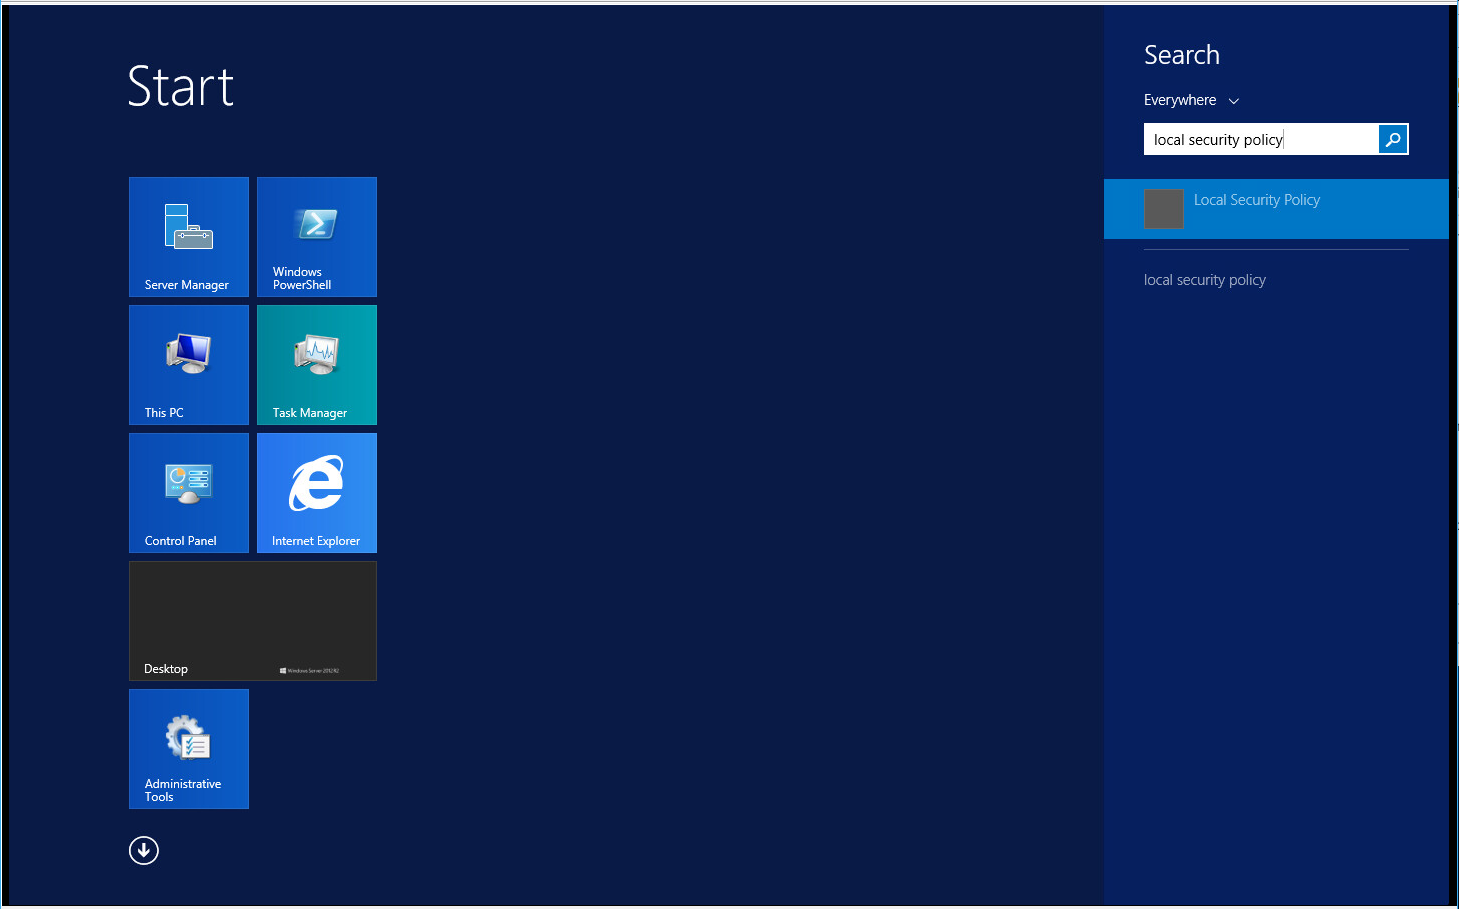
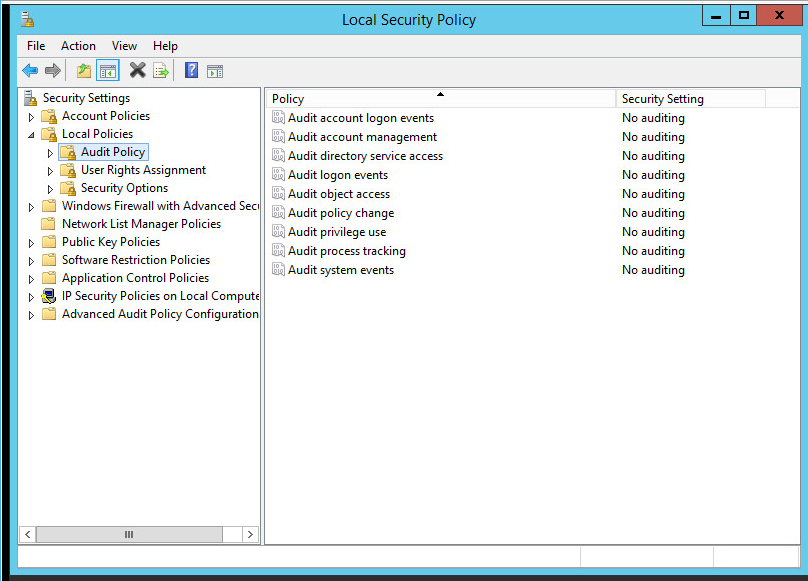
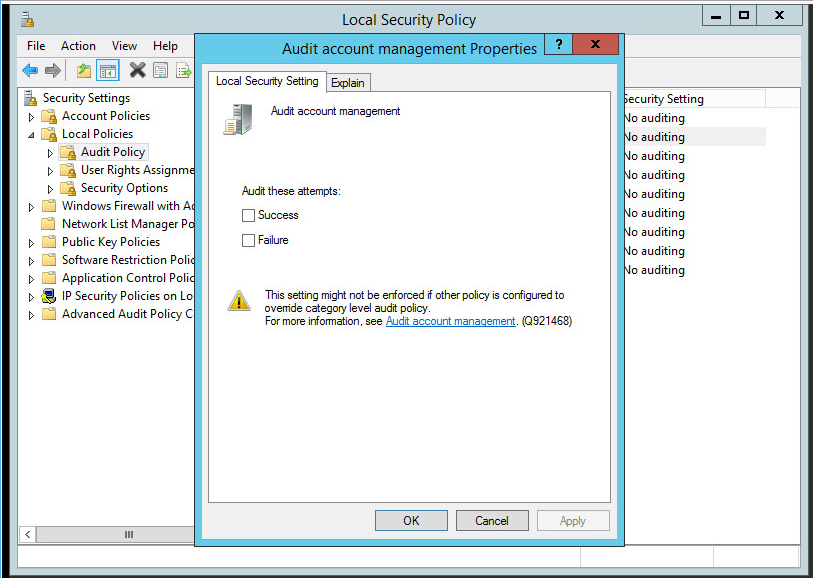
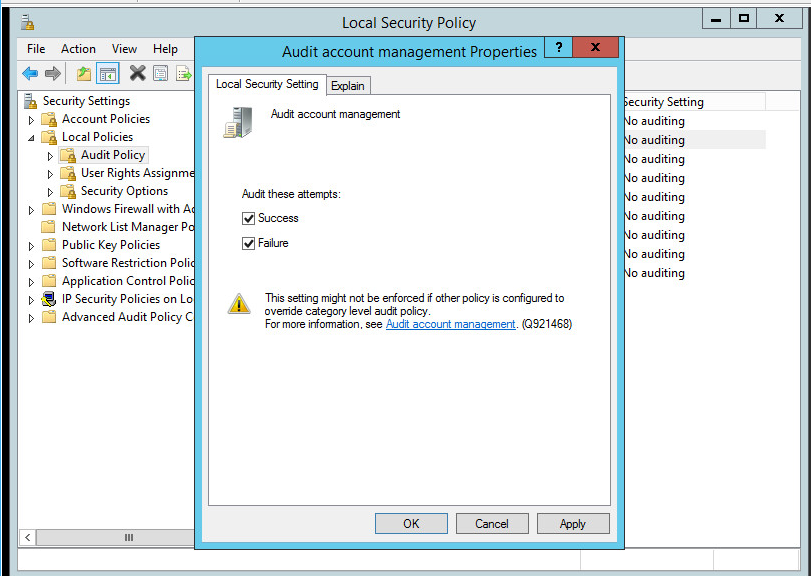
2.1.5. Configuring Active Directory to Audit Account Activity
2.2. Microsoft Exchange Server
As part of our enterprise emulation, we include a Microsoft Exchange server. This section covers the installation and configuration process used to set up Microsoft Exchange on a Windows Server 2012 R2 machine.
2.2.1. Install Microsoft Exchange
Run Exchange2016-x64.exe.
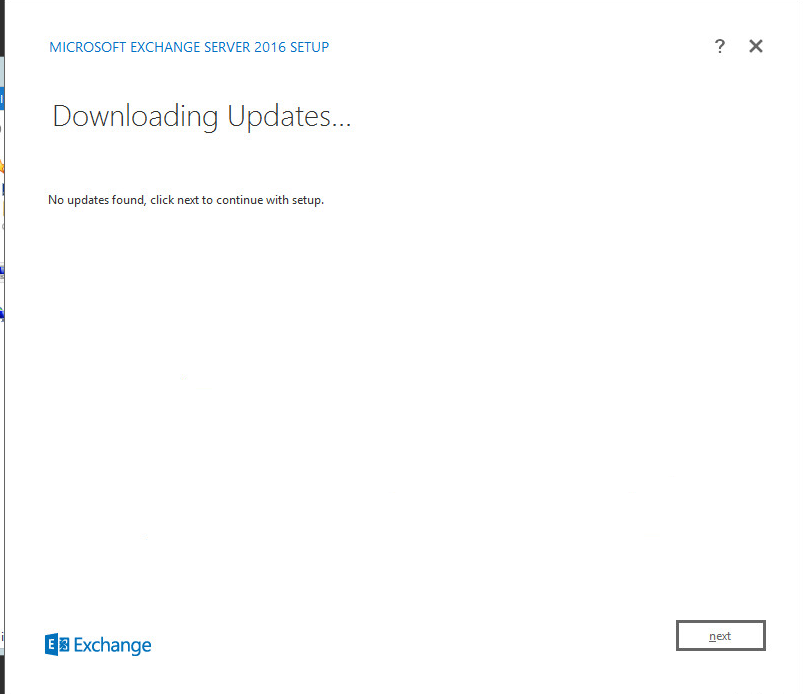
Wait for the check to finish.
Click Next.
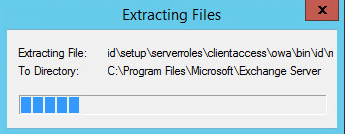
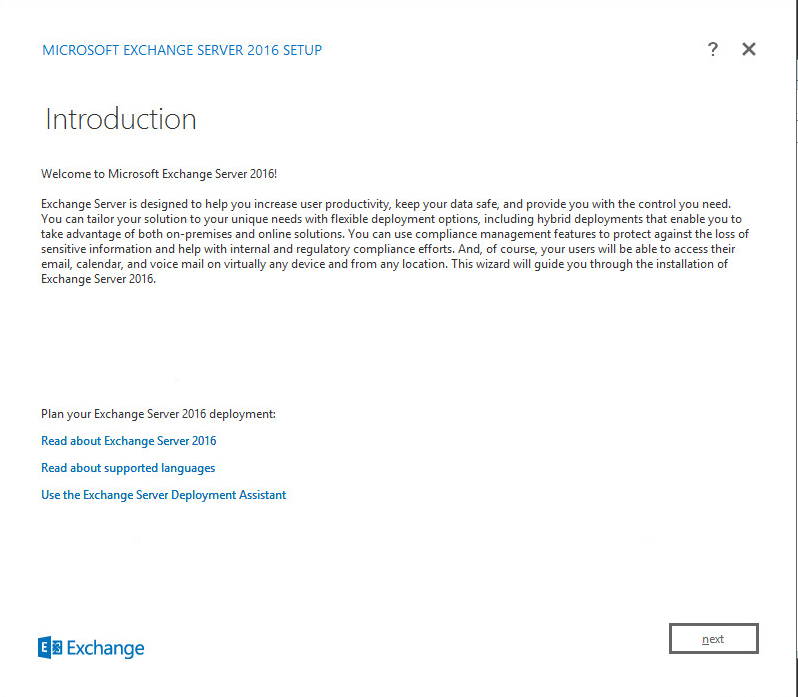
Wait for the copying to finish.
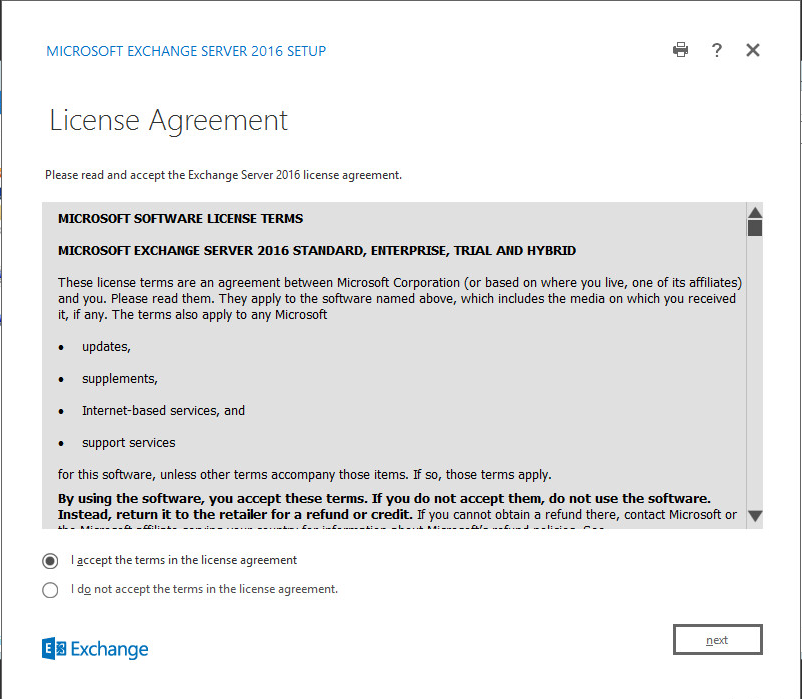
Click Next.
Click Next.
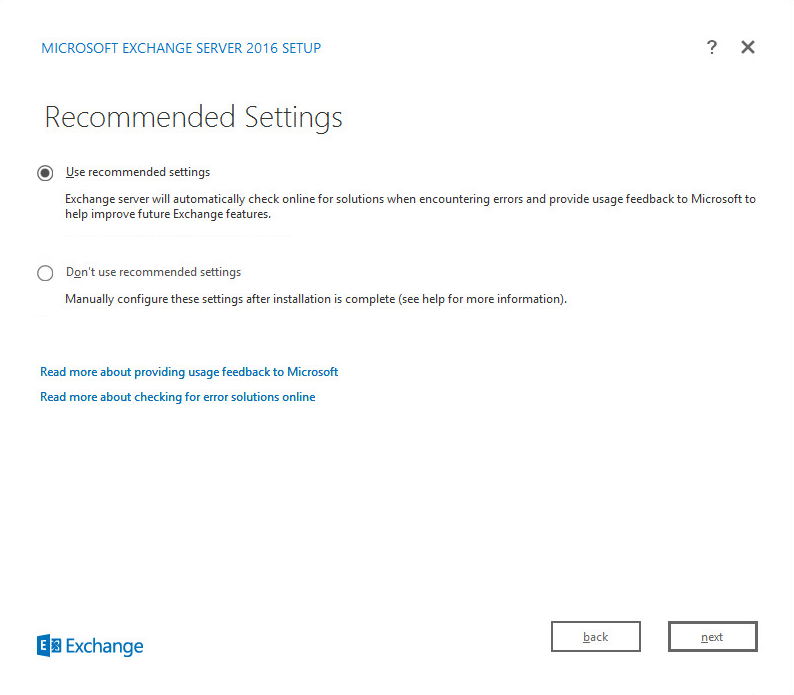
Click Use Recommended Settings.
Click Next.
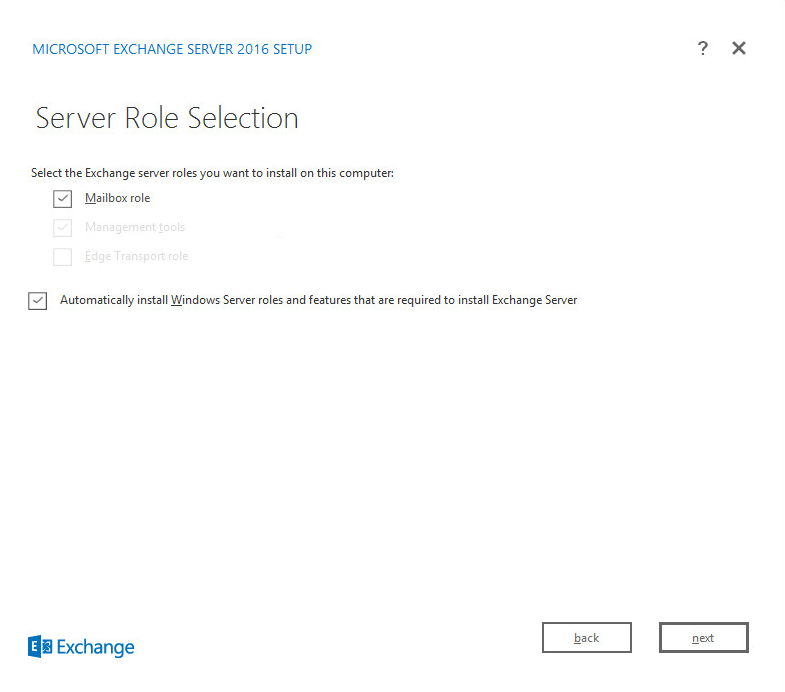
Check Mailbox role.
Check Automatically install Windows Server roles and features that are required to install Exchange Server.
Click Next.
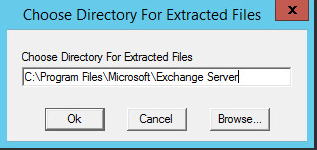
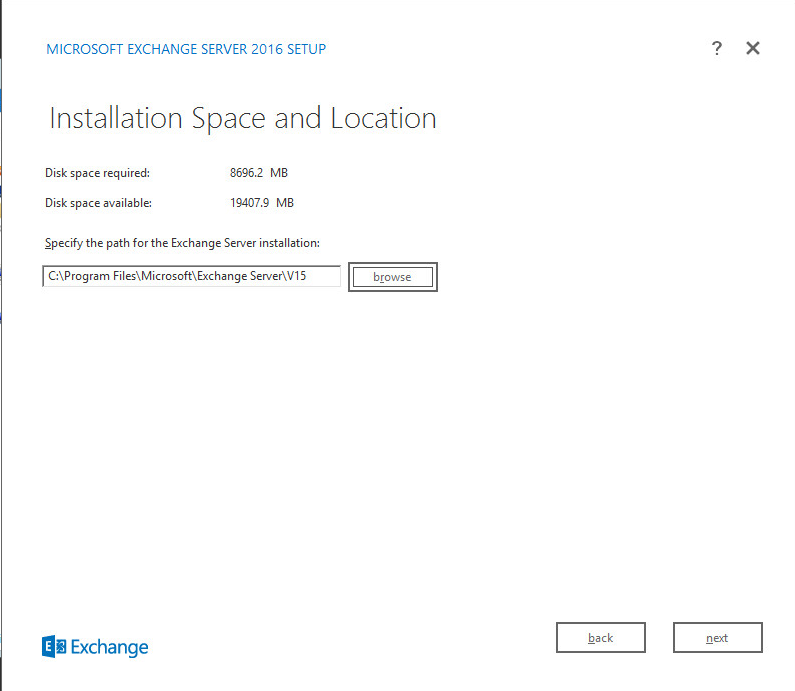
Specify the installation path for MS Exchange.
Click Next.
Specify the name for the Exchange organization. Example: DI.
Decide whether to apply split permissions based on the needs of the enterprise.
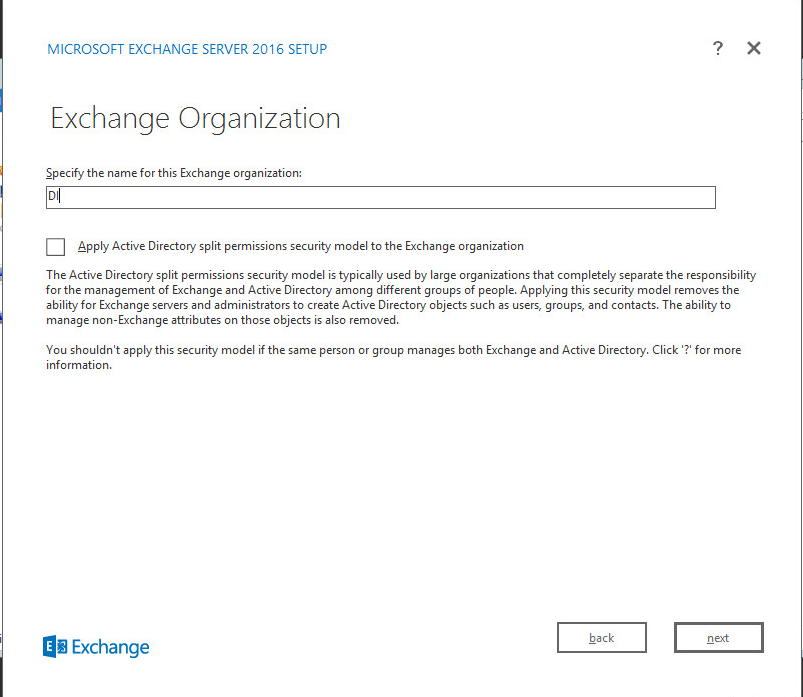
Click Next.
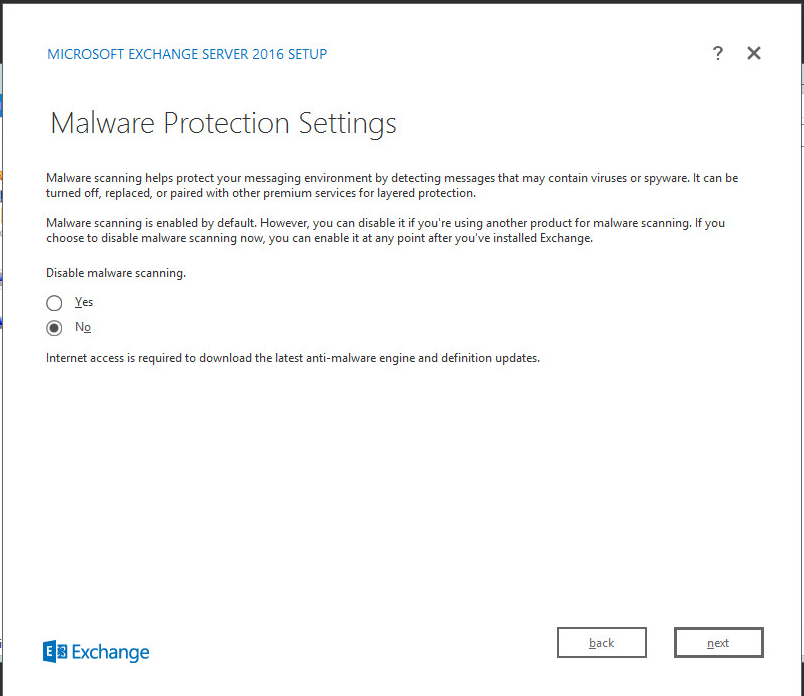
Click No.
Click Next.
Install any prerequisites listed.
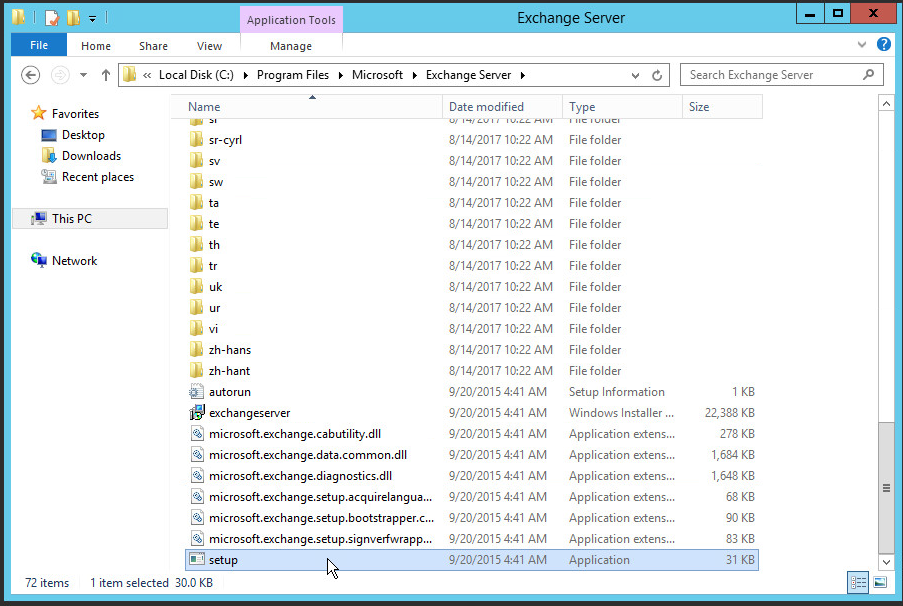
If necessary, restart the server and re-run setup.exe, following through steps 3-22 again.
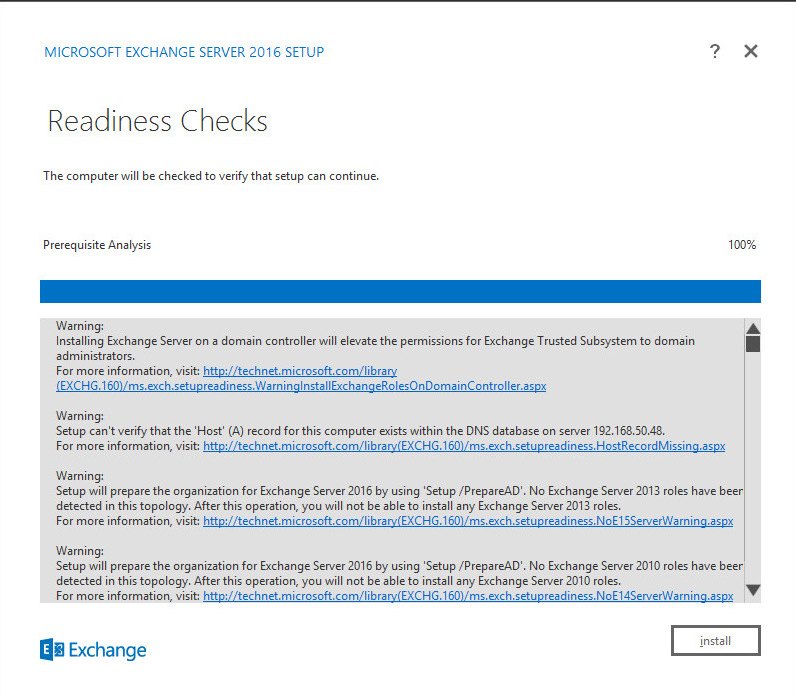
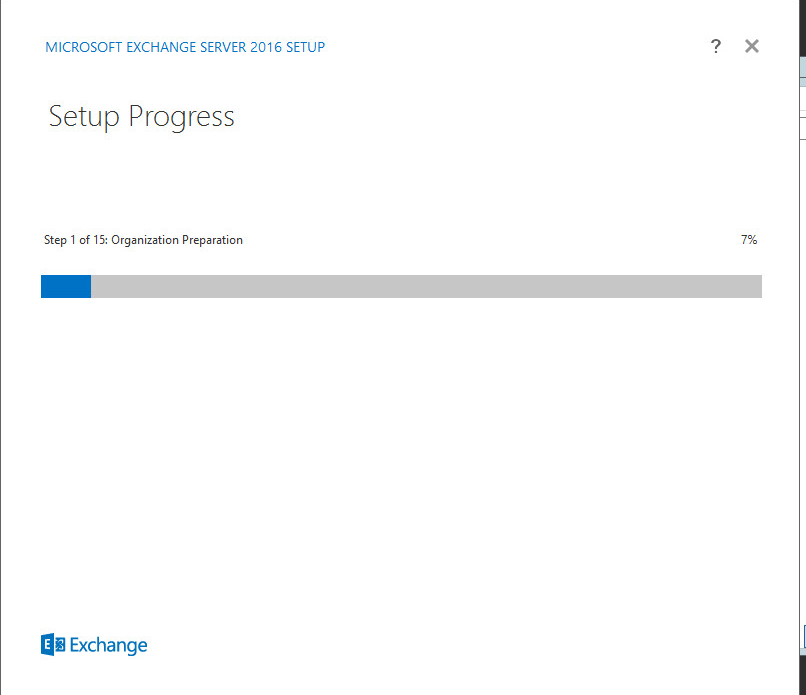
Click Install.
Wait for setup to complete.
2.4. Windows Server Hyper-V Role
As part of our simulated enterprise, we include a Windows Hyper-V server. This section covers the instructions for installing Windows Server Hyper-V on a Windows Server 2012 R2 machine.
The instructions for enabling the Windows Server Hyper-V Role are retrieved from https://technet.microsoft.com/en-us/library/hh846766(v=ws.11).aspx and are replicated below for preservation and ease of use.
2.4.1. Production Installation
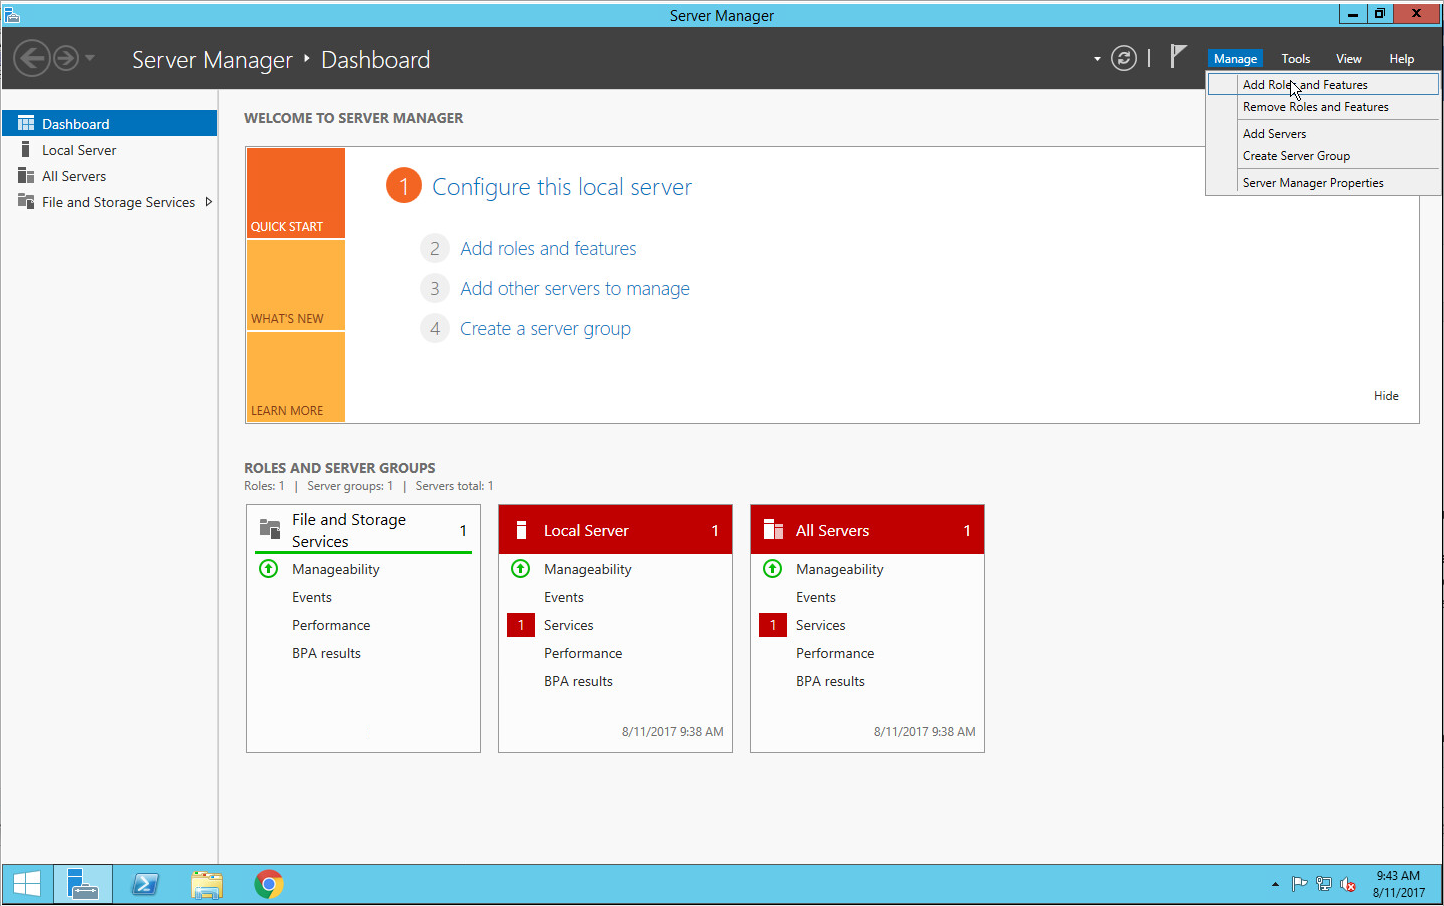
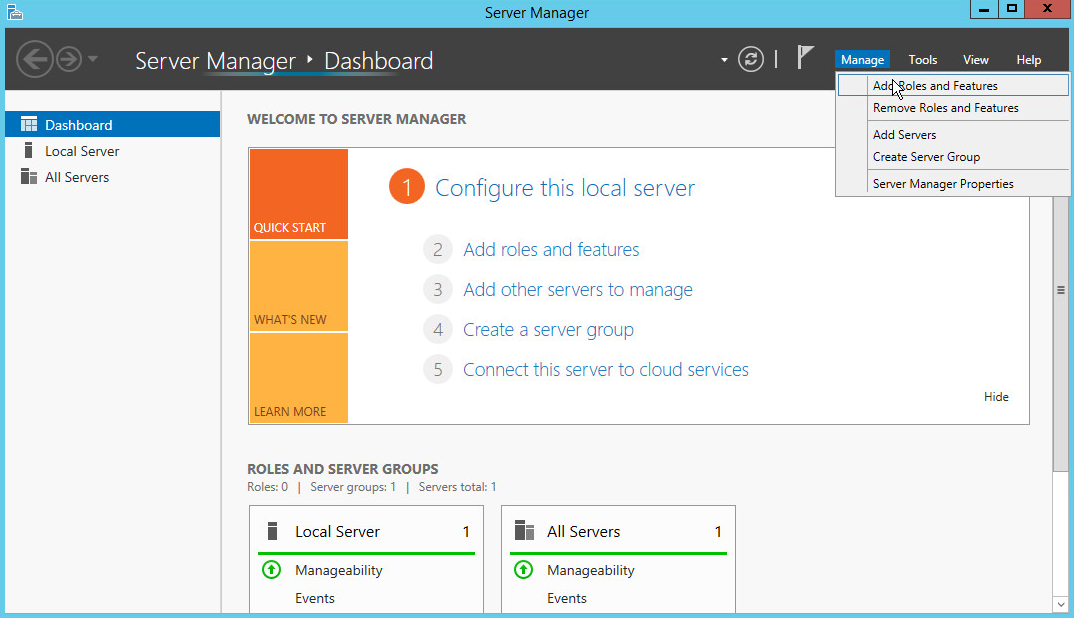
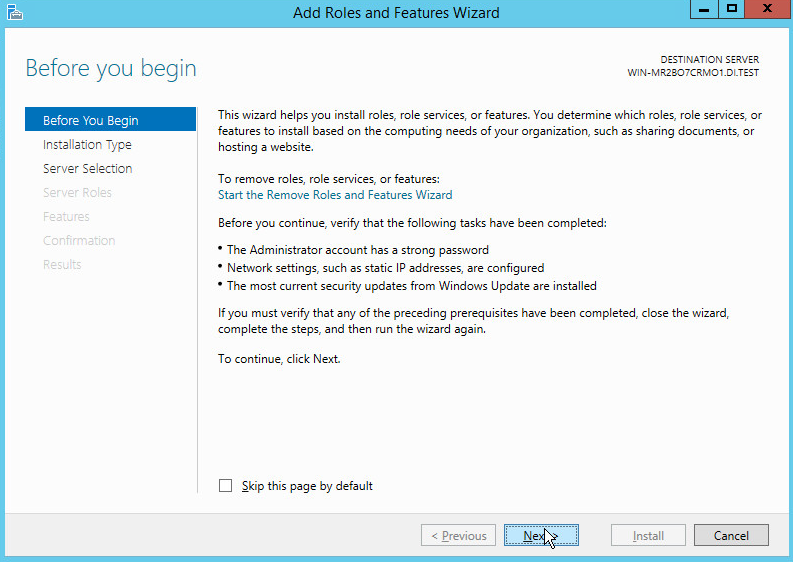
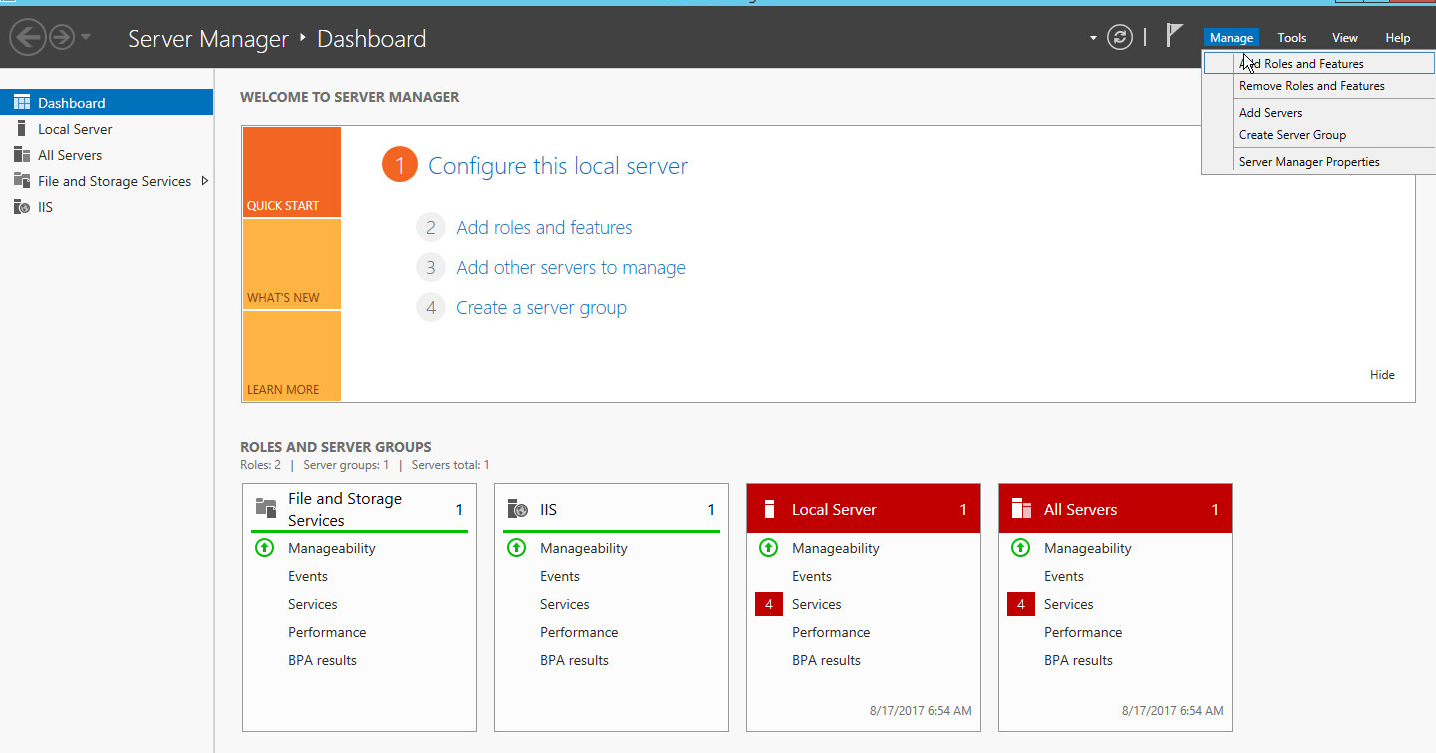
In Server Manager, on the Manage menu, click Add Roles and Features.
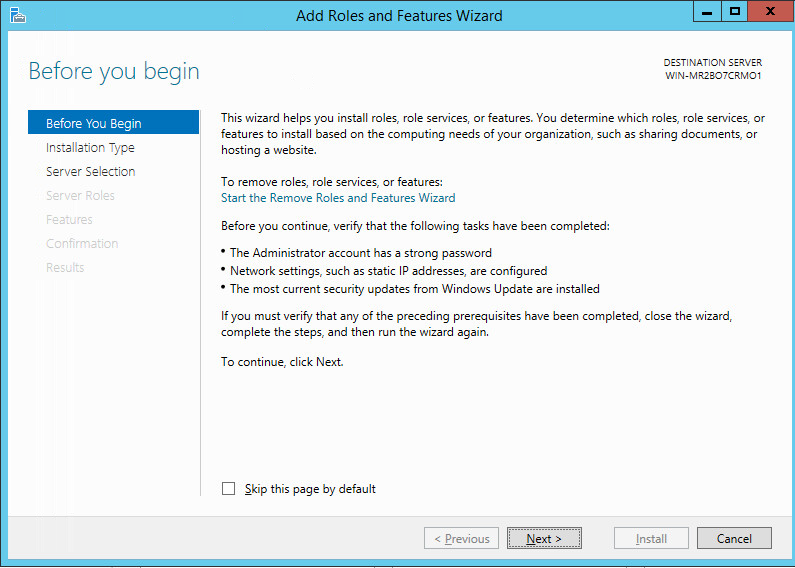
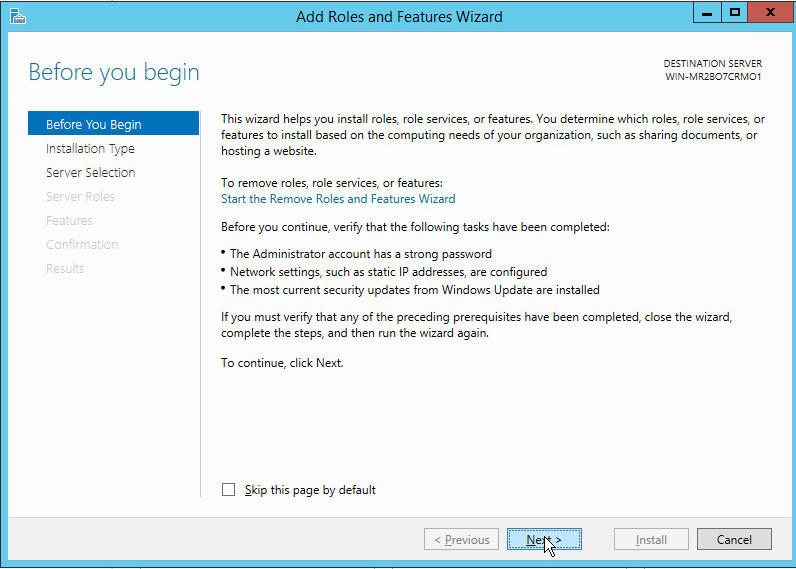
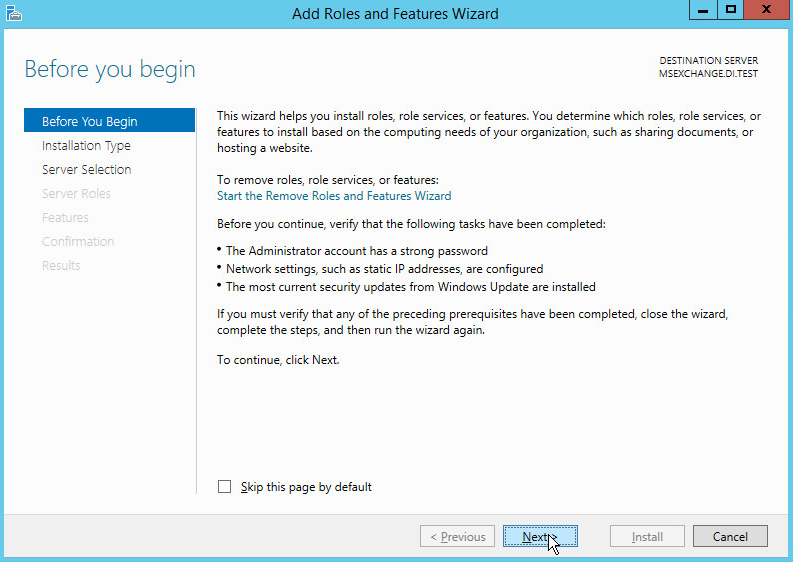
On the Before you begin page, verify that your destination server and network environment are prepared for the role and feature you want to install.
Click Next.
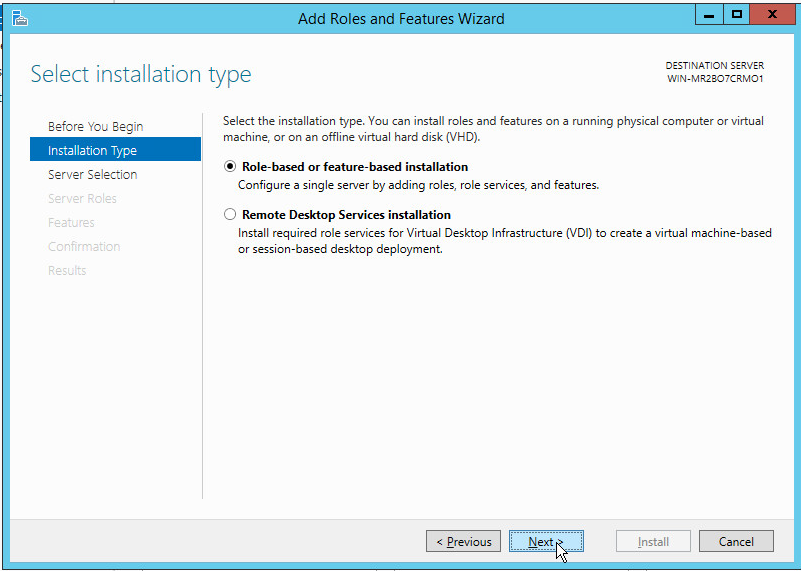
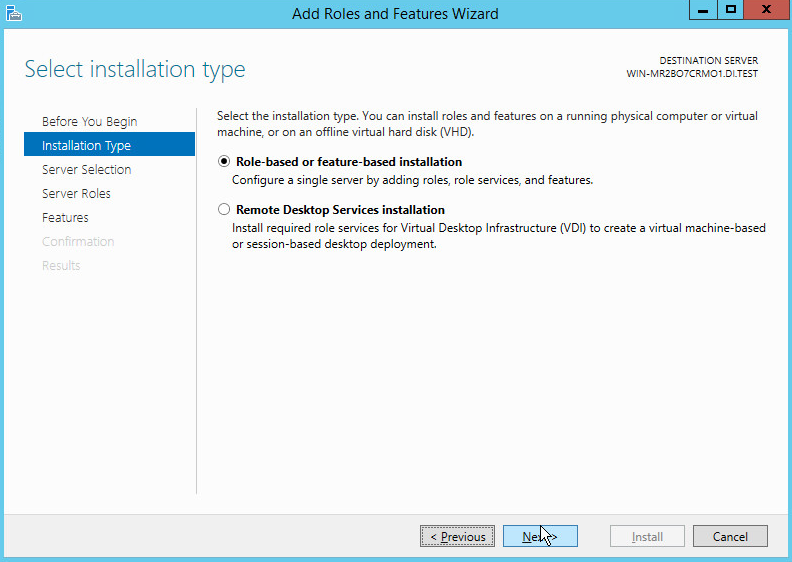
On the Select installation type page, select Role-based or feature-based installation.
Click Next.
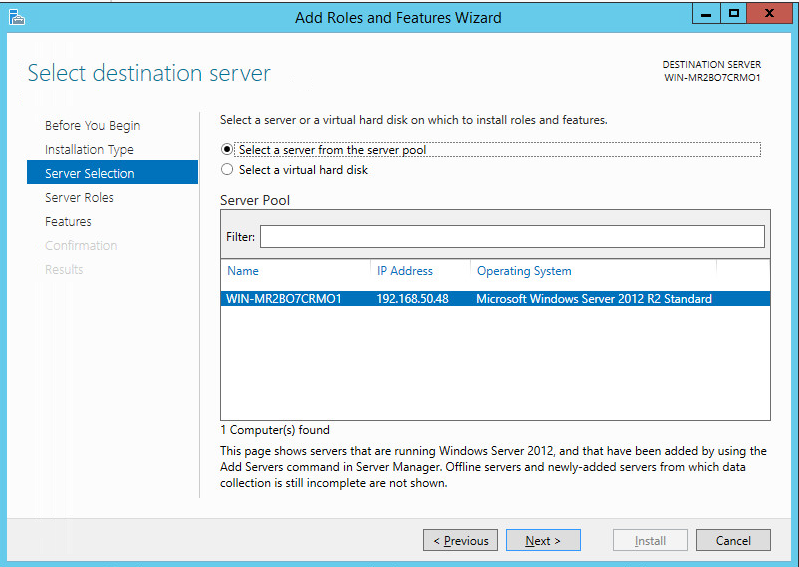
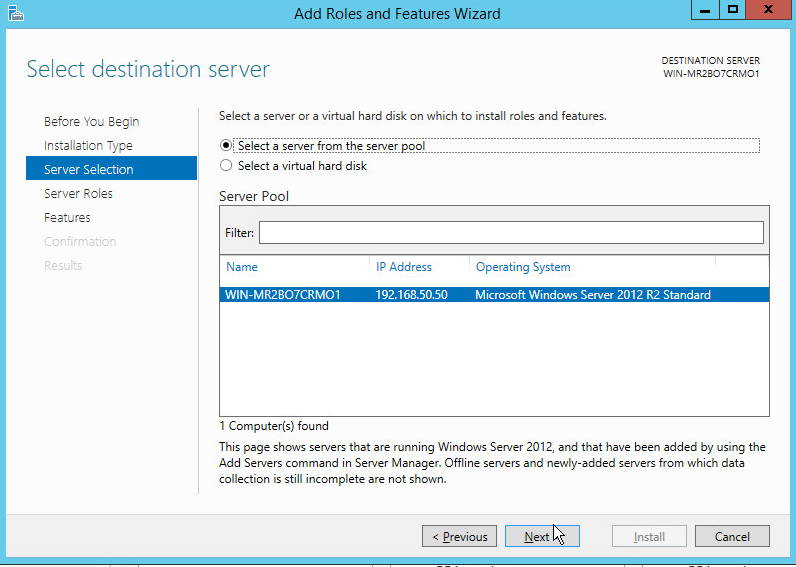
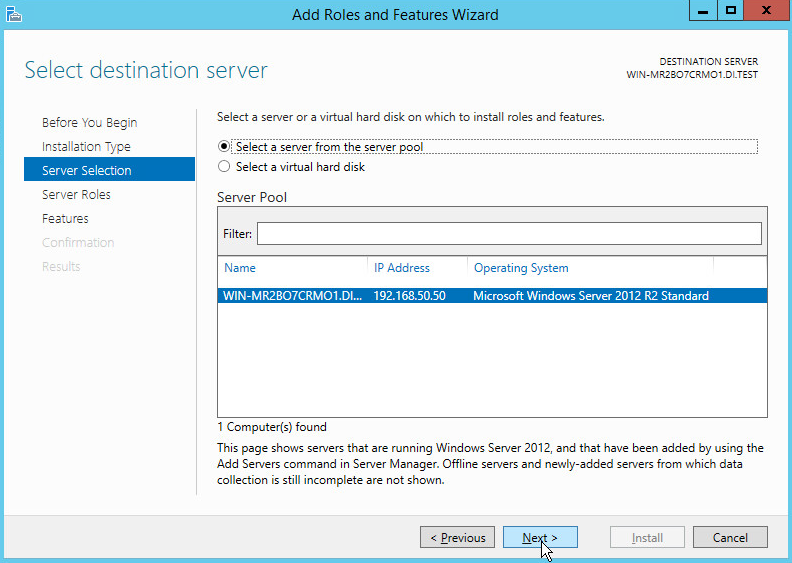
On the Select destination server page, select a server from the server pool.
Click Next.
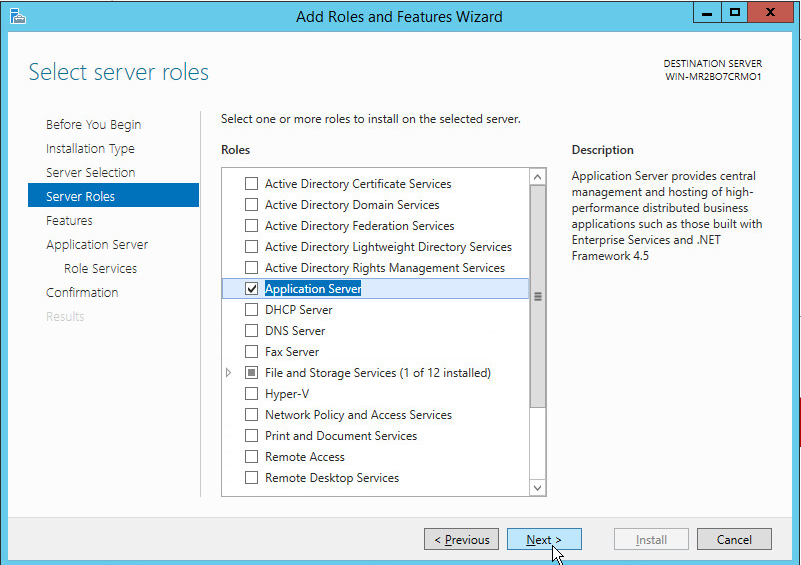
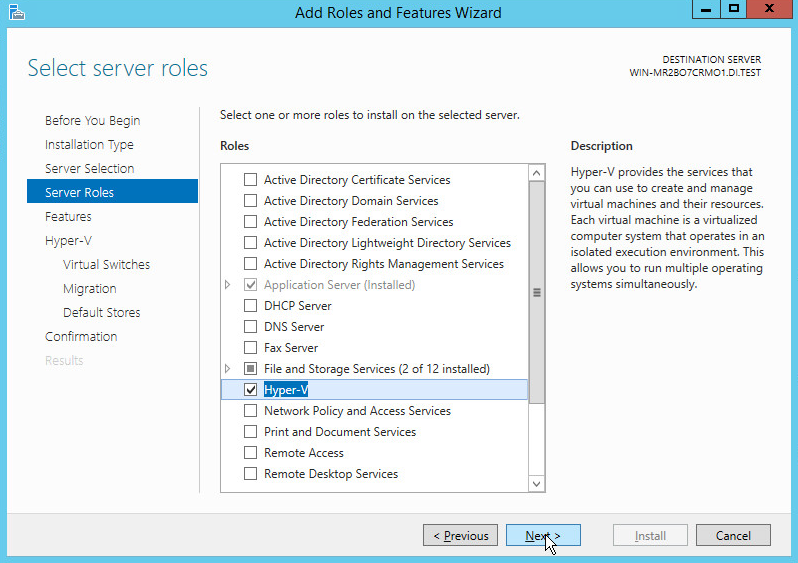
On the Select server roles page, select Hyper-V.
To add the tools that you use to create and manage virtual machines, click Add Features.
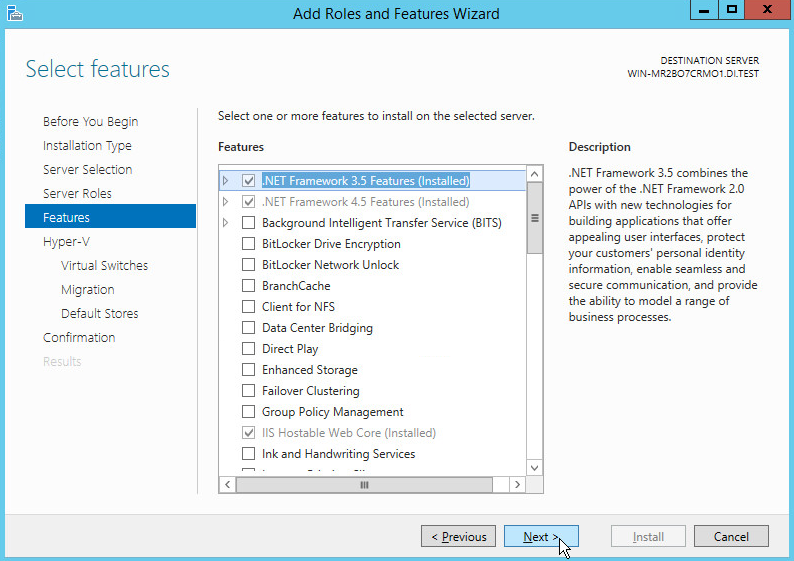
Click Next.
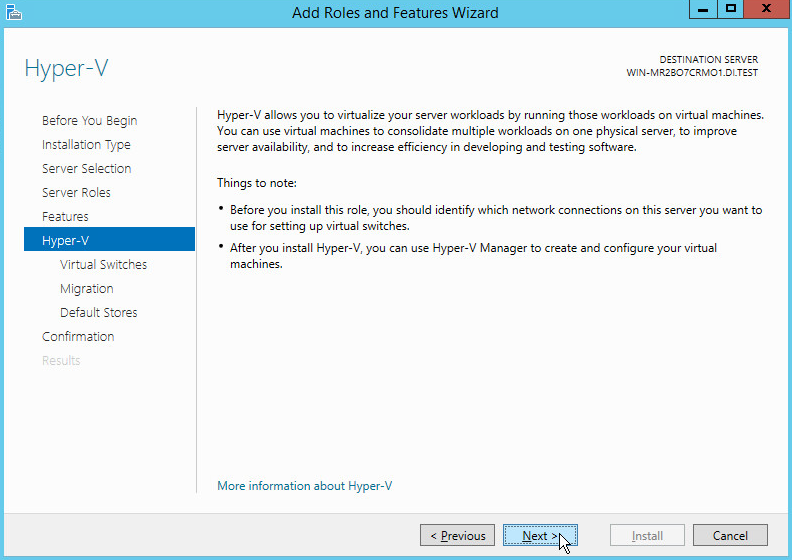
Click Next.
Click Next.
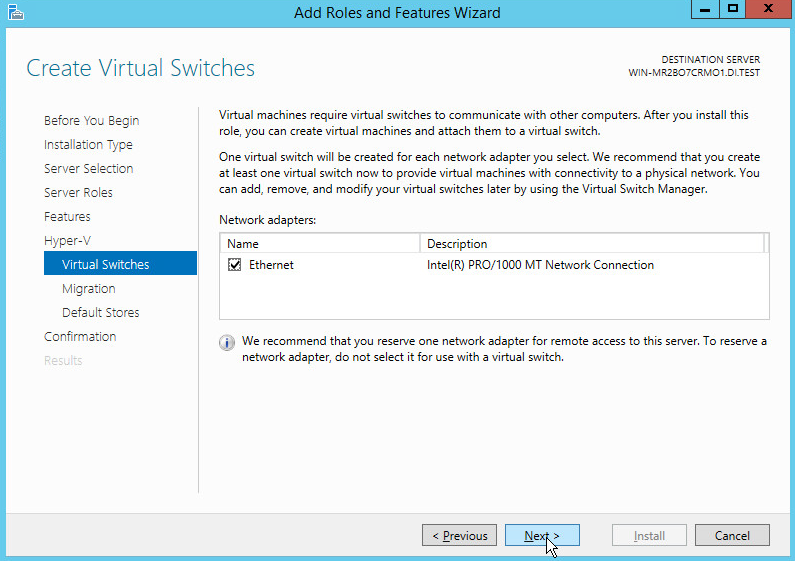
On the Create Virtual Switches page, select the appropriate options.
Click Next.
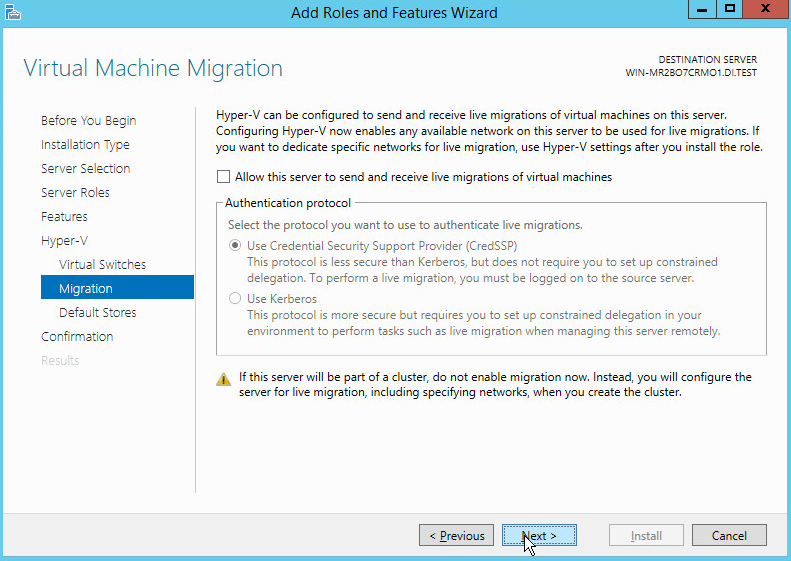
On the Virtual Machine Migration page, select the appropriate options.
Click Next.
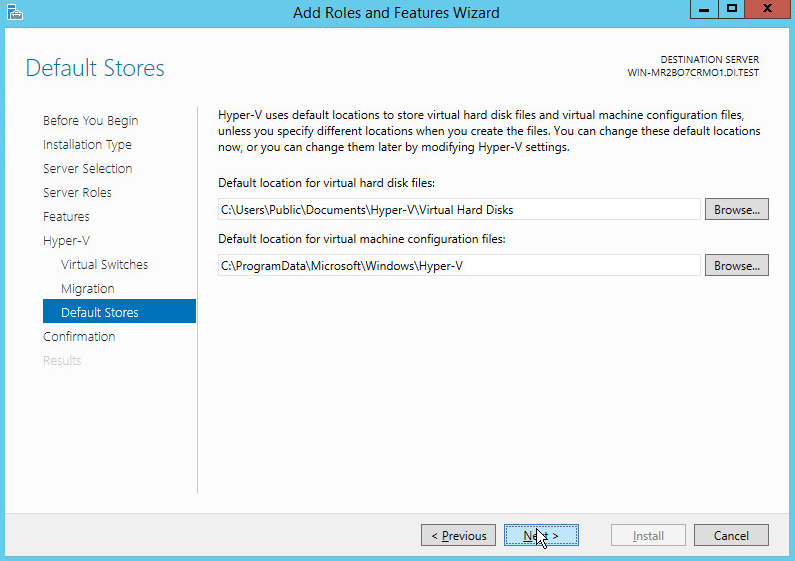
On the Default Stores page, select the appropriate options.
Click Next.
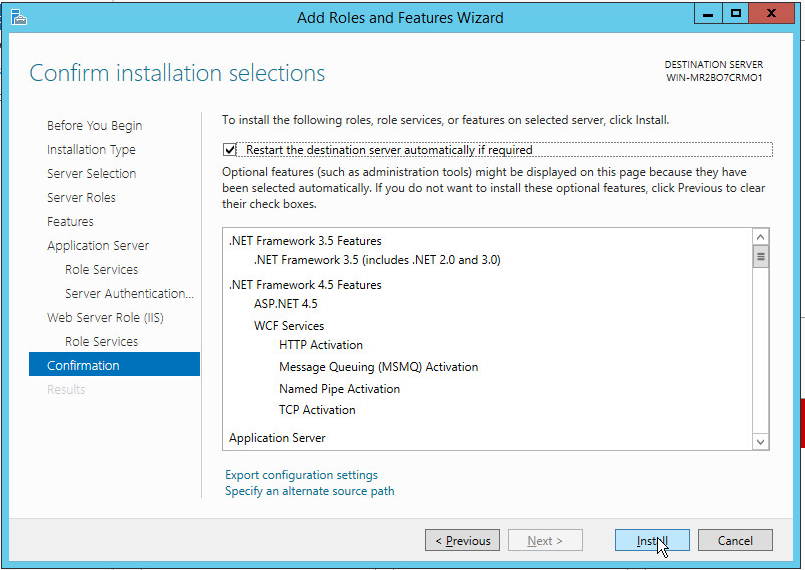
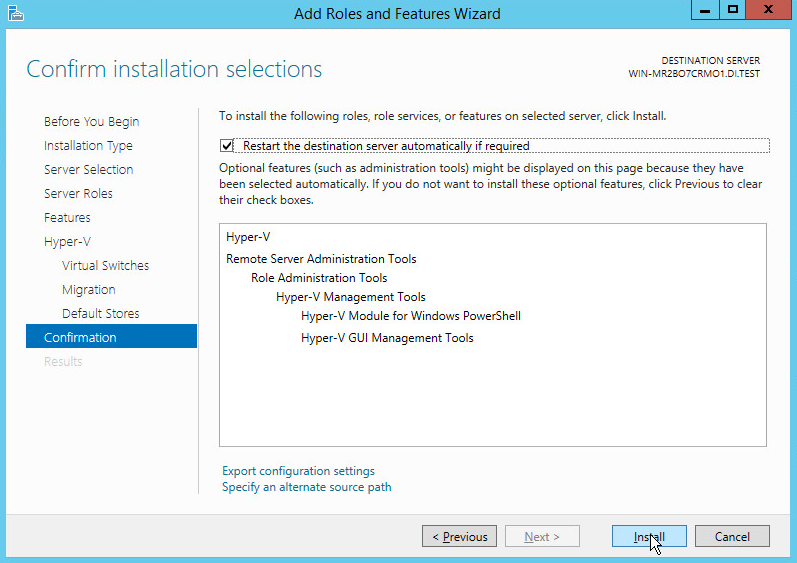
On the Confirm installation selections page, select Restart the destination server automatically if required.
Click Install.
When installation is finished, verify that Hyper-V installed correctly. Open the All Servers page in Server Manager, select a server on which you installed Hyper-V. Check the Roles and Features tile on the page for the selected server.
2.5. MS SQL Server
As part of both our enterprise emulation and data integrity solution, we include a Microsoft SQL Server. This section covers the installation and configuration process used to set up Microsoft SQL Server on a Windows Server 2012 R2 machine.
2.5.1. Install and Configure MS SQL
Acquire SQL Server 2014 Installation Media.
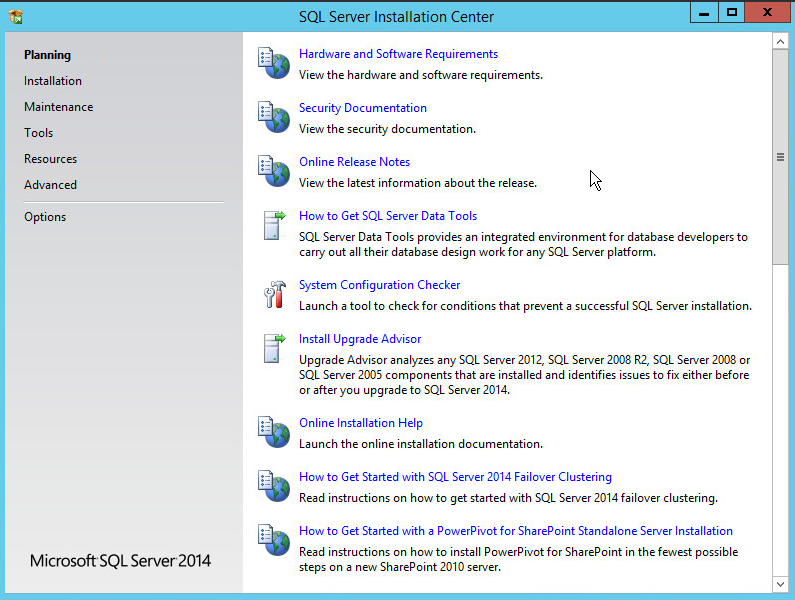
Locate the installation media in the machine and click on SQL2014_x64_ENU to launch SQL Server Installation Center.
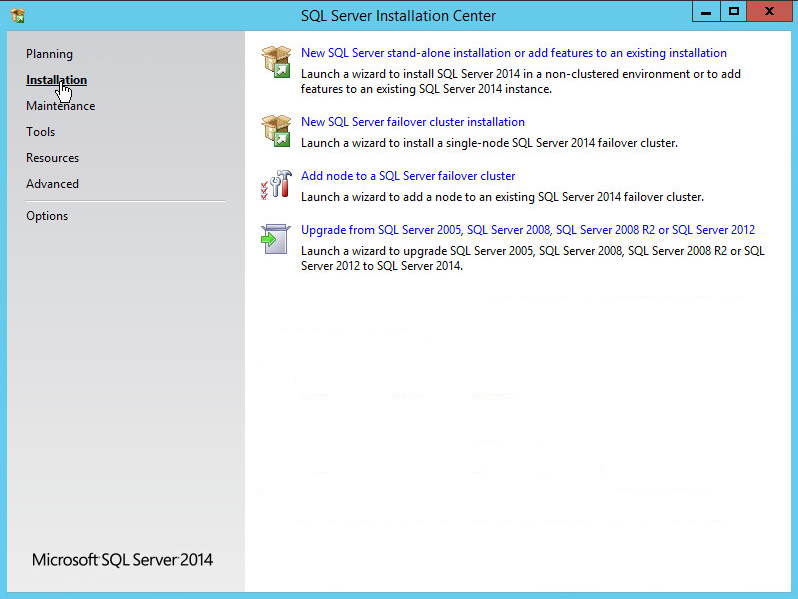
On the left menu, select Installation.
Select New SQL Server stand-alone installation or add features to an existing installation. This will launch the SQL Server 2014 setup.
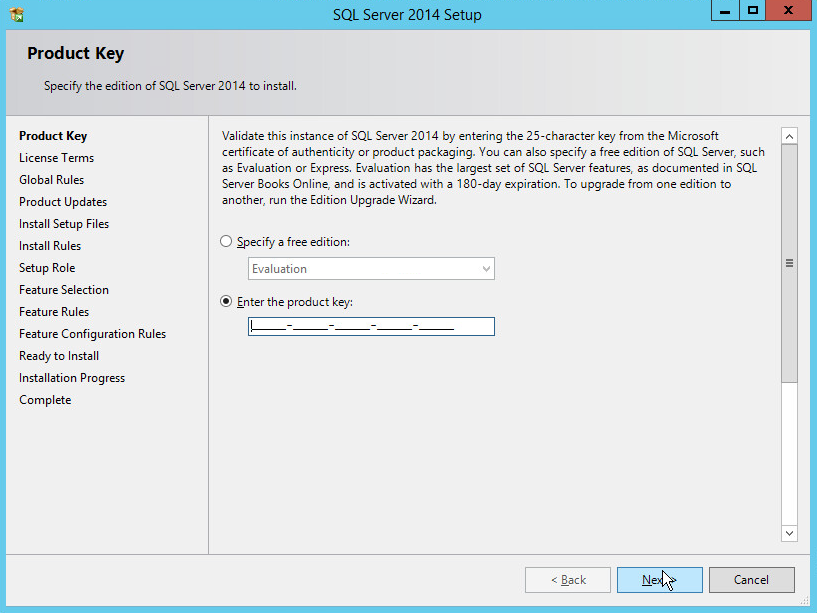
In the Product Key section, enter your product key.
Click Next.
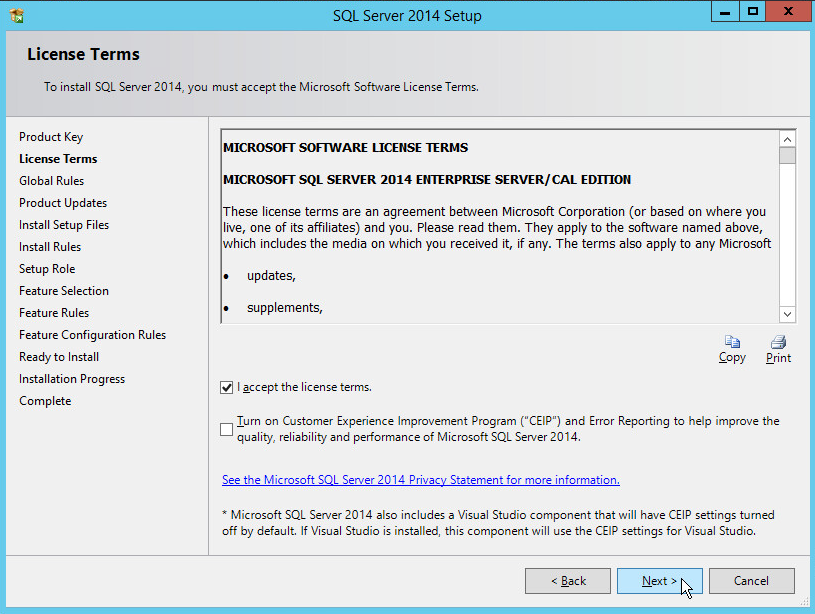
In the License Terms section, read and click I accept the license terms.
Click Next.
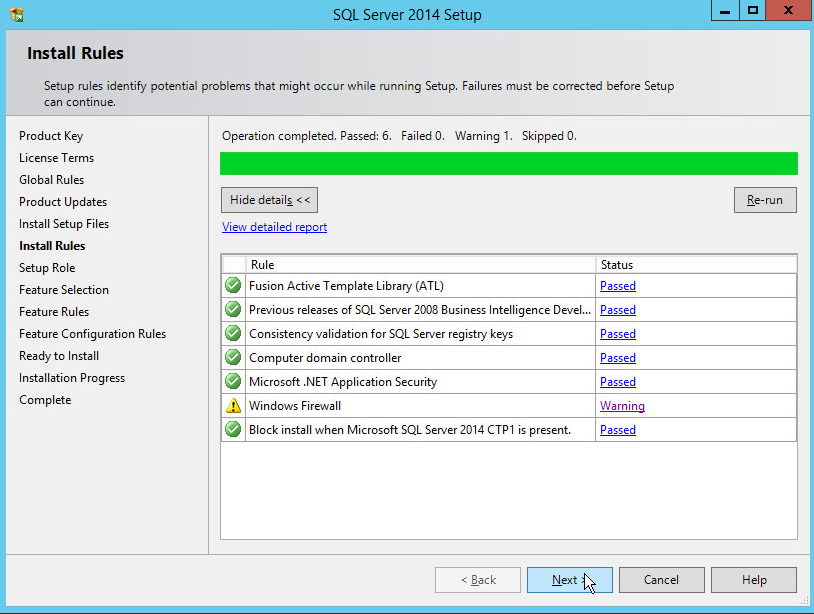
In the Install Rules section, note and resolve any further conflicts.
Click Next.
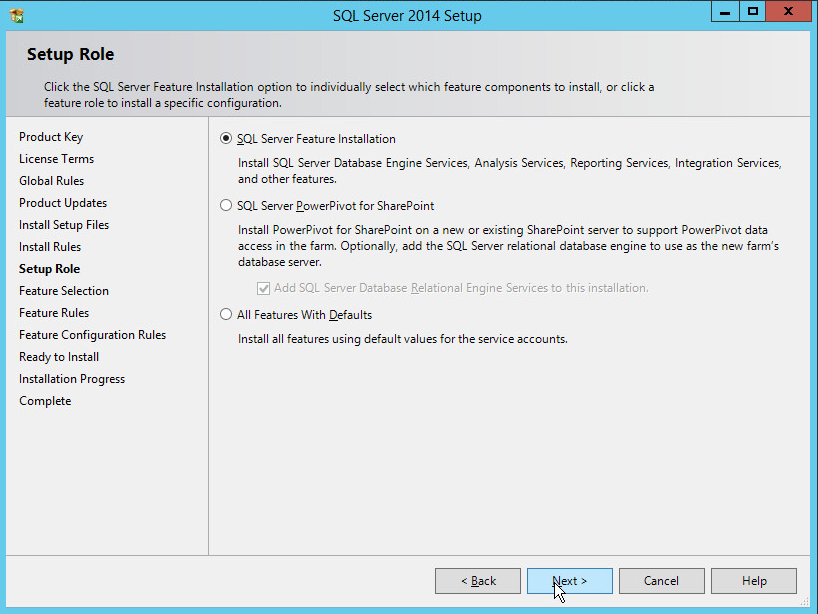
In the Setup Role section, select SQL Server Feature Installation.
Click Next.
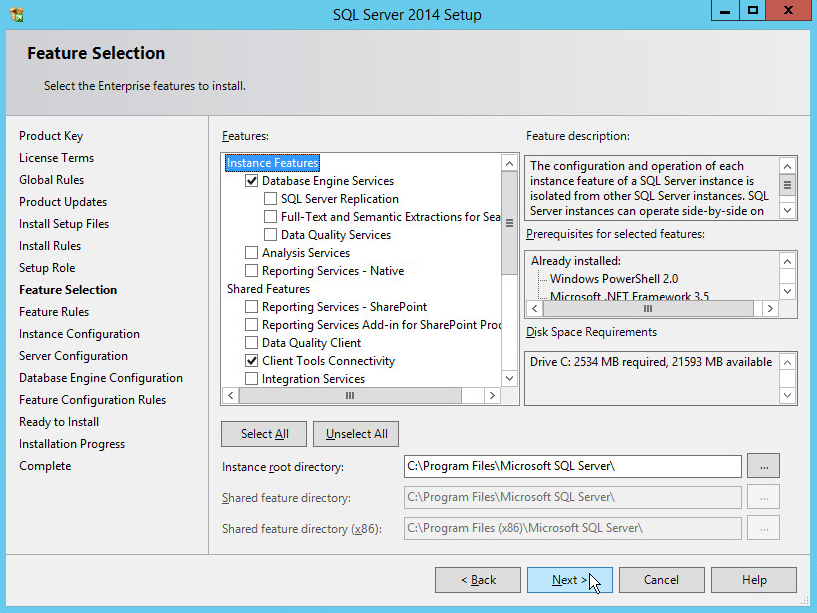
In the Feature Selection section, select the following:
Click Next.
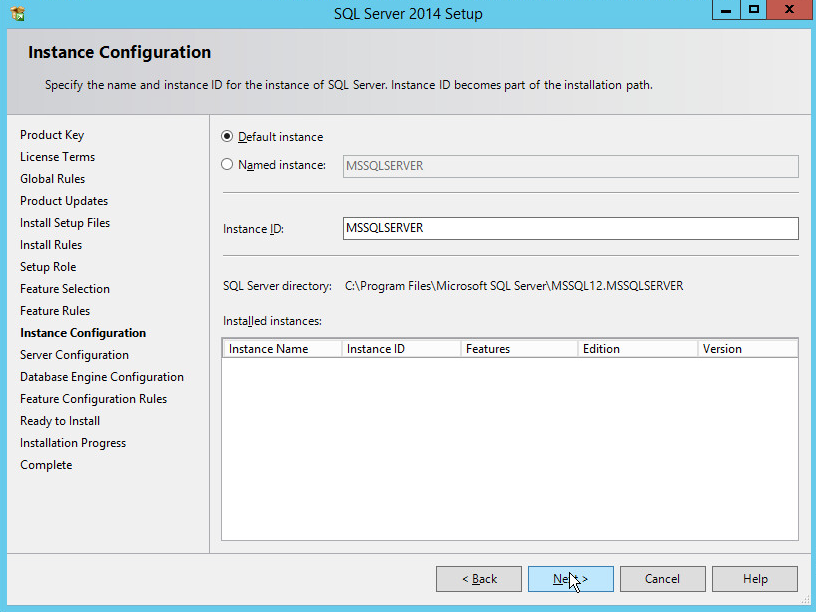
In the Instance Configuration section, select Default instance.
Click Next.
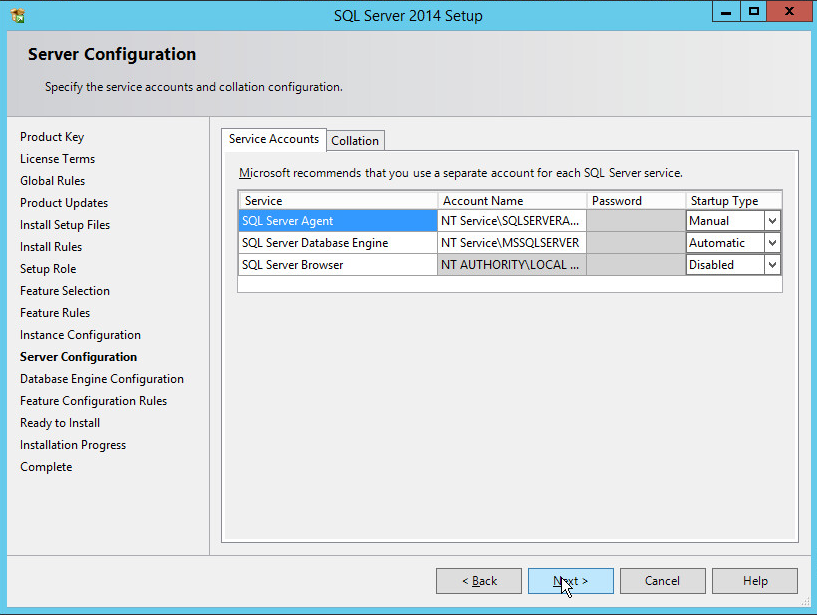
In the Server Configuration section, click Next.
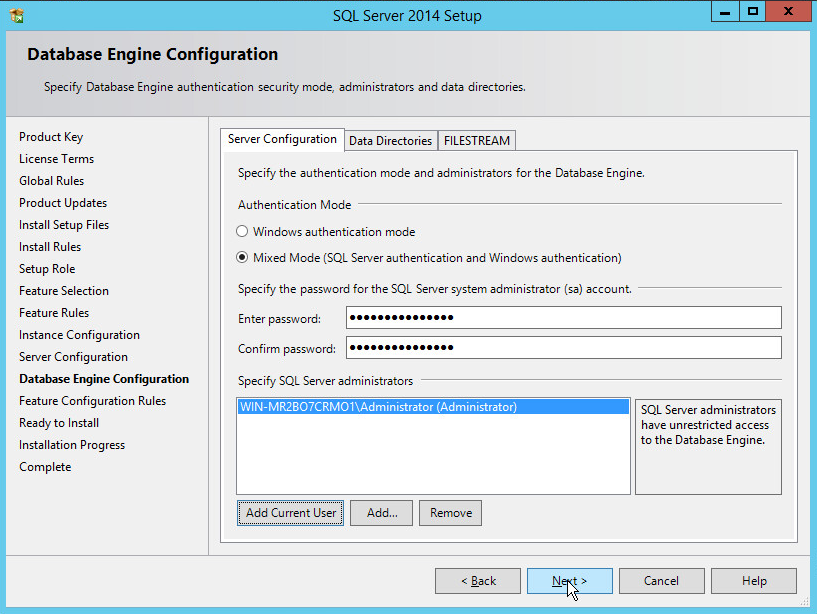
In the Database Engine Configuration section, make sure Mixed Mode is selected.
Add all desired users as Administrators under Specify SQL Server Administrators by pressing Add Current User.
- For Domain accounts, simply type in $DOMAINNAME\$USERNAME into Enter the object names to select textbox.
- Click OK.
- For local computer accounts, click on locations and select the computers name.
- Click OK.
- Type the username into the Enter the object names to select textbox.
- Once you are finished adding users, click Next.
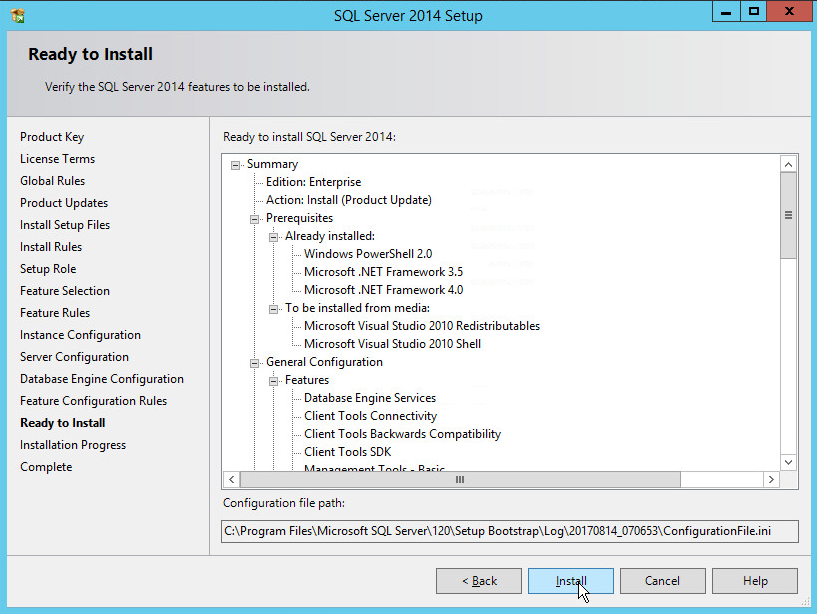
In the Ready to install section, verify the installation and click Install.
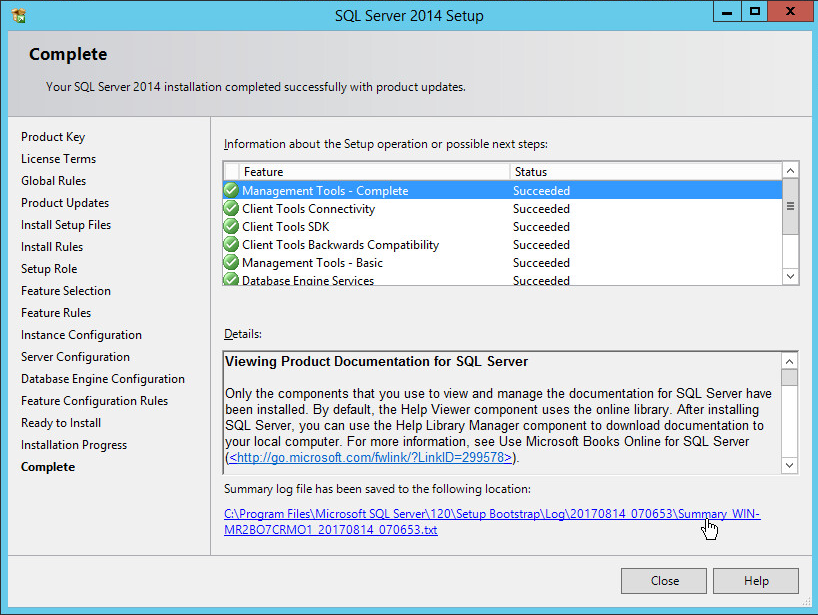
Wait for the install to finish.
2.5.2. Open Port on Firewall
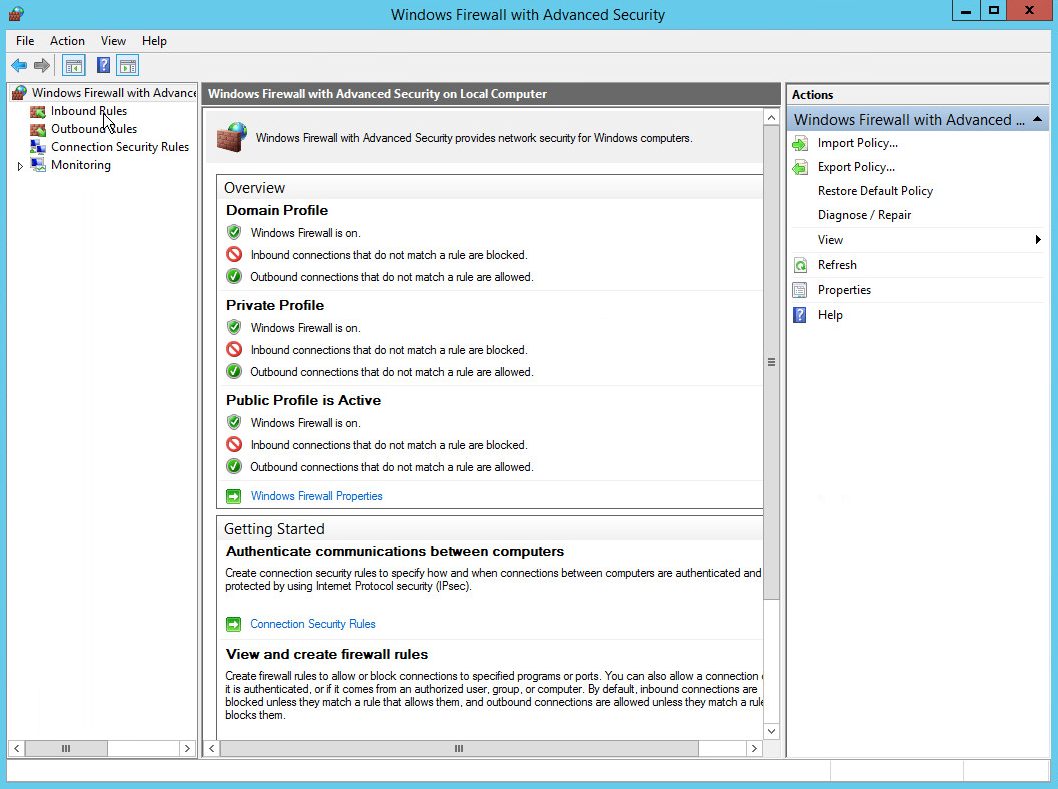
Open Windows Firewall with Advanced Security.
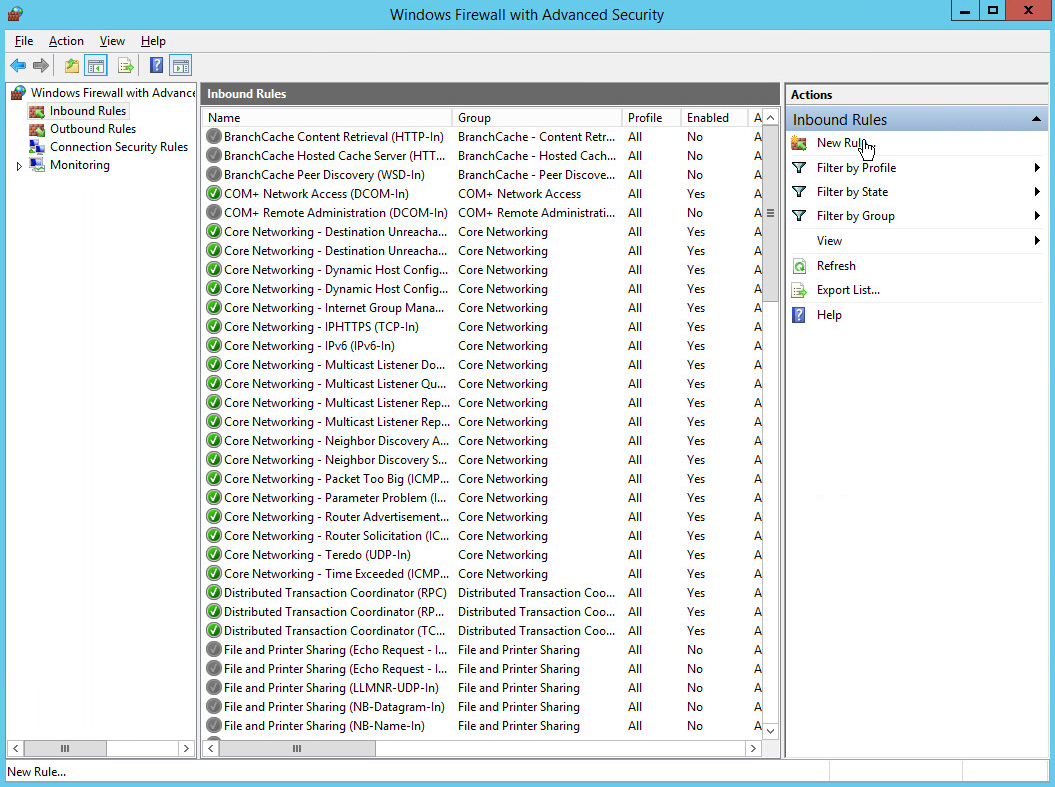
Click Inbound Rules and then New Rule.
Select Port.
Click Next.
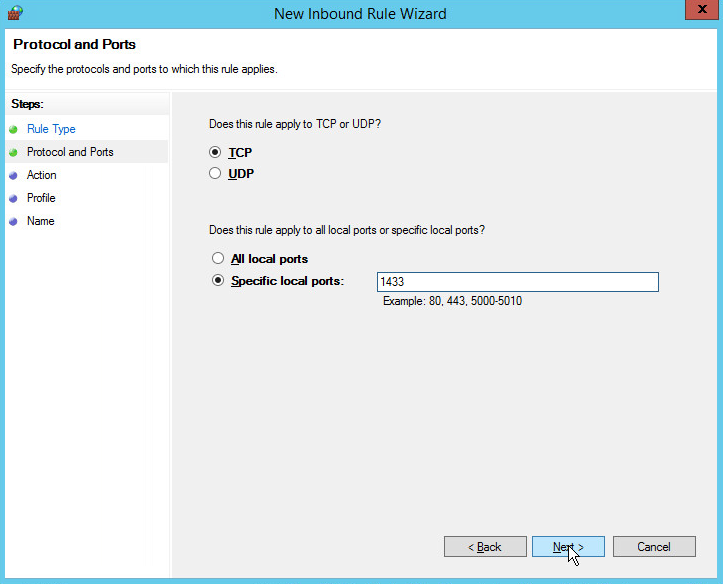
Select TCP and Specific local ports.
Type 1433 into the text field.
Click Next.
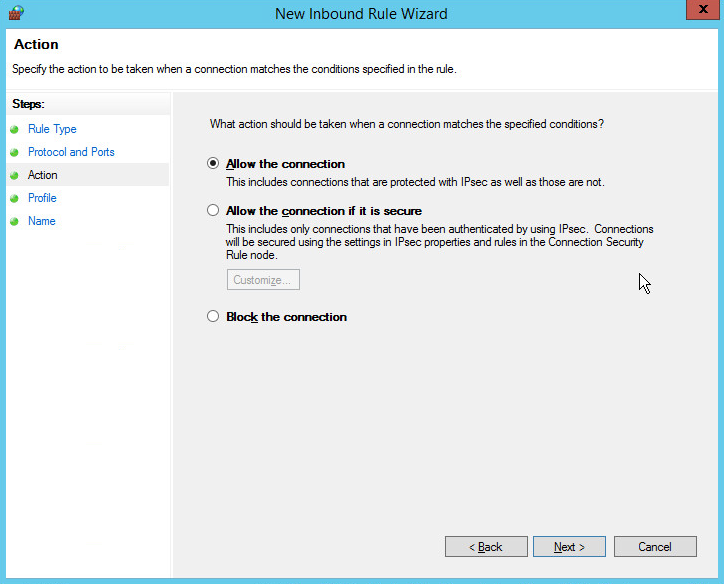
Select Allow the connection.
Click Next.
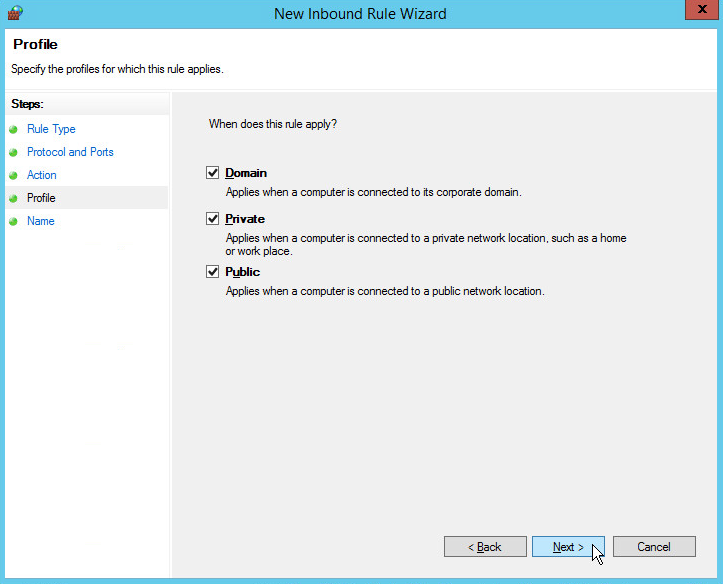
Select all applicable locations.
Click Next.
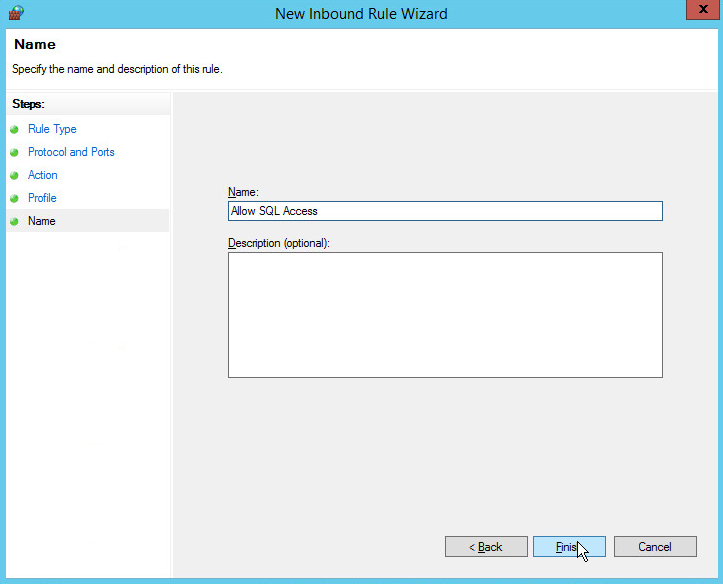
Name the rule Allow SQL Access.
Click Finish.
2.5.3. Add a New Login to the Database
2.6. HPE ArcSight Enterprise Security Manager (ESM)
HPE ArcSight Enterprise Security Manager is primarily a log collection/analysis tool with features for sorting, filtering, correlating, and reporting information from logs. It is adaptable to logs generated by various systems, applications, and security solutions.
This installation guide assumes a pre-configured CentOS 7 Virtual Machine with ESM already installed and licensed. This section covers the installation and configuration process used to set up ArcSight agents on various machines.
2.6.1. Install Individual ArcSight Windows Connectors
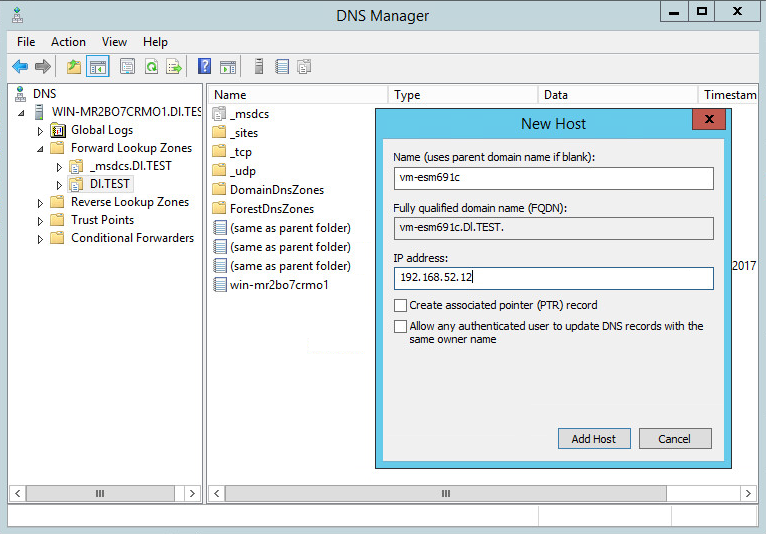
Log in to your DNS server.
Add the host name of the ESM server vm-esm691c to the DNS list and associate it with the IP address of the ESM server.
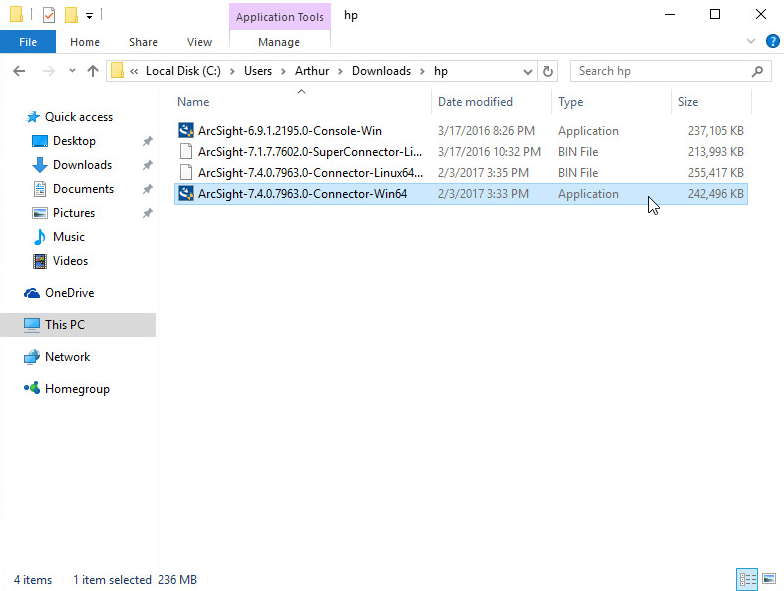
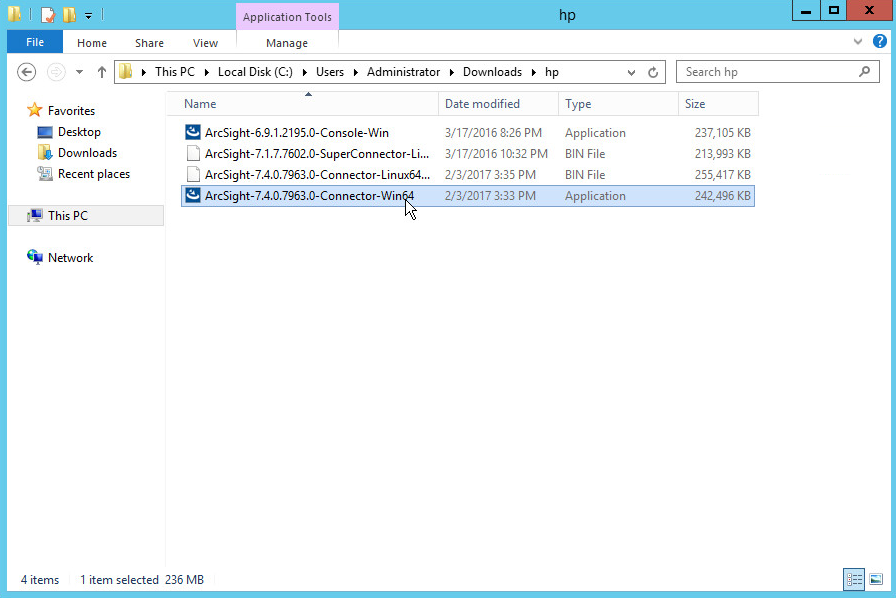
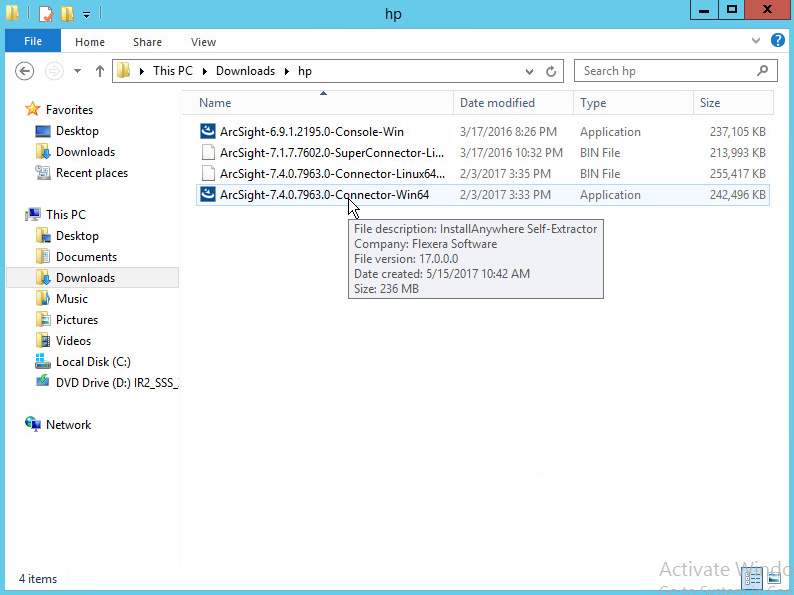
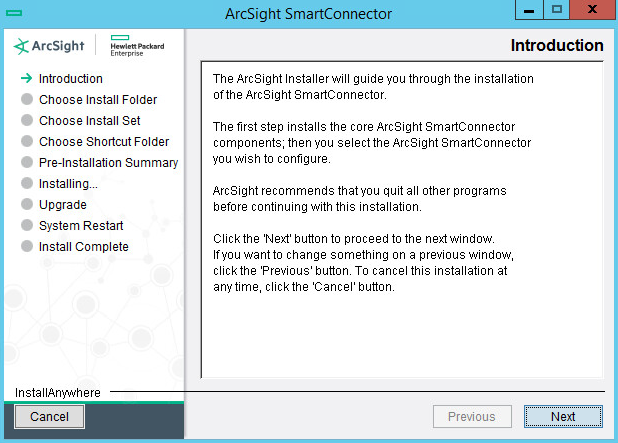
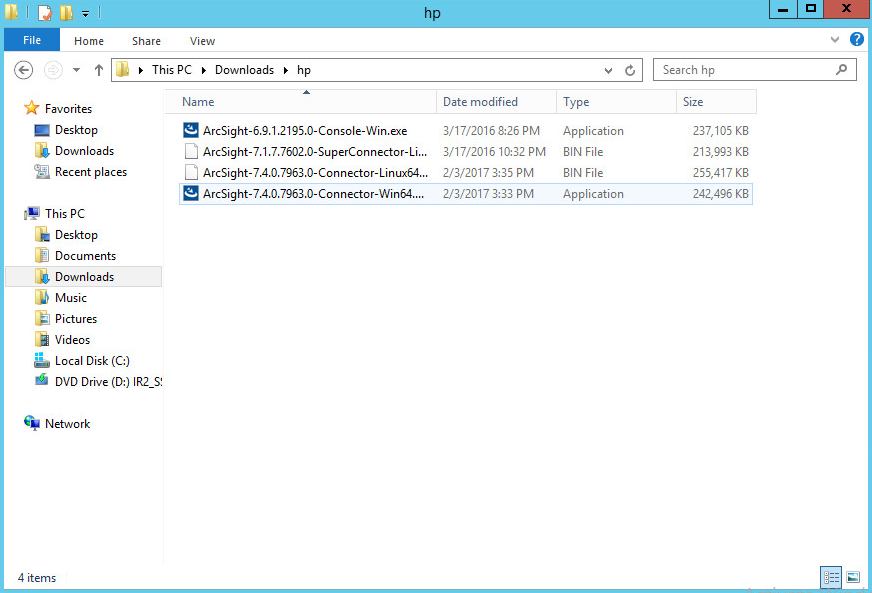
Run the installation file ArcSight-7.4.0.7963.0-Connector-Win64.
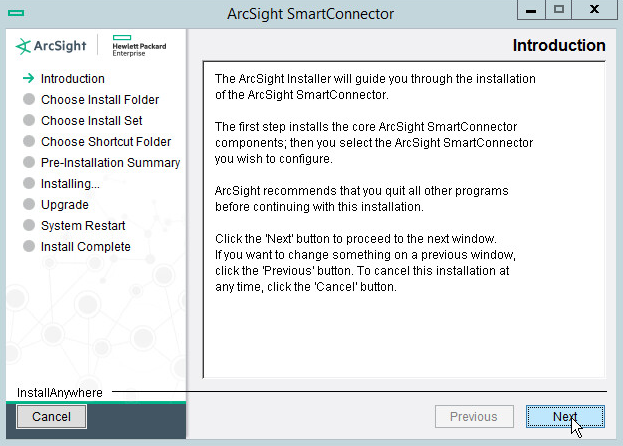
Wait for the initial setup to finish.
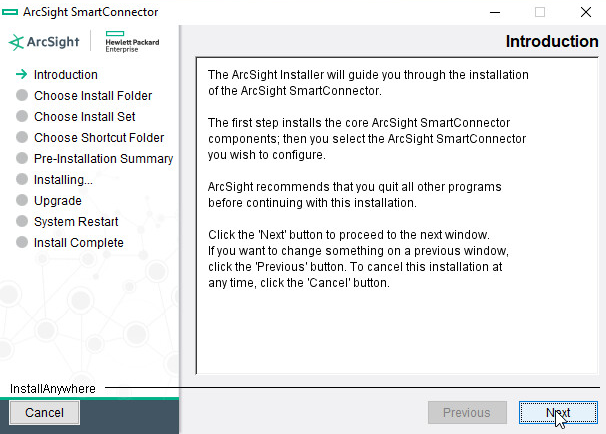
Click Next.
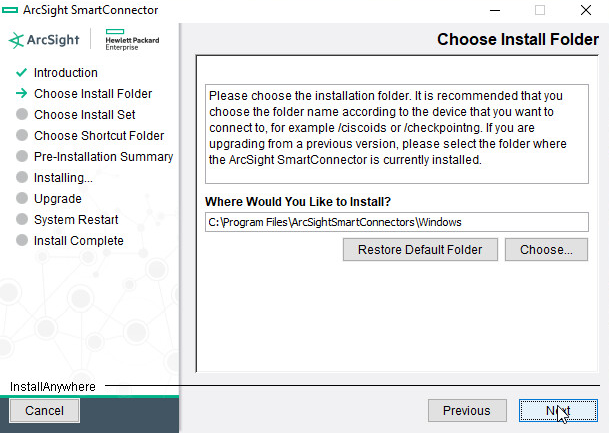
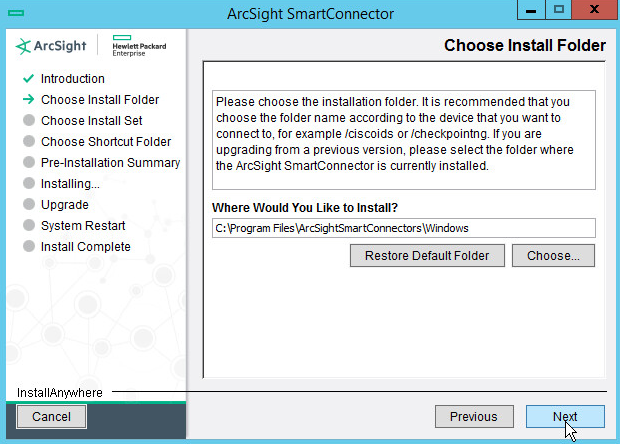
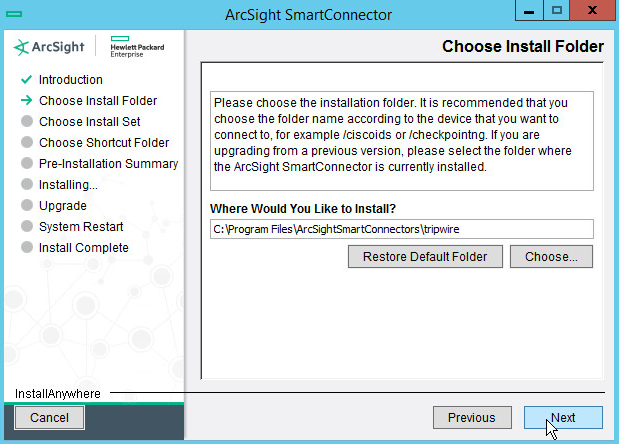
Choose a destination folder. Note: It is recommended to change the default destination folder to
<default>\Windows. This is to avoid conflicts if you wish to install more than one connector.Click Next.
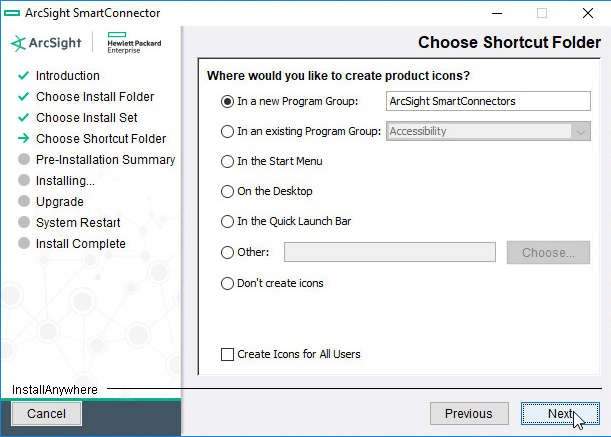
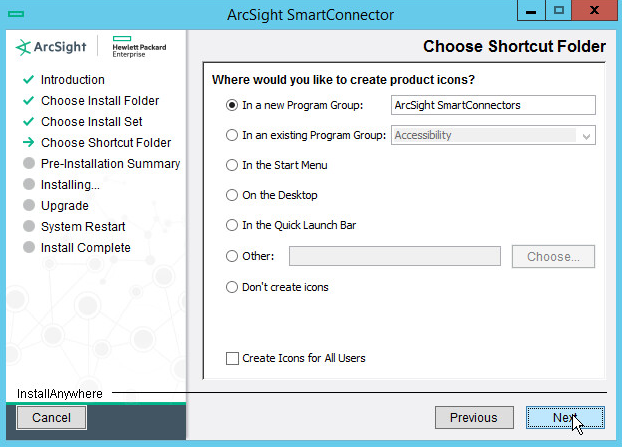
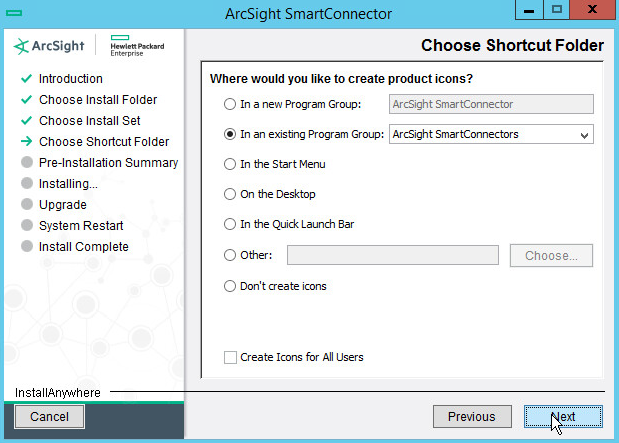
Click Next.
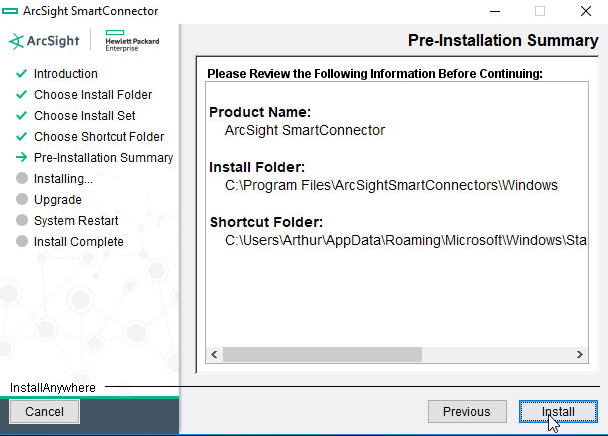
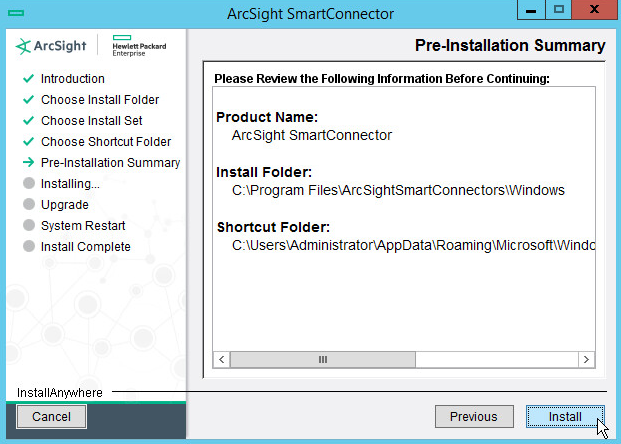
Click Install.
Wait for the installation to finish.
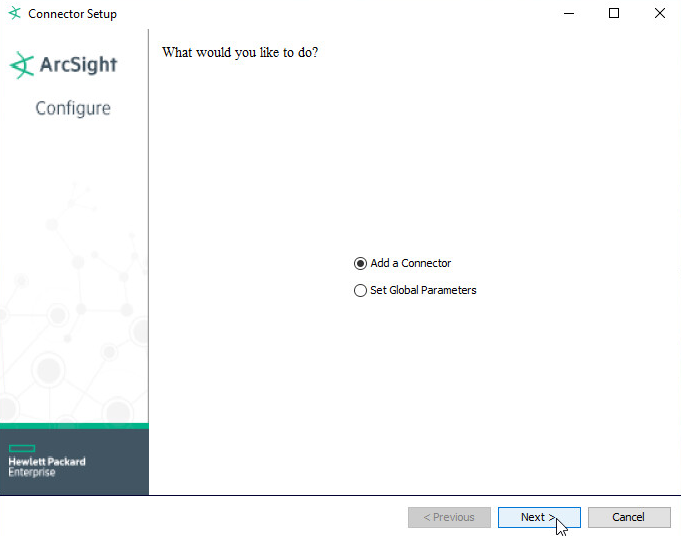
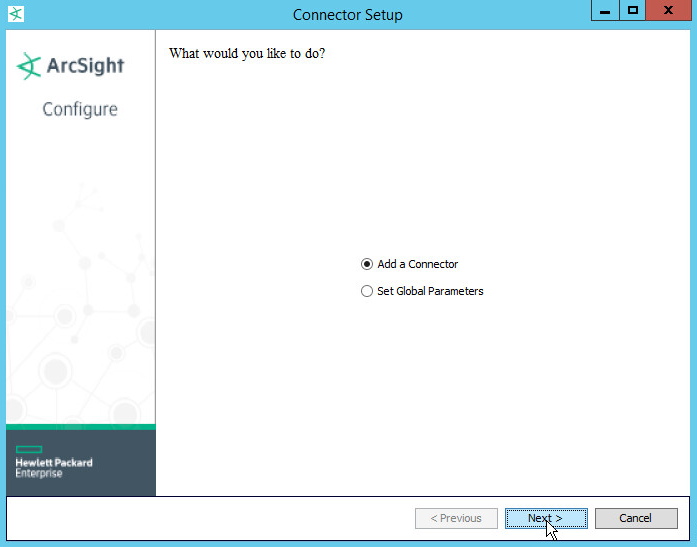
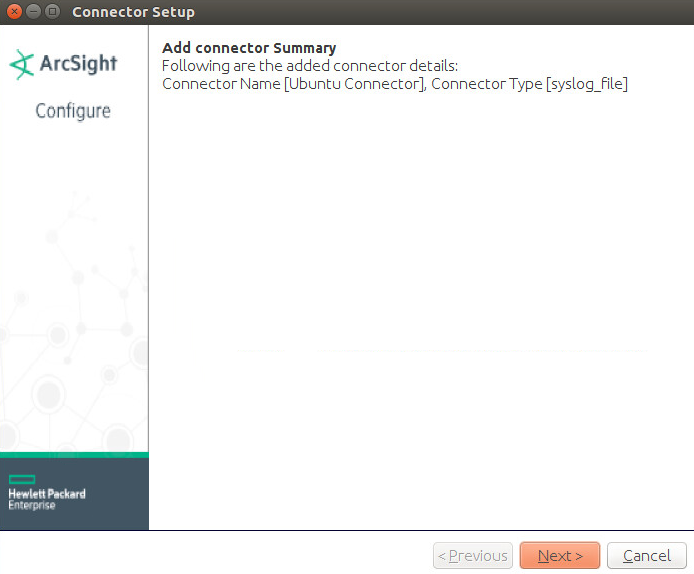
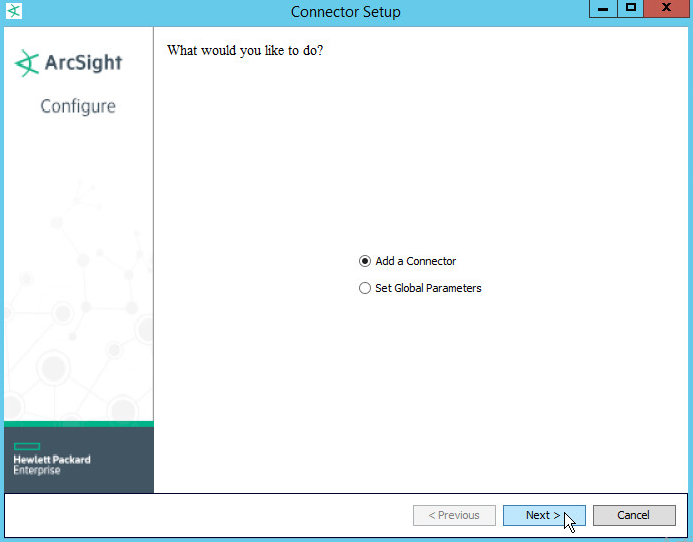
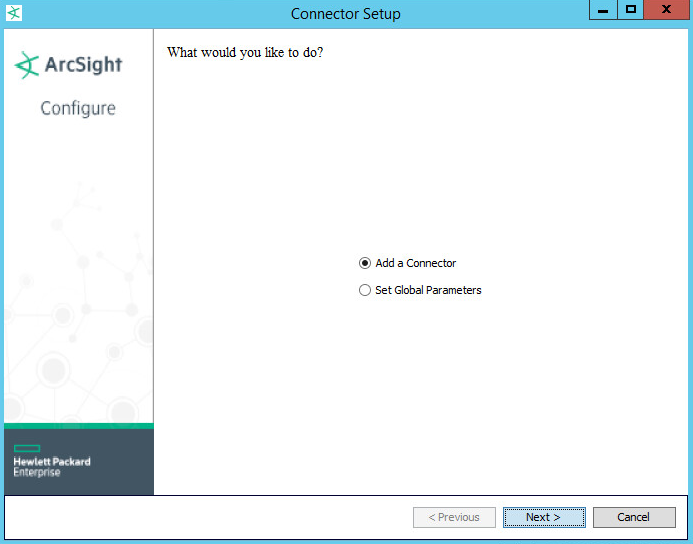
Select Add a Connector.
Click Next.
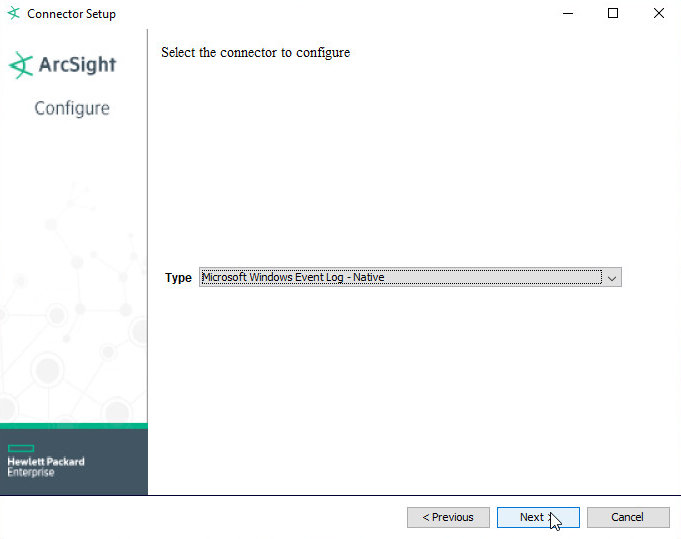
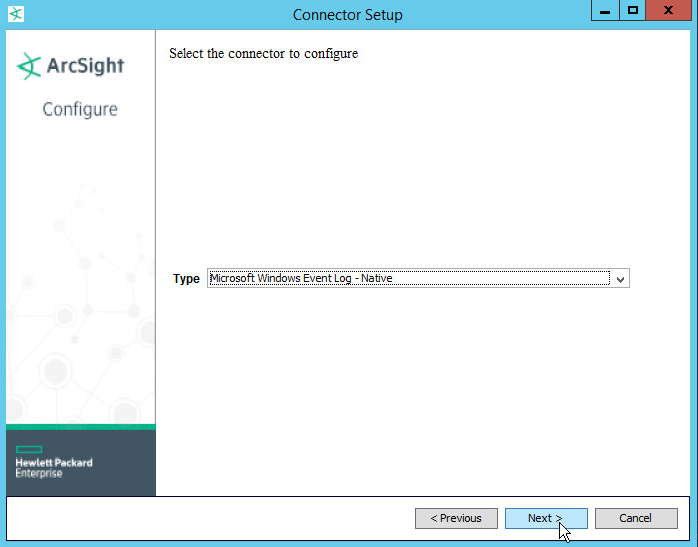
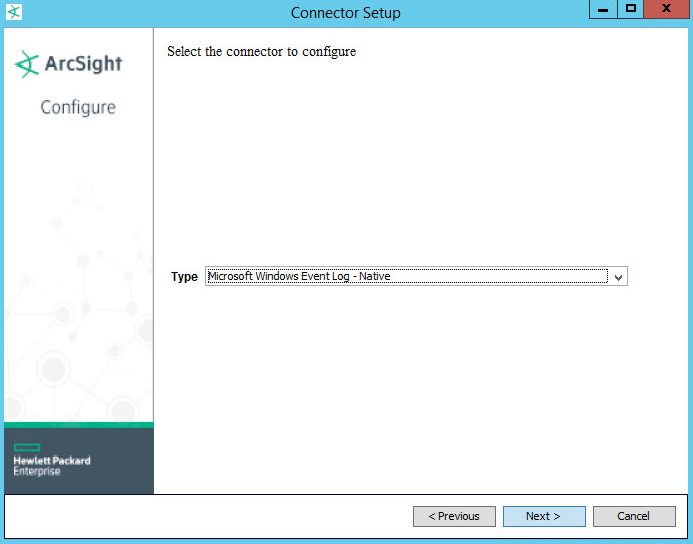
Choose Microsoft Windows Event Log - Native from the list.
Click Next.
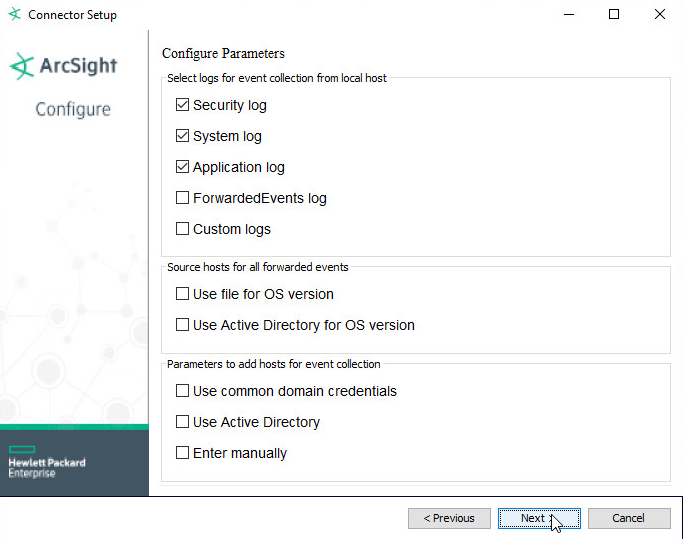
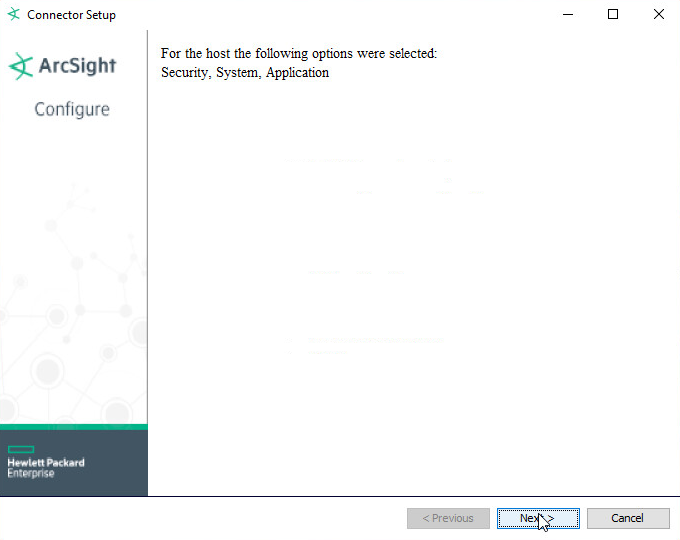
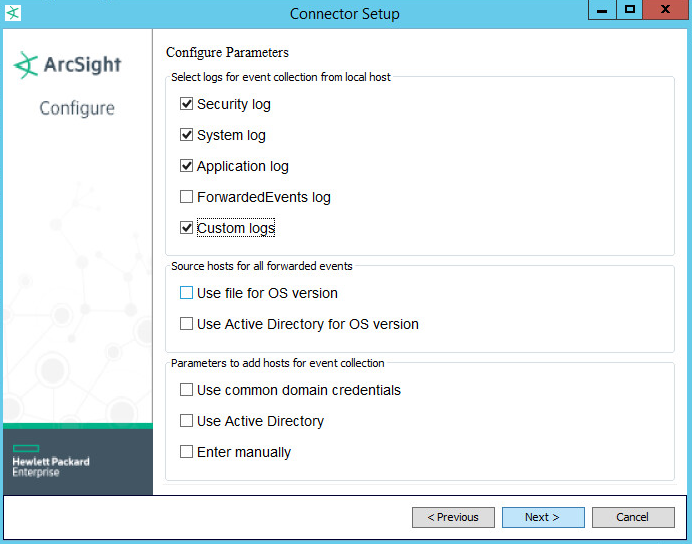
Check Security log, System log, and Application Log.
Click Next.
Click Next.
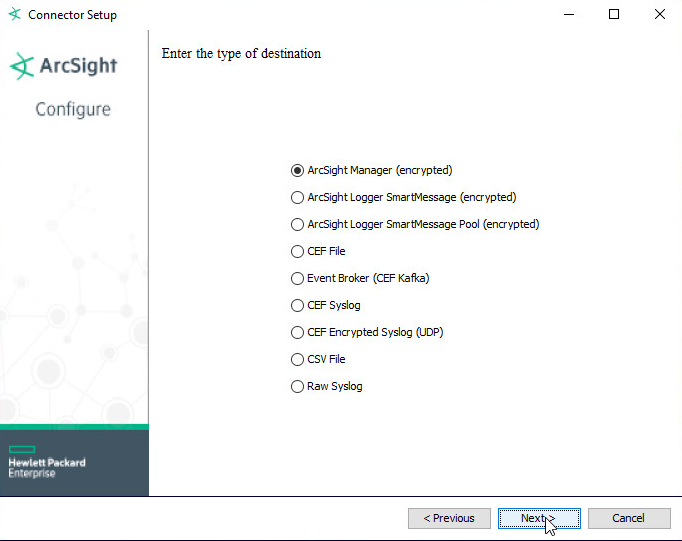
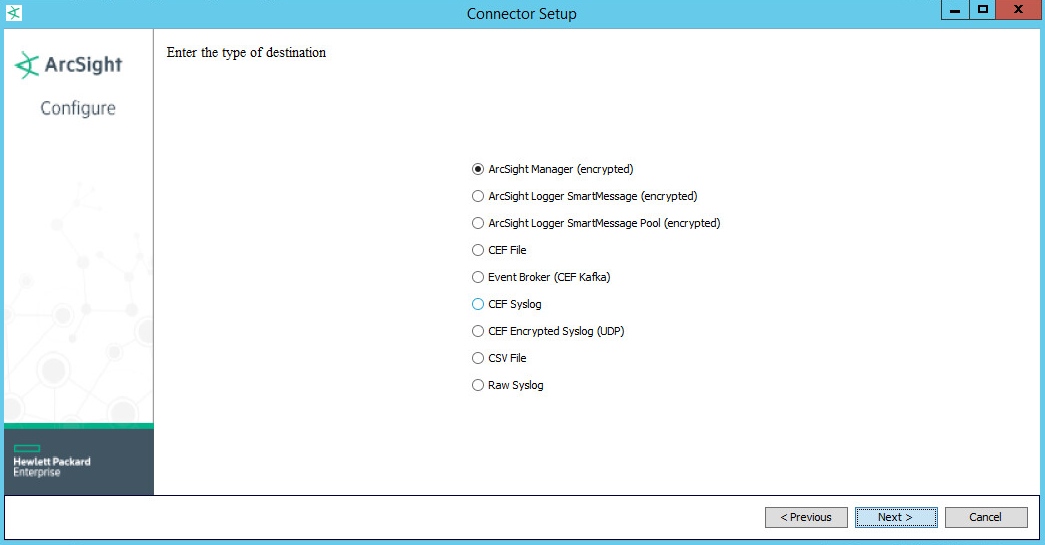
Choose ArcSight Manager (encrypted).
Click Next.
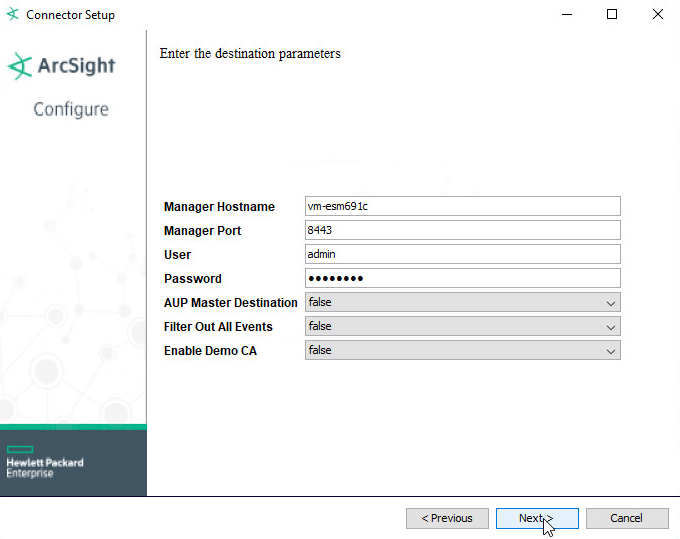
For Manager Hostname, put vm-esm691c, or the hostname of your ESM server.
For Manager Port, put 8443 (or the port that ESM is running on) on the ESM server.
Enter the username and password used for logging into ArcSight Command Center. Default: (admin/password)
Click Next.
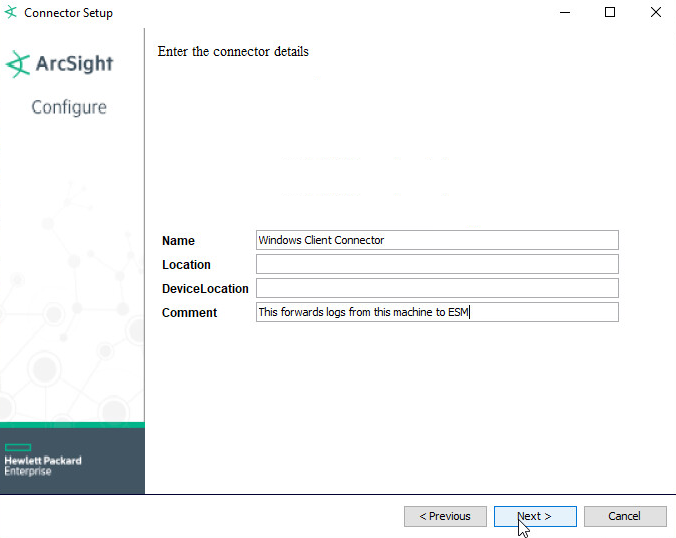
Set identifying details about the system to help identify the connector (include a value for Name; the rest is optional).
Click Next.
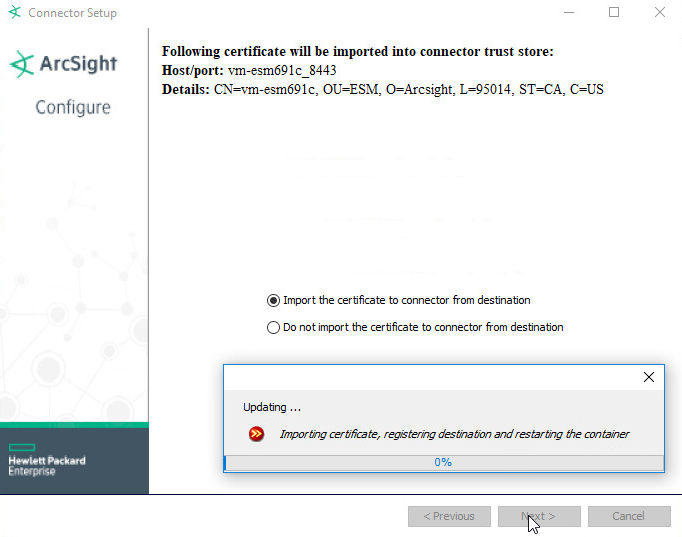
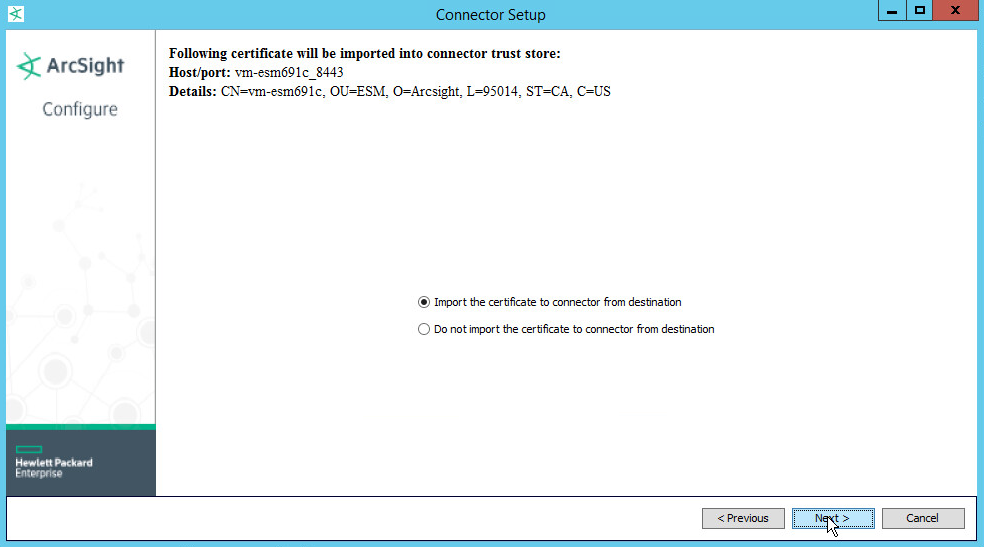
Select Import the certificate to connector from destination. This will fail if the Manager Hostname does not match the hostname of the Virtual Machine.
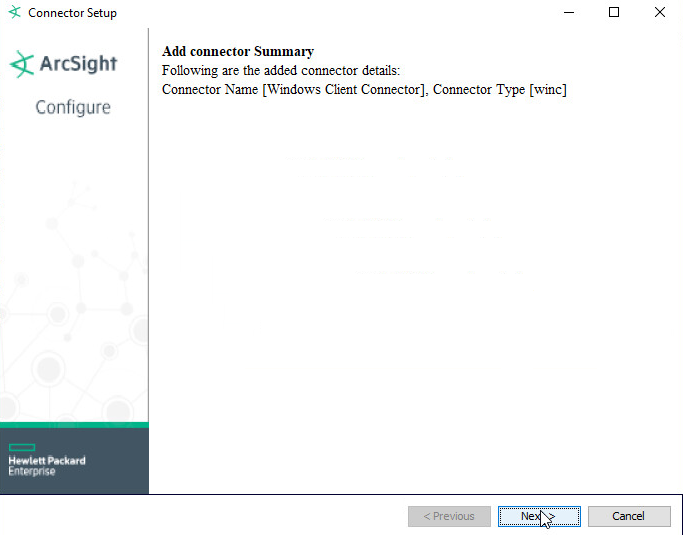
Click Next.
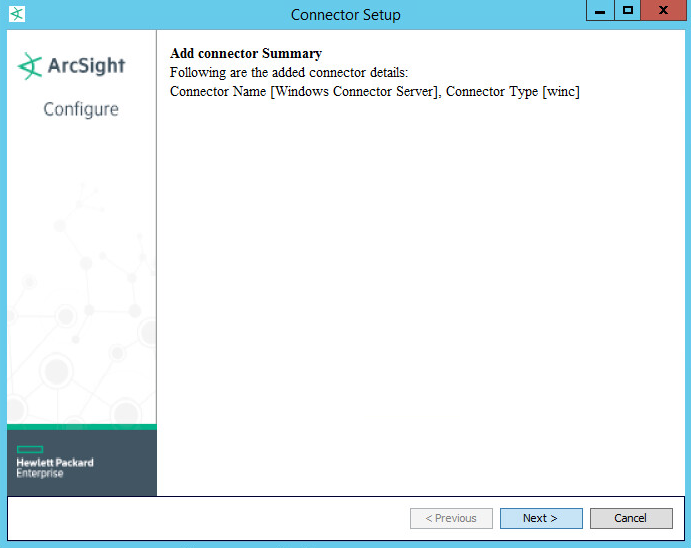
Click Next.
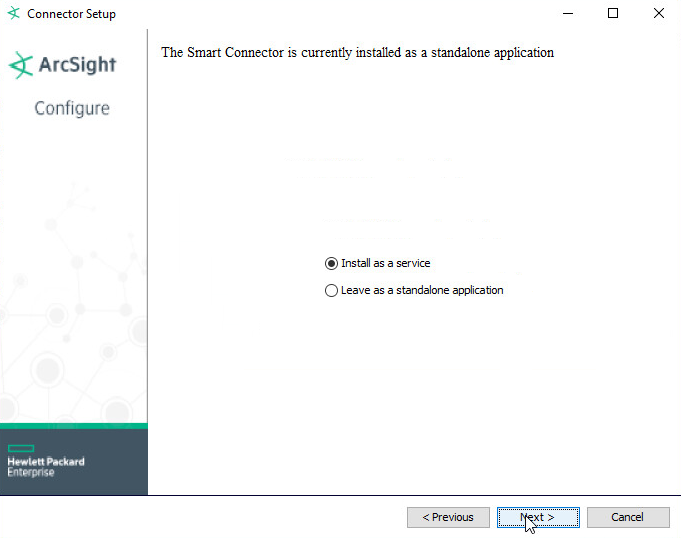
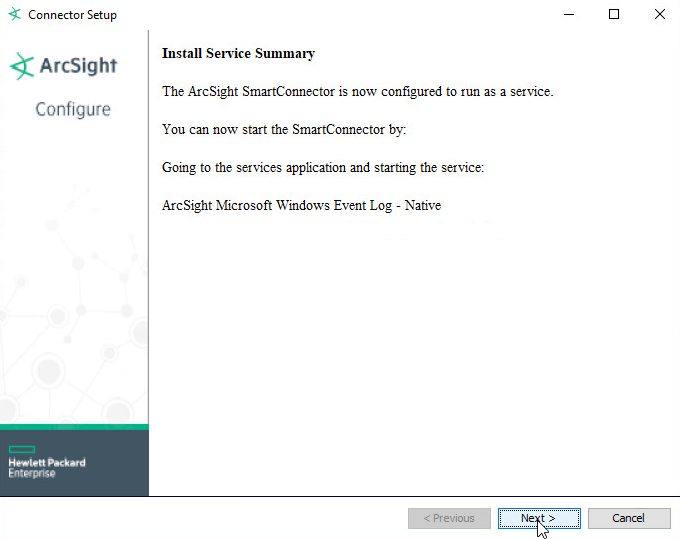
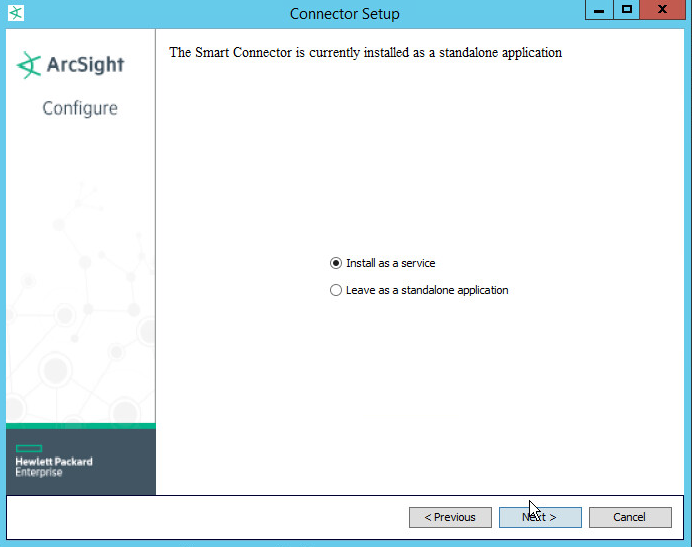
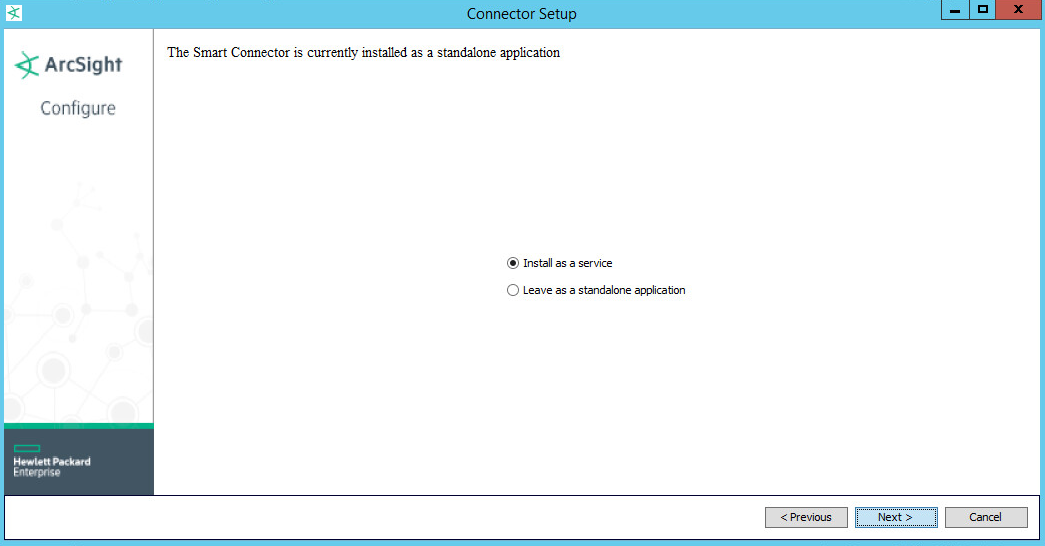
Choose Install as a service.
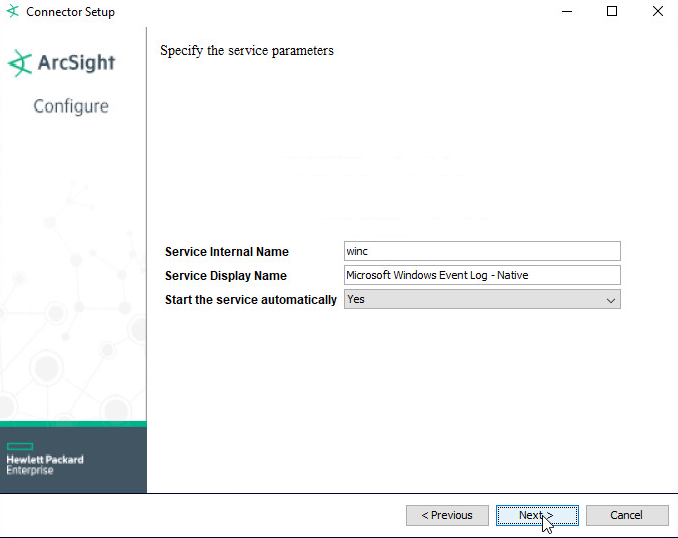
Click Next.
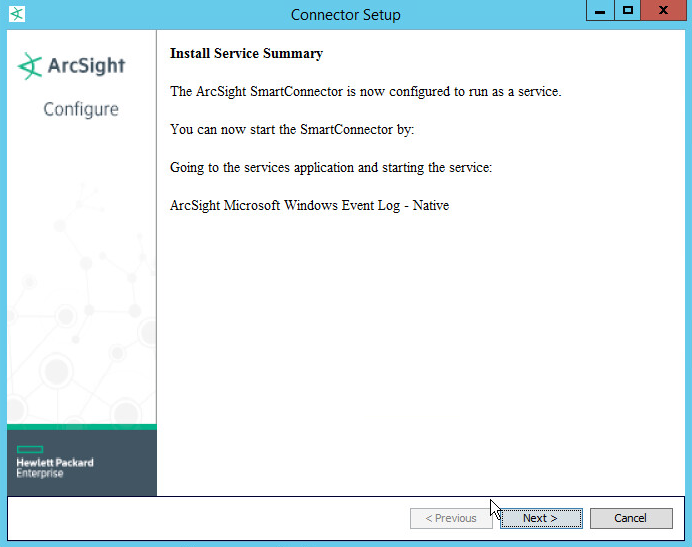
Click Next.
Click Next.
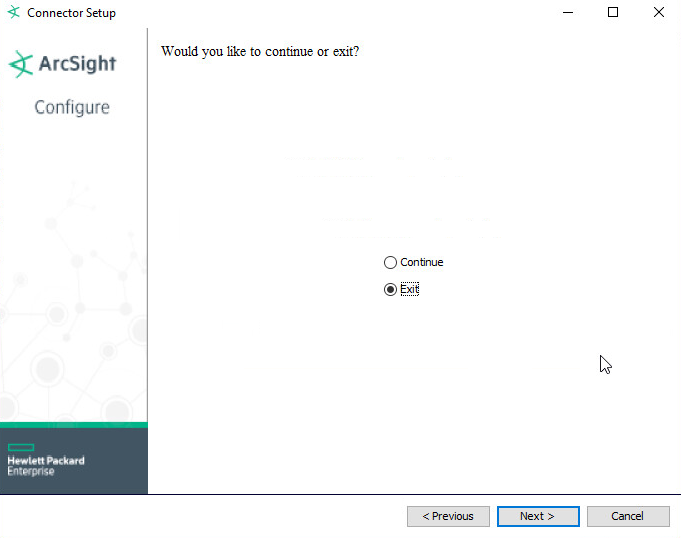
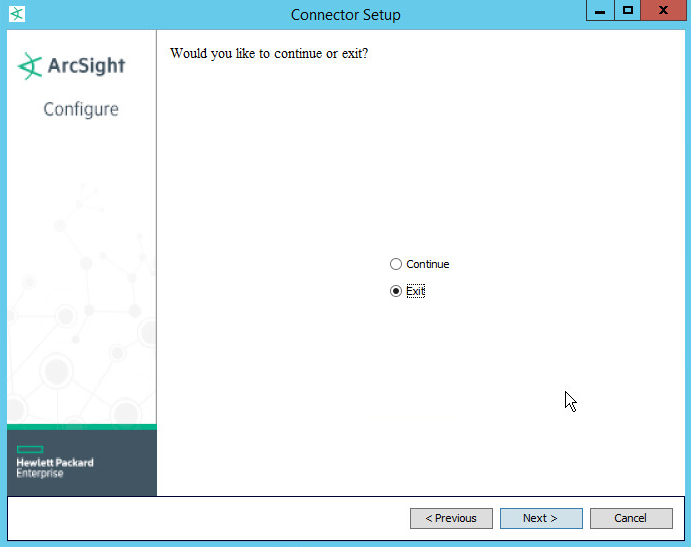
Choose Exit.
Click Next.
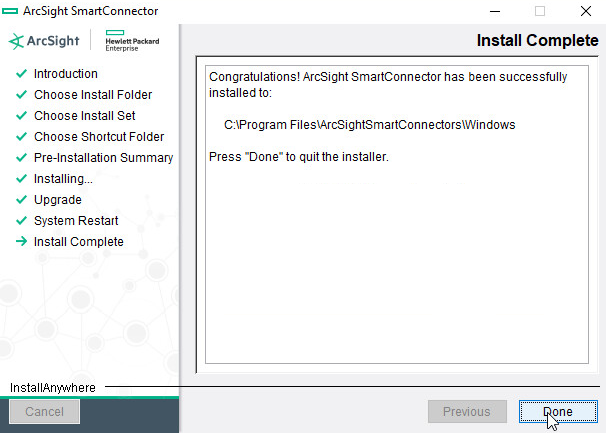
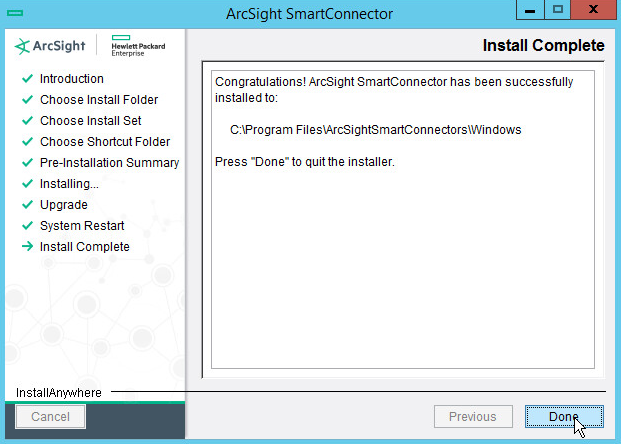
Click Done.
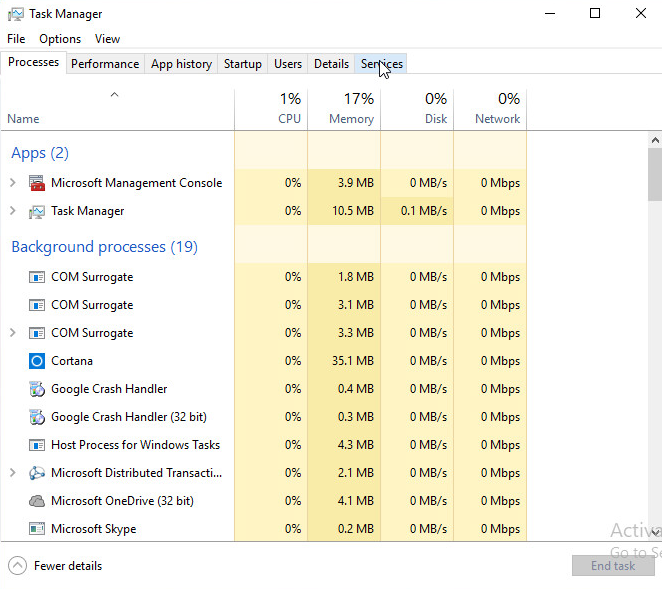
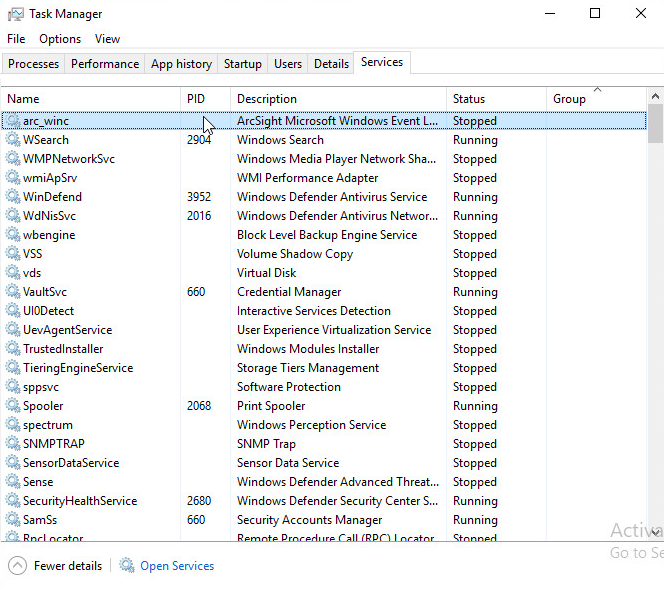
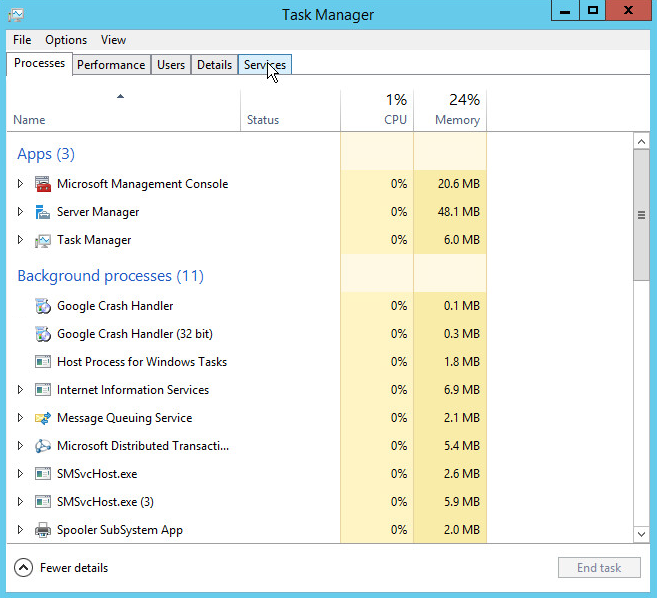
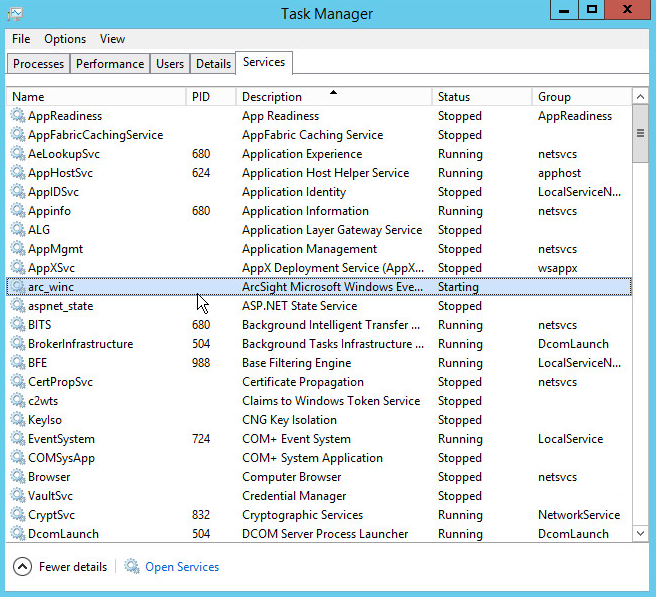
Open Task Manager.
Click More Details.
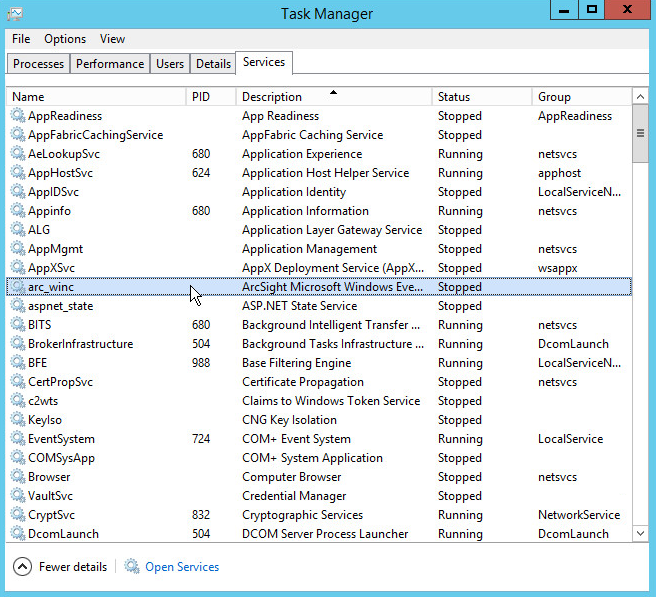
Go to the Services tab.
Find the service just created for ArcSight and right click it.
Choose Start.
The machine will now report its logs to ArcSight ESM.
2.6.2. Install a Connector Server for ESM on Windows 2012 R2
Run the installation file ArcSight-7.4.0.7963.0-Connector-Win64.
Wait for the initial setup to finish.
Click Next.
Choose a destination folder. Note: It is recommended to change the default destination folder to
<default>\Windows. This is to avoid conflicts if you wish to install more than one connector.Click Next.
Click Next.
Click Install.
Wait for the installation to finish.
Select Add a Connector.
Click Next.
Choose Microsoft Windows Event Log - Native from the list.
Click Next.
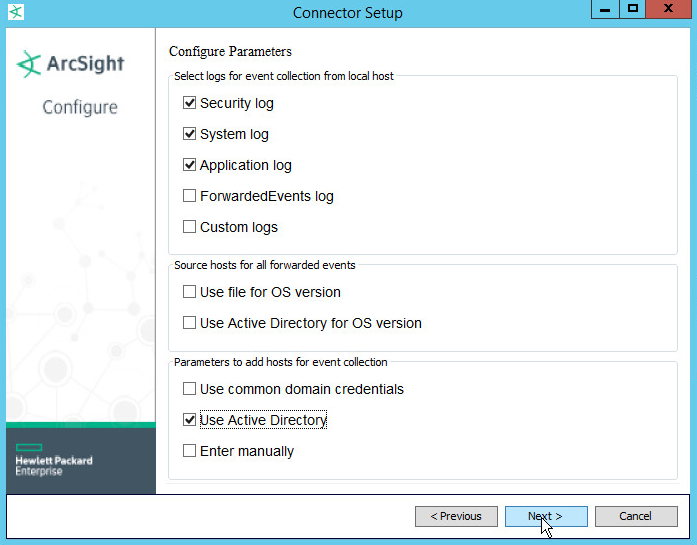
Check Security log, System log, Application Log.
Check Use Active Directory.
Click Next.
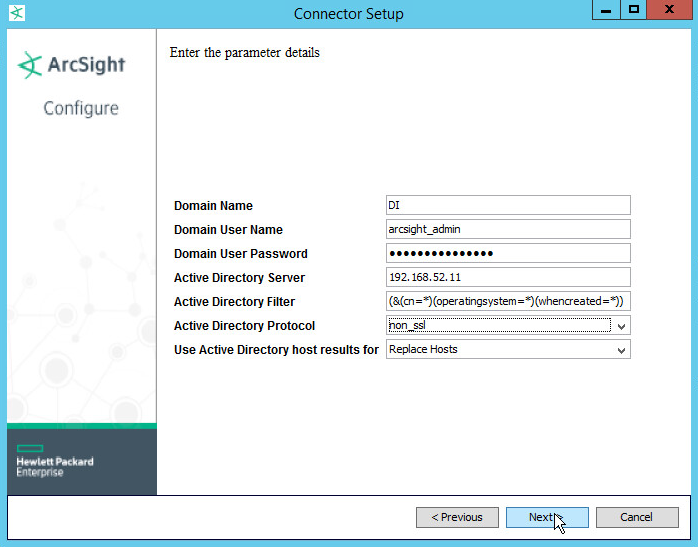
Fill out the form with the appropriate information for your Active Directory server. It is recommended to create an account on Active Directory specifically for ArcSight.
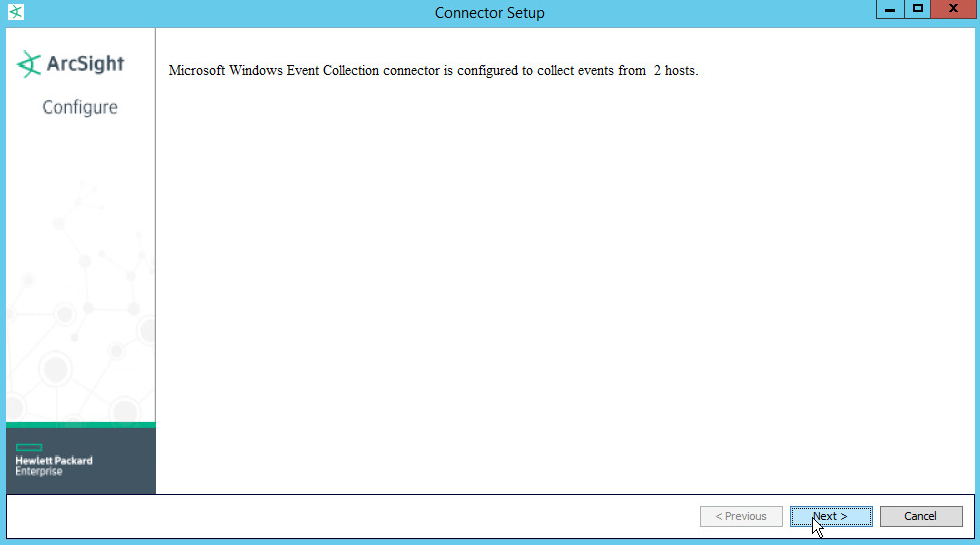
Select Replace Hosts for Use Active Directory host results for.
Click Next.
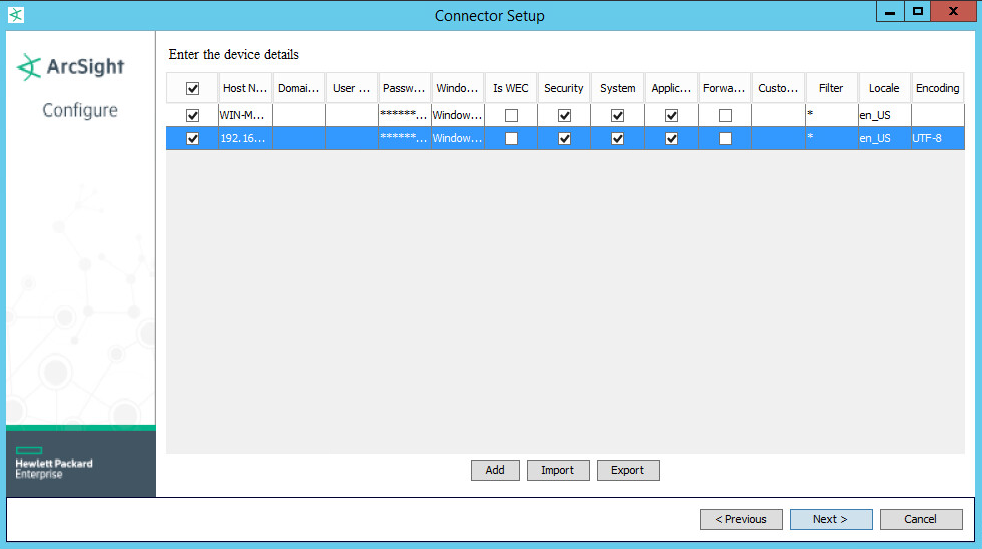
Select all the event types you would like forwarded from each machine.
Click Next.
Click Next.
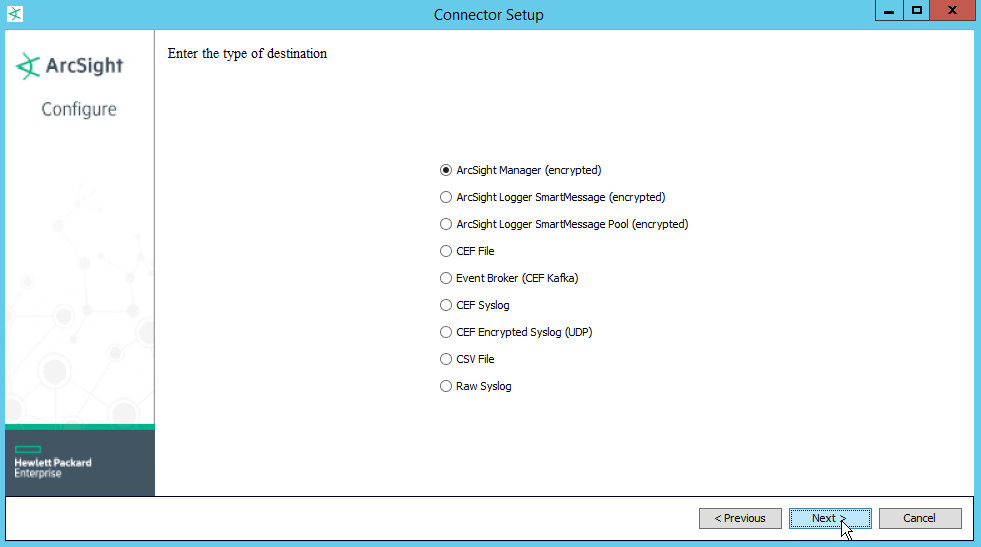
Choose ArcSight Manager (encrypted).
Click Next.
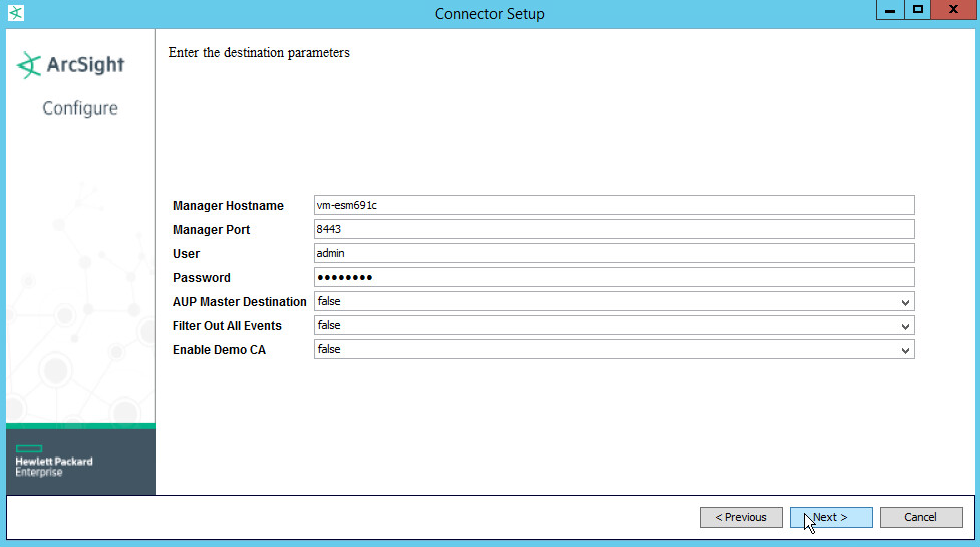
For Manager Hostname, use vm-esm691c or the hostname of your ESM server.
For Manager Port, use 8443 (or the port that ESM is running on) on the ESM server.
Enter the username and password used for logging into ArcSight Command Center. Default: (admin/password)
Click Next.
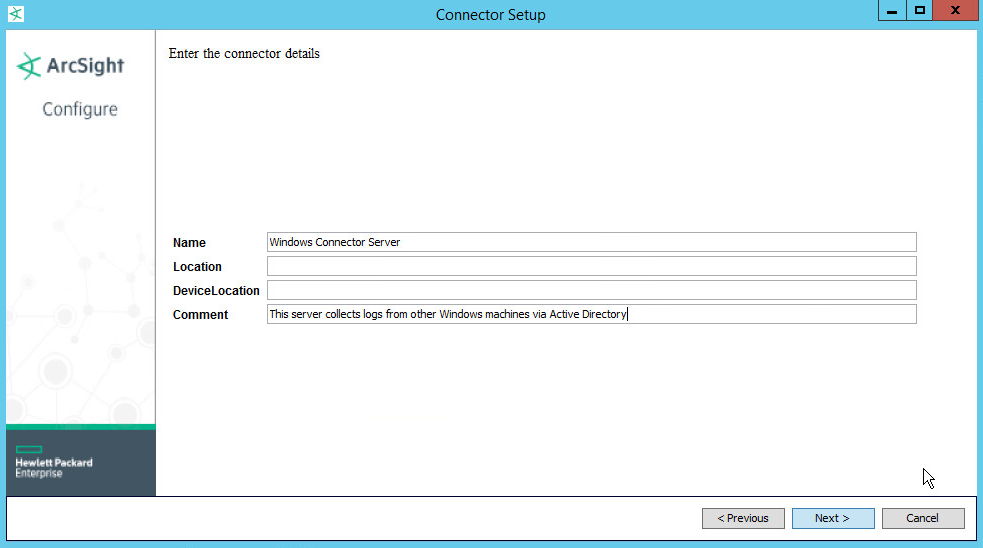
Set identifying details about the system to help identify the connector (include Name; the rest is optional).
Click Next.
Select Import the certificate to connector from destination. This will fail if the Manager Hostname does not match the hostname of the VM.
Click Next.
Click Next.
Choose Install as a service.
Click Next.
Click Next.
Choose Exit.
Click Next.
Click Done.
Open Task Manager.
Click More Details.
Go to the Services tab.
Find the service just created for ArcSight and right click it.
Choose Start.
The machine will now report all collected Windows logs to ArcSight ESM.
2.6.3. Install Syslog Connector for Ubuntu
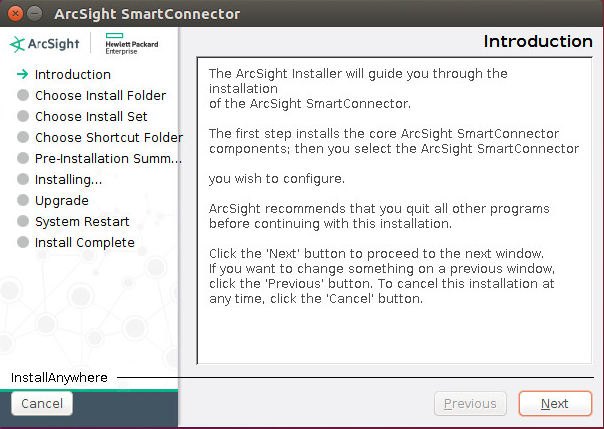
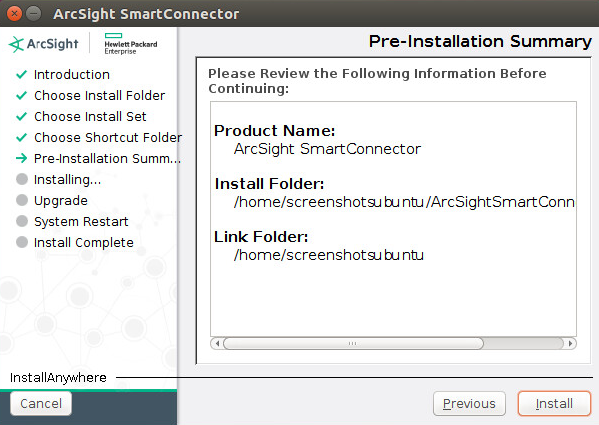
Run ./ArcSight-7.4.0.7963.0-Connector-Linux64.bin.
Click Next.
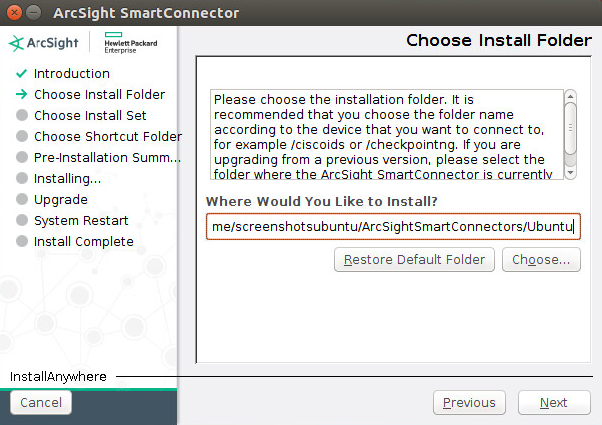
Choose a folder to install the connector in.
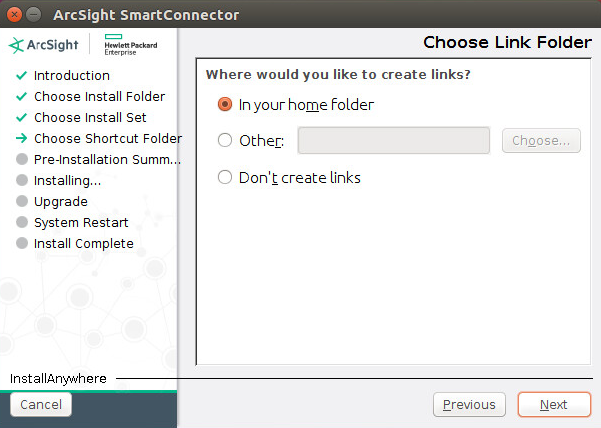
Click Next.
Click Next.
Click Install.
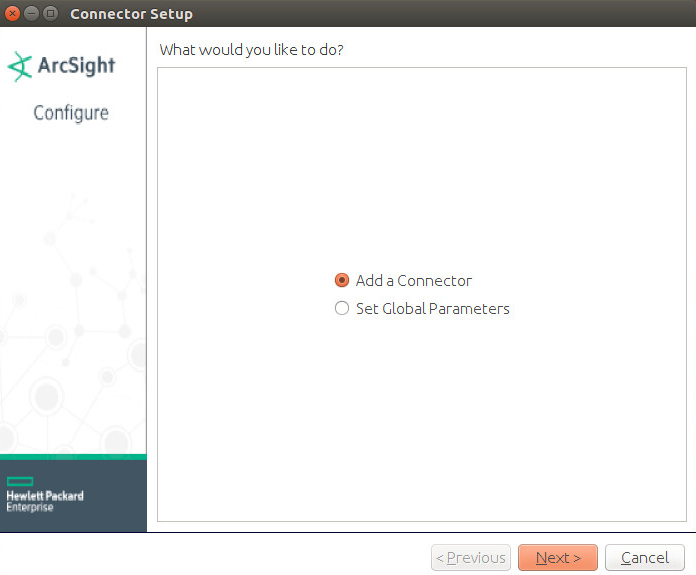
Choose Add a Connector.
Click Next.
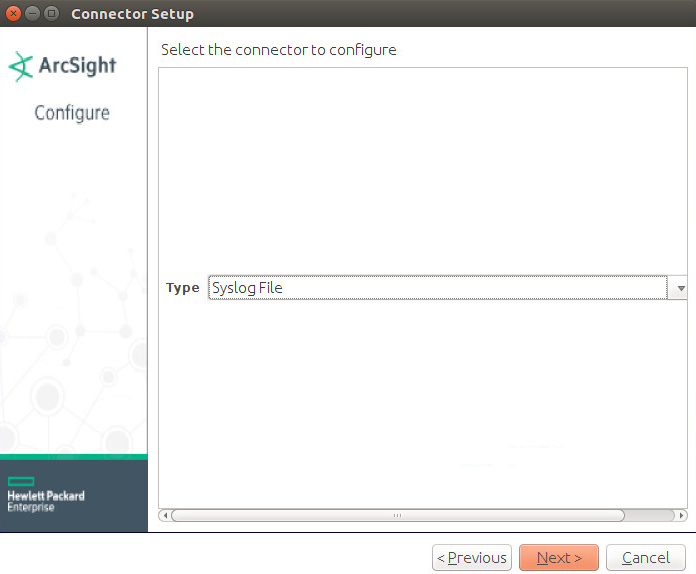
Choose Syslog File.
Click Next.
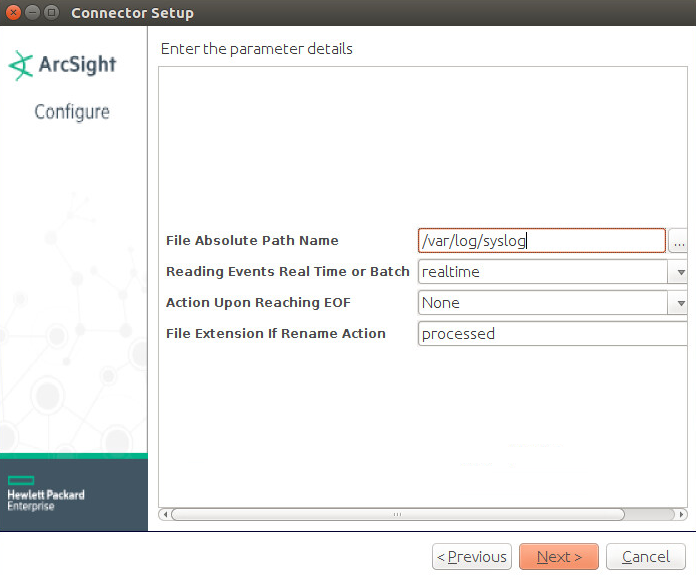
For File Absolute Path Name, select a log file from which to forward events to ESM. Example: /var/log/syslog
Select realtime to have events be streamed or batch to have events sent over in sets.
For Action upon Reaching EOF, select None.
Click Next.
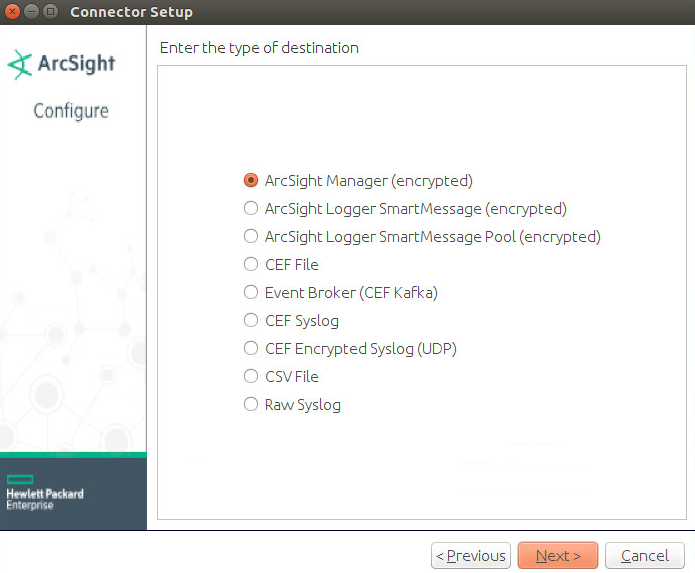
Select ArcSight Manager (encrypted).
Click Next.
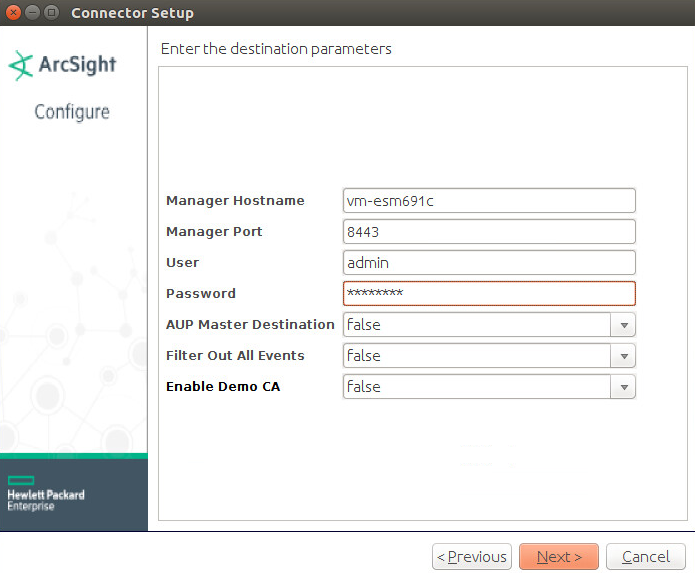
For Manager Hostname, put vm-esm691c or the hostname of your ESM server. (You may need to add dns-search.di.test to /etc/network/interfaces if the hostname does not resolve on its own. For example, vm-esm691c.di.test may resolve but vm-esm691c may not.)
For Manager Port, put 8443 (or the port that ESM is running on) on the ESM server.
Enter the username and password used for logging into ArcSight Command Center. Default: (admin/password)
Click Next.
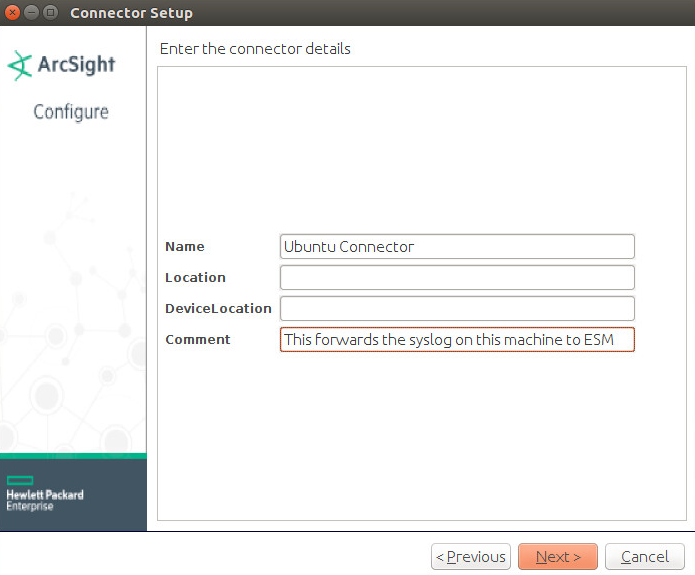
Set identifying details about the system to help identify the connector (include Name; the rest is optional).
Click Next.
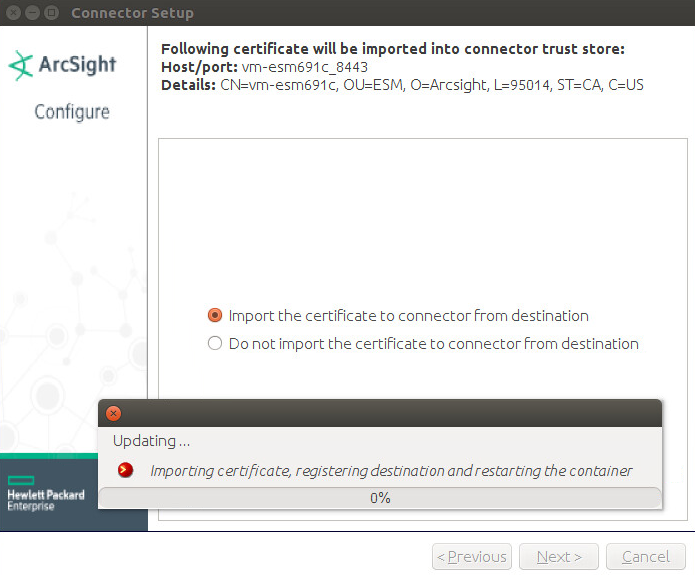
Choose Import the certificate to connector from destination.
Click Next.
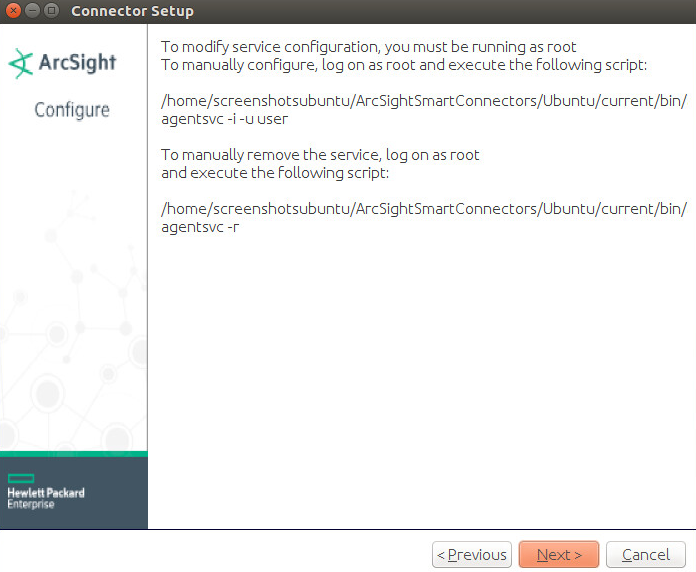
Click Next.
Click Next.
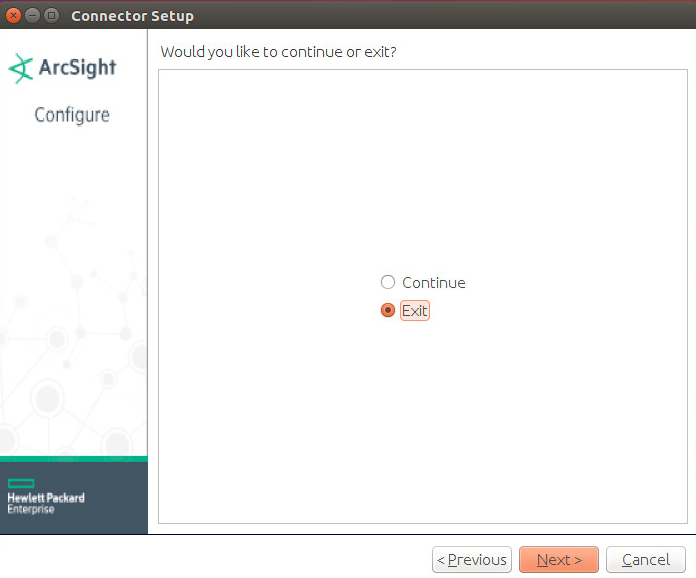
Choose Exit.
Click Next.
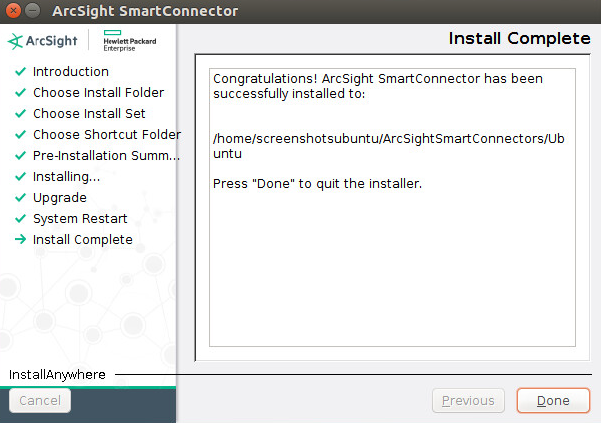
Click Done.
2.7. IBM Spectrum Protect
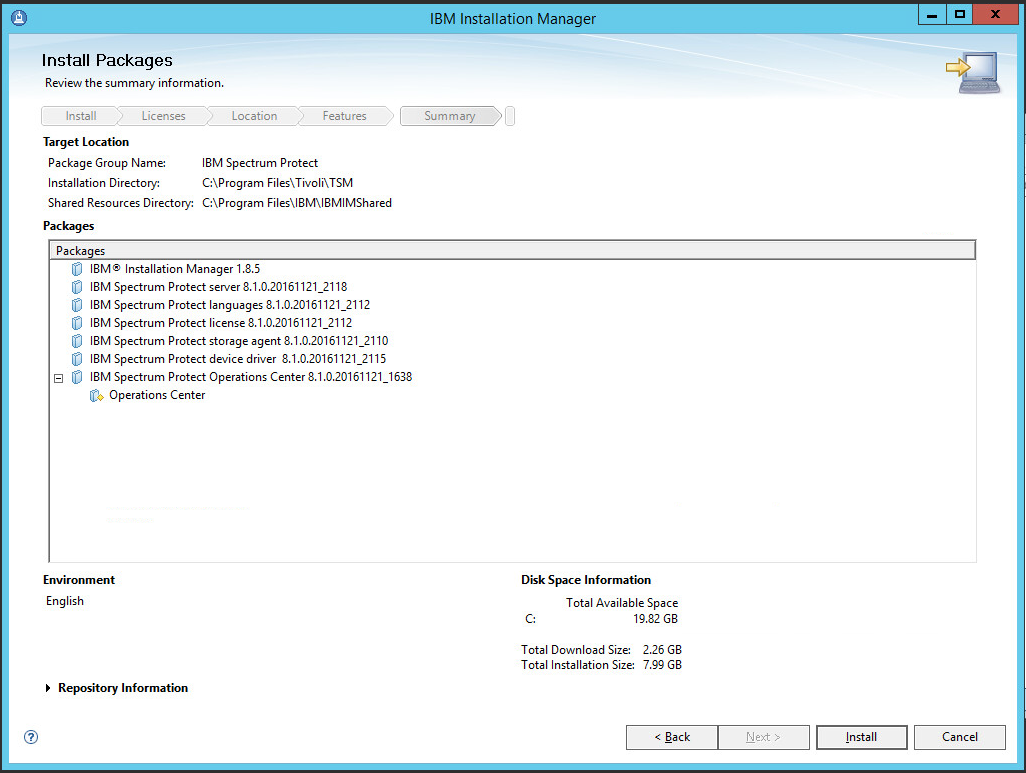
IBM Spectrum Protect is a backup/restore solution that makes use of cloud-based object storage. It allows for administrative management of backups across an enterprise, providing users with mechanisms to restore their data on a file level. This section covers the installation and configuration process used to set up IBM Spectrum Protect on a Windows Server 2012 R2 machine, as well as the installation and configuration processes required for installing the backup/archive client on various machines.
2.7.1. Install IBM Spectrum Protect Server
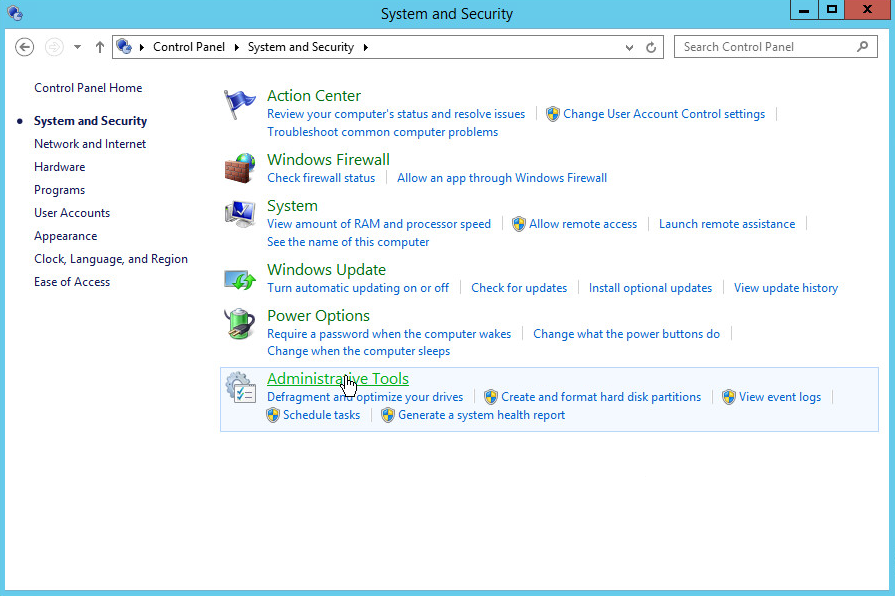
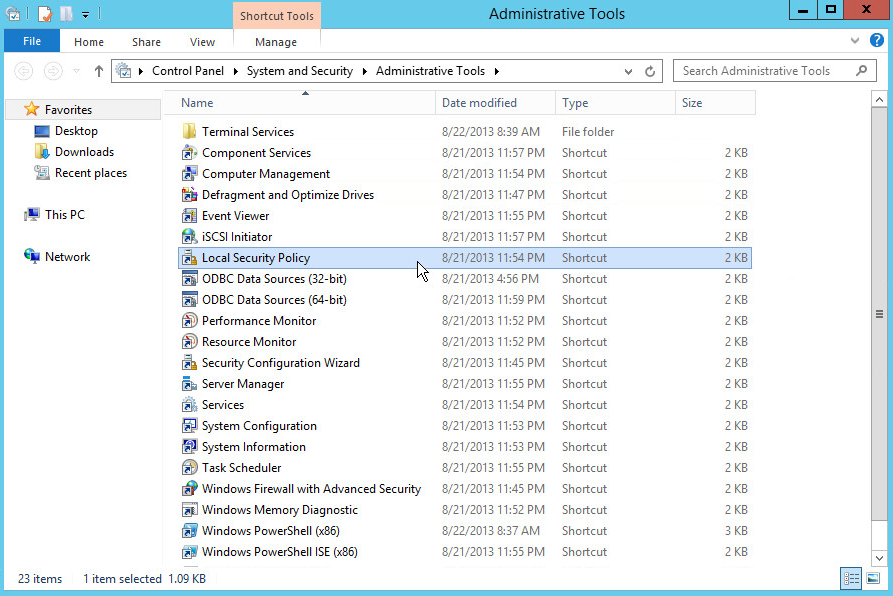
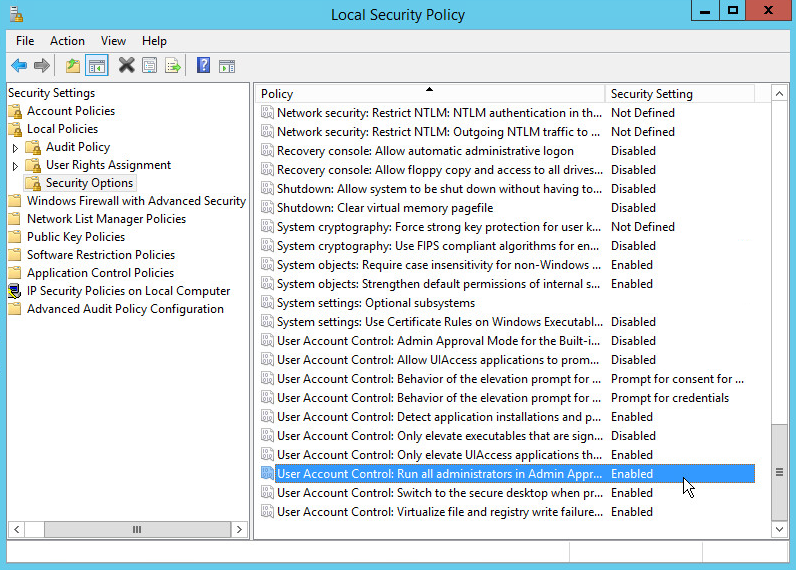
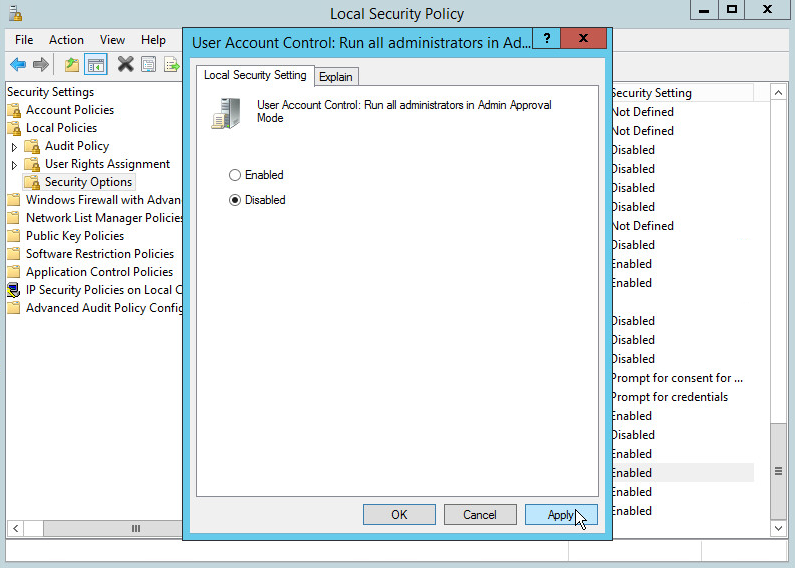
You may need to disable Run all administrators in Admin Approval Mode. To do this go to Control Panel > Administrative Tools > Local Security Policy > Local Policies > Security Options. Double click the User Account Control: Run all administrators in Admin Approval Mode section. Select Disable and click OK. Restart the computer.
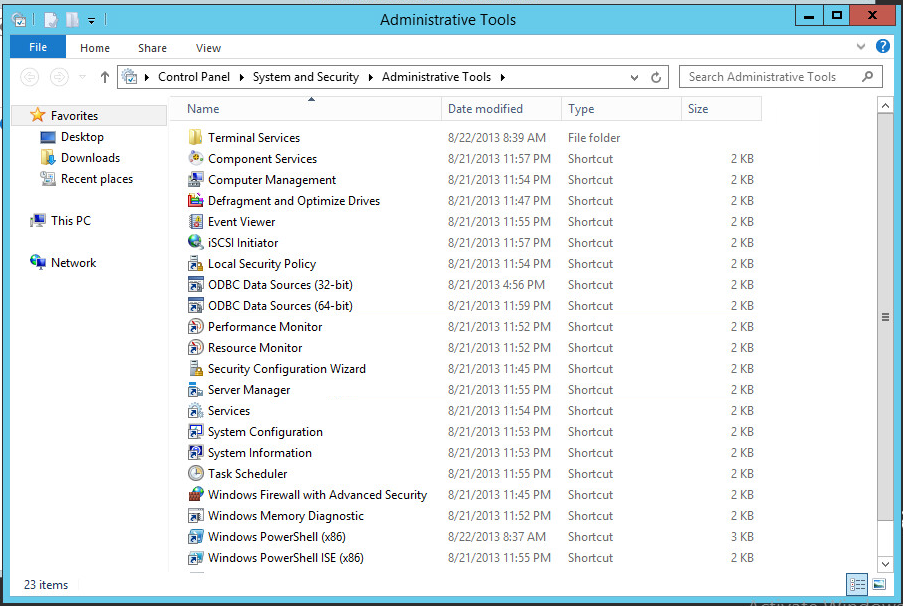
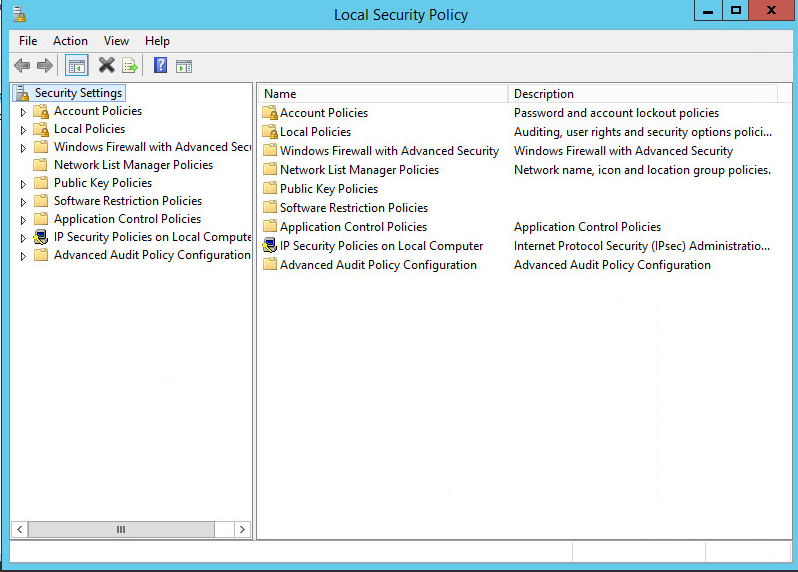
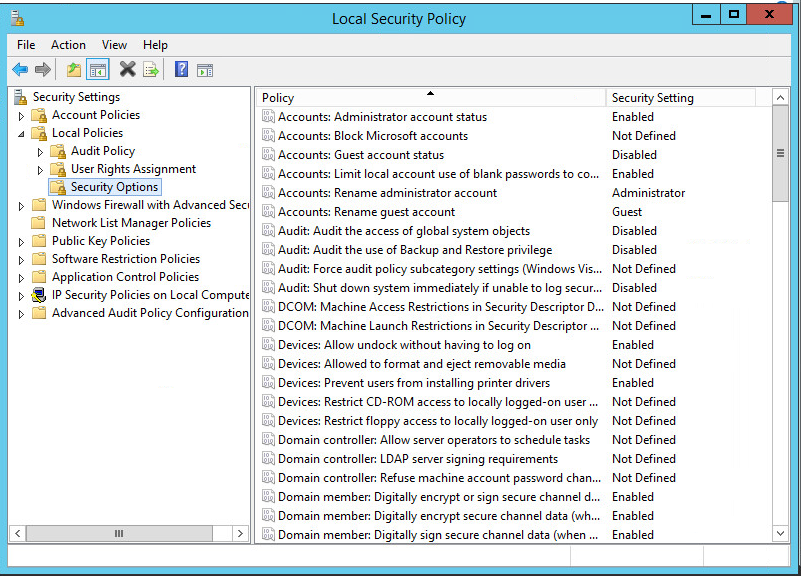
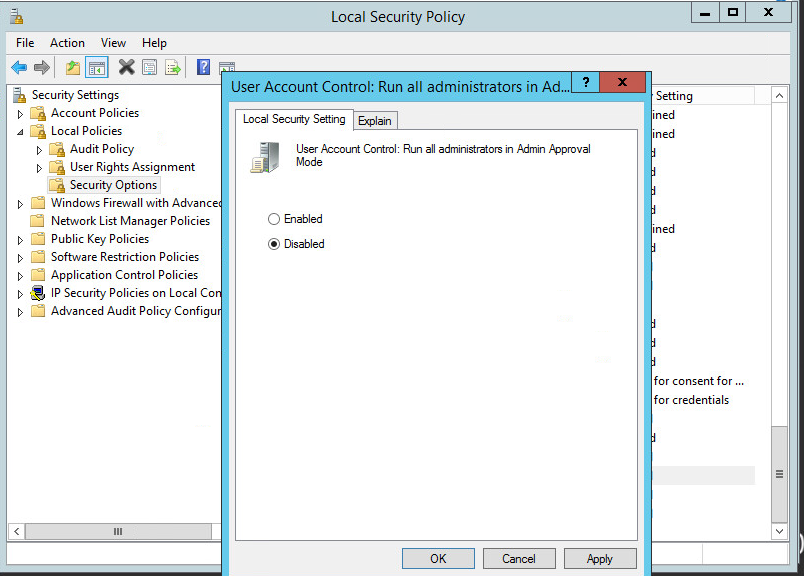
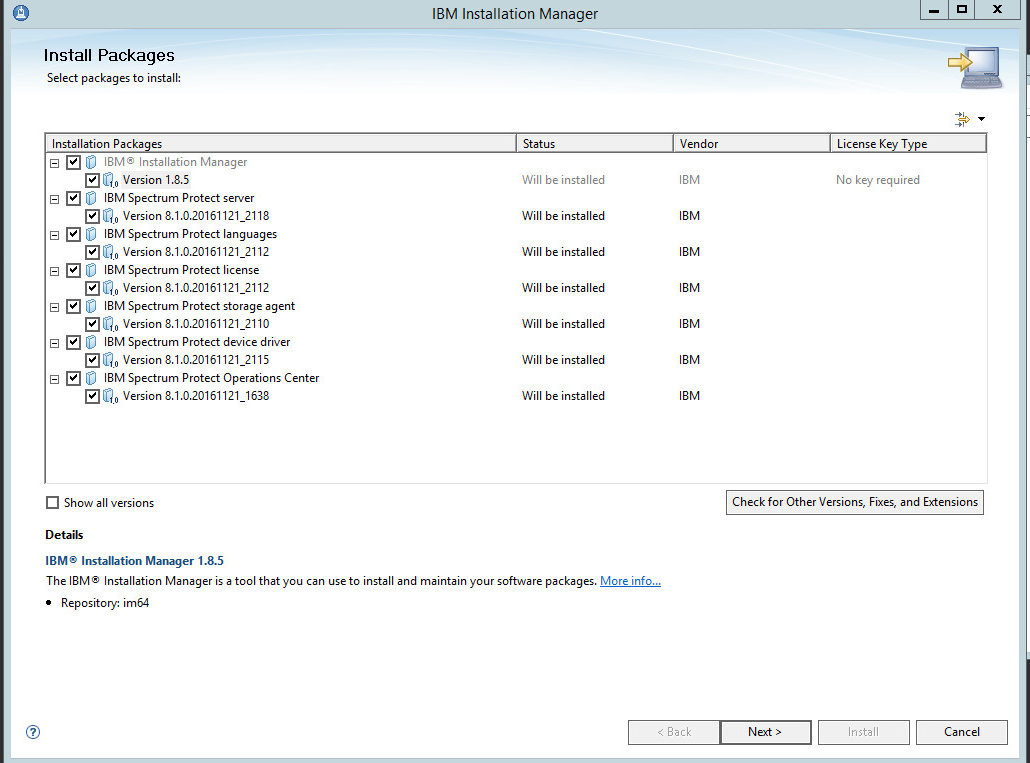
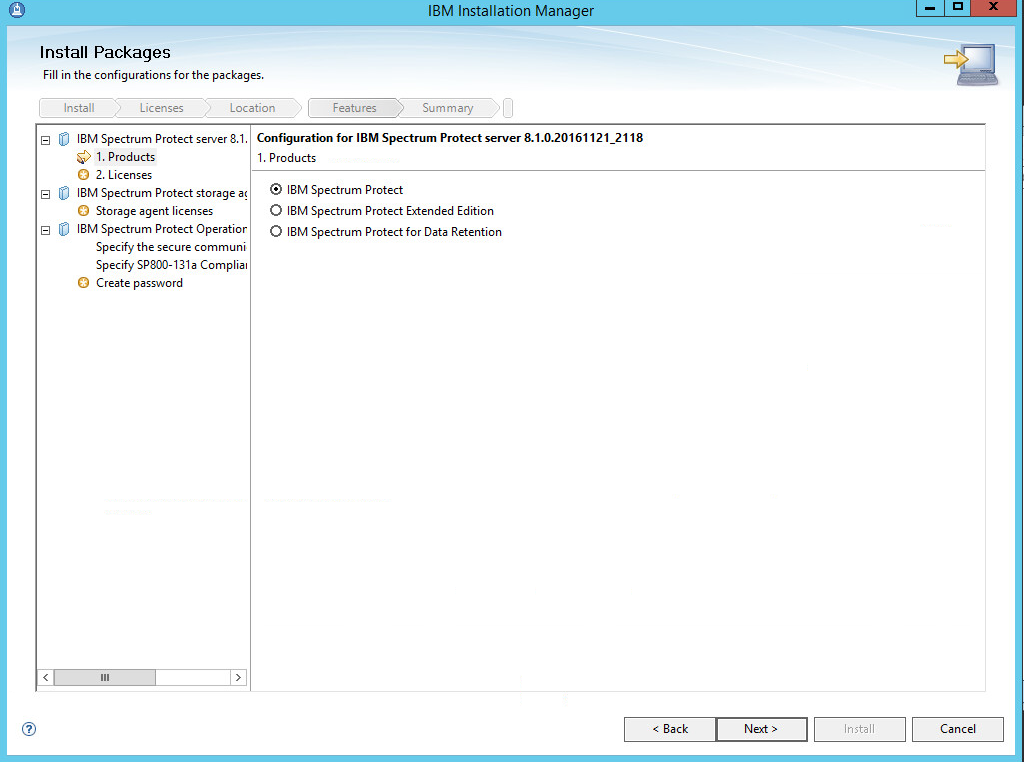
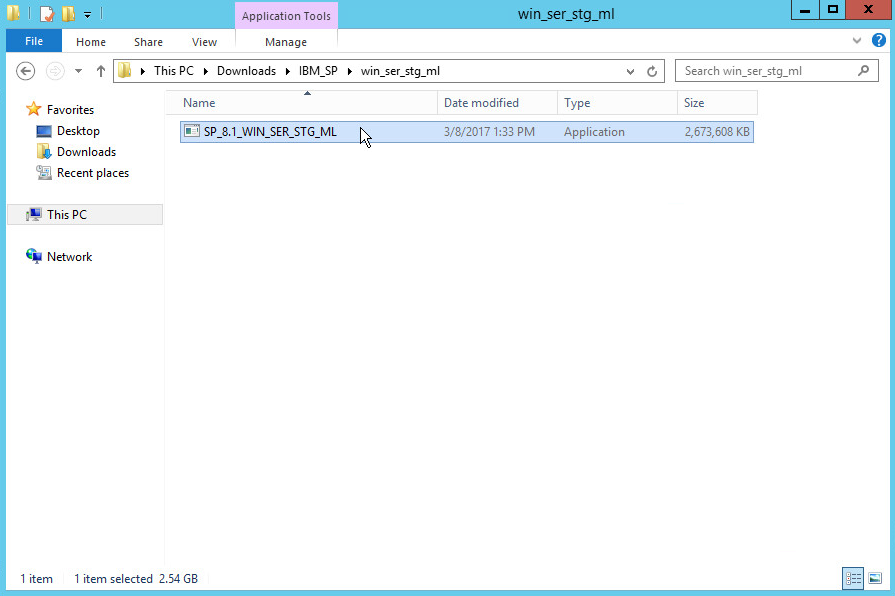
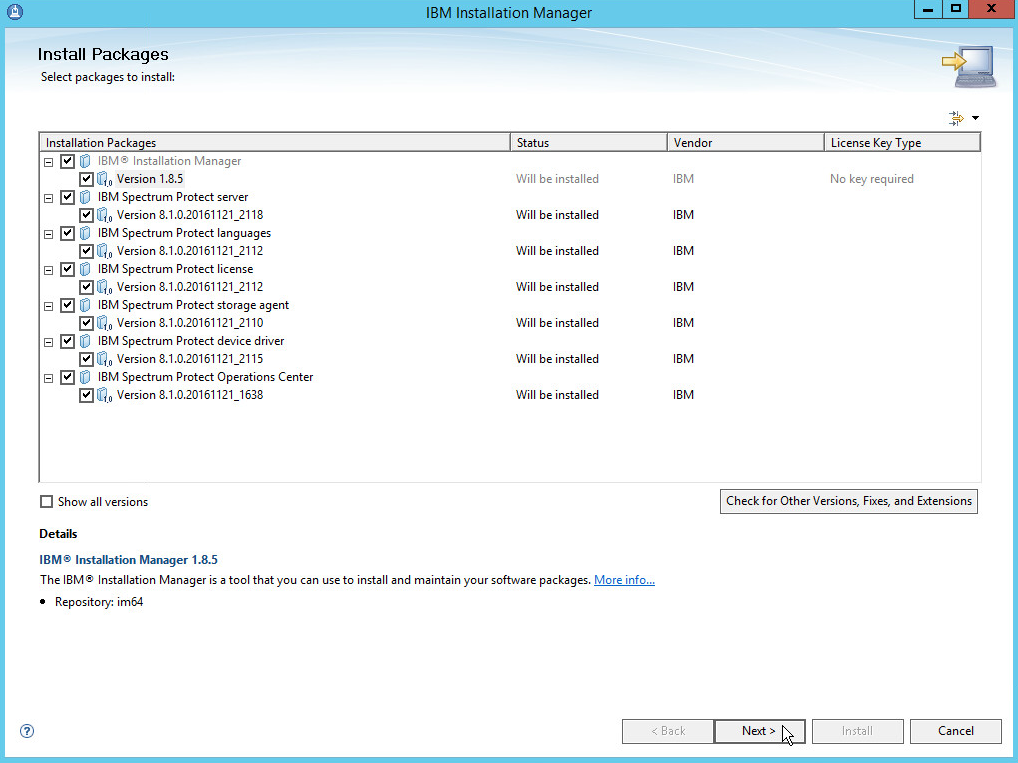
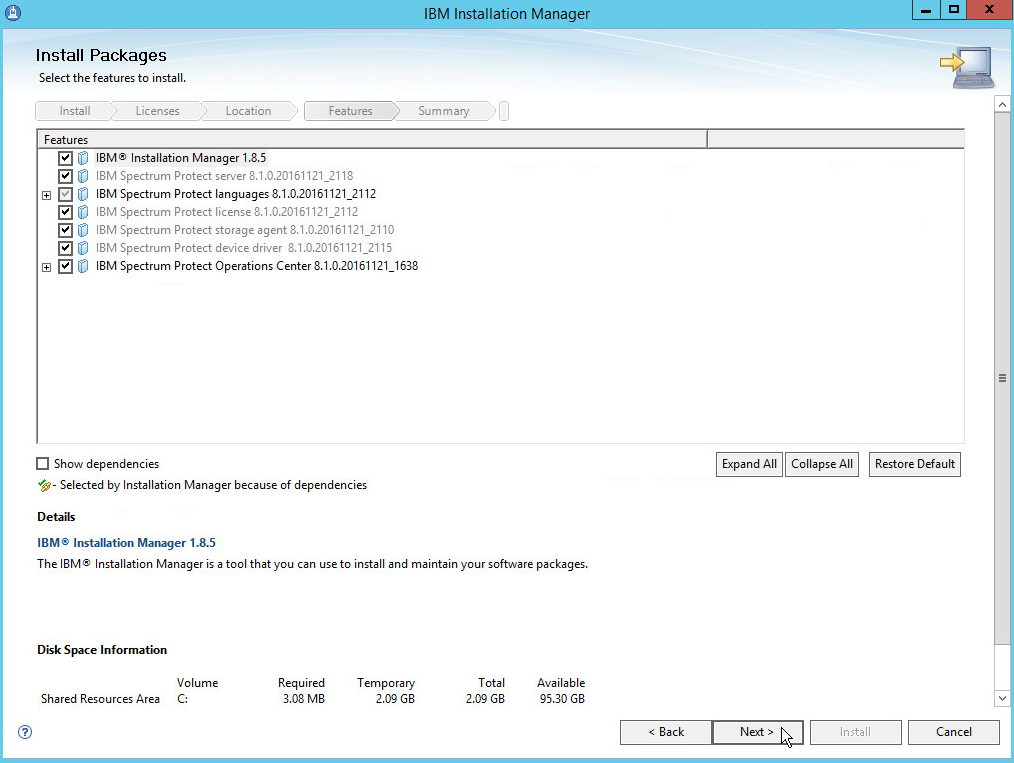
Run WIN_SER_STG_ML in its own folder to extract the contents.
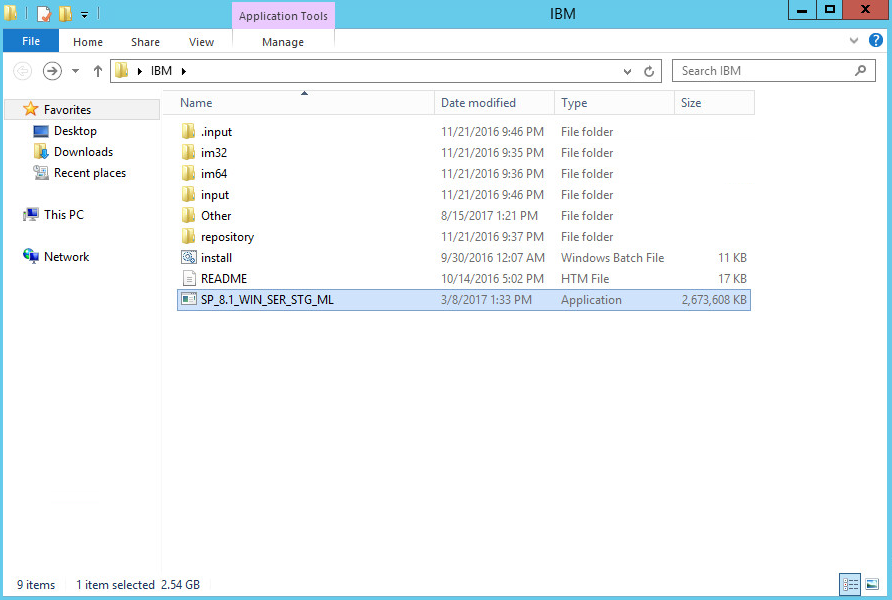
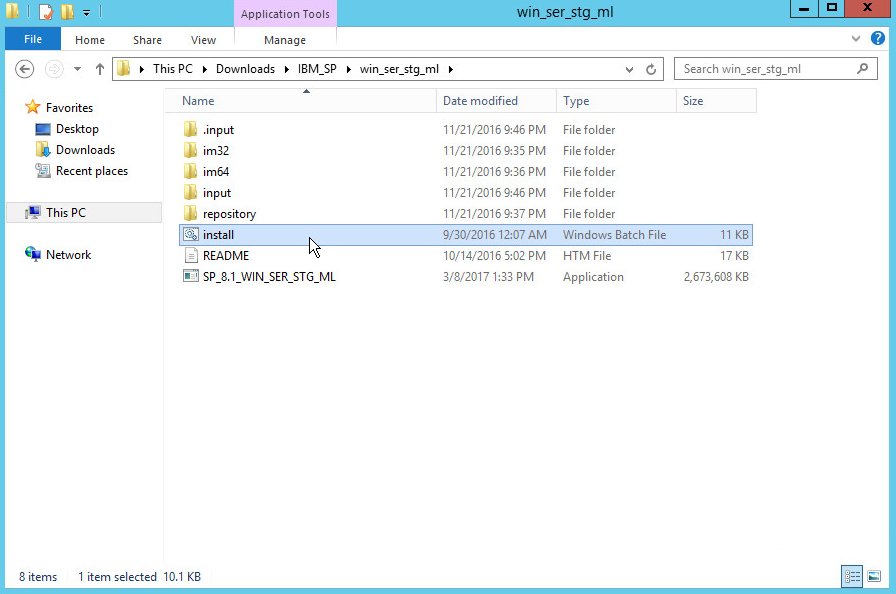
Run the install script.
Click Next.
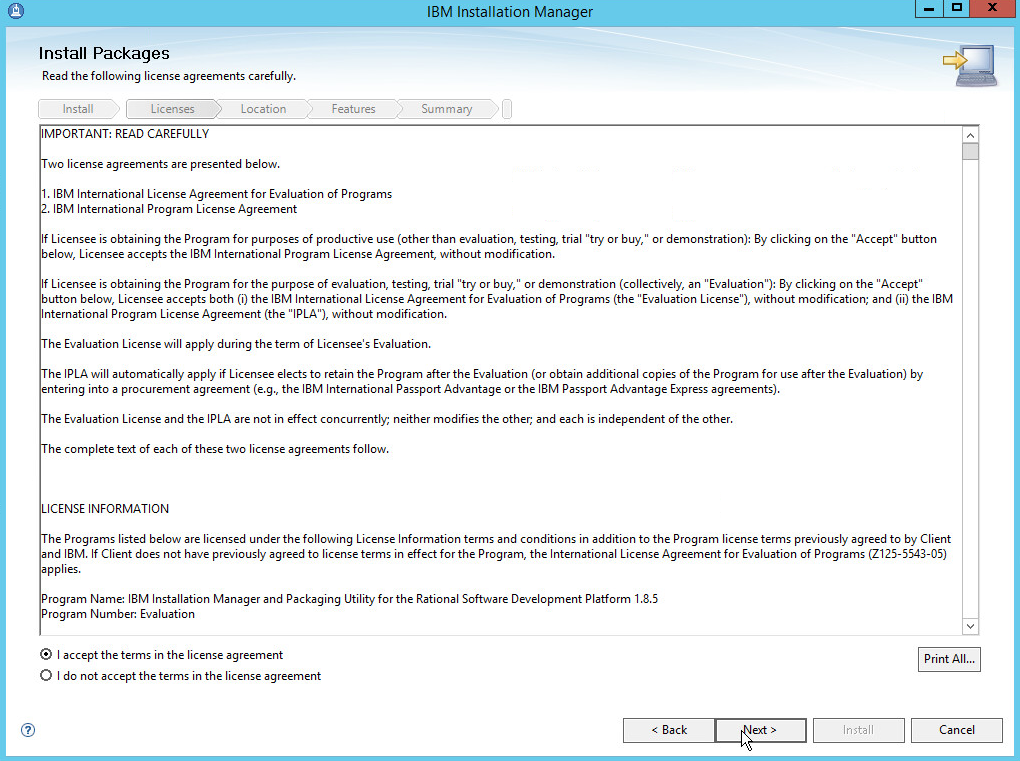
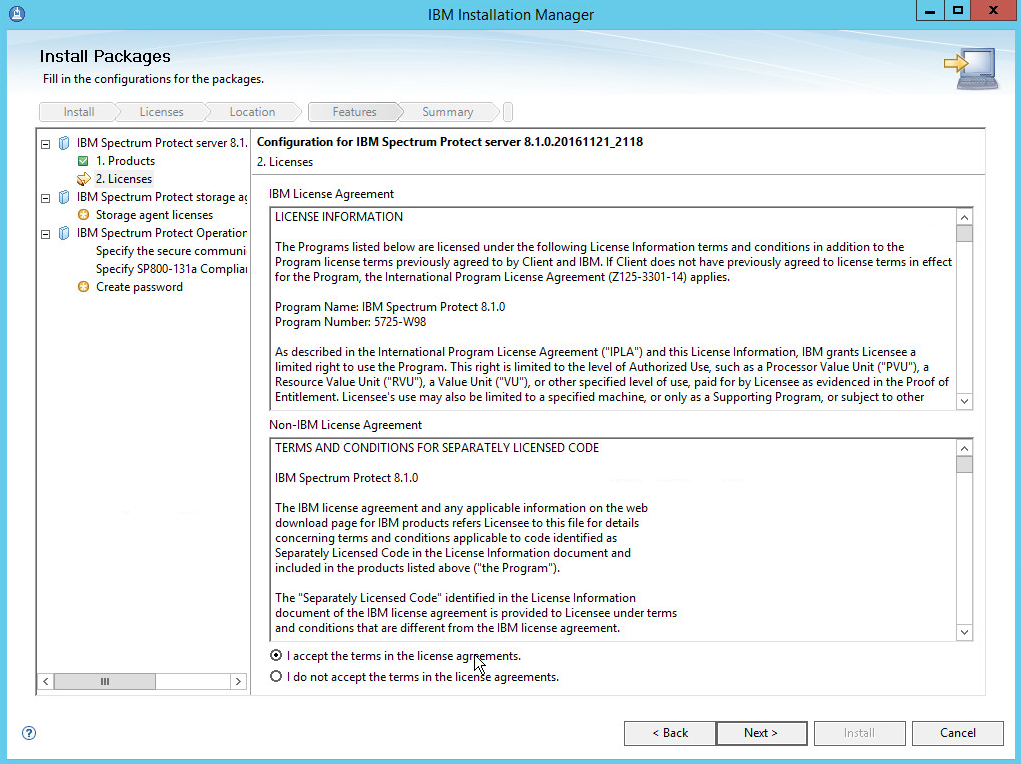
Read and select I accept the terms in the license agreement.
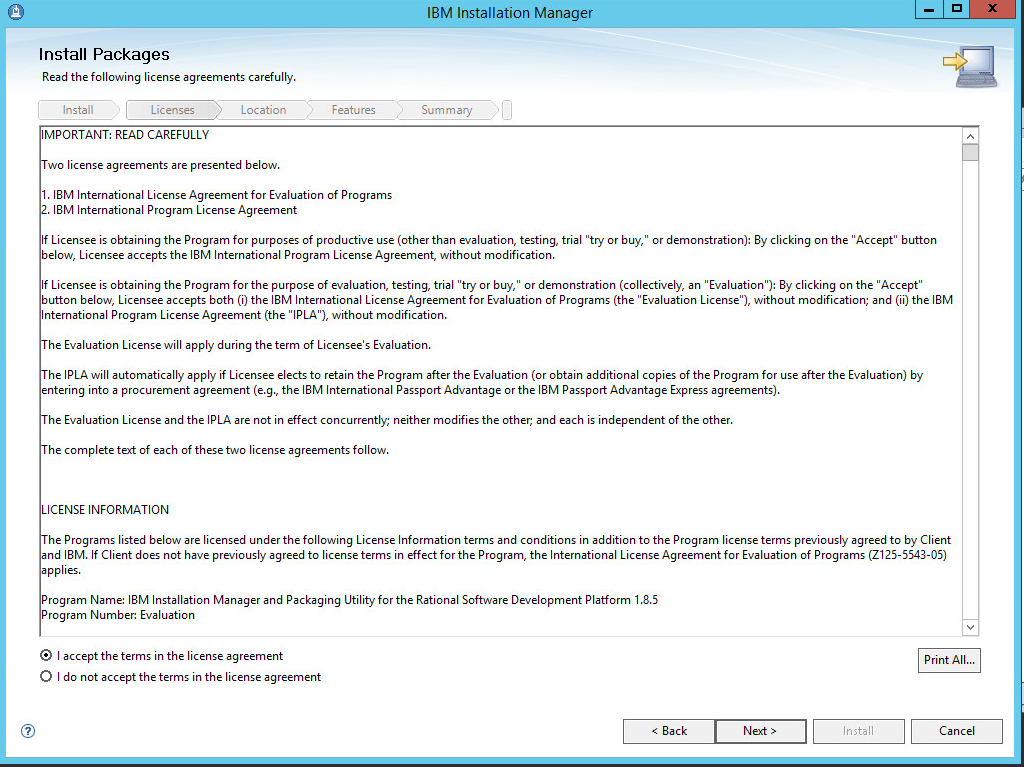
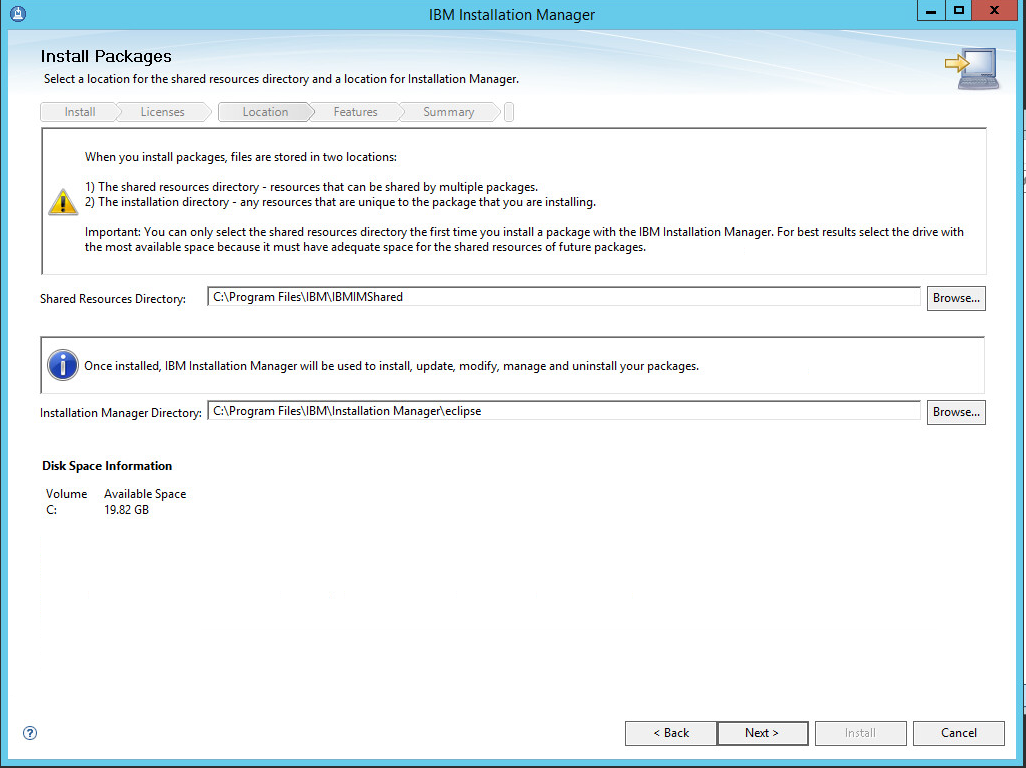
Click Next.
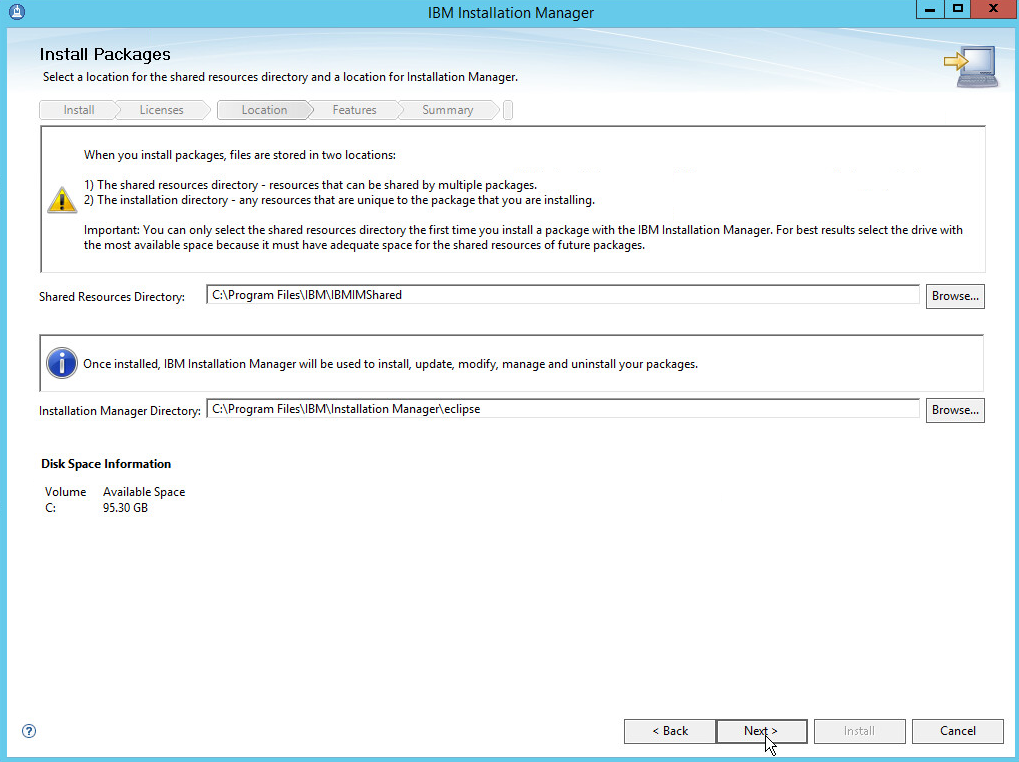
Click Next.
Click Next.
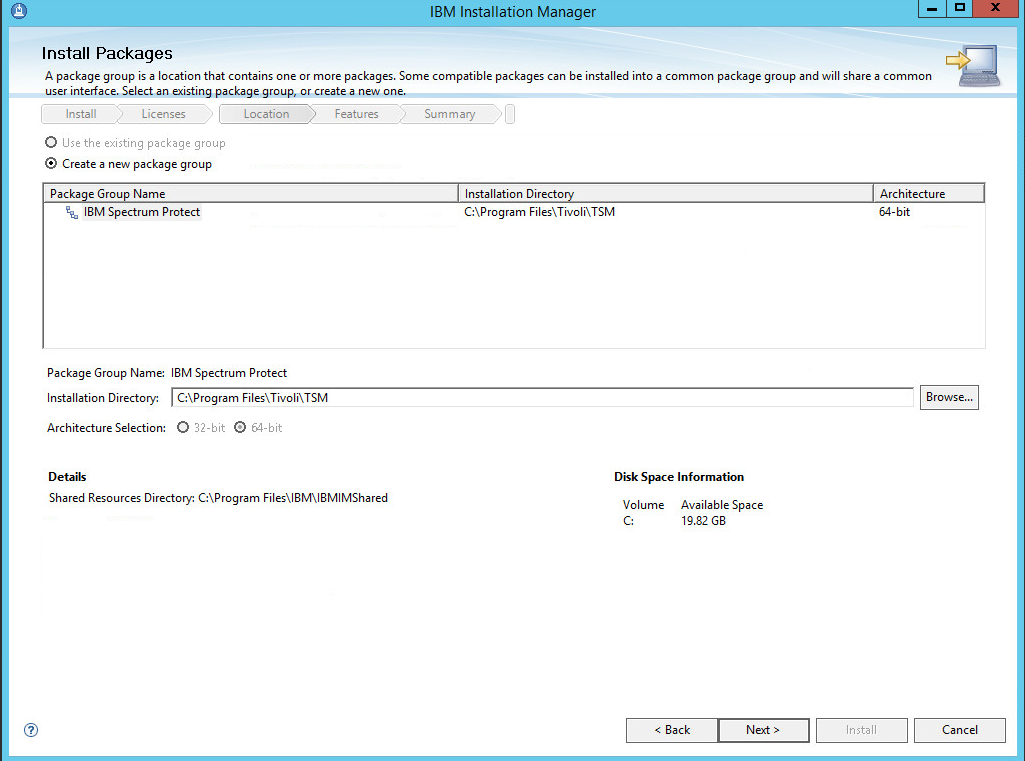
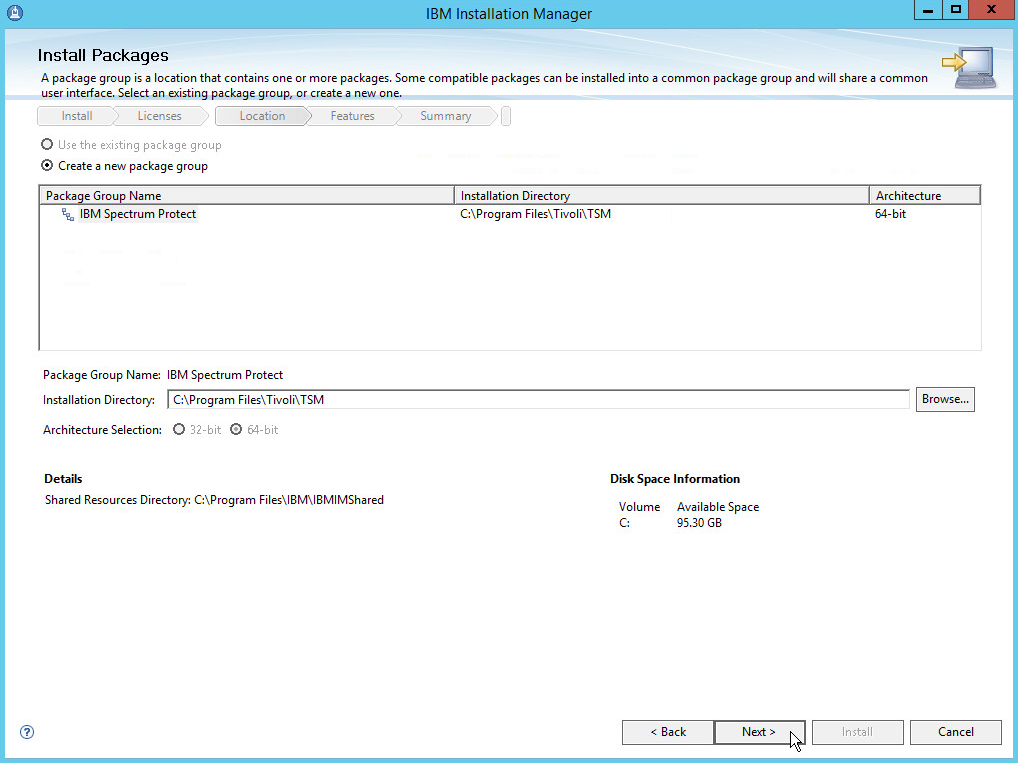
Click Next.
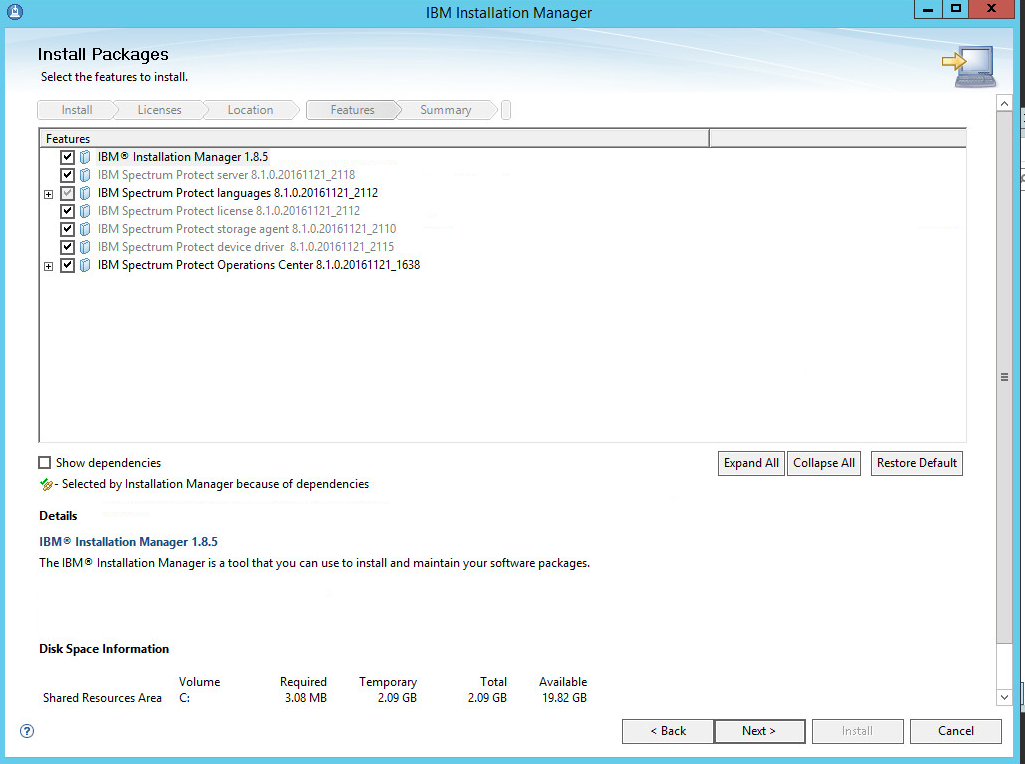
Click Next.
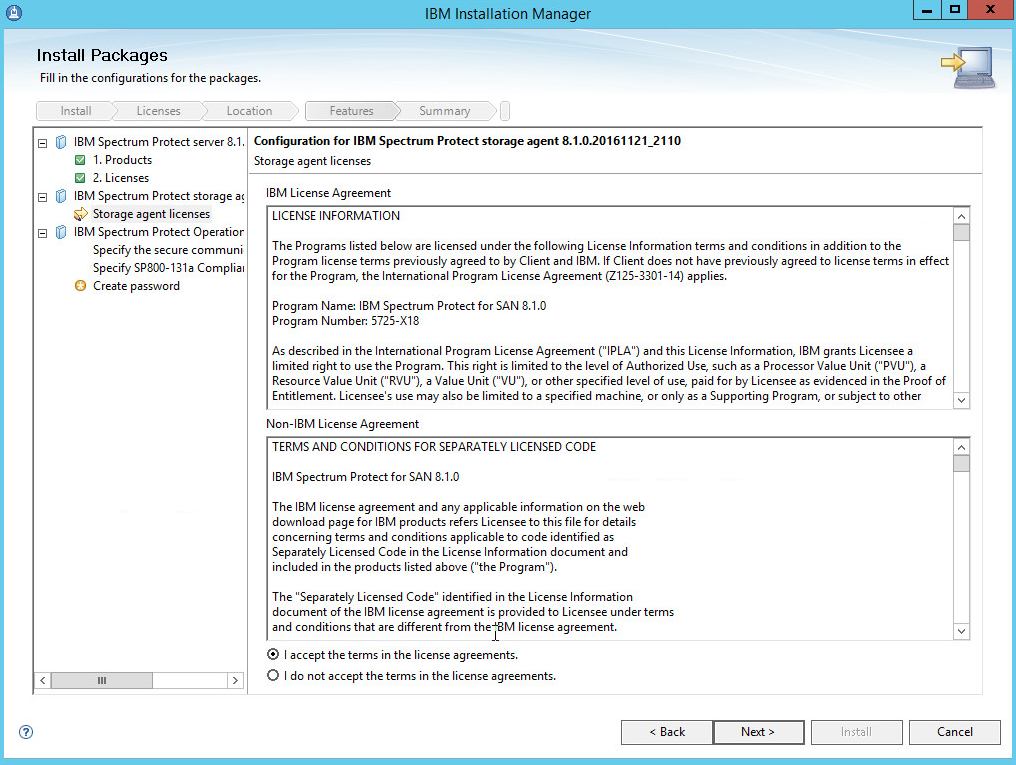
Read and select I accept the terms in the license agreement.
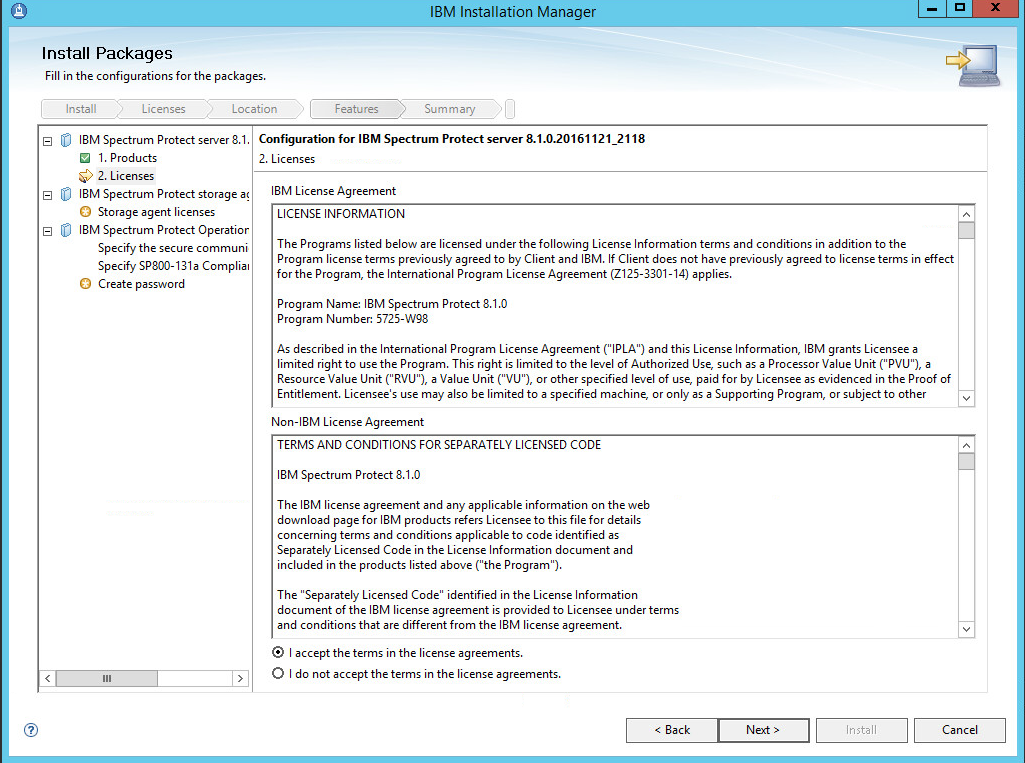
Click Next.
Read and select I accept the terms in the license agreement.
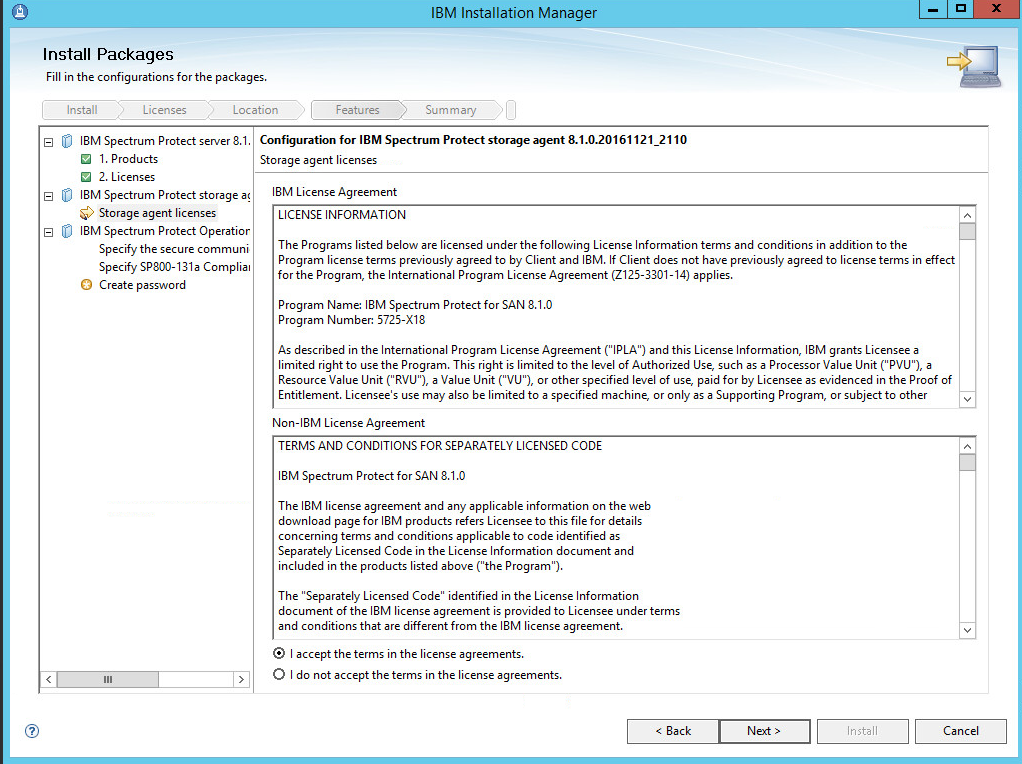
Click Next.
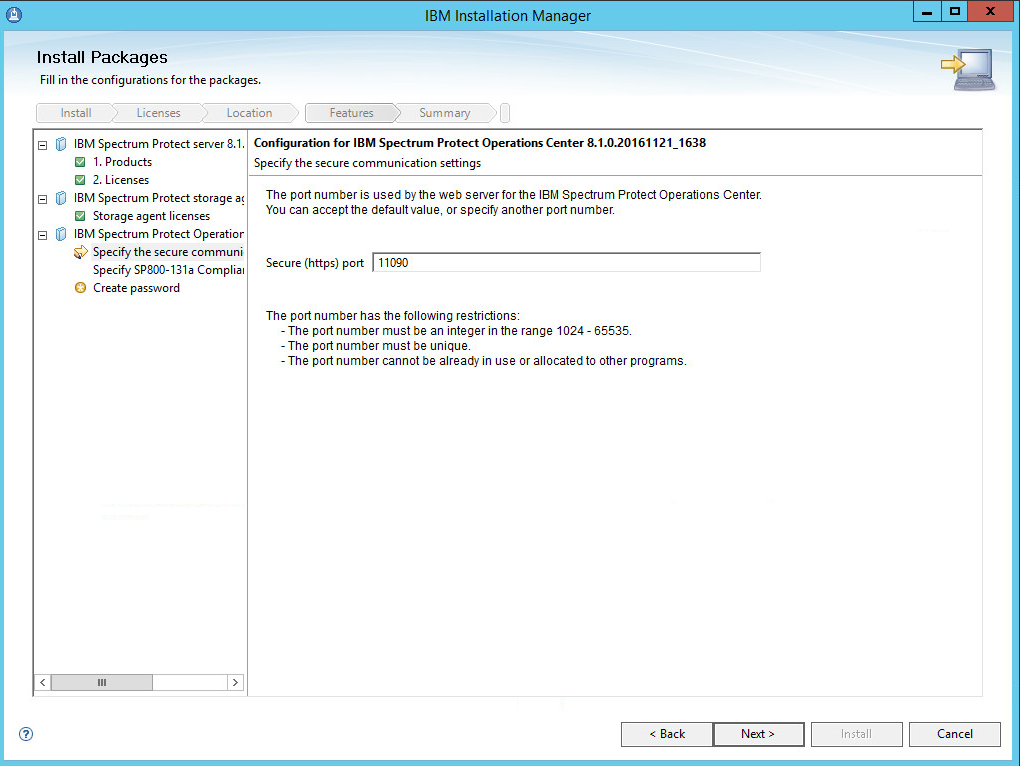
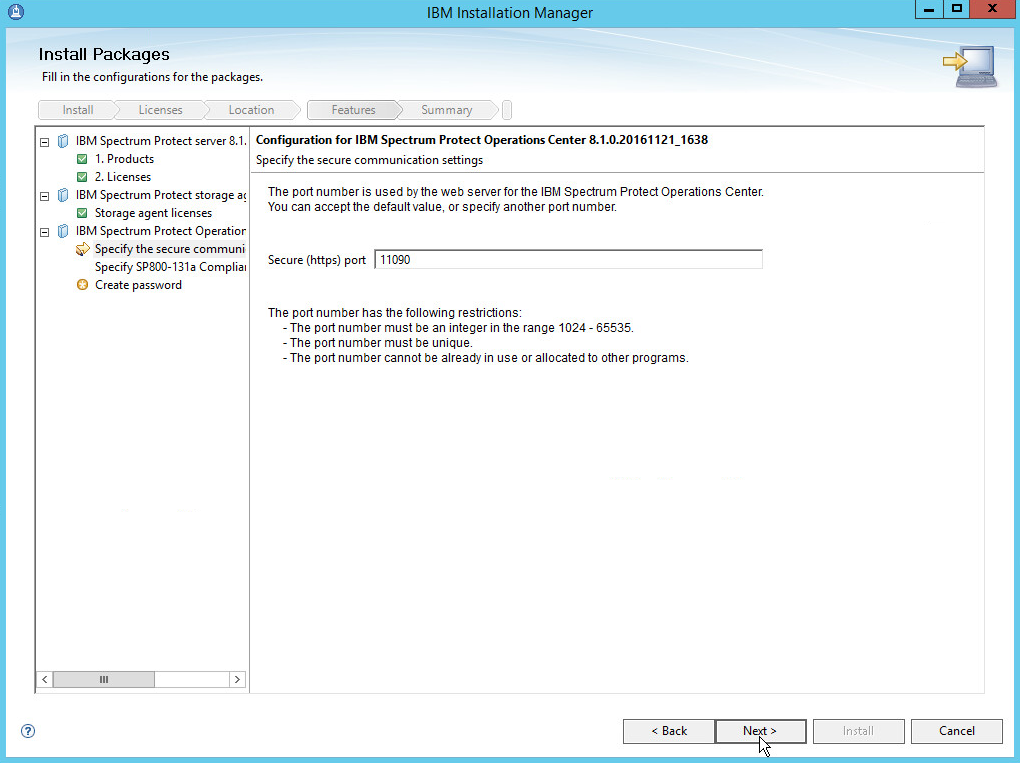
Specify 11090 for the port.
Click Next.
Click Next.
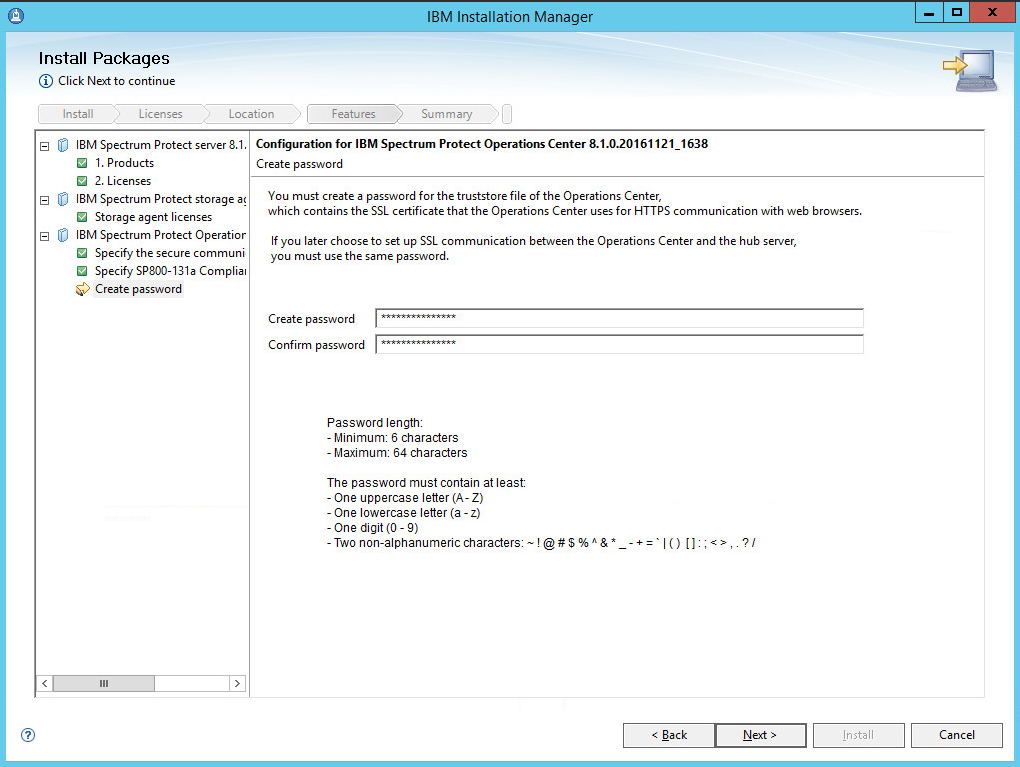
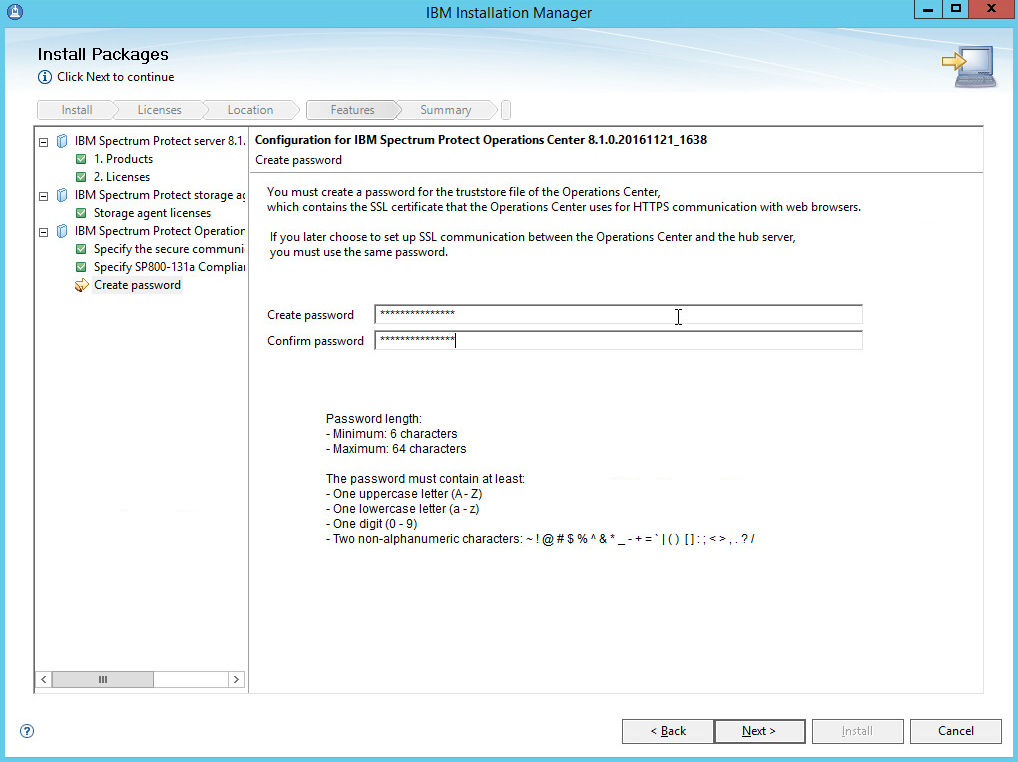
Create a password.
Click Next.
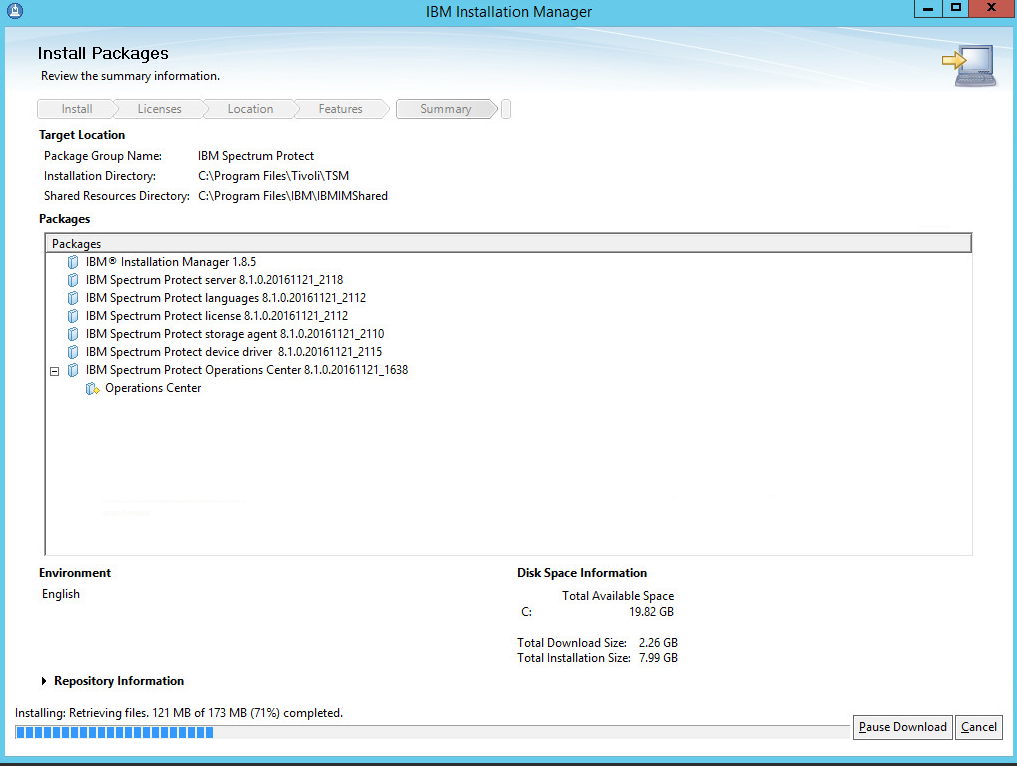
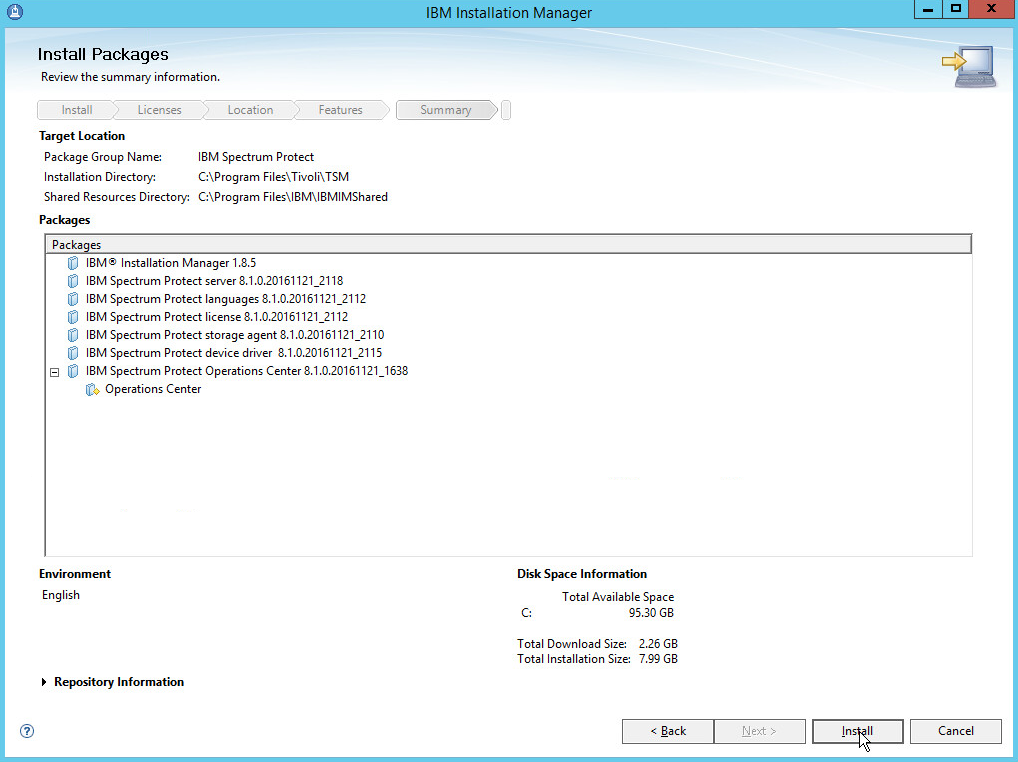
Click Install.
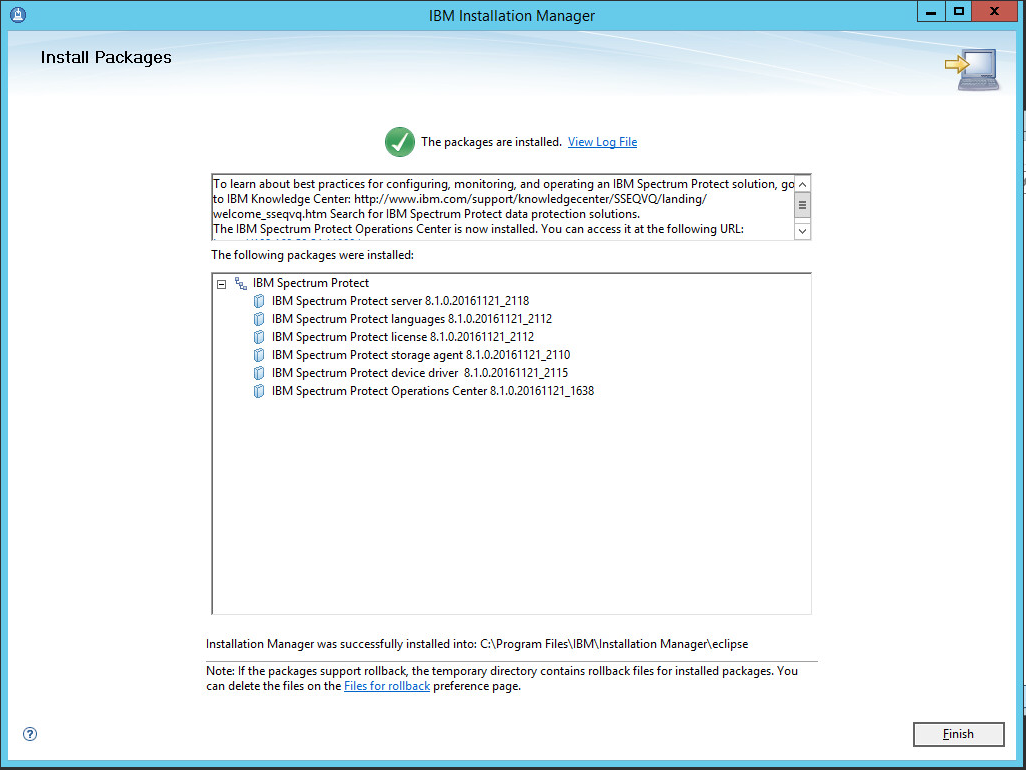
Wait for the install to finish.
Click Finish.
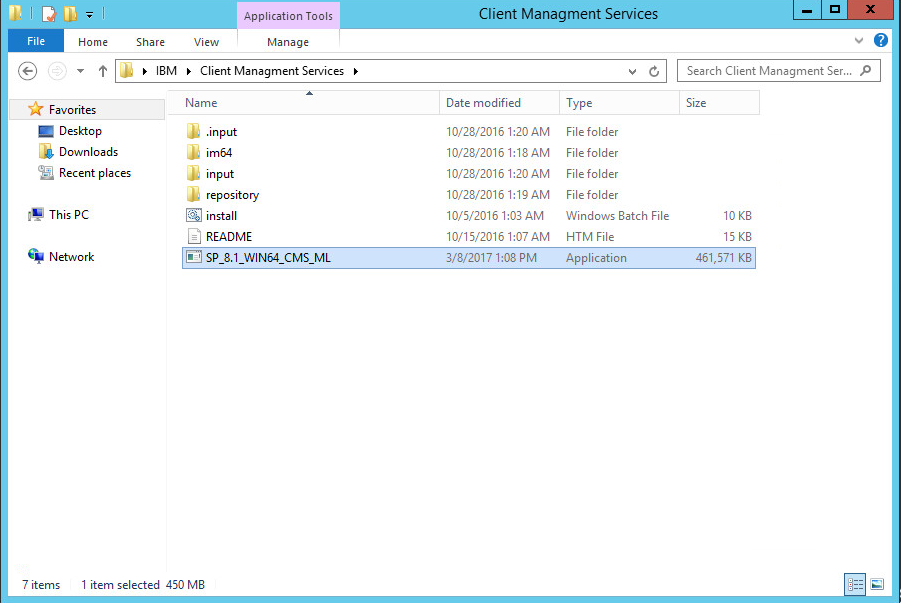
2.7.2. Install IBM Spectrum Protect Client Management Services
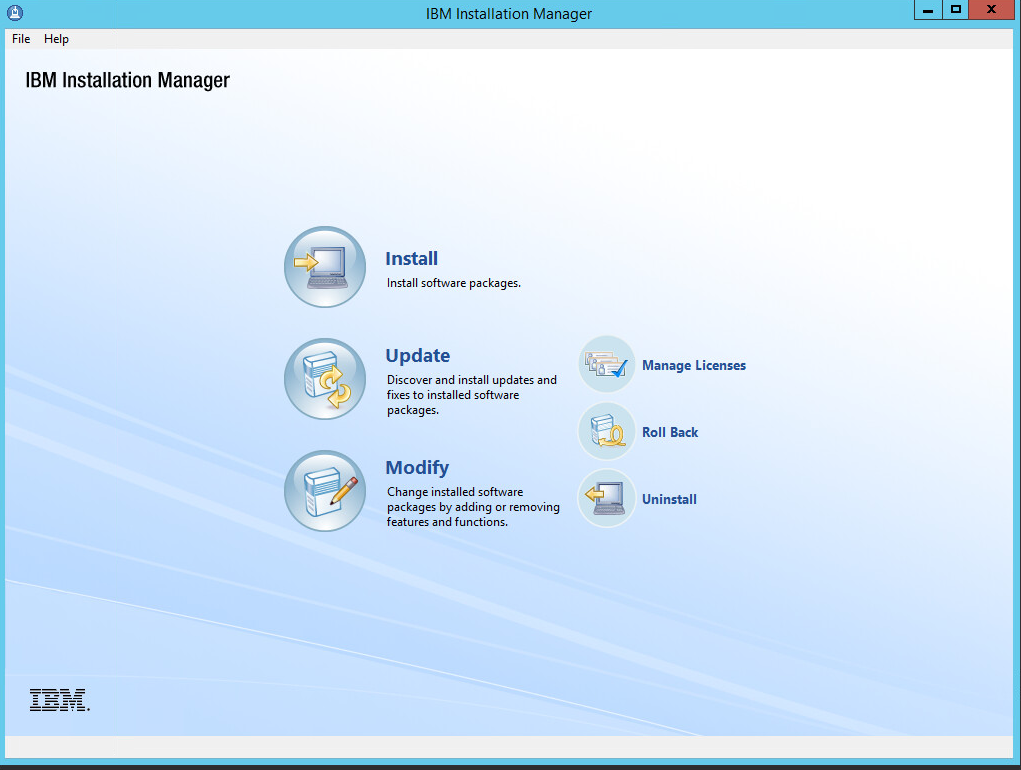
Run the install script.
Click Install.
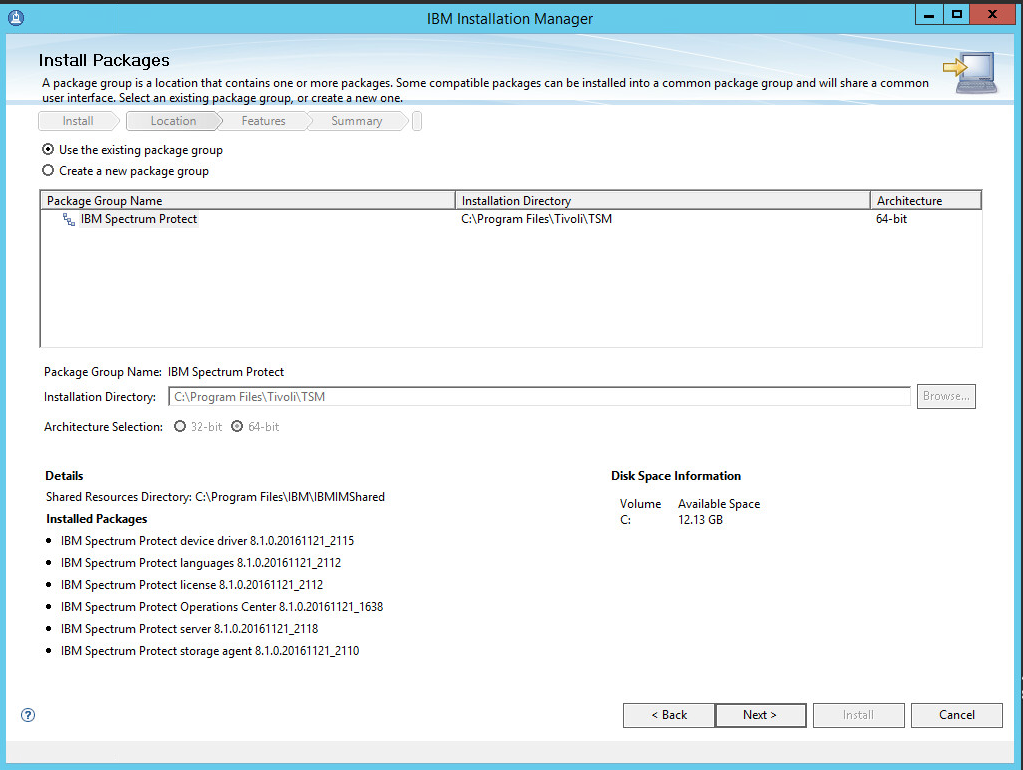
Check the box next to IBM Spectrum Protect Client Management Services.
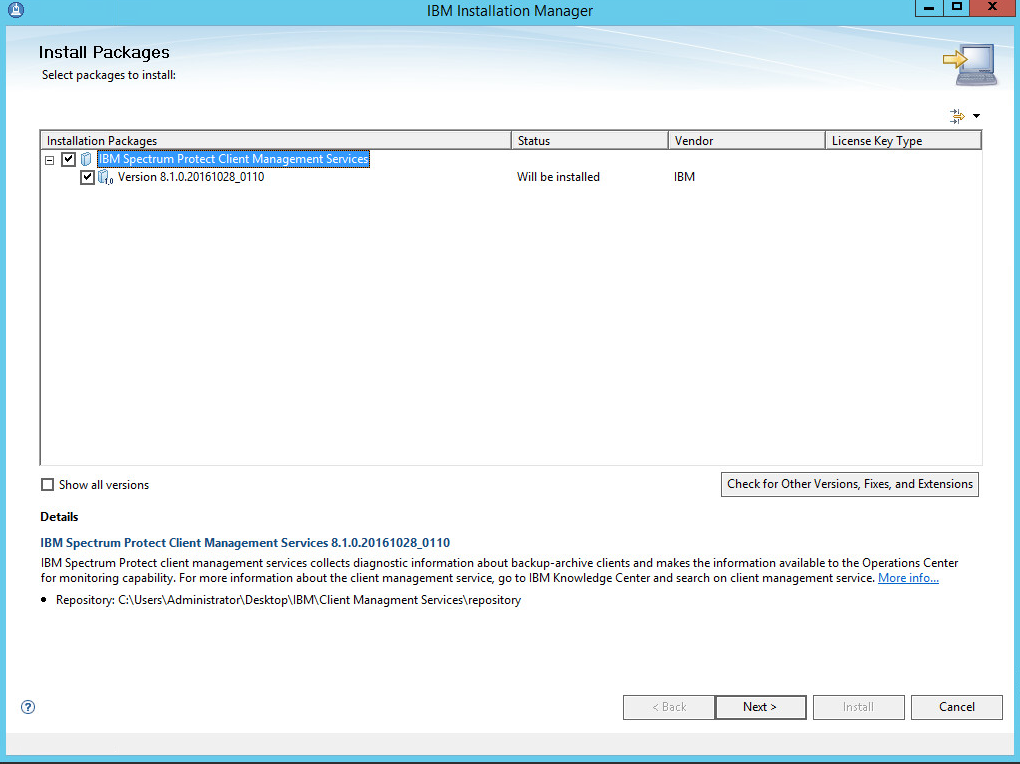
Click Next.
Click Next.
Make sure all the boxes next to the package Client Management Services are checked.
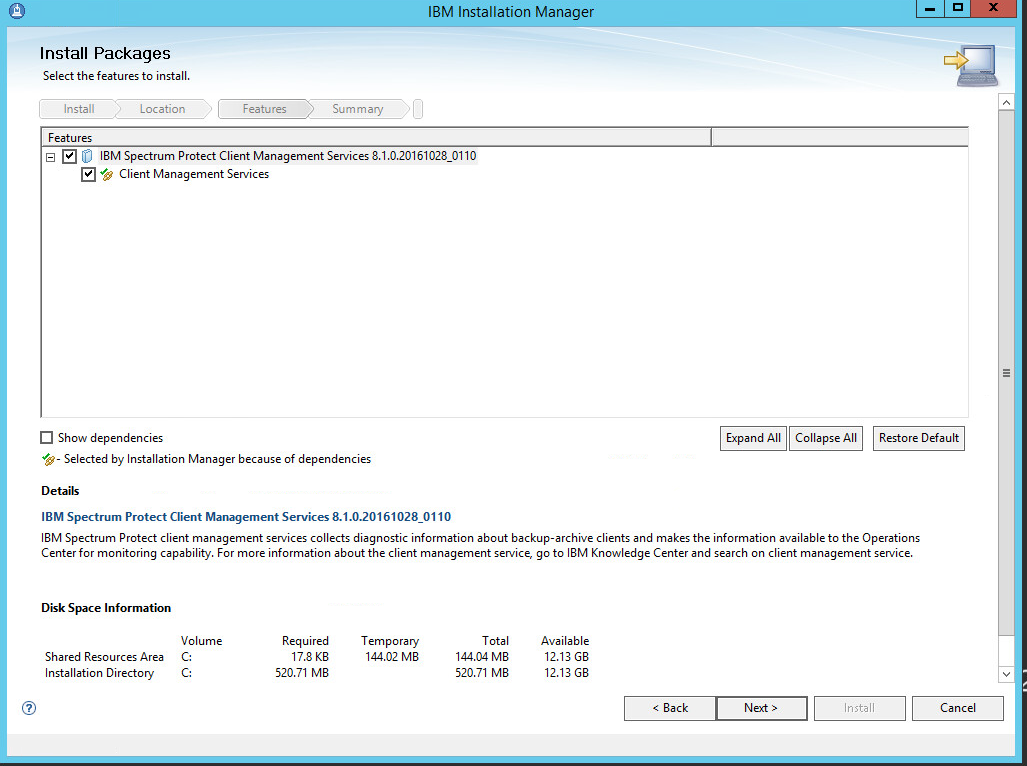
Click Next.
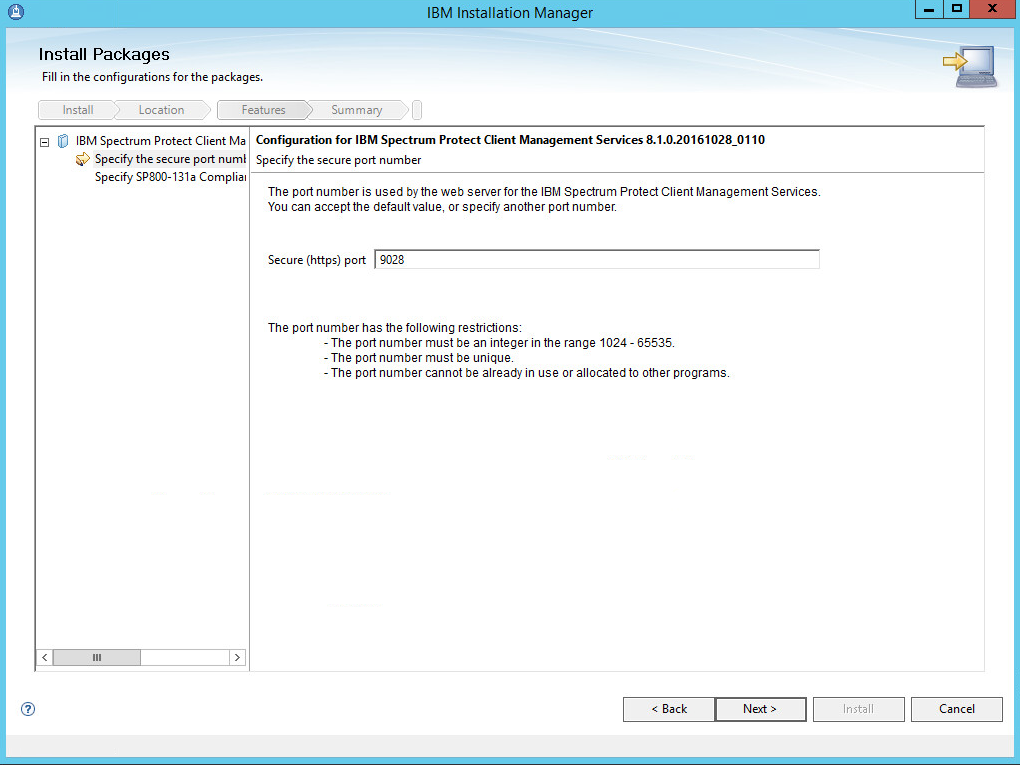
Set the port to 9028.
Click Next.
Click Next.
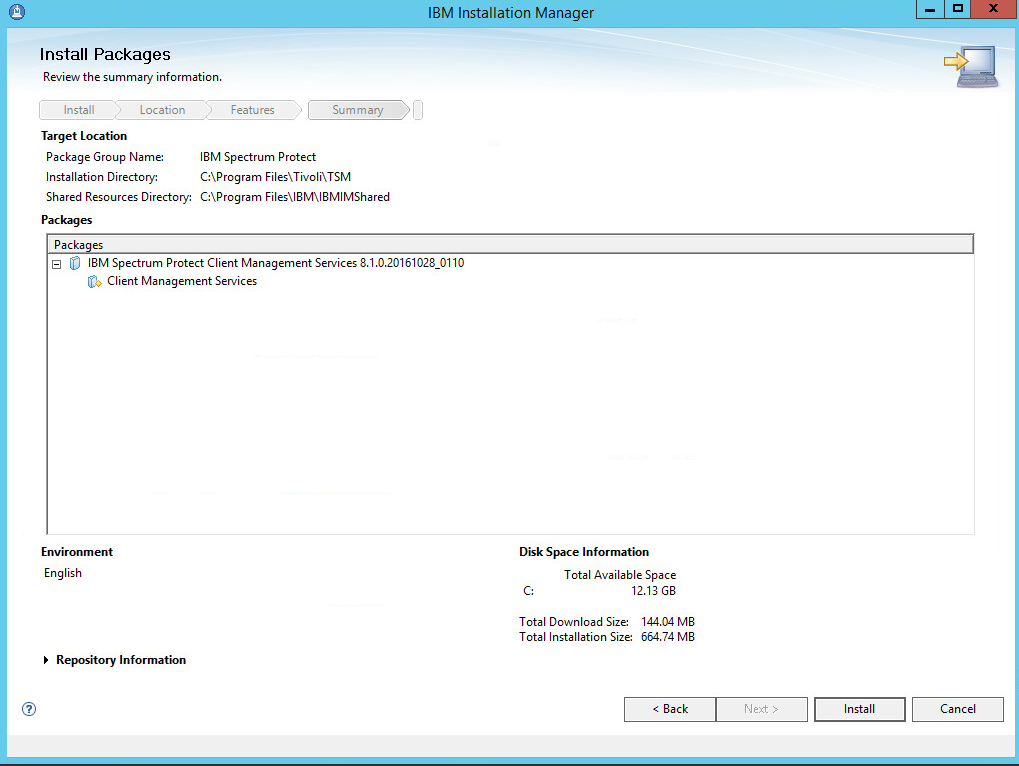
Click Install.
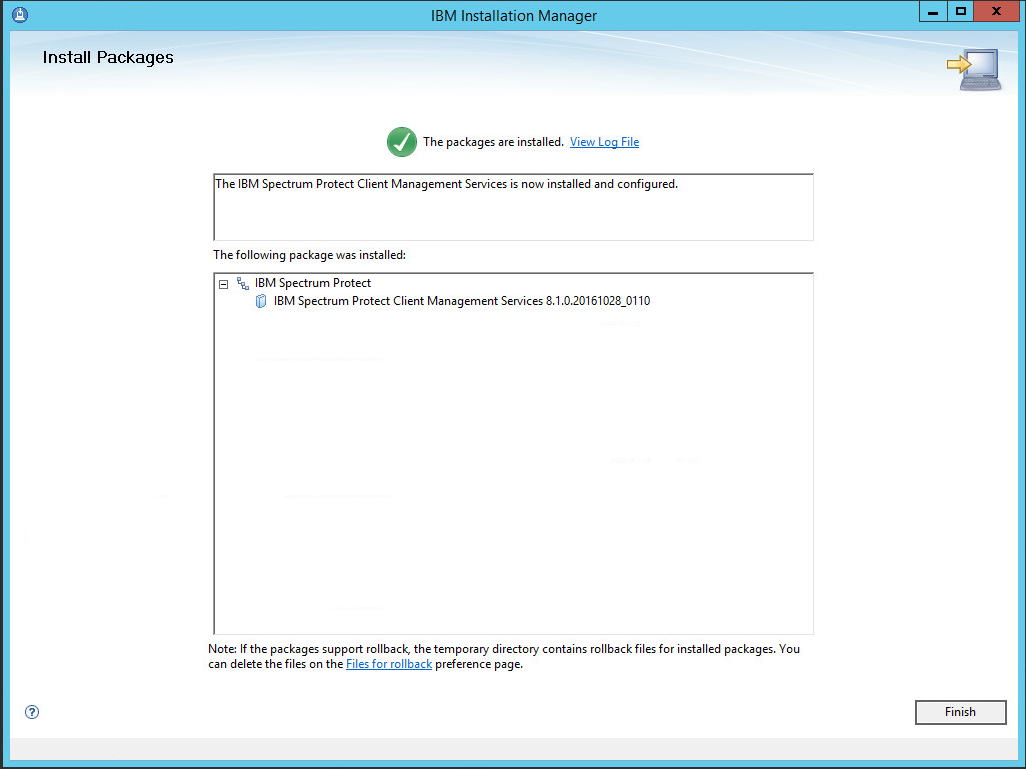
Observe the successful installation and click Finish.
2.7.3. Configure IBM Spectrum Protect
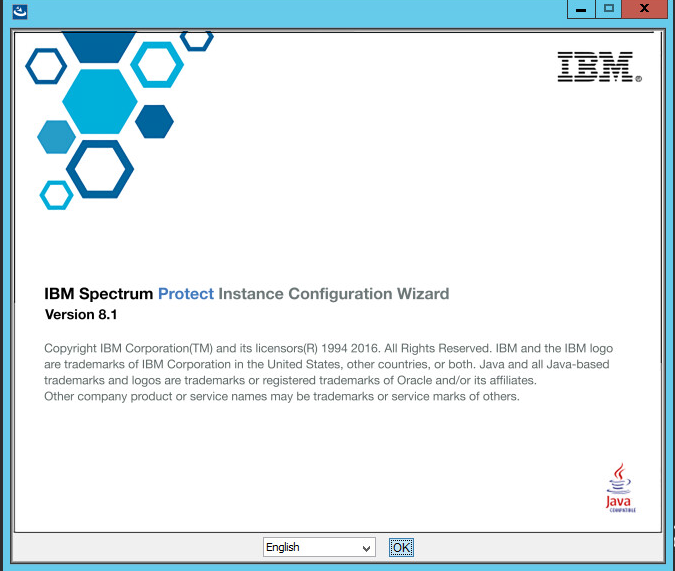
Click OK.
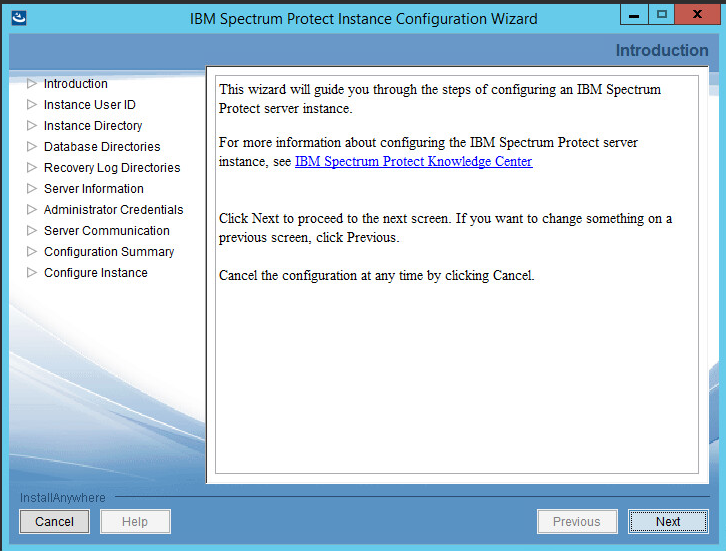
Click Next.
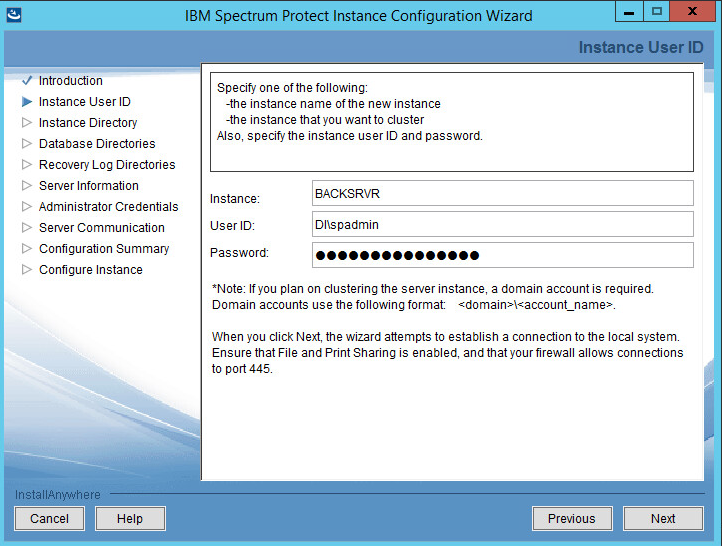
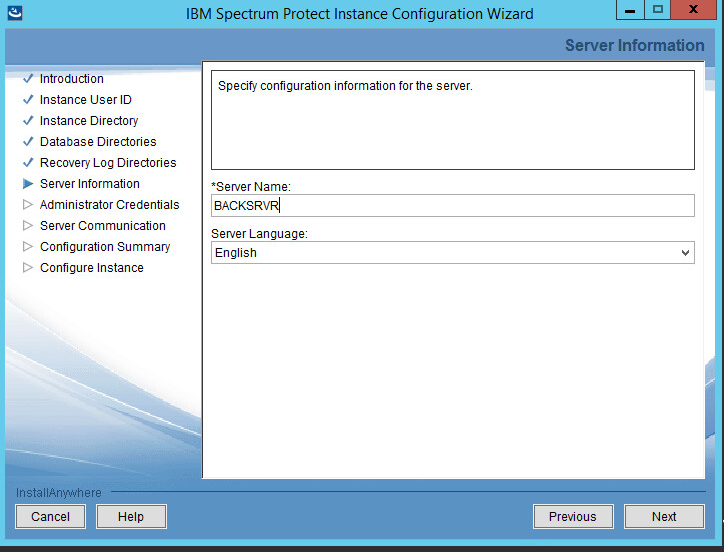
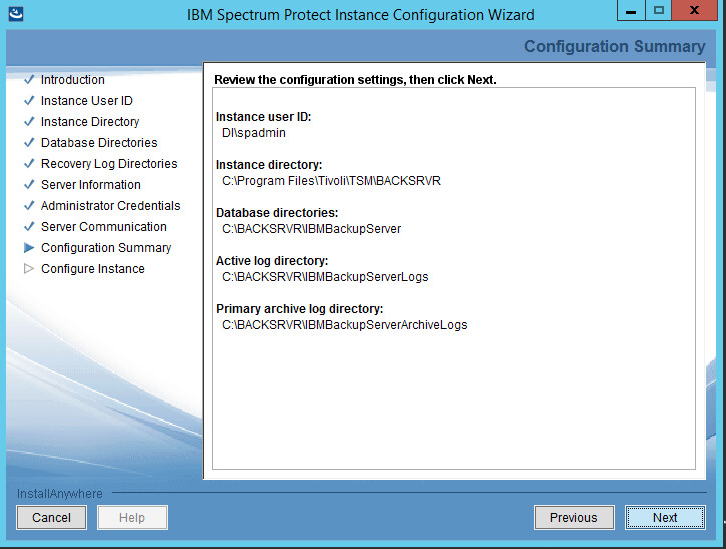
Specify a name and an account for the IBM server to use. Example: (name: BACKSRVR, User ID: DI\spadmin).
Click Next.
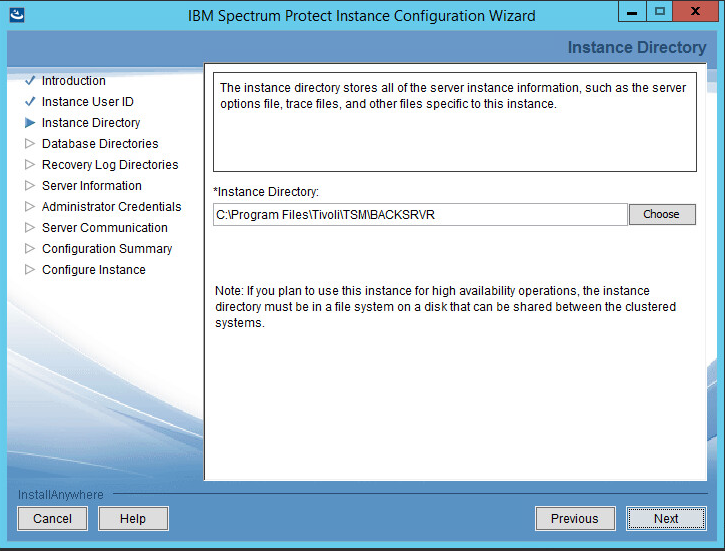
Choose a directory.
Click Next.
Click Yes if prompted to create the directory.
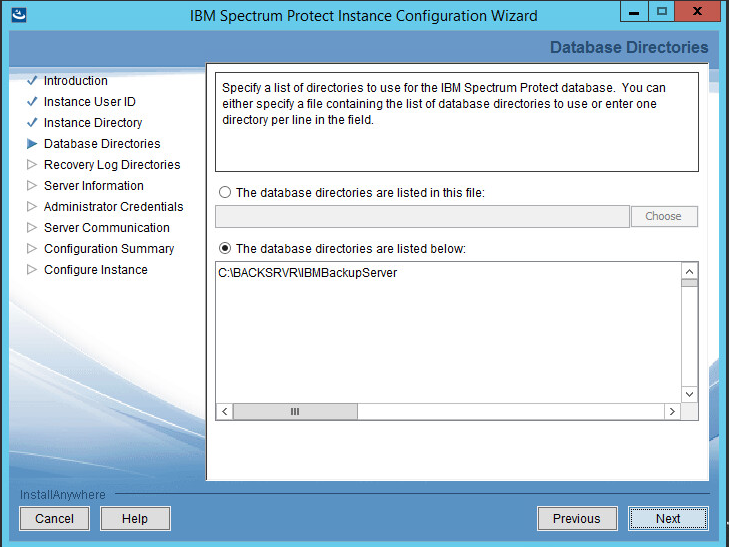
Choose The database directories are listed below.
Create a directory to contain the database. Example: C:\BACKSRVR\IBMBackupServer.
Click Next.
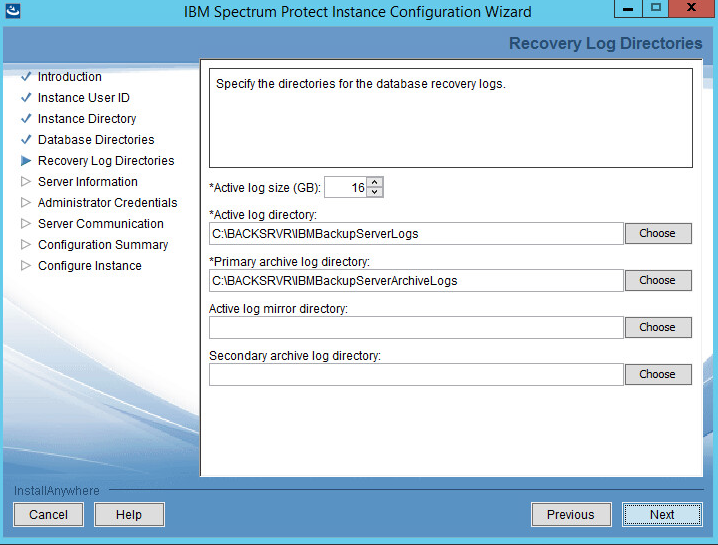
Create directories for logs and archive logs. Example: C:\BACKSRVR\IBMBackupServerLogs, C:\BACKSRVR\IBMBackupServerArchiveLogs.
Click Next.
Specify the server name.
Click Next.
Click Next.
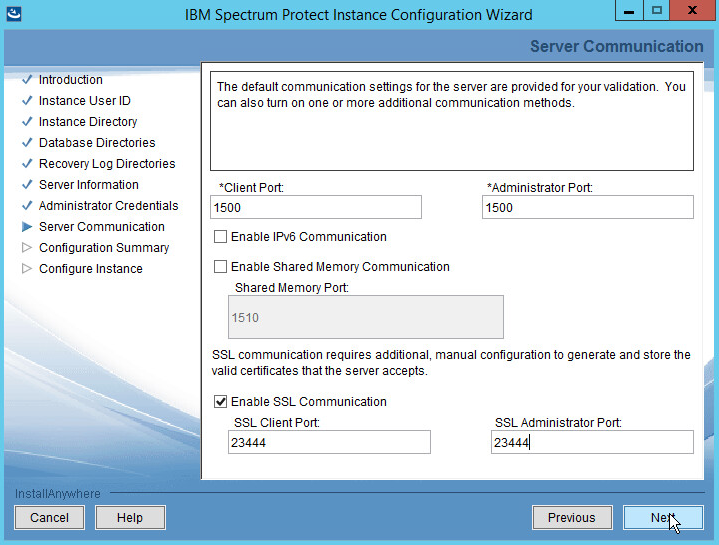
Select a port. Example: 1500.
Check the box next to Enable SSL Communication and enter a port. Example: 23444.
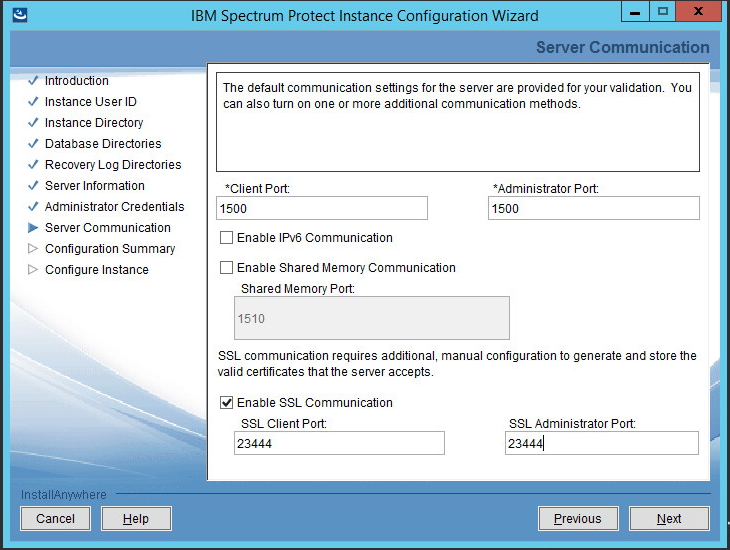
Click Next.
Click Next.
Click Next.
Click Done.
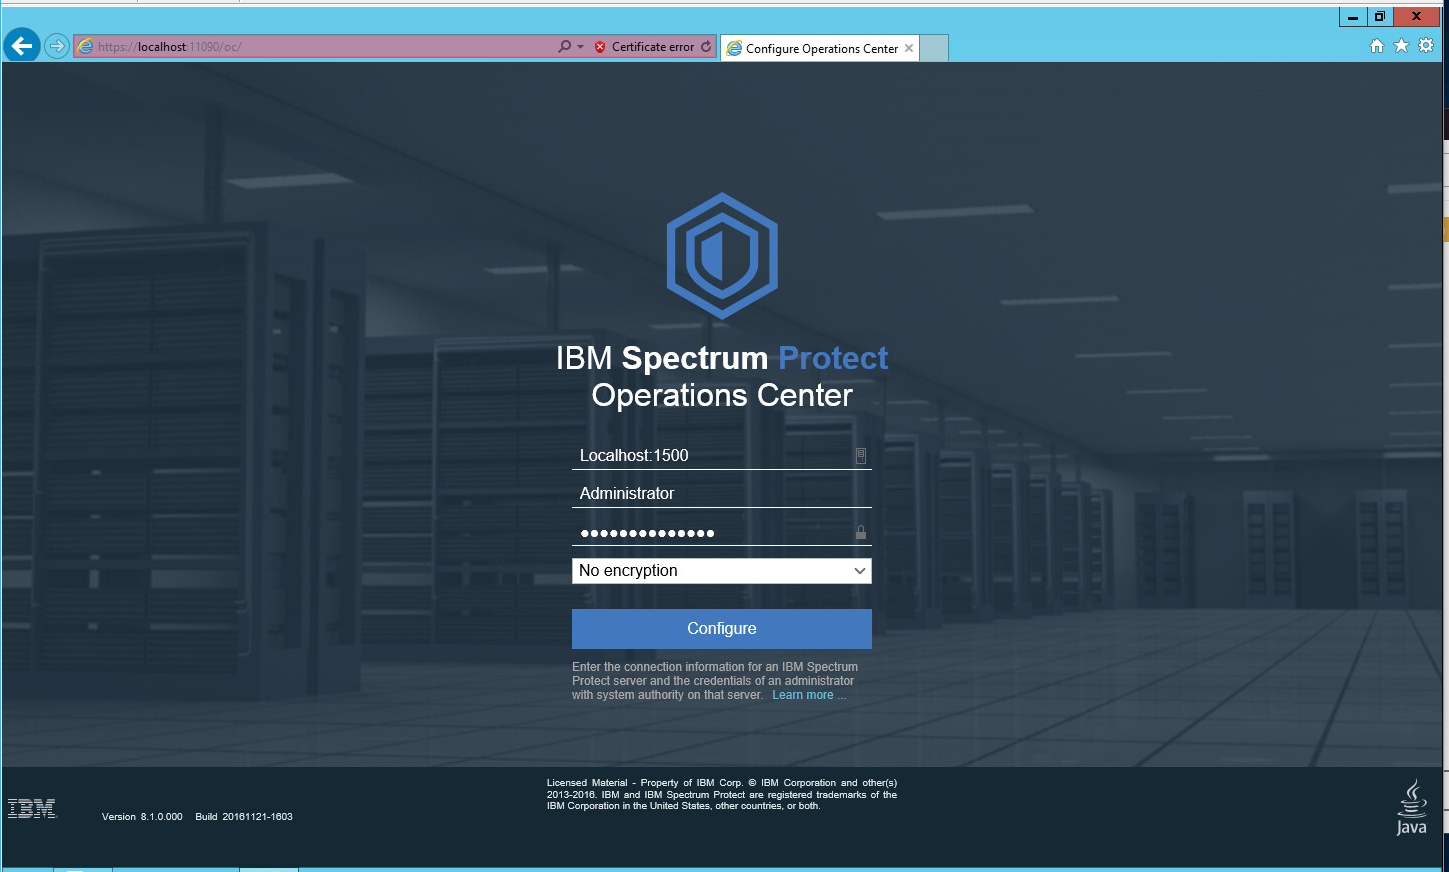
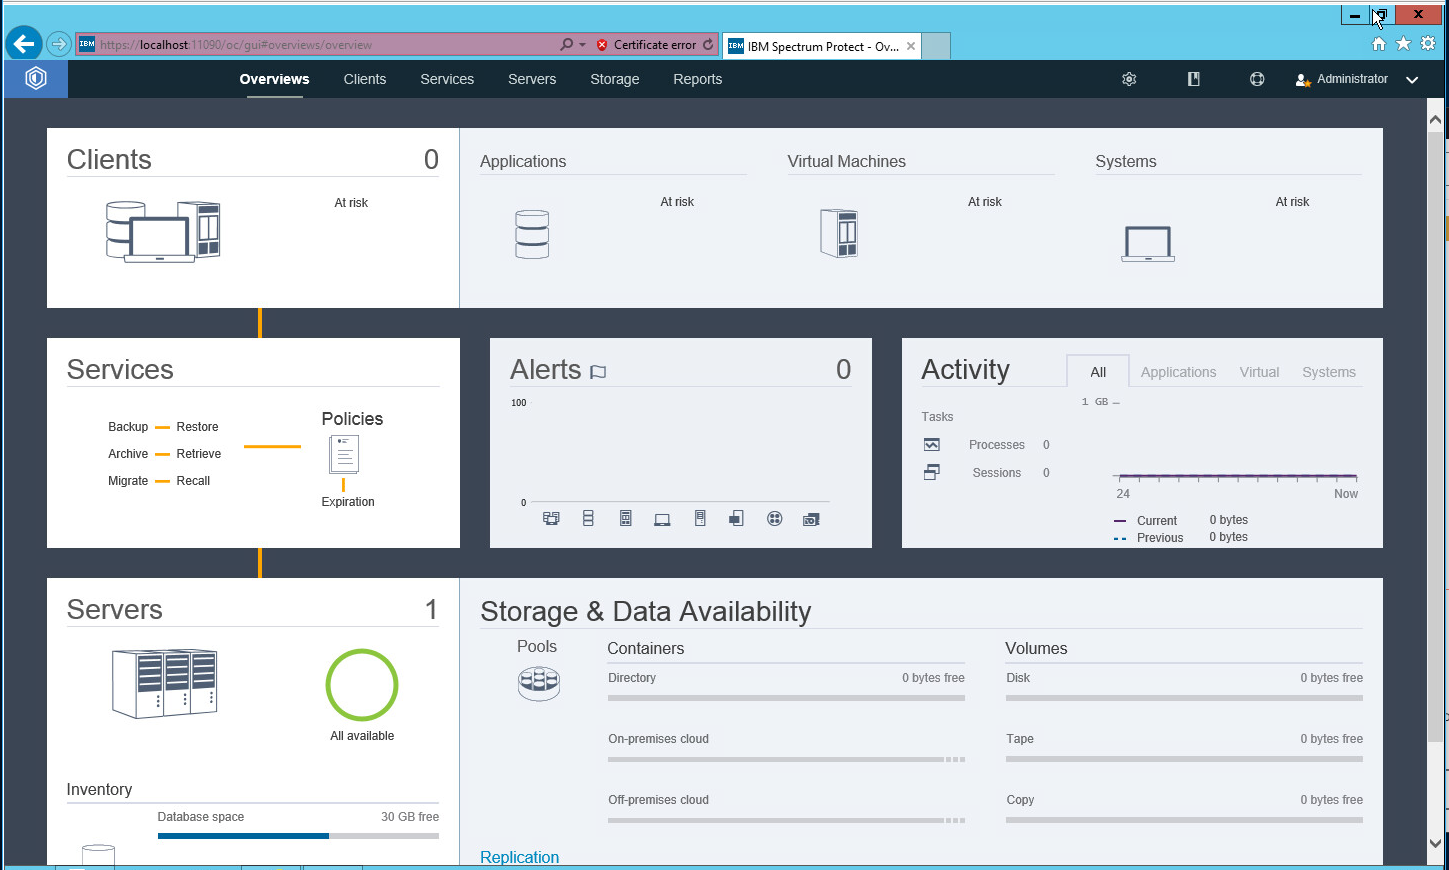
Log in to Operations Center by going to localhost:11090/oc/. If issues occur, check firewall permissions for ports 1500 and 23444 (or whichever ports were designated in steps 20 and 21).
Log in using the credentials provided in the Configuration Wizard.
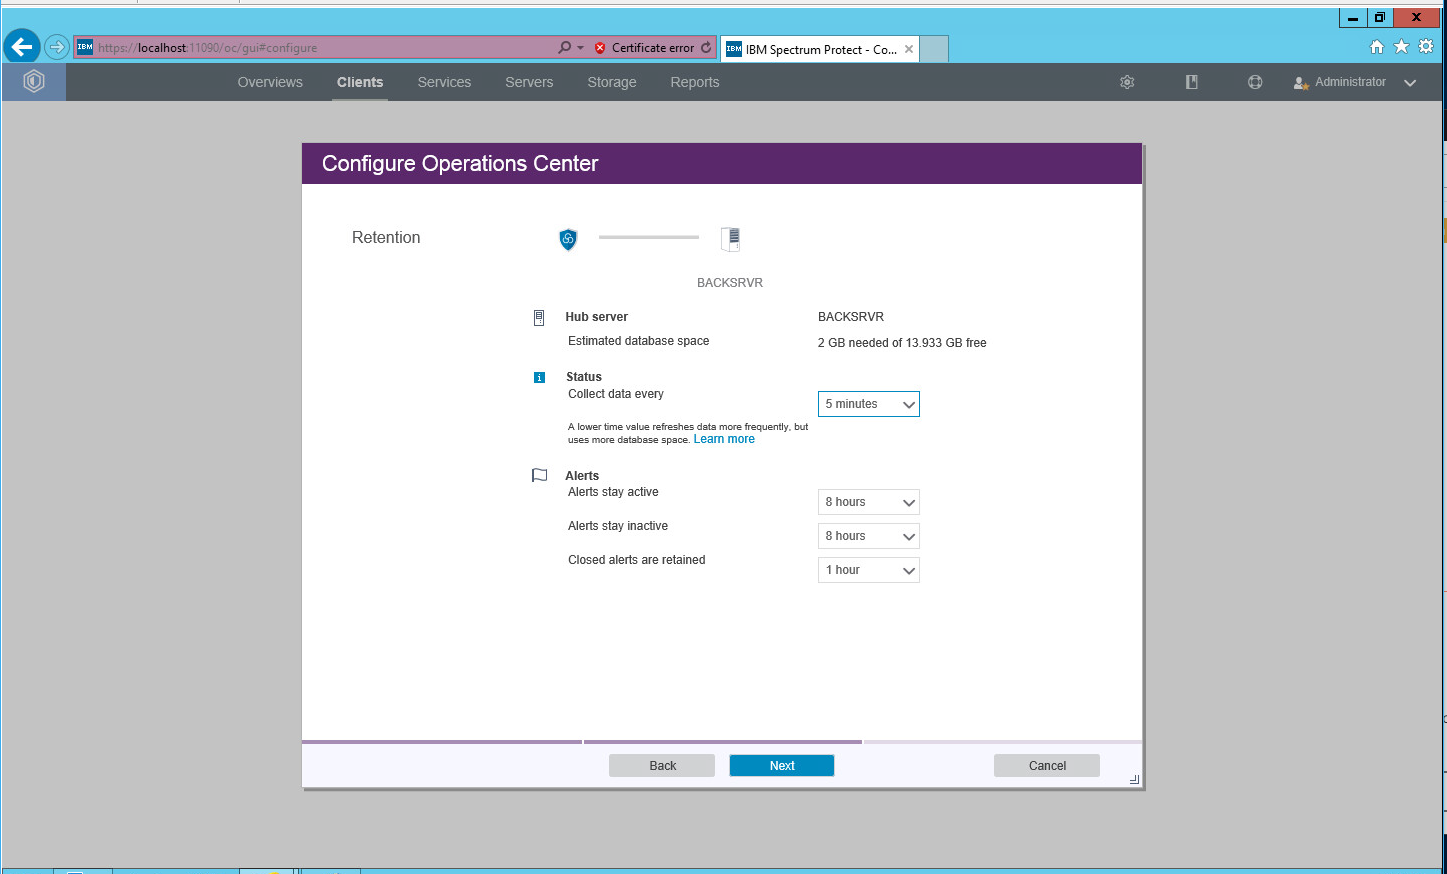
Enter the password for a new account to be created on the system.
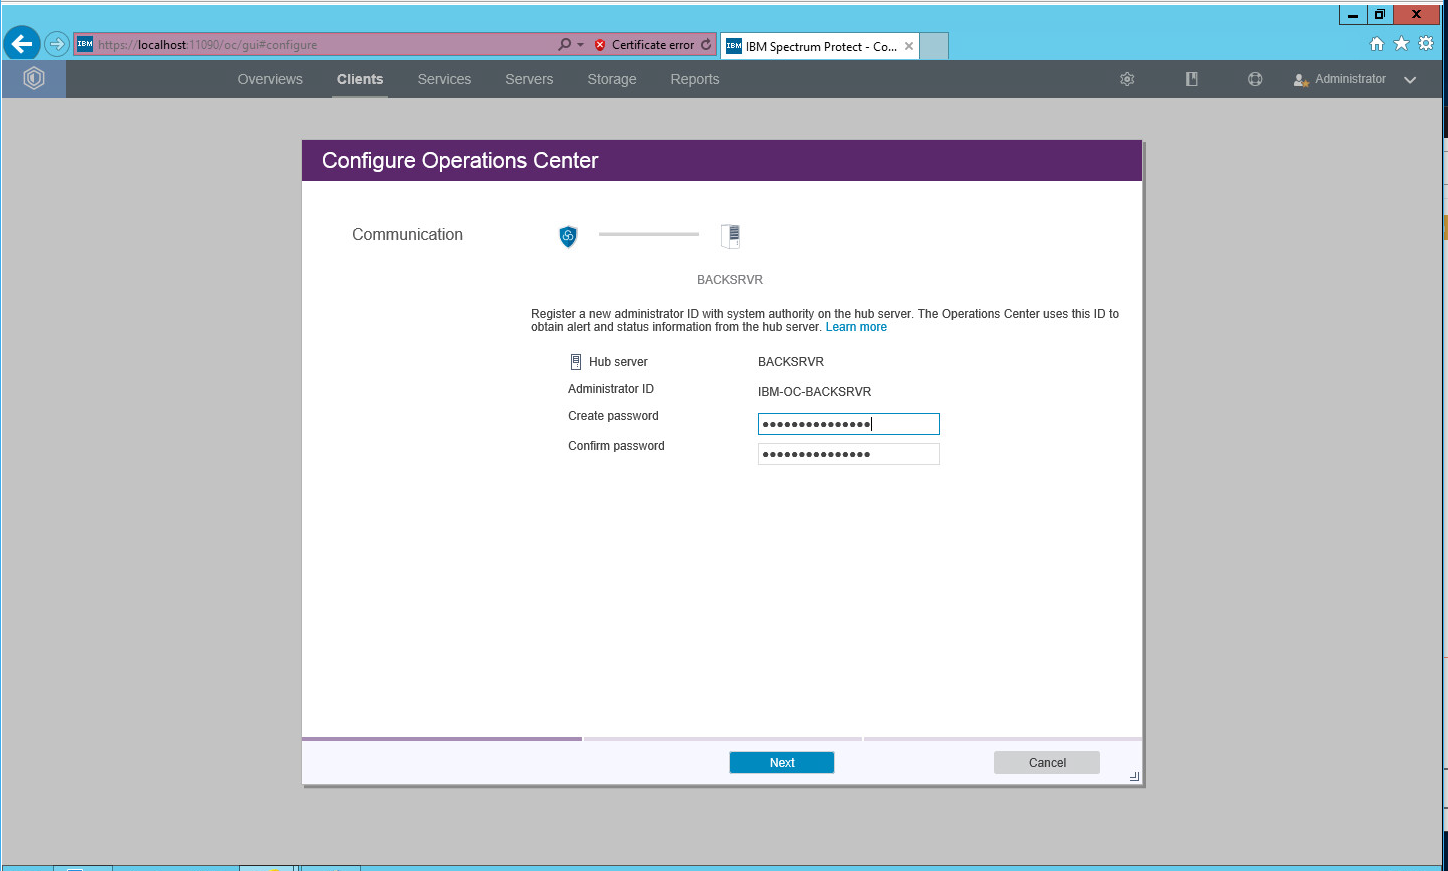
Click Next.
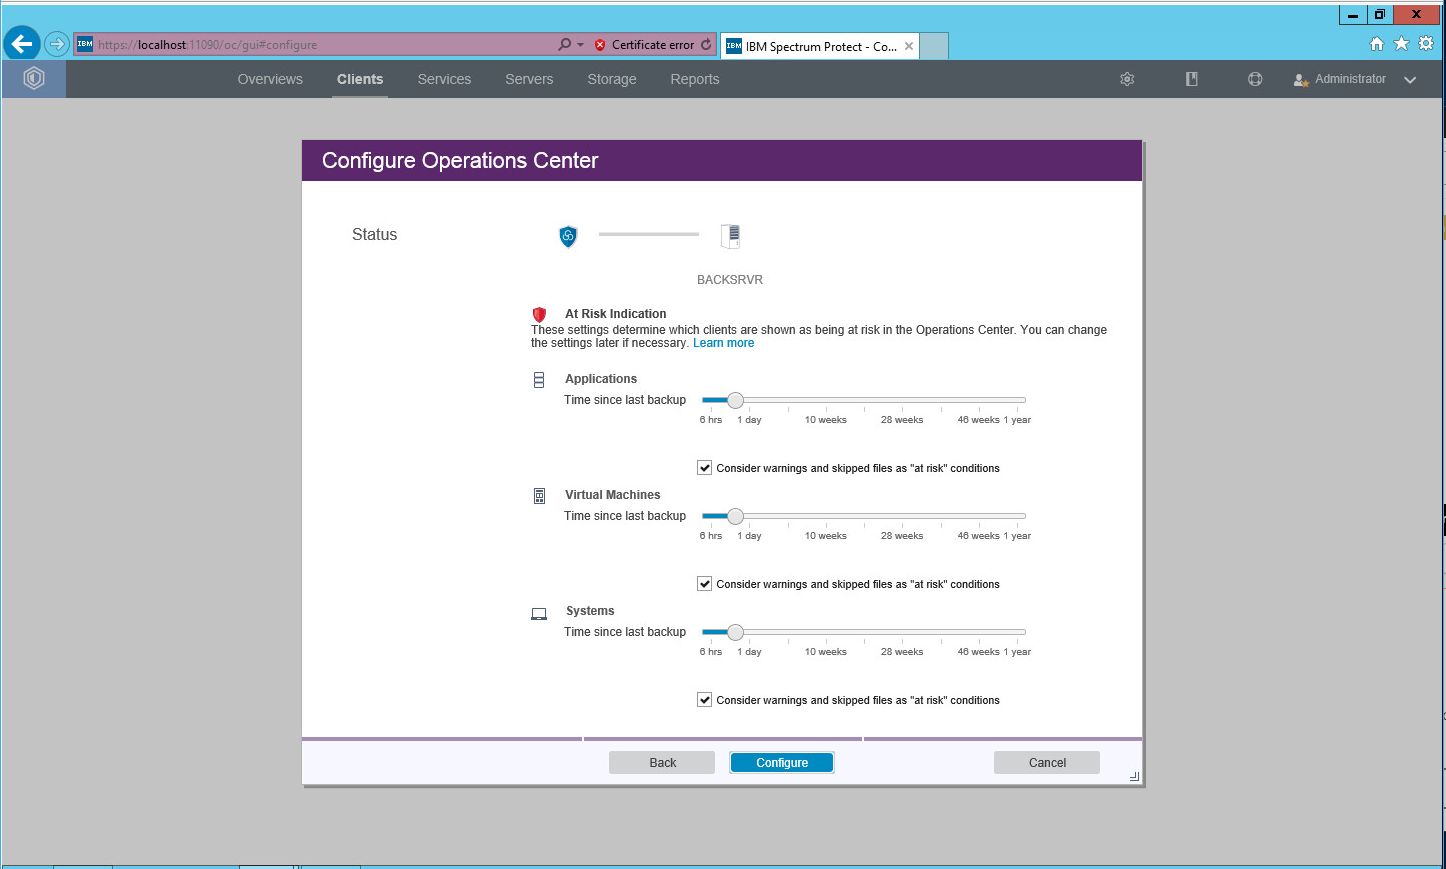
Click Next.
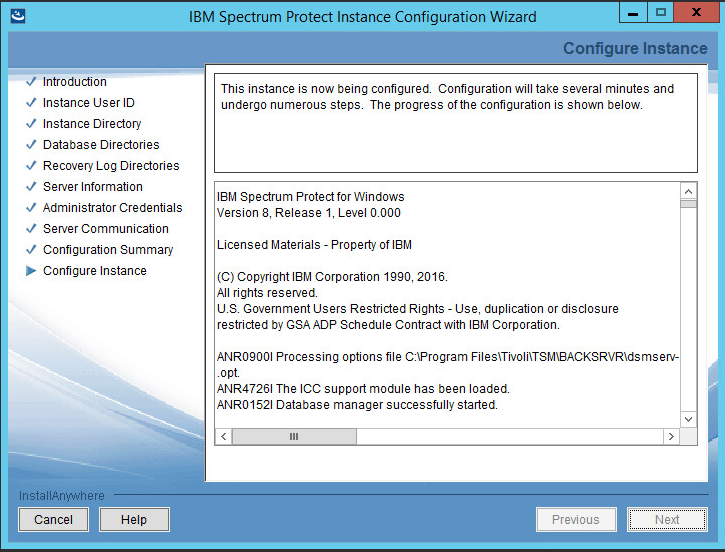
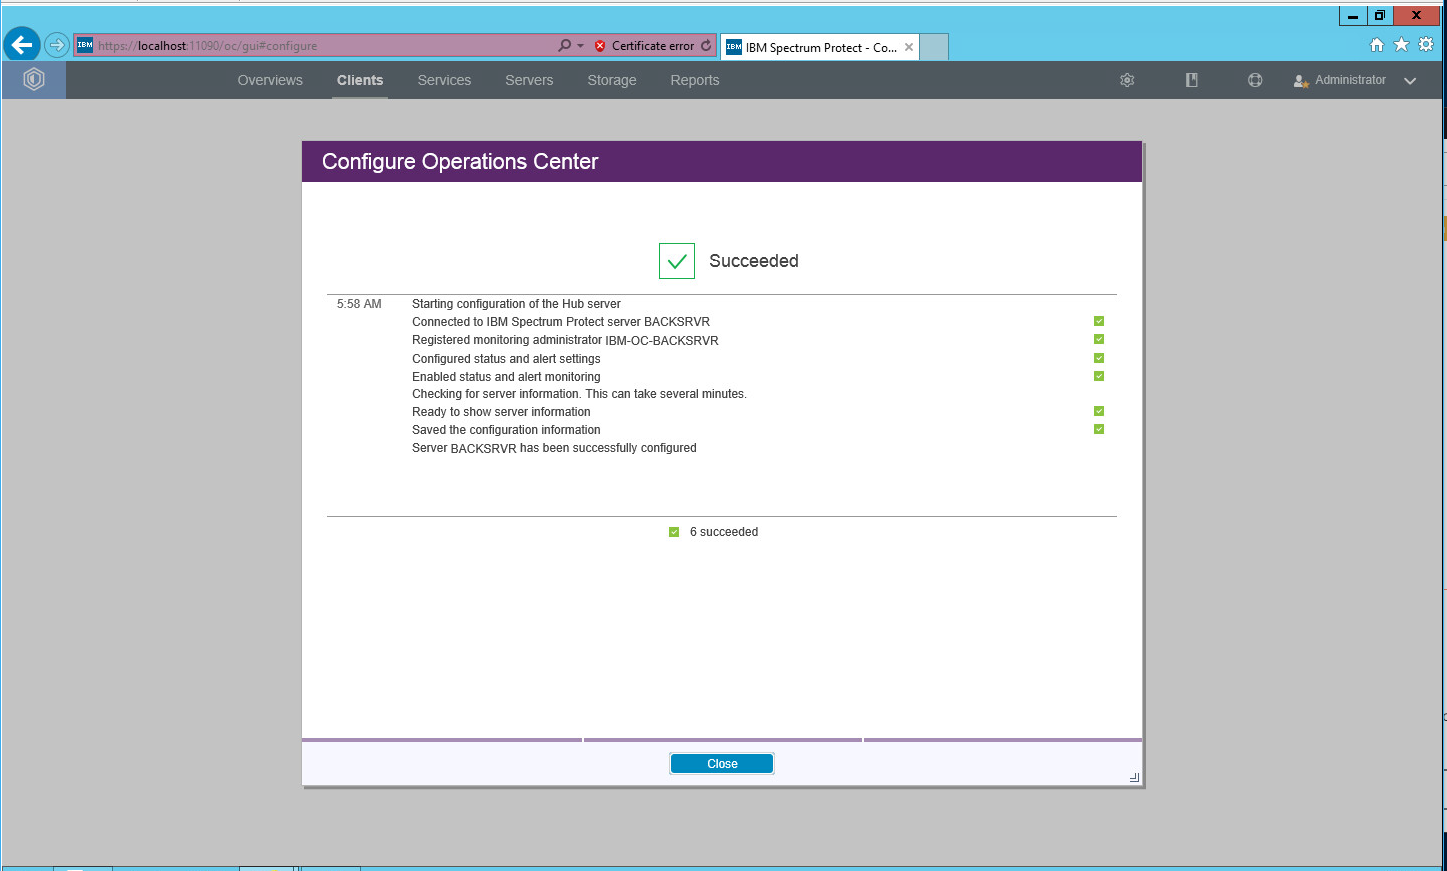
Click Configure.
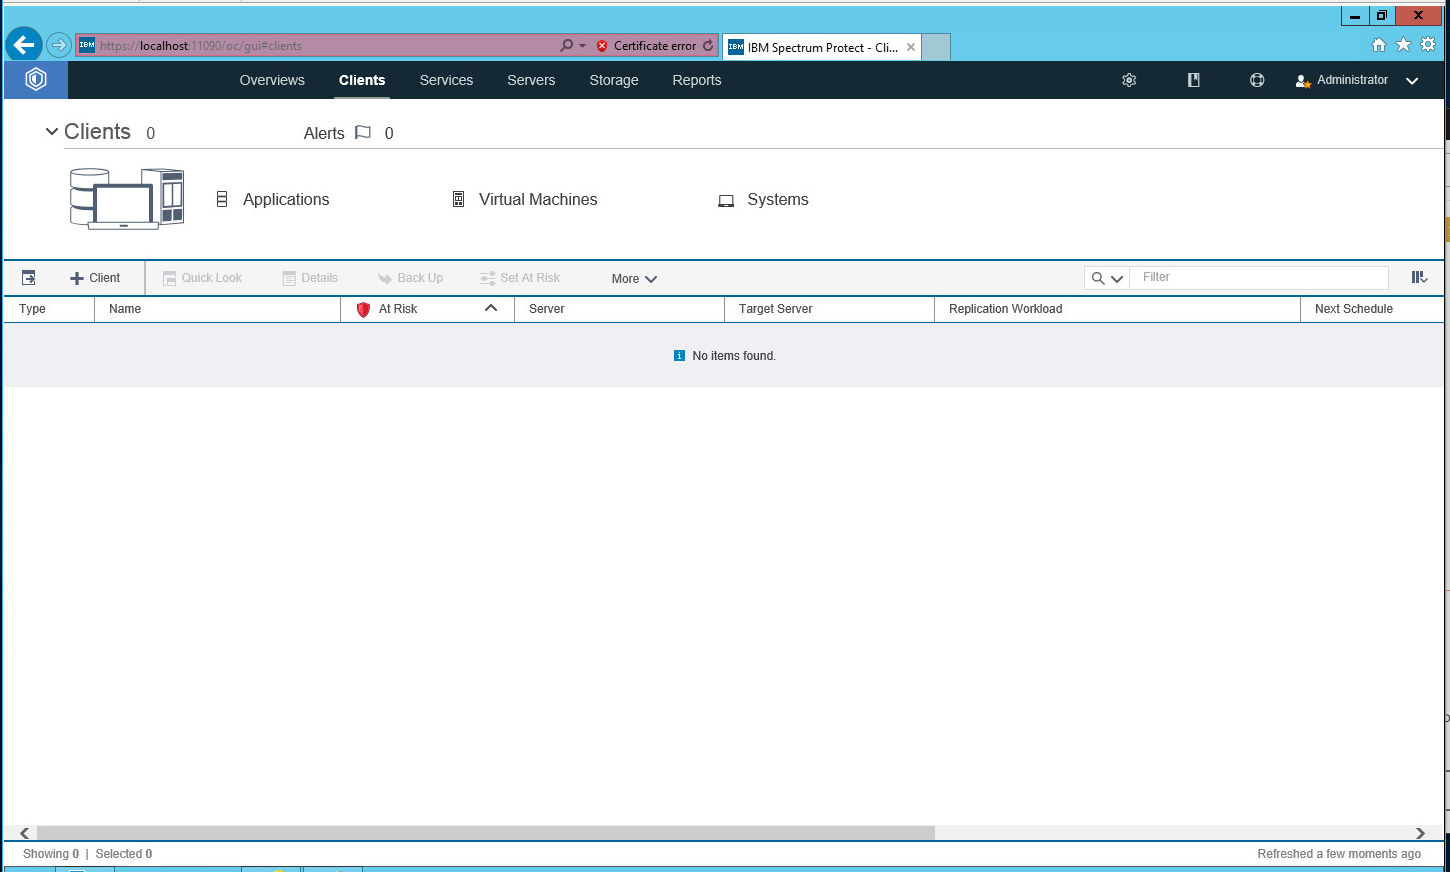
2.7.4. Adding Clients to IBM Spectrum Protect
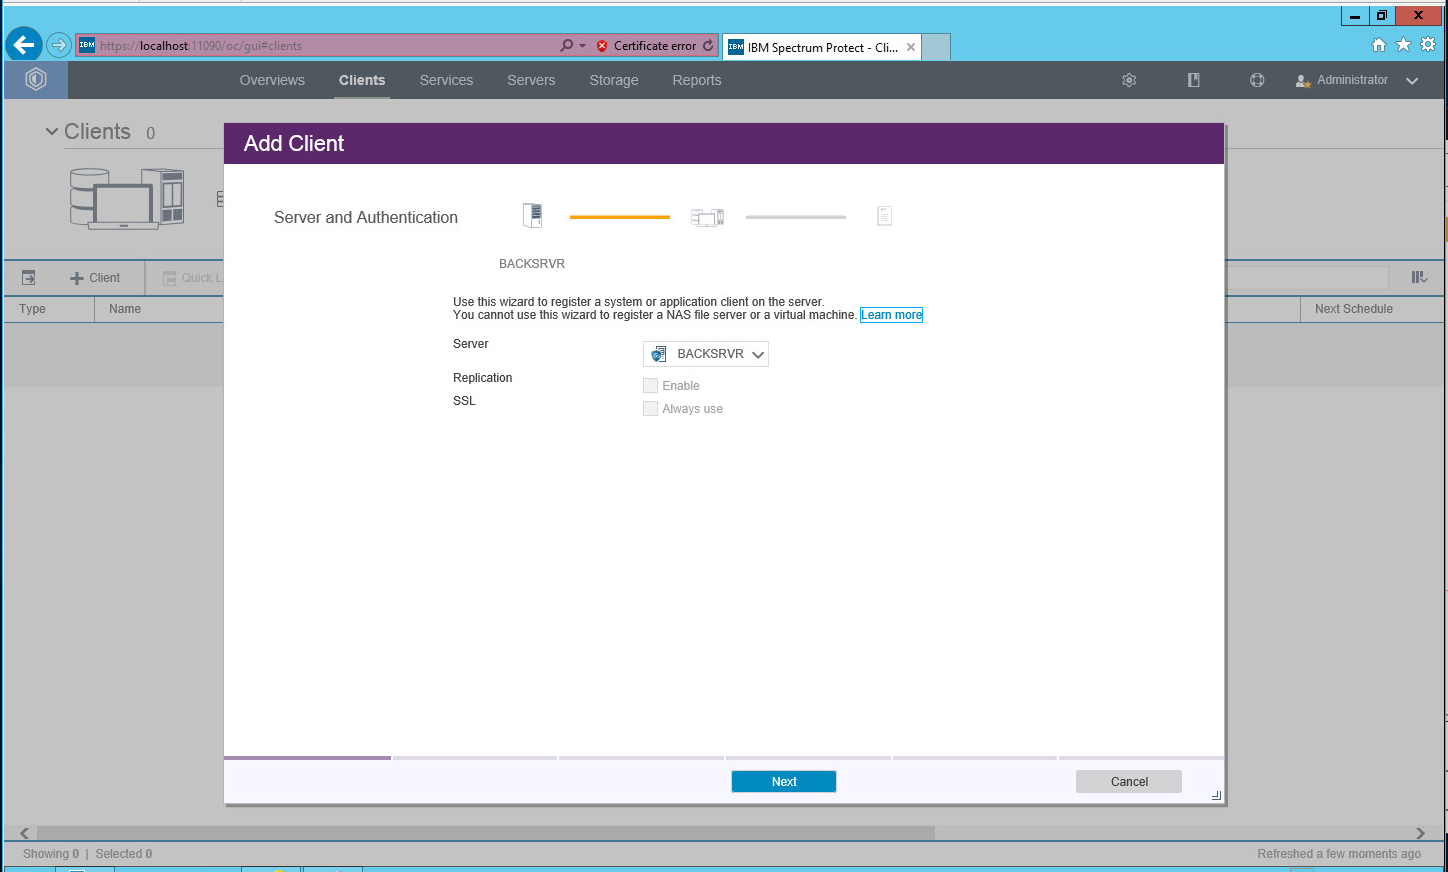
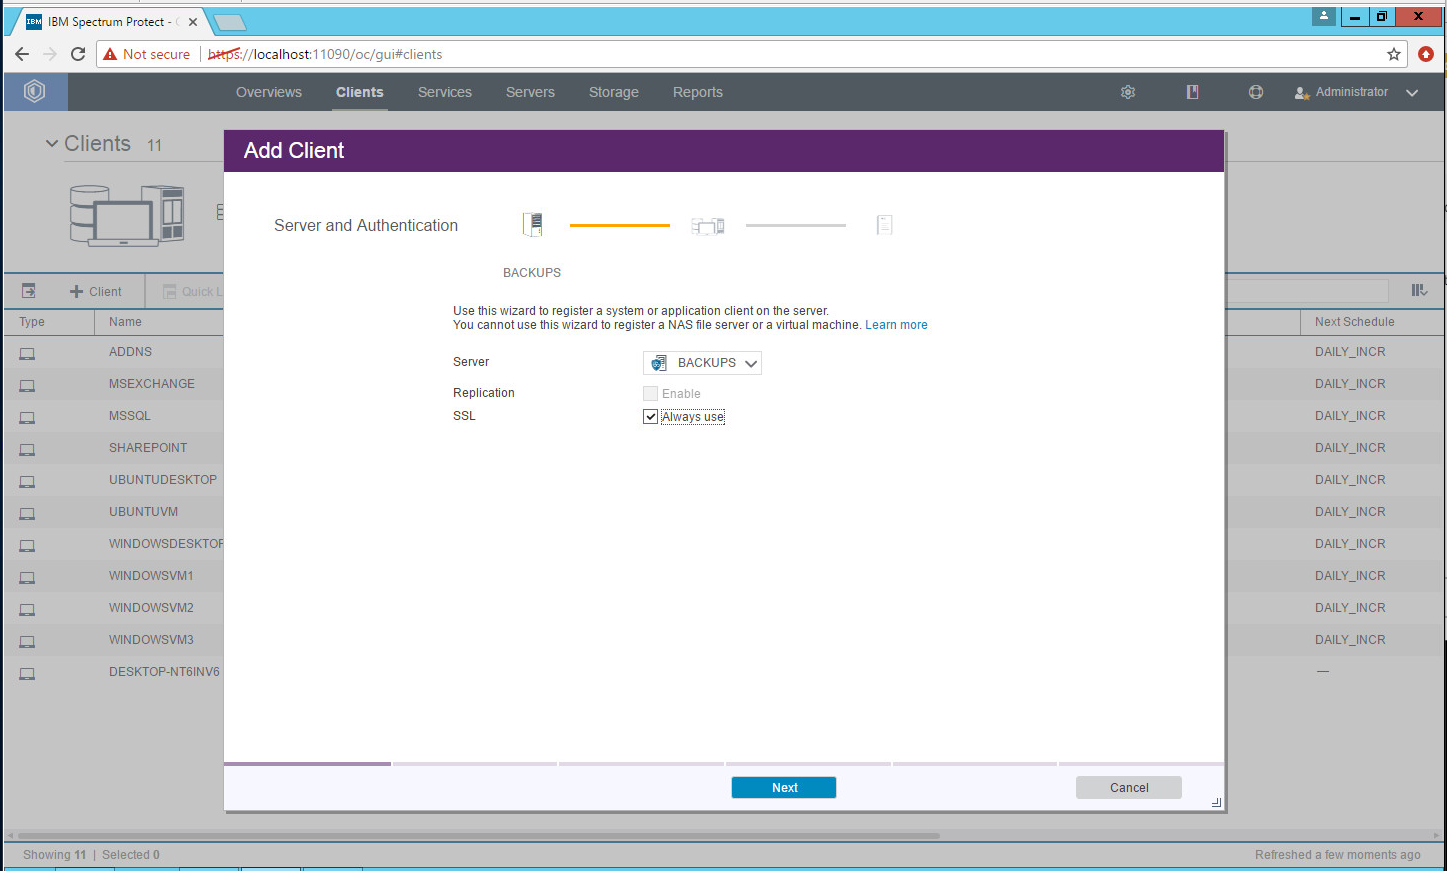
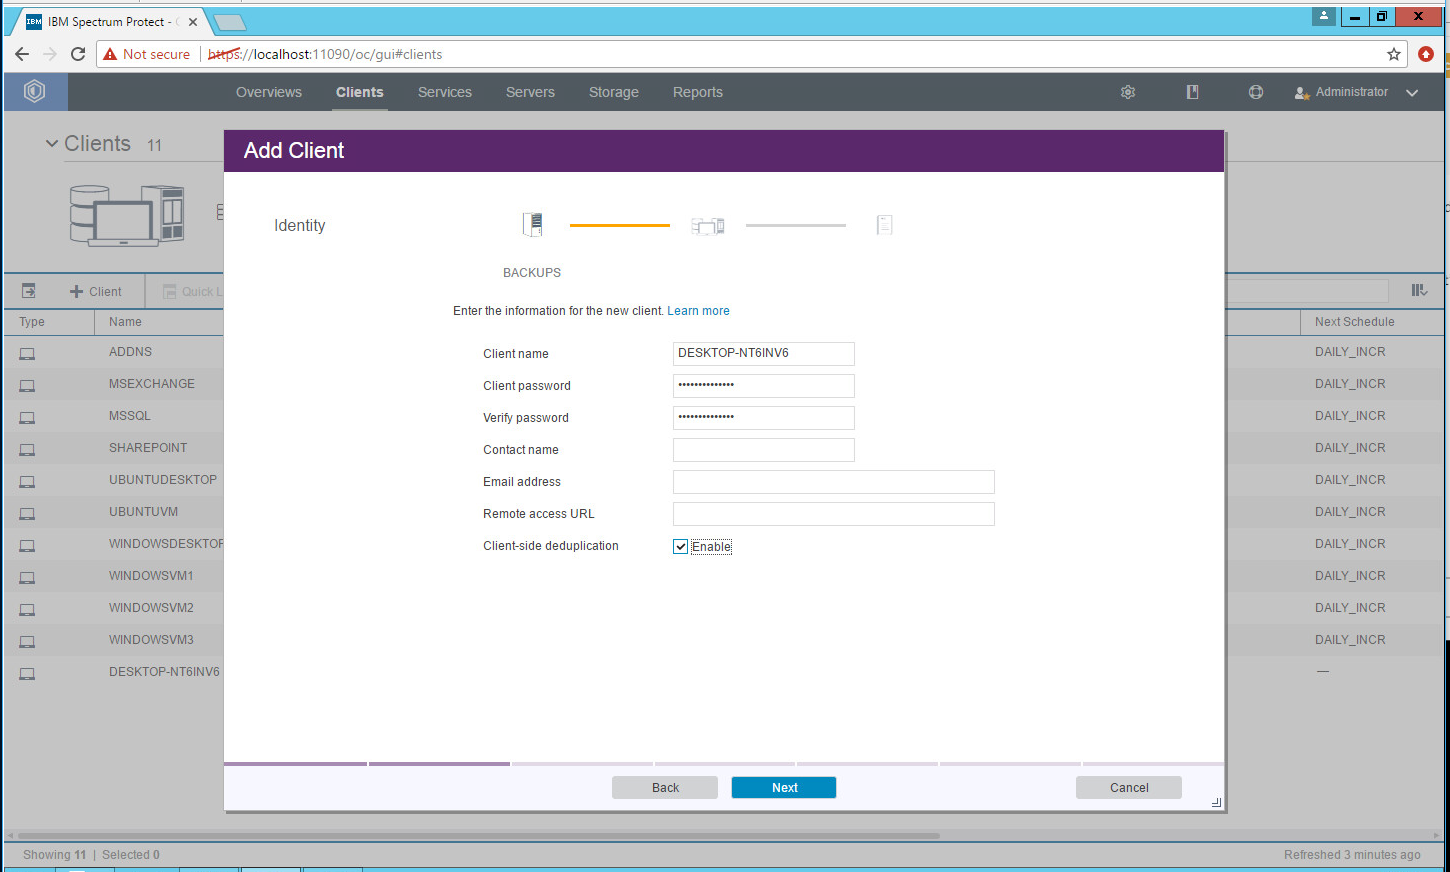
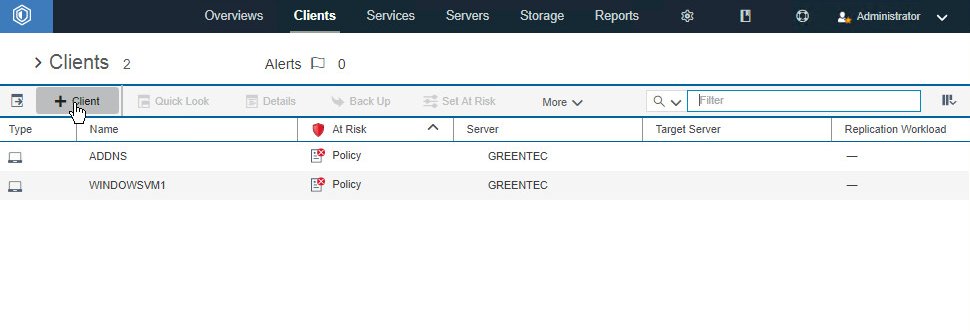
Click +Client.\
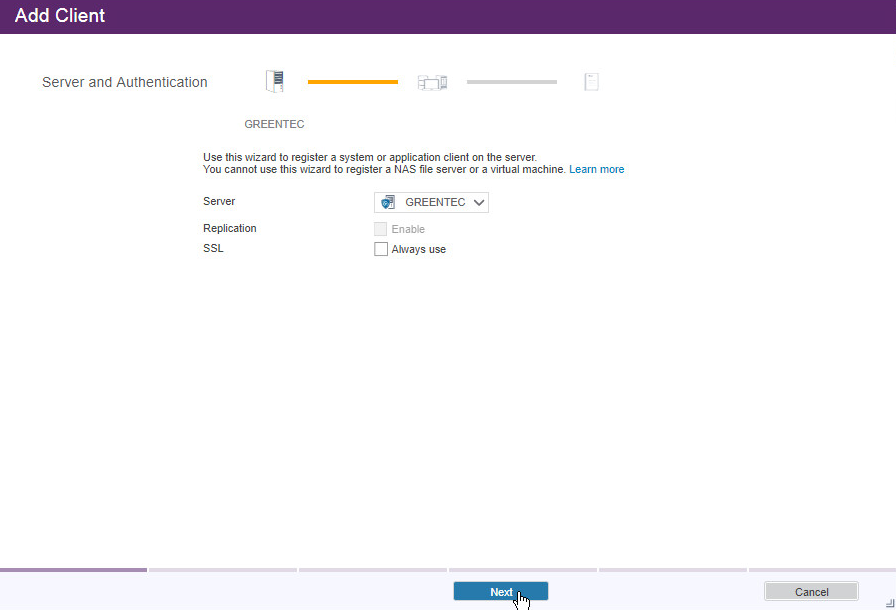
Select the server running the IBM backup capabilities.
Click Next.
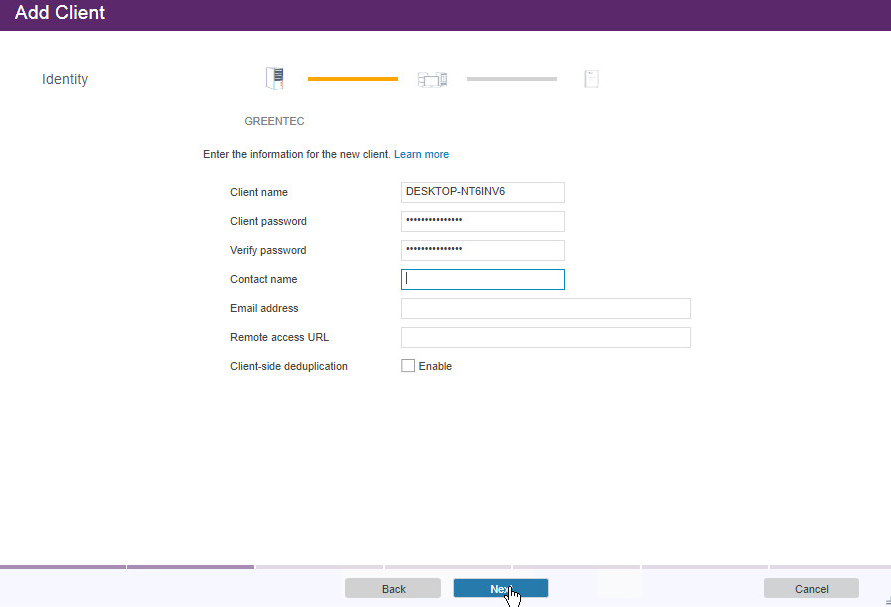
Enter the name of a client machine that you want to be able to backup data from and a password.
Decide whether to use Client-side deduplication (it reduces the required storage space for backups).
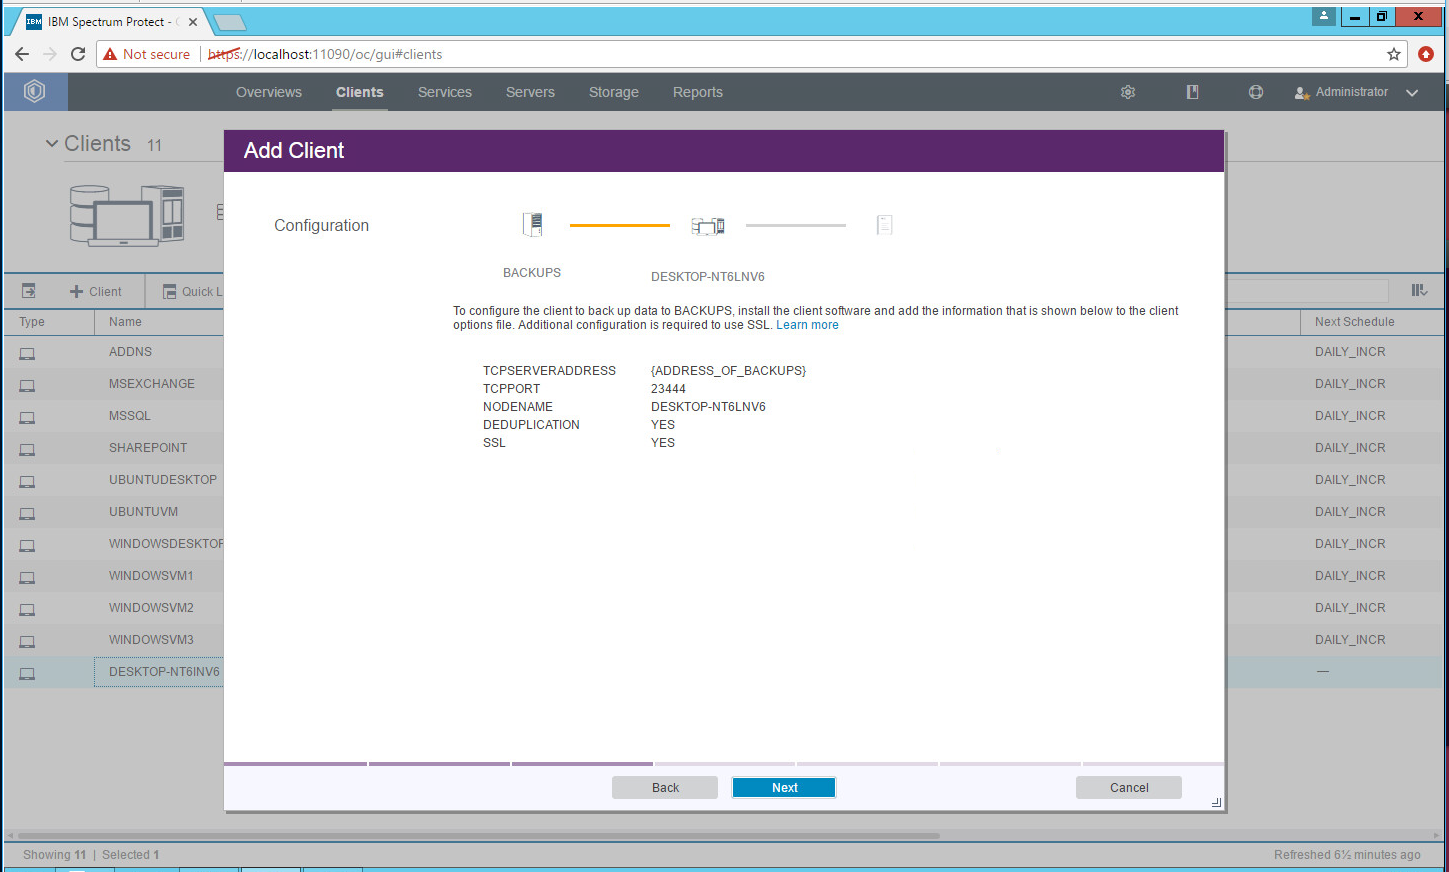
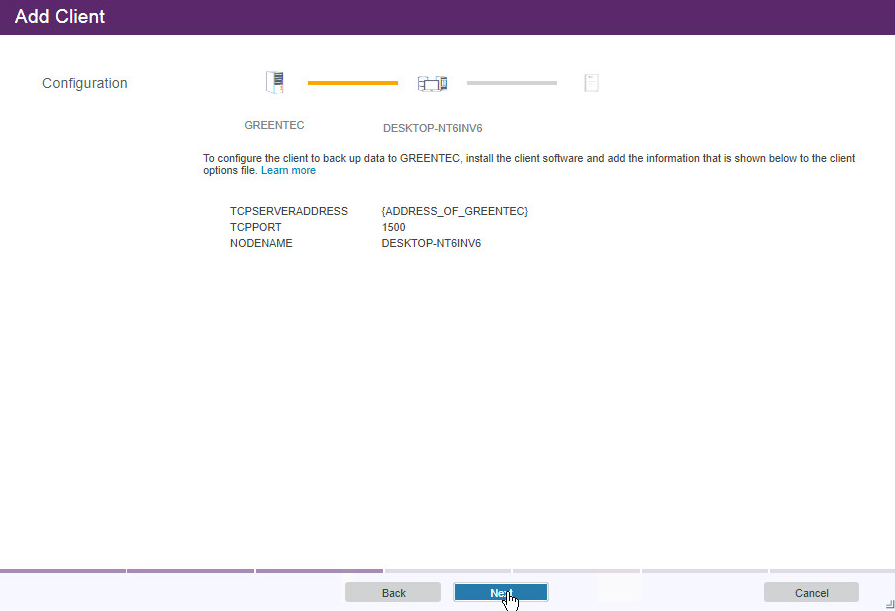
Click Next. Note the information on the next page as it is required to connect the server to the client.
Click Next.
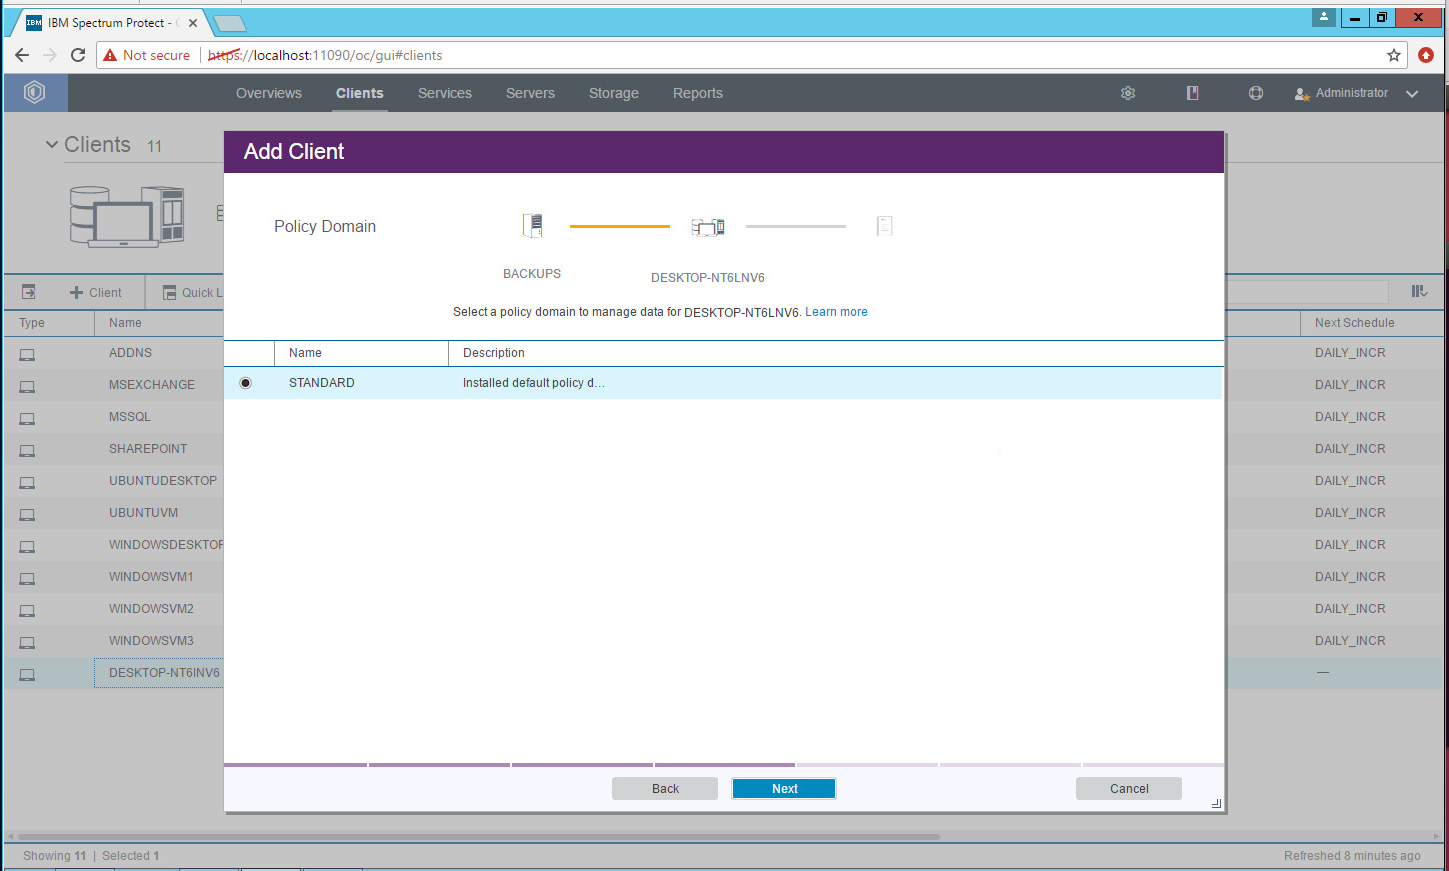
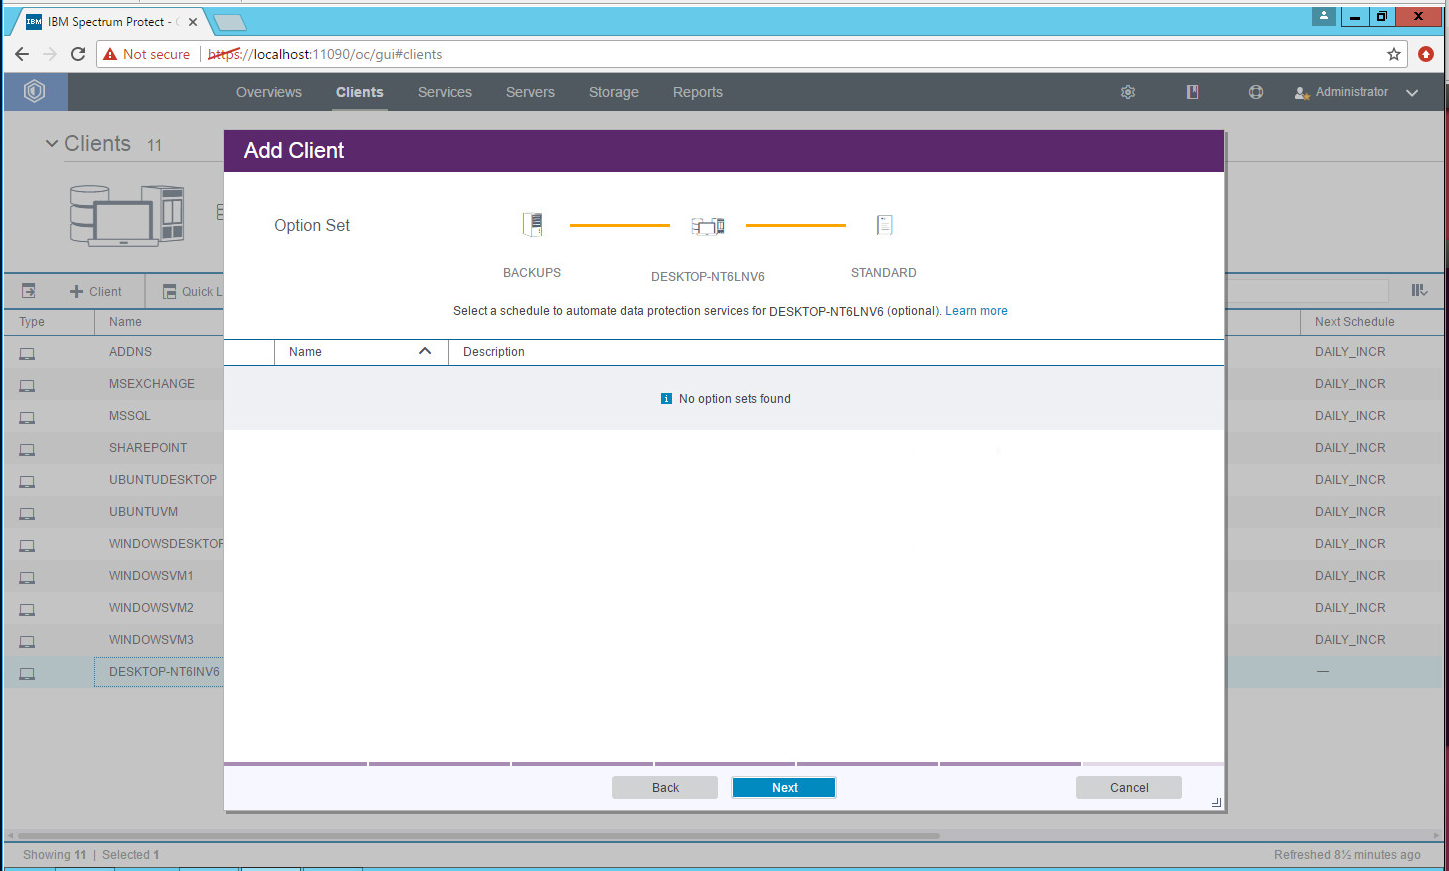
Click Next.
Click Next.
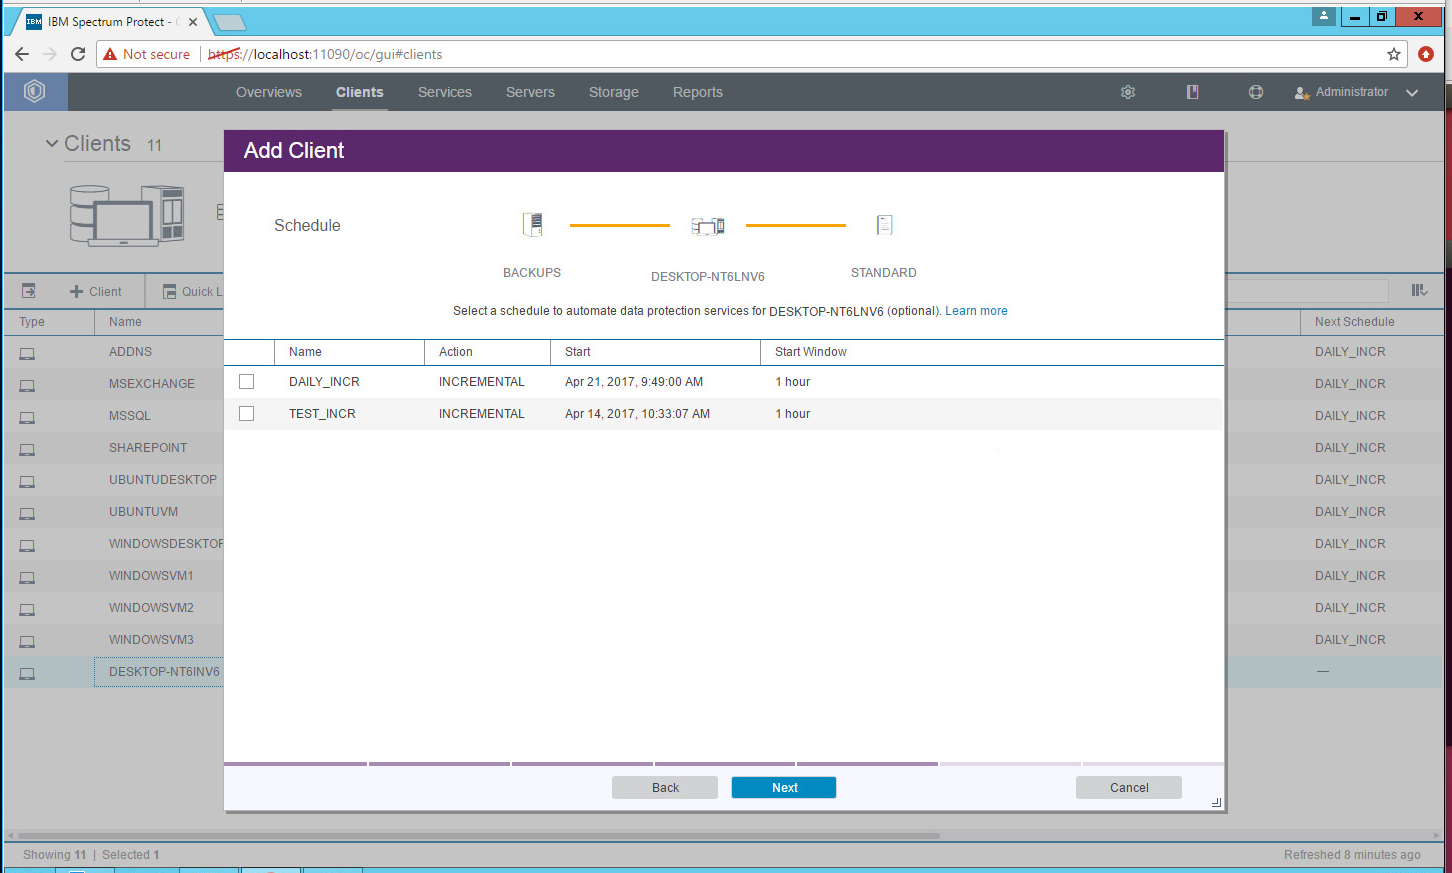
Click Next.
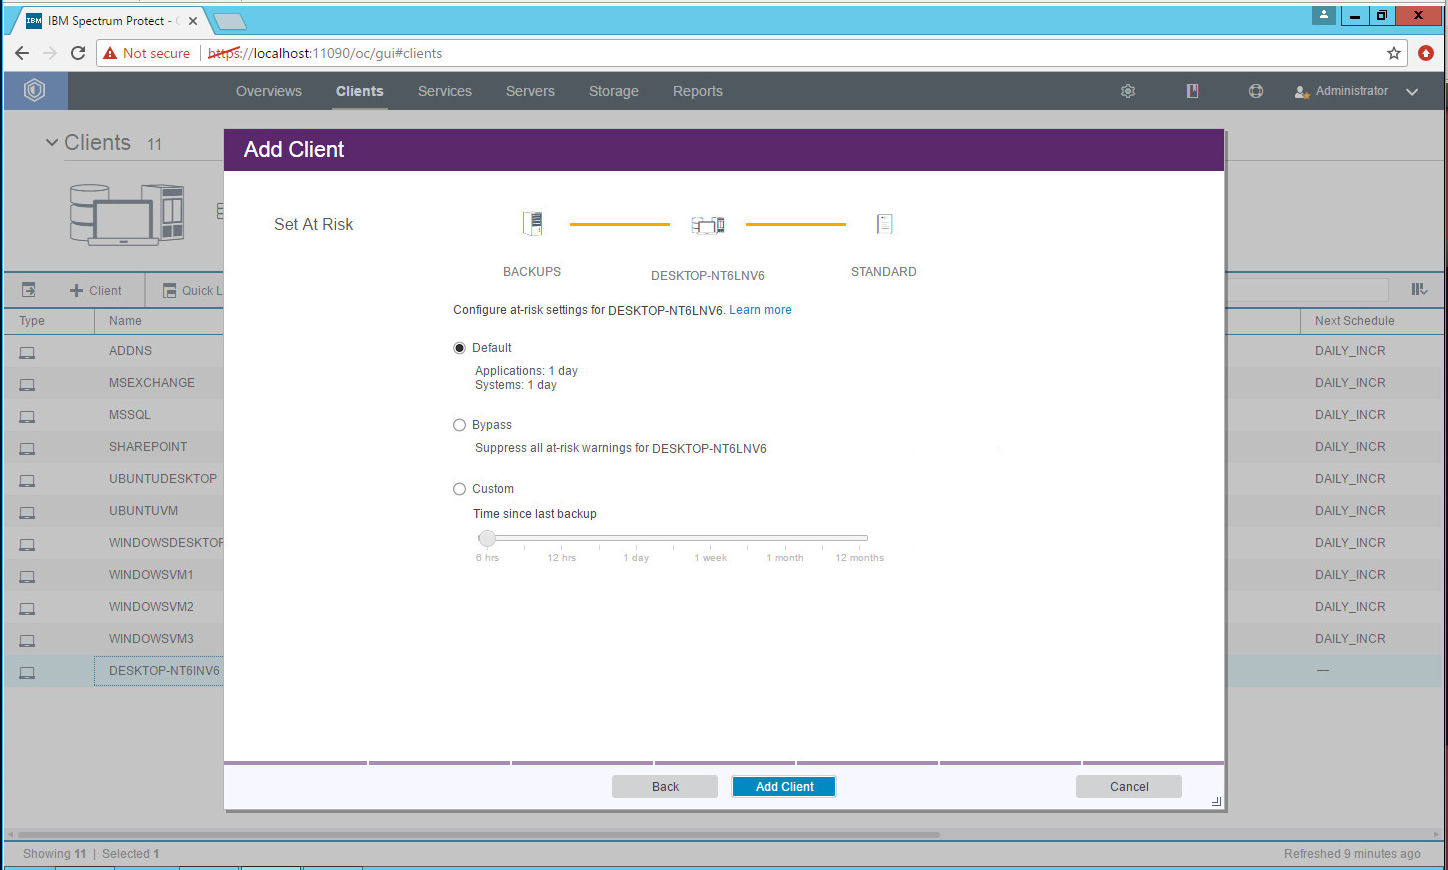
Select Default.
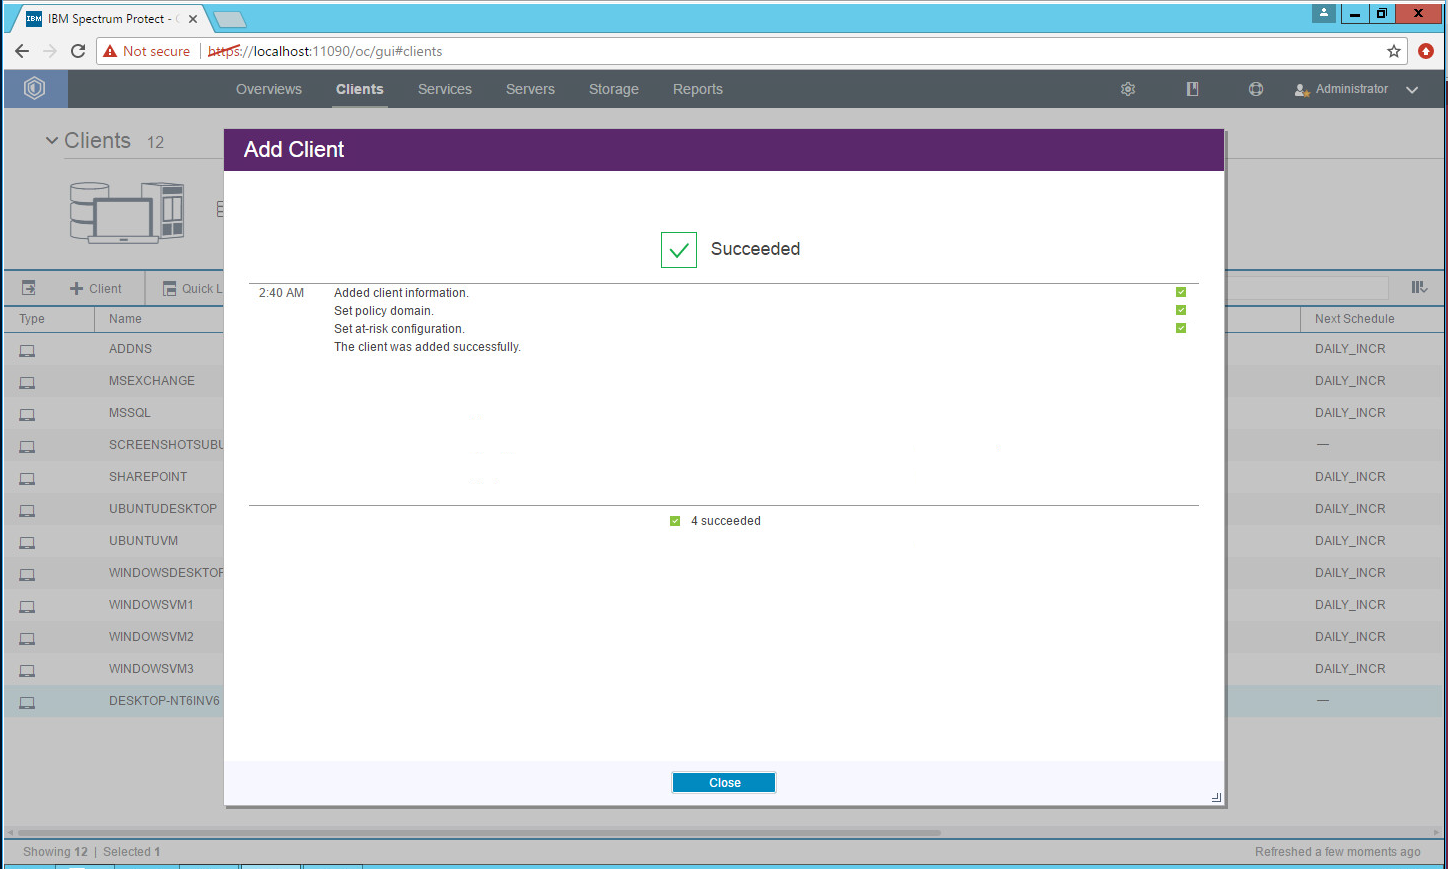
Click Add Client.
Make sure to allow the ports for SSL and TCP traffic through the firewall (23444, 1500).
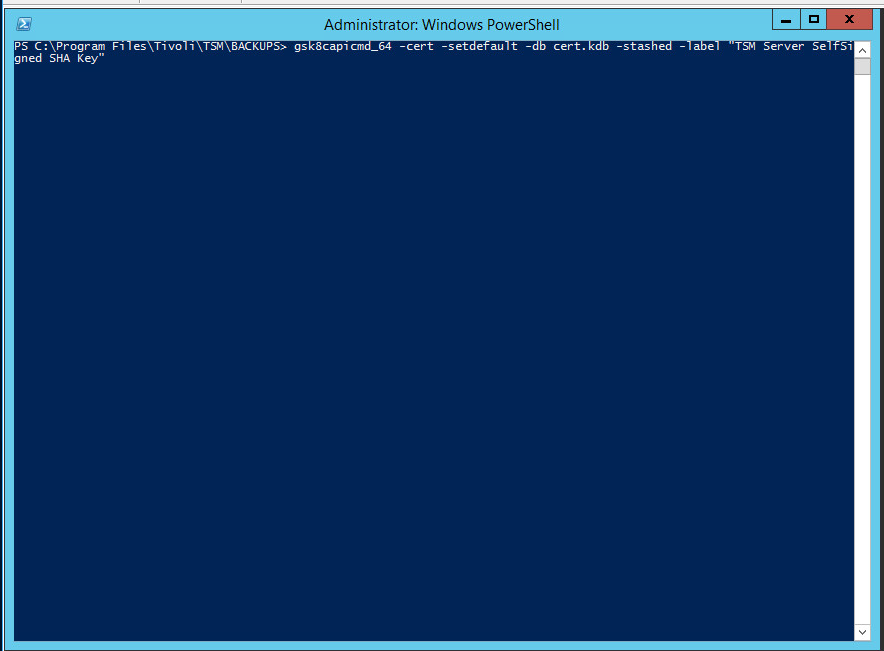
Run the following command to set cert256.arm as the default certificate on the IBM Backup server. Execute this command from the root server directory. Example: C:\Program Files\Tivoli\TSM\BACKSRVR
> gsk8capicmd_64 -cert -setdefault -db cert.kdb -stashed -label "TSM Server SelfSigned SHA Key"
Note: By default, gsk8capicmd_64 is located at C:\Program Files\Common Files\Tivoli\TSM\api64\gsk8\bin.
2.7.5. Install the Spectrum Protect Client on Windows
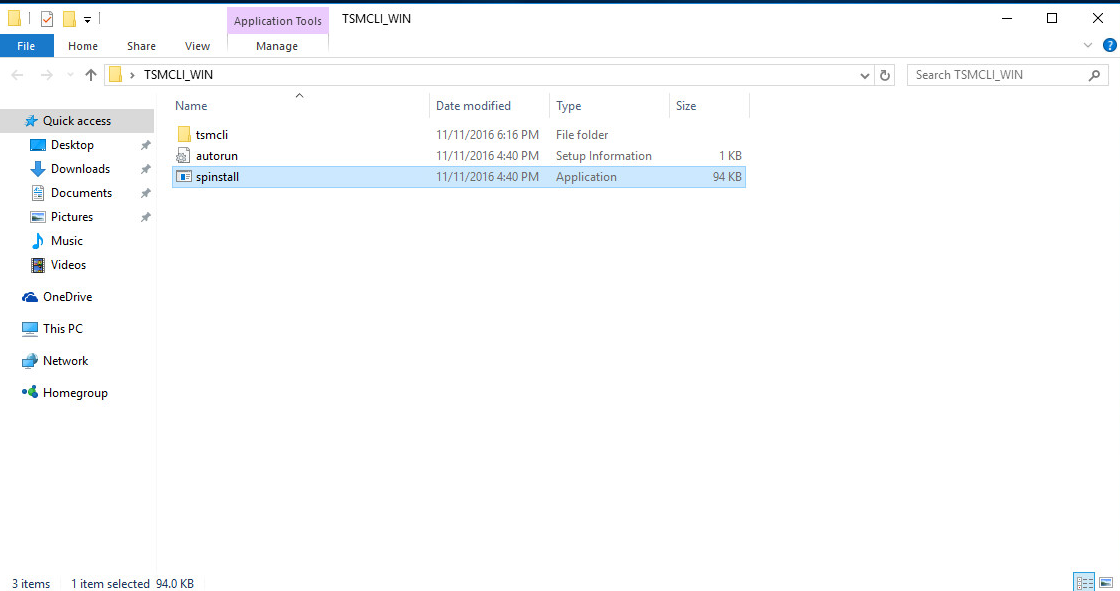
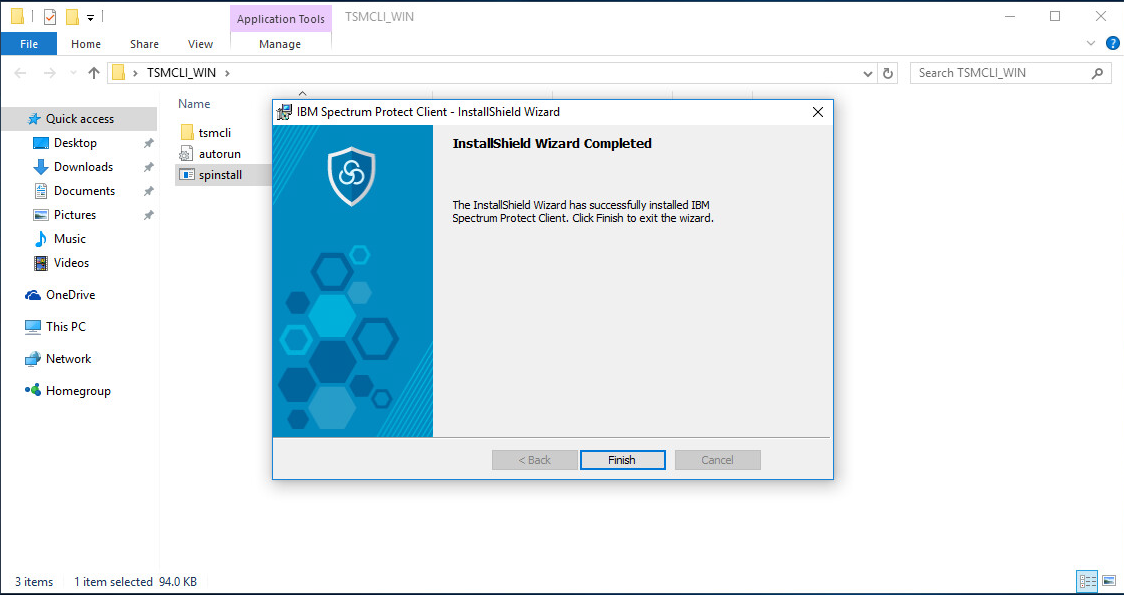
Run the spinstall script (install any prerequisites required).
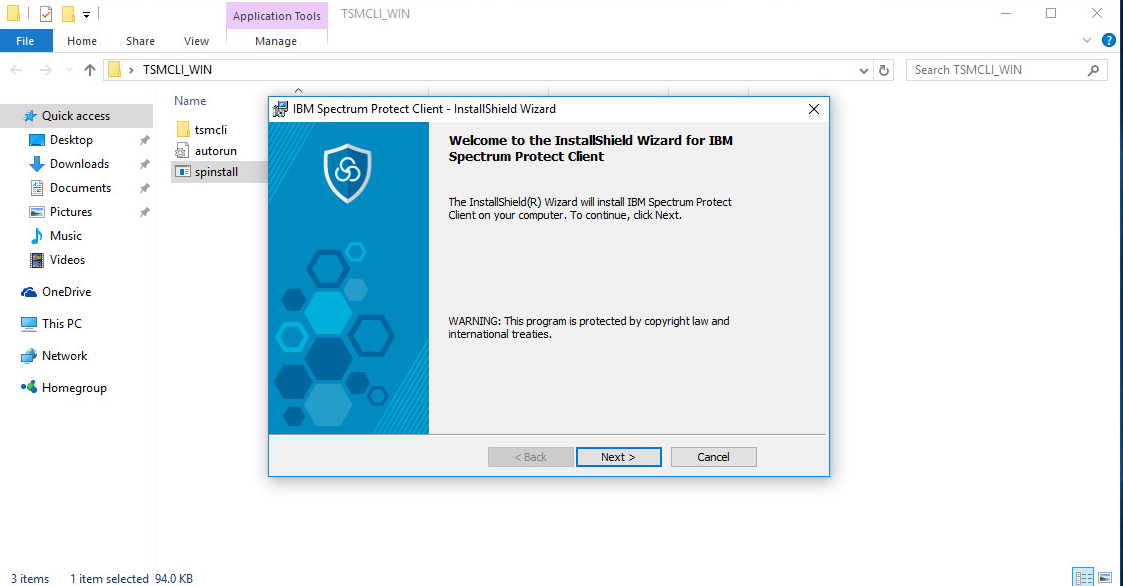
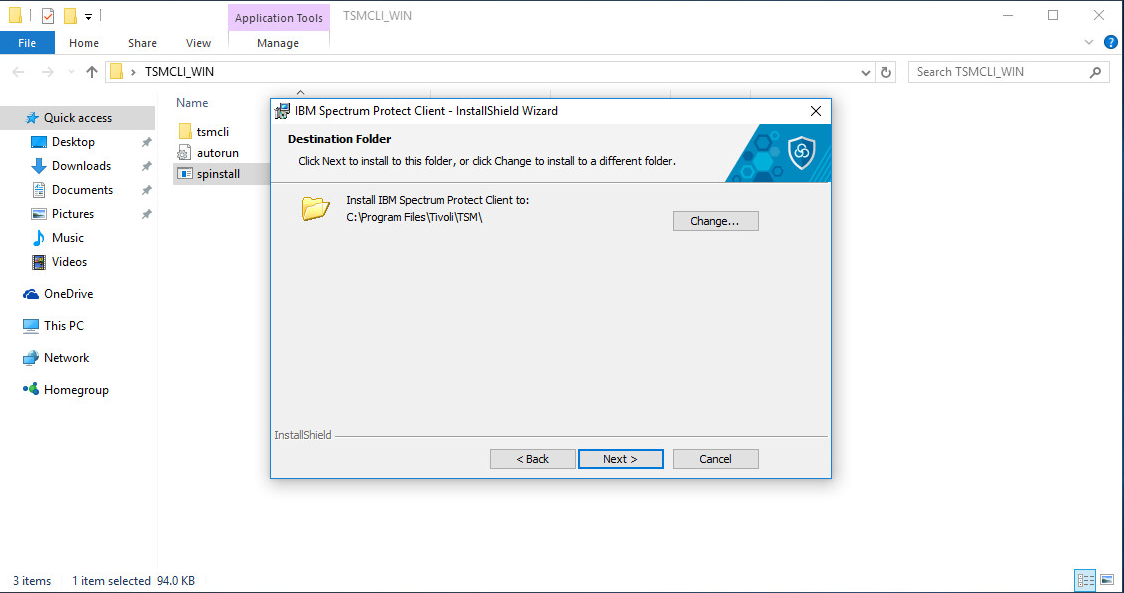
Click Next.
Click Next.
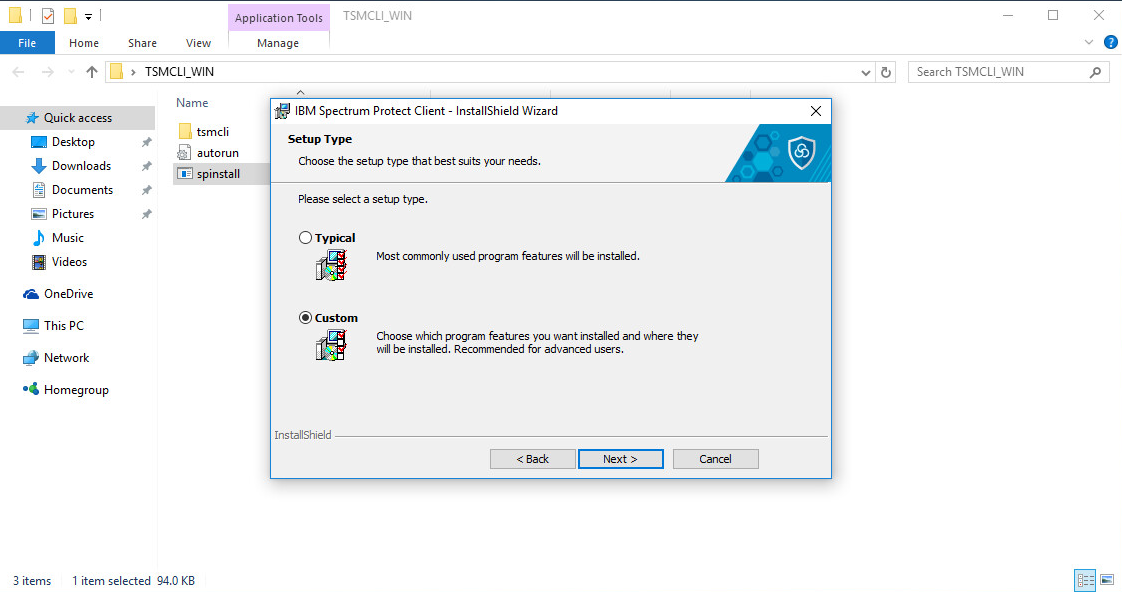
Select Custom Install.
Click Next. Make sure that all packages are selected for installation.
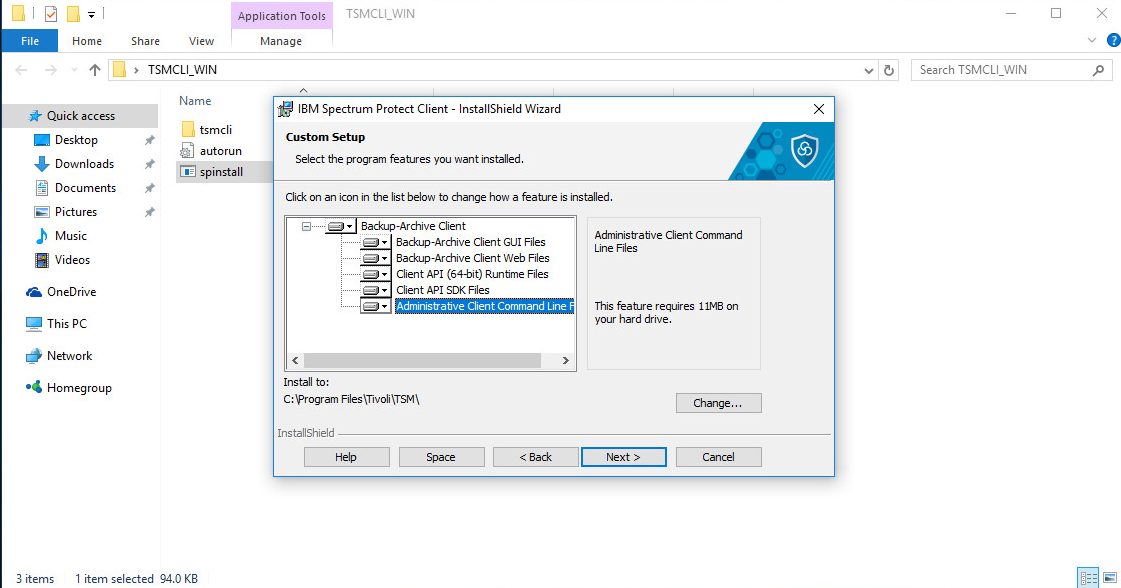
Click Next.
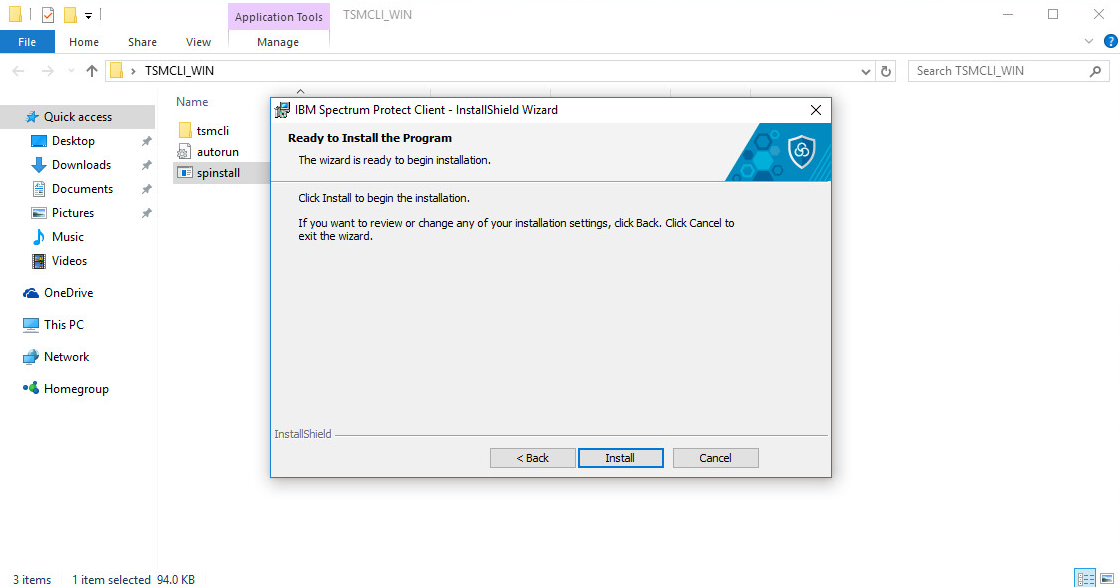
Click Install.
Click Finish.
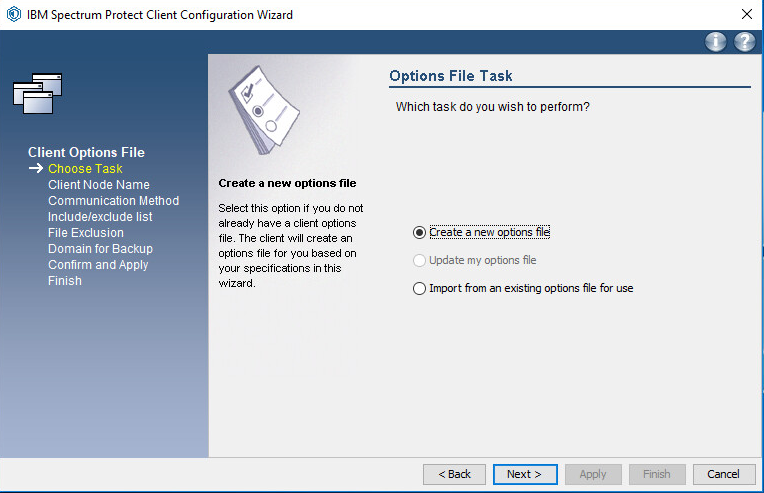
Run Backup-Archive GUI from the Start menu. This should open the IBM Spectrum Protect Client Configuration Wizard.
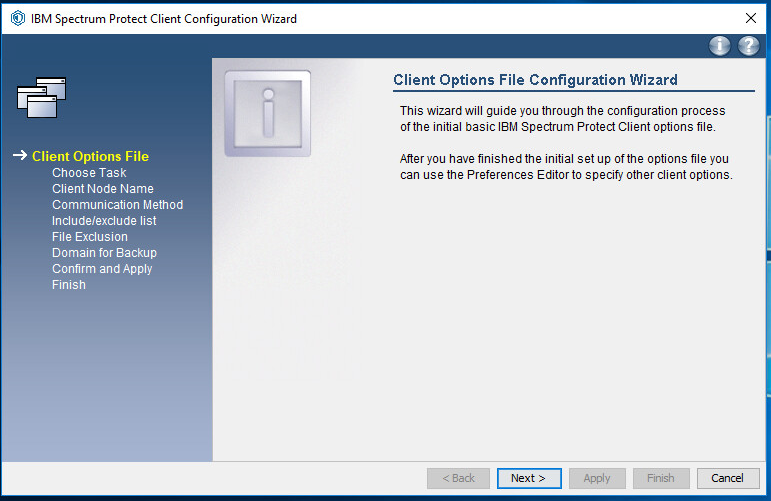
Click Next.
Click Next.
Enter the Node Name that you created in the Operations Center.
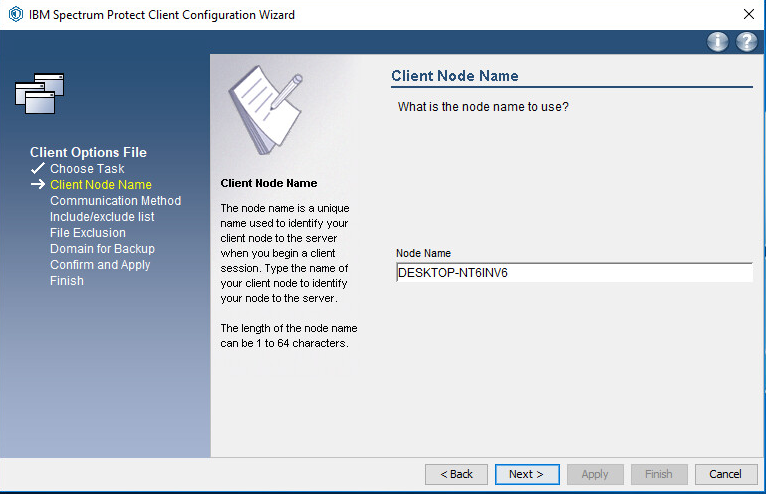
Click Next.
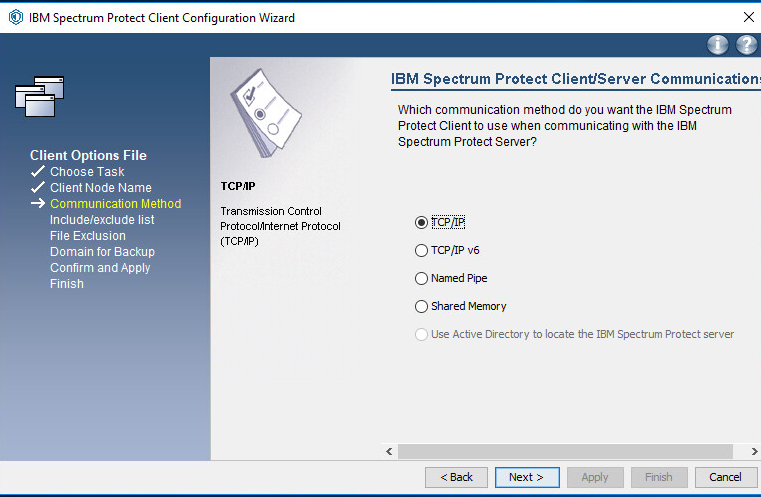
If prompted, allow the program through the firewall.
Click Next.
Specify the IP address of the server running the IBM backup server.
Specify the port that the server is accepting connections on (Example: 23444).
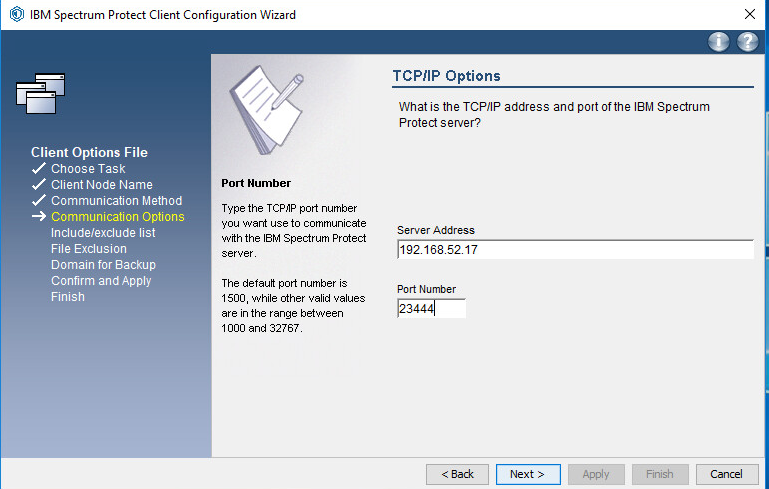
Click Next.
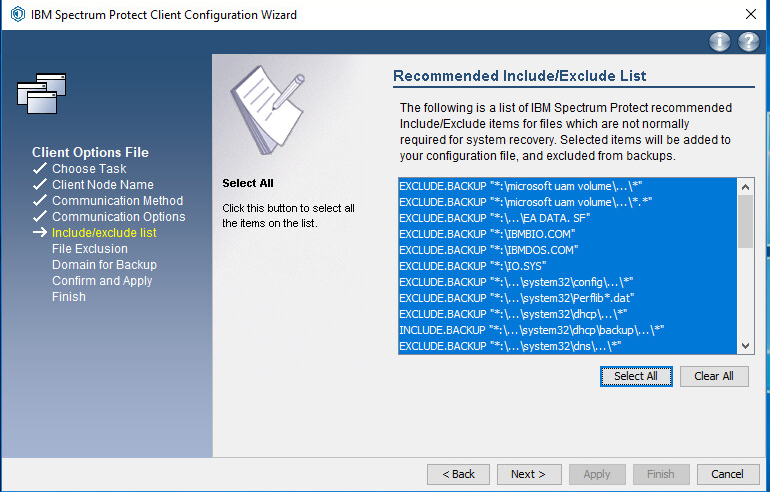
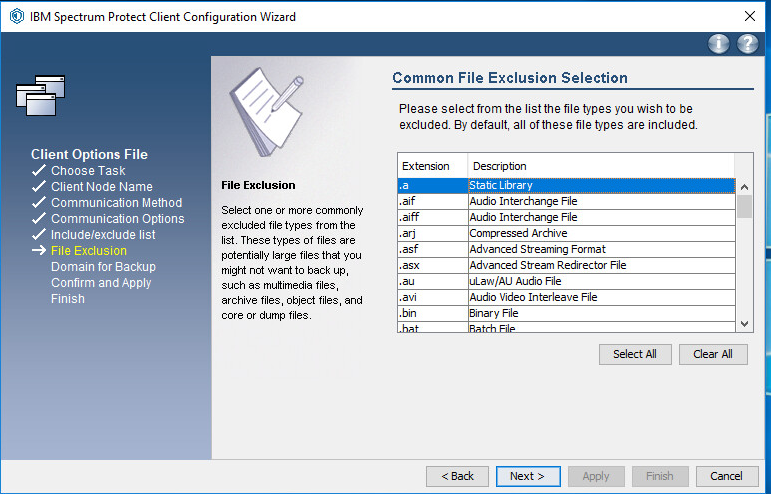
Click Select All or choose specific items from the recommended list of inclusions/exclusions.
Click Next.
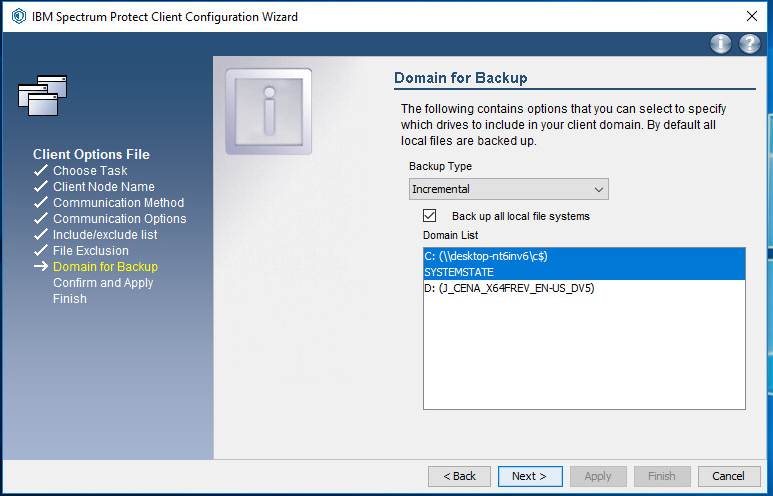
Click Next.
Check the box next to Backup all local file systems.
Click Next.
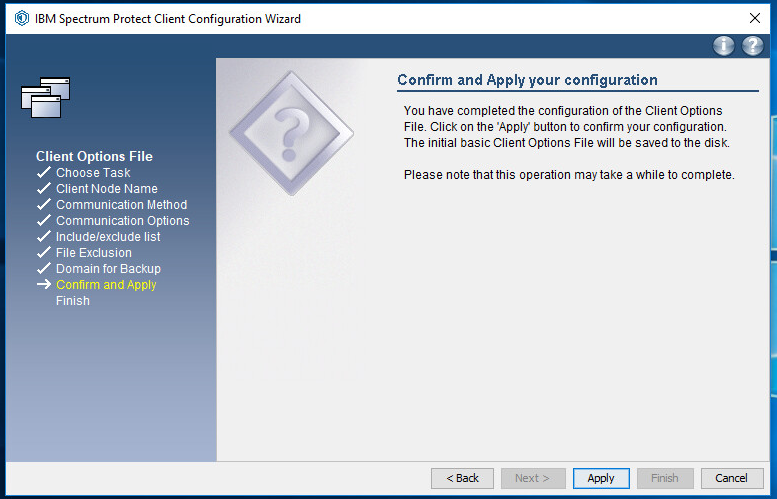
Click Apply.
Click Finish.
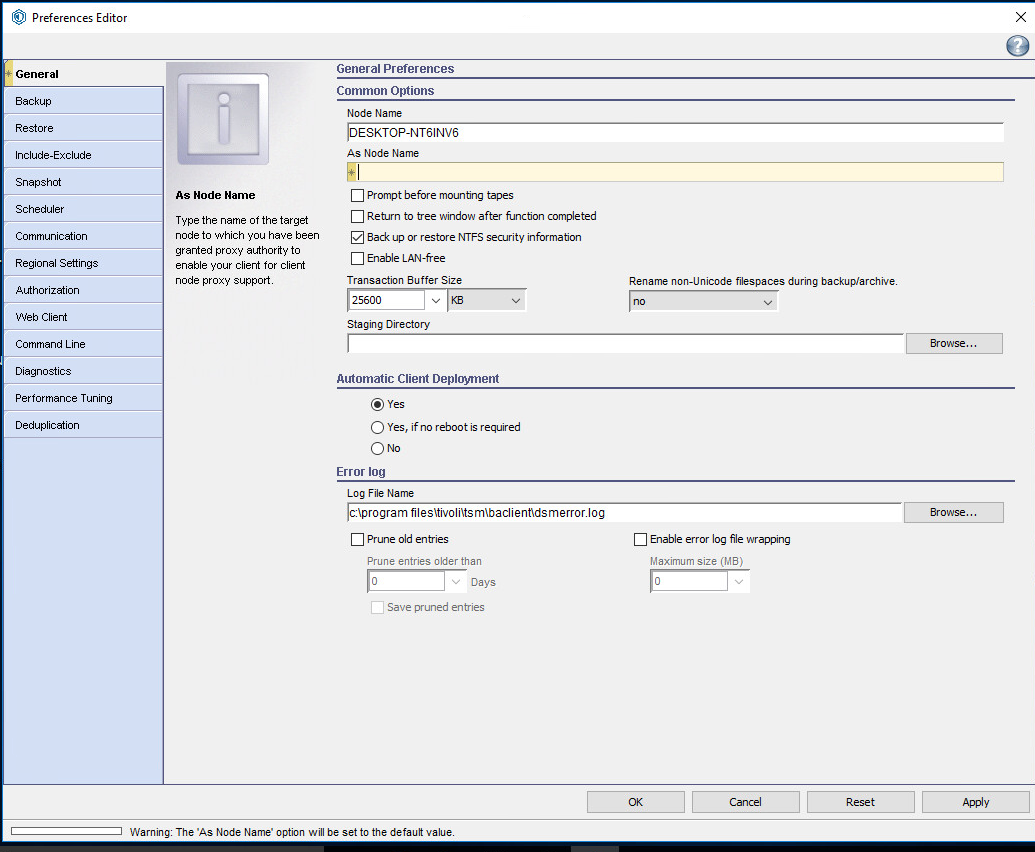
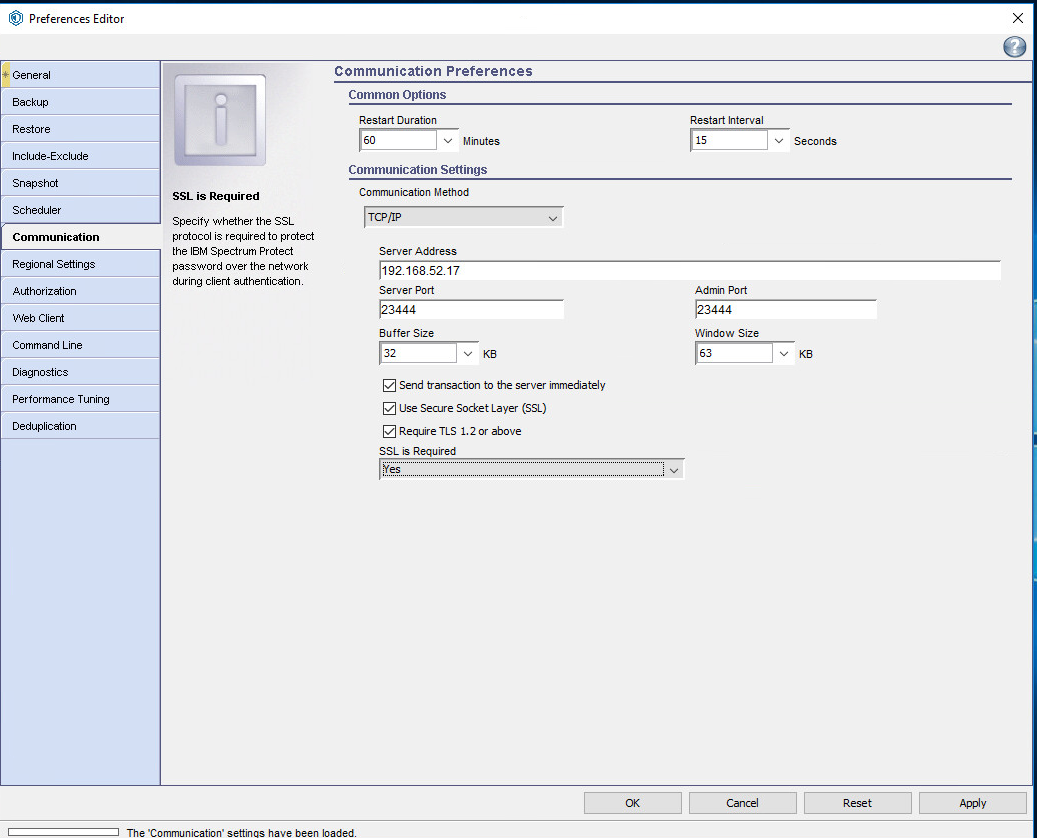
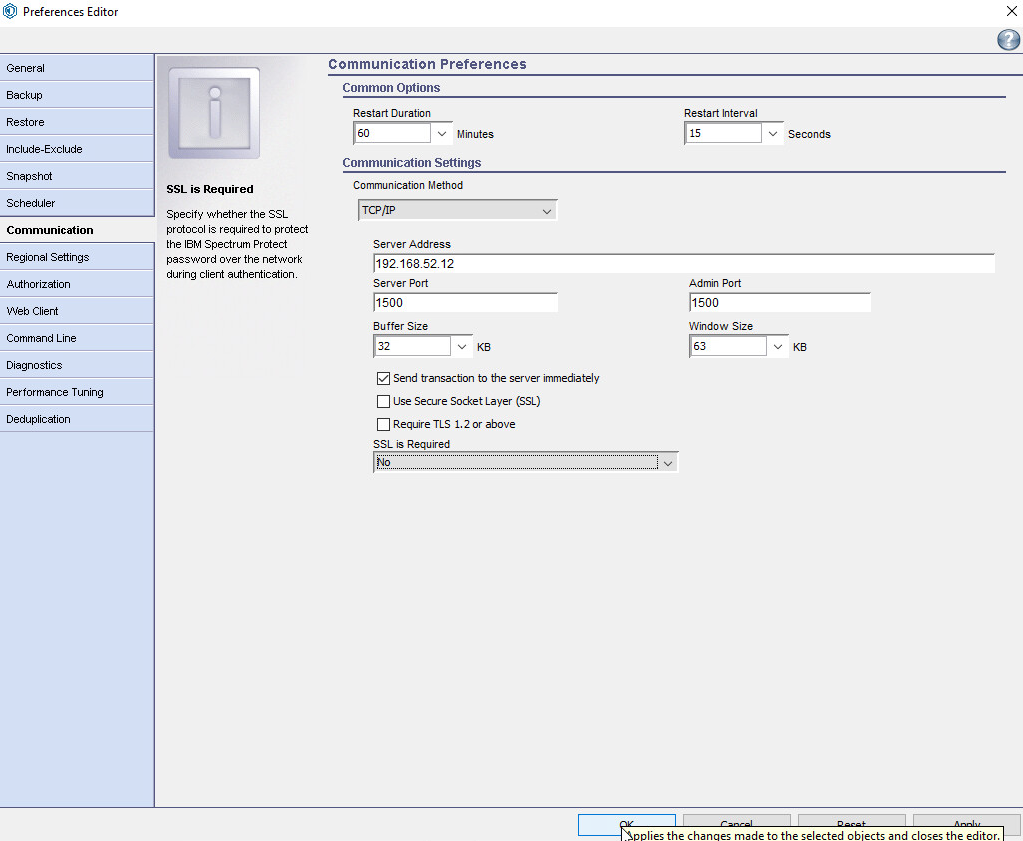
In the Backup-Archive GUI (you may have to log in using the credentials specified on the server or you may have to choose to ignore a warning that you couldn’t connect), go to Edit > Client Preferences.
Click Communication.
Ensure that the server address is correct and that the ports point to your SSL port (23444).
Check the boxes next to Send transaction to the server immediately, Use Secure Sockets Layer (SSL), and Require TLS 1.2 or above.
Click OK.
Retrieve cert256.arm from the server.
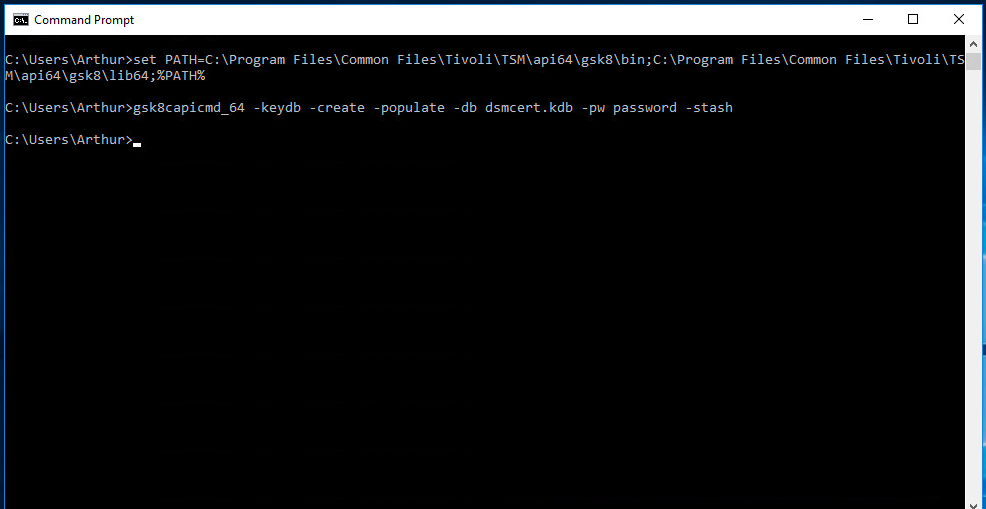
On the client machine, create a new key database by running the following commands:
> set PATH=C:\Program Files\Common Files\Tivoli\TSM\api64\gsk8\bin\;C:\Program Files\Common Files\Tivoli\TSM\api64\gsk8\lib64;%PATH%
> gsk8capicmd_64 -keydb -create -populate -db dsmcert.kdb -pw password -stash
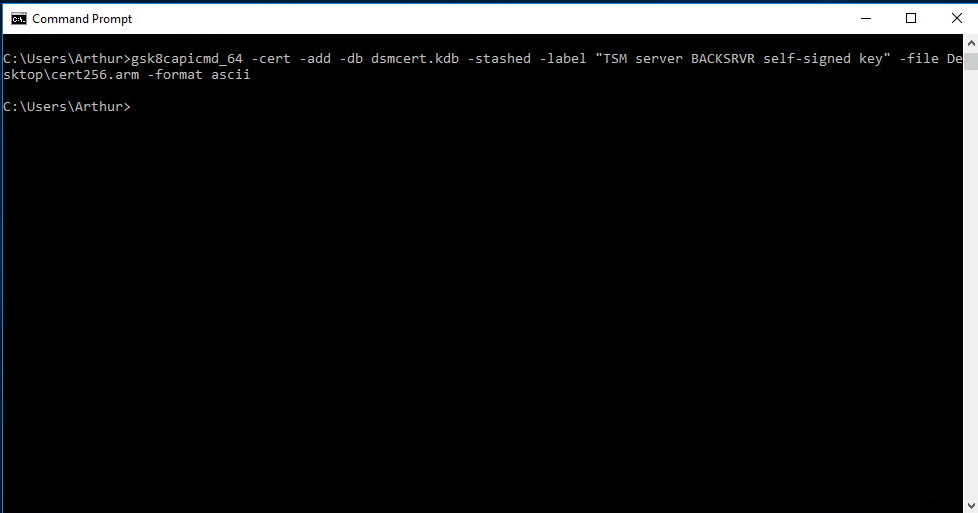
Import cert256.arm by running the command:
> gsk8capicmd\_64 -cert -add -db dsmcert.kdb -stashed -label "TSM
server BACKSRVR self-signed key" -file <path-to-cert256.arm> -format
asci
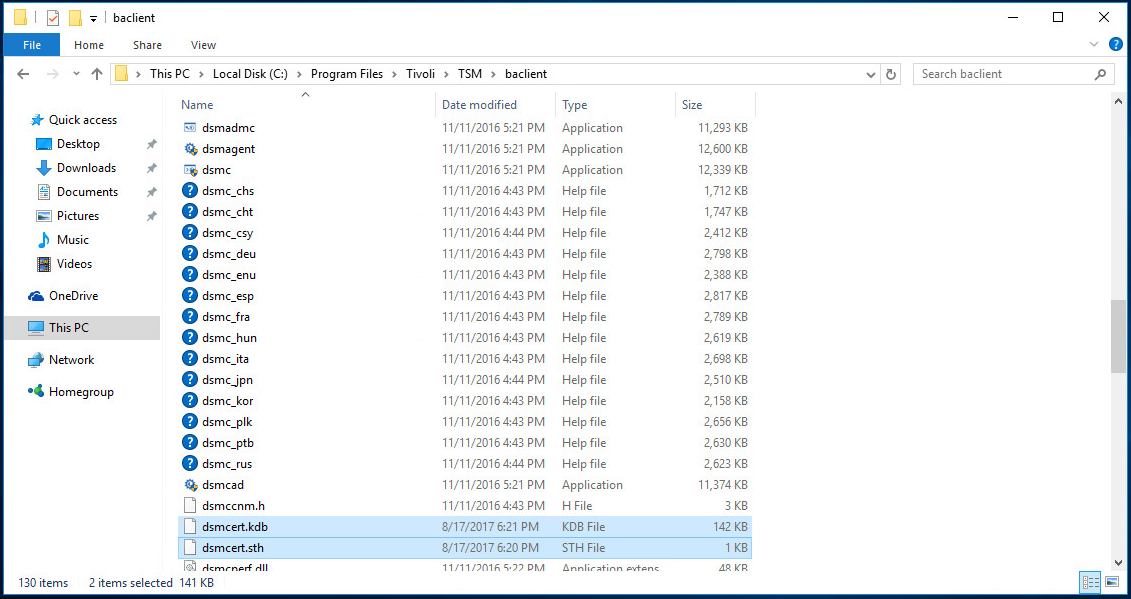
Copy the resulting dsmcert.kdb and dsmcert.sth to C:\Program Files\Tivoli\TSM\baclient.
2.7.6. Install the Spectrum Protect Client on Ubuntu
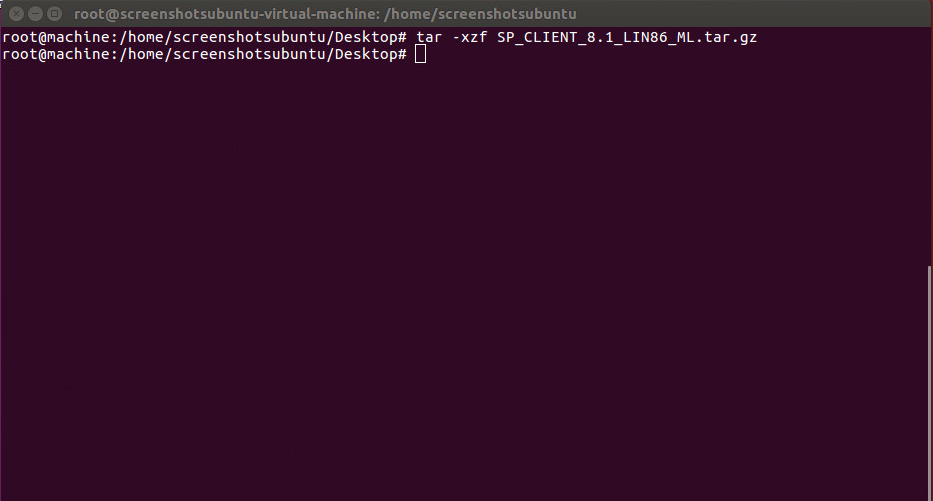
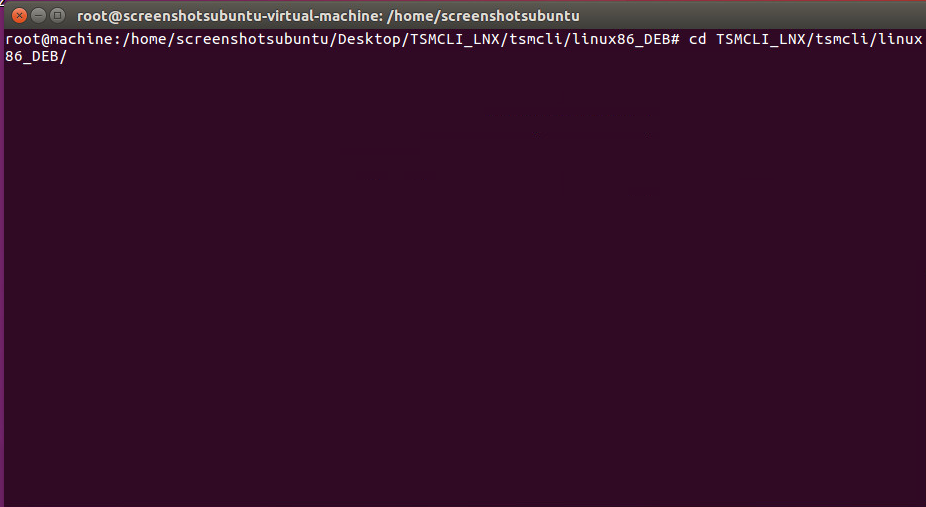
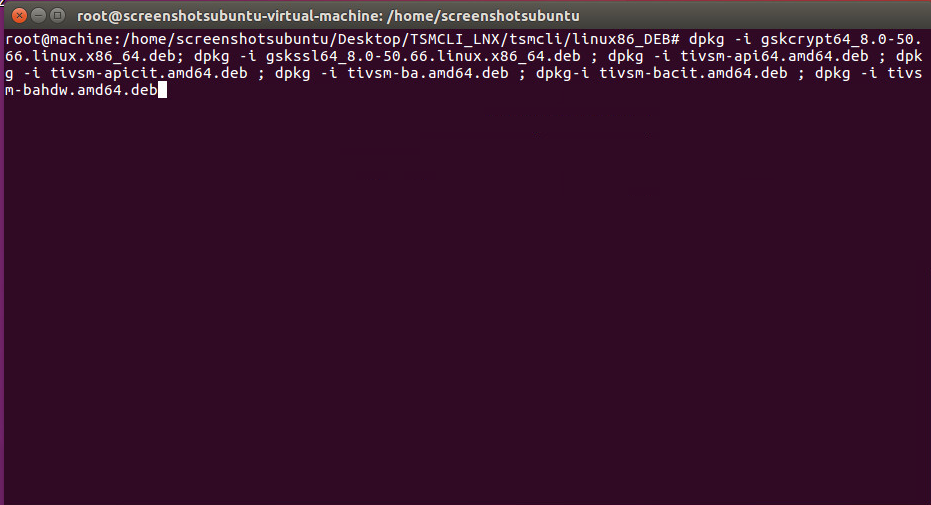
Install all the .deb files in this directory, except tivsm-jbb.amd64.deb, by running the following command (they must be dpkg’d individually since they have interdependencies):
dpkg -i [name of package].deb
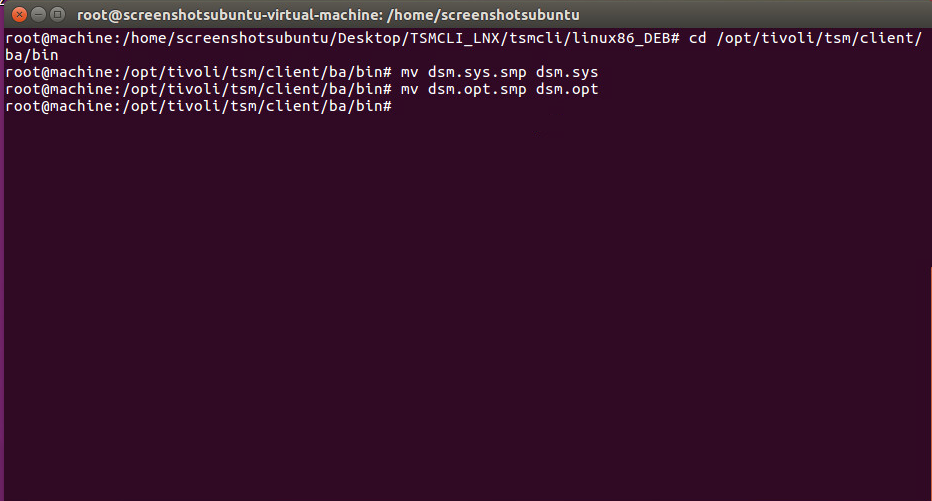
Issue the following commands to setup the options files:
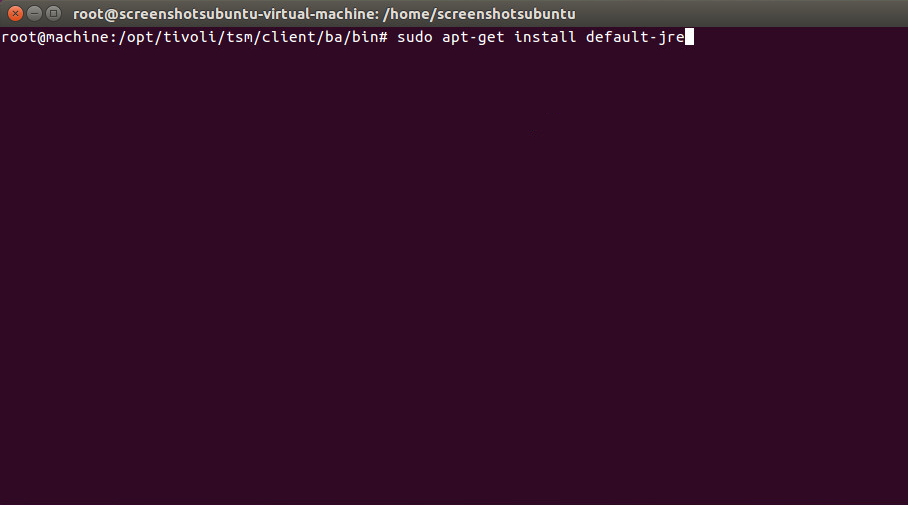
Install Java with:
sudo apt-get install default-jre
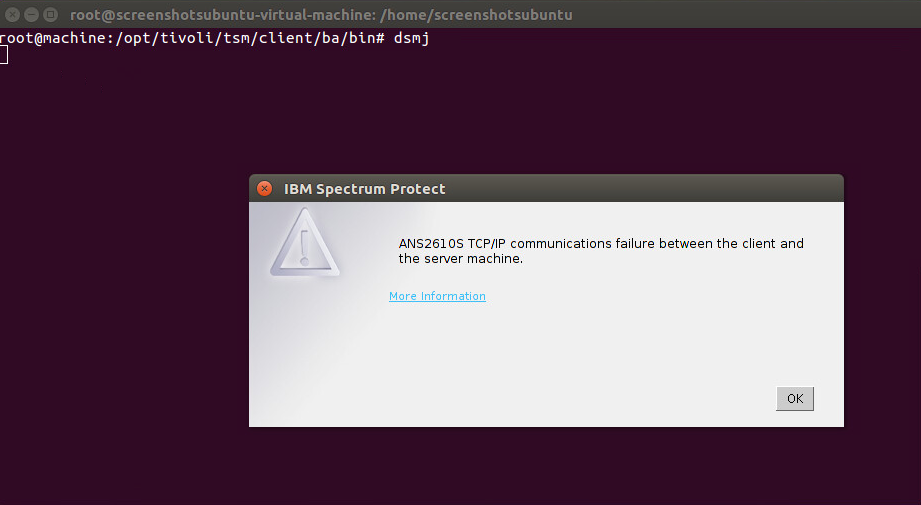
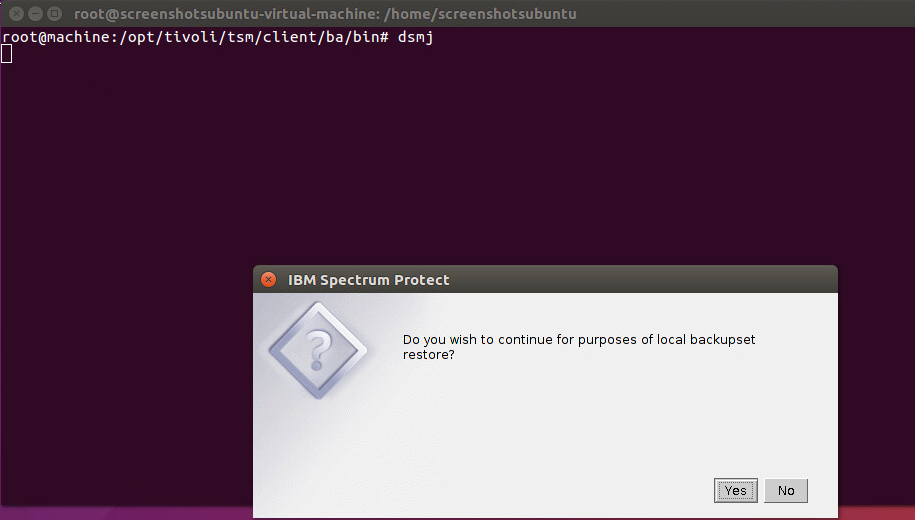
- After about 5 minutes, it will be unable to connect and will ask if you wish to start the clientanyway. Click Yes.
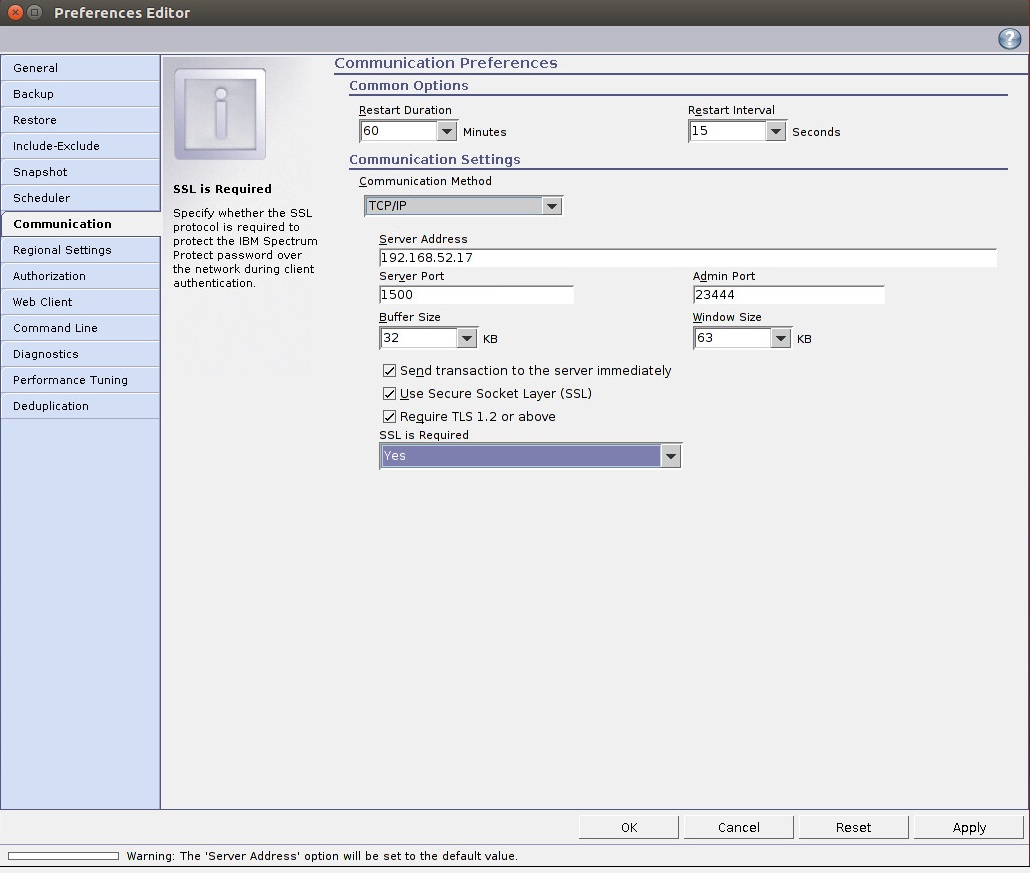
Open Edit > Client Preferences. Enter the node name as the name of the client you added to the Spectrum Protect server.
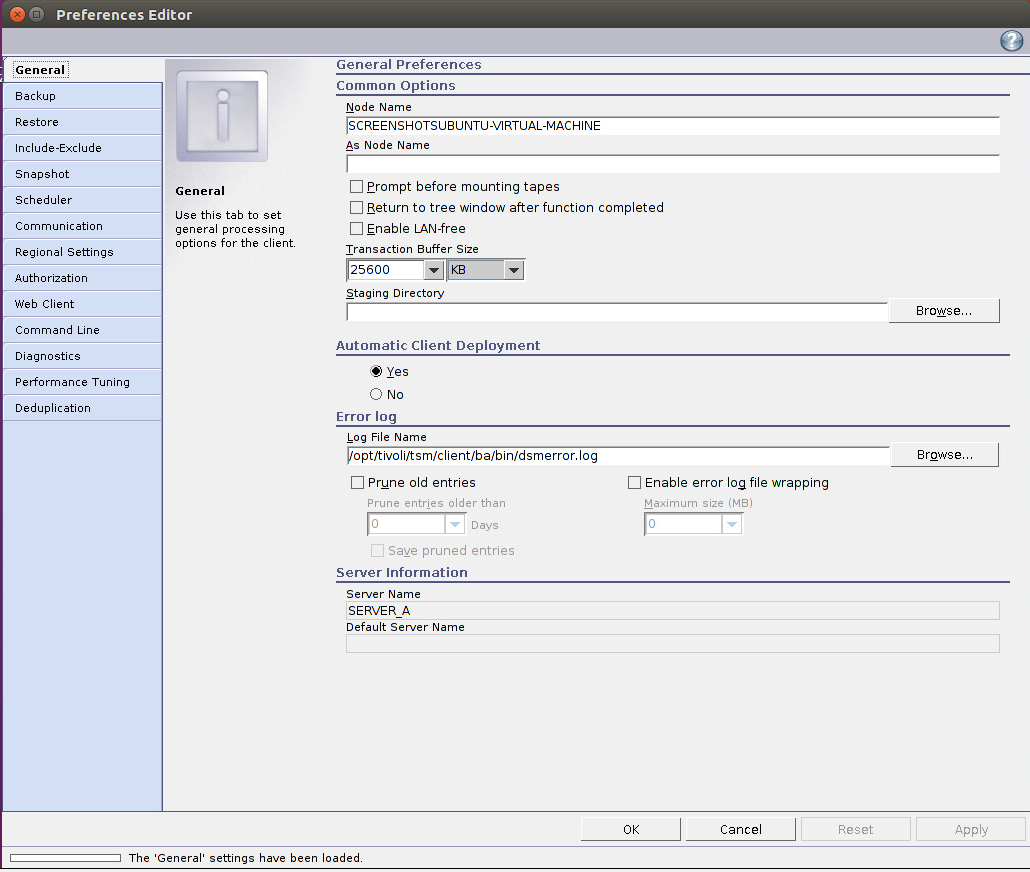
Click the Communication tab.
Enter the IP Address for the server.
Enter the Server port and Admin port (23444).
Check the boxes next to Send transaction to the server immediately, Use Secure Sockets Layer (SSL), and Require TLS 1.2 or above.
Click OK.
Retrieve cert256.arm from the server.
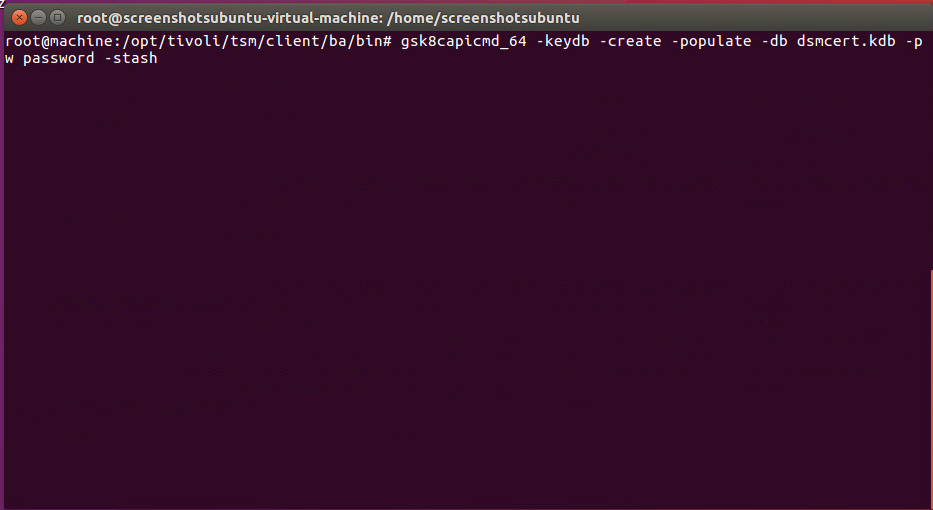
On the client machine create a new key database by running the following commands:
> gsk8capicmd_64 -keydb -create -populate -db dsmcert.kdb -pw password -stash
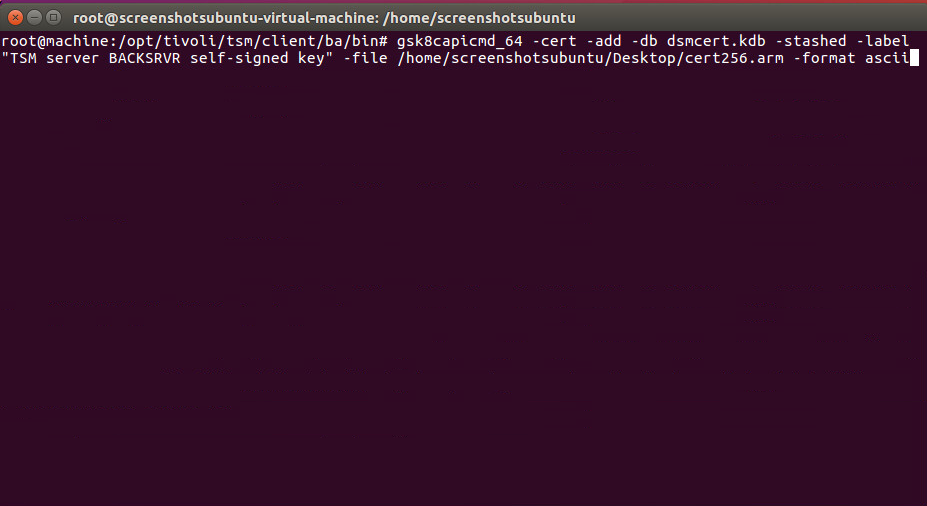
Import cert256.arm by running the command:
> gsk8capicmd_64 -cert -add -db dsmcert.kdb -stashed -label "TSM server BACKSRVR self-signed key" -file <path-to-cert256.arm> -format asci
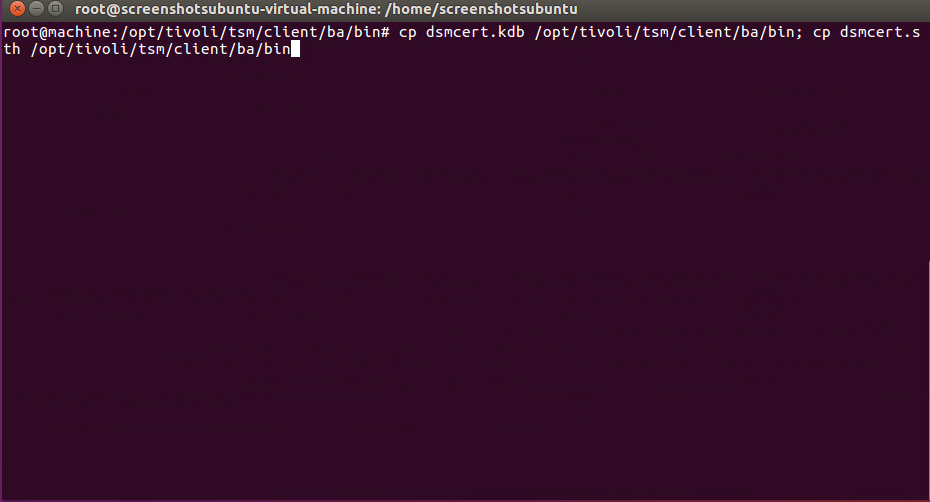
Copy the resulting “dsmcert.kdb” and “dsmcert.sth” to /opt/tivoli/tsm/client/ba/bin.
You may be asked to reconfigure the dsm.opt file when setting up the scheduler but the options should be filled out already.
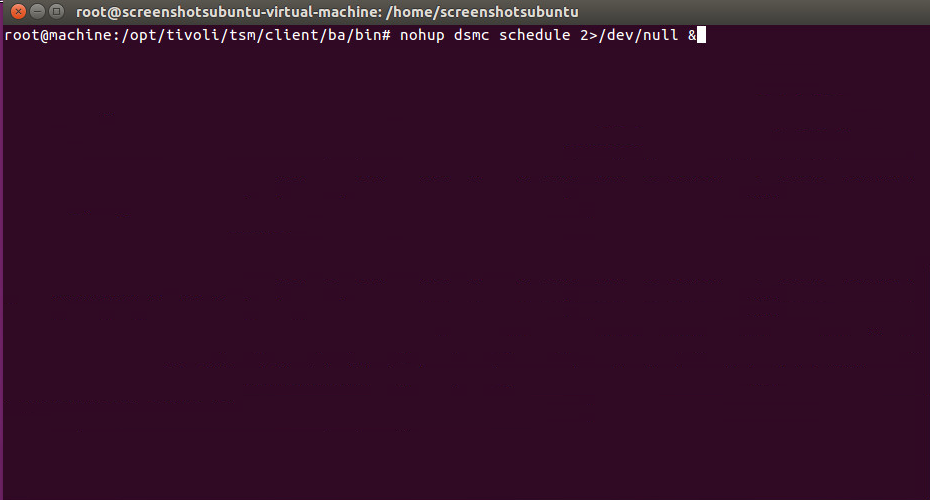
To start the scheduler as a background process, run the following command:
> nohup dsmc schedule 2>/dev/null &
You can add this command to the startup programs in Ubuntu to make it start automatically.
2.8. GreenTec WORMdisks
See the Installation of GreenTec Command Line Utilities document, that should accompany the installation disk, for a detailed guide on how to install the GreenTec command line utilities. Furthermore, refer to the GT_WinStatus User Guide , that should also accompany the installation disk, for instructions on how to effectively use GreenTec disks to preserve data. Read these instructions carefully, as locking GreenTec WORMdisks can result in making some or all of the disk or the entire disk unusable. Having portions of the disk, or the entire disk, permanently locked is sometimes desirable but it is dependent on the needs of your organization. For example, if you want to store backup information or logs securely.
The GT_WinStatus User Guide provides instructions for locking and temporarily locking disk sectors. In this practice guide, we will not include instructions on when or how to lock GreenTec disks. However, in some cases, we will provide instructions detailing how to save data to these disks and leave locking them to the implementing parties.
2.9. Veeam Backup & Replication
Veeam’s Backup & Replication tool provides backup and restore capabilities. In the data integrity solution, Veeam is used to backup and restore virtual machines residing within Windows Server Hyper-V. In this section is the installation and configuration process for Veeam Backup & Replication on a Windows Server 2012 R2 machine. Additional installation and configuration instructions can be found at https://helpcenter.veeam.com/docs/backup/hyperv/install_vbr.html?ver=95.
2.9.1. Production Installation
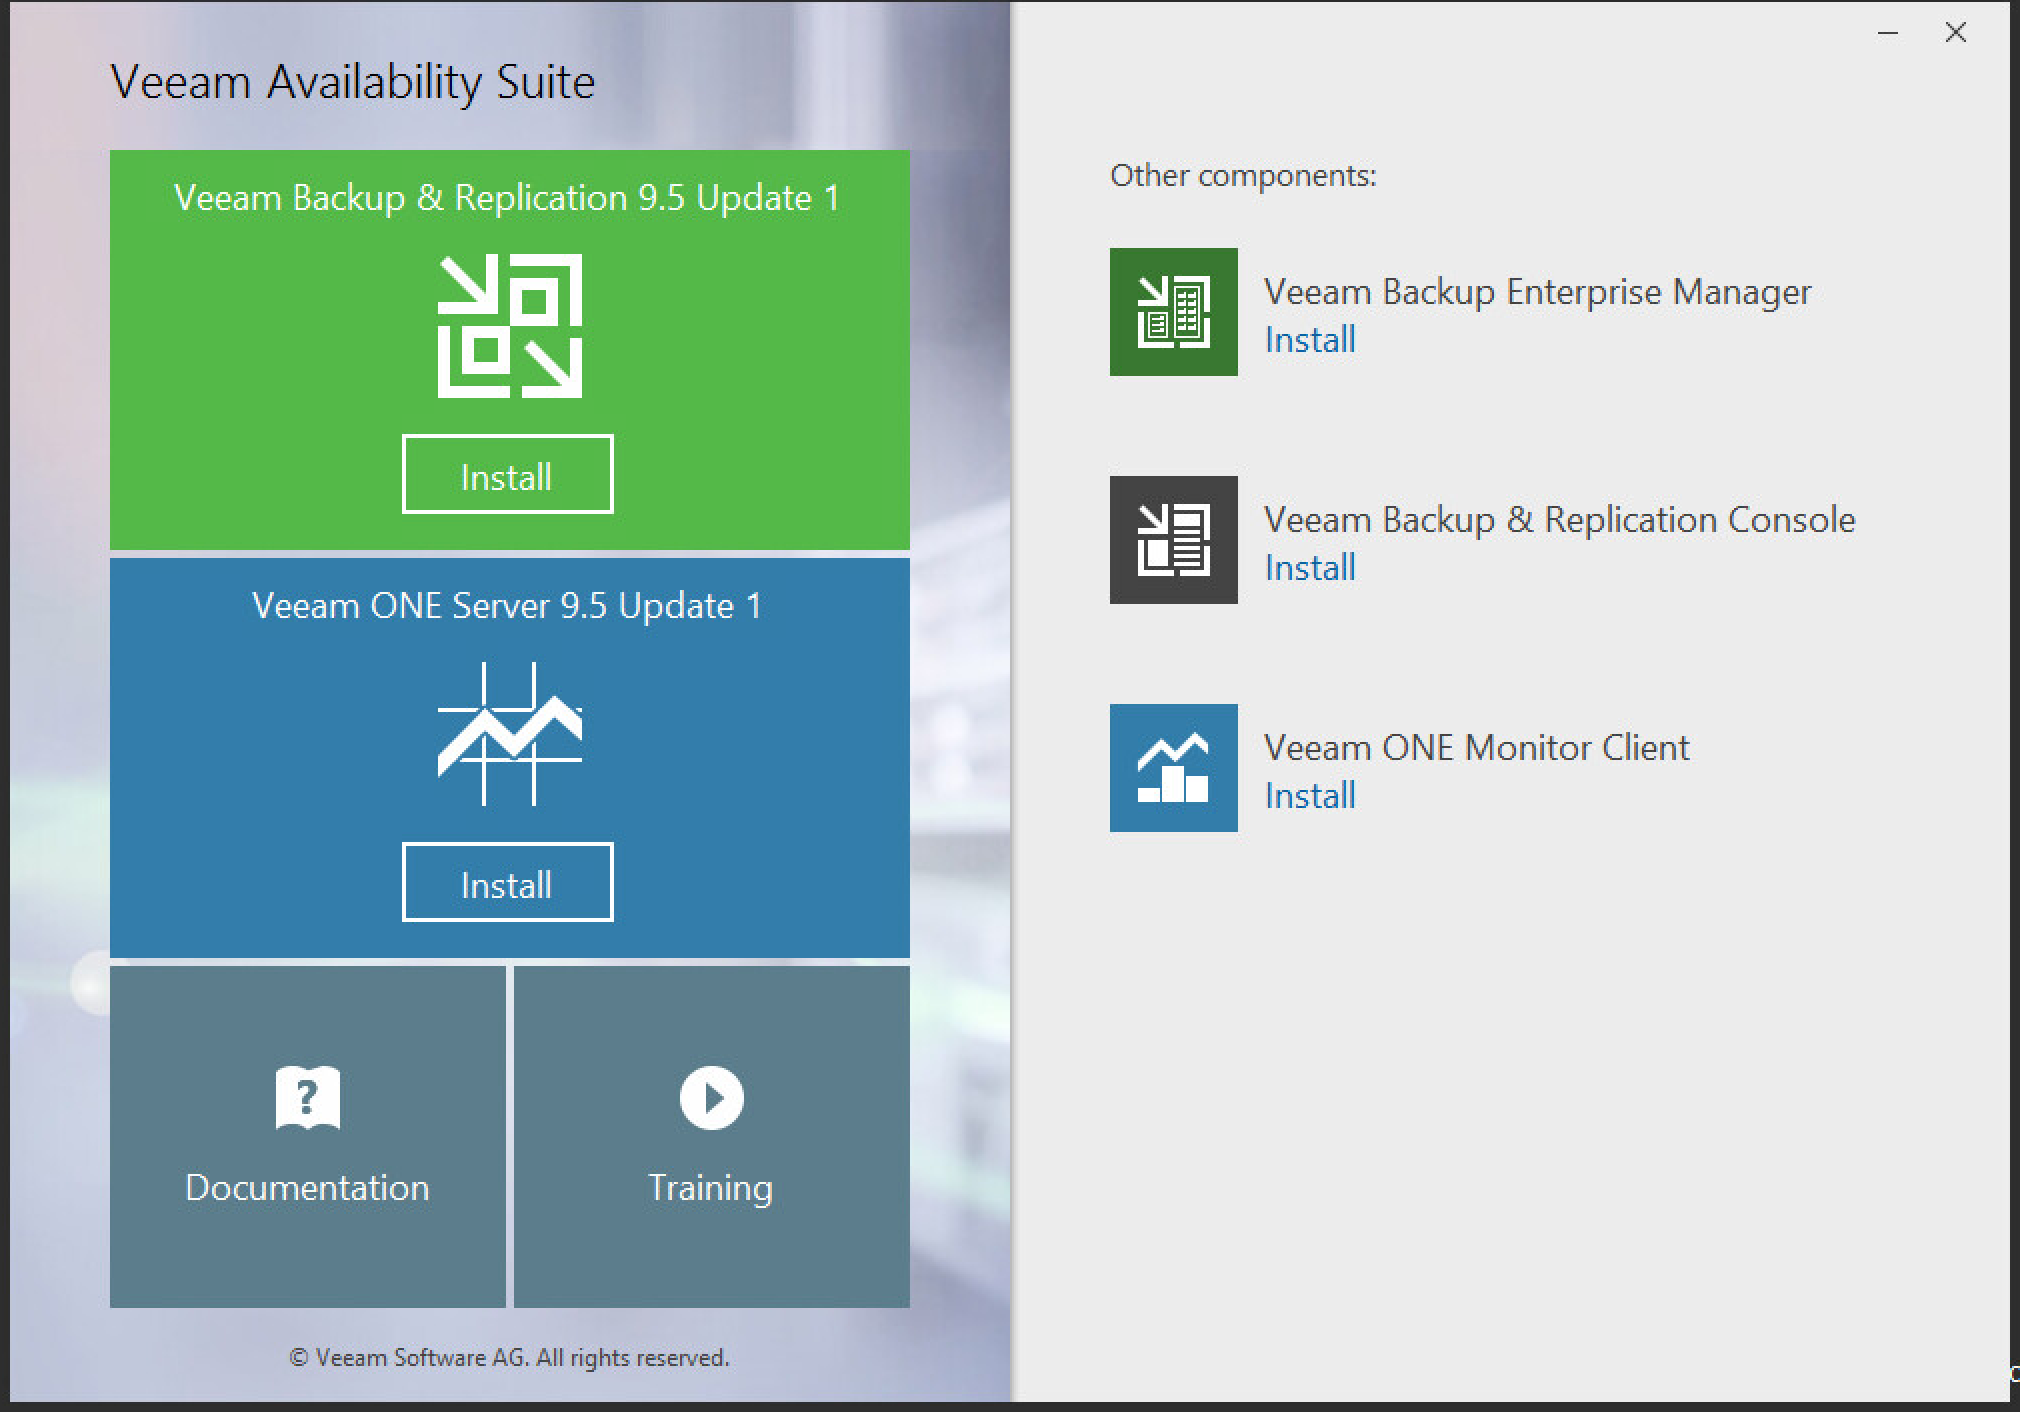
Start the Veeam Setup Wizard and click to begin the installation process for Veeam Backup & Replication with the appropriate version number.
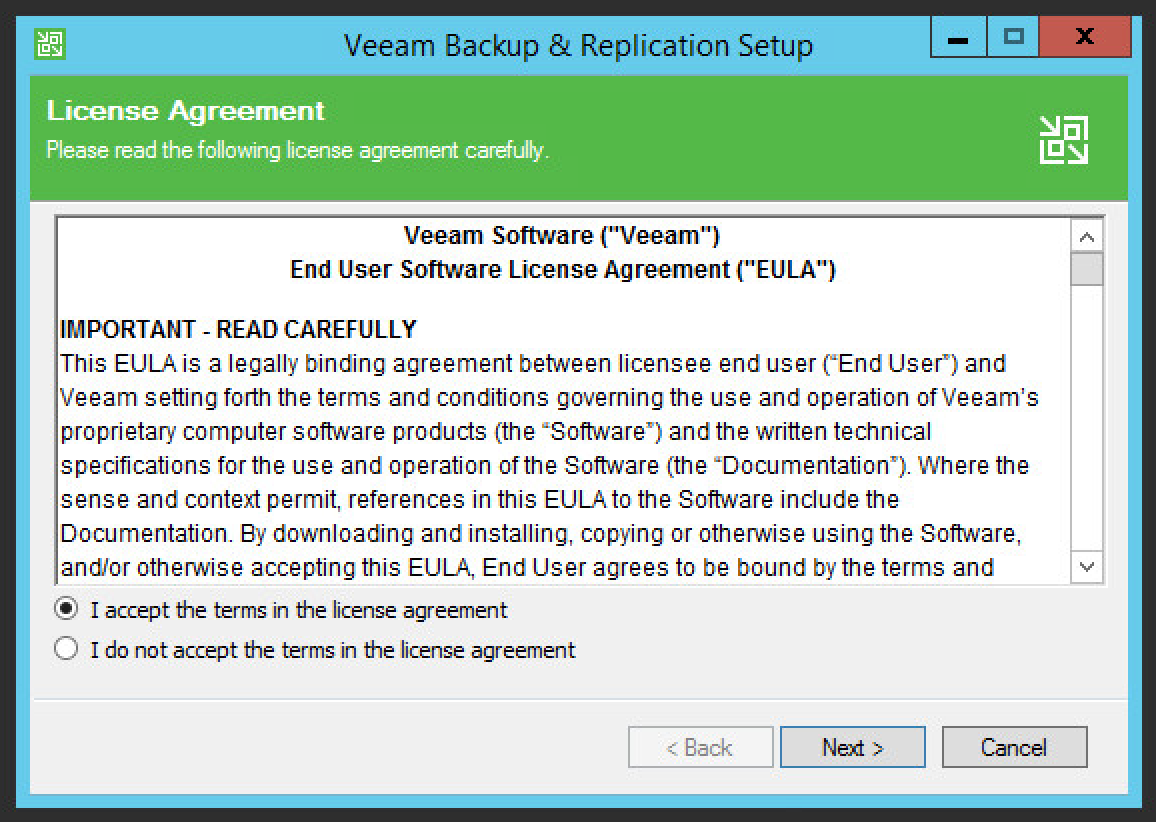
Read and accept the license agreement.
Click Next.
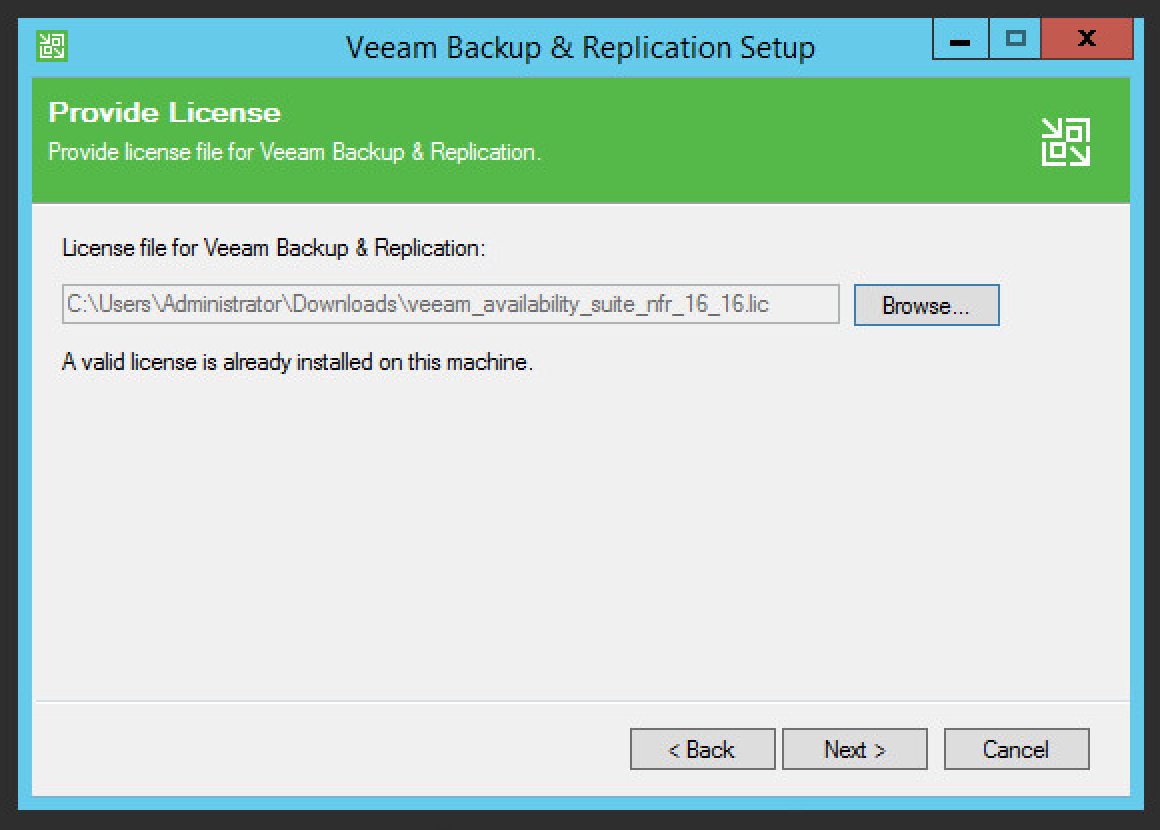
Browse to the location of the license file.
Click Next.
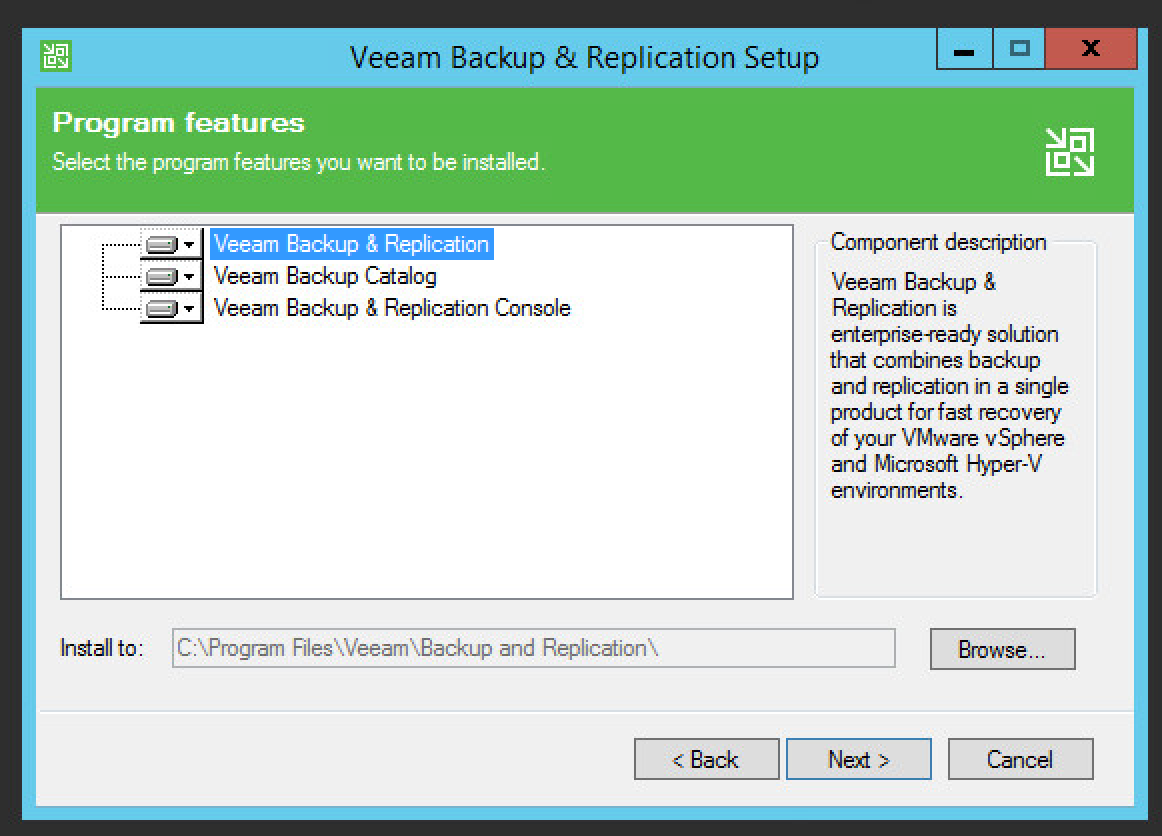
Select installation components required by your organization.
Click Next.
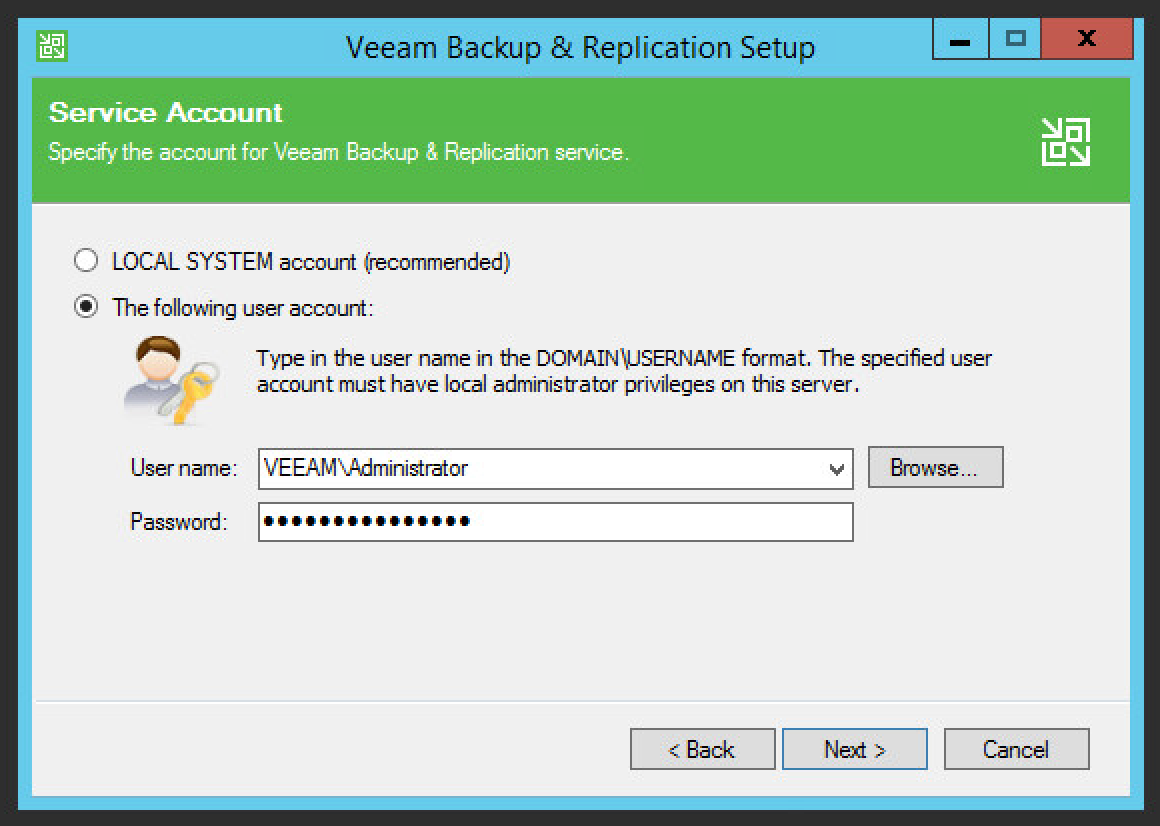
Specify account credentials for Service account.
Click Next.
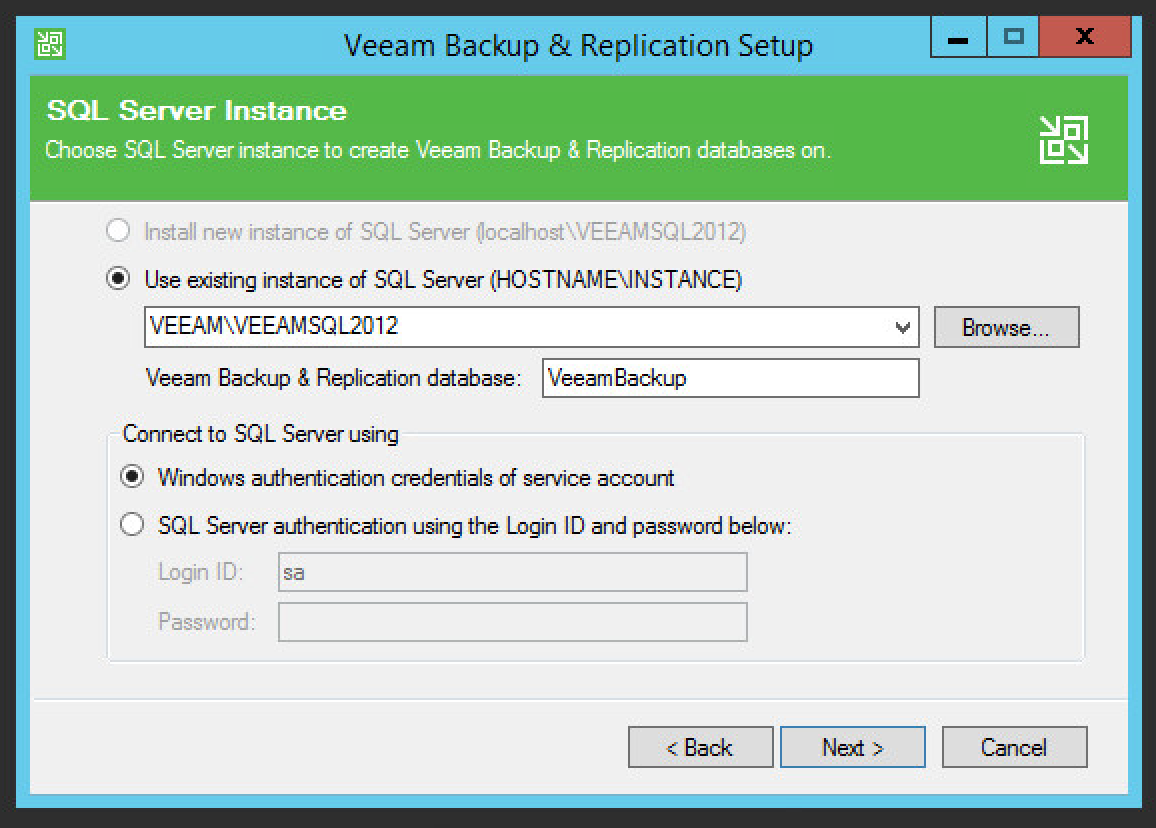
Specify details of the SQL Server Instance.
Click Next.
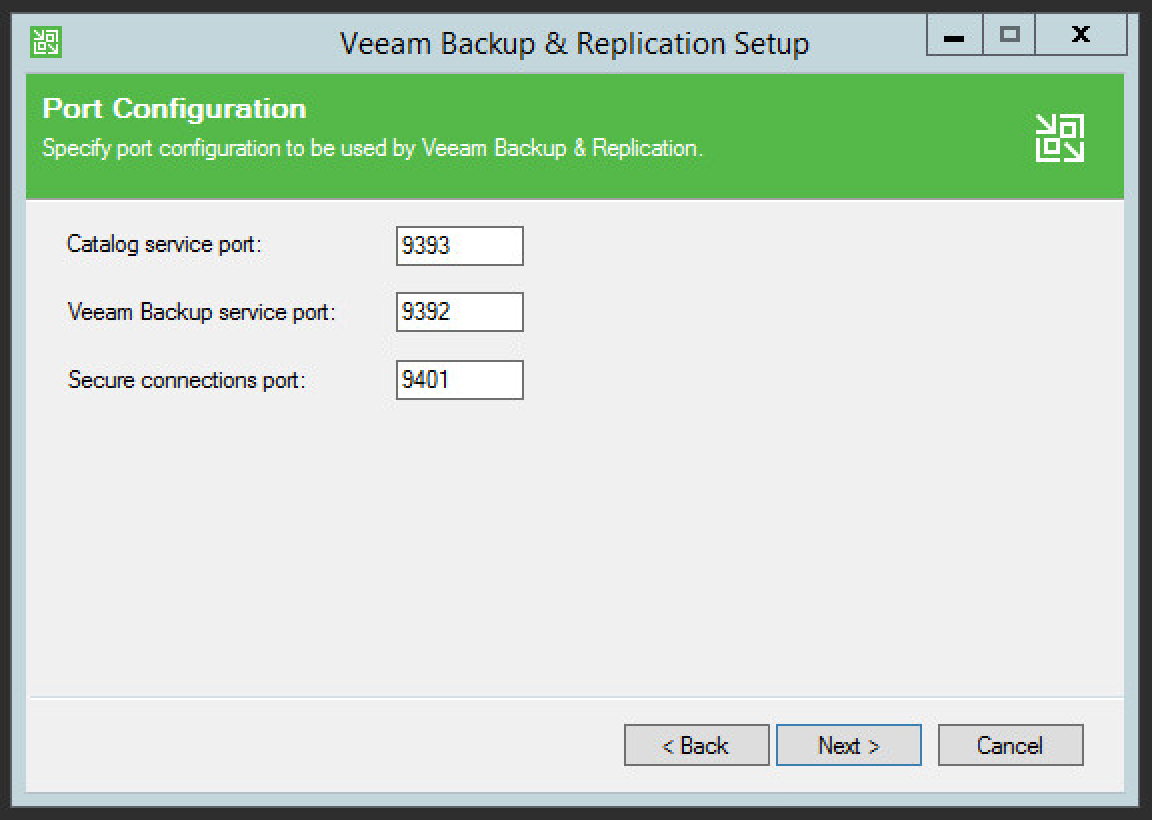
Specify port numbers for Veaam Backup & Replication services.
Click Next.
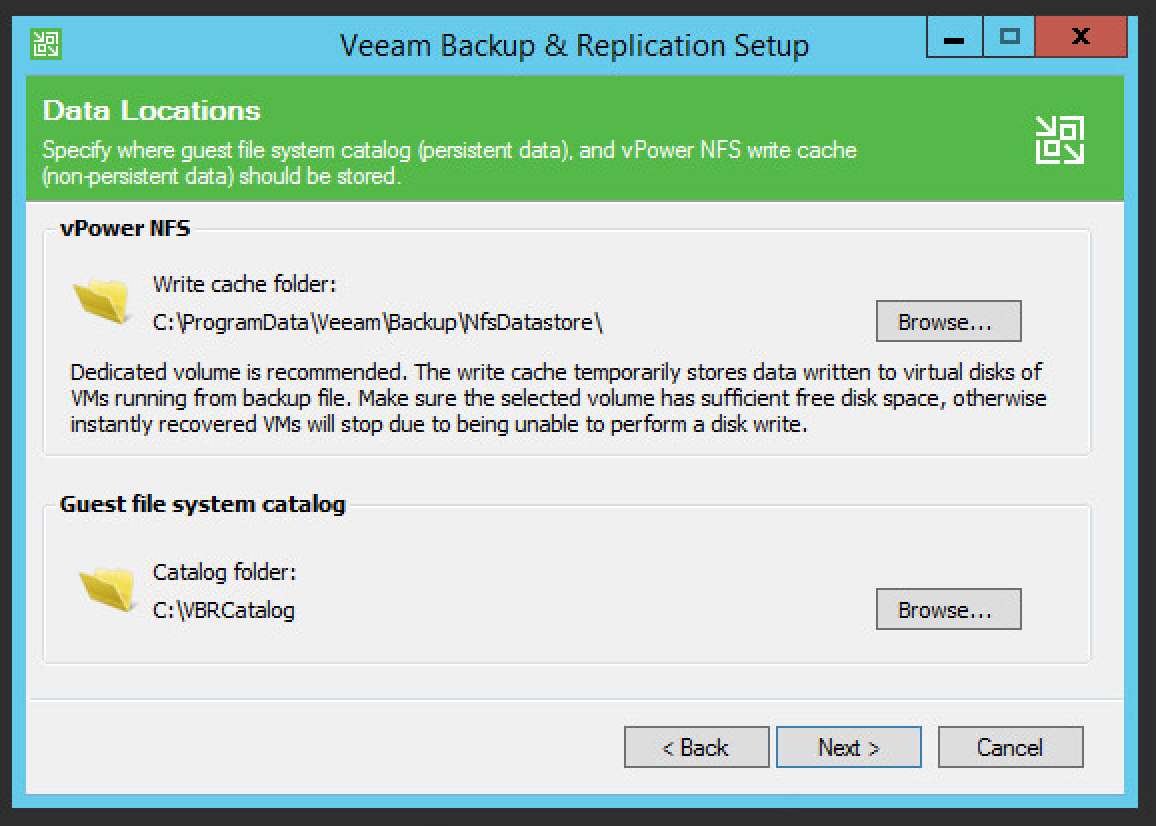
Specify data storage locations.
Click Next.
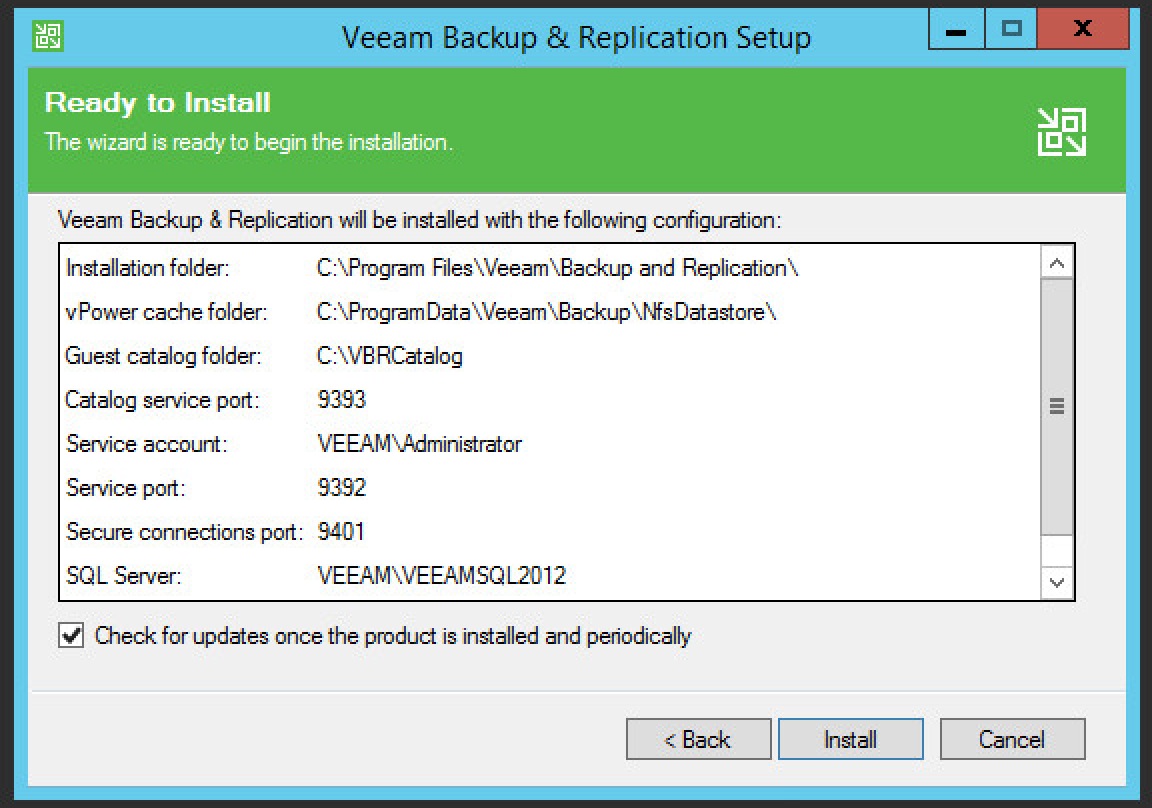
Review installation and configuration details and click Install.
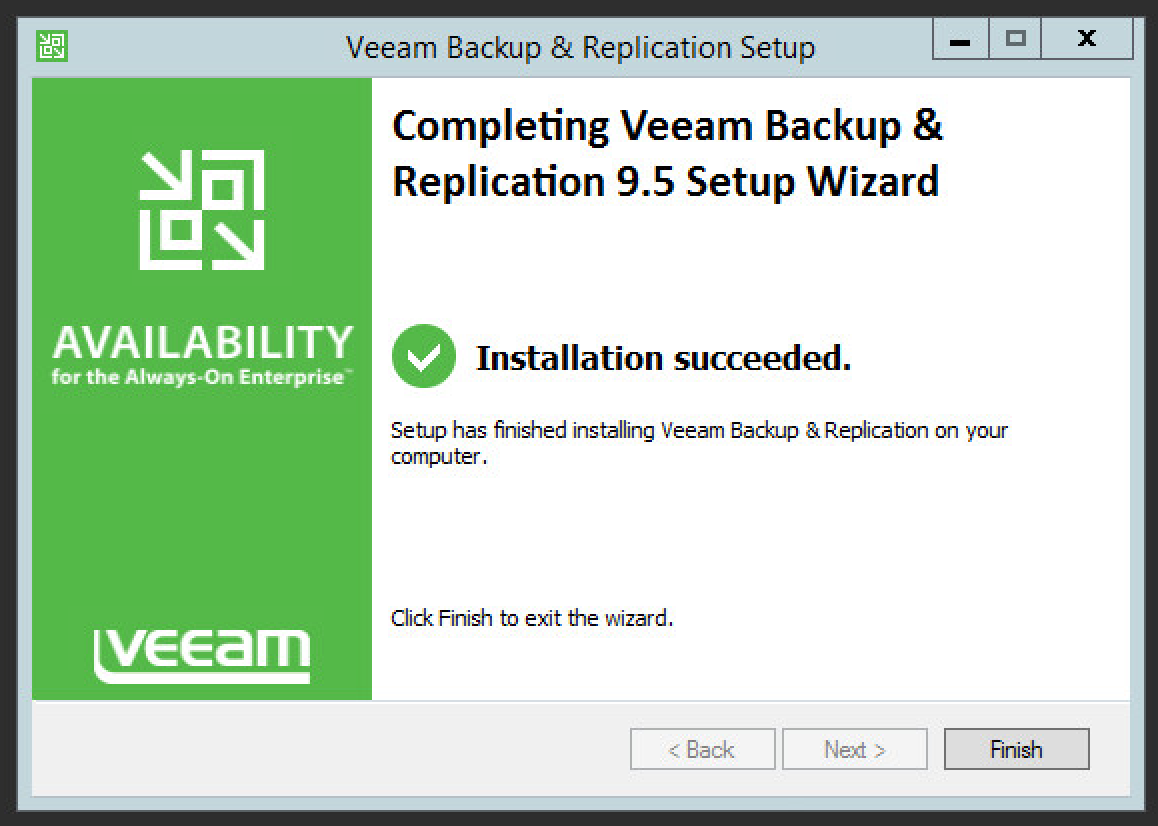
Observe the successful installation and click Finish.
2.10. Tripwire Enterprise and Tripwire Log Center (TLC)
Tripwire Enterprise is a data integrity solution that monitors file activity and associated information across an enterprise. In this solution, we use it to monitor both a MS SQL database and file changes in certain folders. Tripwire Log Center allows for the collection and standardization of logs produced by Tripwire Enterprise.
Please see the Tripwire Enterprise Install and Maintenance Guide, accessible at http://download.tripwire.com/te_en/docs852/te_install_and_maint_guide.pdf?V2ymLyYUTw_9Yx-EB3c3uKKO7JcgvOihm3YK_zuCGJtyYm5c9NPiogn8hIakZL3NlLqa, for a detailed, illustrated guide to the installation. The only addition to this documentation is that the MS SQL Server should be in “Mixed Mode” for authentication purposes. This section covers the installation and configuration process we used to set up Tripwire Agents on various machines as well as the installation and integration of Tripwire Log Center with Tripwire Enterprise. The result of this integration is the generation and forwarding of events from Tripwire Enterprise to Tripwire Log Center.
2.10.1. Install Tripwire Agent on Windows
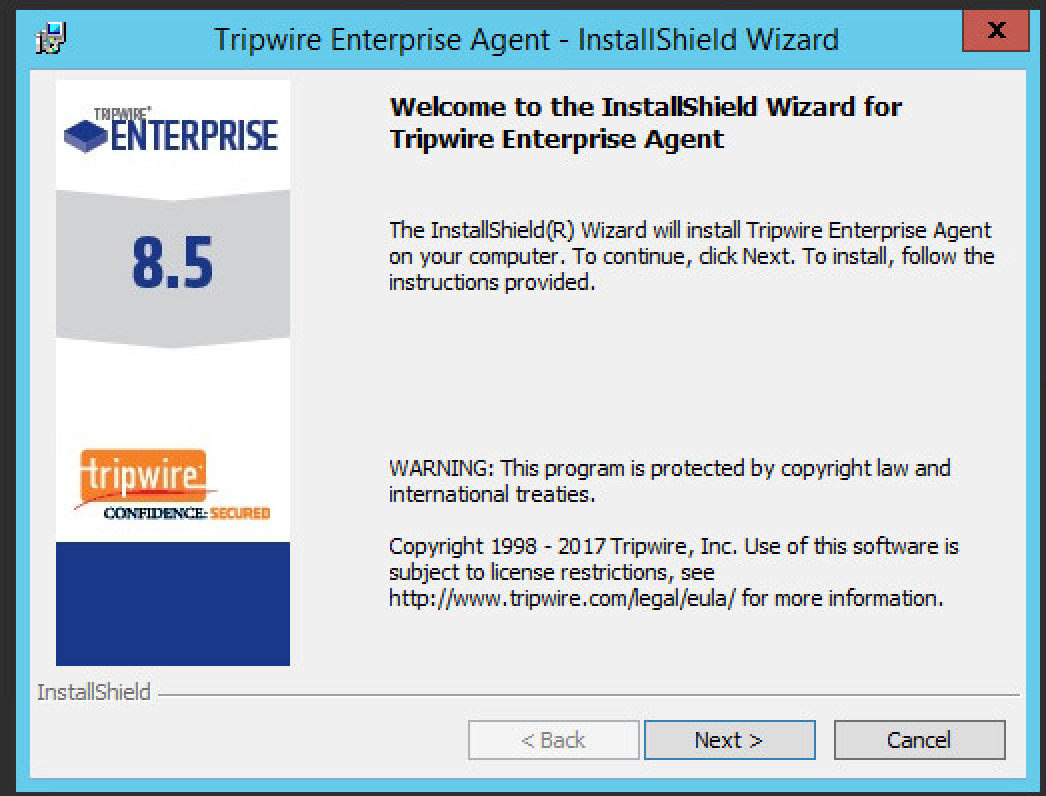
Run
te_agent.msion the client machine.Click Next.
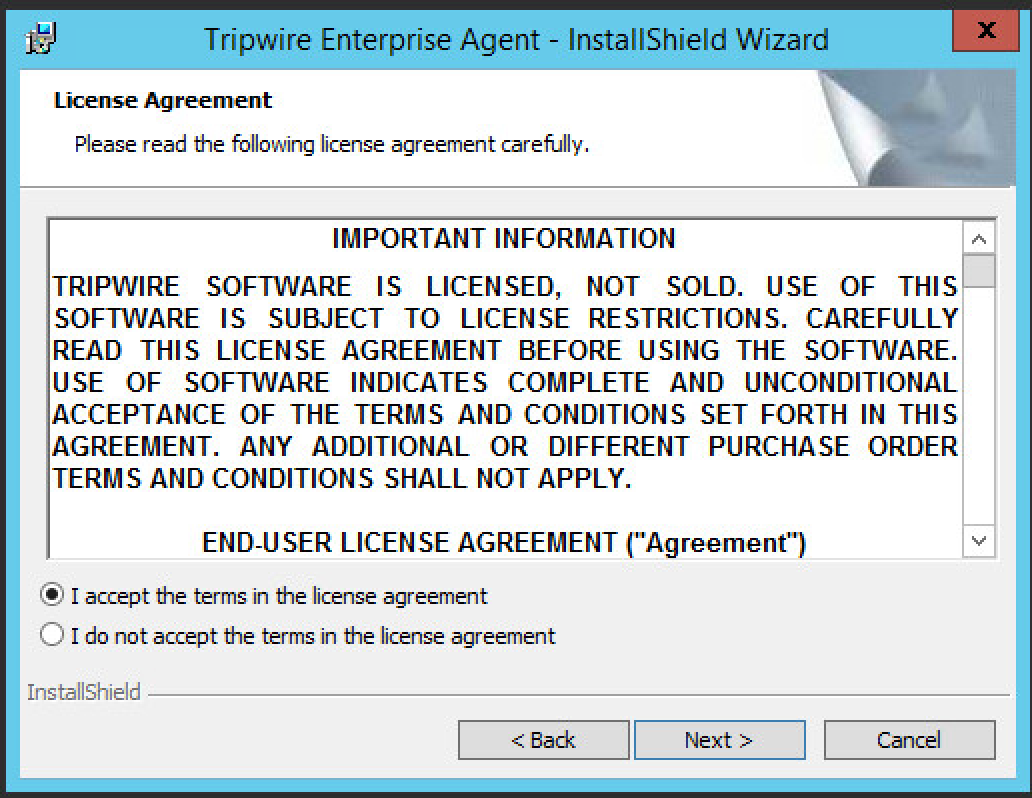
Accept the license agreement.
Click Next.
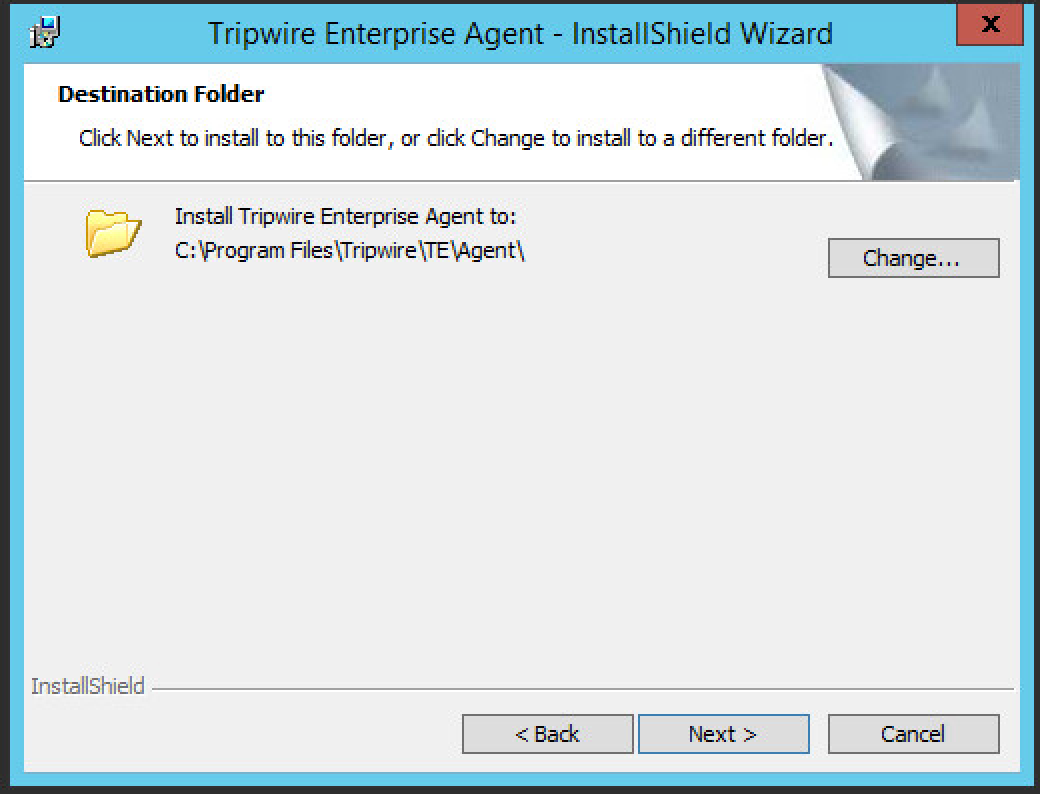
Specify the installation path.
Click Next.
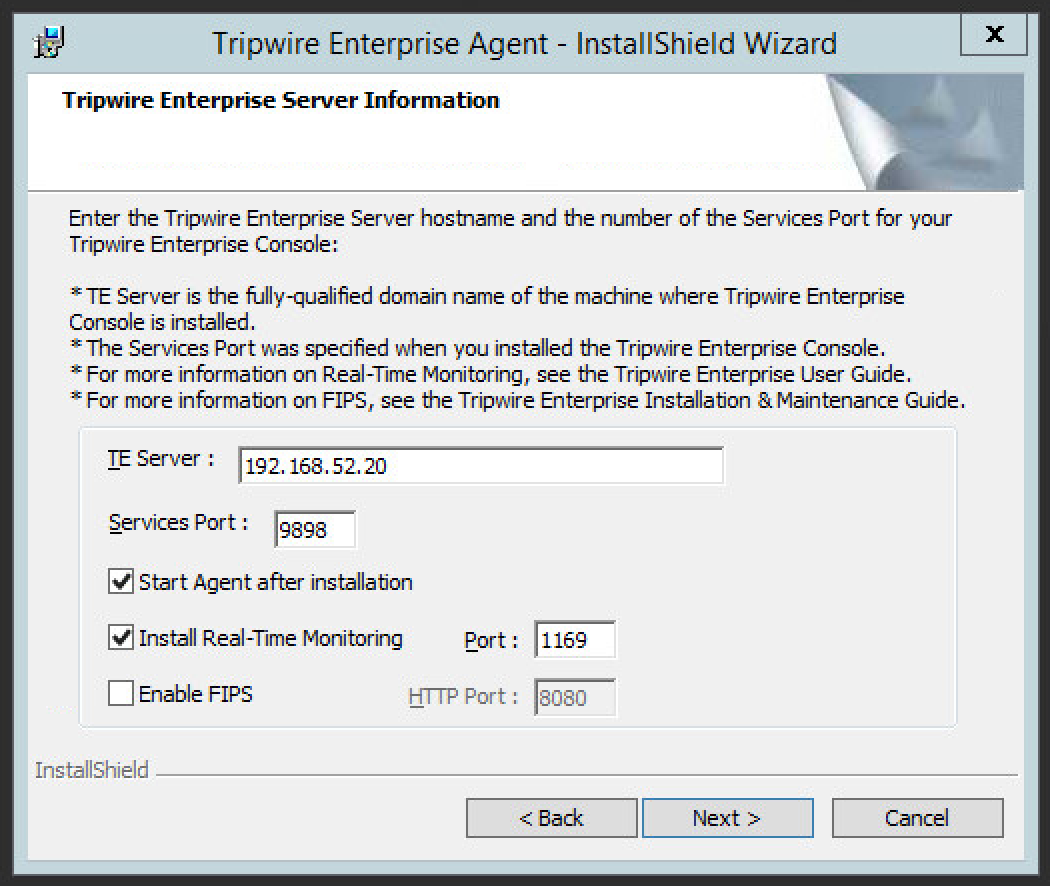
Enter the IP address of the Tripwire server.
Click Next.
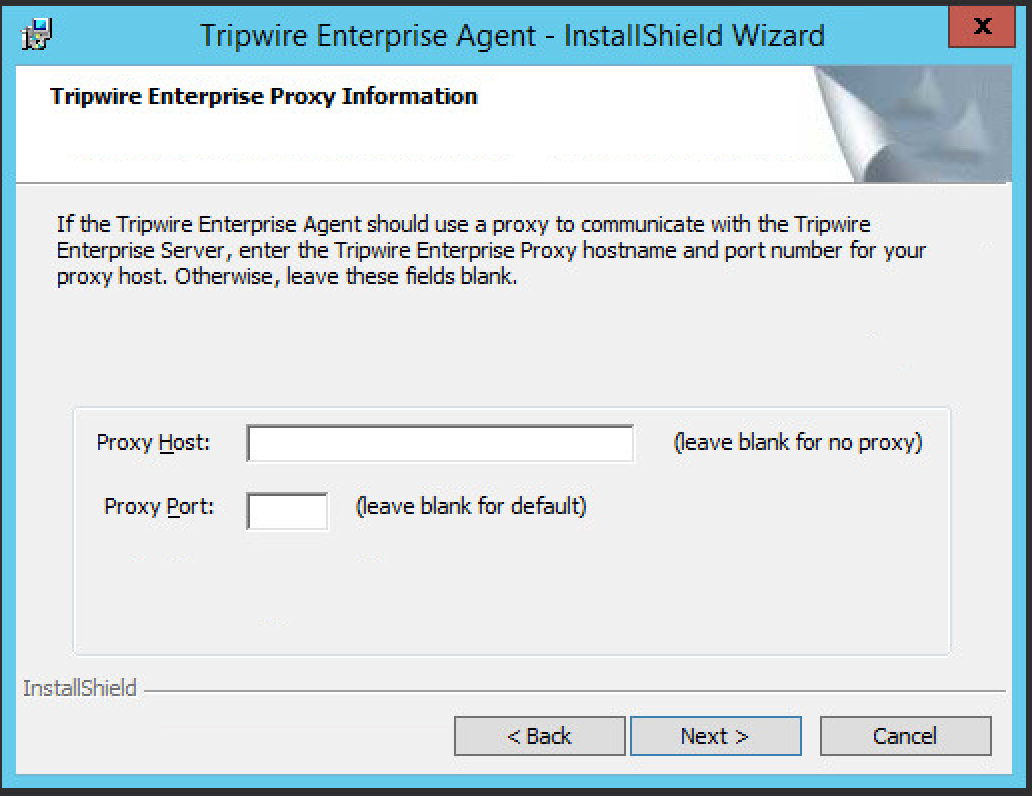
Leave the proxy settings blank.
Click Next.
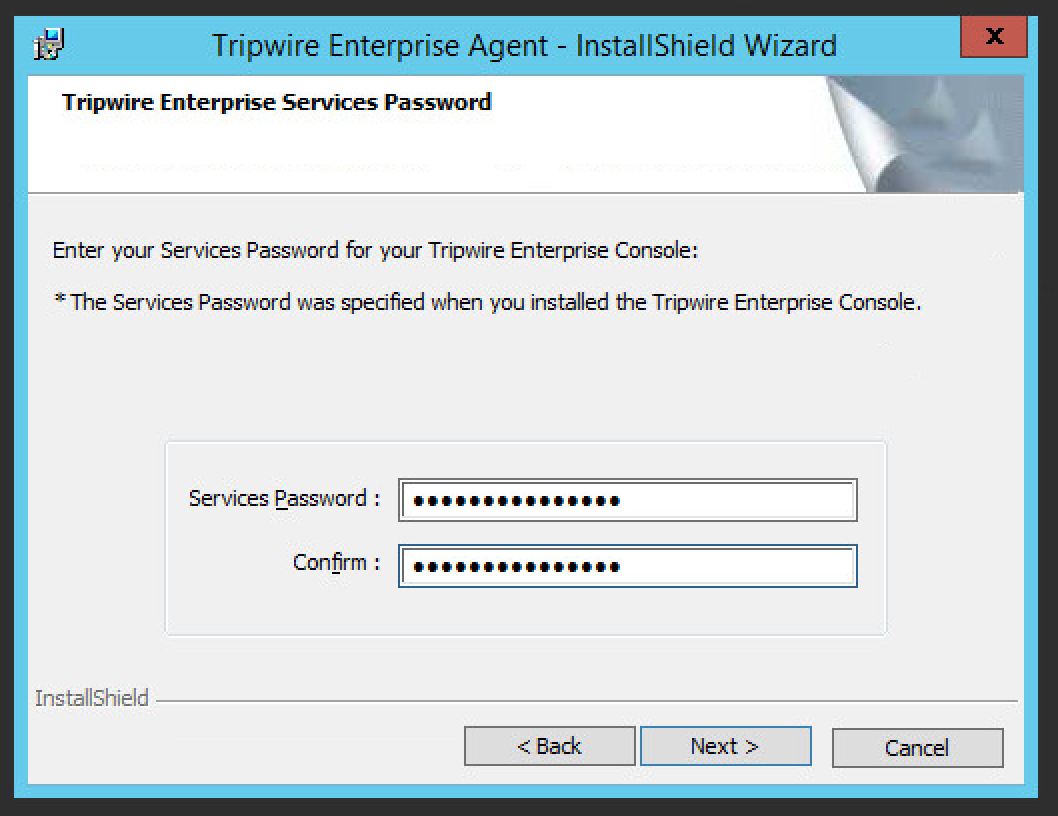
Enter the services password specified in the server upon installation twice.
Click Next.
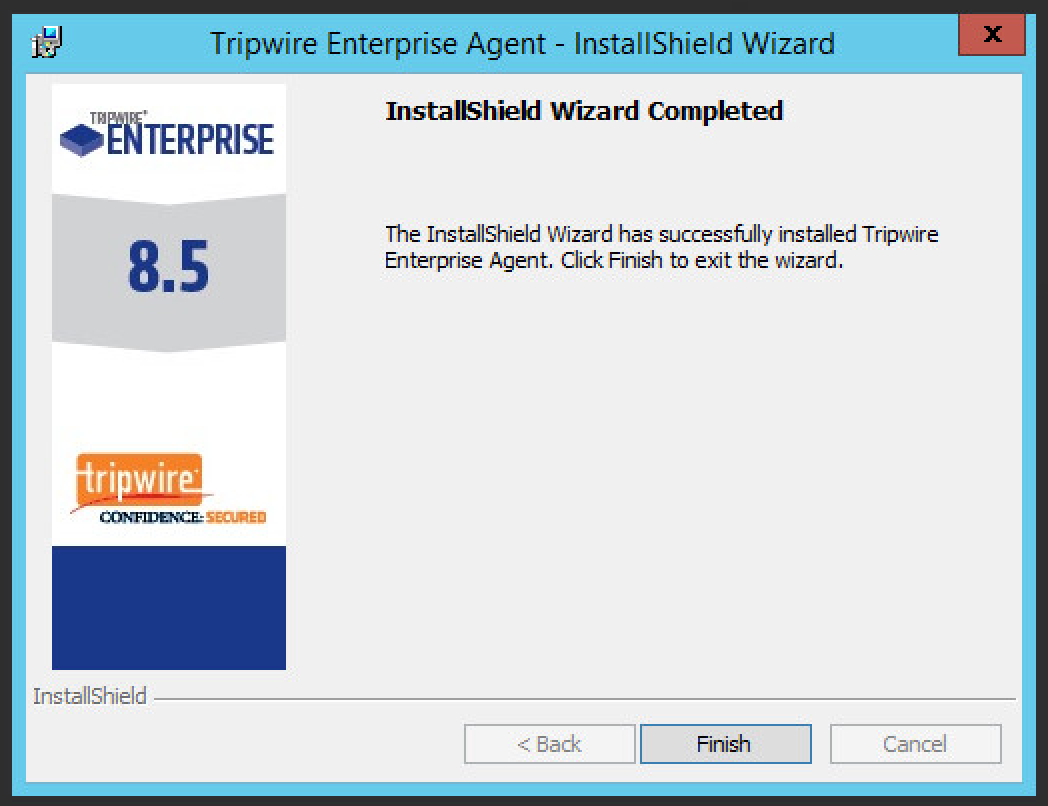
Click Install.
Start Tripwire Agent from the start menu (on some systems it may start automatically - check services.msc to verify that it is running).
2.10.2. Install Tripwire Agent on Ubuntu
Execute the following commands as root.
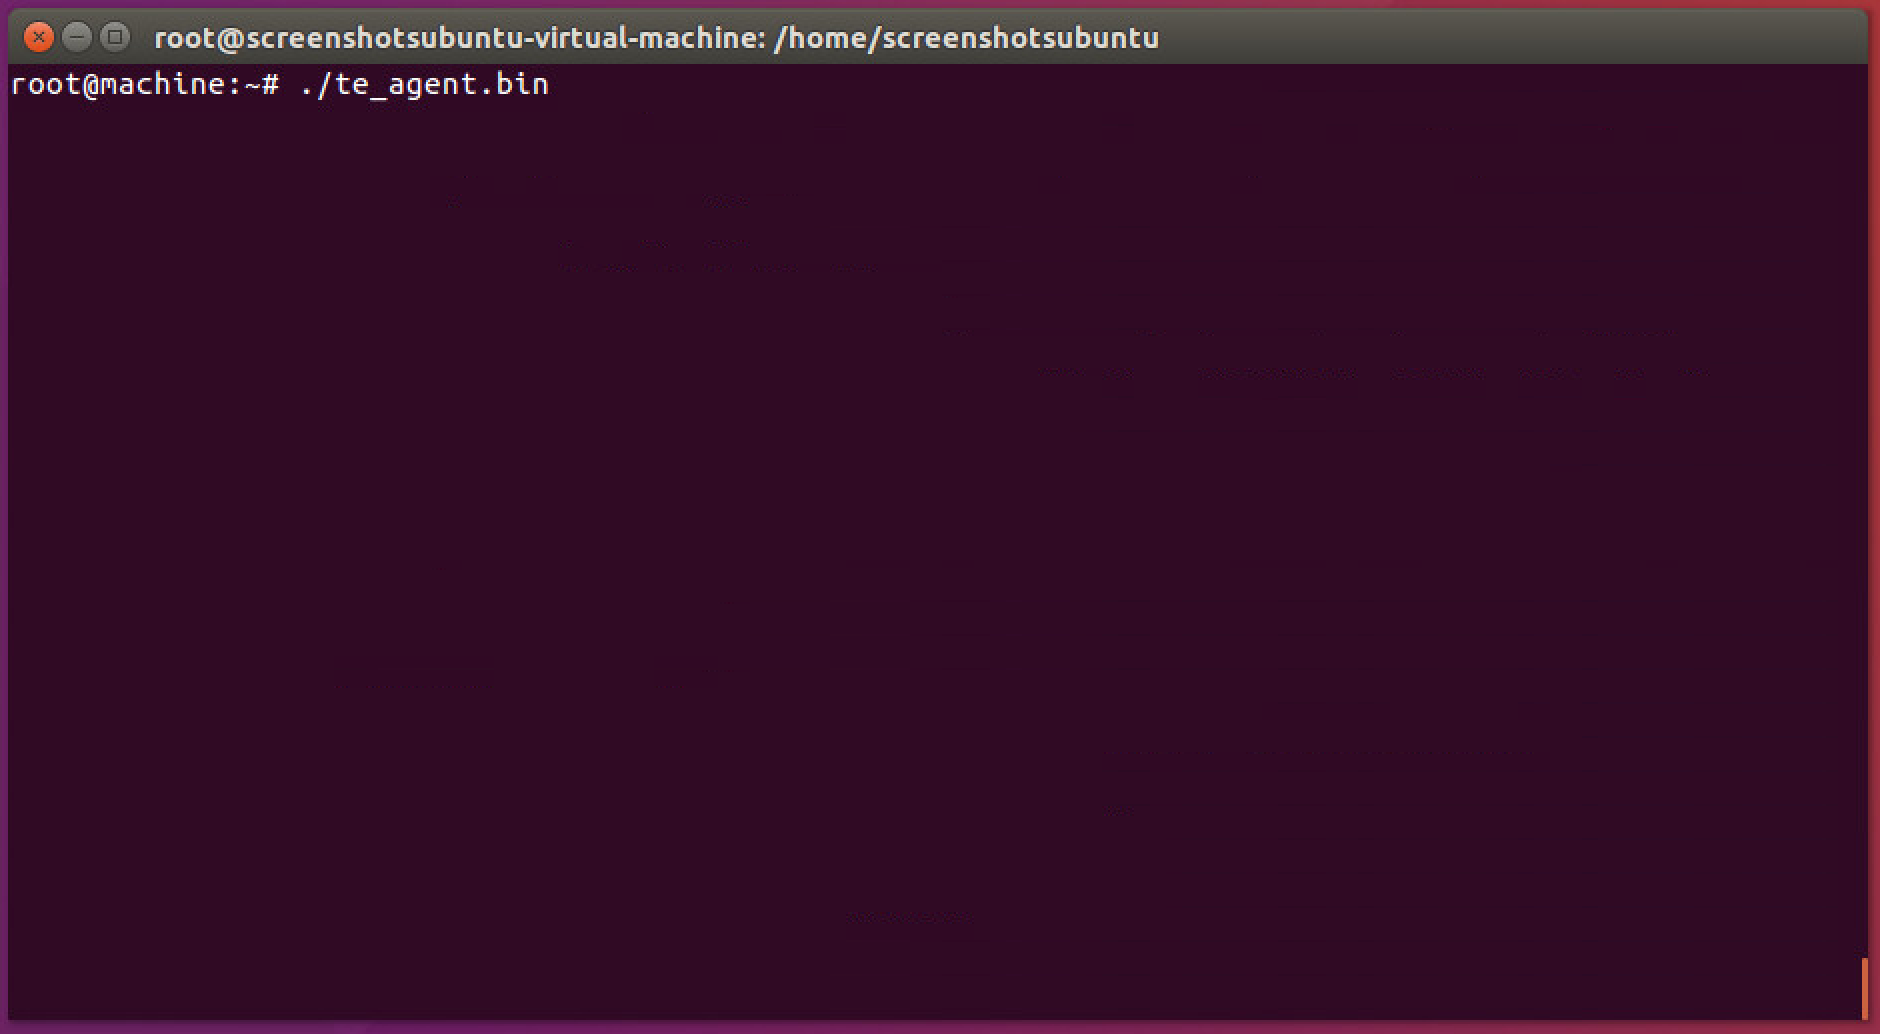
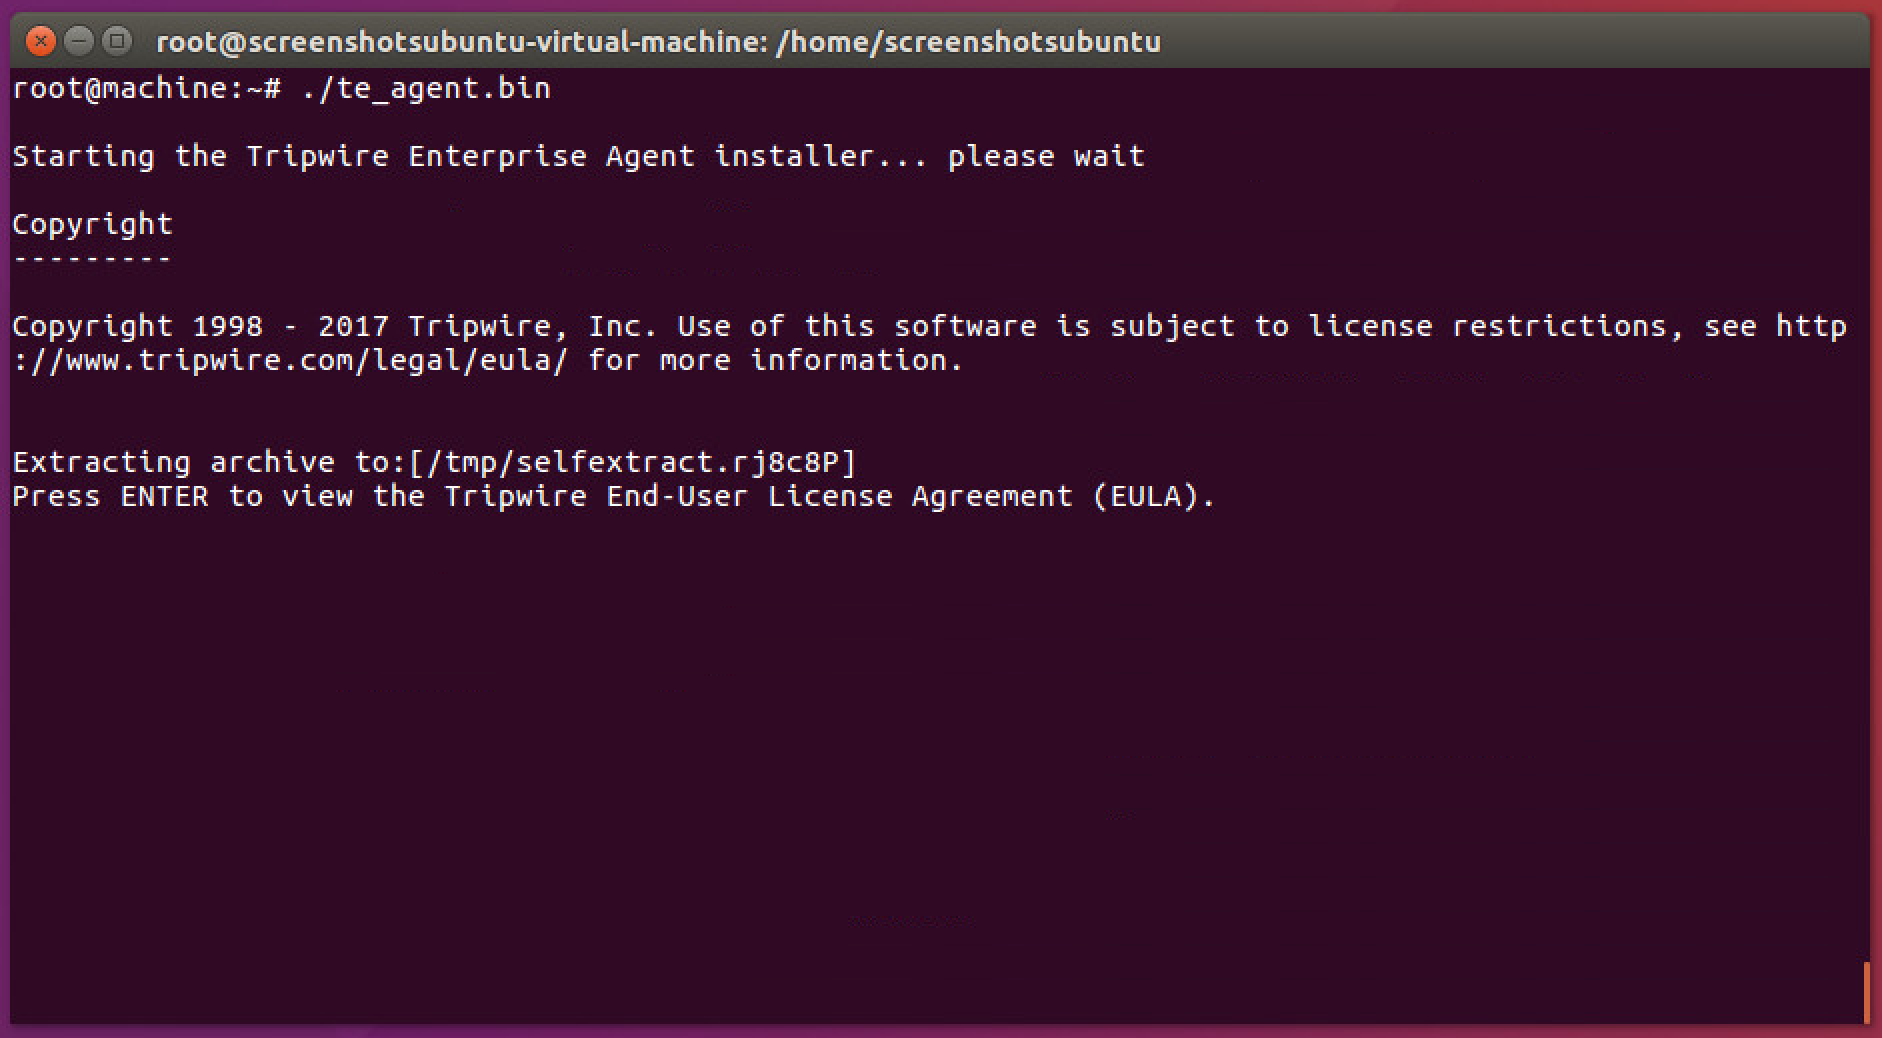
Run te_agent.bin by issuing the command:
./te_agent.bin
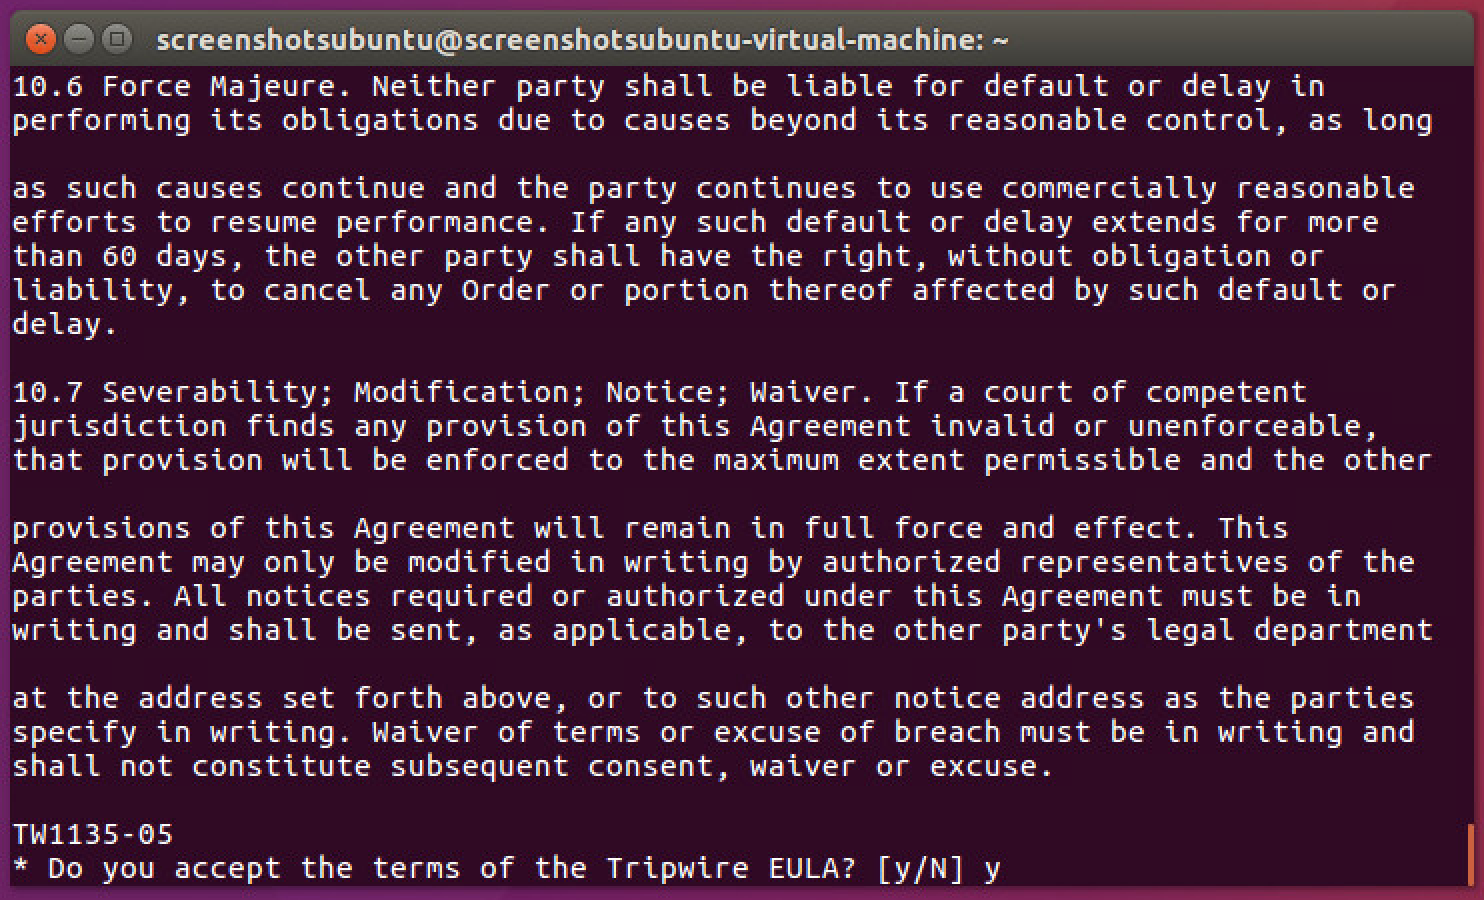
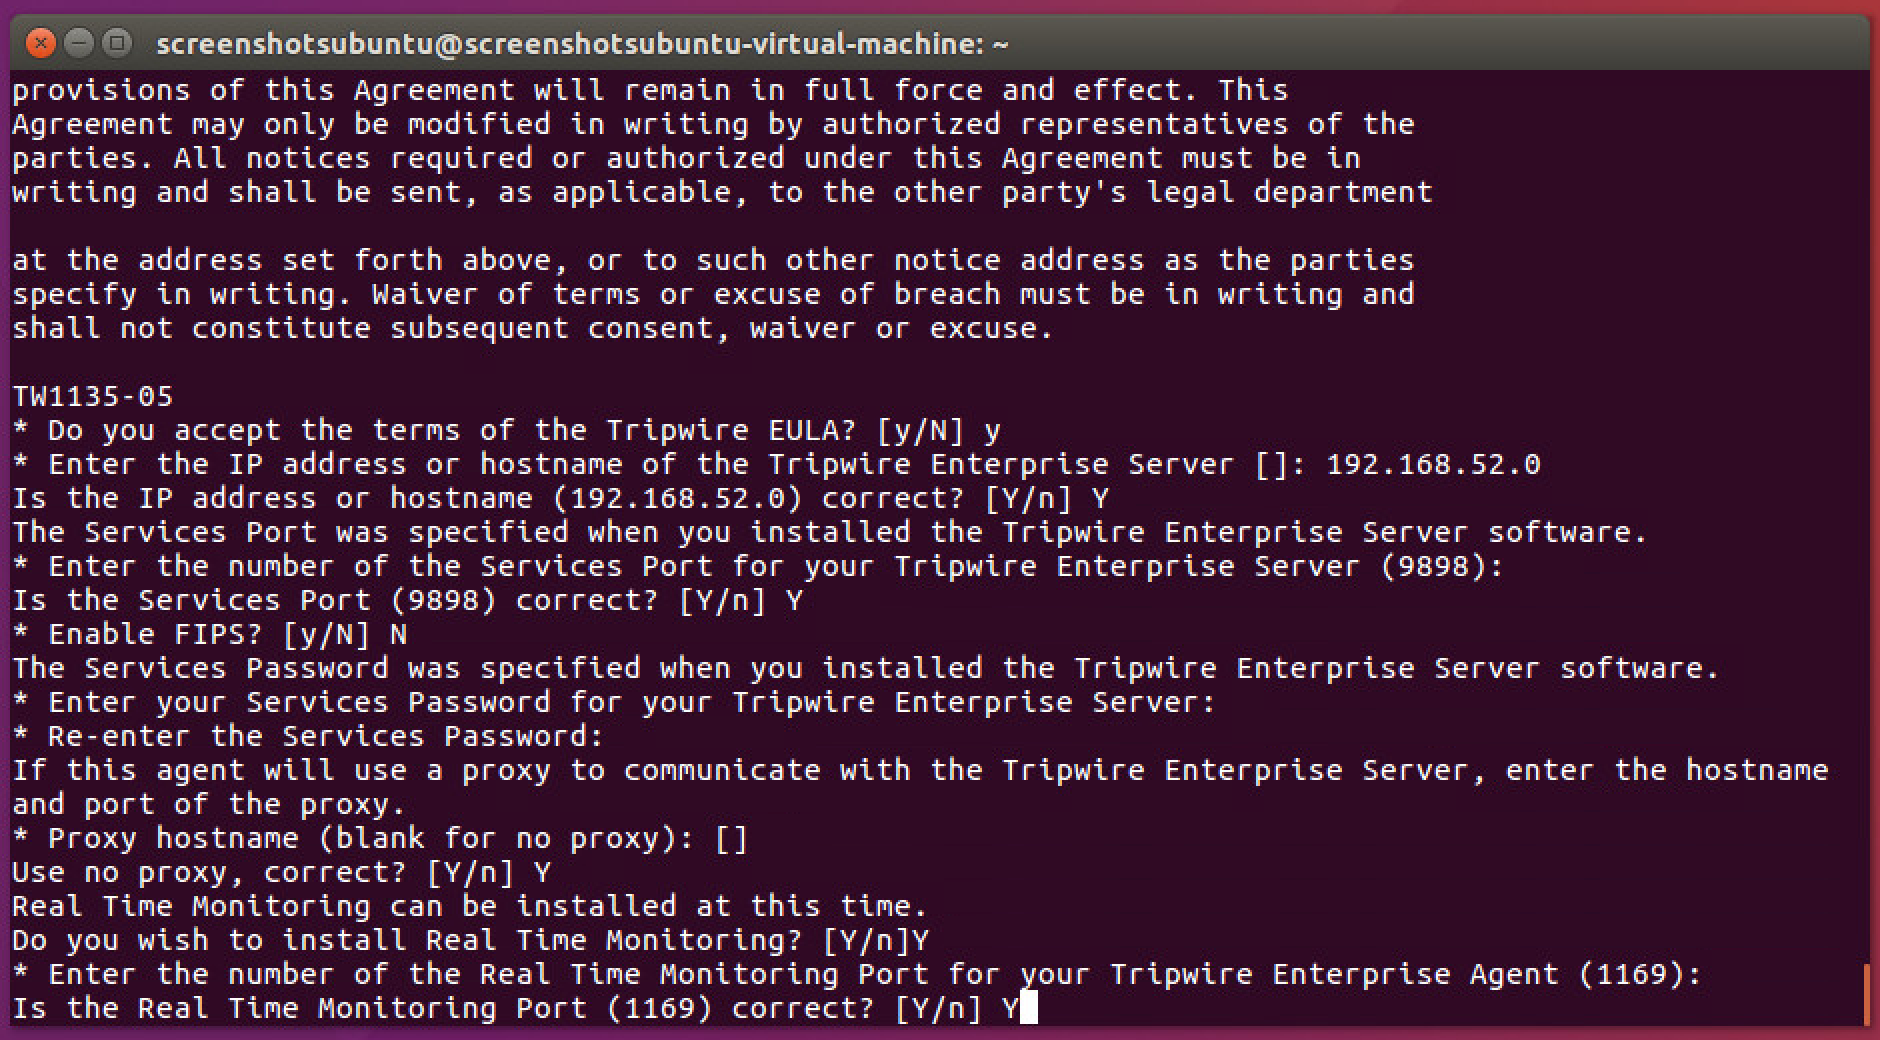
Press Enter repeatedly to read through the EULA.
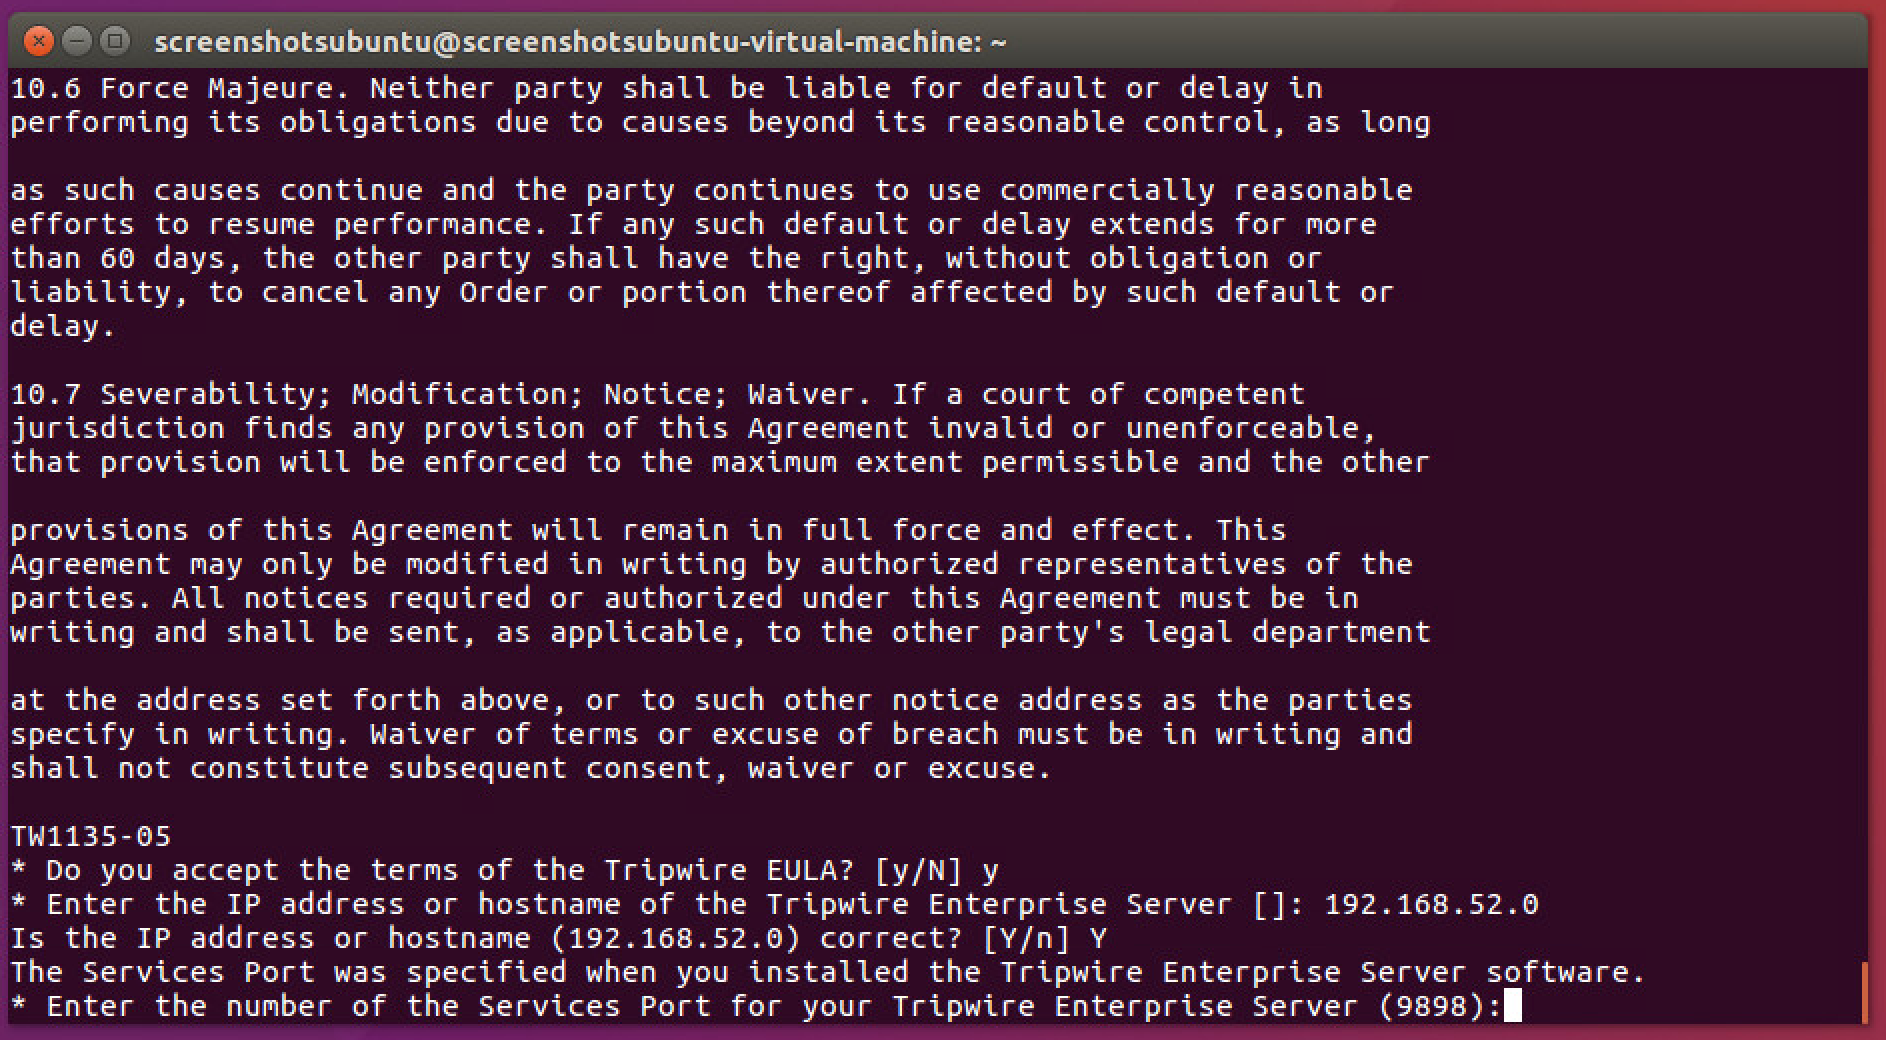
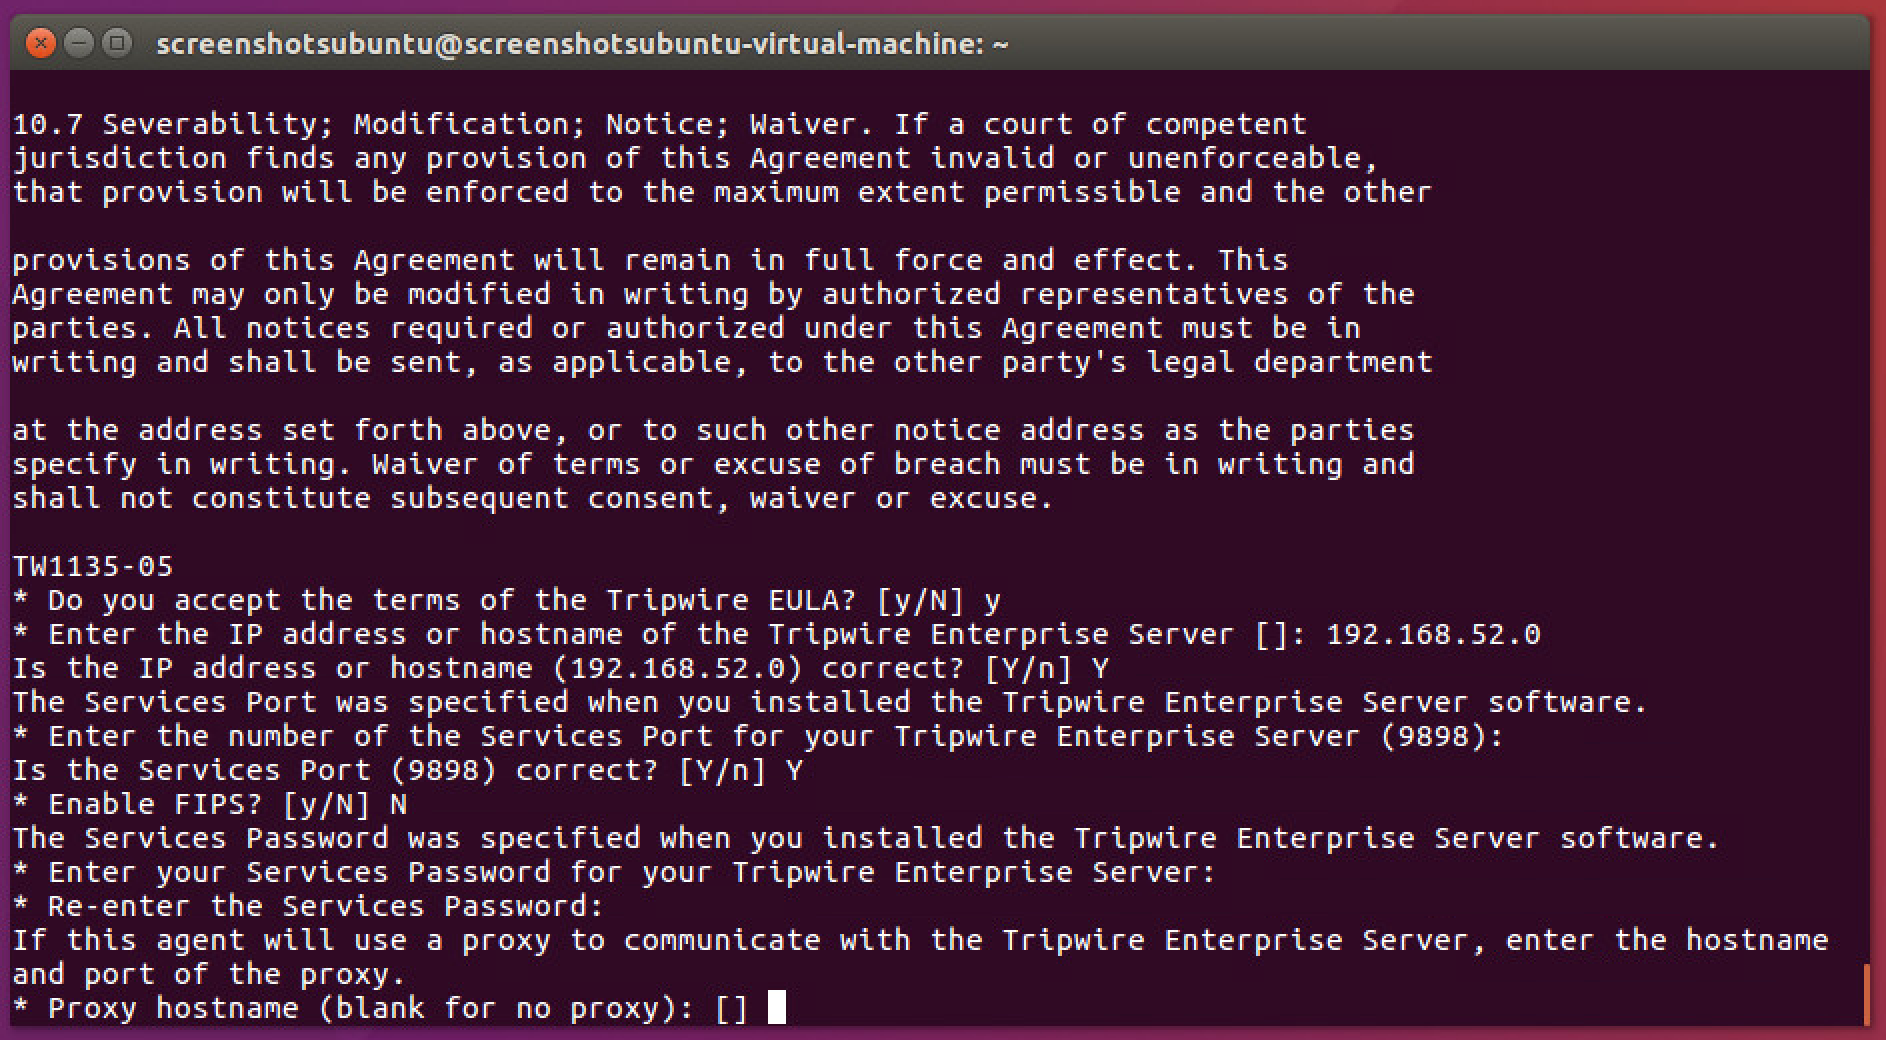
Enter Y to accept the EULA.
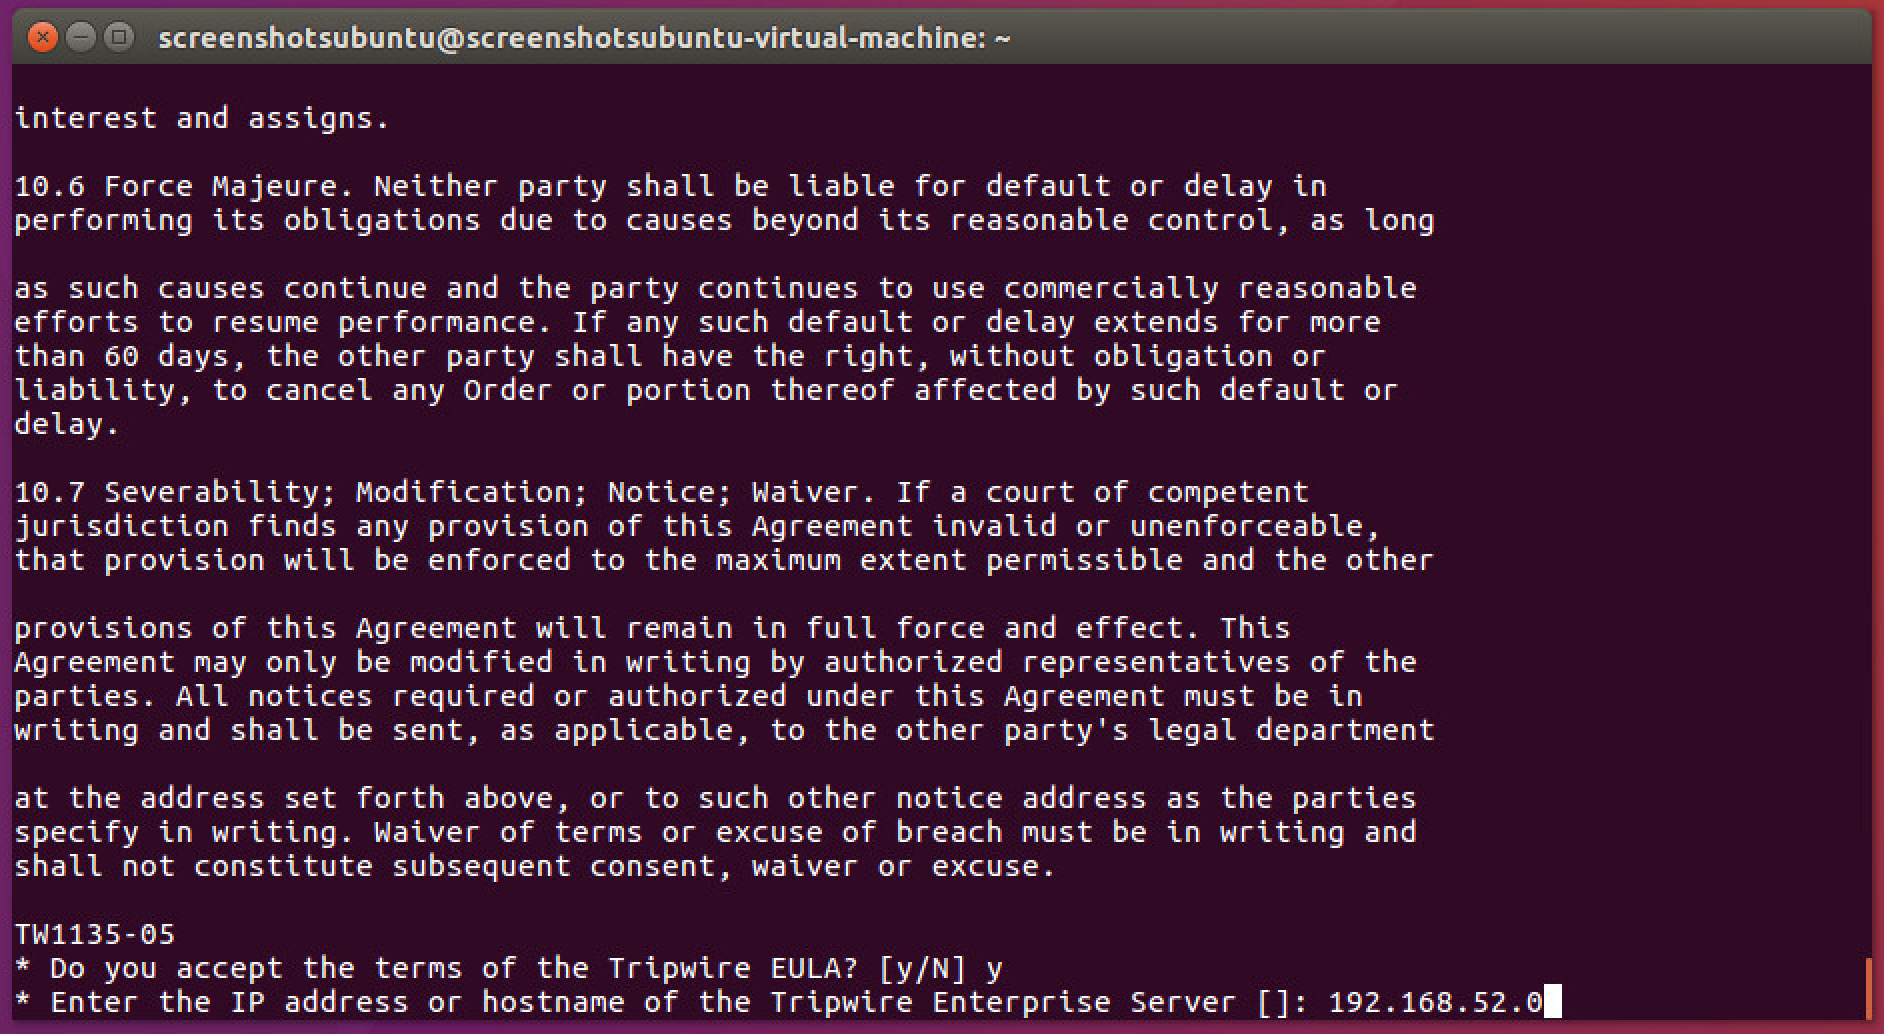
Press Enter.
Enter the IP address of the Tripwire server.
Press Enter.
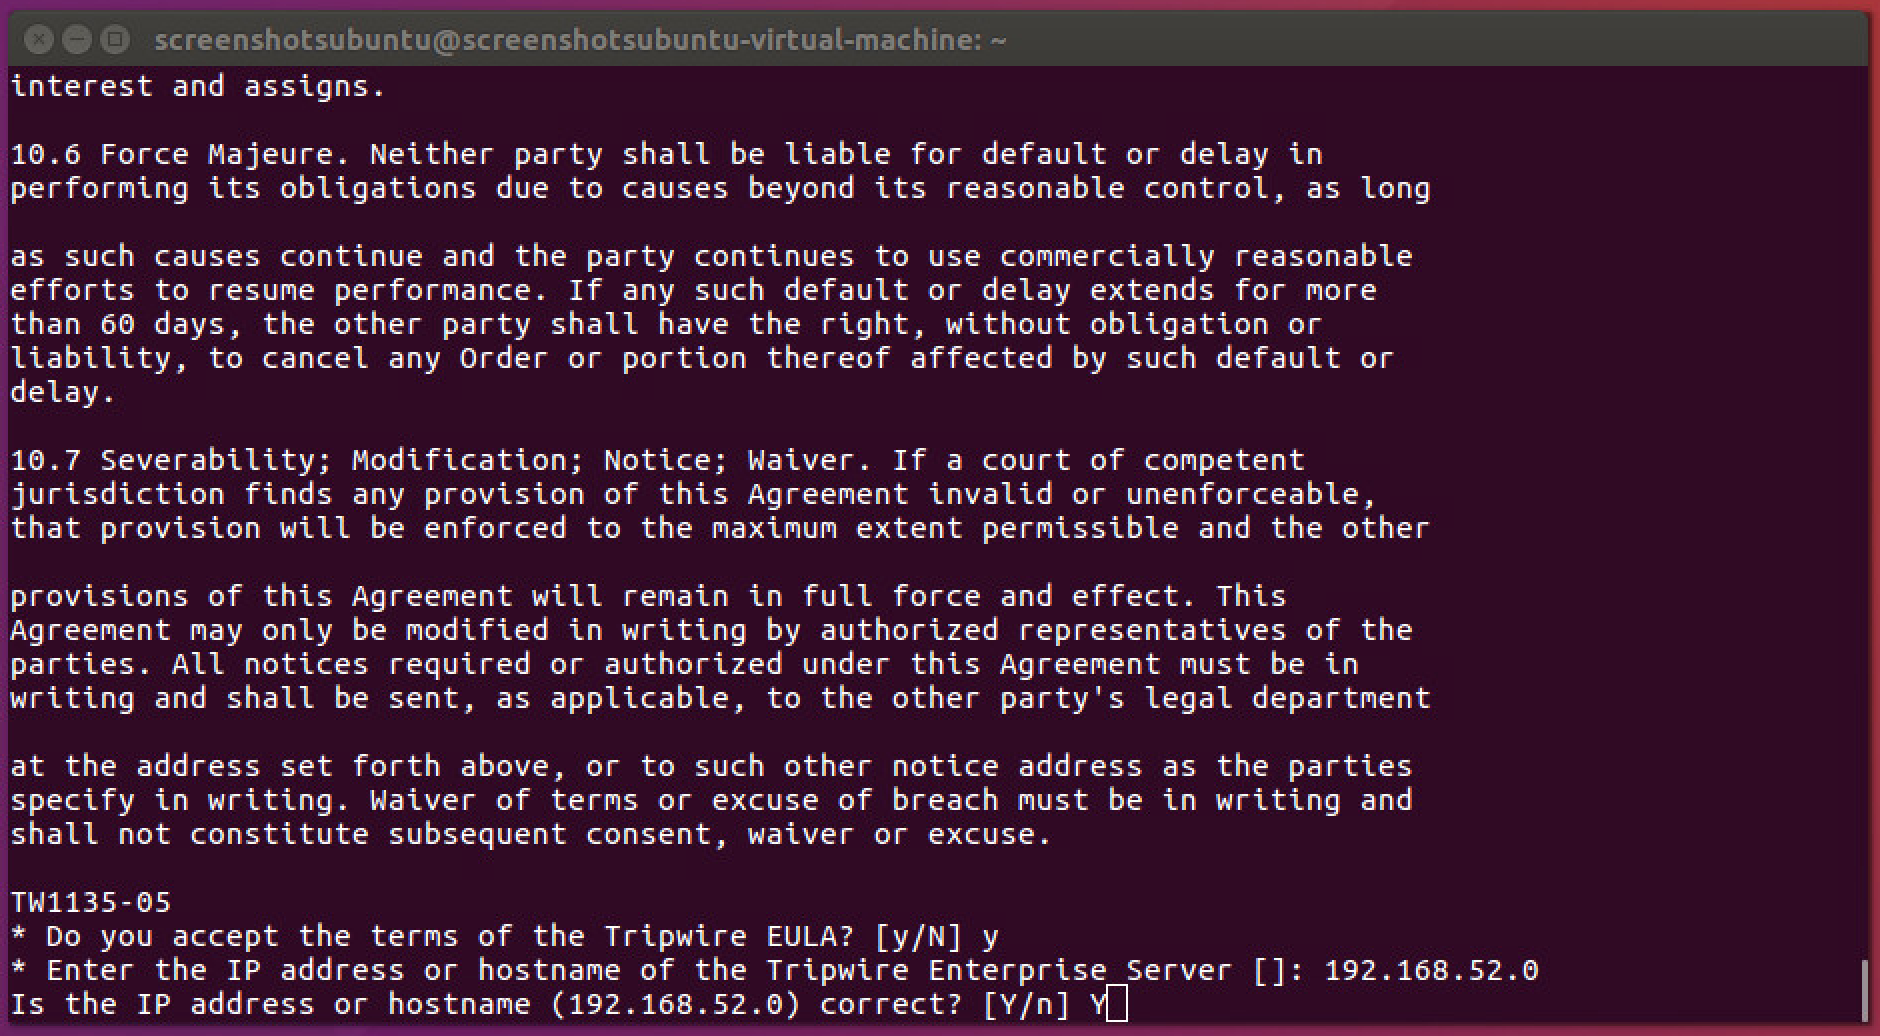
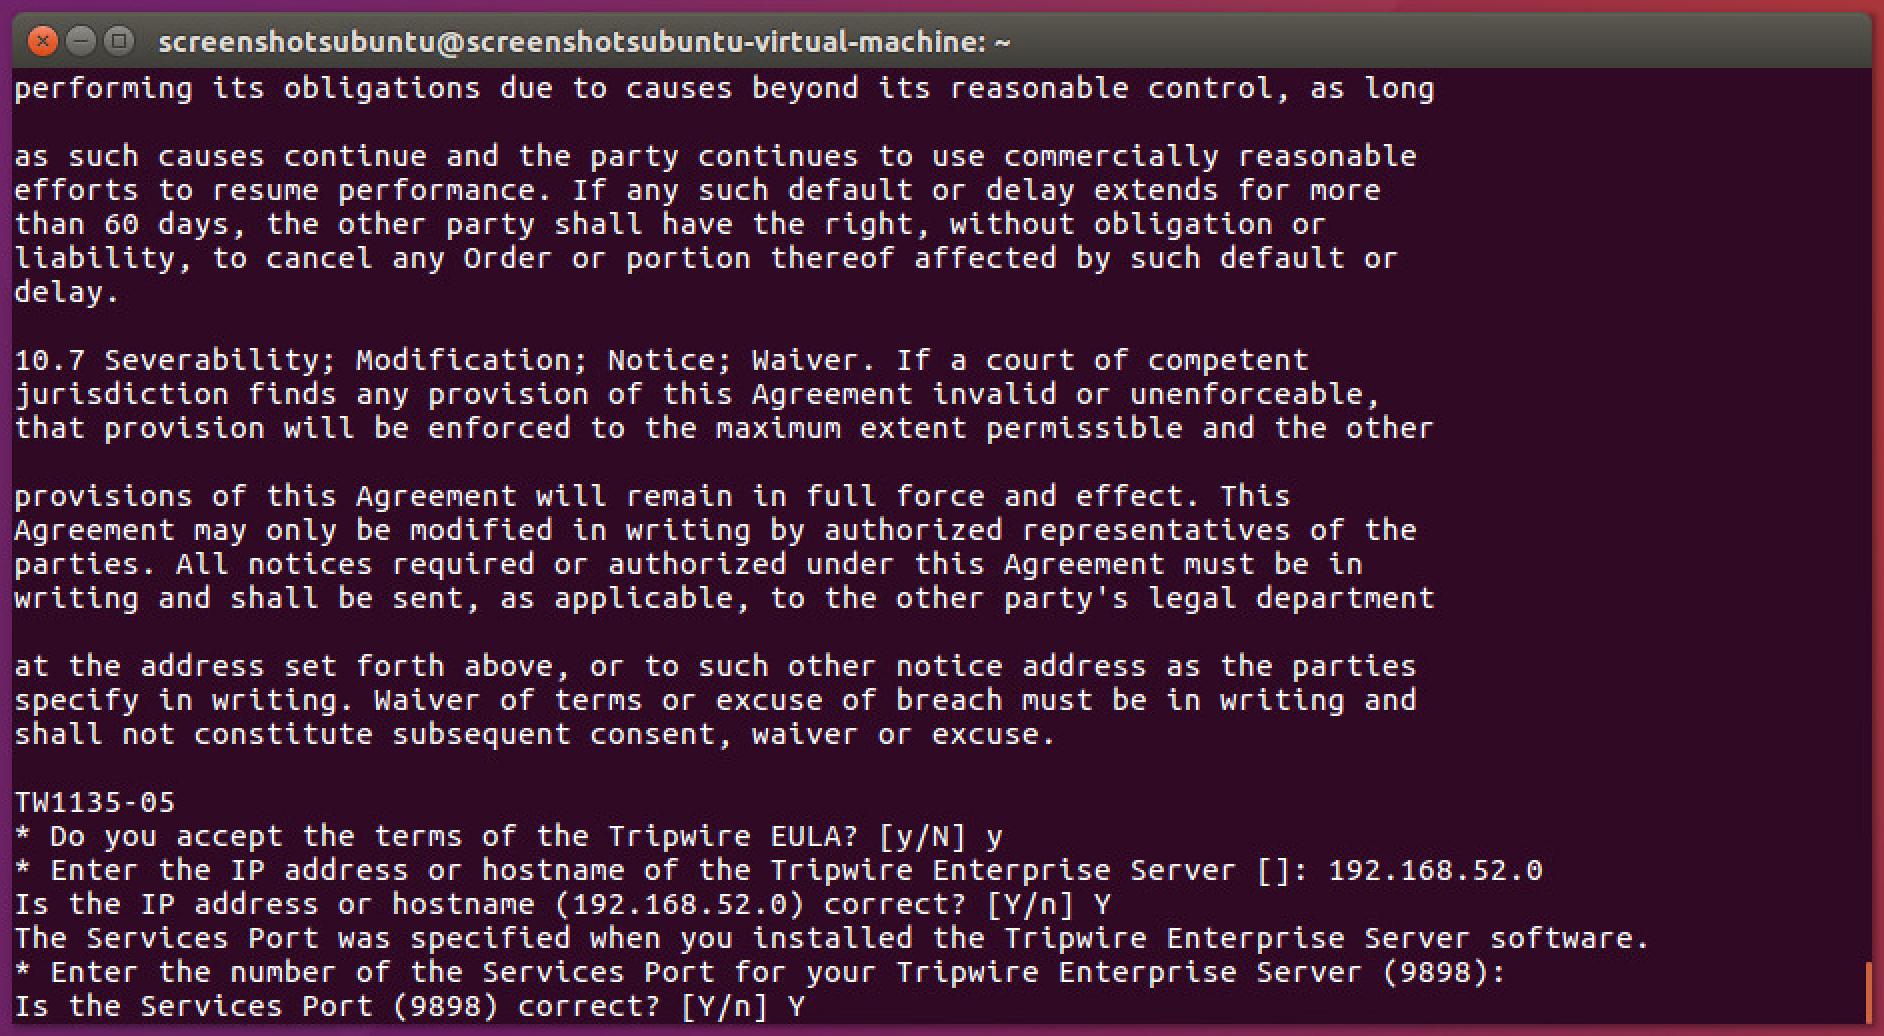
Enter Y if the address was entered correctly.
Press Enter.
Press Enter.
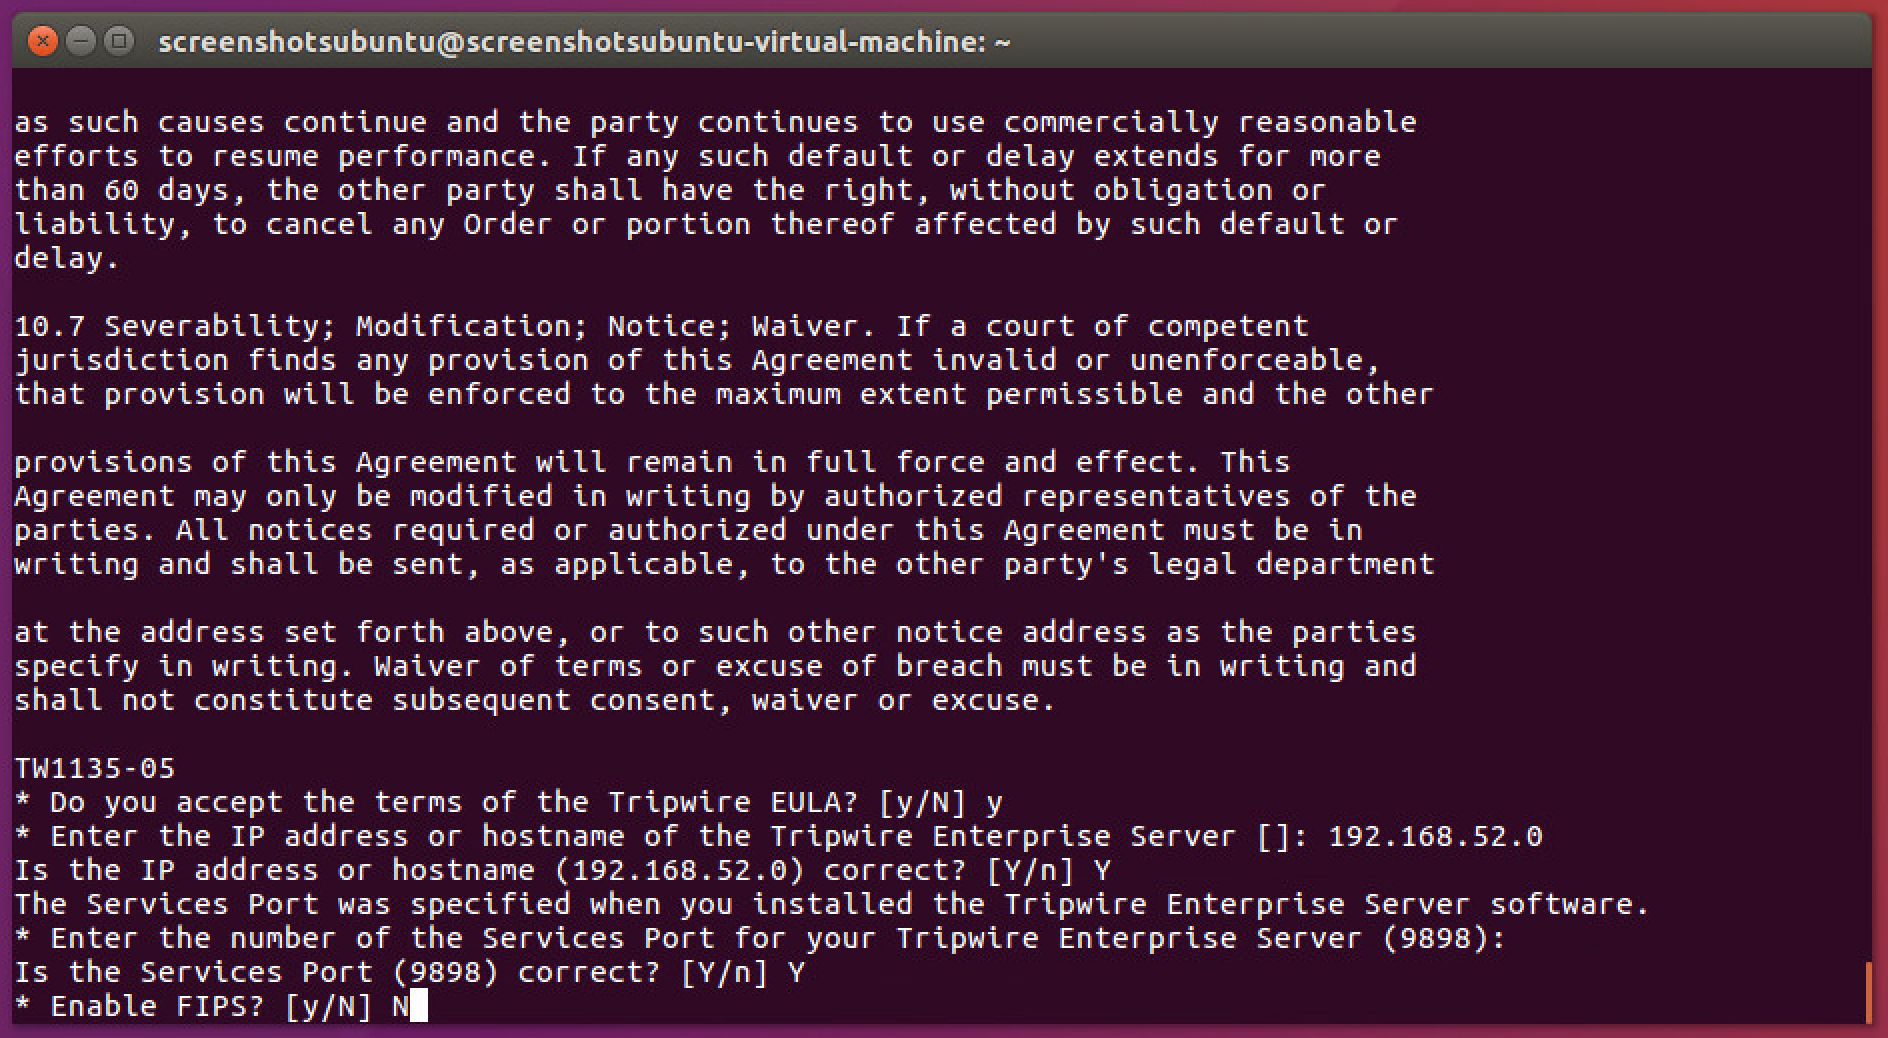
Enter Y to use the default port number.
Press Enter.
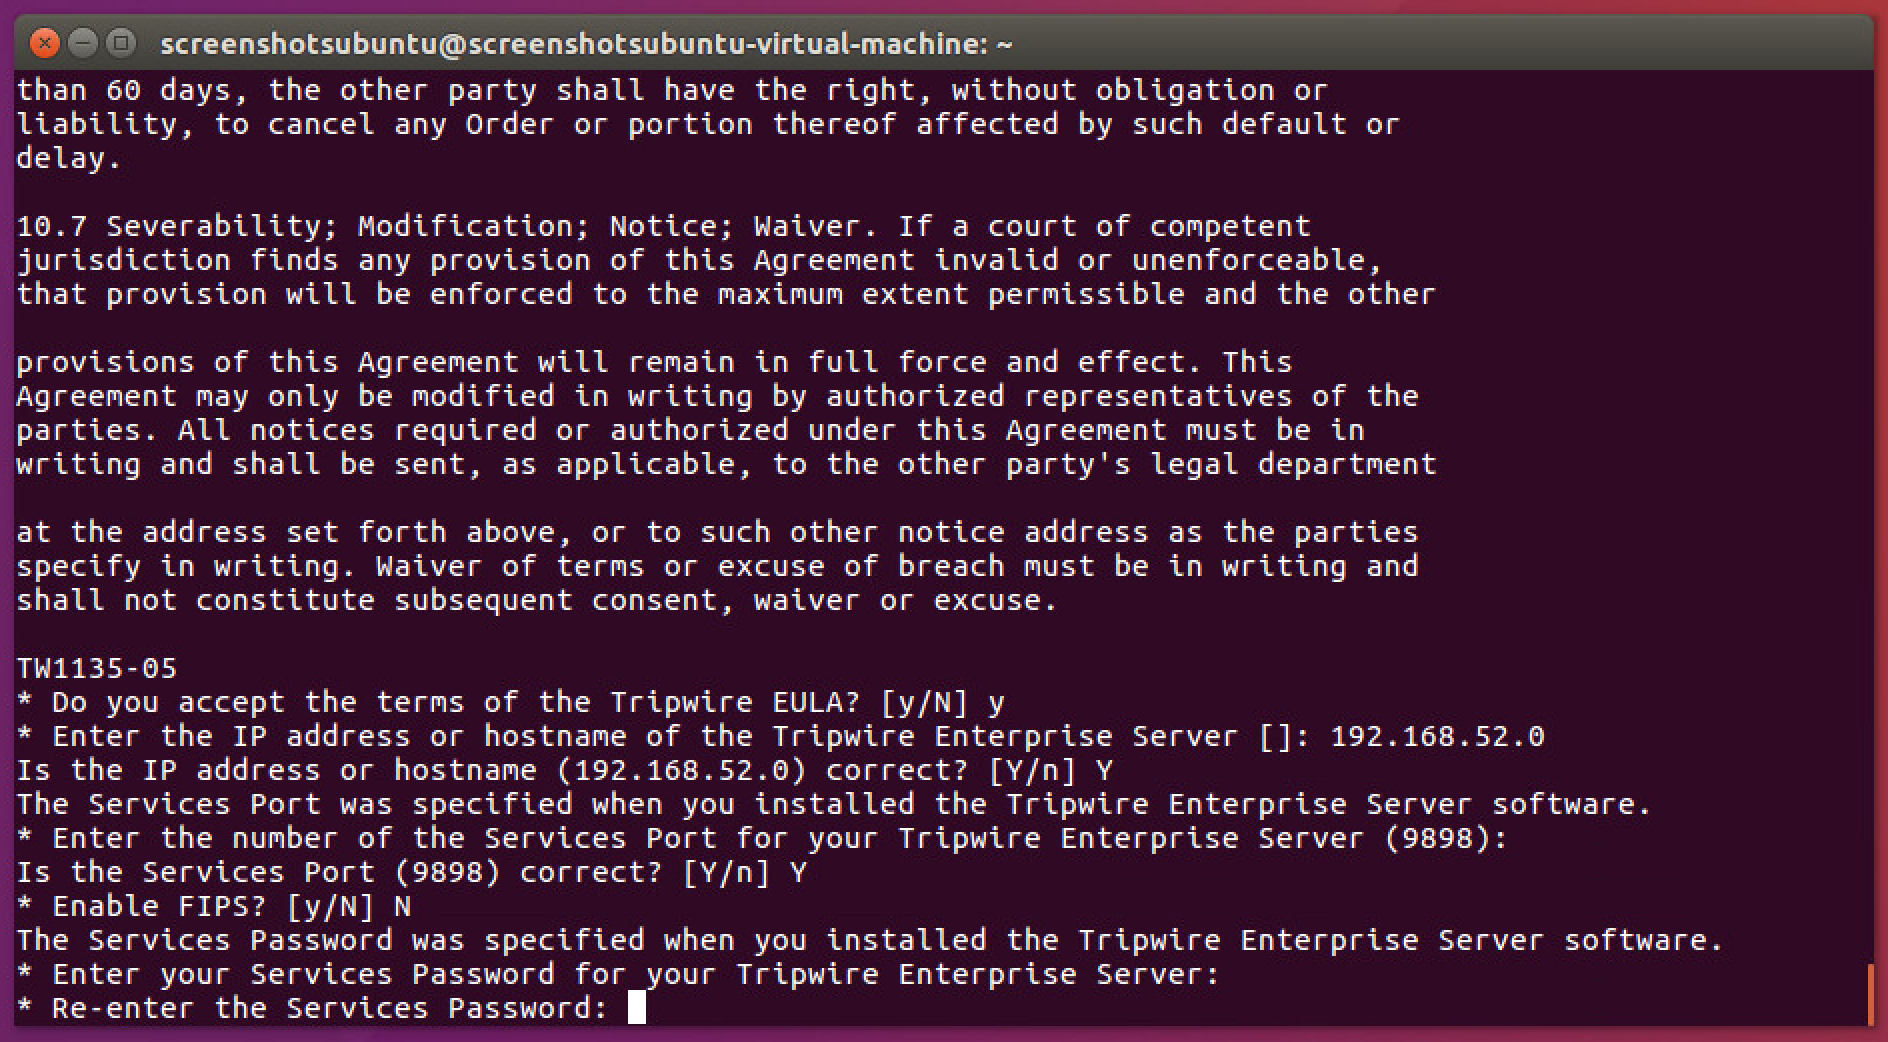
Enter N to disable the use of the Federal Information Processing Standard (FIPS), unless your system requires the use of FIPS.
Press Enter.
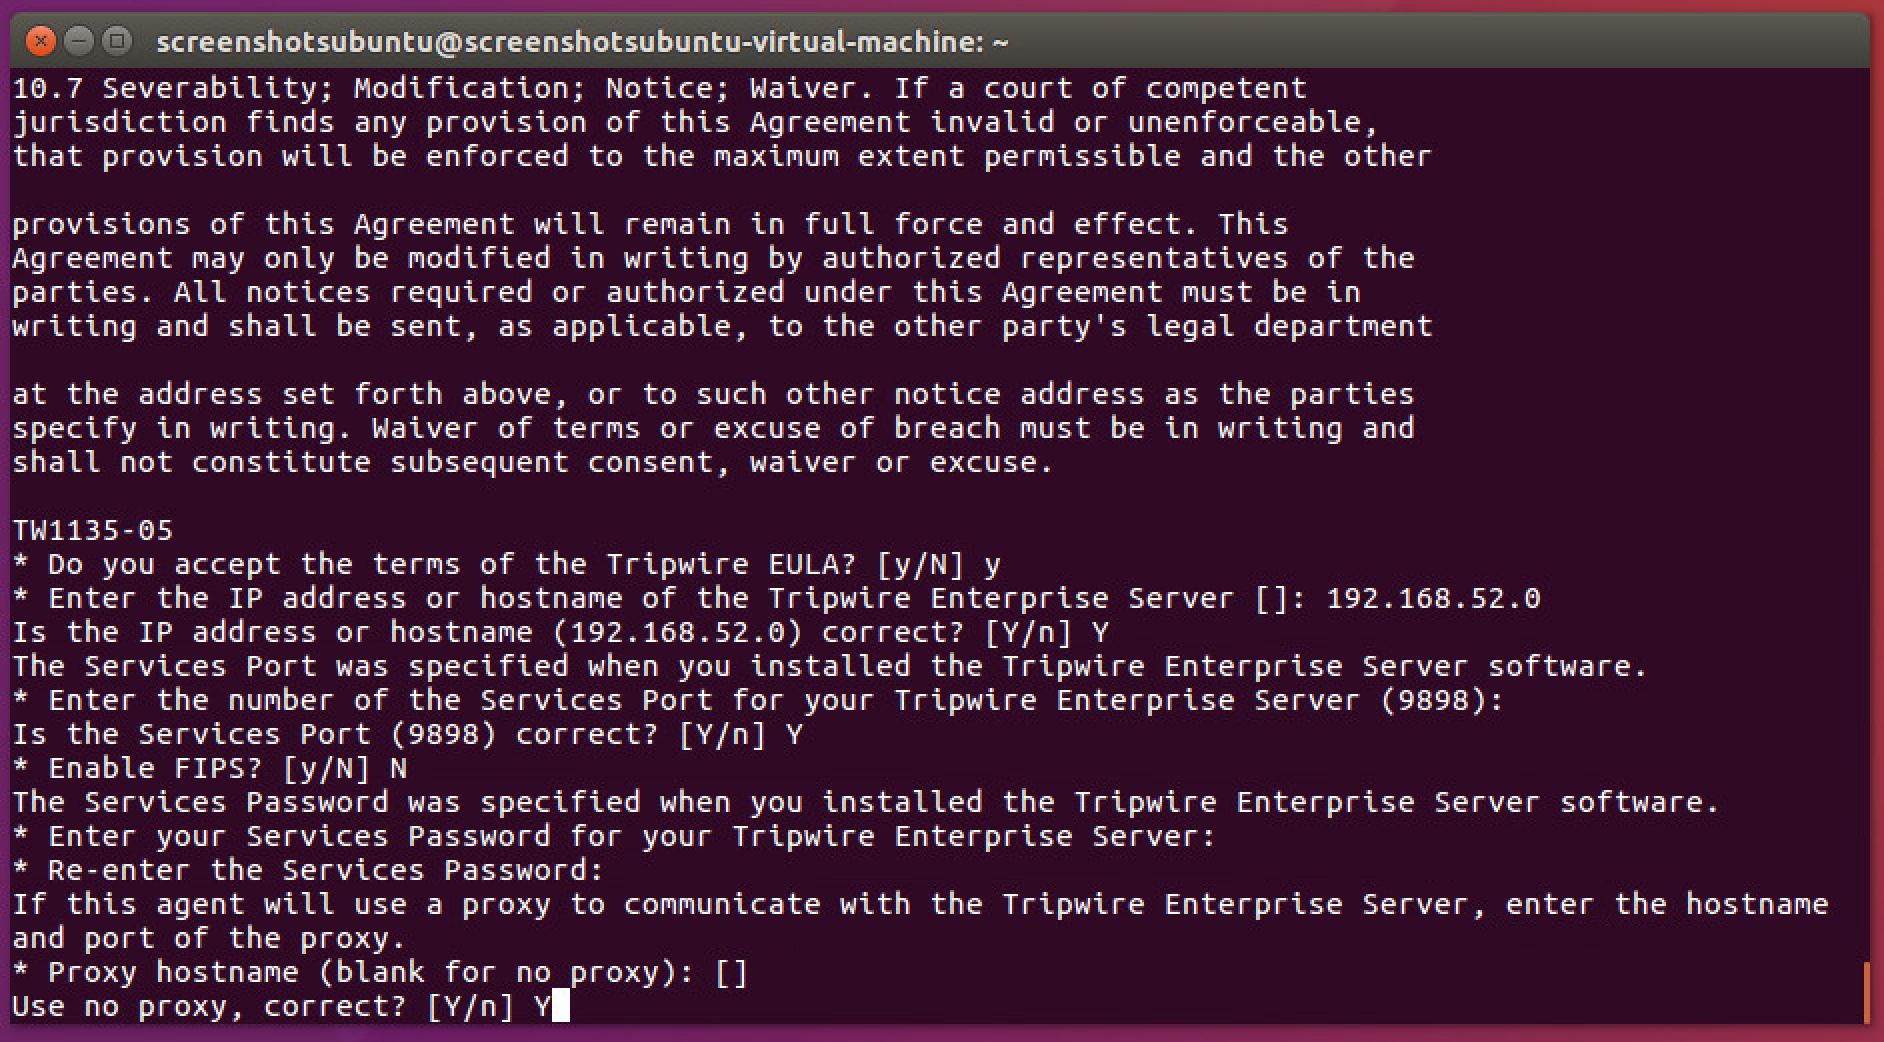
Enter the services password twice, pressing Enter after each time. Note that no text will appear while typing the password.
Press Enter to skip using a proxy.
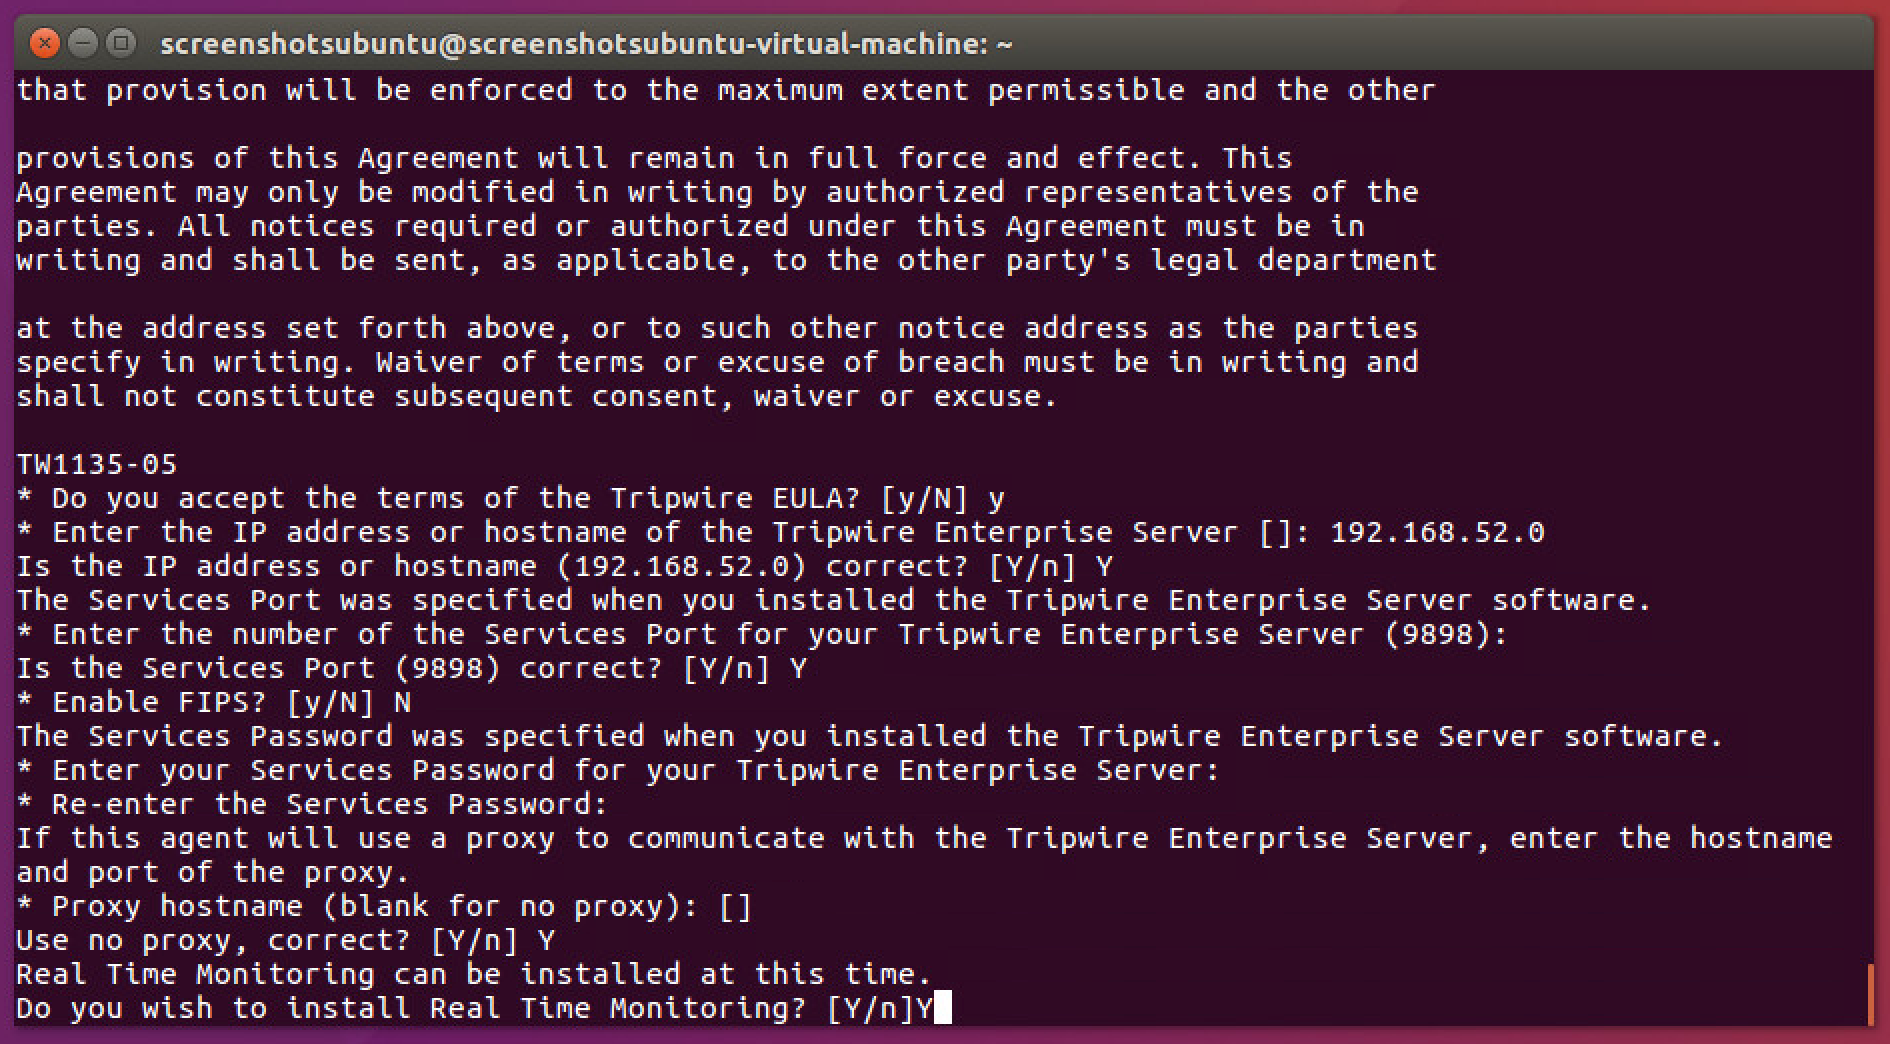
Press Y.
Press Enter.
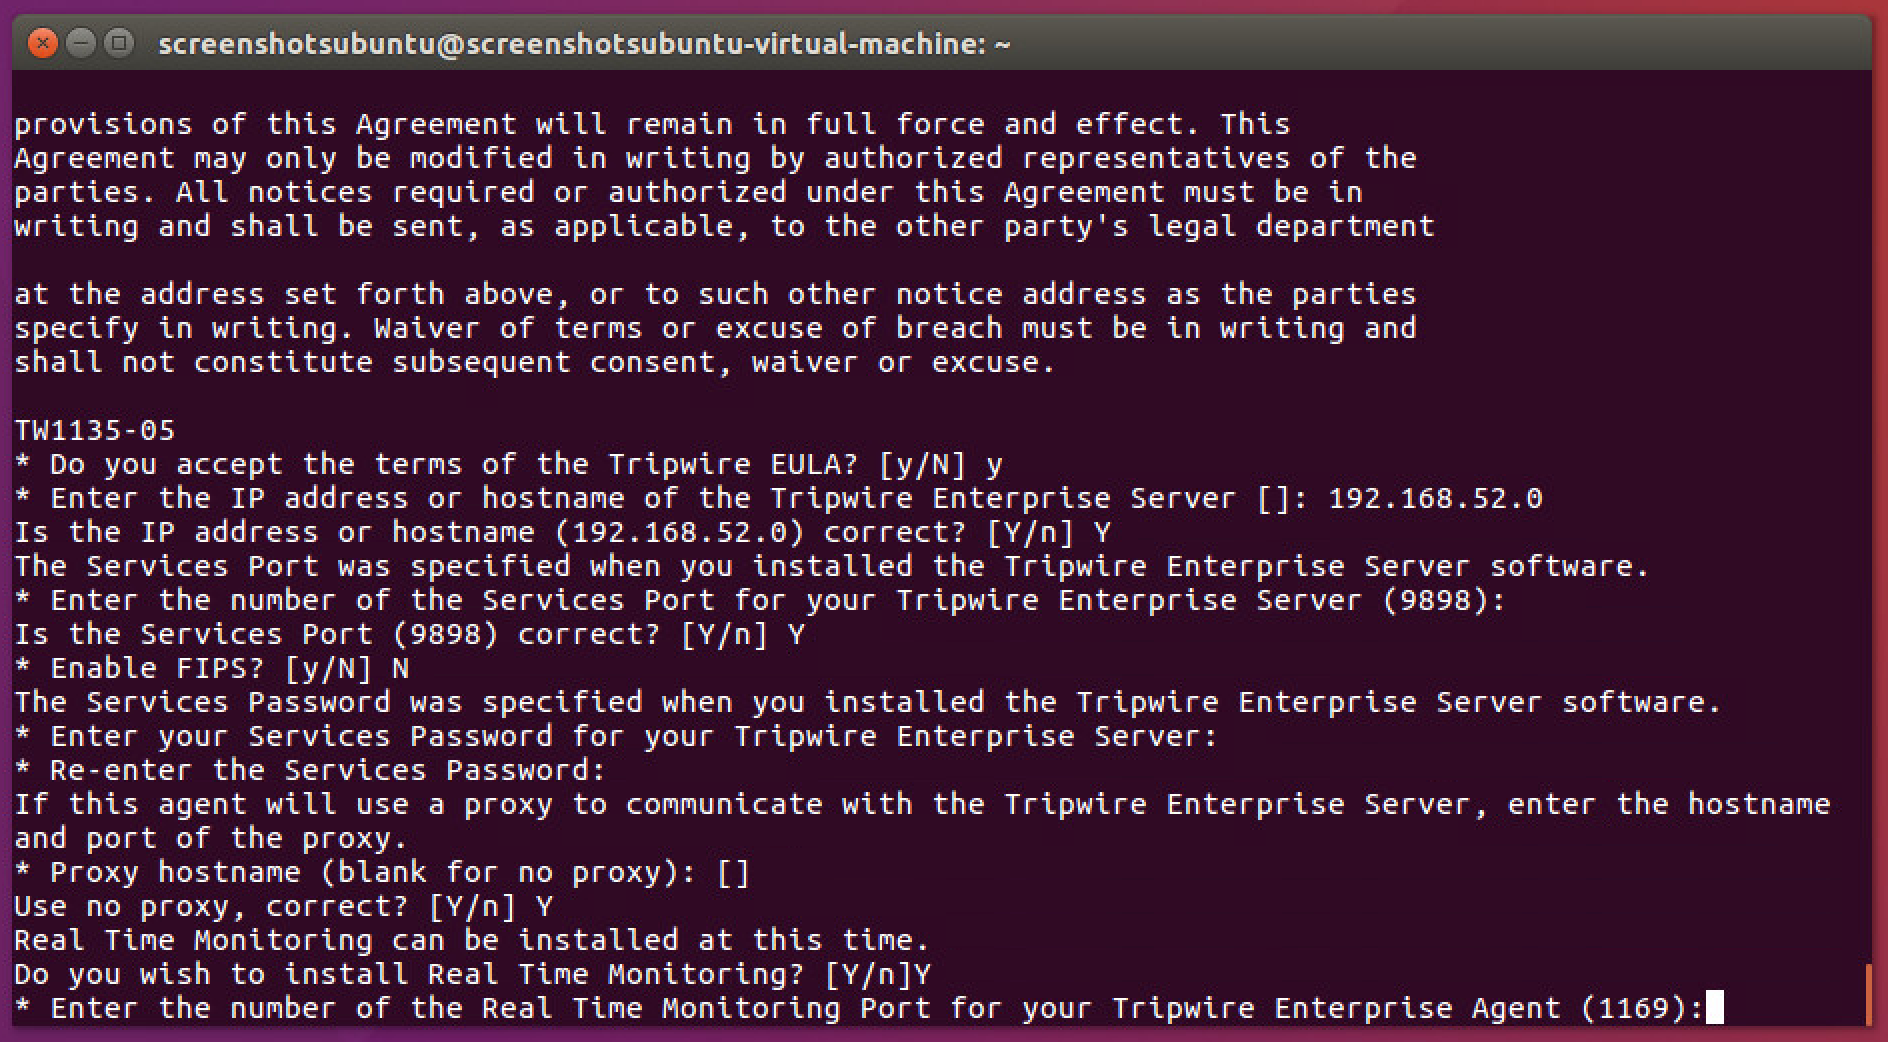
Press Y to install Real Time Monitoring.
Press Enter.
Press Enter to accept the default port.
Press Y.
Press Enter.
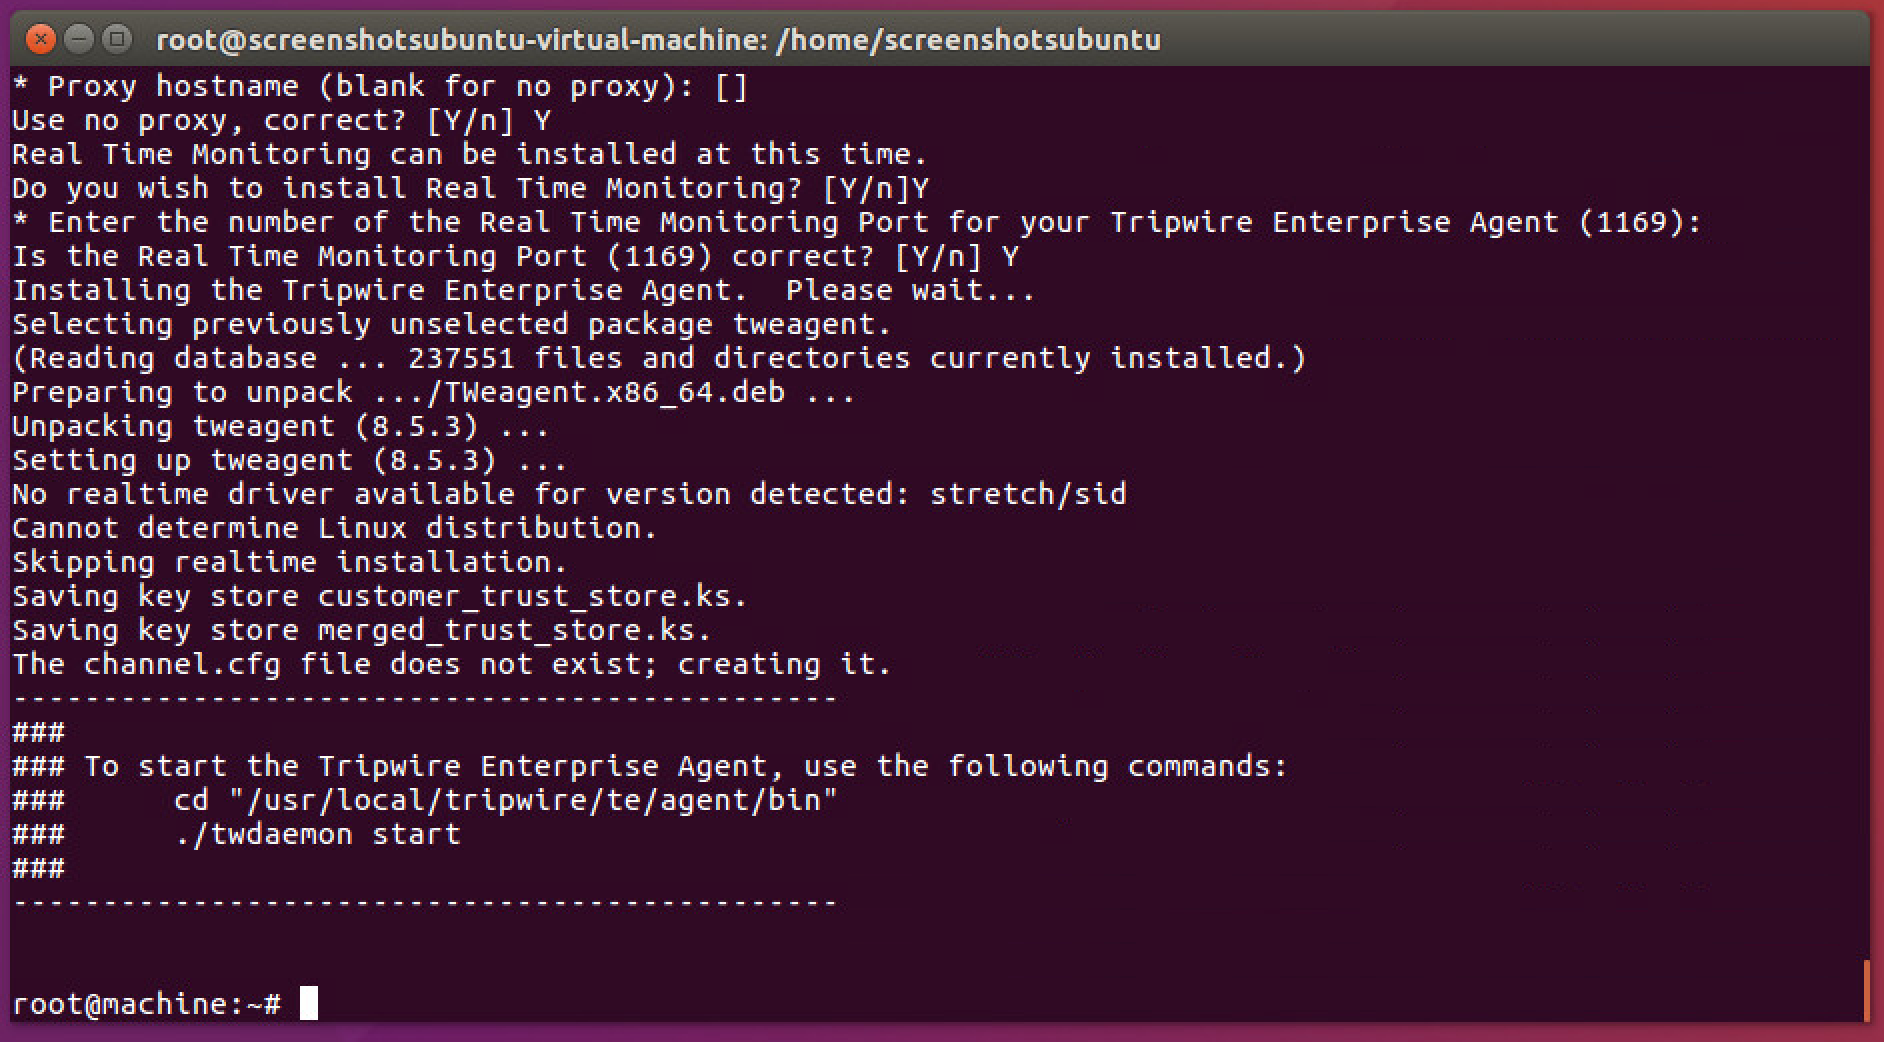
The agent should install.
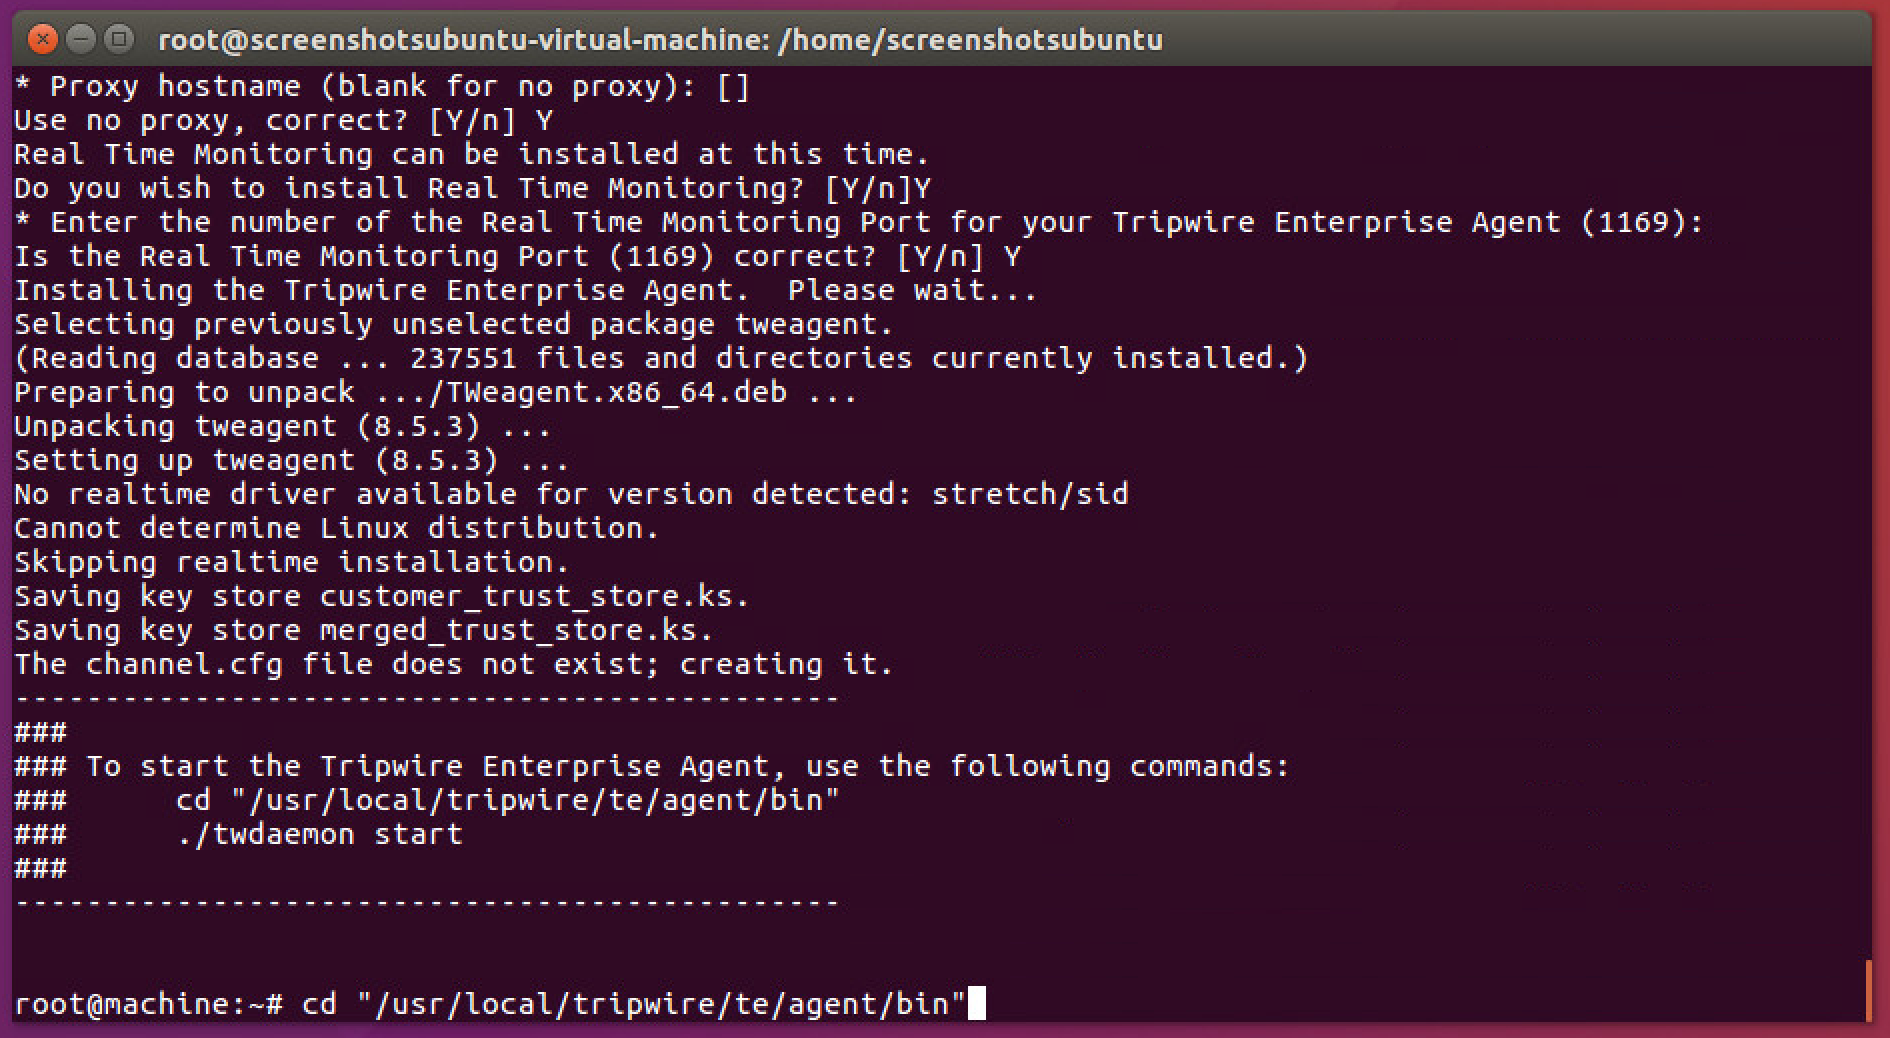
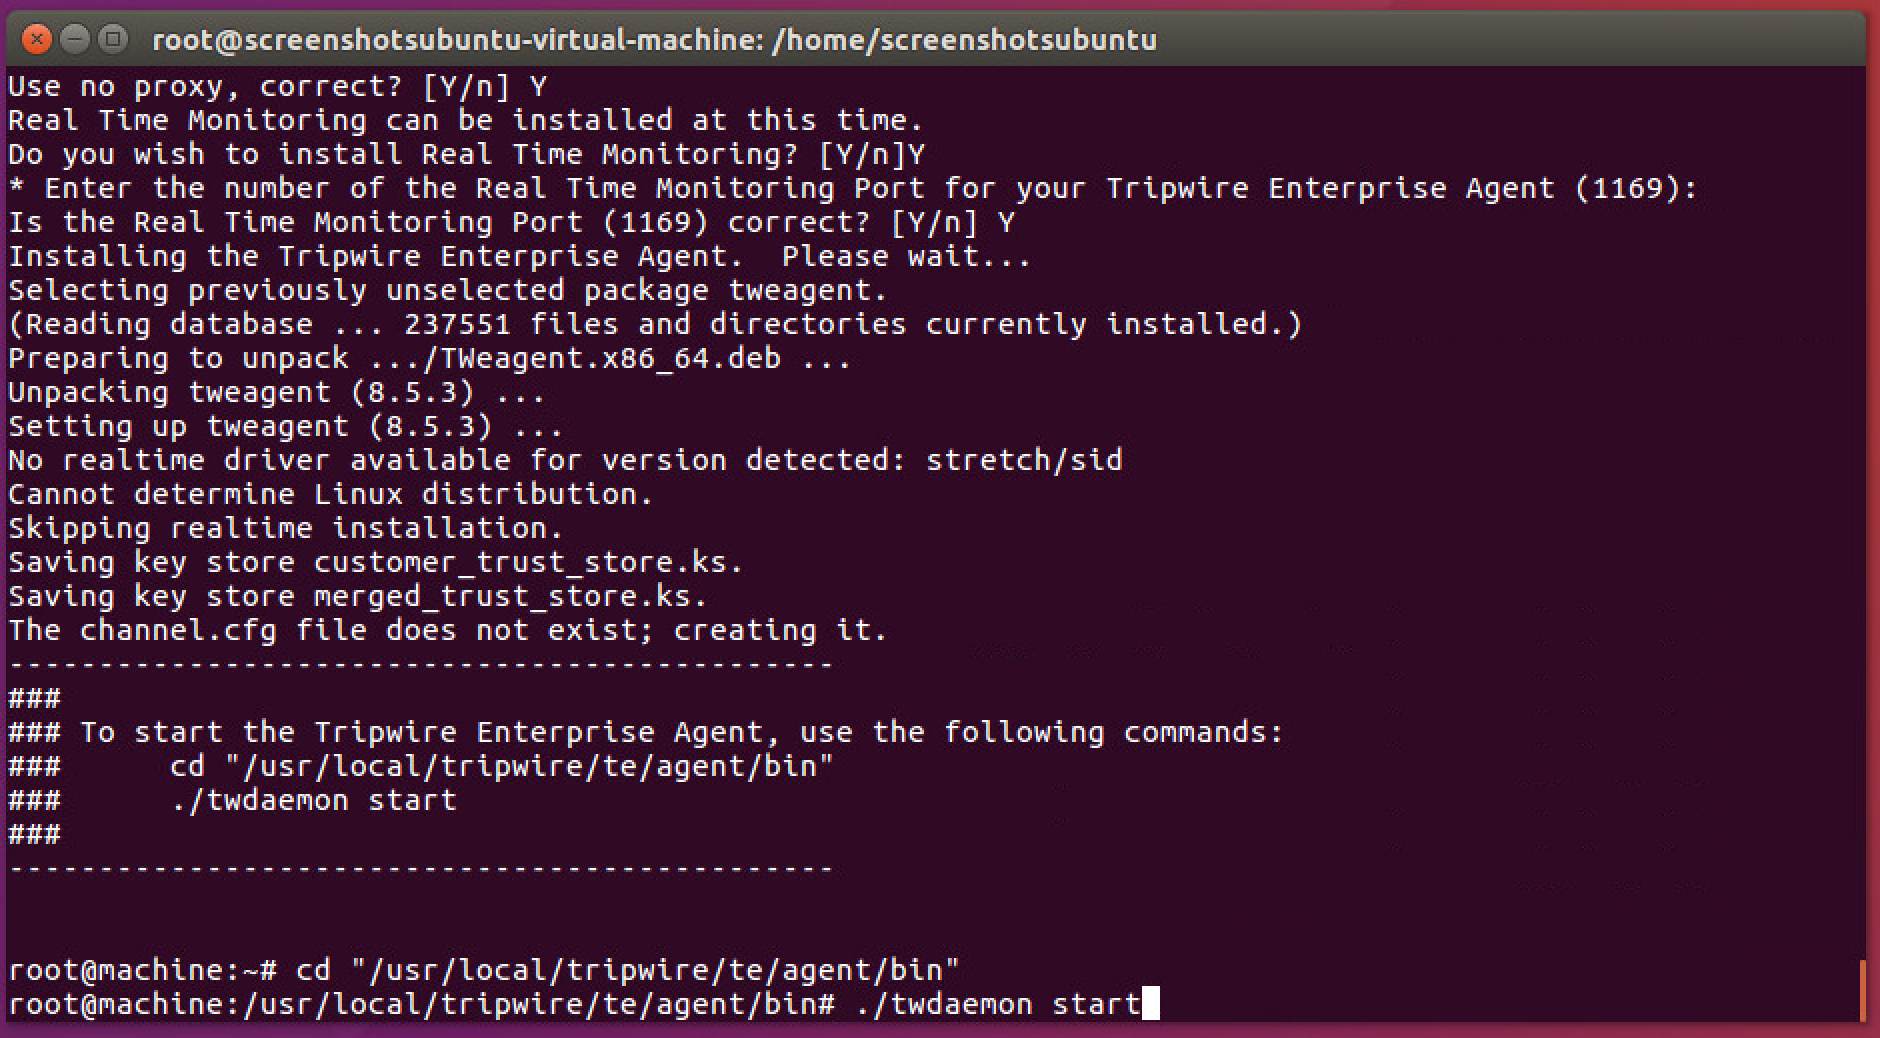
Run the following commands as root:
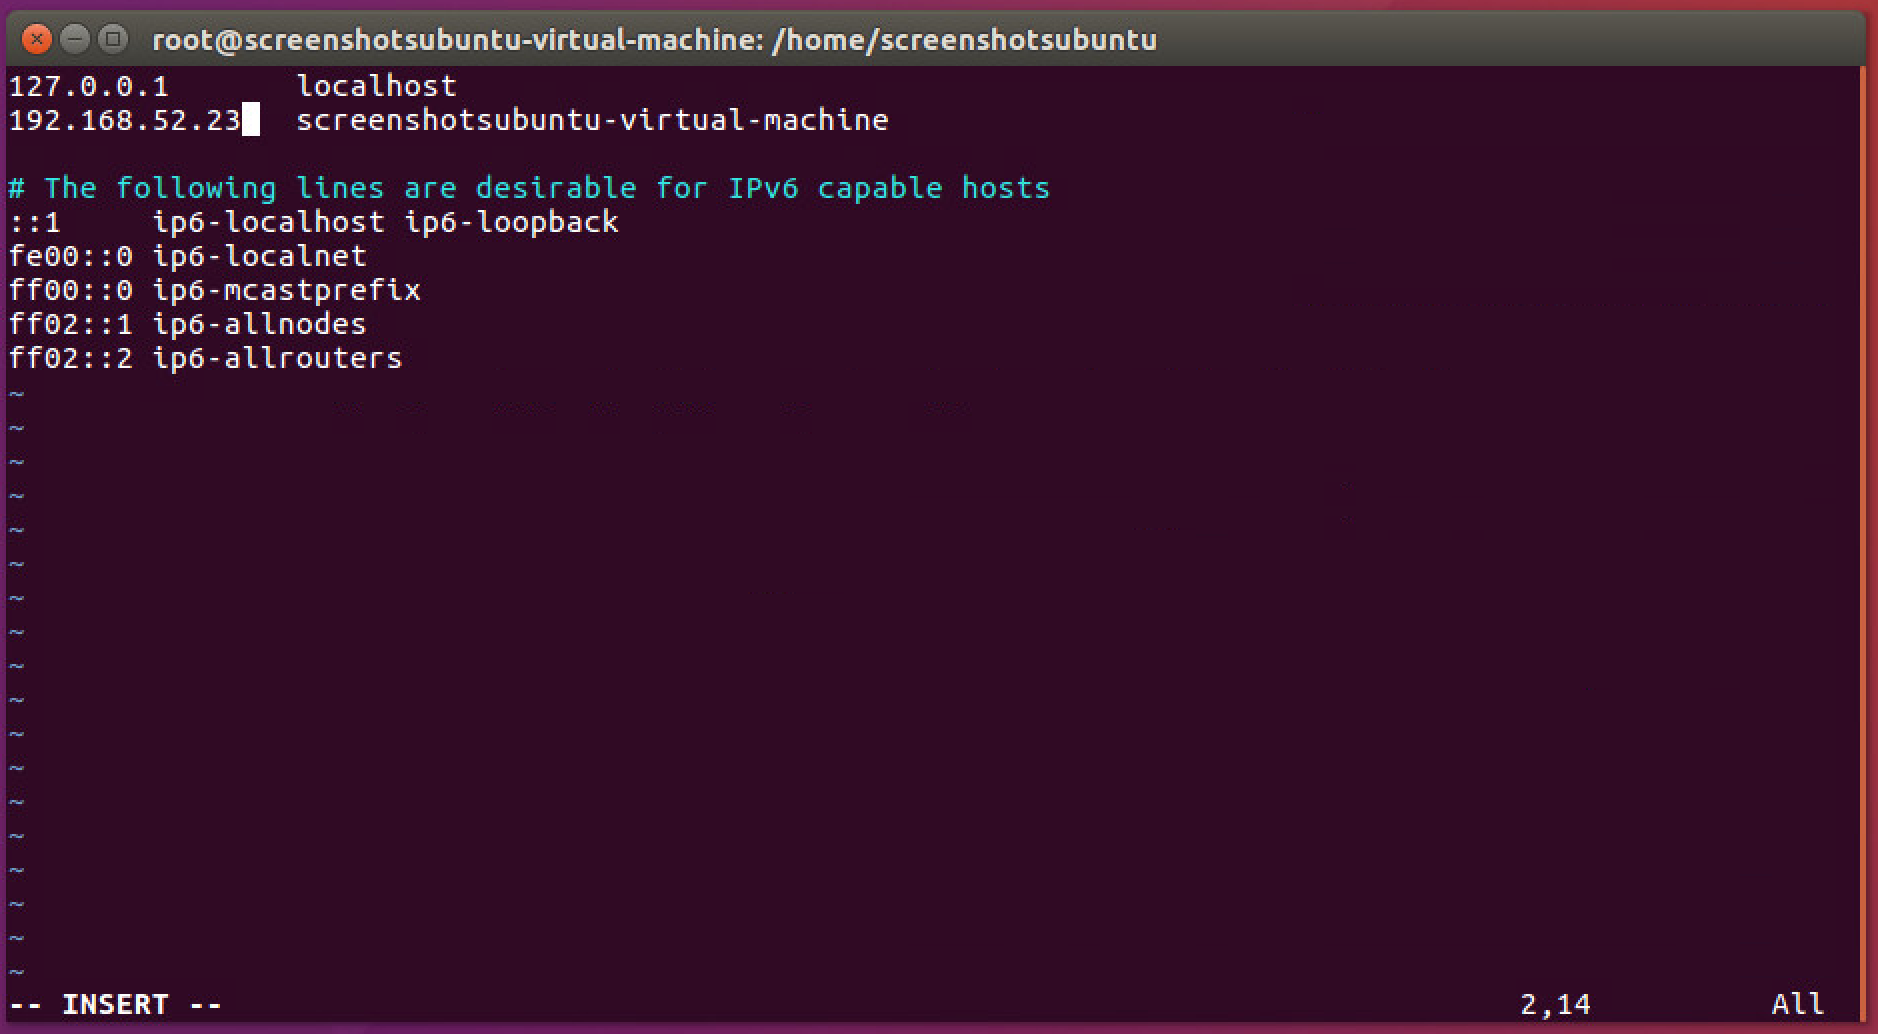
You may need to change /etc/hosts in Debian systems if there is a line which looks like this:
127.0.1.1 <hostname>Change this to:
<IP of machine> <hostname>Otherwise, Tripwire Enterprise may consider multiple Debian machines as the same machine in the assets view of Tripwire Enterprise.
2.10.3. Install Tripwire Log Center
See the Tripwire Log Center 7.2.4 Installation Guide that should accompany the installation media for instructions on how to install TLC. Use the Tripwire Log Center Manager installer.
Notes:
- It is recommended that you install Tripwire Log Center on a separate system from Tripwire Enterprise.
- You will need to install JRE8 and the Crypto library. Instructions are also in the Tripwire Log Center Installation Guide.
- You may need to unblock port 9898 on your firewall for the Tripwire enterprise agents.
- Do not install PostgreSQL if you wish to use a database on another system.
- When it finishes installing there should be a configuration wizard.
2.10.4. Configure Tripwire Log Center
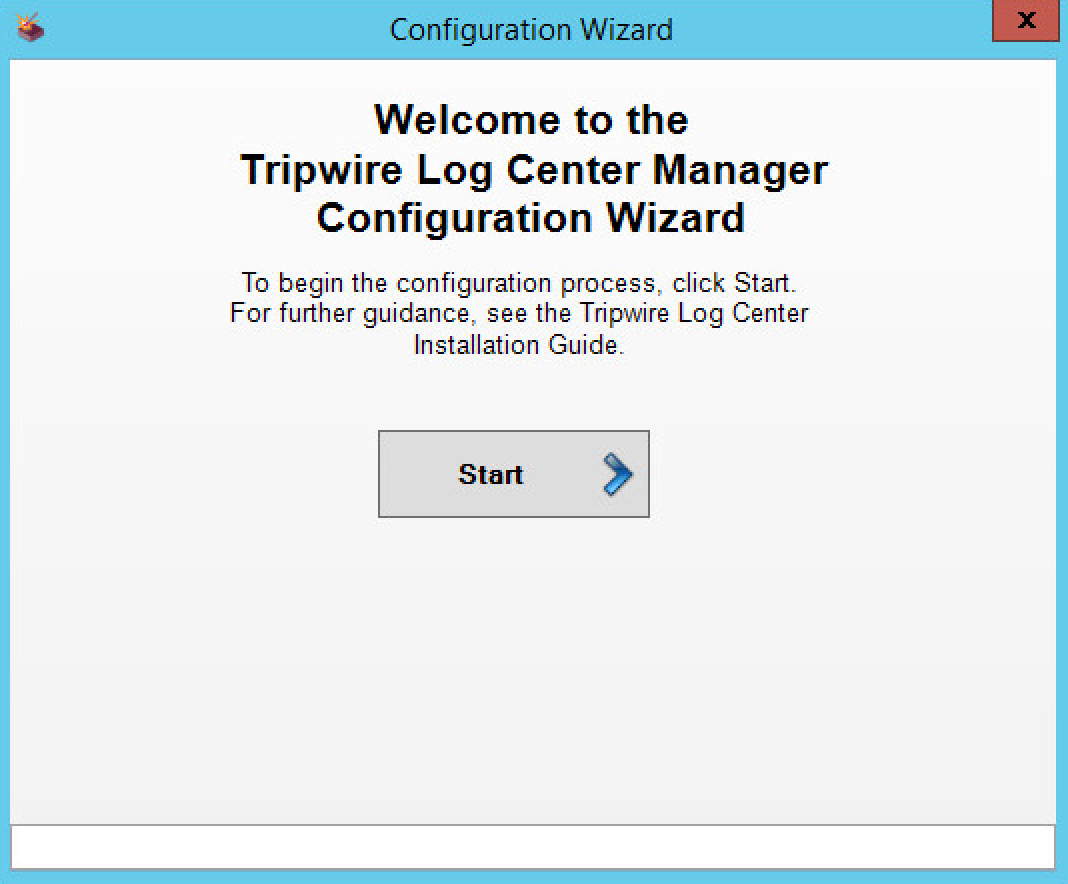
Click Start.
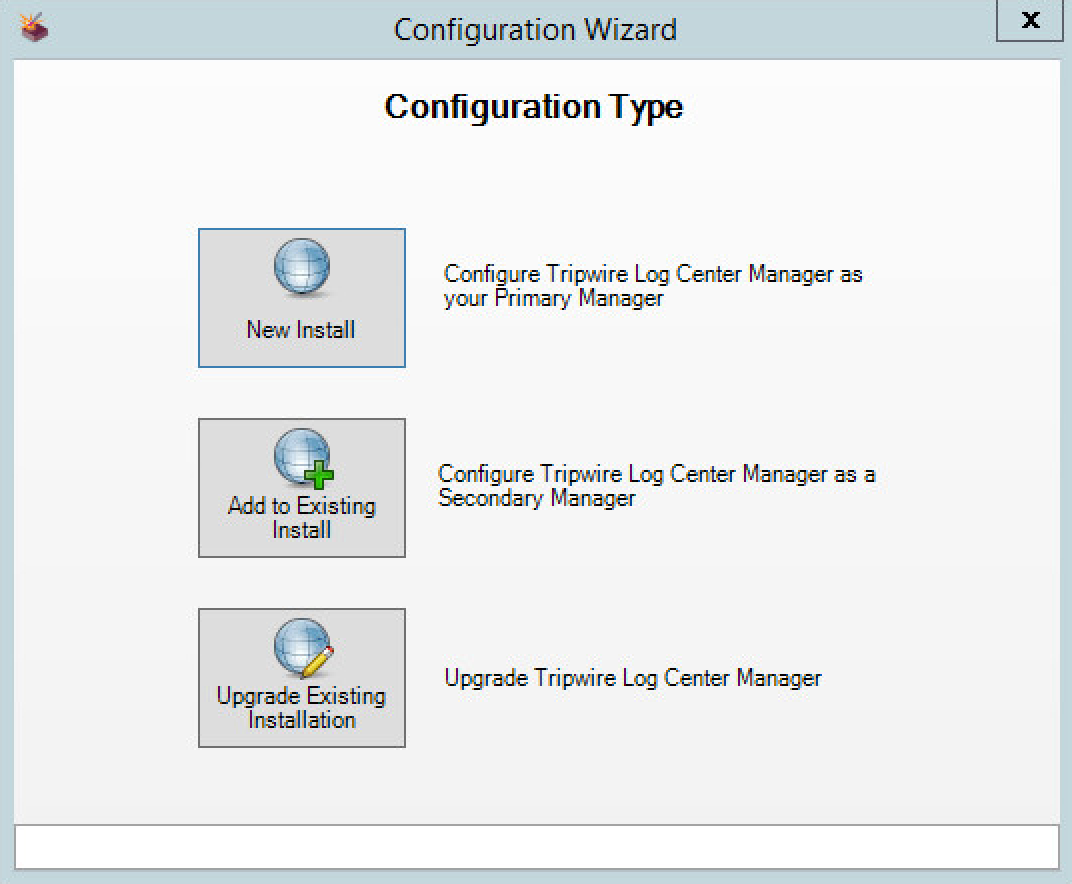
Click New Install.
Click Authorize.
An error may appear asking you to install .NET 3.5.
To do this, open Server Manager.
Click Manage.
Click Add Roles and Features.
Click Next.
Select Role-based or feature-based installation.
Click Next.
Select the current server from the list.
Click Next.
Click Next.
Check the box next to .NET Framework 3.5 Features.
Click Install.
Wait for the installation to finish.
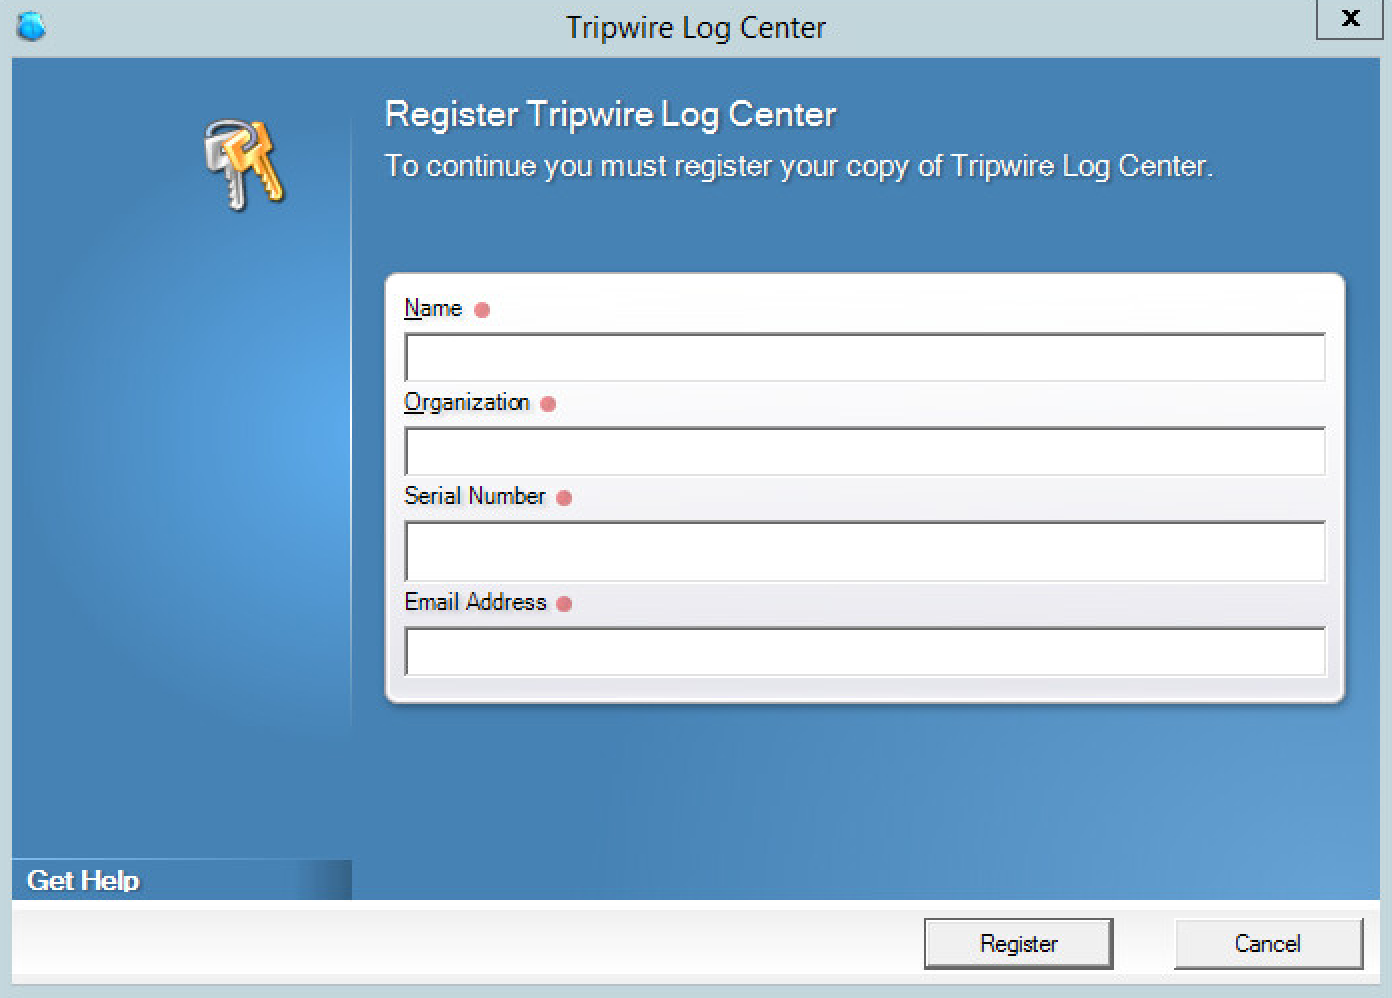
If prompted, enter Name, Organization, Serial Number, and email address in the fields. Click Register. This step will not appear if the software has already been registered
Click Close.
Continue with the configuration wizard.
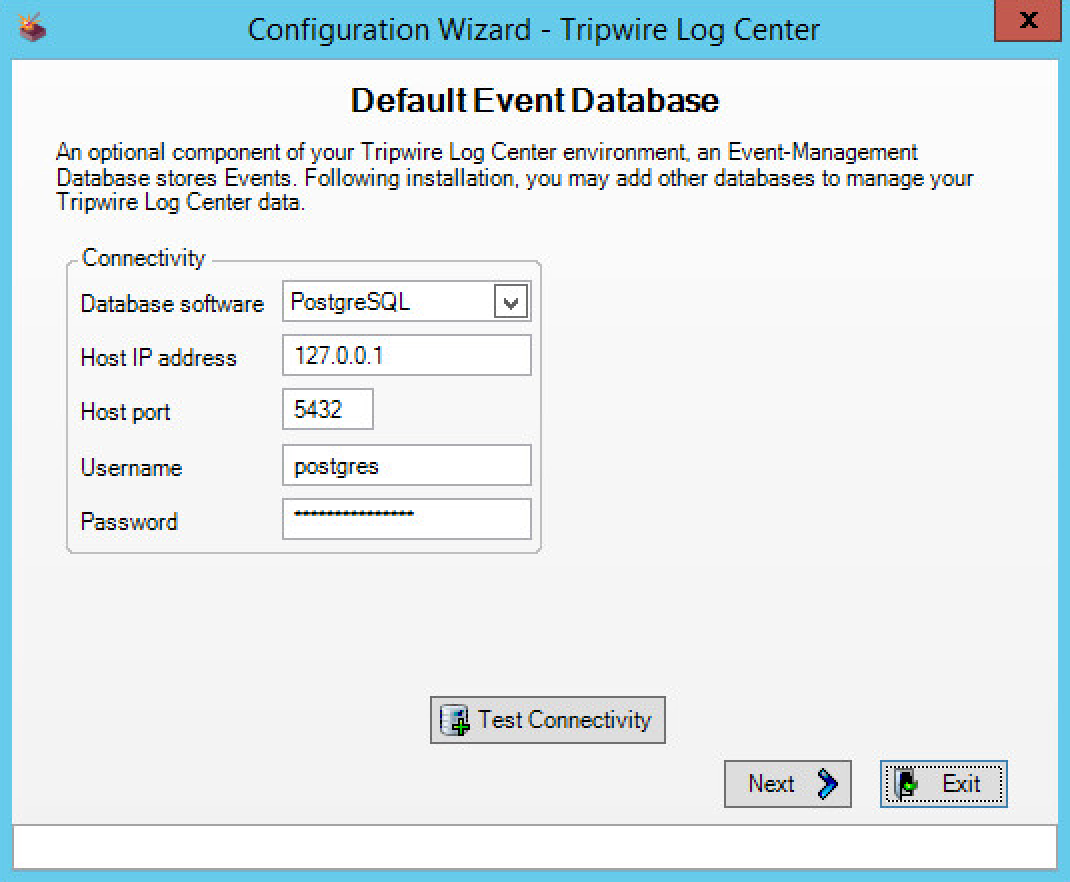
Enter appropriate details for your Database Software.
Select Use Windows Authentication.
Click Next.
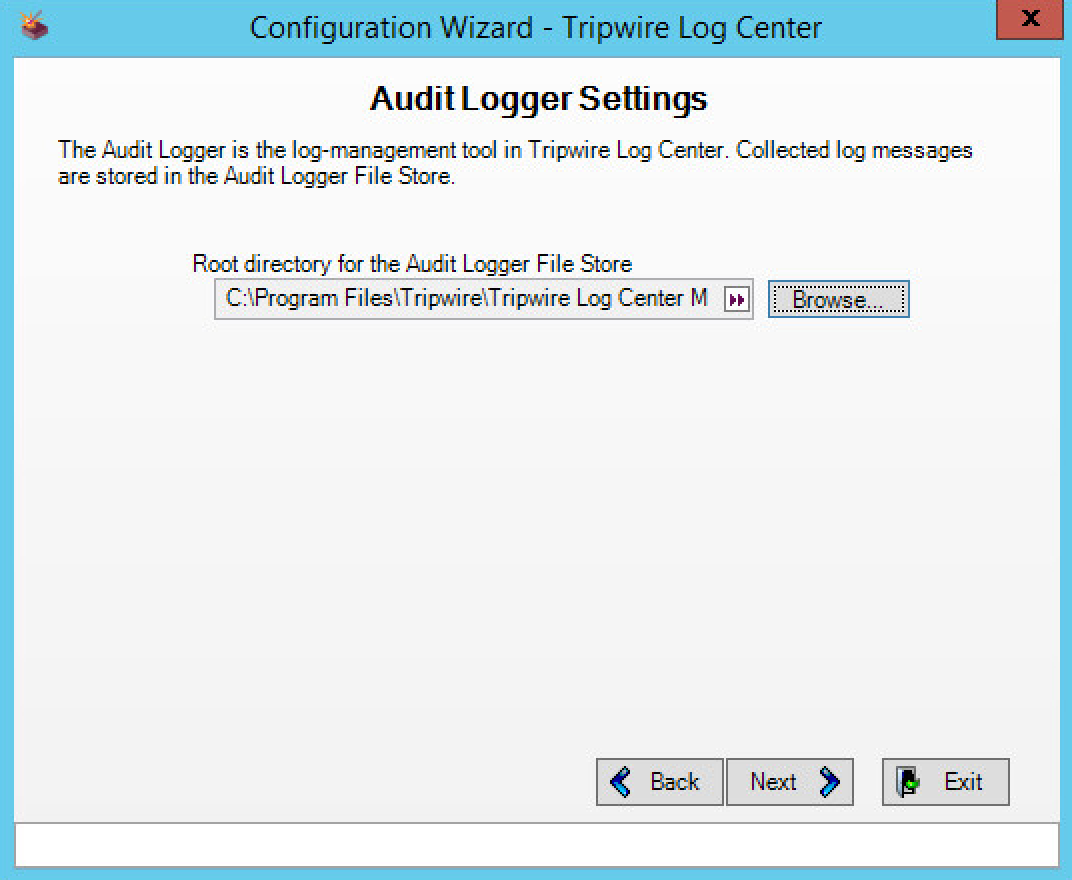
Select a directory to store log messages in. Example: C:\Program Files\Tripwire\Tripwire Log Center Manager\Logs\AUDIT
Click Next.
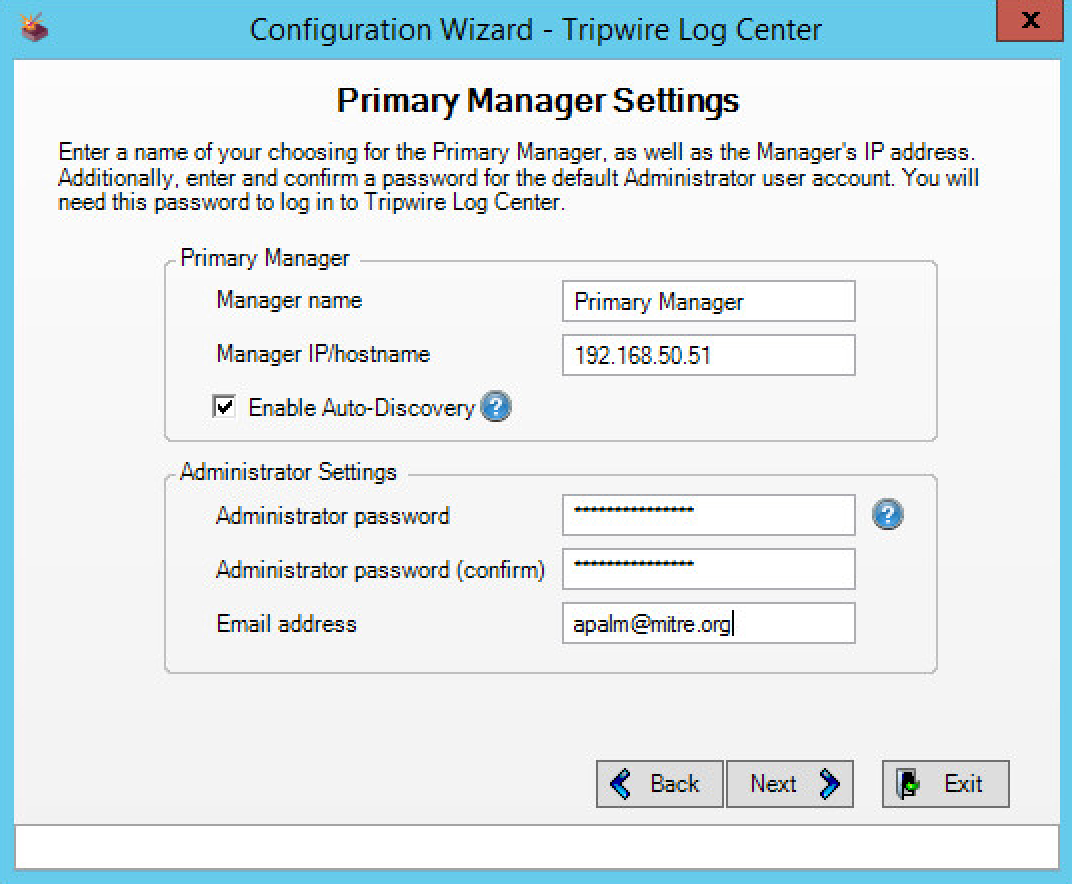
Create an Administrator password and enter it twice.
Enter your email address.
Click Next.
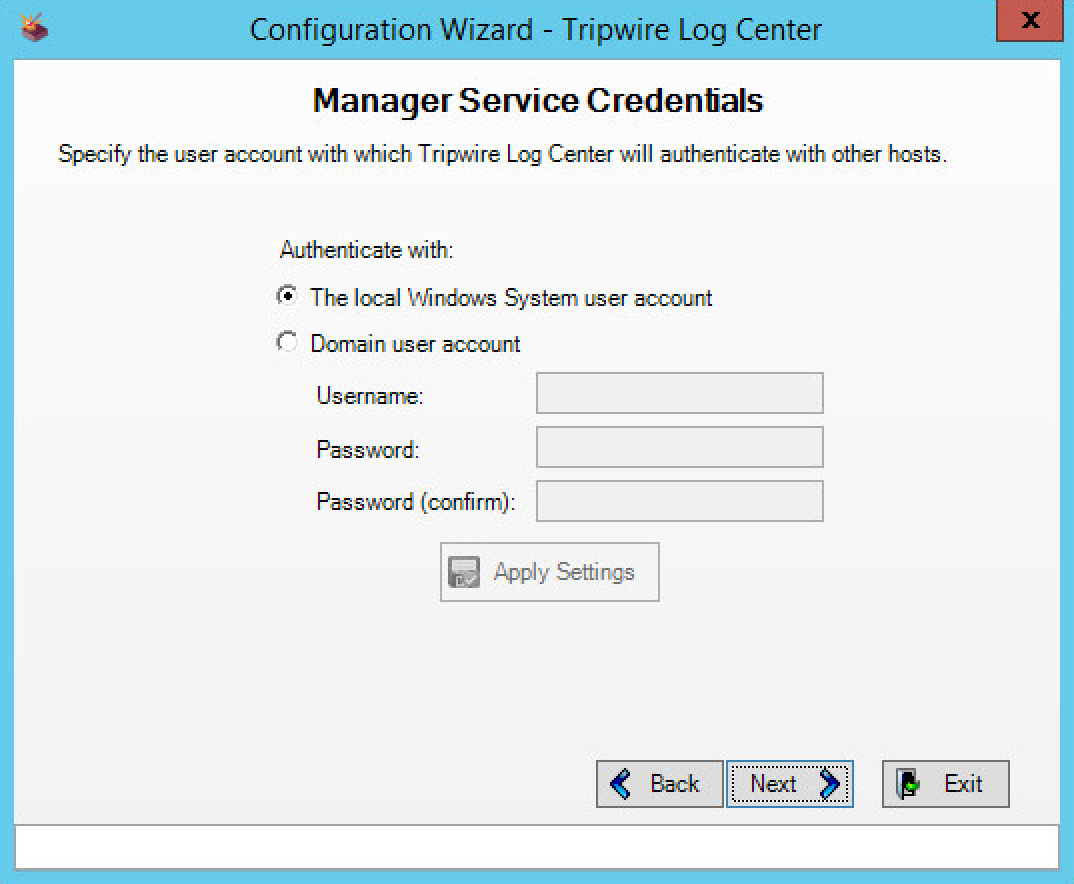
Select authenticate with the local windows system user account.
Click Next.
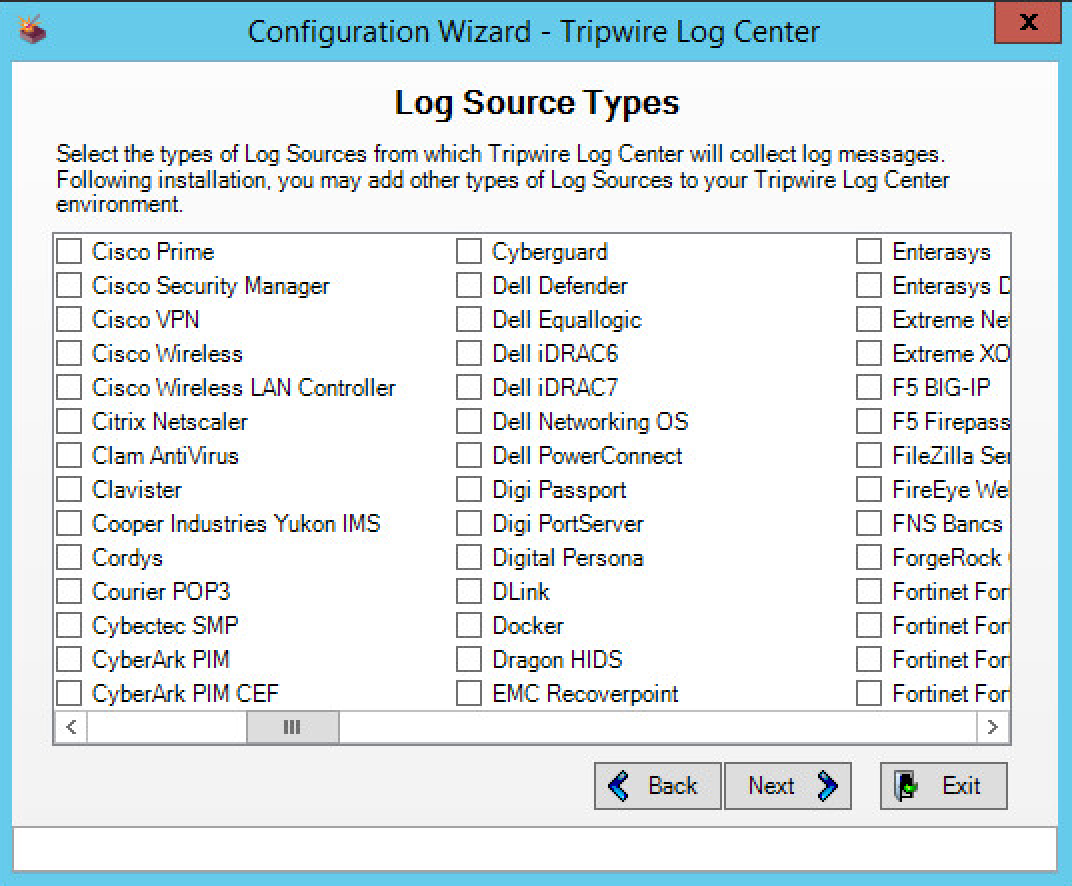
Select any log sources that you expect to collect using Tripwire Log Center. Examples: Tripwire Enterprise, Windows 10, Tripwire IP360 VnE, Linux Debian, Linux Ubuntu, Microsoft Exchange, Microsoft SQL Server.
Click Next.
Click Start.
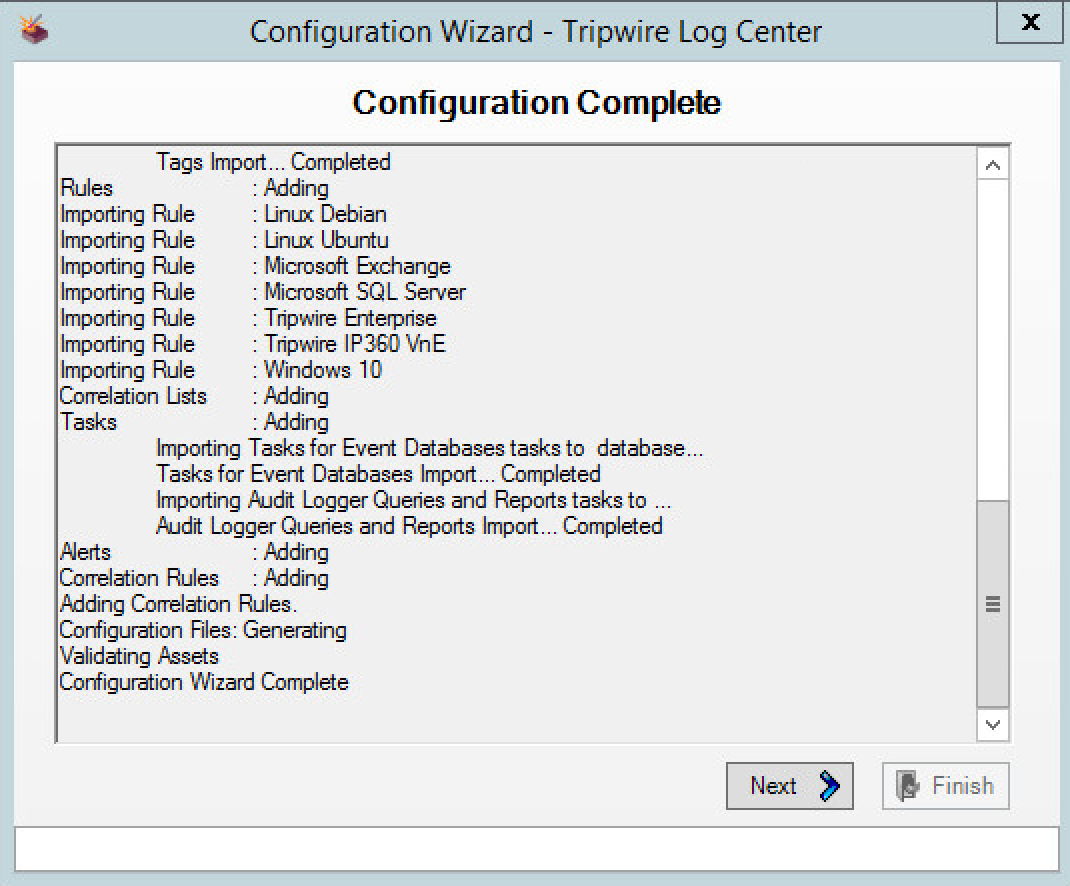
Click Next when the configuration finishes.
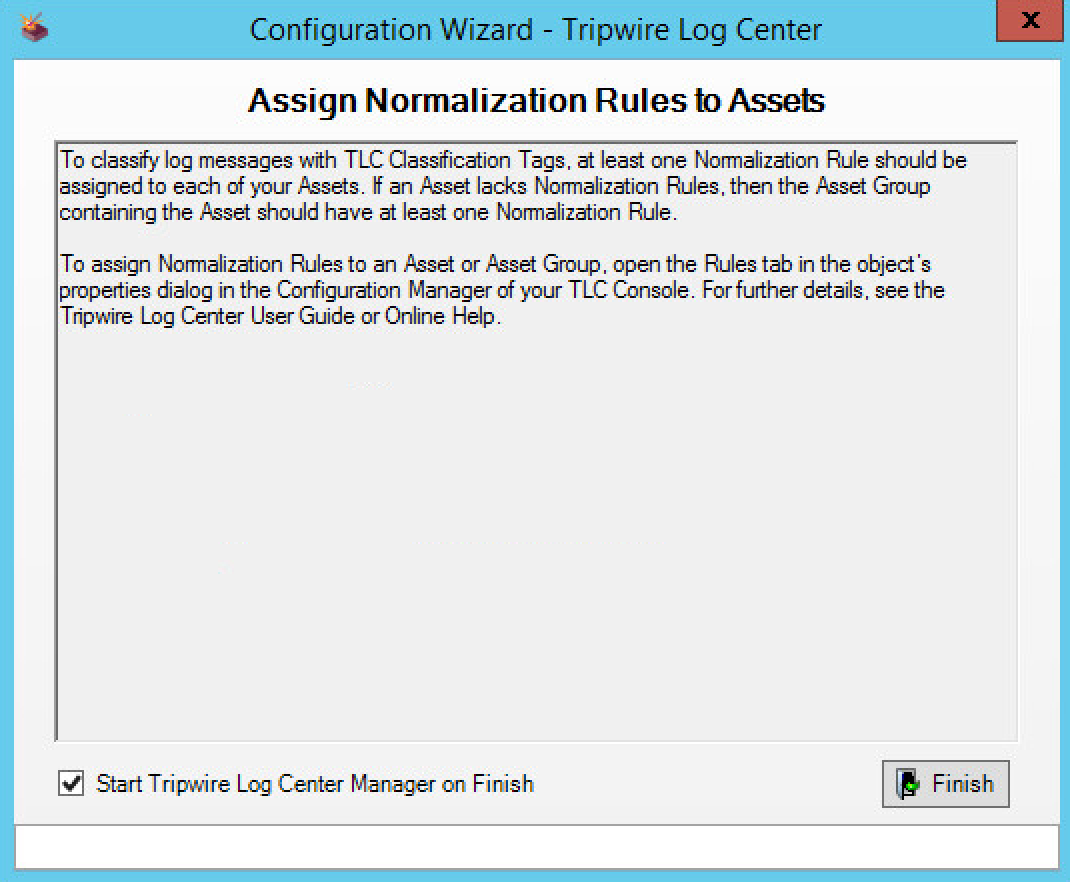
Observe the successful installation and click Finish.
2.10.5. Install Tripwire Log Center Console
See chapter 4 of Tripwire Log Center 7.2.4 installation guide for instructions on how to install Tripwire Log Center Console. Use the Tripwire Log Center Console installer. This can be done on any system, even the system running.
2.10.6. Integrate Tripwire Log Center Tripwire Log Center with Tripwire Enterprise
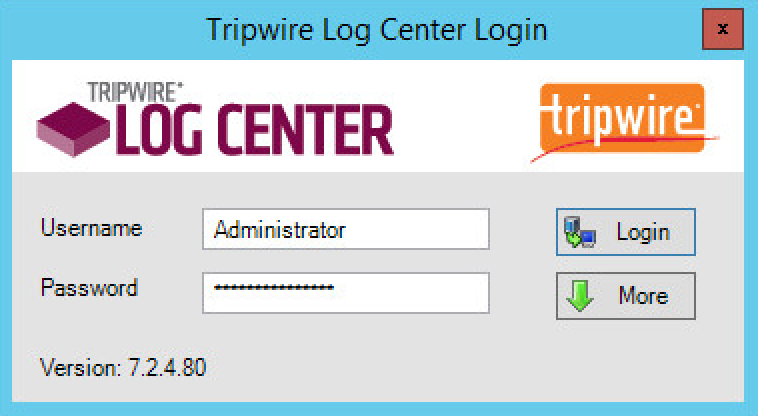
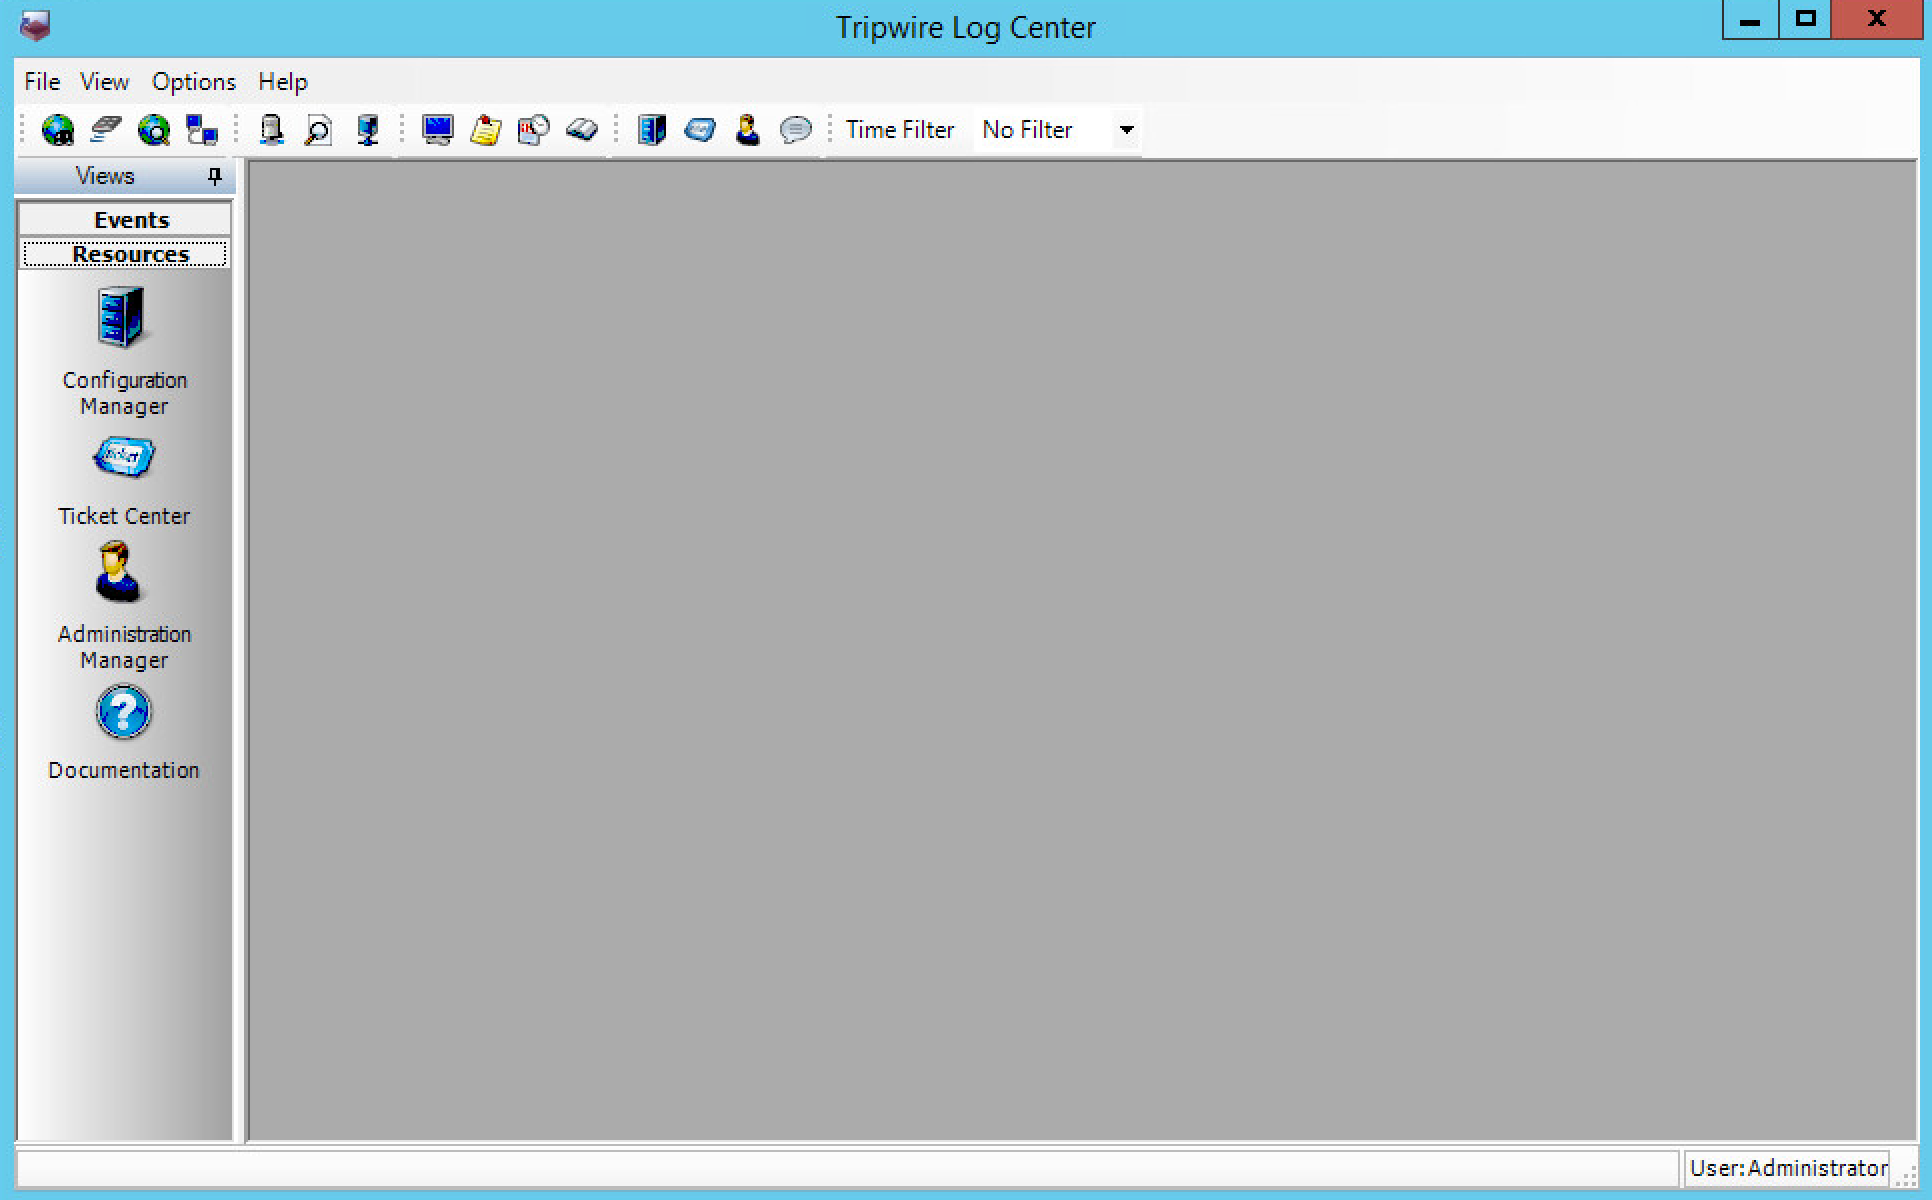
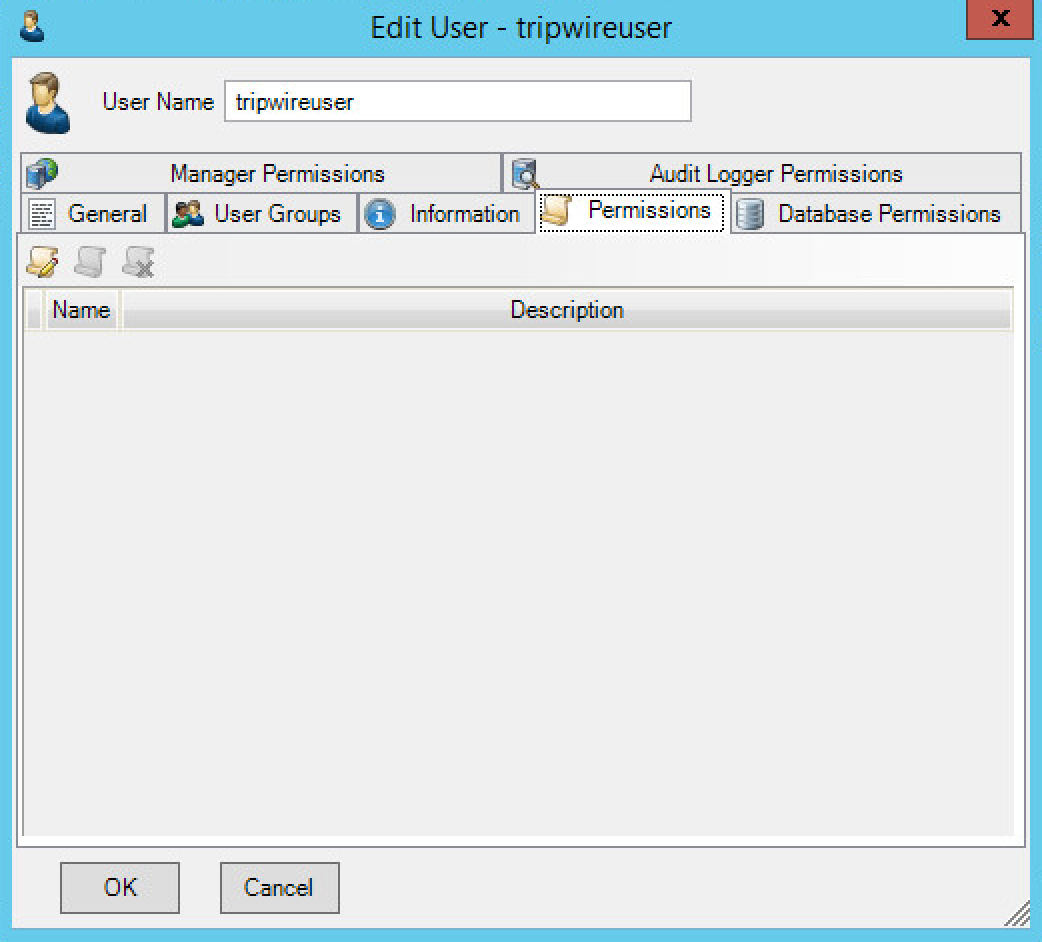
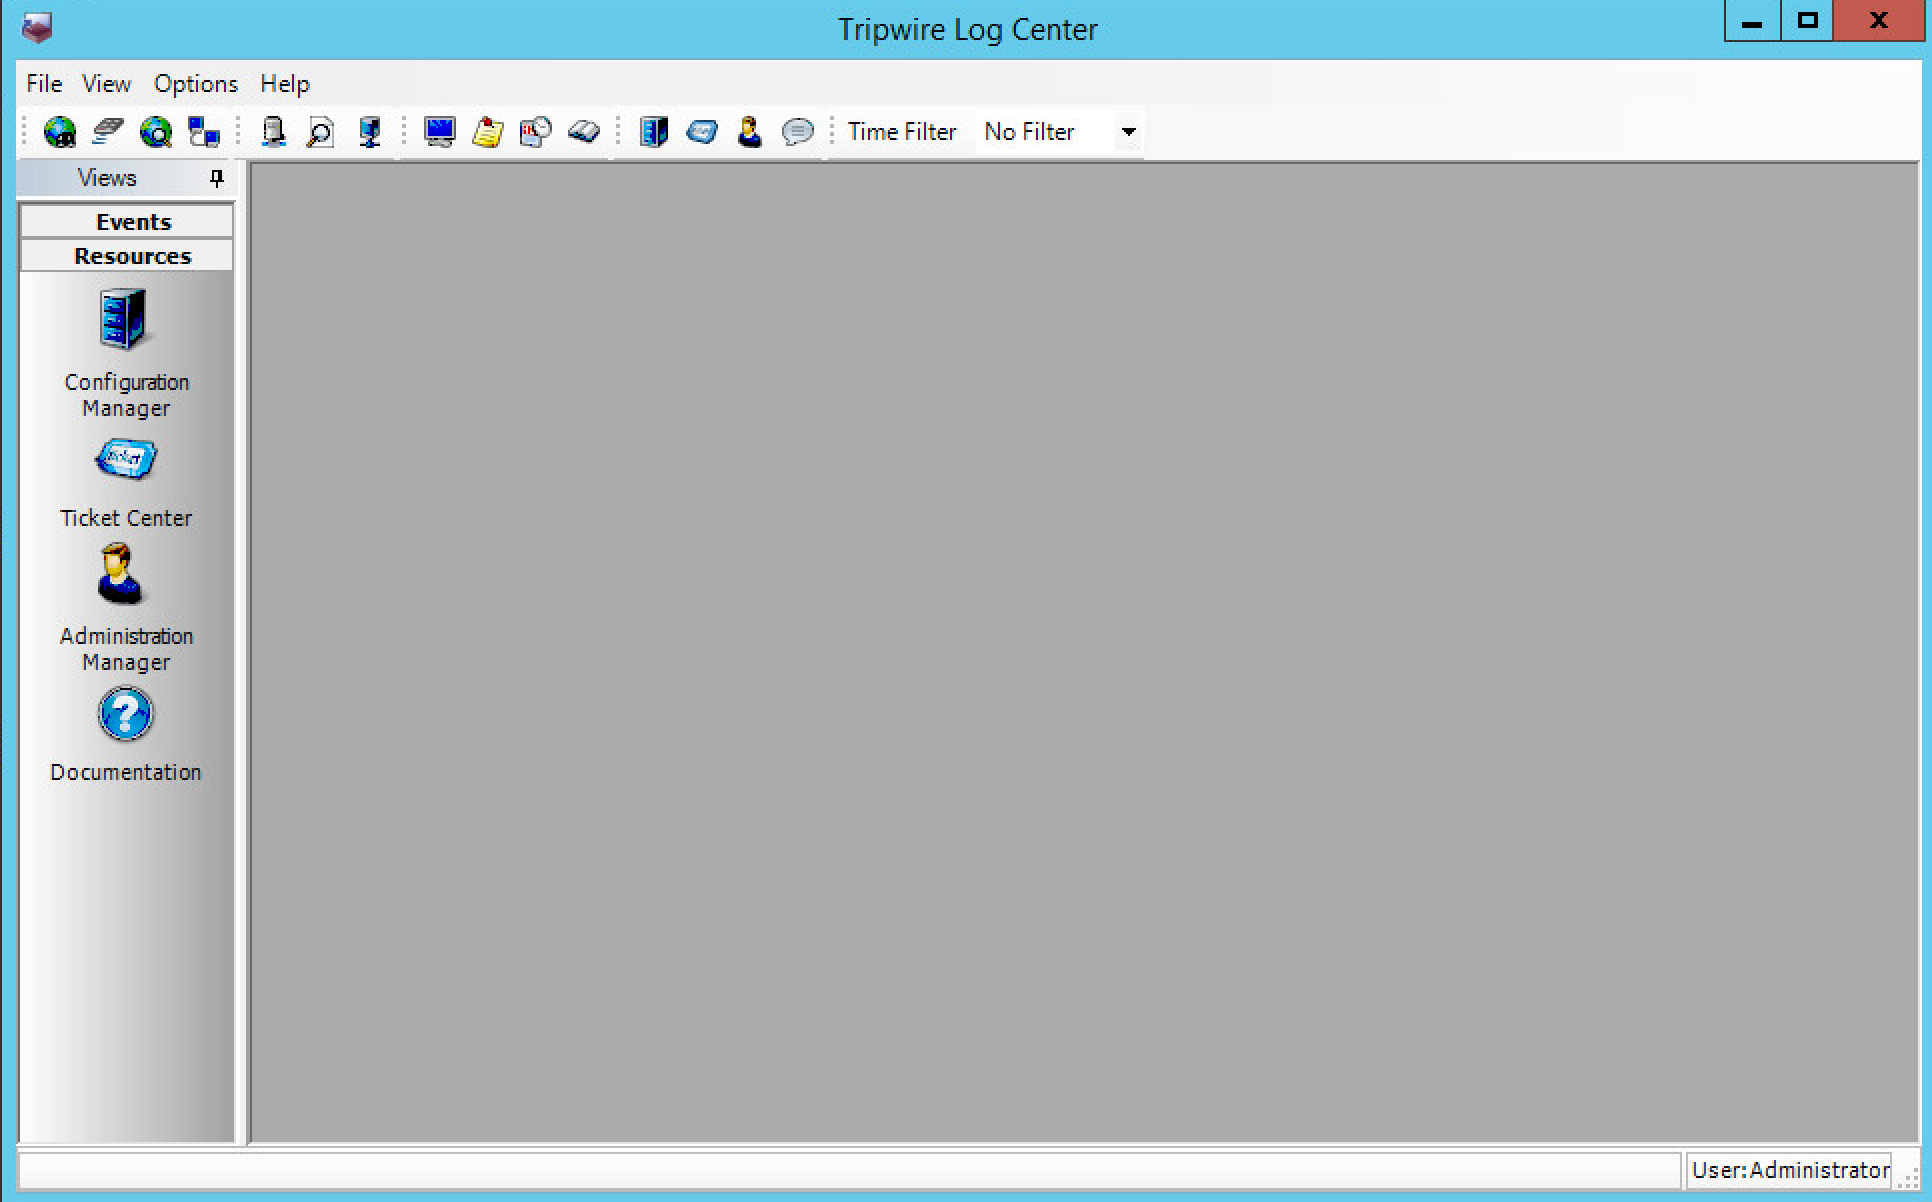
Create a user account in Tripwire Log Center by logging into Tripwire Log Center Console.
Click the Administration Manager button.
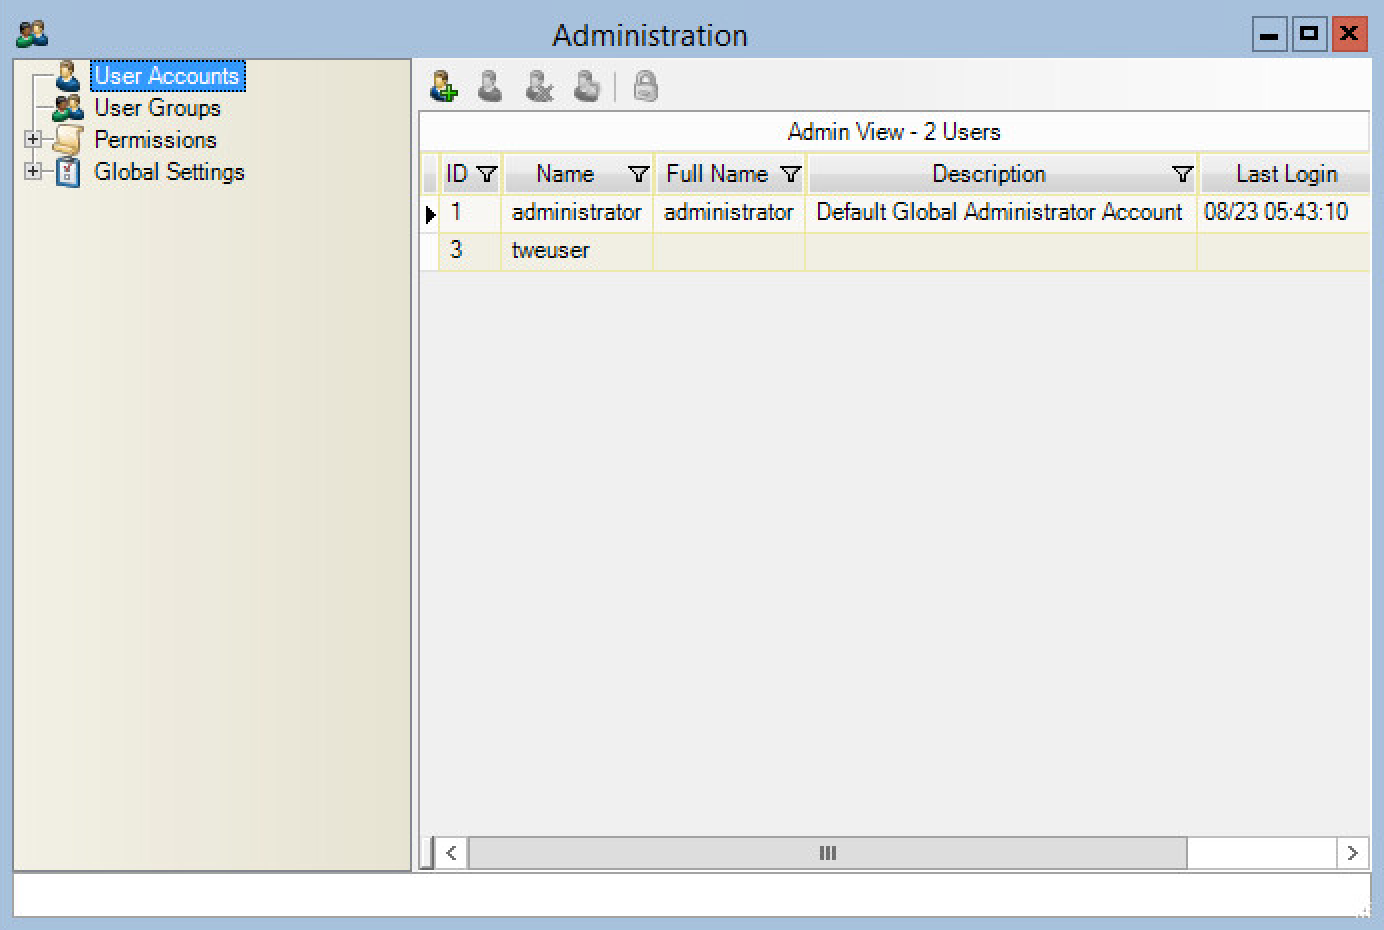
On the side bar, click User Accounts.
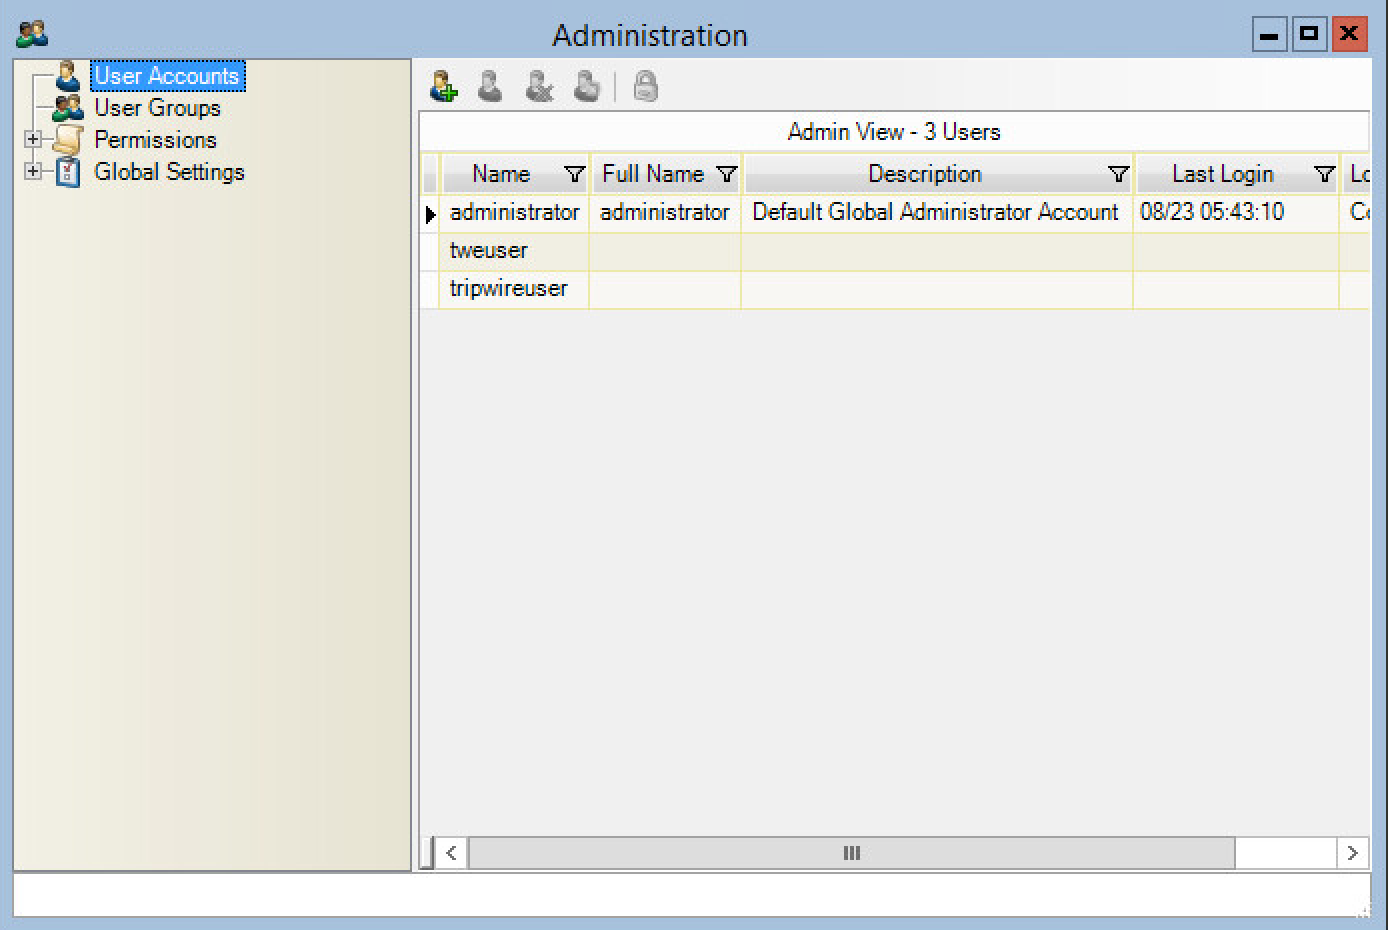
Click the Add button.
Enter the details of the user.
Double click the user account.
Select the Permissions tab.
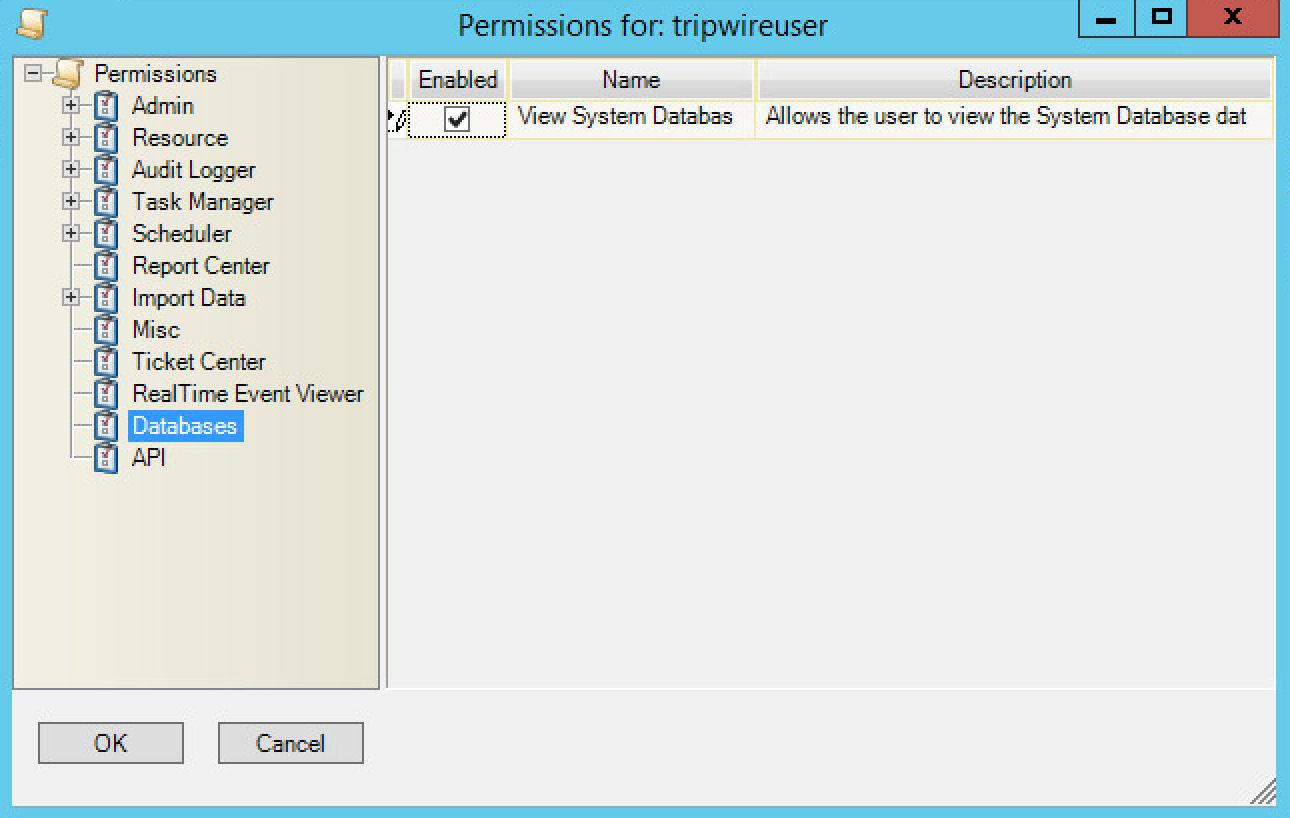
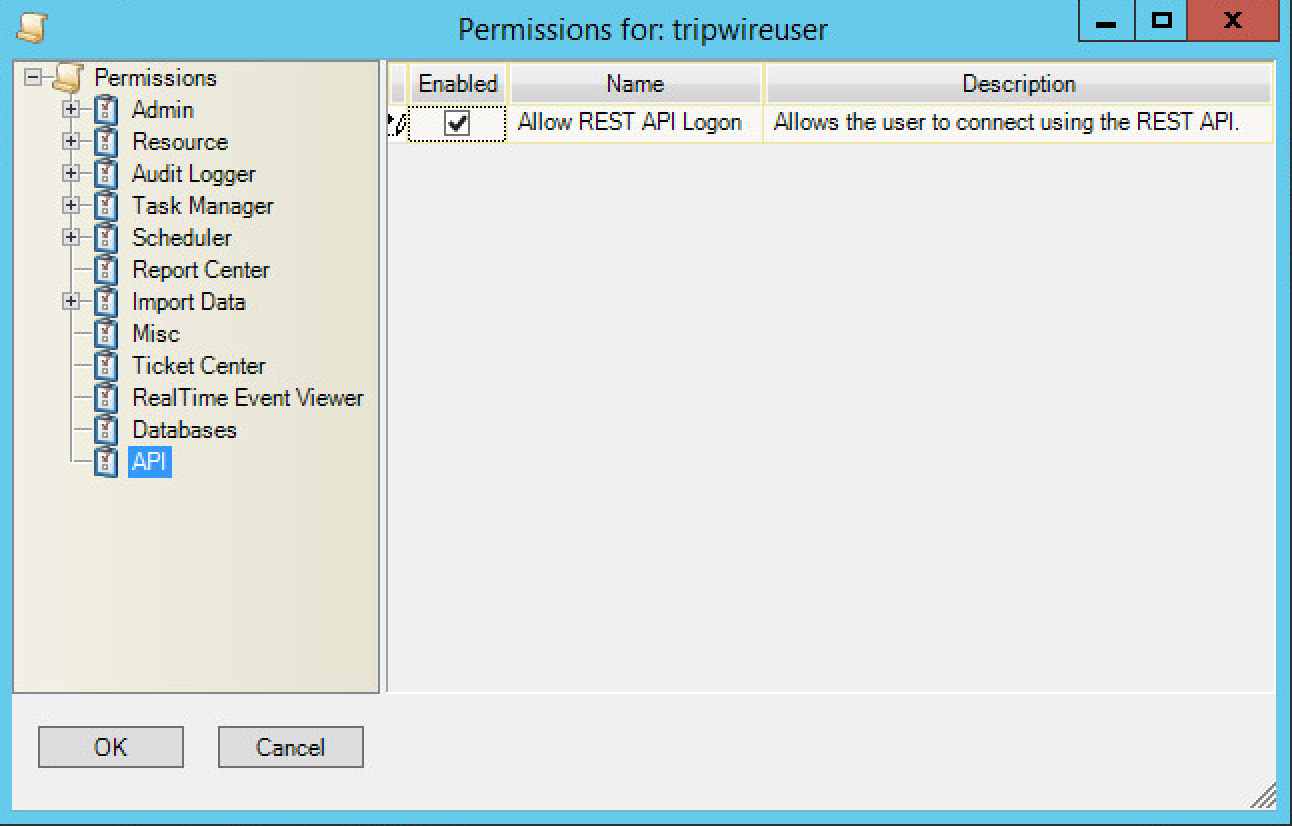
Click Change User Permissions.
Select Databases and check the box.
Select API and check the box.
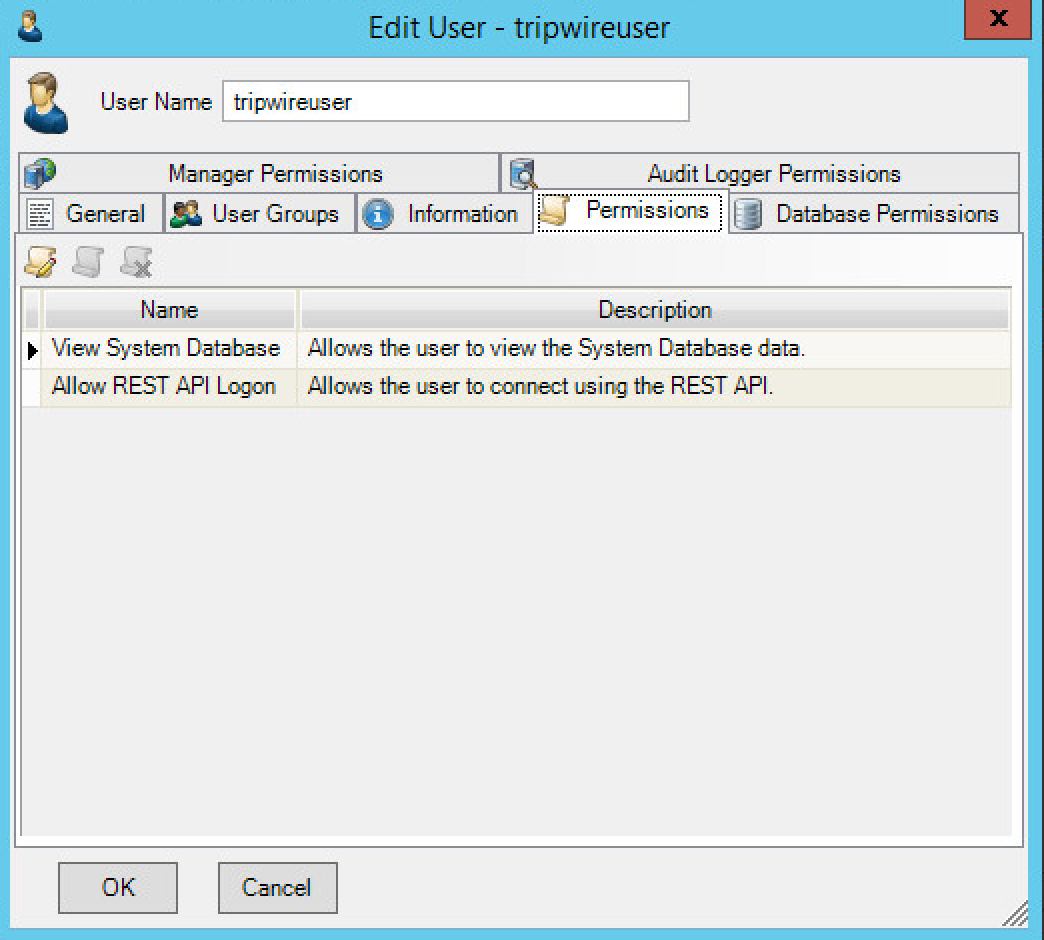
Click OK.
Click OK.
Click OK.
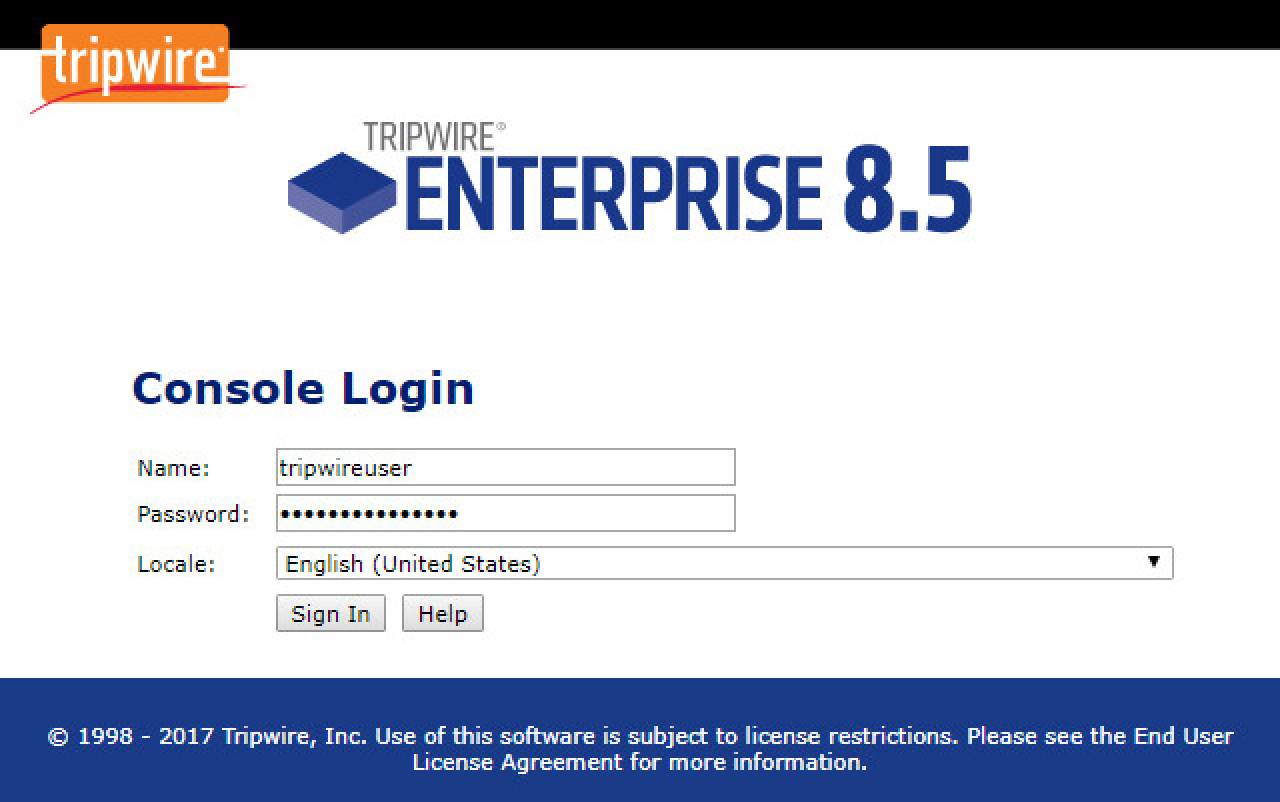
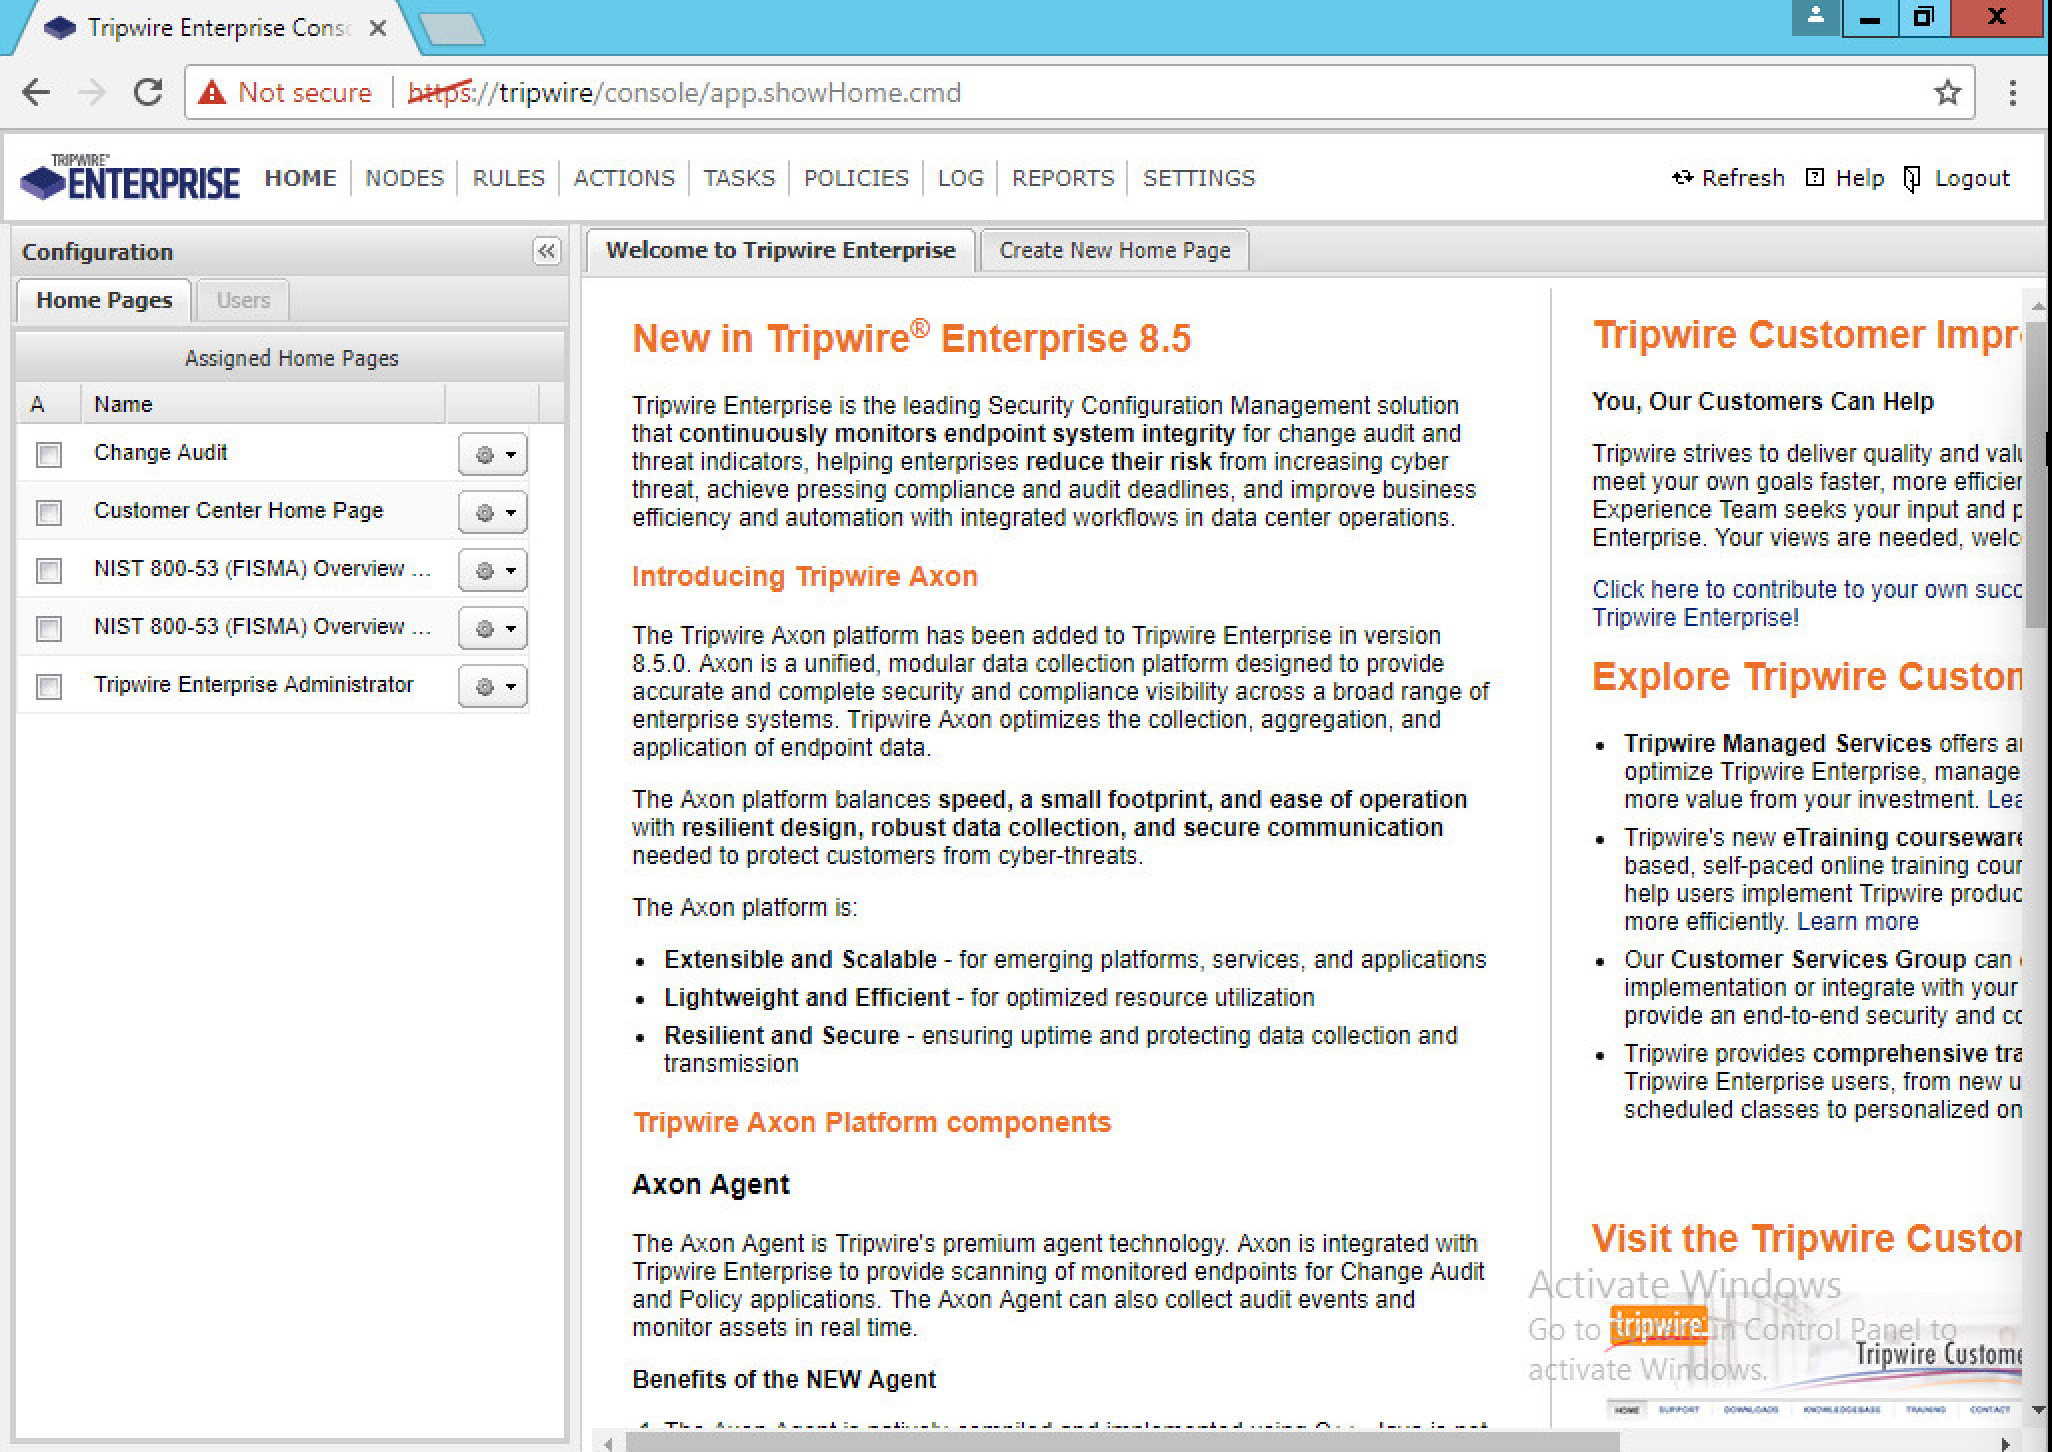
Open Tripwire Enterprise by going to https://tripwire/.
Log in to the Tripwire Enterprise Console.
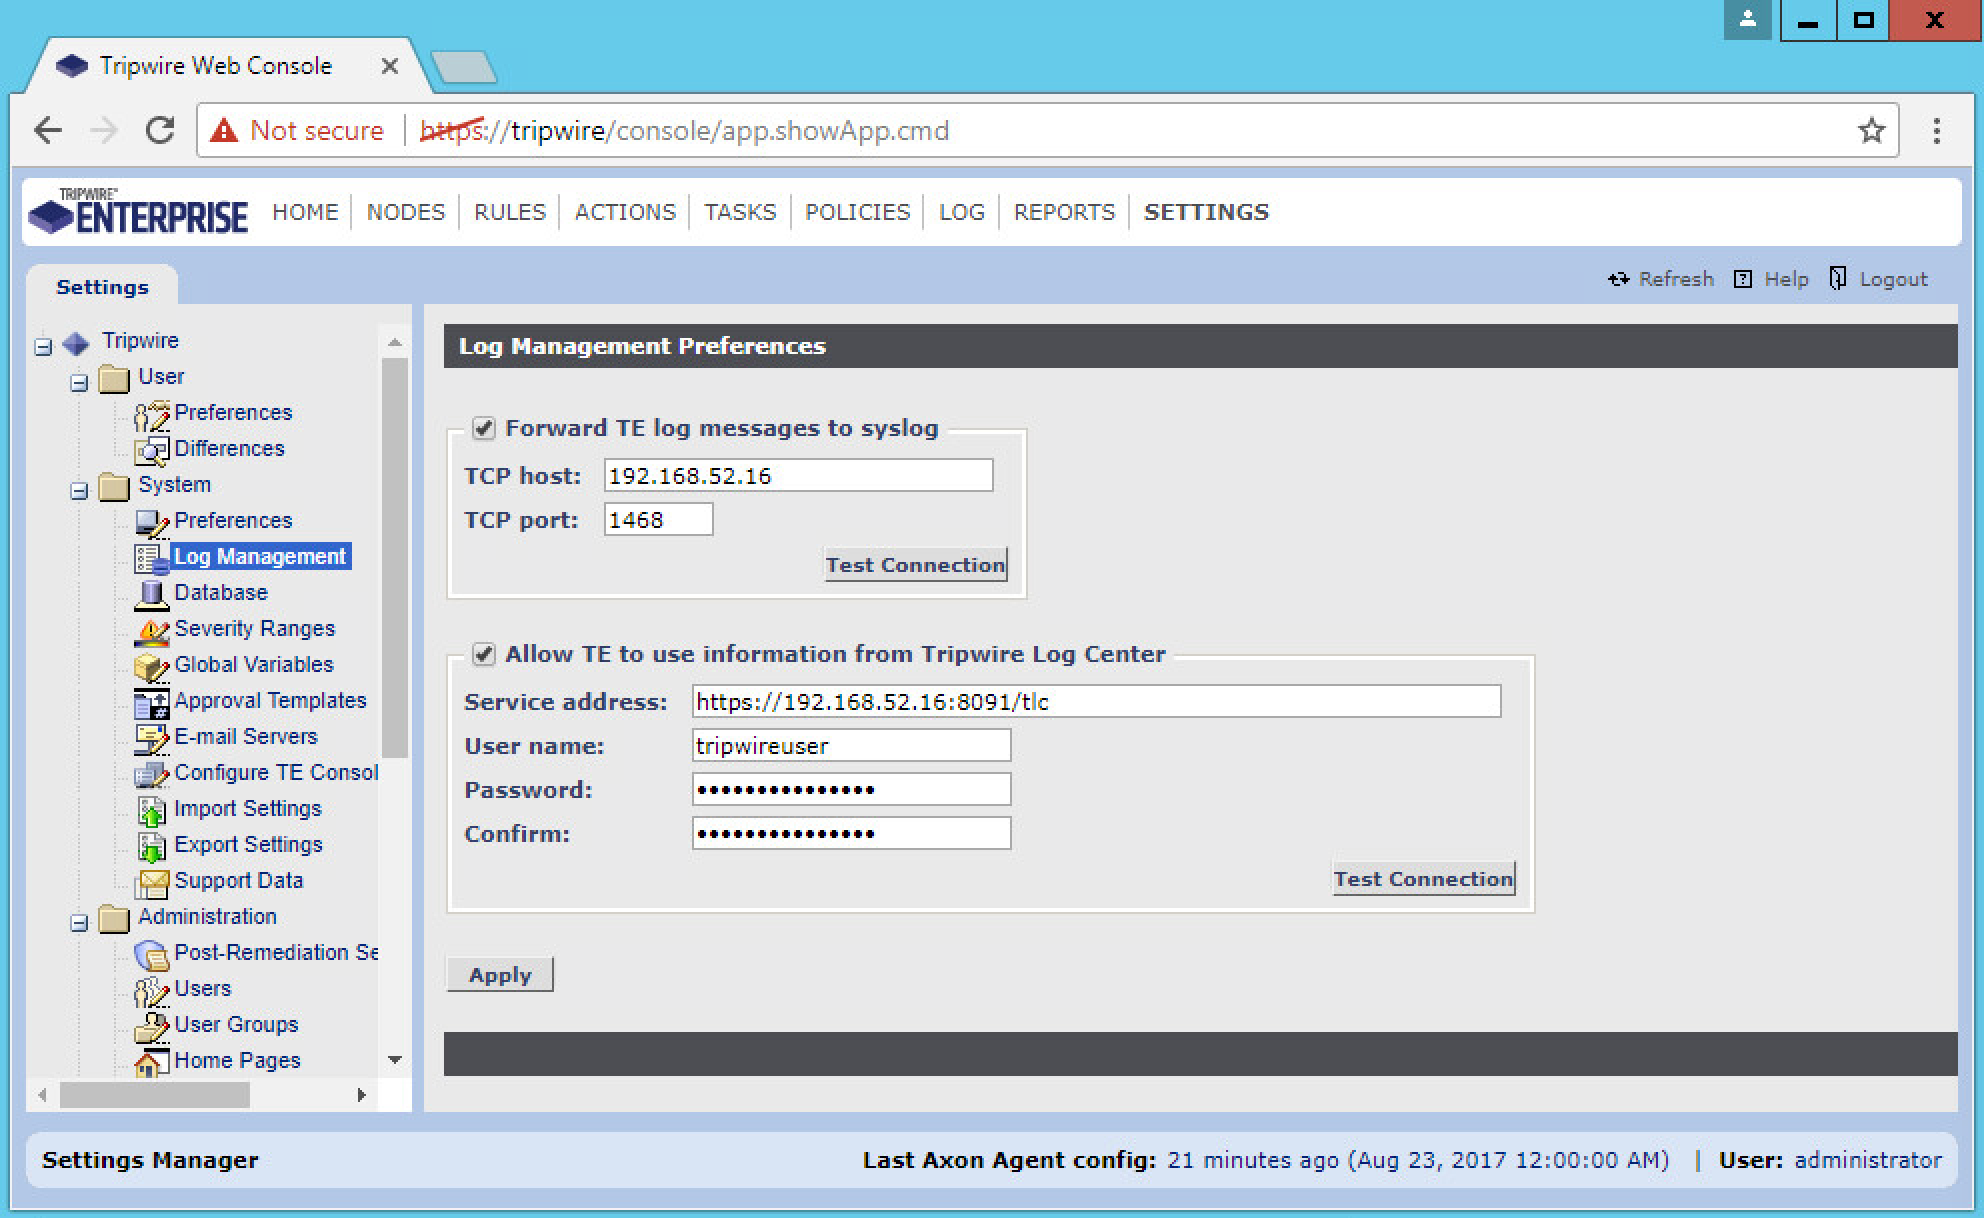
Click Settings.
Go to System > Log Management.
Check the box next to Forward TE log messages to syslog.
Enter the IP address and port of the Tripwire Log Center server. The default port is 1468.
Check the box next to Allow TE to use information from Tripwire Log Center.
Enter the service address like this: https://192.168.50.44:8091/tlc, replacing the IP address with the IP address of the Tripwire Log Center server.
Enter the account information for the account created with the Databases and API permissions.
Click Apply.
Click OK.
Go back to the Tripwire Log Center Console.
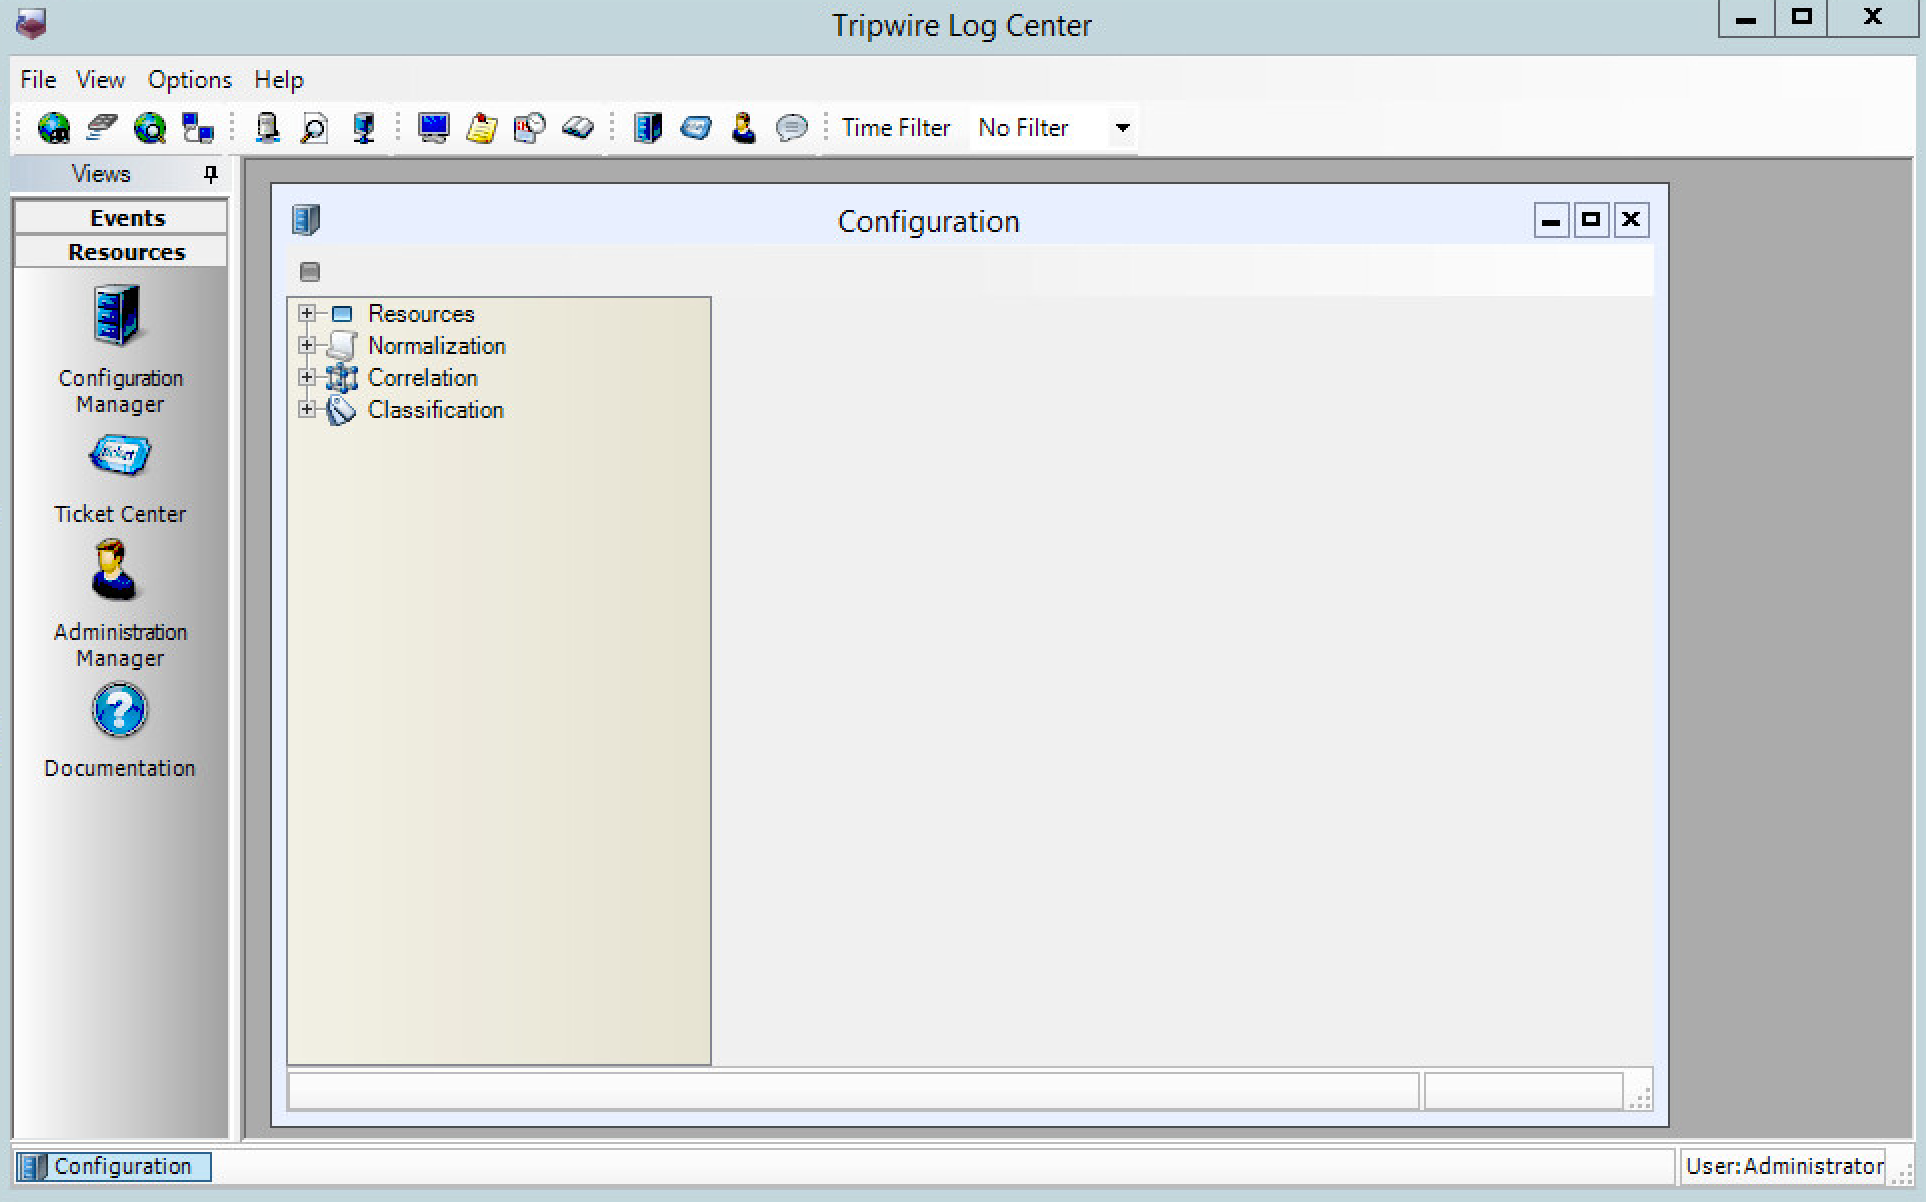
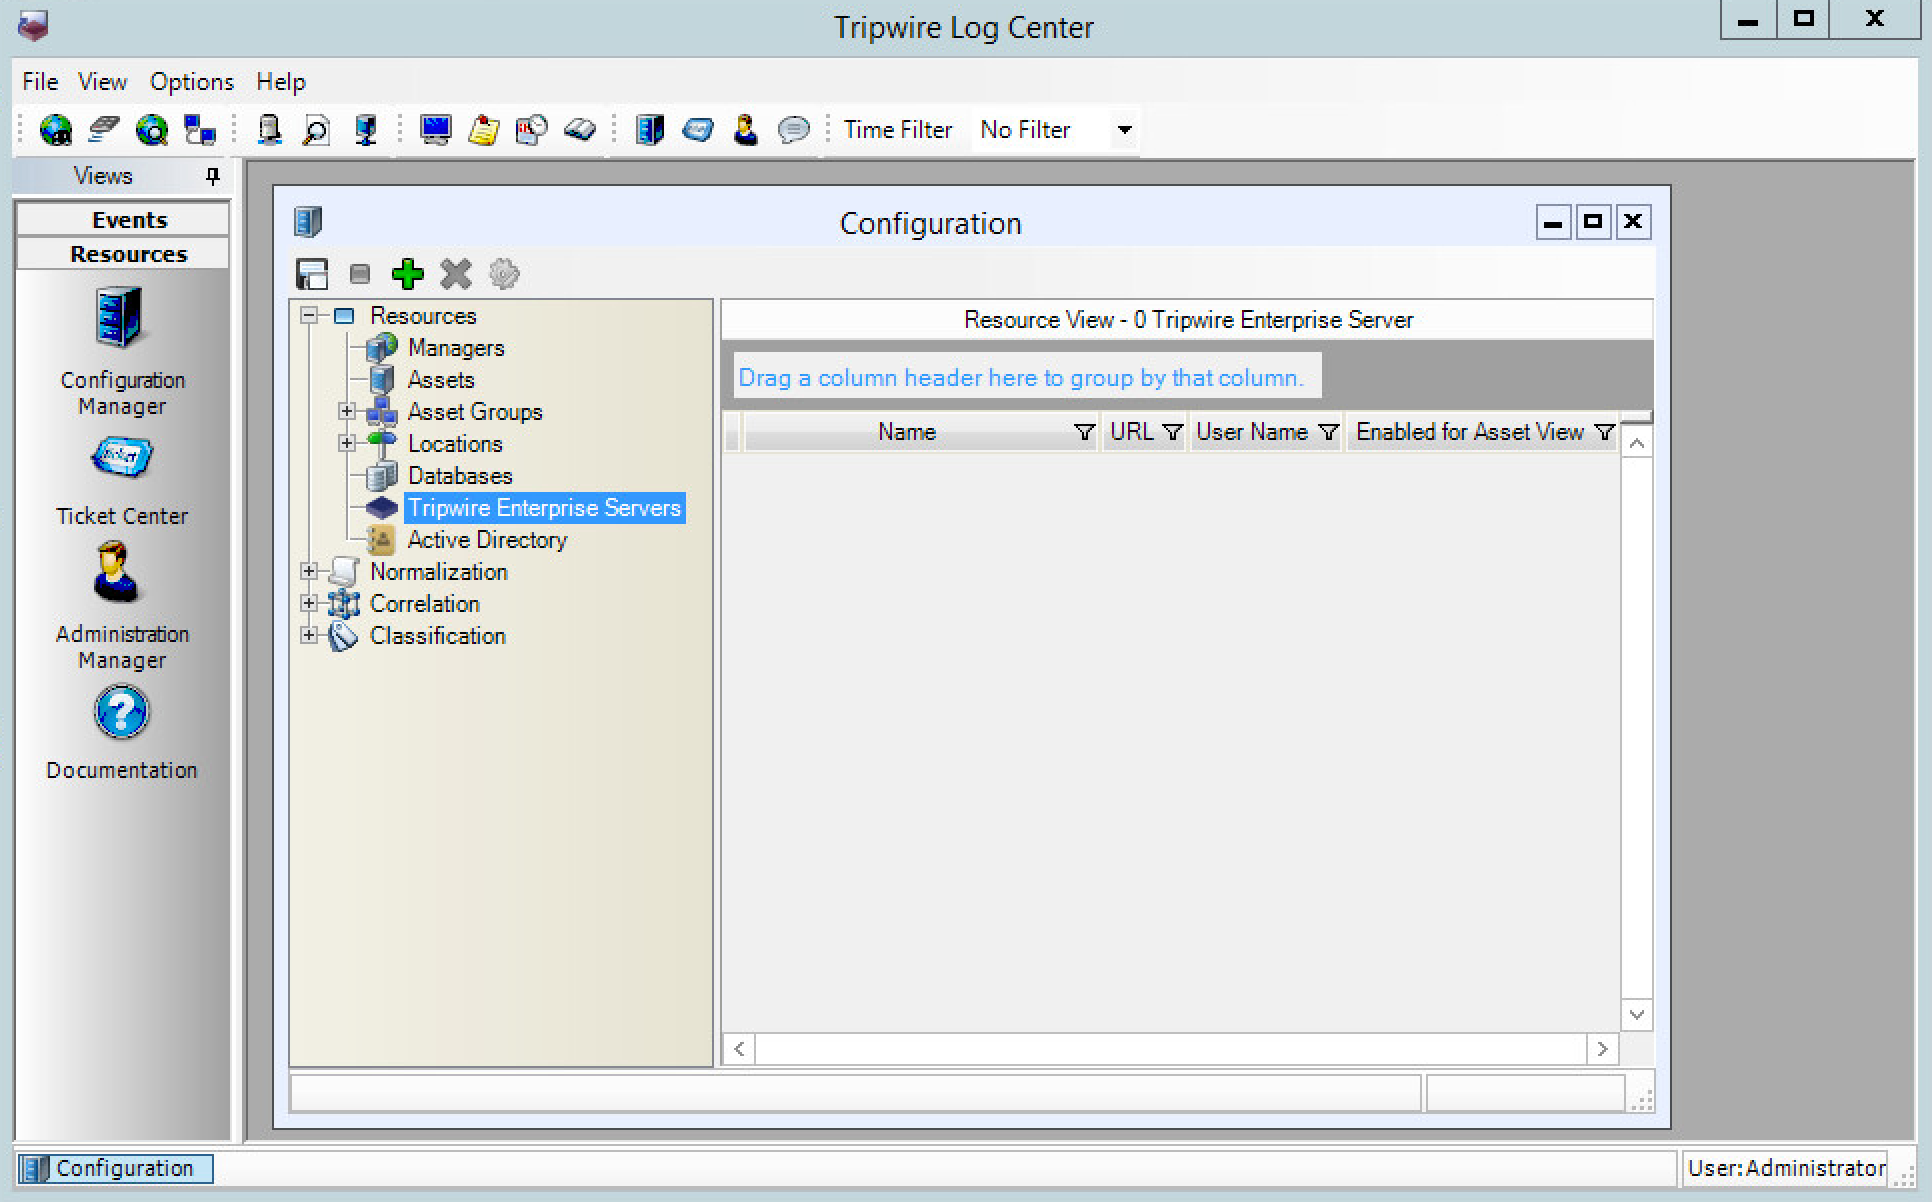
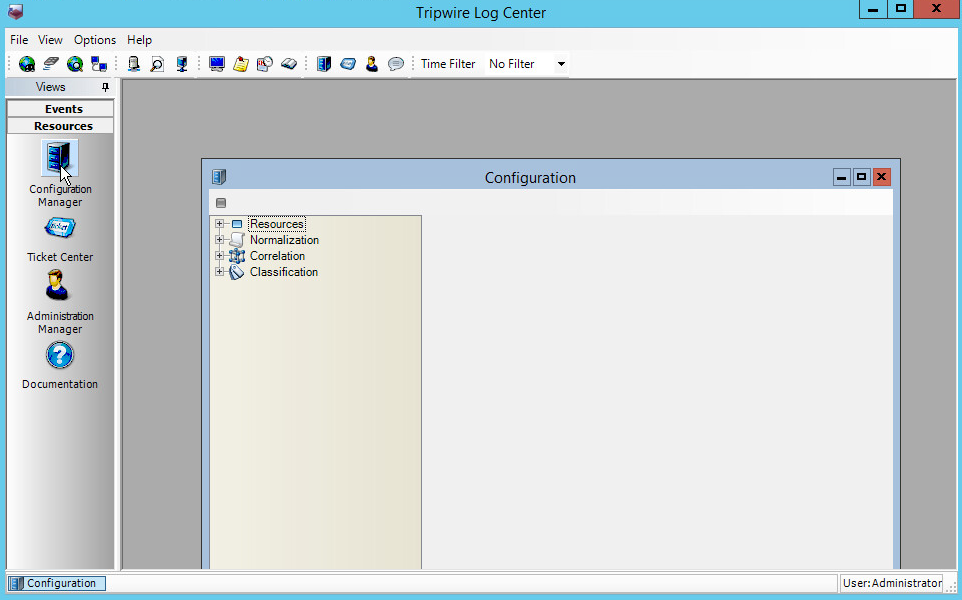
Click Configuration Manager.
Click Resources > Tripwire Enterprise Servers.
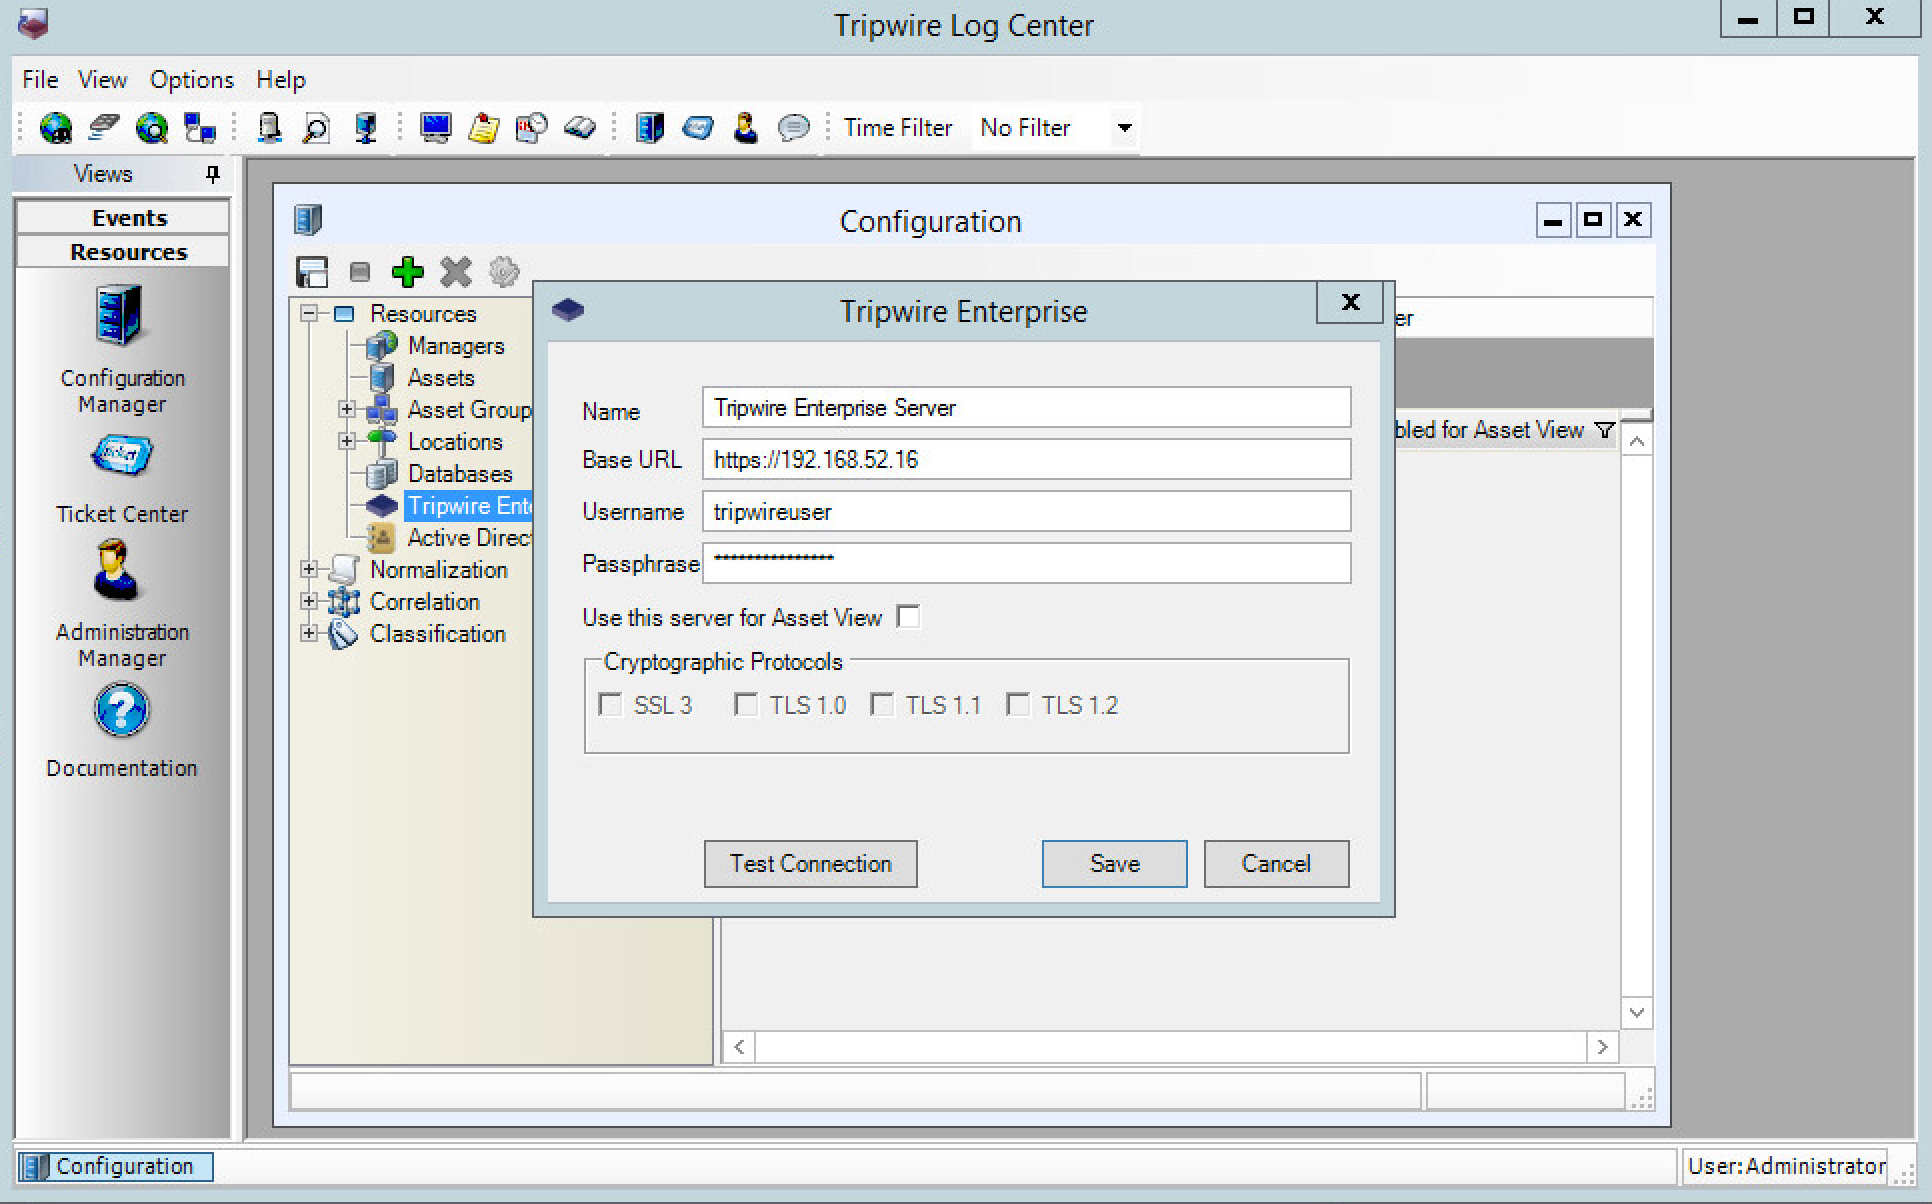
Click Add.
Enter a name for the Tripwire Enterprise server.
Enter the IP address and port for the Tripwire Enterprise server. By default, Tripwire Log Center and Tripwire Enterprise will communicate on port 443. (https://192.168.50.43)
Enter the name of a user account on the Tripwire Enterprise server. The account must have the following permissions: create, delete, link, load, update, view.
Click Save.
2.11. Integration: Tripwire Log Center (TLC) and HPE ArcSight ESM
In this section is a process for integrating Tripwire Log Center and HPE ArcSight ESM. This integration assumes the correct implementation of Tripwire and ArcSight as described in earlier sections. The result of this integration is the forwarding of logs generated by Tripwire Enterprise to ArcSight ESM as well as a method for filtering specifically for file change events in ArcSight ESM.
2.11.1. Integrating TLC and ESM
Run ArcSight-7.4.0.7963.0-Connector-Win64 on any Windows server (except for the server running the Tripwire Log Center).
Click Next.
Specify a folder to install the connector.
Click Next.
Click Next.
Click Install.
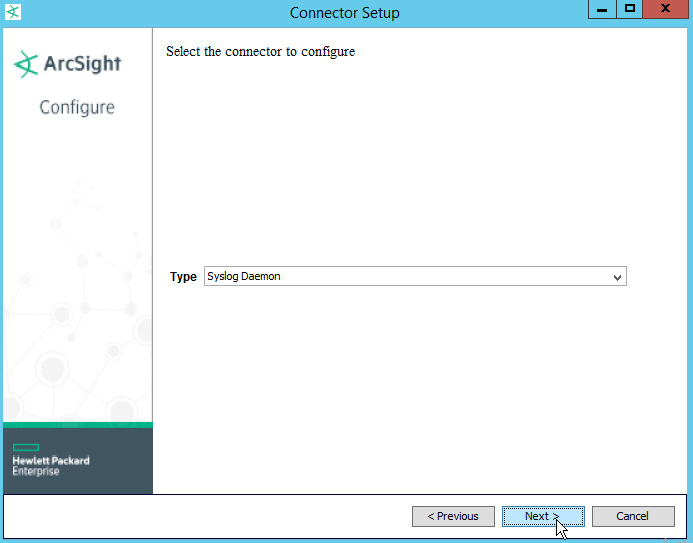
Select Add a Connector.
Click Next.
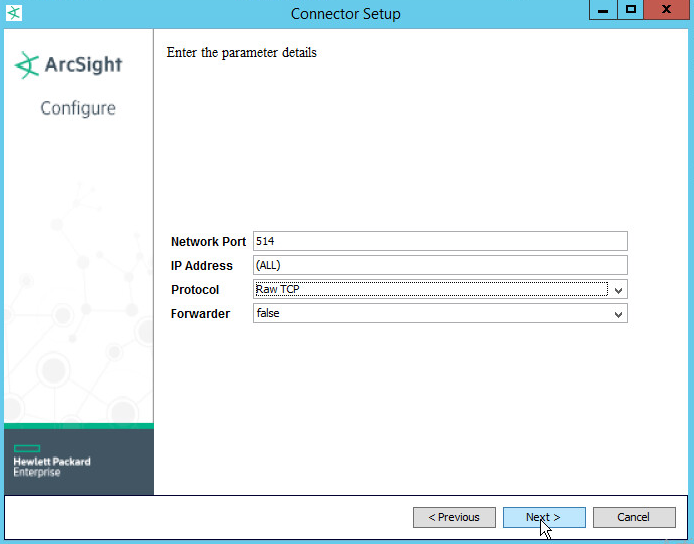
Select Syslog daemon.
Click Next.
Select a port for the daemon to run on.
Leave IP address as (ALL).
Select Raw TCP for Protocol.
Select False for Forwarder.
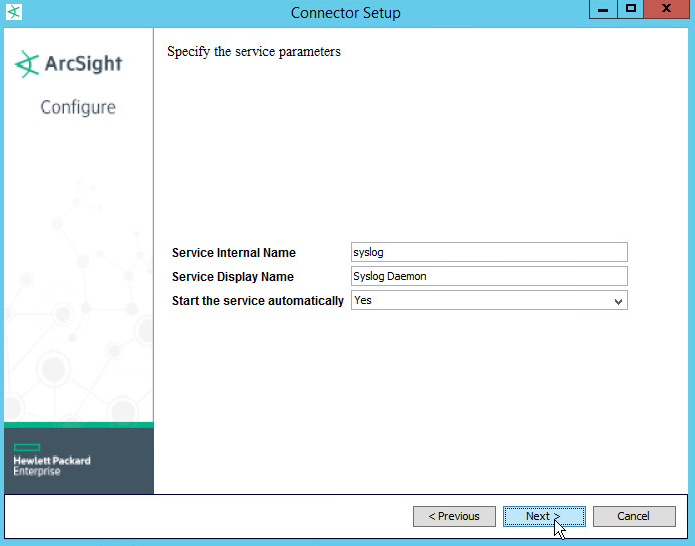
Click Next.
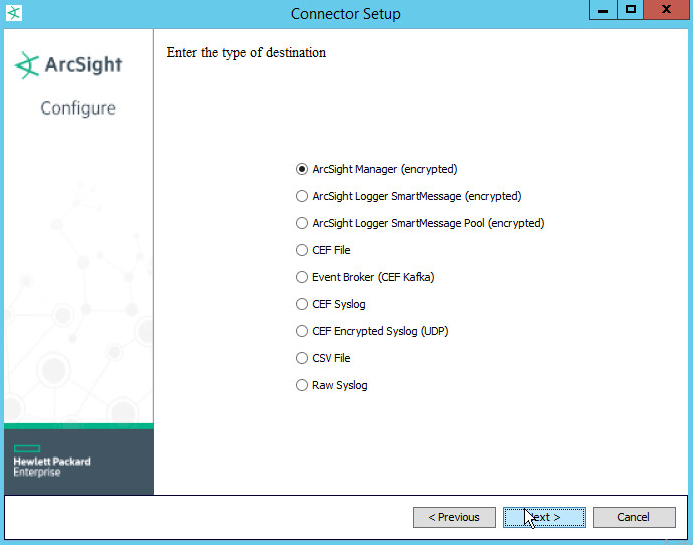
Choose ArcSight Manager (encrypted).
Click Next.
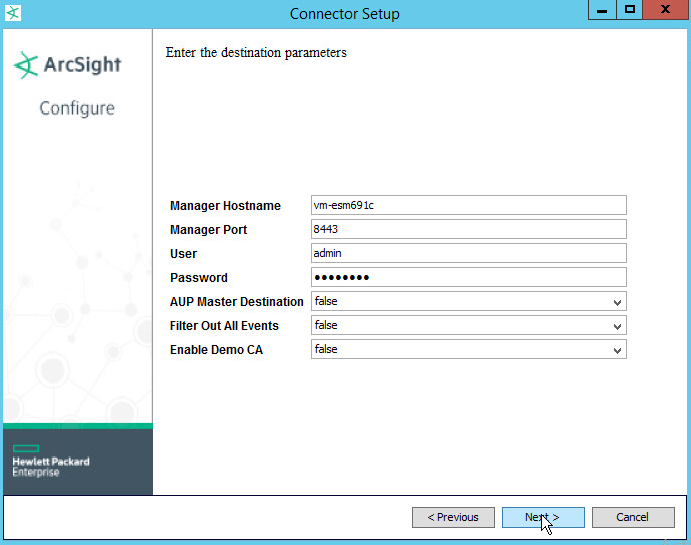
For Manager Hostname, put vm-esm691c or the hostname of your ESM server.
For Manager Port, put 8443 (or the port that ESM is running on).
Enter the username and password used for logging into ArcSight Command Center. Default: (admin/password)
Click Next.
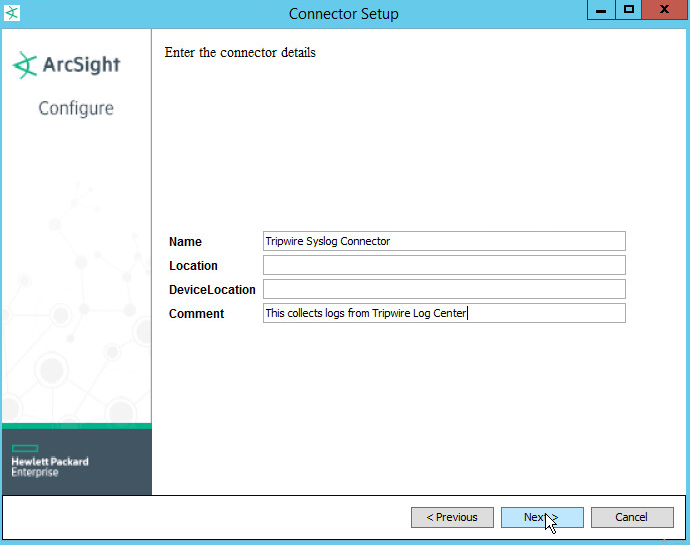
Set identifying details about the system to help identify the connector (include Name; the rest is optional).
Click Next.
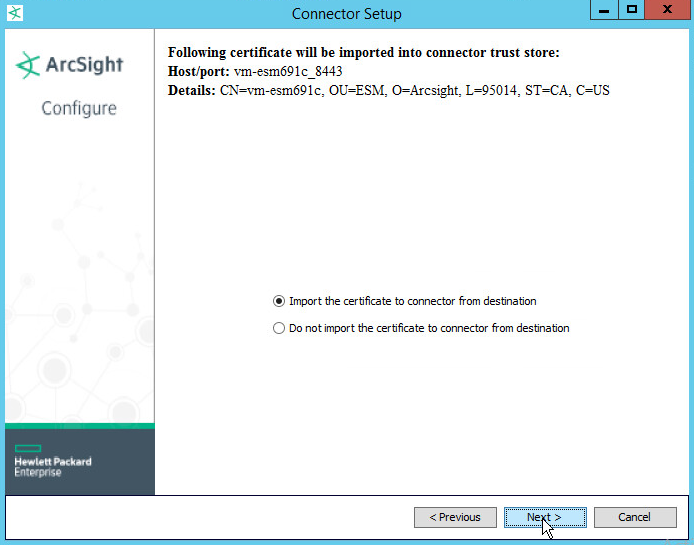
Select Import the certificate to connector from destination. This will fail if the Manager Hostname does not match the hostname of the VM.
Click Next.
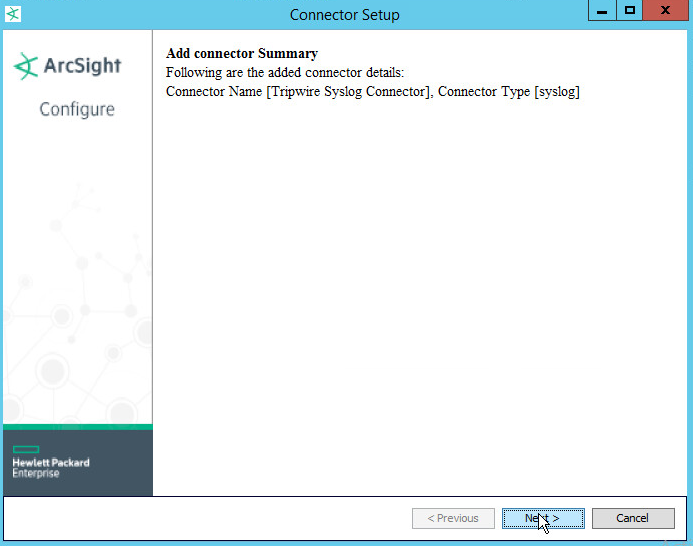
Click Next.
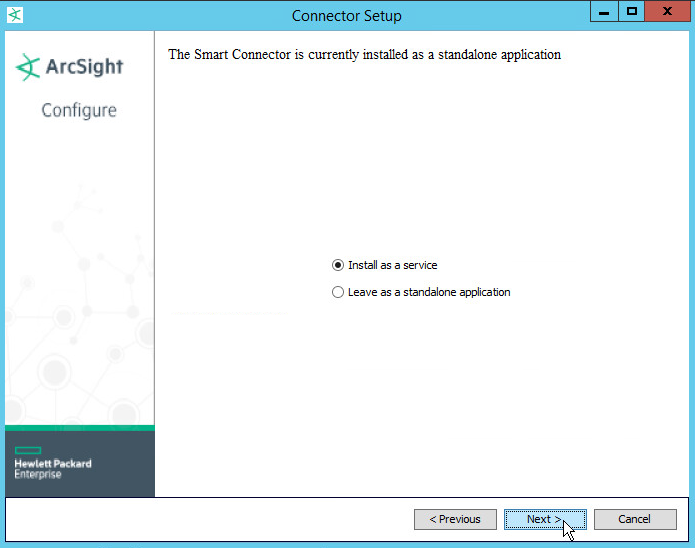
Choose Install as a service.
Click Next.
Click Next.
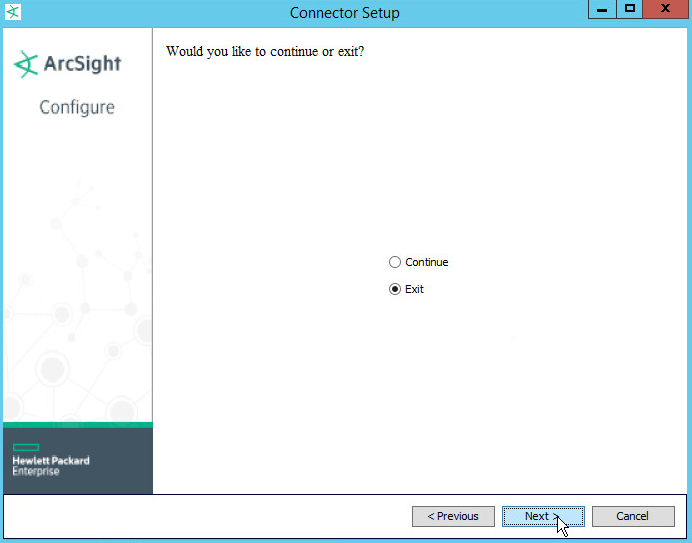
Choose Exit.
Click Next.
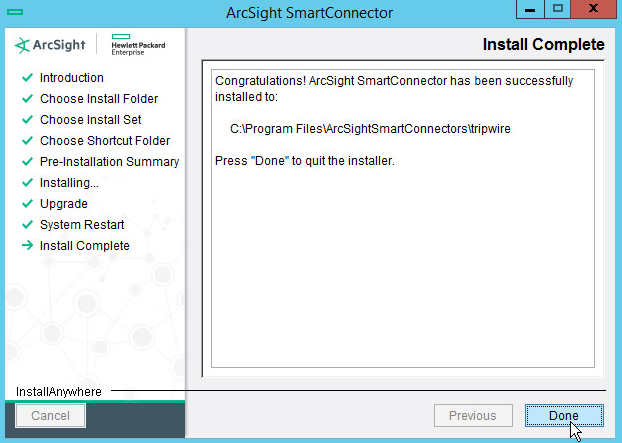
Click Done.
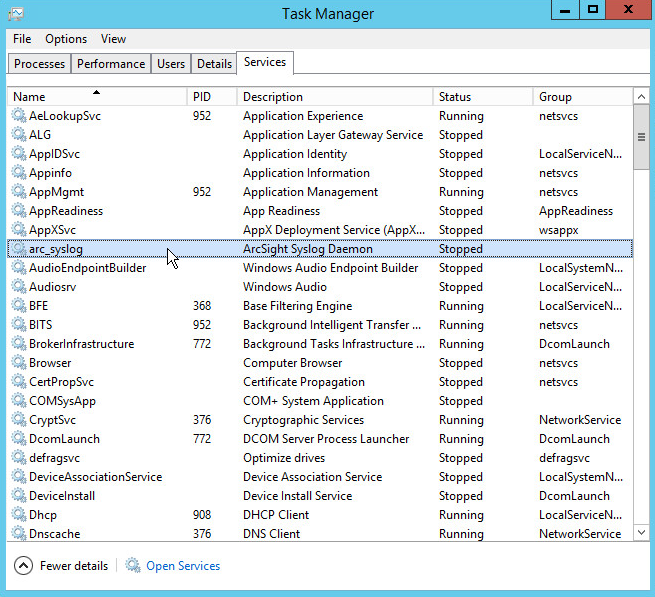
Open Task Manager.
Click More Details.
Go to the Services tab.
Find the service just created for ArcSight and right click it.
Choose Start.
Open the Tripwire Log Center Console.
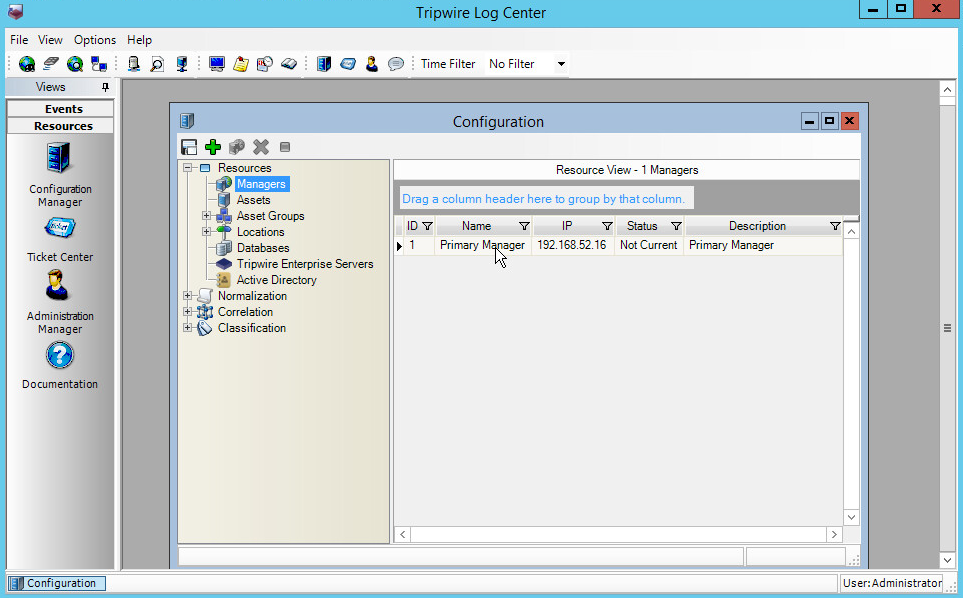
Go to the Configuration Manager.
Select Resources > Managers.
Double click the Primary Manager listed.
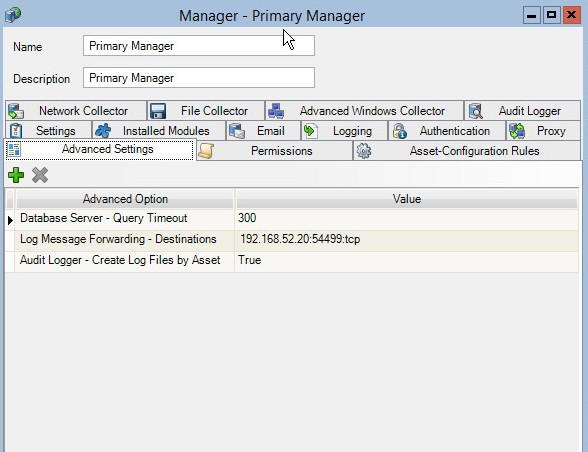
Click the Advanced Settings tab.
Click the +Add button. This should add a row to the table.
In the Advanced Option box, select Log Message Forwarding - Destinations.
In the Value box next to it, type <ip_address>:<port>:udp, with the IP Address and port of the syslog daemon just created.
2.11.2. Configuring Tripwire Enterprise and HPE ArcSight ESM to Detect and Report File Integrity Events
2.11.2.1. Creating a Rule for Which Files to Monitor Across Your Enterprise
Log into Tripwire Enterprise by going to https://tripwire and entering the user name and password.
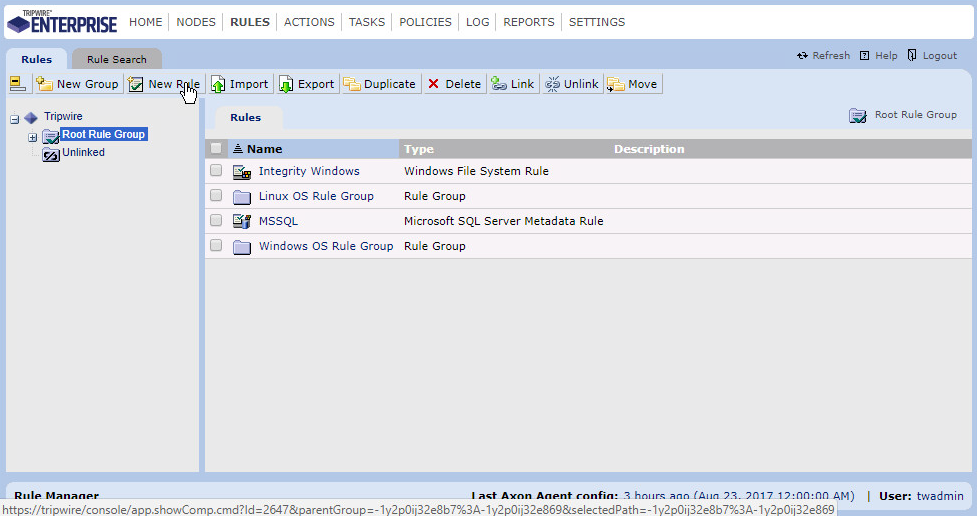
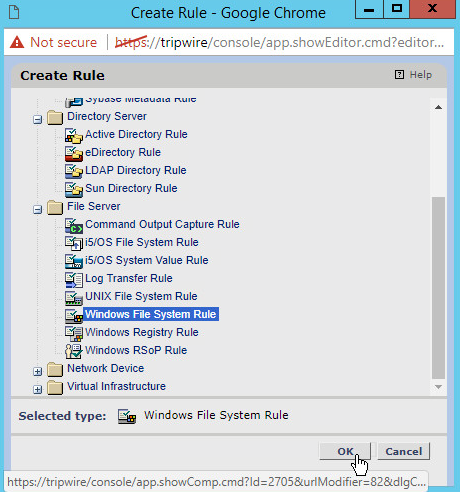
Click the Rules link.
Click New Rule.
Select Types > File Server > Windows File System Rule.
Click OK.
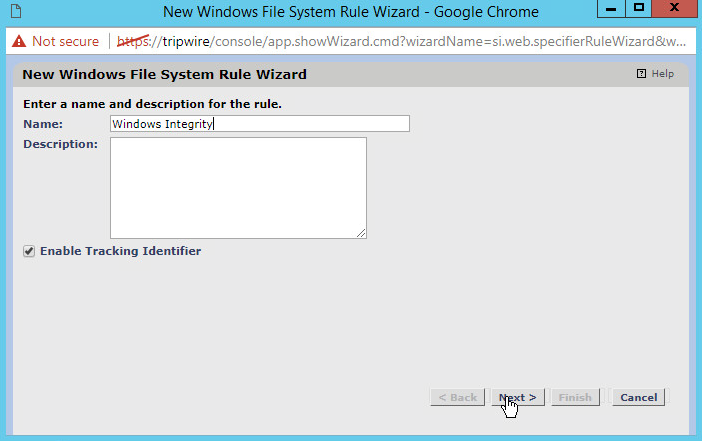
Enter a name for the rule.
Click Next.
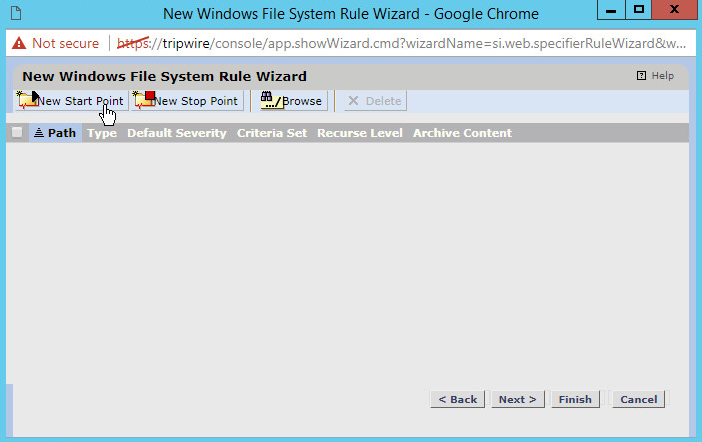
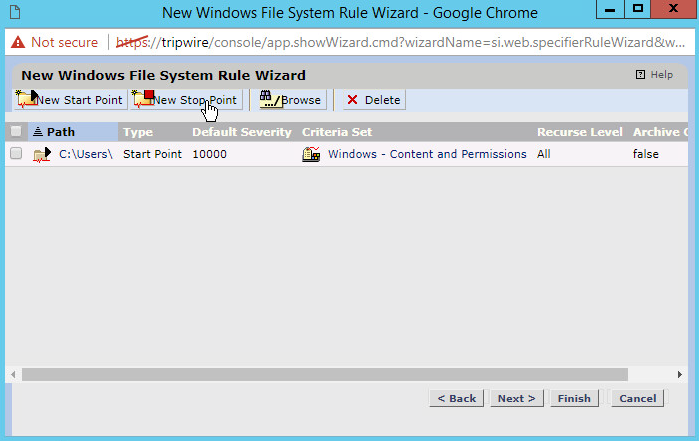
Click New Start Point. This will bring up a New Start Point Wizard.
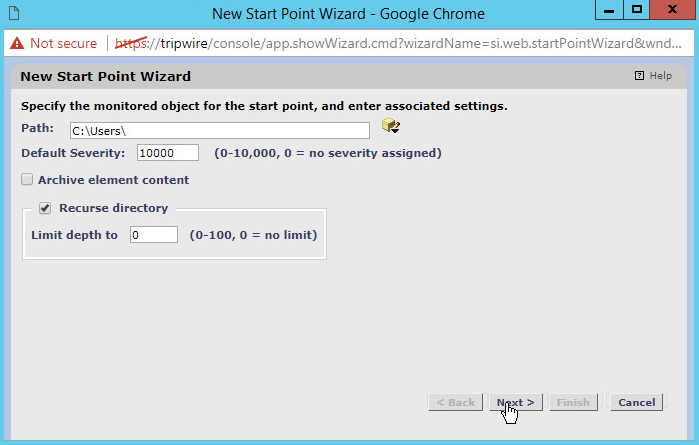
Enter the path to a folder or file that will be monitored across all Windows Systems. For example, we chose to monitor C:\Users.
If you selected a directory and want the integrity check to recurse in all sub directories, make sure the box next to Recurse directory is checked.
Click Next.
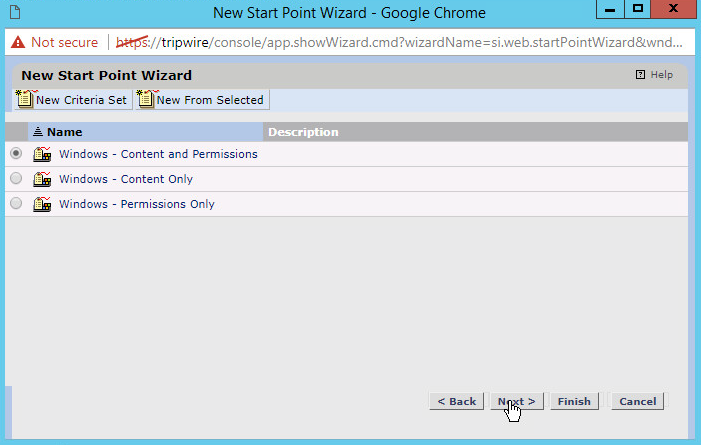
Select Windows Content and Permissions.
Click Next.
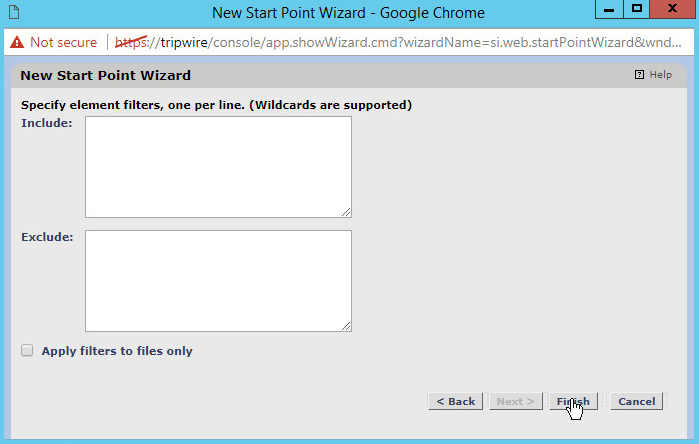
Click Finish.
If you wish to exclude directories, click New Stop Point.
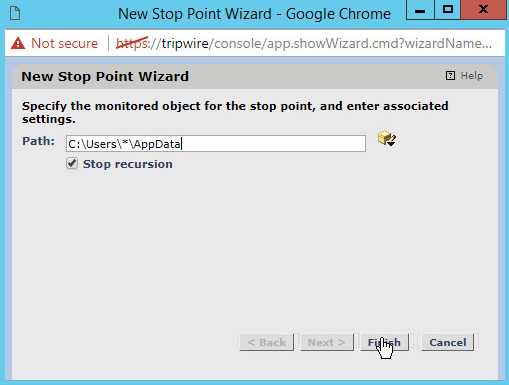
Enter the path name of directories you wish to exclude. For example, we chose to exclude C:\Users\*\AppData because that provided many false flags of routine application data modification.
Check the box next to Stop Recursion.
Click Finish.
The rule created defines a space for the tasks we will create to search through.
2.11.2.2. Creating a Baseline Task
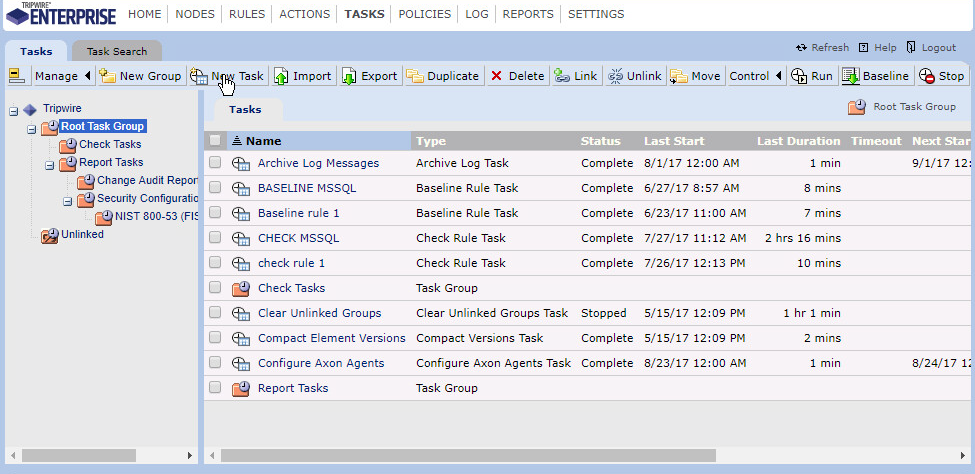
Click the Tasks link.
Click New Task.
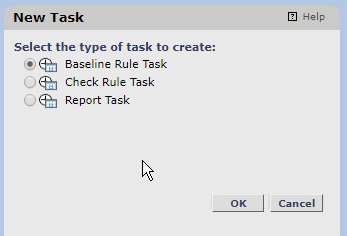
Select Baseline Rule Task.
Click OK.
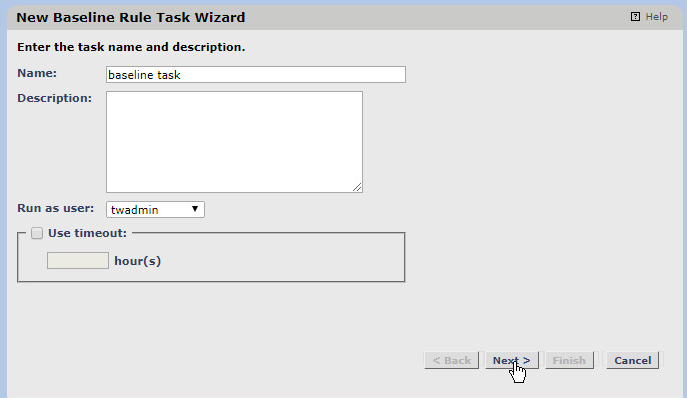
Enter a name for the baseline rule task.
Select a privileged user in Tripwire Enterprise to run the rule as.
Click Next.
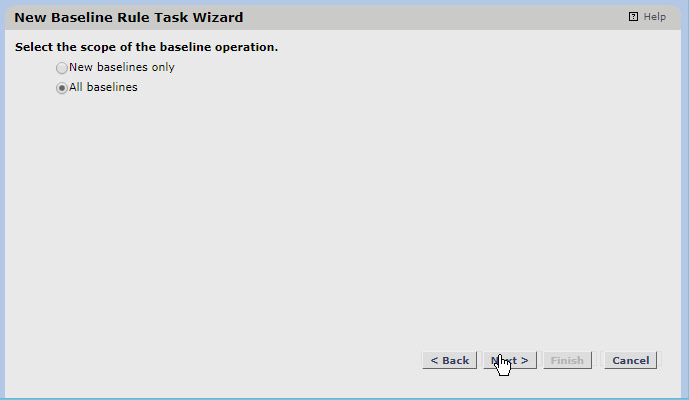
Select All Baselines.
Click Next.
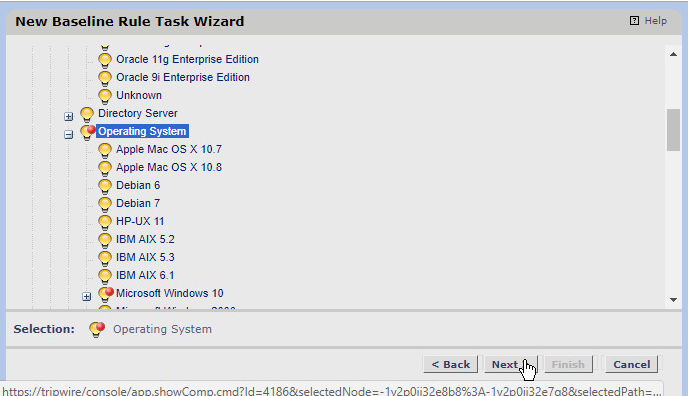
Expand Root Node Group > Smart Node Groups > System Tag Sets > Operating System.
You can select specific types of operating systems to run the task on or specific machines. We simply selected Operating System to have it run on all applicable Windows machines.
Once you have made your selection, click Next.
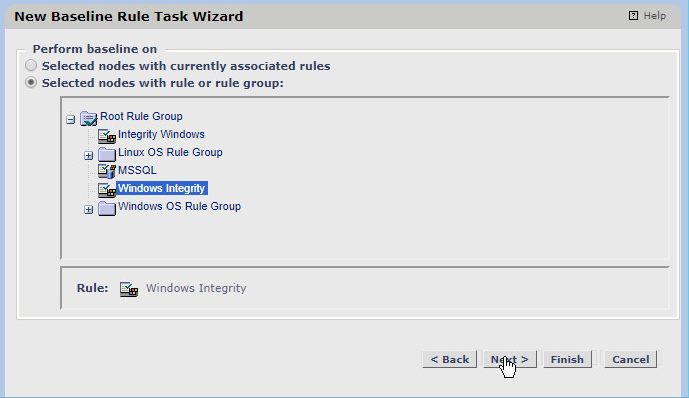
Select Selected nodes with rule or rule group.
Click the rule you created earlier.
Click Next.
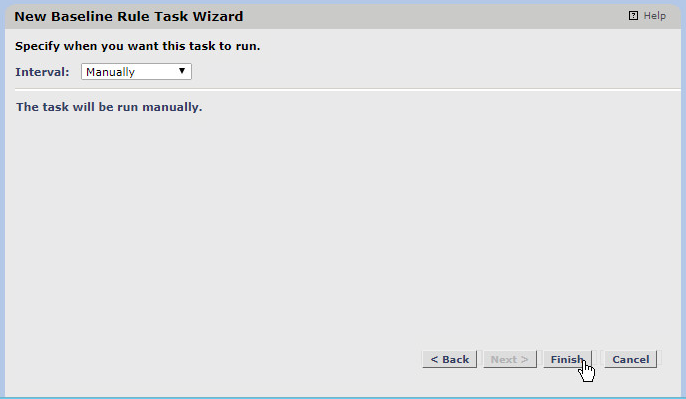
Decide how often the baseline task should be run. We set it to manually but you can also set a very specific schedule by choosing periodic.
Click Finish.
This rule will create baselines of the specified objects. Baselines are essentially versions of the file that check rules will compare against. Baselines should be primarily taken when the integrity of files are known to be good.
2.11.2.3. Creating a Syslog Action
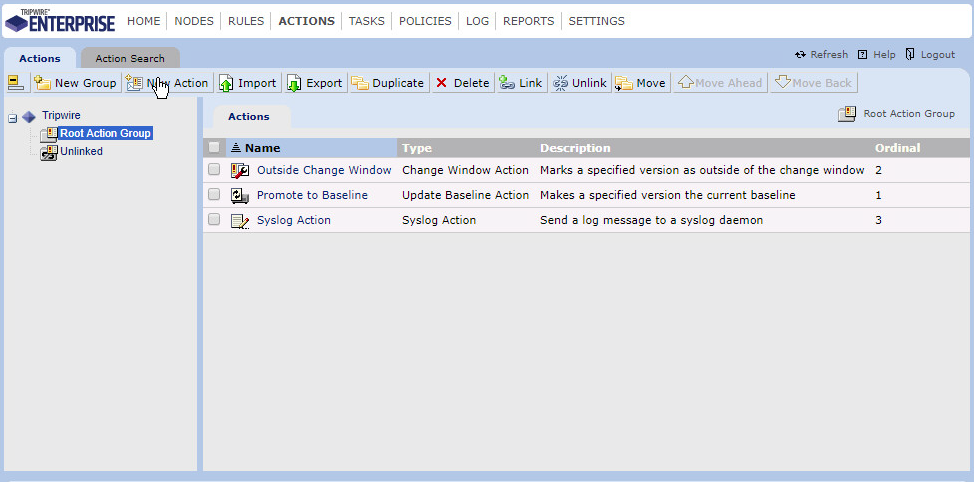
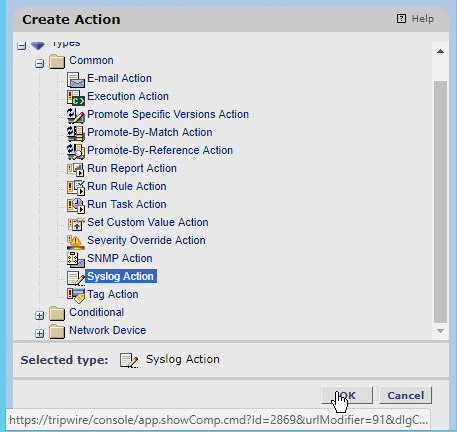
Click the Actions link.
Click New Action.
Select Syslog Action.
Click OK.
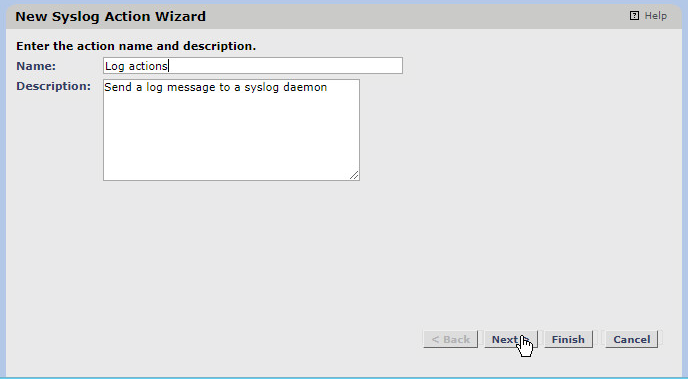
Enter a name for the Syslog Action.
Click Next.
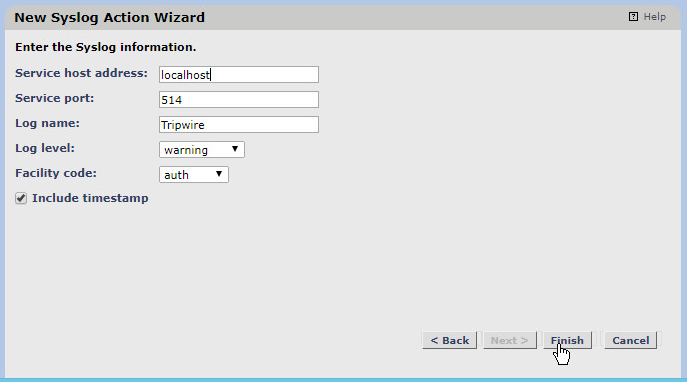
Enter the IP address of the Tripwire Log Center server.
Enter the port that Tripwire Log Center receives TCP syslog messages on.
Enter a log name, a level, and a facility code per your needs. These will show up in logs, so you can use these to help separate or identify log sources.
Click Finish.
2.11.2.4. Creating a Check Task
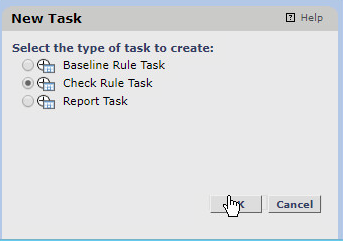
Click the Tasks link.
Click New Task.
Select Check Rule Task.
Click OK.
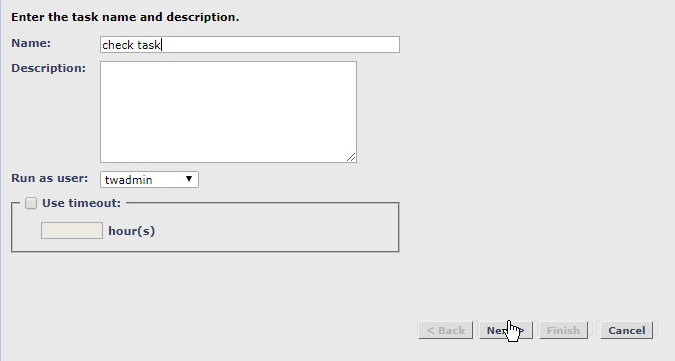
Enter a name for the baseline rule task.
Select a privileged user in Tripwire Enterprise to run the rule as.
Click Next.
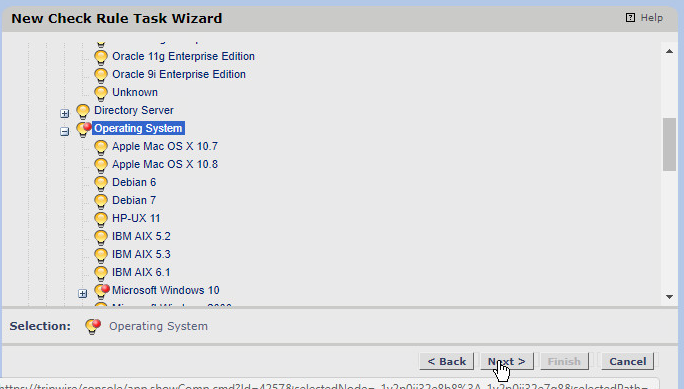
Expand Root Node Group > Smart Node Groups > System Tag Sets > Operating System.
Here, you can select specific types of operating systems to run the task on or specific machines. We simply selected Operating System to have it run on all applicable Windows machines.
Once you have made your selection, click Next.
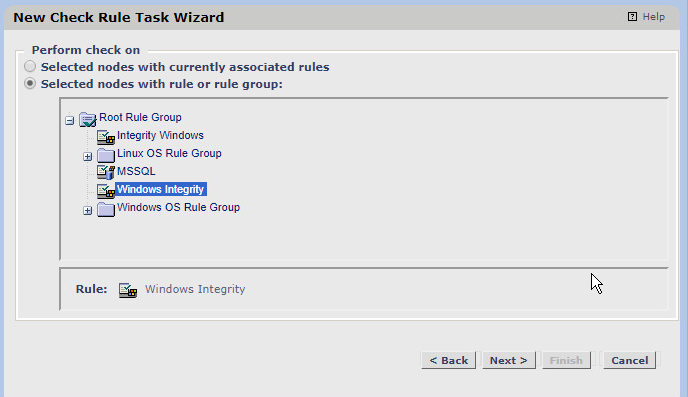
Select Selected nodes with rule or rule group.
Click the rule you created earlier.
Click Next.
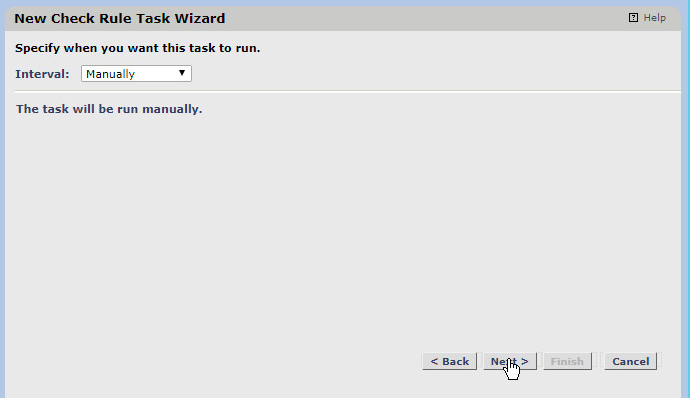
Decide how often the check task should be run. We set it to manually, but you can also set a very specific schedule by choosing periodic.
Click Next.
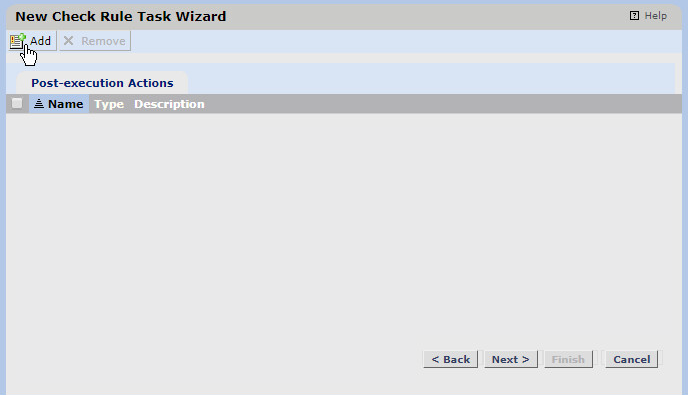
Click Add.
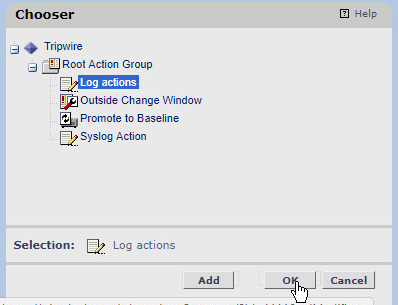
Select the Syslog Action created earlier.
Click OK.
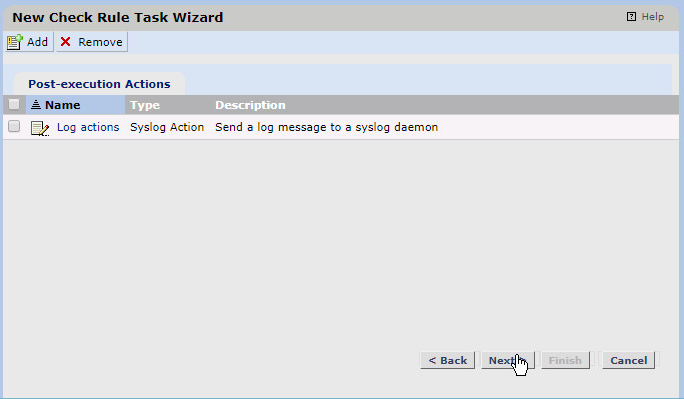
Click Next.
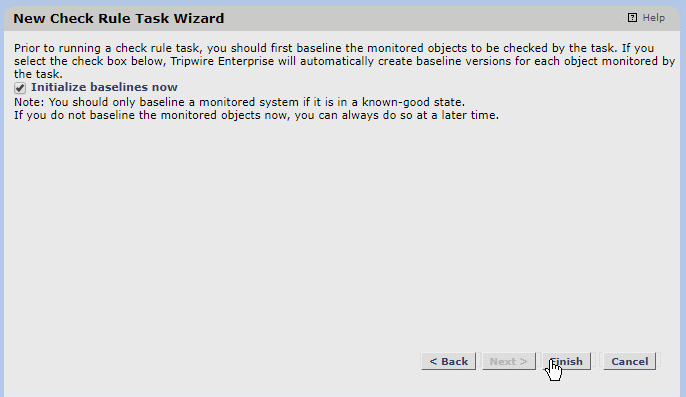
Uncheck the box next to initialize baselines now if you do not wish to immediately take a baseline of all systems.
Click Finish.
This rule will check the current versions of the selected files against their baselines and log any changes to Tripwire Log Center.
2.11.2.5. Running the Baseline Task
- Check the box next to the baseline task you created earlier.
- Click Control > Run on the taskbar.
- Wait for the run to finish. You can click the Log link to see the progress.
- When it finishes, it will log a message such as “Task ‘Baseline Rule Windows’ was completed in 600 seconds.”
2.11.2.6. Make Changes to Monitored Objects
- Open a machine being monitored by the rule you created.
- Modify a file or files in the folder that you selected in the rule creation wizard (which are being monitored by Tripwire).
2.11.2.7. Running the Check Task
- Check the box next to the check task you created earlier.
- Click Control > Run on the taskbar.
- Wait for the run to finish. You can click the Log link to see the progress.
- If you made changes to a monitored object, the log message should appear at the time the changes were made even if the change was made prior to the scan.
2.11.2.8. Filtering for Tripwire Enterprise Integrity Events in HPE ArcSight ESM
Open the ArcSight ESM machine.
Log in by going to https://vm-esm691c:8443 and entering your username/password.
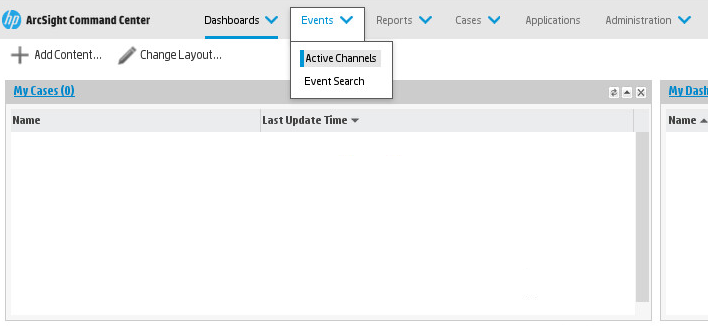
Click Events > Active Channels.
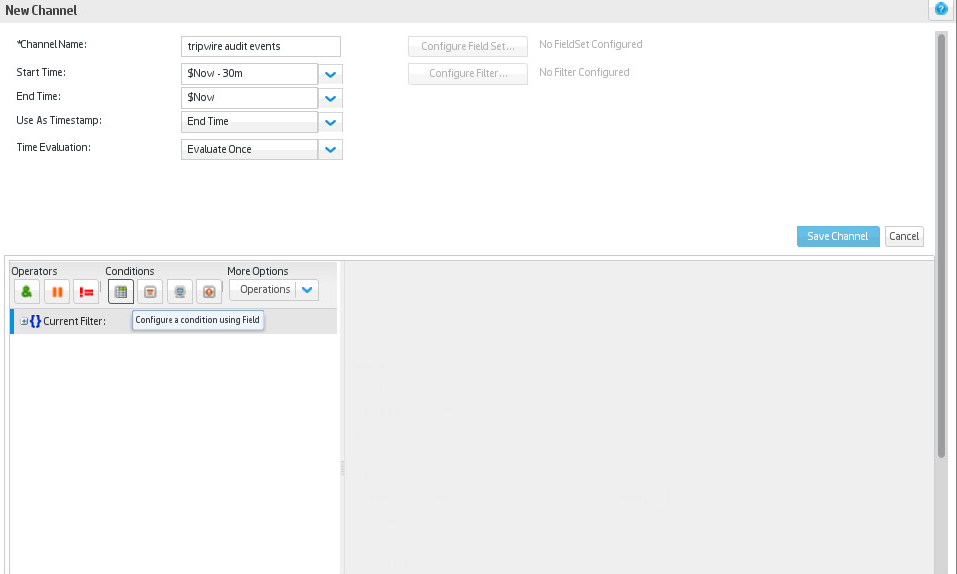
Click New.
Enter a name for the channel. Select a start time to show events, and leave $NOW as the end time.
Click Configure Filter.
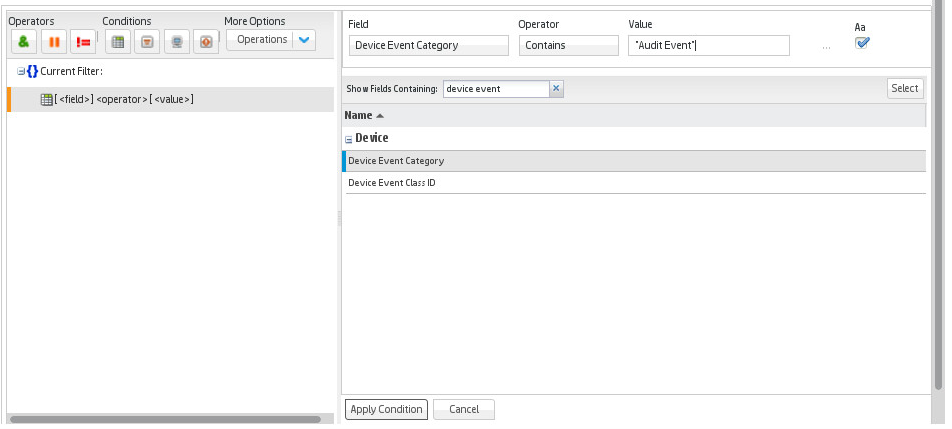
Click the button that says Configure a condition using field.
Double click Device Event Category.
For Operator, choose Contains.
For Value, enter Audit Event.
Click Apply Condition.
Click Update Filter Configuration under the list of fields.
Click Save Channel.
Click the channel you just created. It should show all file changes in the time frame you specified forwarded from Tripwire Enterprise to Tripwire Log Center to ArcSight ESM.
2.12. Integration: HPE ArcSight ESM with Veeam and Hyper-V
This section covers the process for integrating HPE ArcSight ESM with Veeam and Hyper-V. This integration assumes the correct implementation of Veeam and ArcSight as described in earlier sections. The result is the forwarding of logs generated by Veeam and Hyper-V to ArcSight ESM, as well as custom parsers to supplement the information provided by this forwarding process.
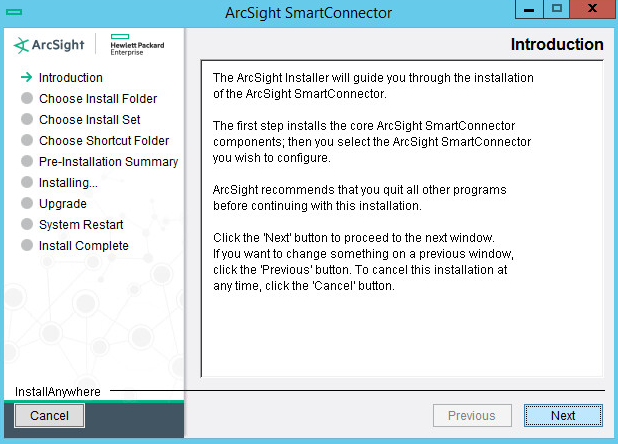
2.12.1. Install ArcSight Connector
Run the installation file ArcSight-7.4.0.7963.0-Connector-Win64 on the Veeam Server.
Wait for the initial setup to finish.
Click Next.
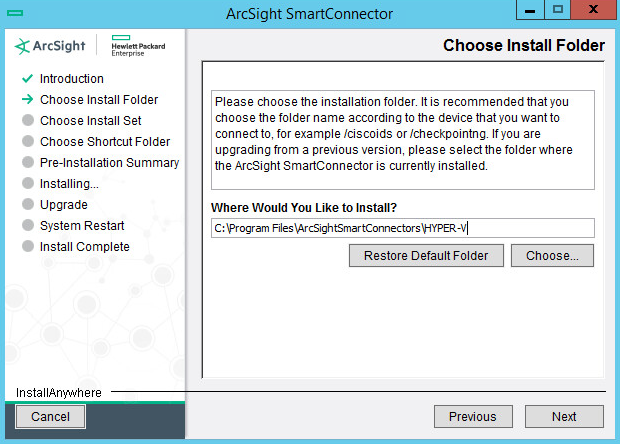
Choose a destination folder. Note: It is recommended to change the default to
<default>\HYPERVso that other installed connectors do not overwrite this one.Click Next.
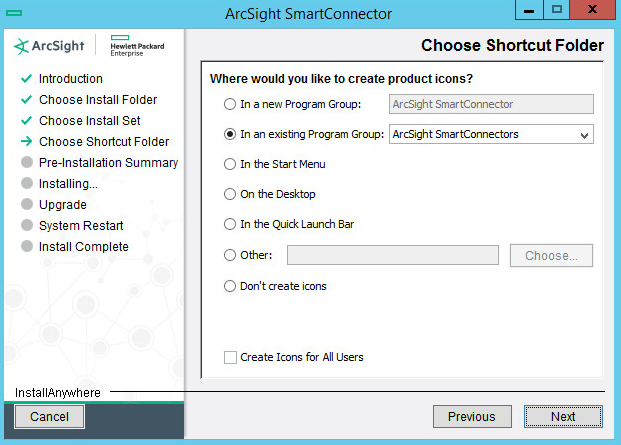
Click Next.
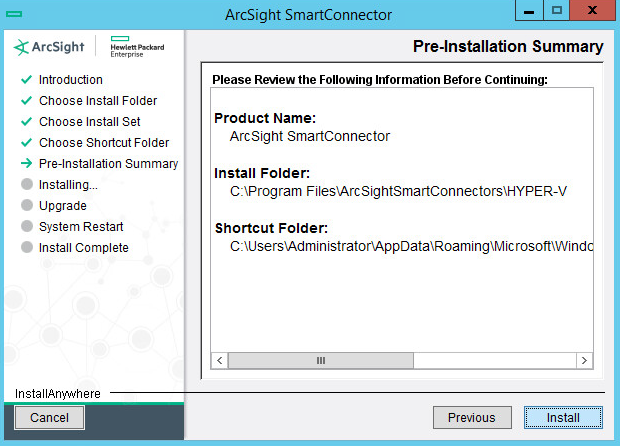
Click Install.
Wait for the installation to finish.
Select Add a Connector.
Click Next.
Choose Microsoft Windows Event Log - Native from the list.
Click Next.
Check Security log, System log, Application Log, and Custom Log.
Click Next.
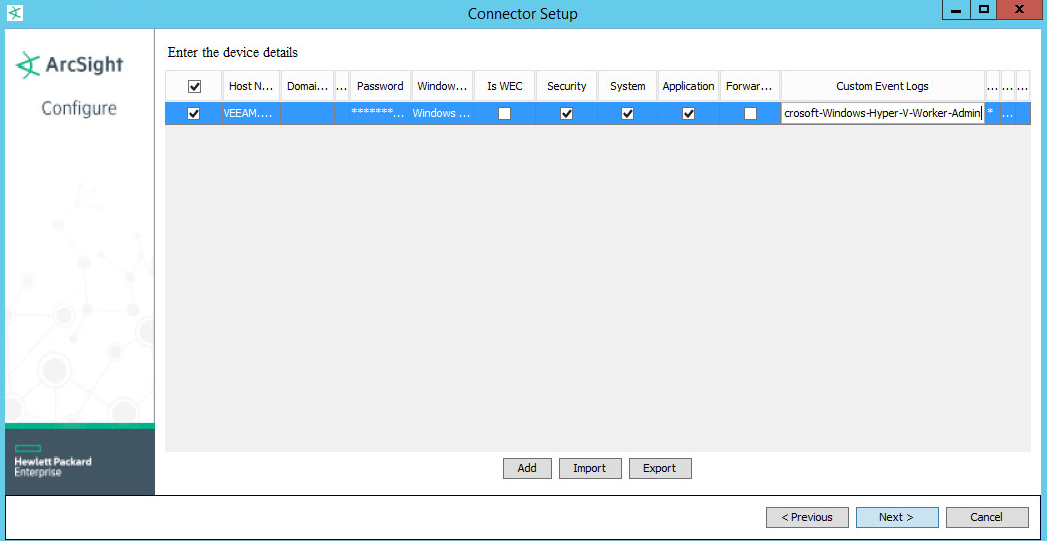
Click on the box underneath Custom Event Logs.
Enter Veeam Backup, Microsoft-Windows-Hyper-V-VMMS-Admin, Microsoft-Windows-Hyper-V-Integration-Admin, Microsoft-Windows-Hyper-V-SynthNic-Admin, Microsoft-Windows-Hyper-V-Worker-Admin.
You can add more application logs through the following process:
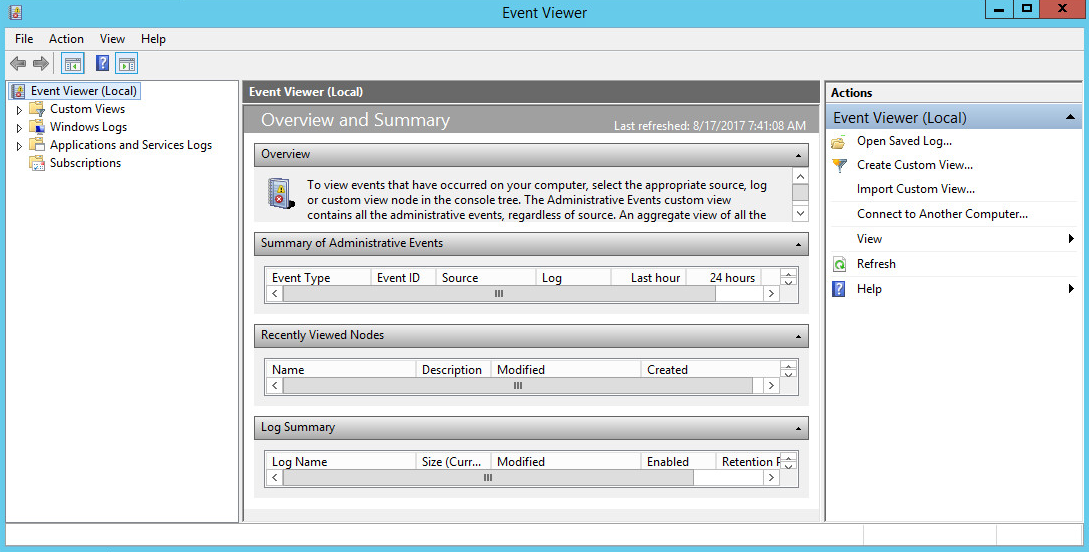
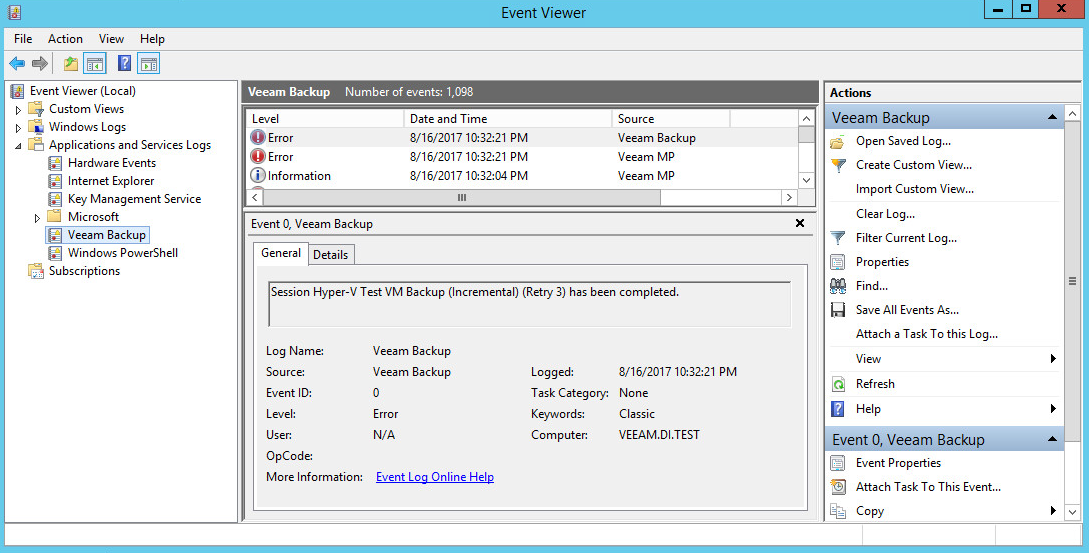
Open Microsoft Event Viewer.
Find the log you wish to add.
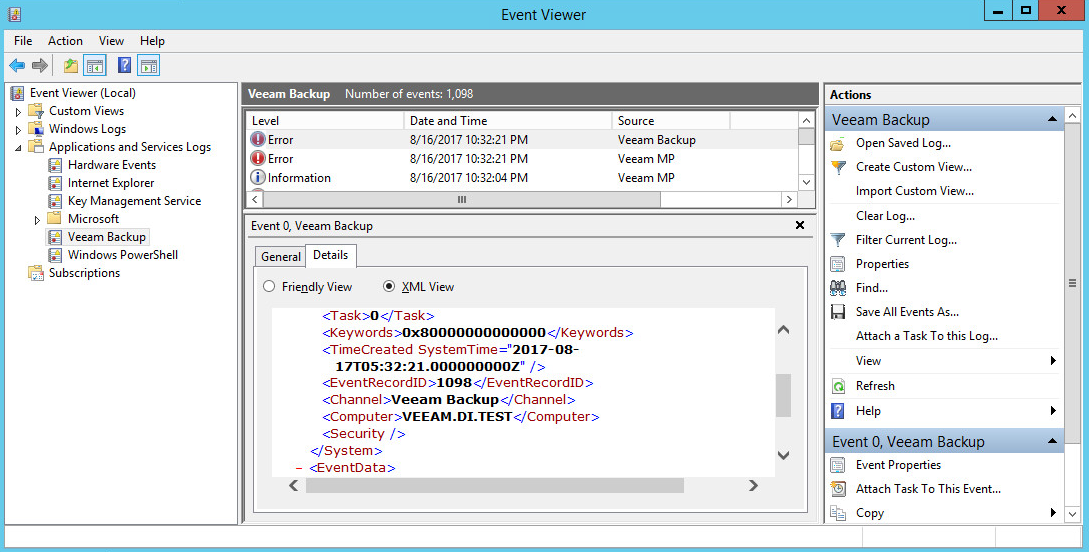
Open the Details pane of a log and find the field Channel.
Note that this may differ from the Log Name in the General pane. (For example, one of the Hyper-V log’s Log Name is Microsoft-Windows-Hyper-V-VMMS/Admin but the channel name is Microsoft-Windows-Hyper-V-VMMS-Admin.)
Enter all these channel names separated by commas in the Custom Event Logs field.
Click Next.
Choose ArcSight Manager (encrypted).
Click Next.
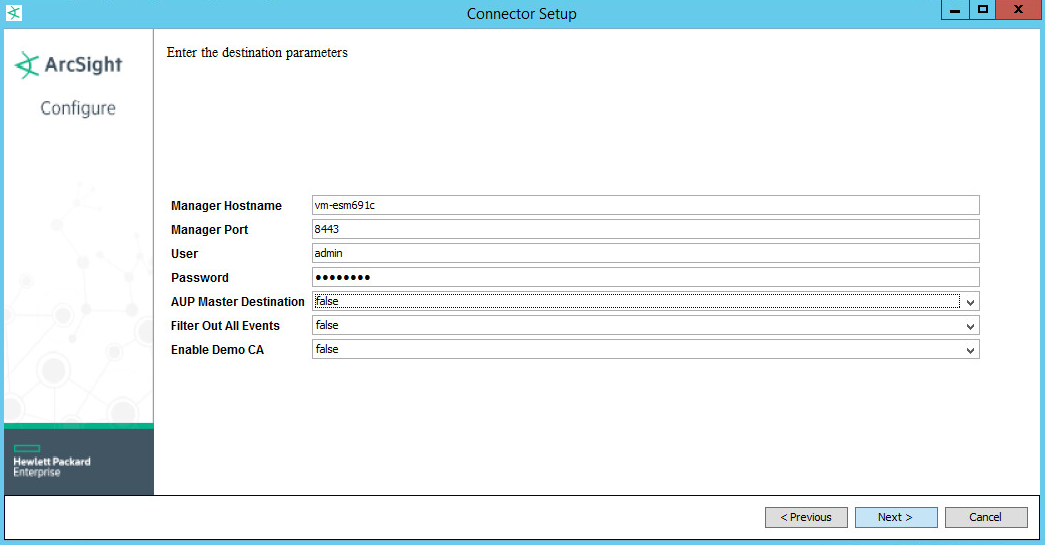
For Manager Hostname, put vm-esm691c, or the hostname of your ESM server.
For Manager Port, put 8443, or the port that ESM is running on, on the ESM server.
Enter the username and password used for logging into ArcSight Command Center (admin/password).
Click Next.
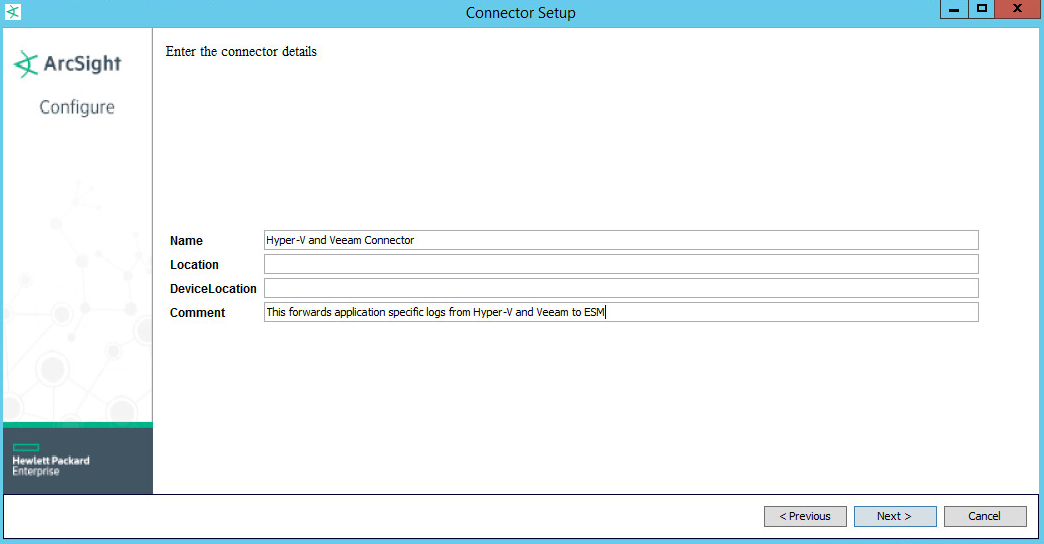
Set identifying details about the system to help identify the connector (include at least Name; the rest is optional).
Click Next.
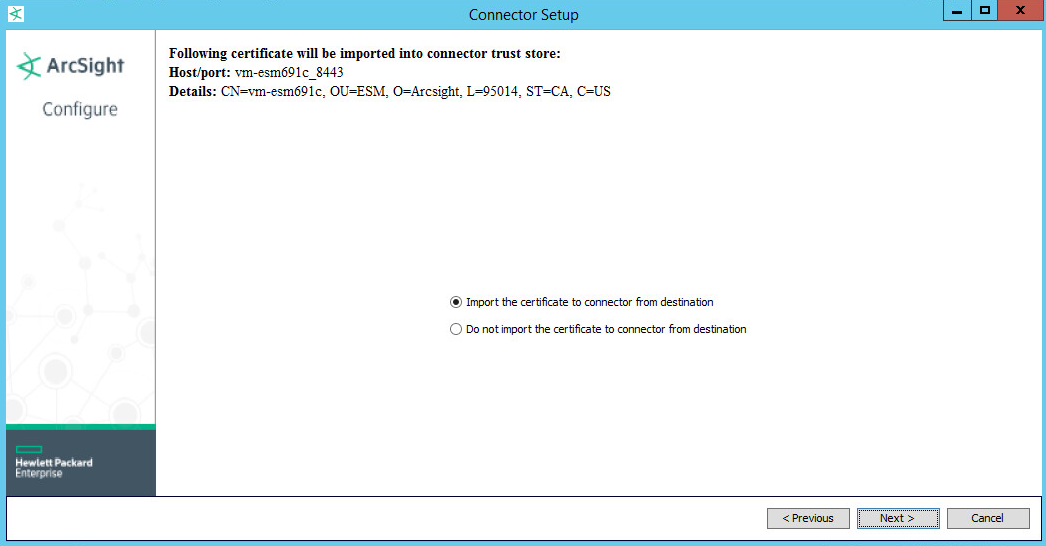
Select Import the certificate to connector from destination. This will fail if the Manager Hostname does not match the hostname of the VM.
Click Next.
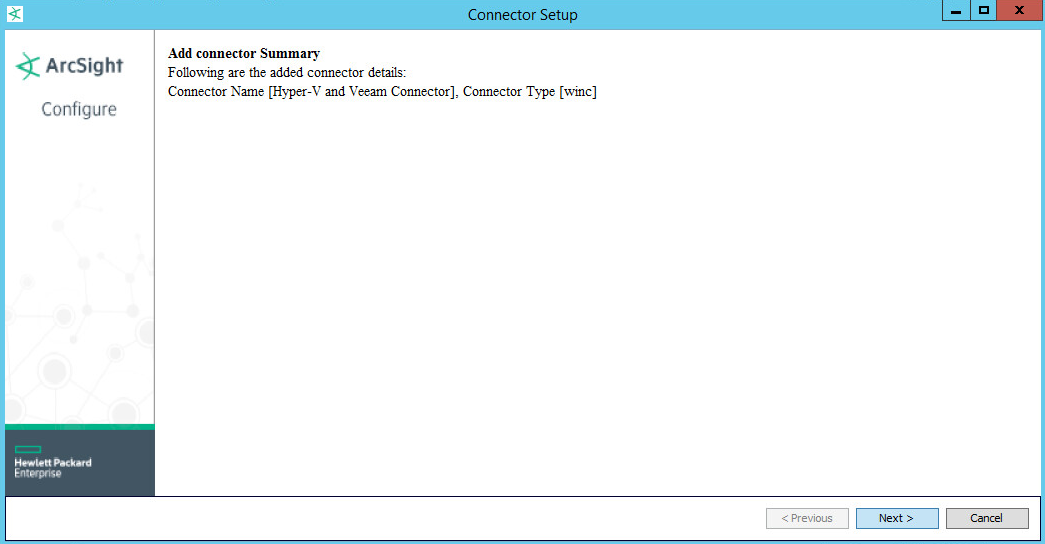
Wait for the process to complete.
Click Next.
Choose Install as a service.
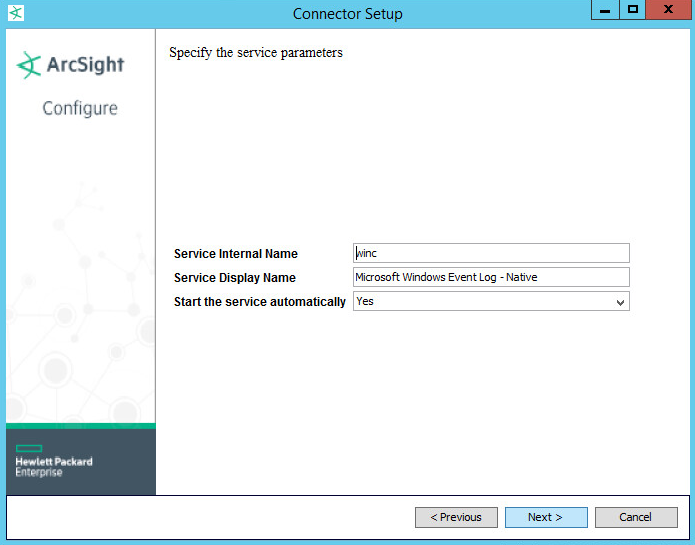
Click Next.
Click Next.
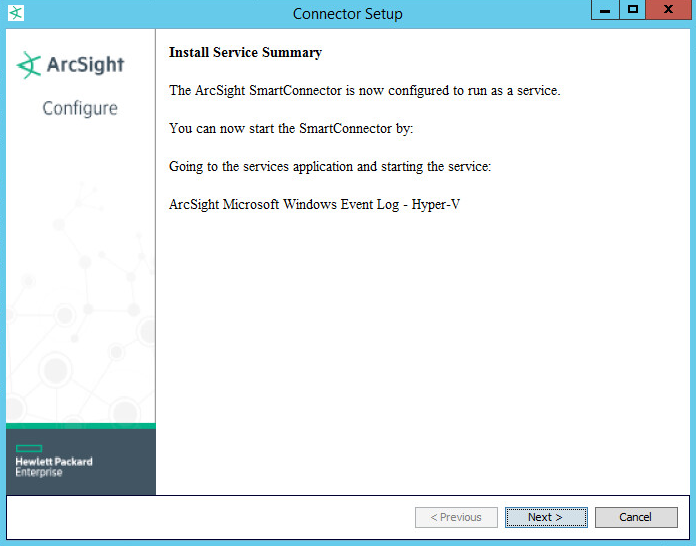
Click Next.
Choose Exit.
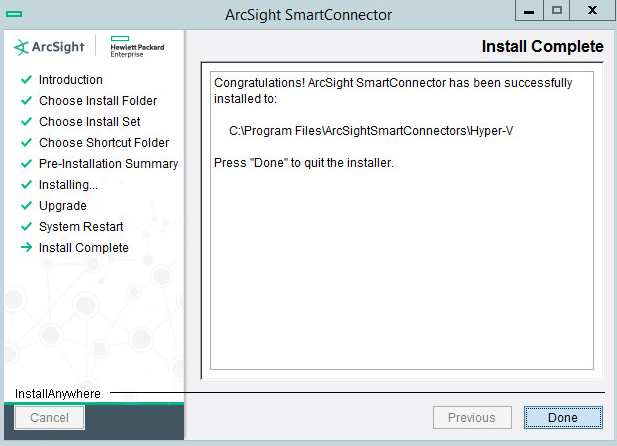
Click Next.
Click Done.
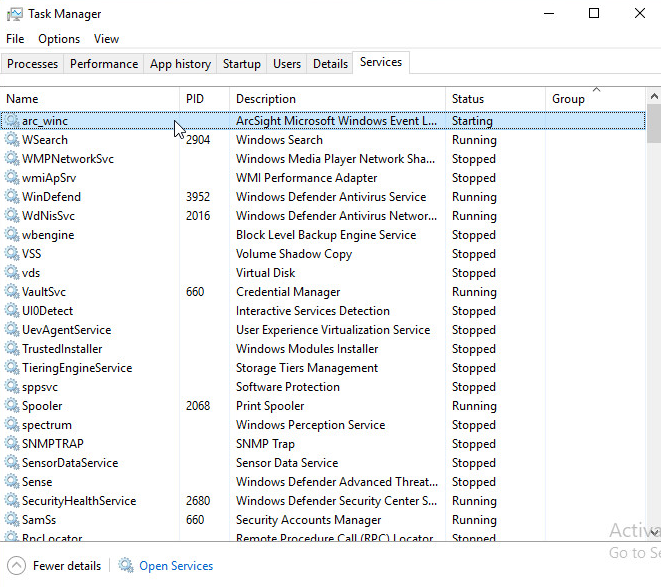
Open Task Manager.
Click More Details.
Go to the Services tab.
Find the service just created arc_winc for ArcSight, and right click it.
Choose Start.
The machine will now report its logs to ArcSight ESM.
For more fine-grained reporting, such as including more information about the event, you may wish to include custom parsers that are described below.
2.12.2. Create a Parser for Veeam Logs
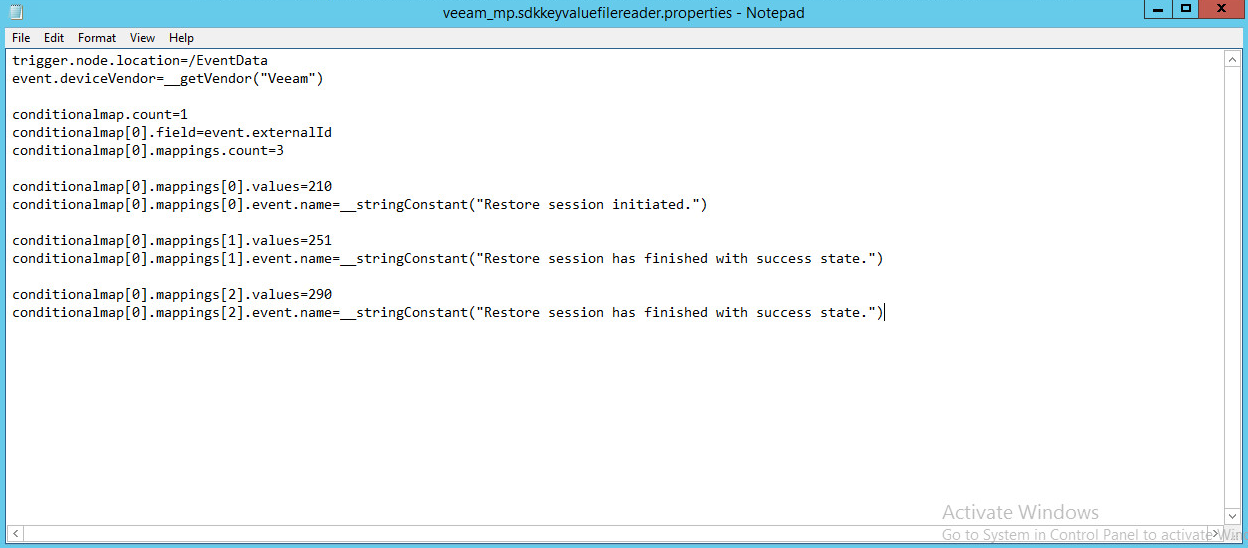
For a Veeam custom parser that handles event numbers 210, 251, and 290, create a configuration file with the following text:
trigger.node.location=/EventData
event.deviceVendor=__getVendor("Veeam")
conditionalmap.count=1
conditionalmap[0].field=event.externalId
conditionalmap[0].mappings.count=3
conditionalmap[0].mappings[0].values=210
conditionalmap[0].mappings[0].event.name=__stringConstant("Restore session initiated.")
conditionalmap[0].mappings[1].values=251
conditionalmap[0].mappings[1].event.name=__stringConstant("Restore session has finished with success state.")
conditionalmap[0].mappings[2].values=290
conditionalmap[0].mappings[2].event.name=__stringConstant("Restore session has finished with success state.")
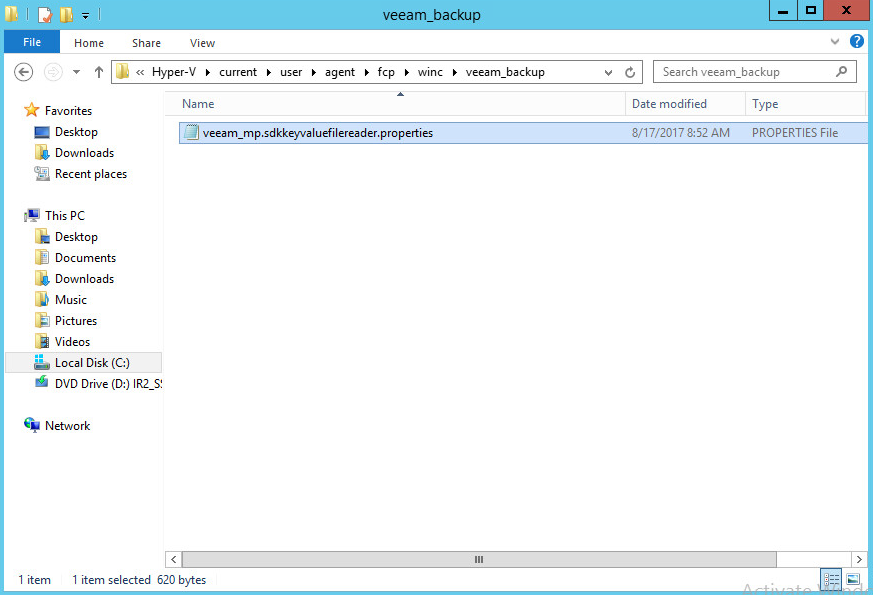
Save this file as C:\Program Files\ArcSightSmartConnectors\<name of folder>\current\user\agent\fcp\winc\veeam_backup\veeam_mp.sdkkeyvaluefilereader.properties
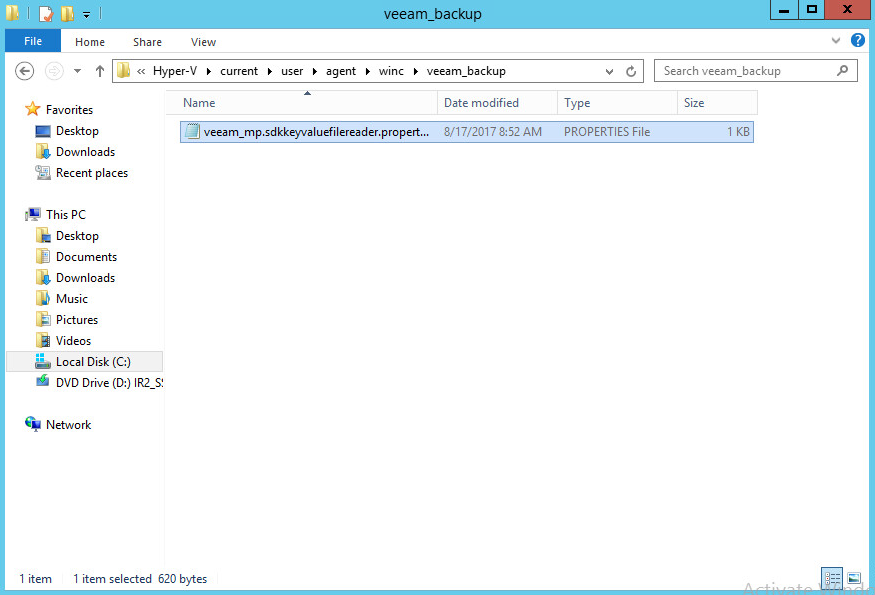
Copy this file to C:\Program Files\ArcSightSmartConnectors\<name of folder>\current\user\agent\winc\veeam_backup\veeam_mp.sdkkeyvaluefilereader.properties
2.12.3. Create a Parser for Hyper-V Logs
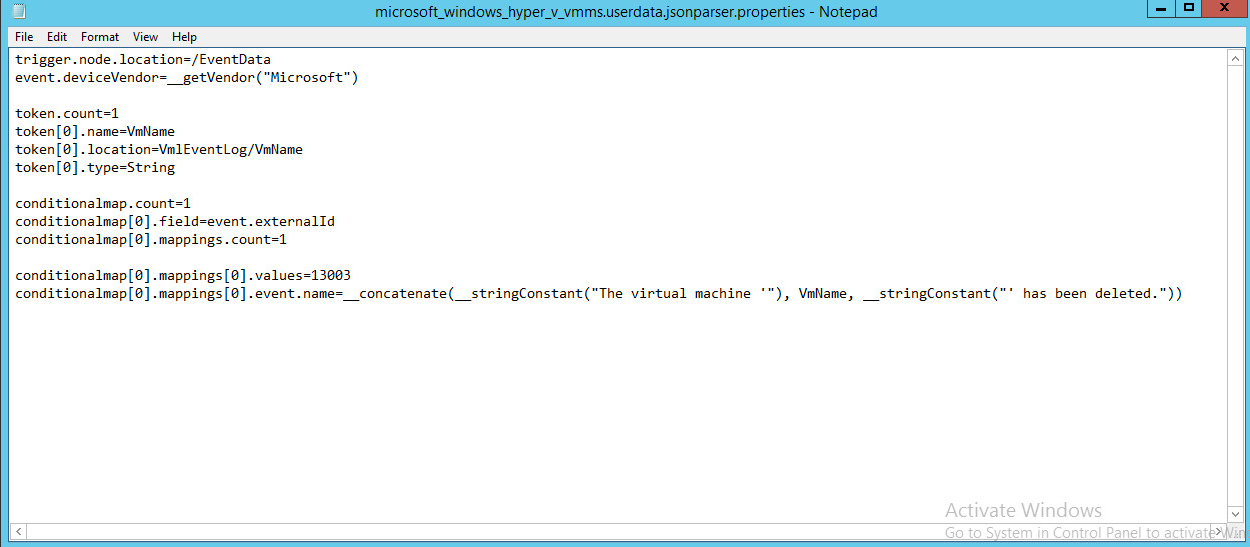
For a Hyper-V VMMS custom parser, create a configuration file with the following text:
trigger.node.location=/EventData
event.deviceVendor=__getVendor("Microsoft")
token.count=1
token[0].name=VmName
token[0].location=VmlEventLog/VmName
token[0].type=String
conditionalmap.count=1
conditionalmap[0].field=event.externalId
conditionalmap[0].mappings.count=1
conditionalmap[0].mappings[0].values=13003
conditionalmap[0].mappings[0].event.name=__concatenate(__stringConstant("The virtual machine '"), VmName, __stringConstant("' has been deleted."))
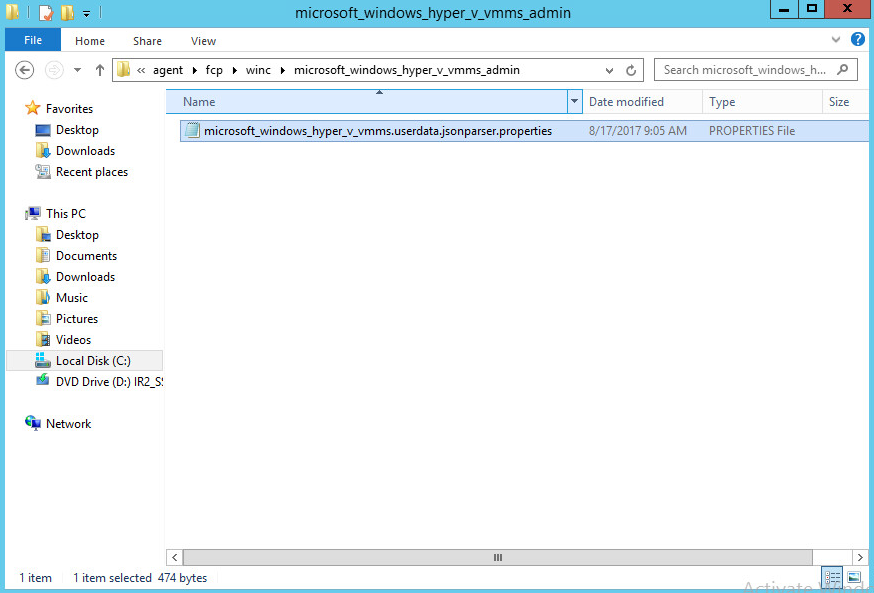
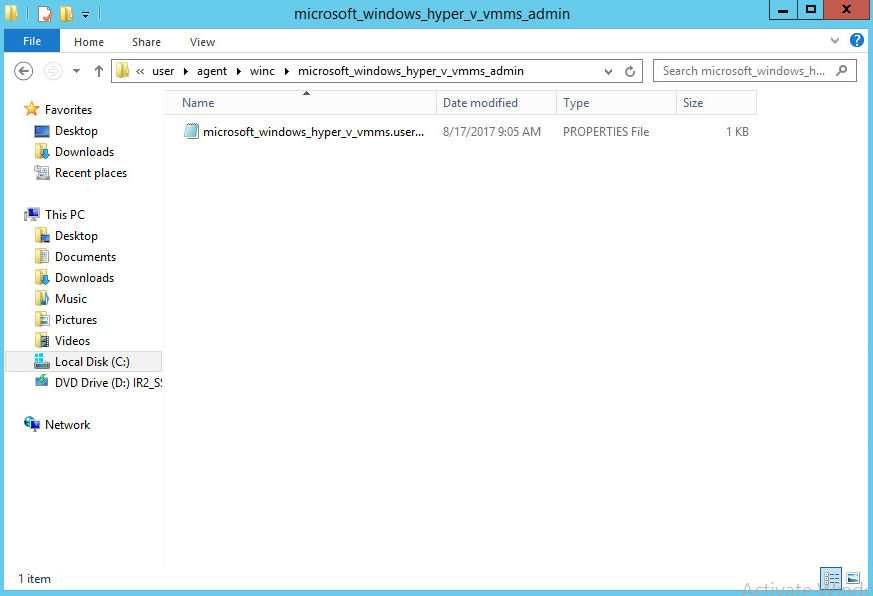
Save this file as
C:\Program Files\ArcSightSmartConnectors\<name of folder>\current\user\agent\fcp\winc\microsoft_windows_hyper_v_vmms_admin\microsoft_windows_hyper_v_vmms.userdata.jsonparser.properties
Copy this file to
C:\Program Files\ArcSightSmartConnectors\<name of folder>\current\user\agent\winc\microsoft_windows_hyper_v_vmms_admin\microsoft_windows_hyper_v_vmms.userdata.jsonparser.properties
These two parsers will allow for details of VM deletions and VM restores to be shown in ArcSight. Custom parsers are a functionality of ArcSight. For more information on the creation of custom parsers, please see the ArcSight FlexConnector Developer’s Guide, as well as the SmartConnector for Microsoft Windows Event Log - Native, Configuration Guide (for information specific to Windows event logs).
2.13. Integration: GreenTec WORMdisks and IBM Spectrum Protect
This section covers the process for integrating IBM Spectrum Protect and GreenTec WORMdisks. The result is the capability to backup clients directly to WORMdisks in order to preserve data more securely. This integration process does not include instructions related to locking the WORMdisks – that process is found in the GT_WinStatus User Guide, that should accompany the installation disk. Scheduling the locking of these disks is left up to the discretion of the adapting organization.
2.13.1. Install IBM Spectrum Protect Server on the GreenTec Server
You may need to disable Run all administrators in Admin Approval Mode. To do this go to Control Panel > Administrative Tools > Local Security Policy > Local Policies > Security Options. Double click the User Account Control: Run all administrators in Admin Approval Mode section. Select Disable and click OK. Restart the computer.
Run WIN_SER_STG_ML in its own folder to extract the contents.
Run the install script.
Make sure all the boxes are checked.
Click Next.
Read and select I accept the terms in the license agreement.
Click Next.
Select the installation location for files.
Click Next.
Click Next.
Make sure all the packages are checked.
Click Next.
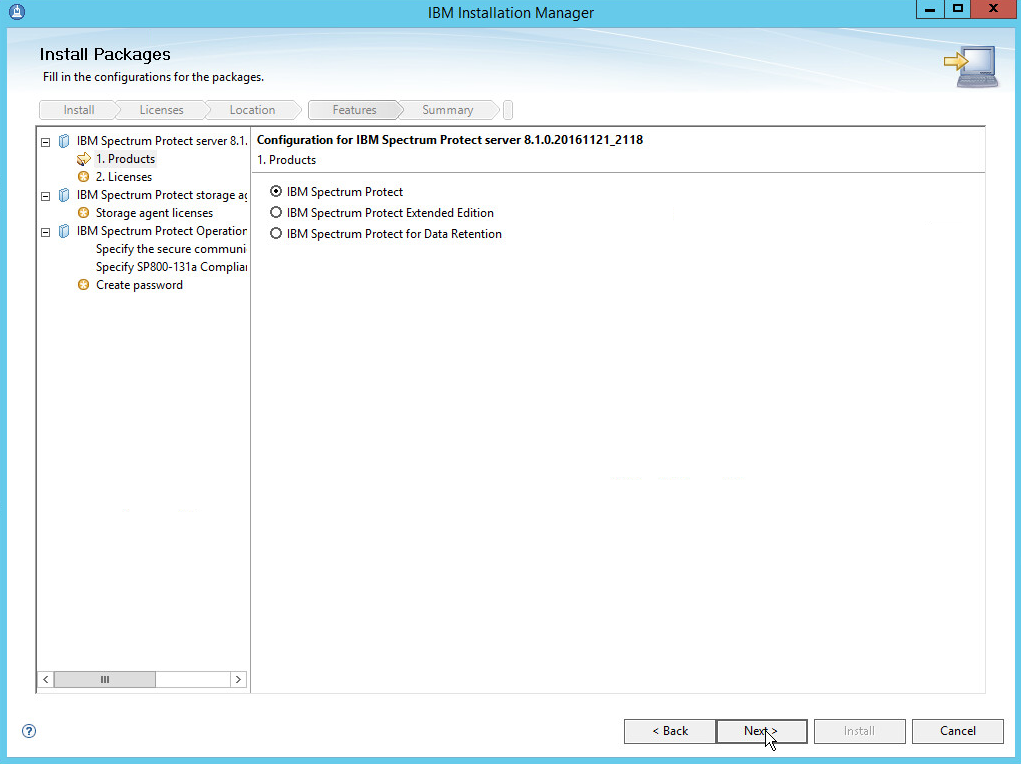
Select IBM Spectrum Protect.
Click Next.
Read and select I accept the terms in the license agreement.
Click Next.
Read and select I accept the terms in the license agreement.
Click Next.
Specify 11090 for the port.
Click Next.
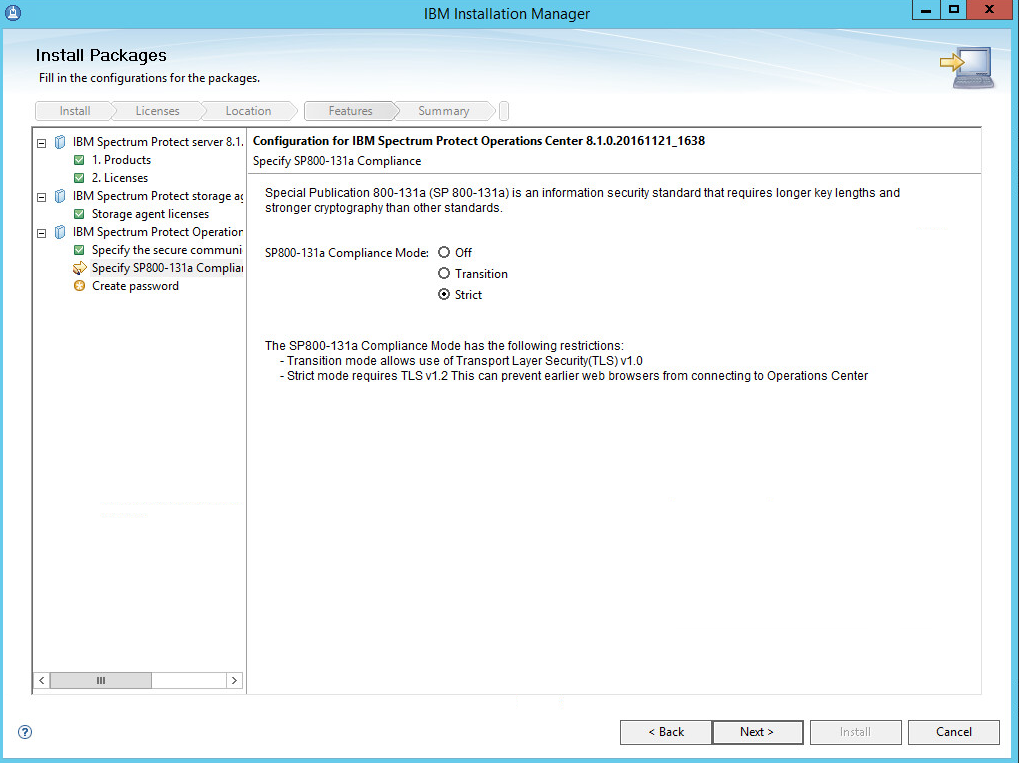
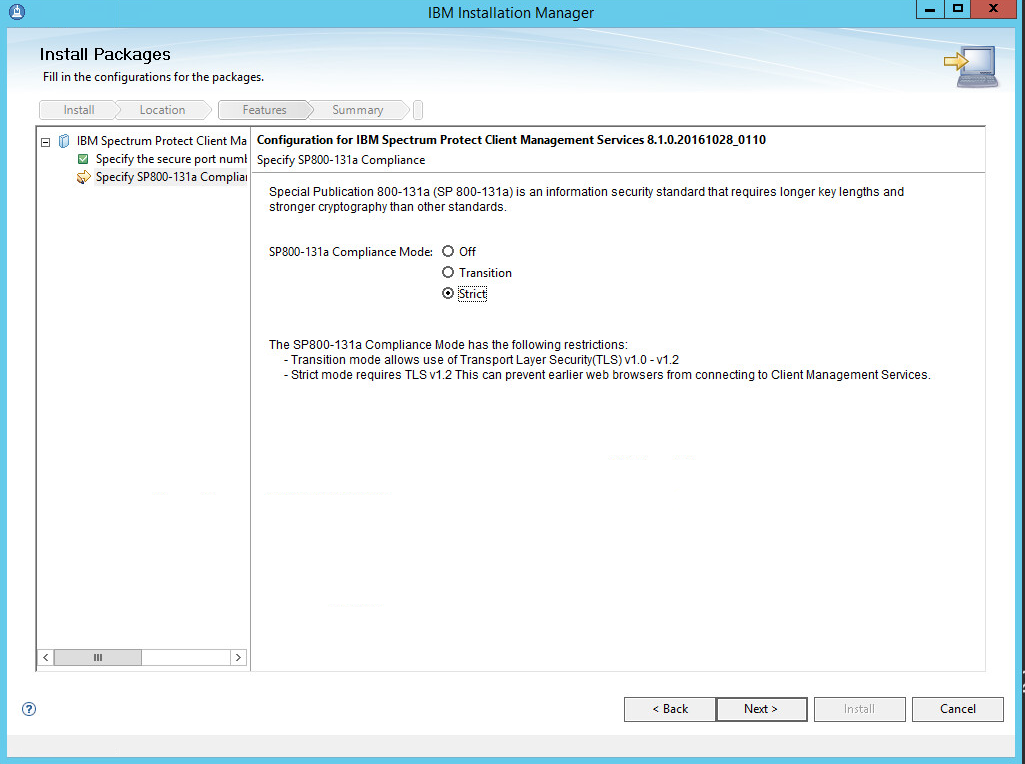
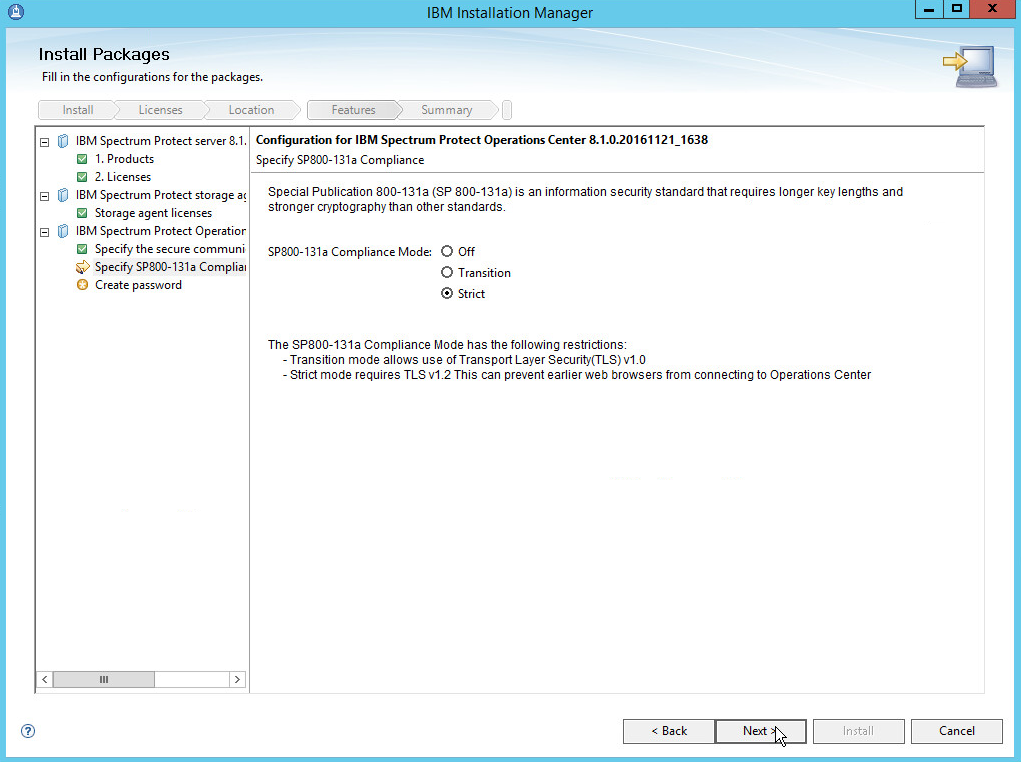
Select Strict for the SP800-131a Compliance.
Click Next.
Create a password.
Click Next.
Click Install.
After the successful installation, click Finish.
2.13.2. Configure IBM Spectrum Protect
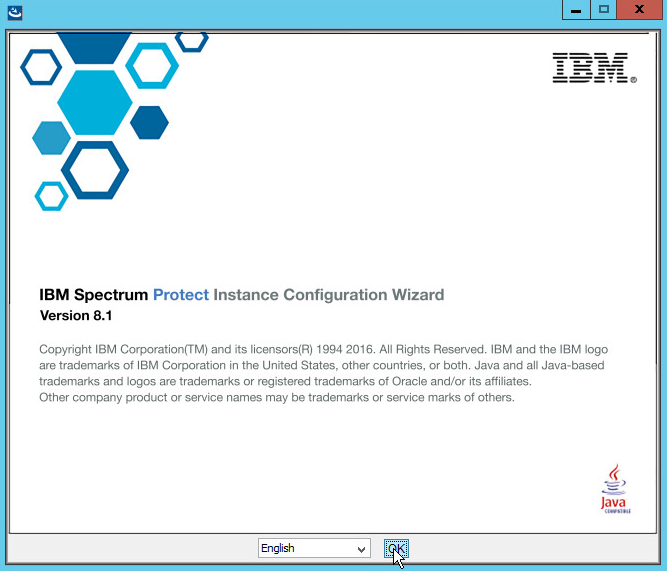
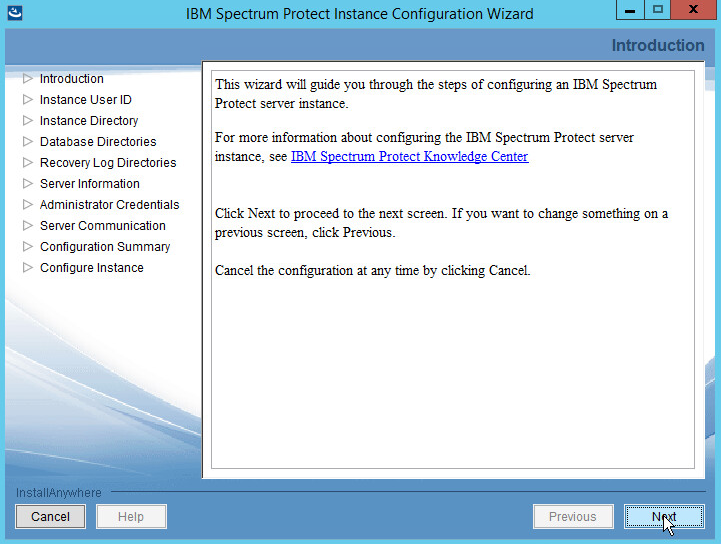
Go to Start > IBM Spectrum Protect Configuration Wizard.
Click OK.
Click Next.
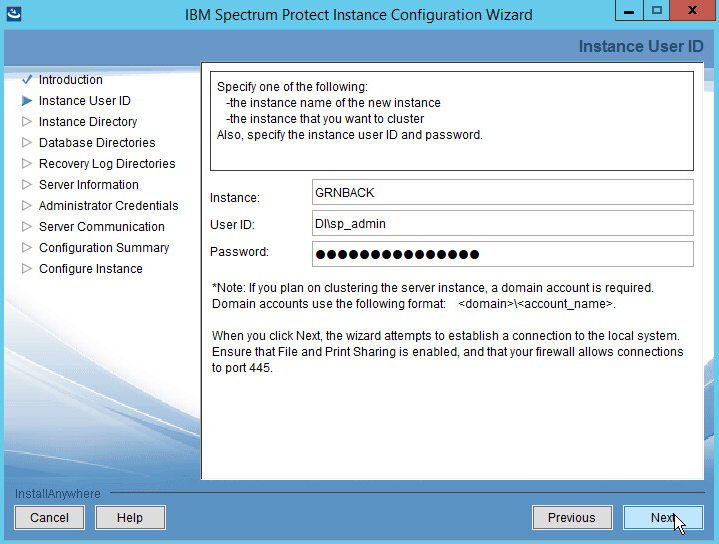
Specify a name and an account for the IBM server to use. Example: (name: GRNBACK, User ID: DI\sp_admin)
Click Next.
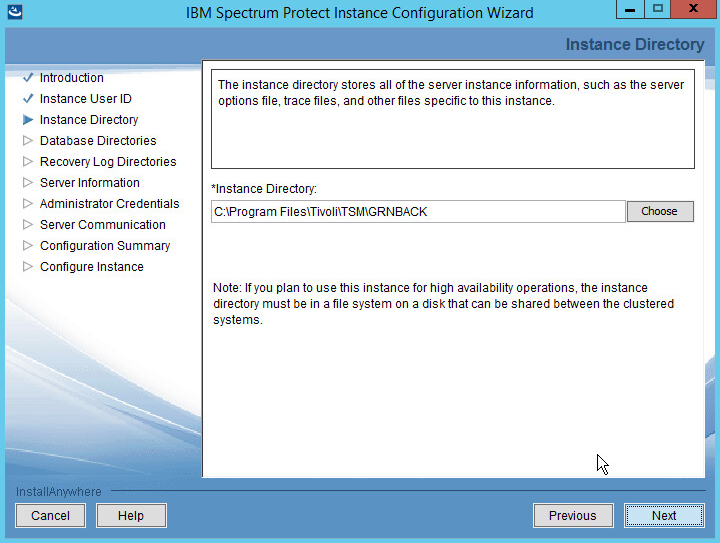
Choose a directory.
Click Next.
Click Yes if prompted to create the directory.
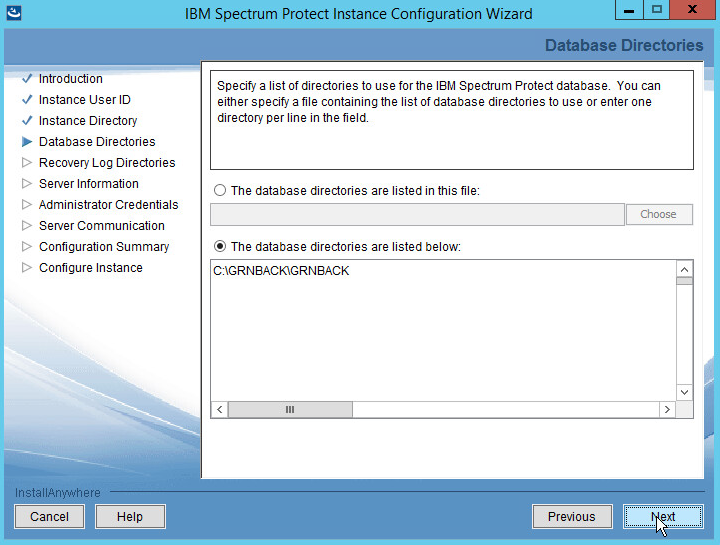
Choose The database directories are listed below.
Create a directory to contain the database. Example: C:\BACKSERV\IBMBackupServer.
Enter the directory in the space provided.
Click Next.
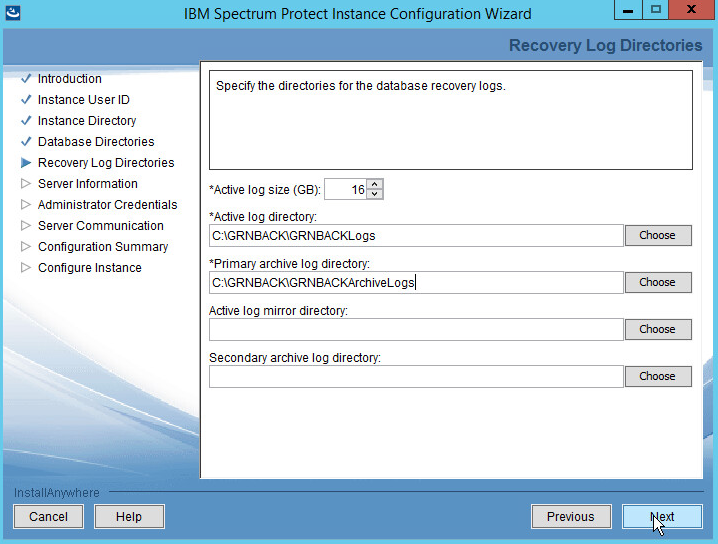
Create directories for logs and archive logs. Example: C:\BACKSERV\IBMBackupServerLogs, C:\BACKSERV\IBMBackupServerArchiveLogs.
Enter the directories in their respective fields.
Click Next.
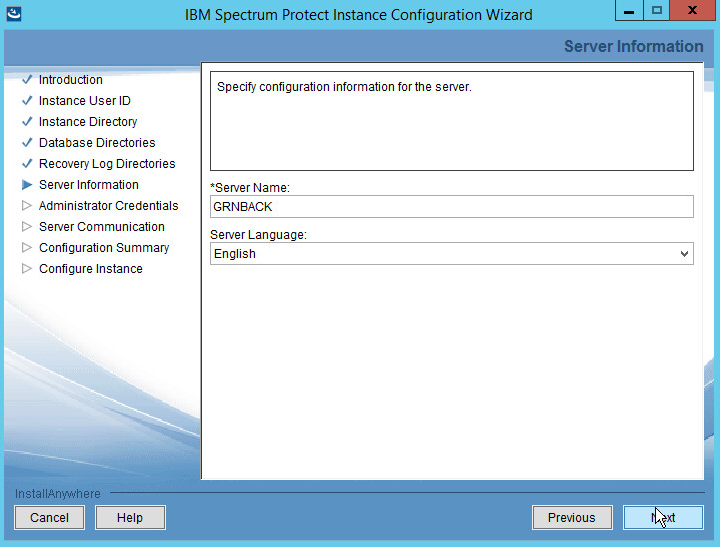
Specify the server name.
Click Next.
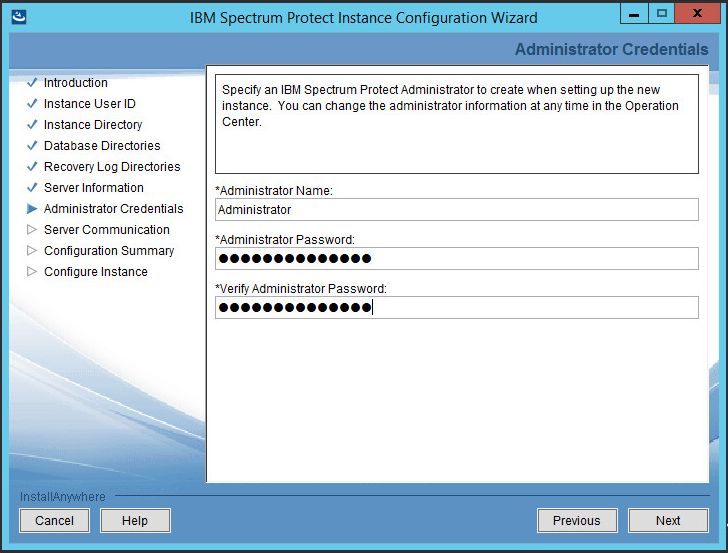
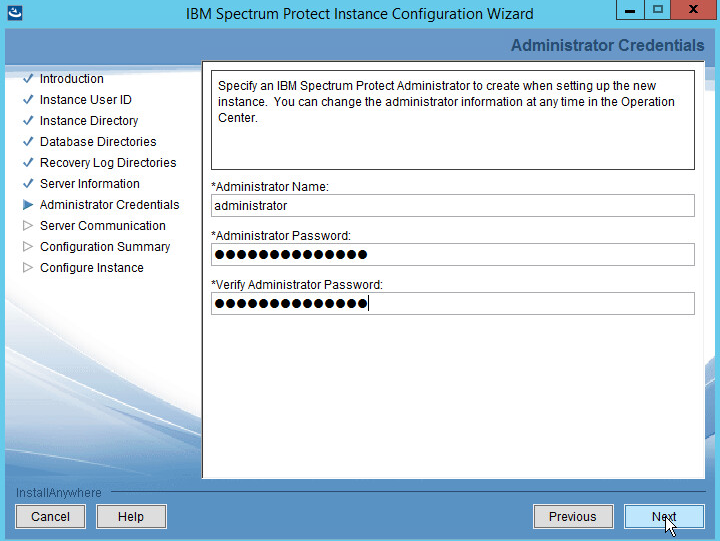
Specify an Administrator account.
Click Next.
Select a port (example: 1500).
Check the box next to Enable SSL Communication and enter a port (example: 23444).
Click Next.
Click Next.
Wait for the installation to finish.
Click Next.
Click Done.
Log in to Operations Center by going to localhost:11090/oc/.
Log in using the credentials provided in the Configuration Wizard.
Enter the password for a new account to be created on the system.
Click Next.
Select the time interval for data collection.
Click Next.
Select time intervals that suit your organization’s needs.
Click Configure.
2.13.3. Connect the GreenTec Server to the IBM Spectrum Protect Server
Go back to the primary IBM server.
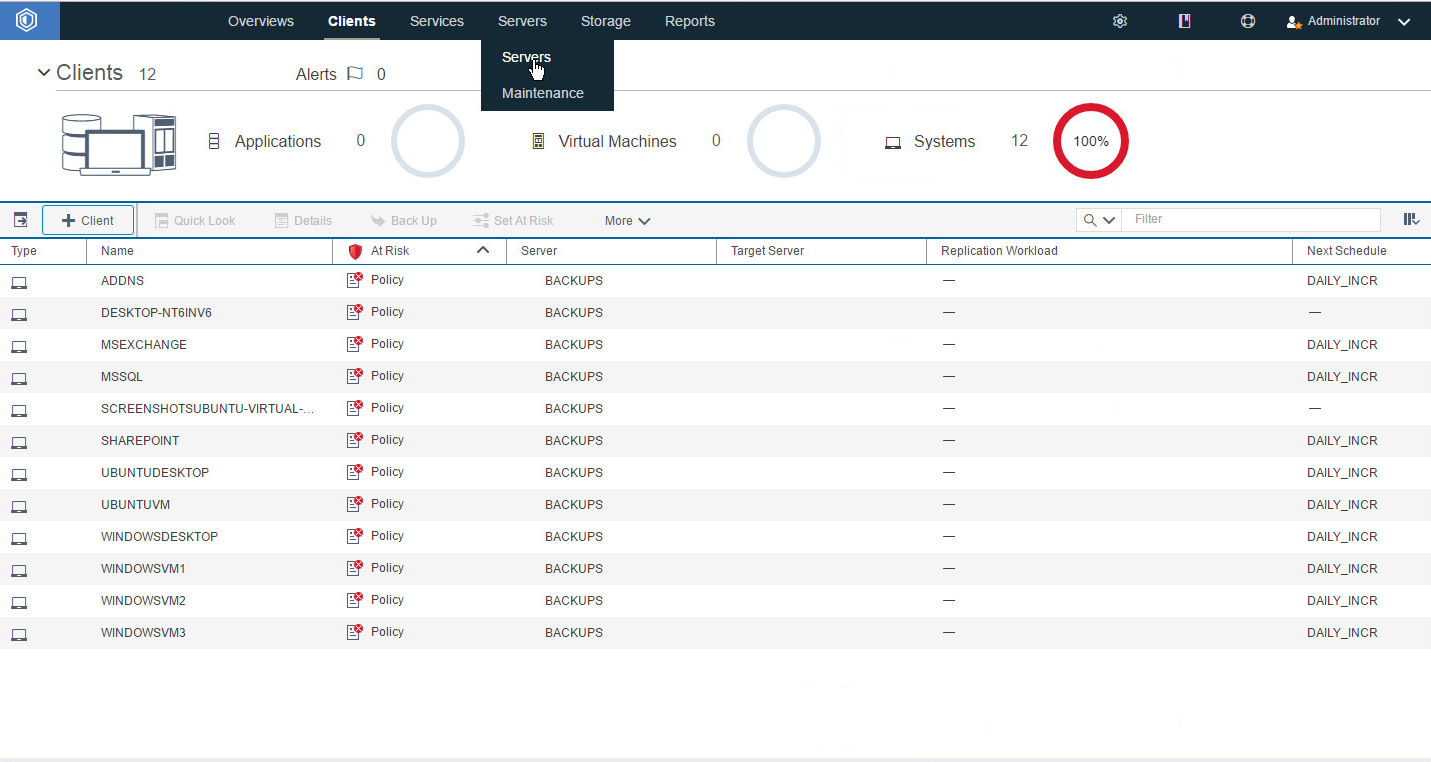
Click Servers.
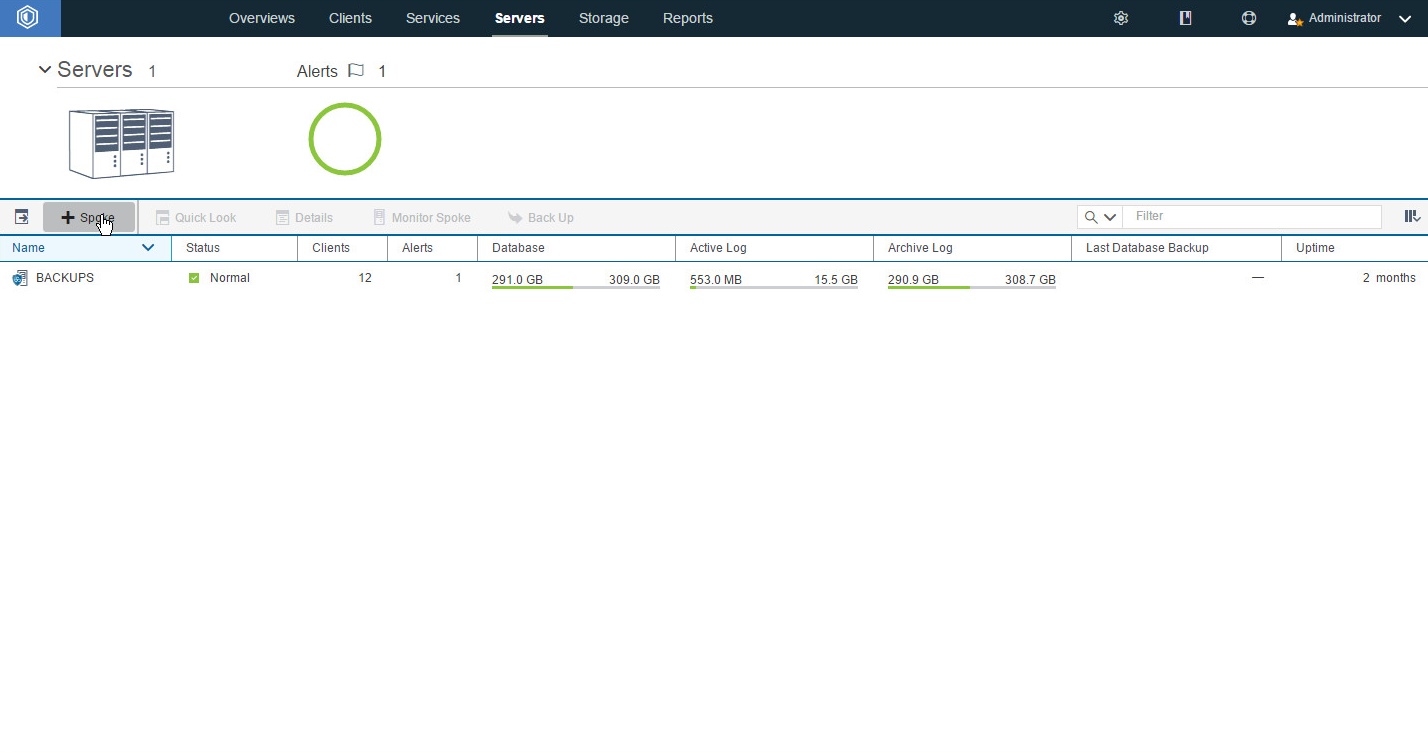
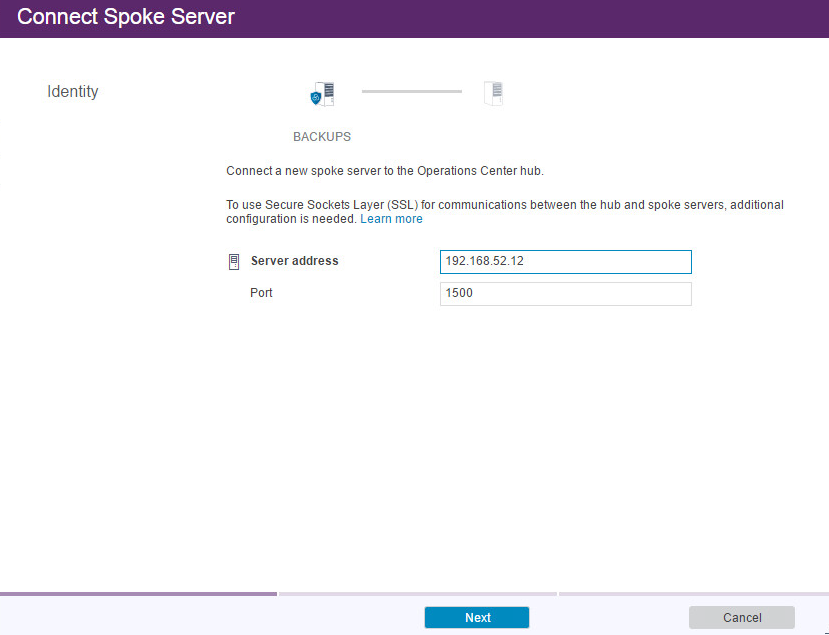
Click +Spoke.
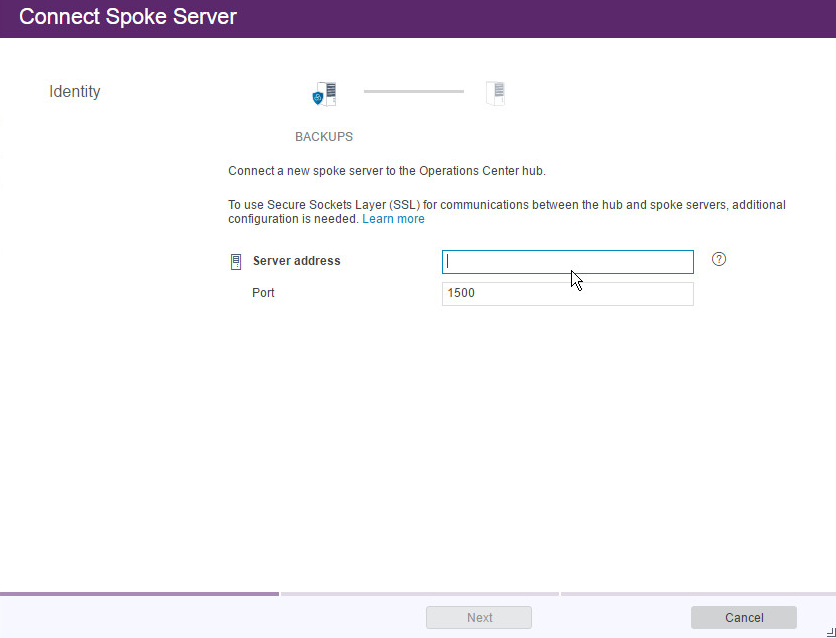
Enter the IP address of the server with GreenTec disks attached.
Enter the port that the server is configured to listen for connections on (Example: 1500).
Click Next.
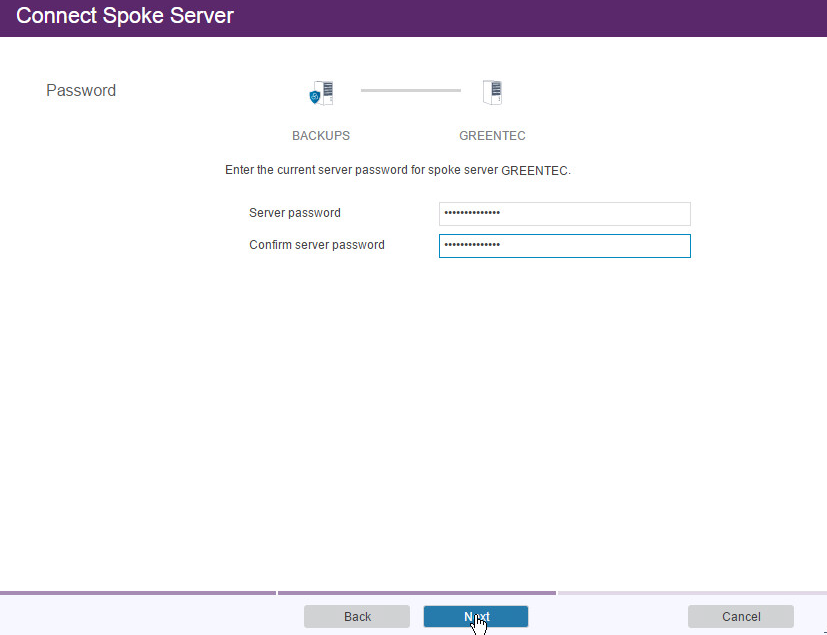
Enter the password for the new server twice.
Click Next.
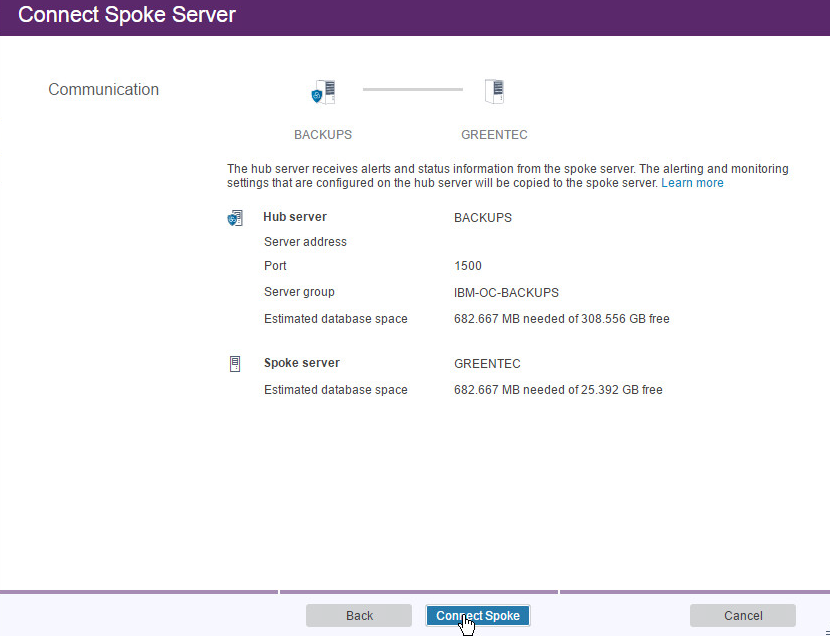
Click Connect Spoke.
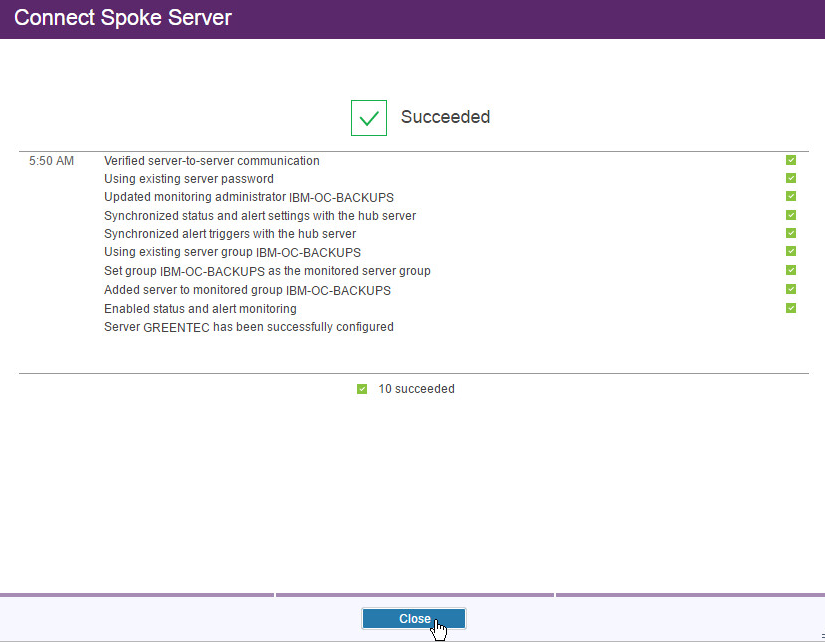
Click Close.
2.13.4. Define a Volume on the GreenTec Server
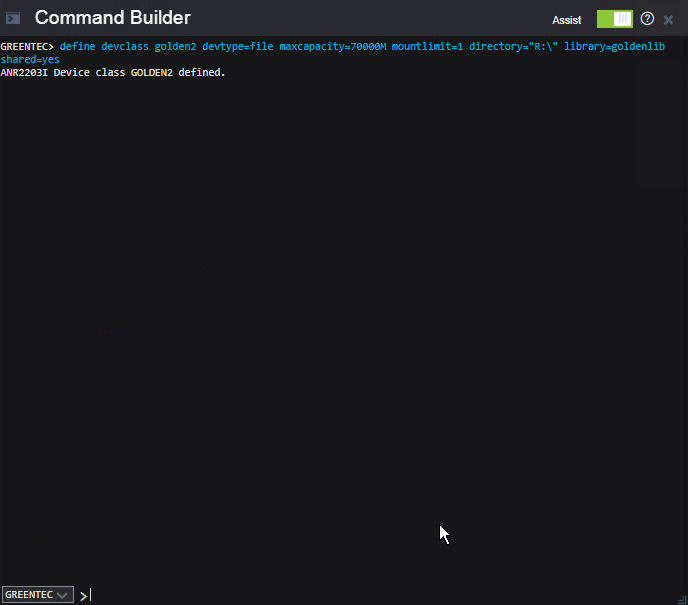
Issue the following command in the Operations Center (on the GreenTec server) command builder to create a device class for the backup disk (replace the name golden, max capacity value, and directory value as you see fit).
> define devclass golden devtype=file maxcapacity=350000M shared=yes mountlimit=1 directory="E:\" library=backuplib
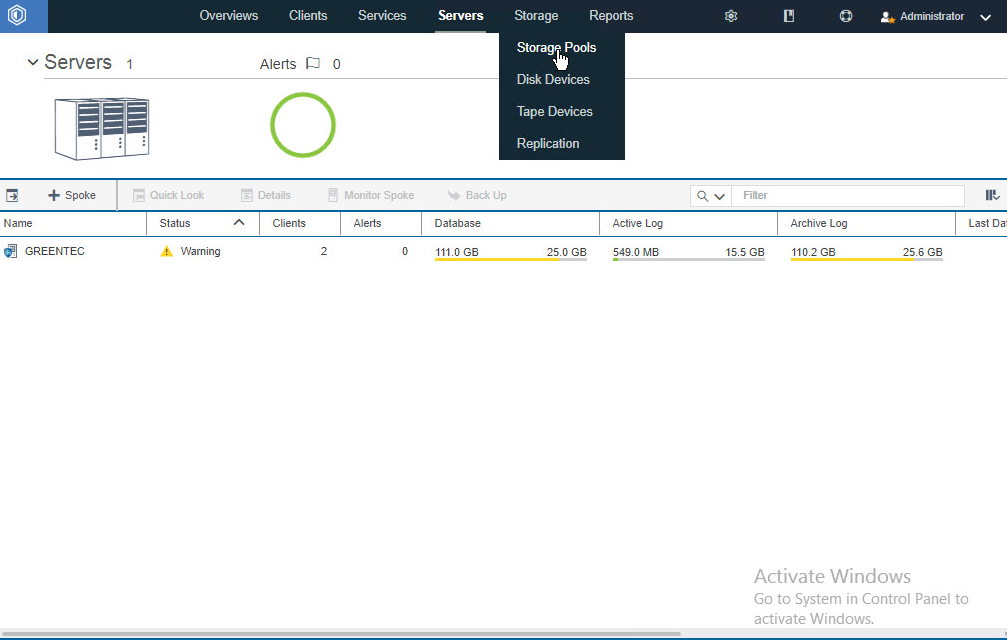
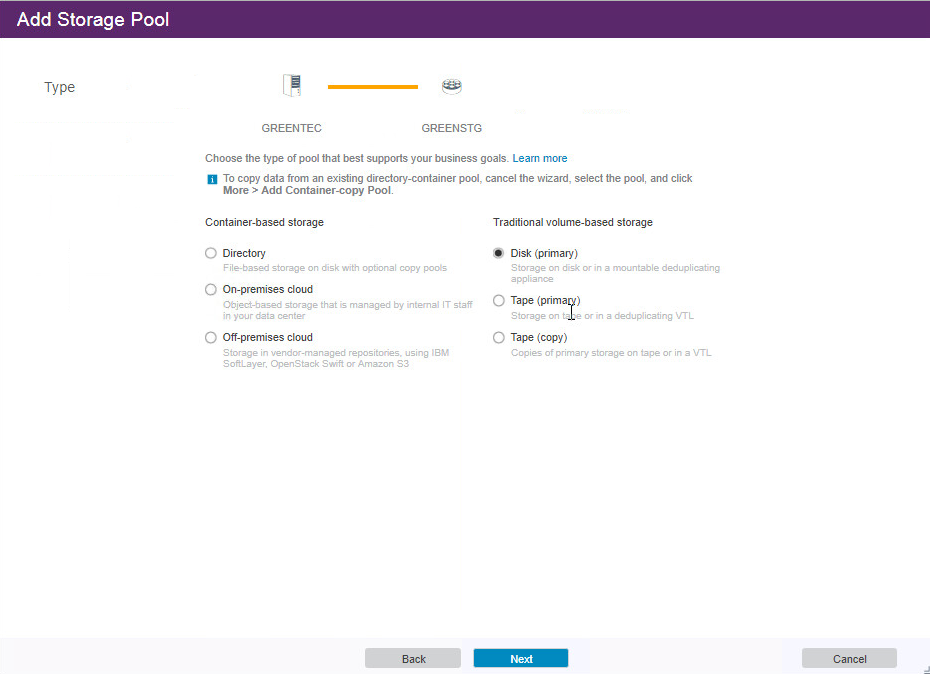
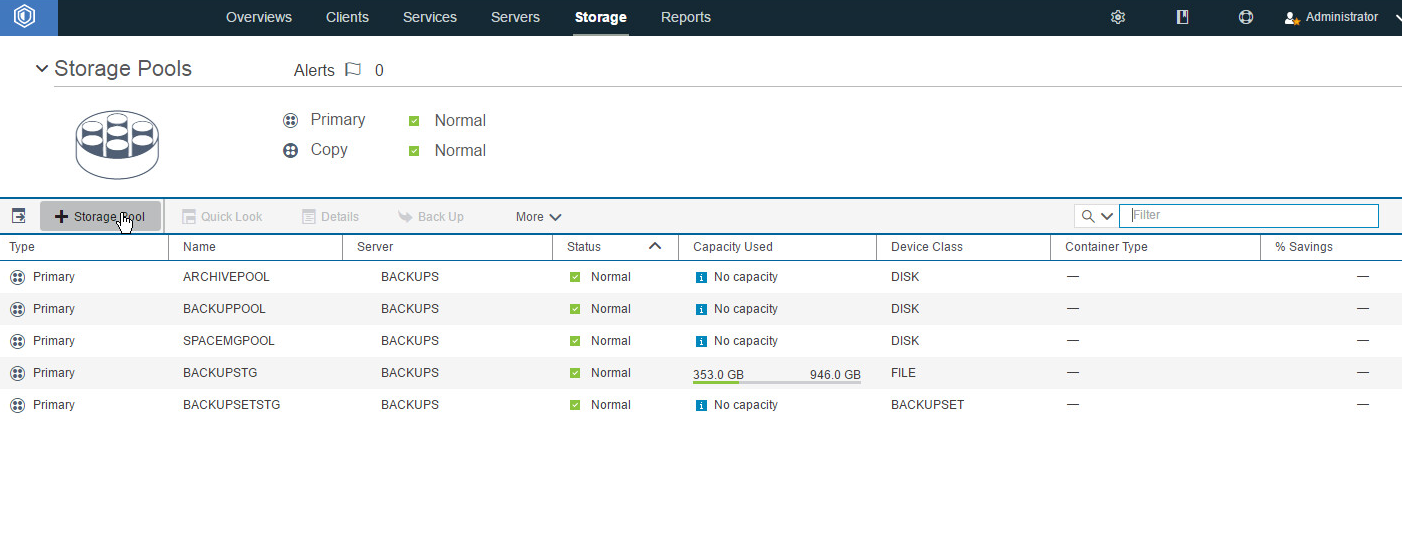
Go to Storage > Storage Pools.
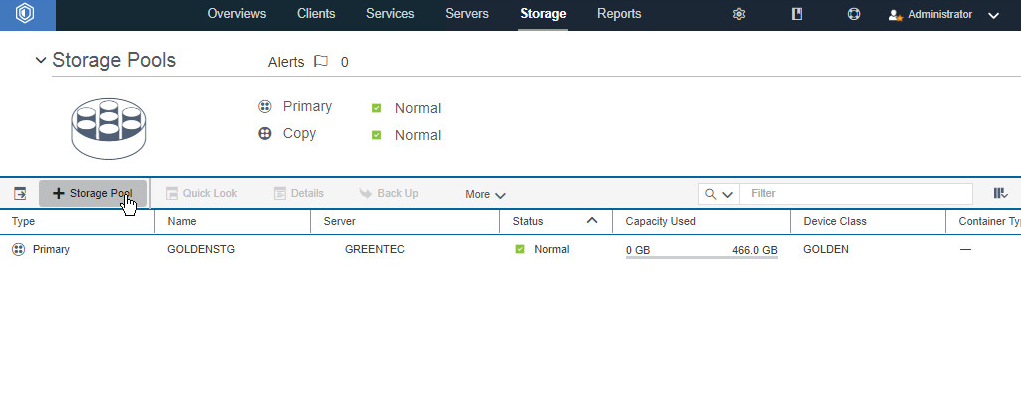
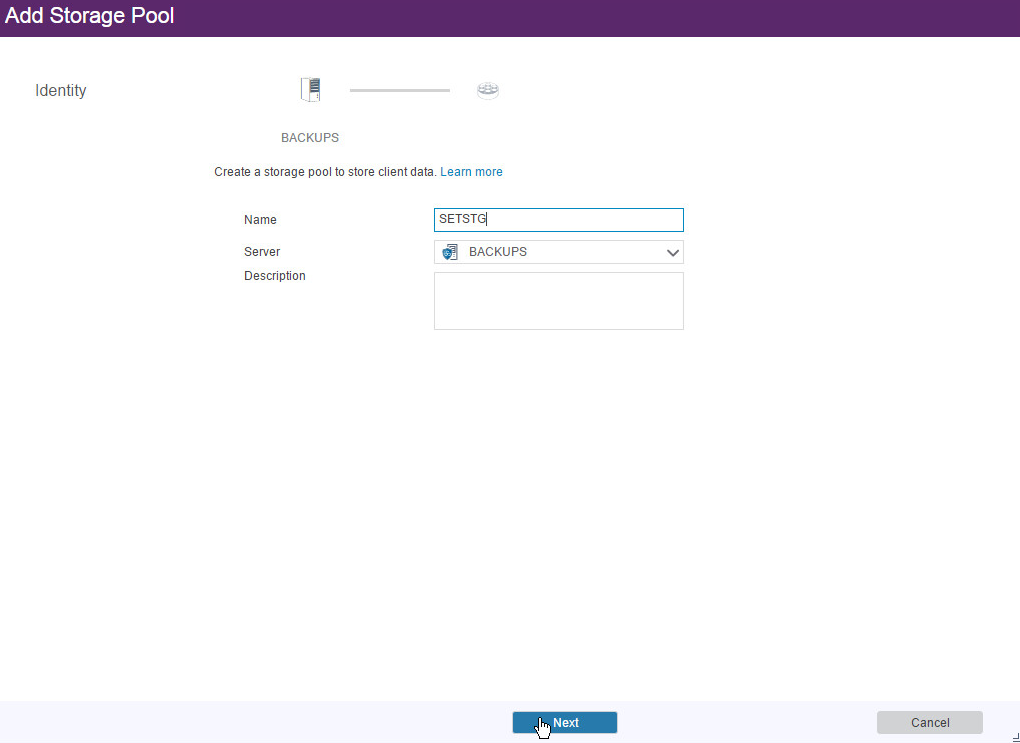
Click +Storage Pool.
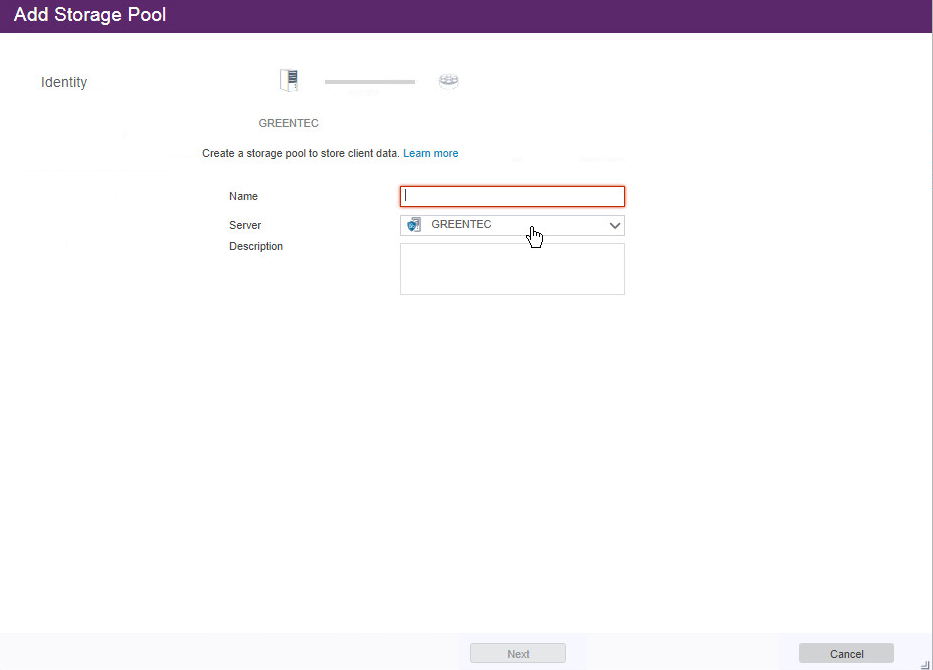
Enter a name.
Click Next.
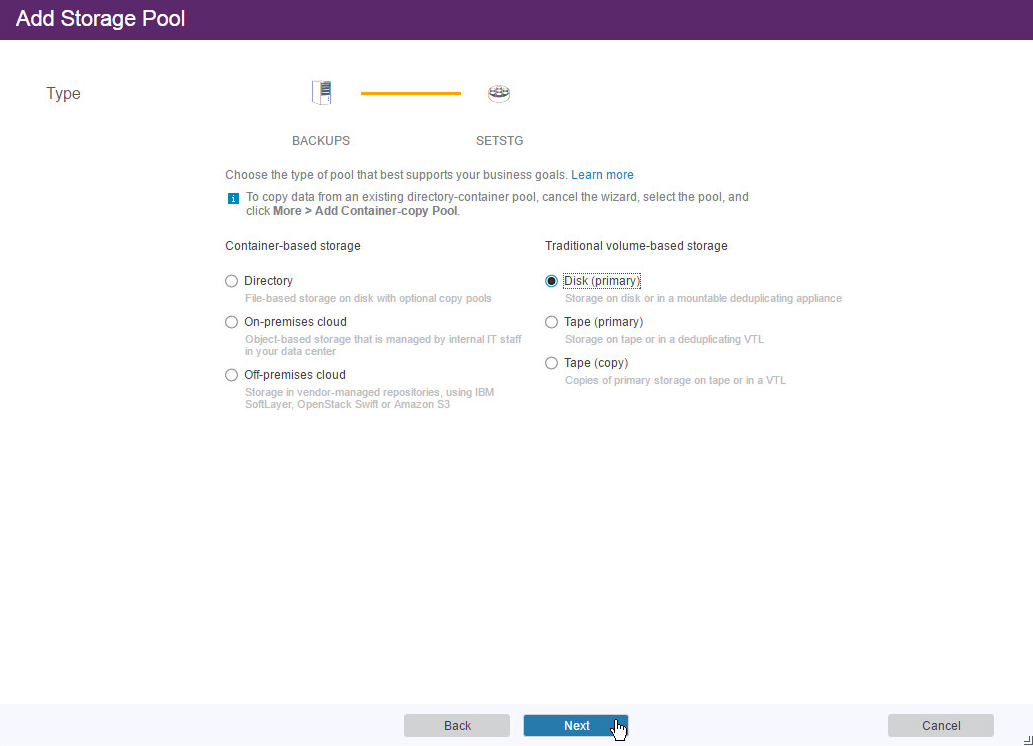
Select Disk (primary).
Click Next.
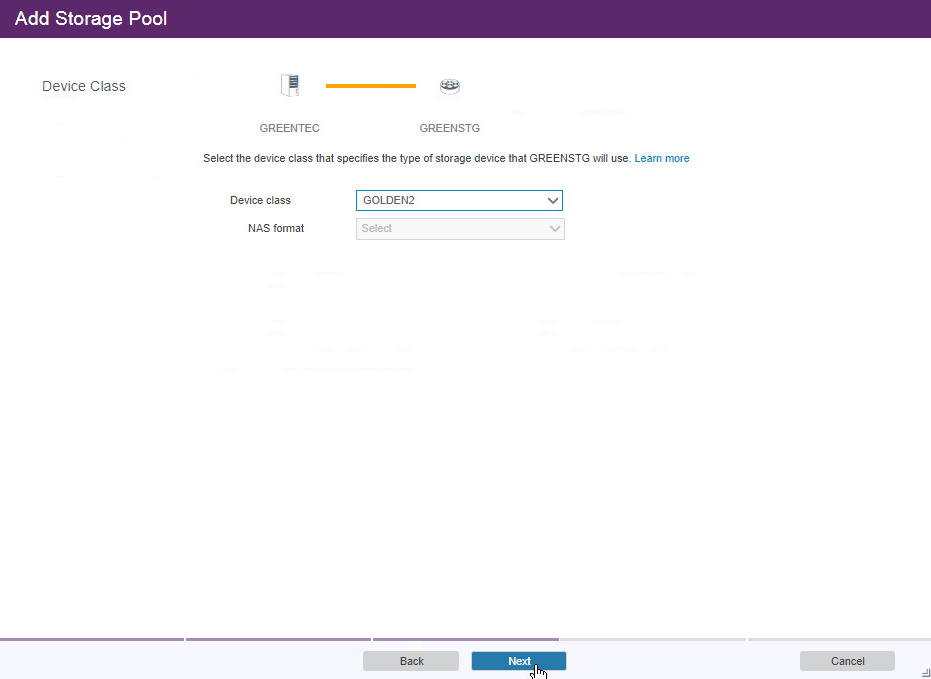
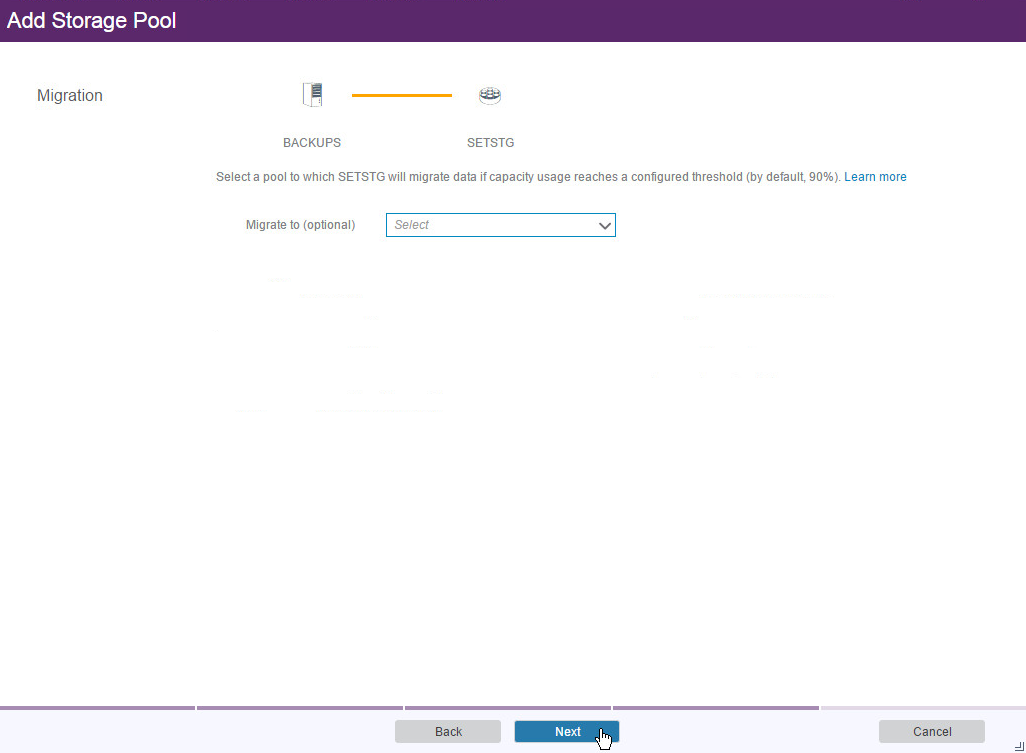
Select the device class you just created.
Click Next.
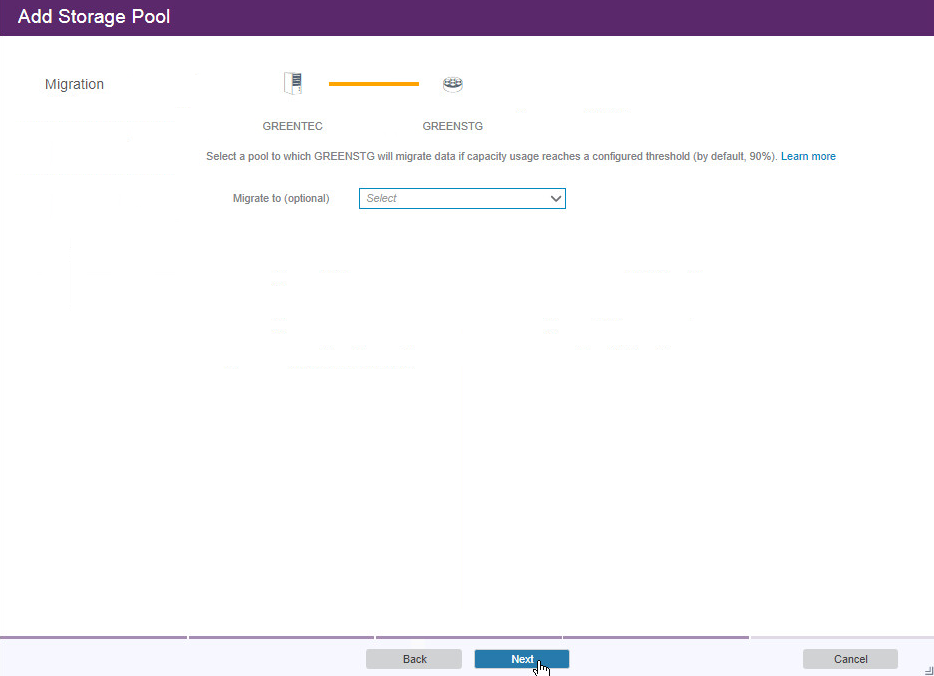
Click Next.
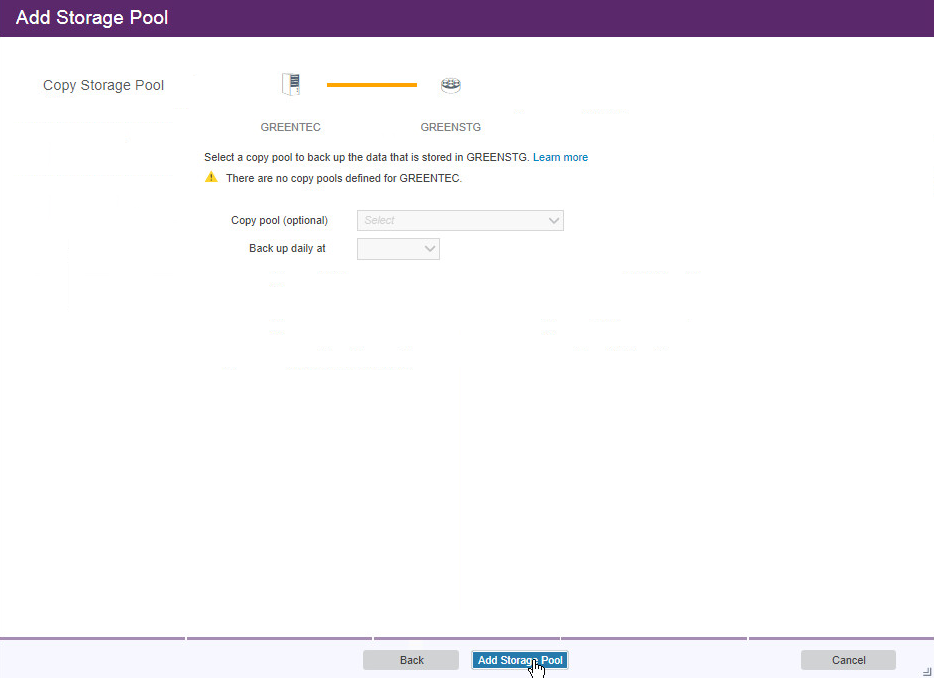
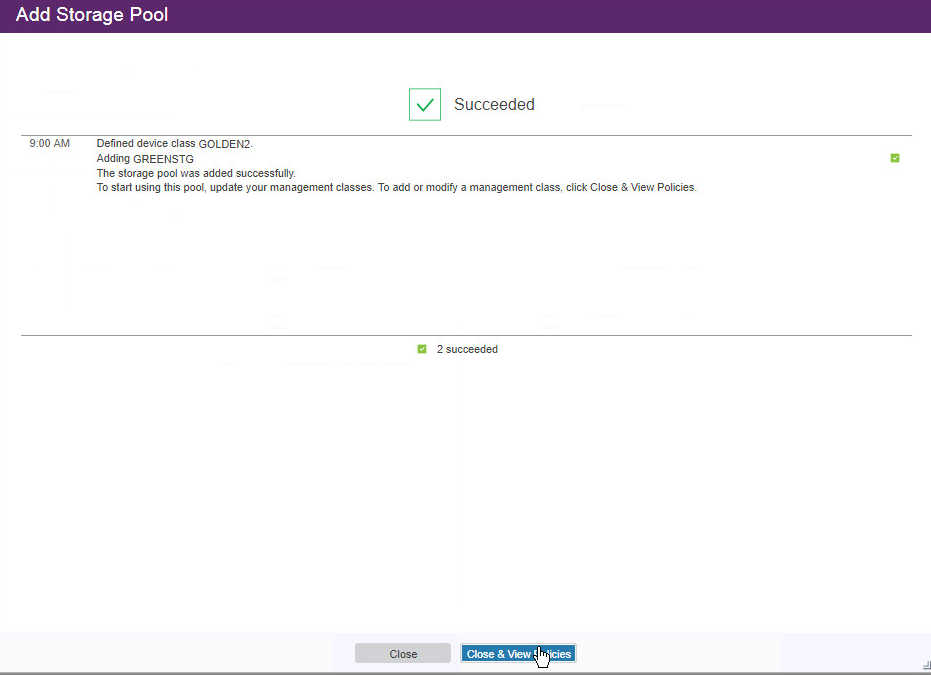
Click Add Storage Pool.
Click Close & View Policies.
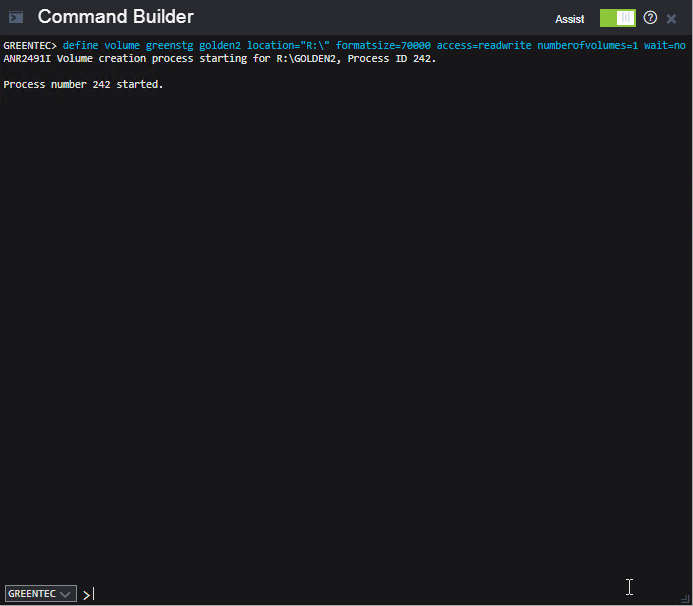
Issue the following command in the Operations Center command builder to create a volume on the backup disk.
define volume goldenstg golden1 location="E:\" formatsize=350000 access=readwrite numberofvolumes=1 wait=no
The storage pool may indicate that there is no capacity, but once you backup something it should correctly show the capacity.
2.13.5. Create a Policy to Backup to GreenTec disks
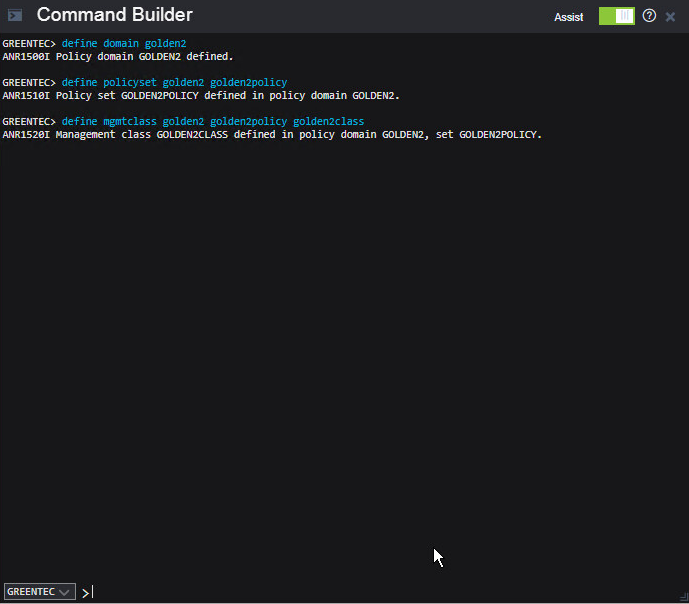
Issue the following command in the Operations Center (on the GreenTec server) command builder to delete the standard policy domain:
delete domain standard
Issue the following command to create a new domain.
define domain golden
Issue the following command to create a new policy set in this domain.
define policyset goldenpolicy
Issue the following command to create a management class in this domain.
define mgmtclass golden goldenpolicy goldenclass
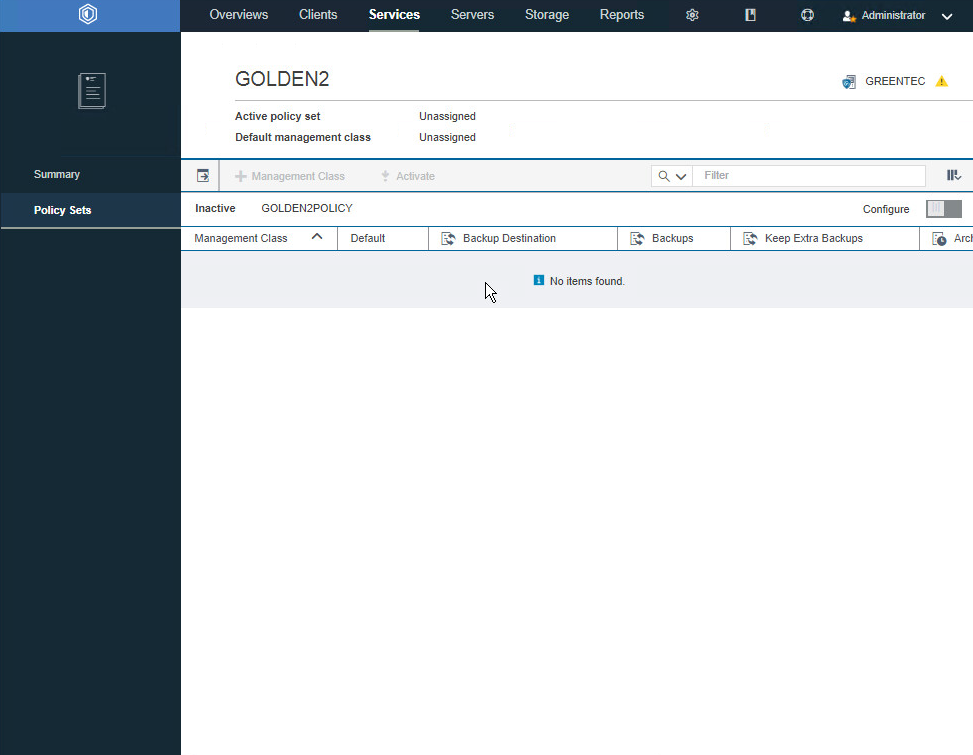
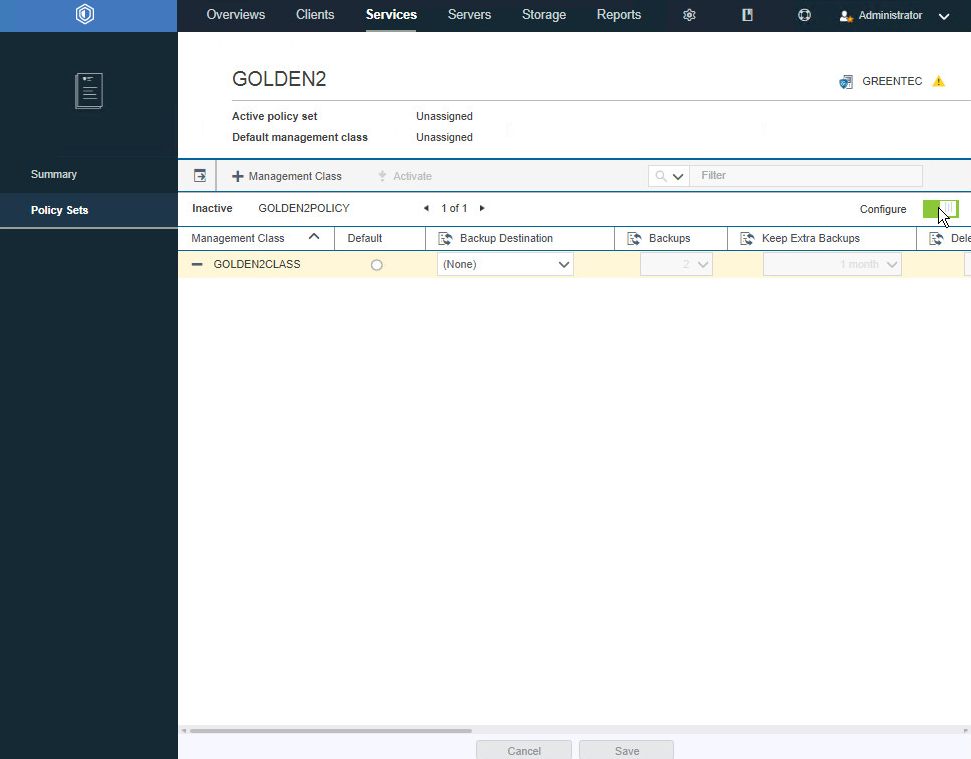
Click Services > Policy Sets.
Toggle the Configure button. This should allow you to edit the settings of the newly created management class.
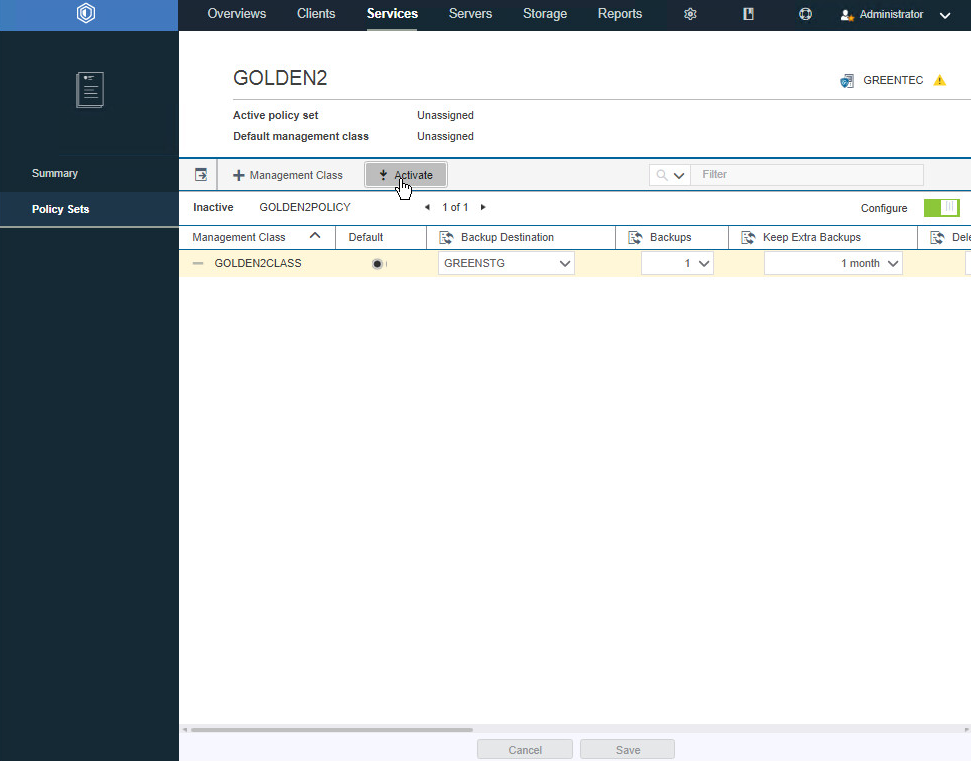
Select Default.
For Backup Destination, select the storage pool you just created.
For Backups, select 1.
Select the rest of the settings per your organization’s needs.
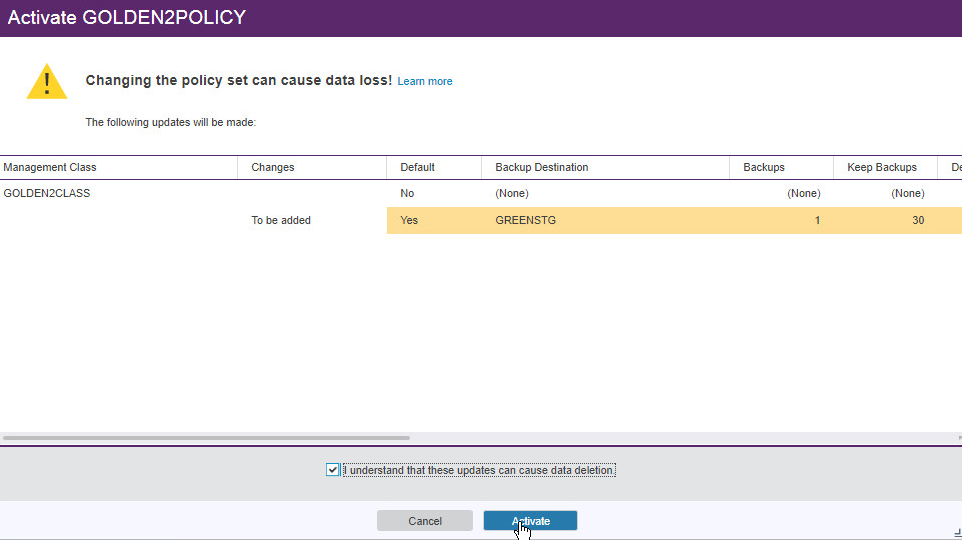
Click the Activate button.
Check the box next to I understand that these updates can cause data deletion.
- Click Activate.
2.13.6. Create a Schedule That Uses the New Policy
On the primary IBM Spectrum Protect Server log in to the Operations Center.
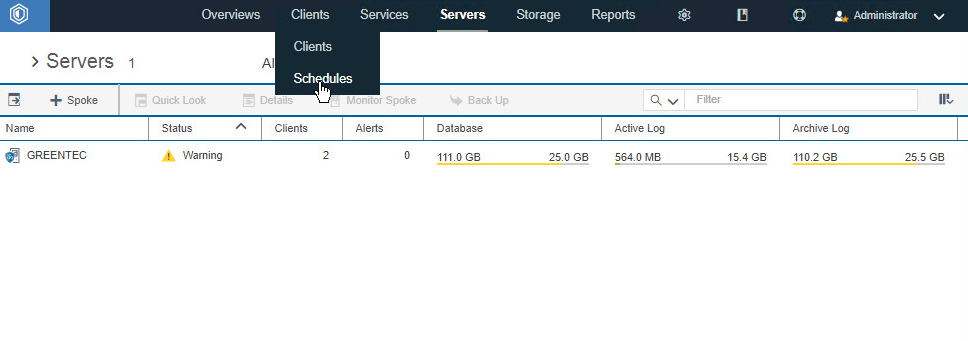
Go to Clients > Schedules.
Click +Schedule.
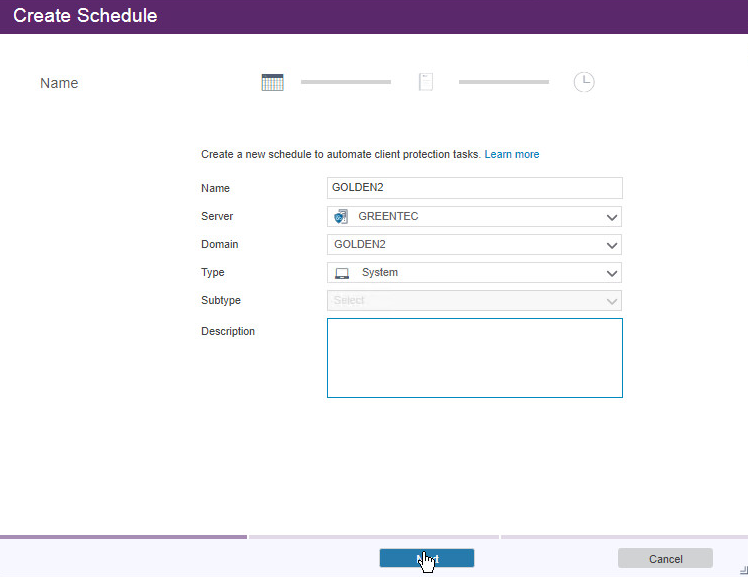
Enter a name for the schedule.
For Server, select the GreenTec server.
For Domain, select the policy domain you just created.
For Type, select System.
Click Next.
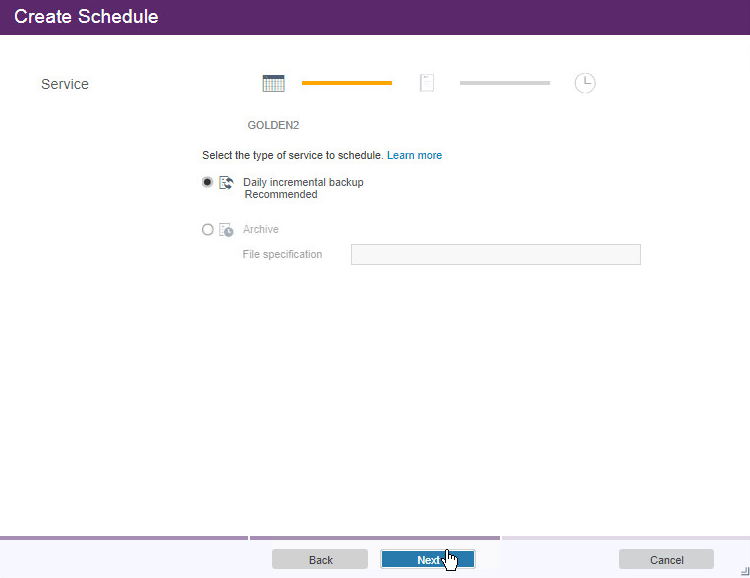
Select Daily incremental backup.
Click Next.
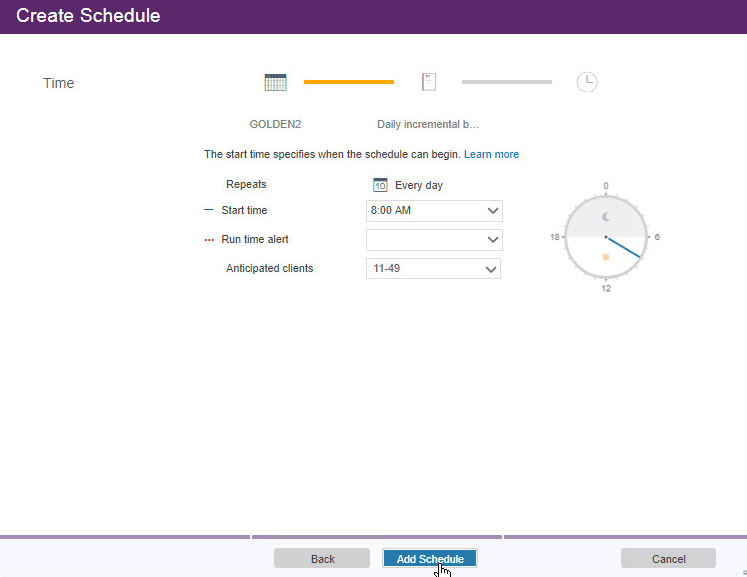
Configure the schedule settings for your organization’s needs. This can be changed later.
Click Add Schedule.
From the command builder, run the following command to update the schedule:
update schedule golden golden starttime=now action=backup type=client objects="c:\*" startdate=06/10/2017 perunits=onetime
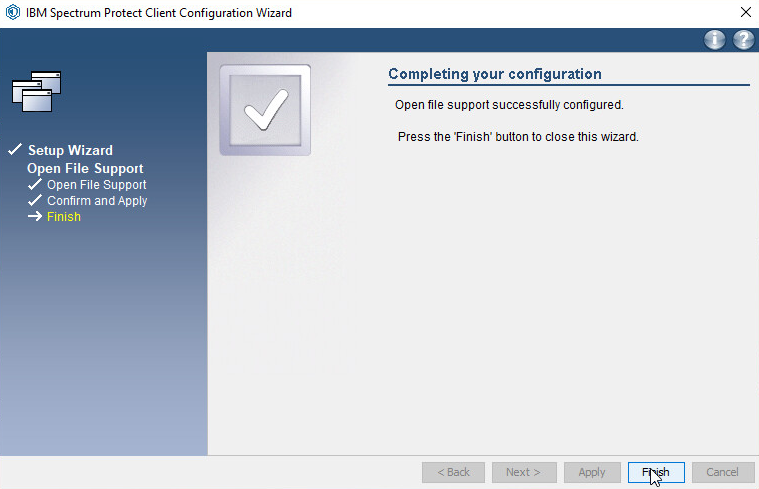
2.13.7. Installing Open File Support on the Client
Open the client machine (with the IBM Backup Archive Client installed) to make a golden disk.
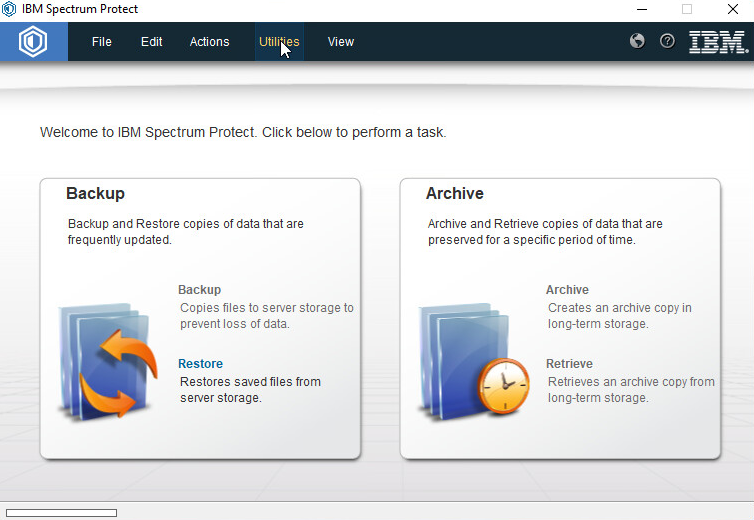
Open the IBM BA Client.
Click Utilities > Setup Wizard.
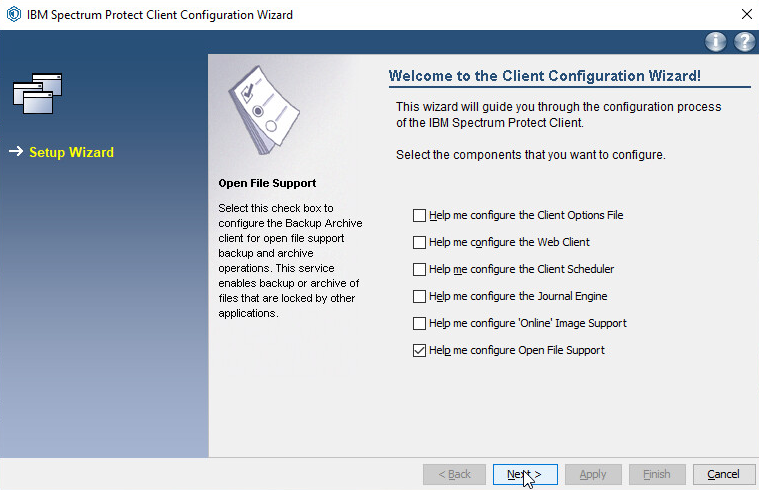
Check the box next to Help me configure Open File Support.
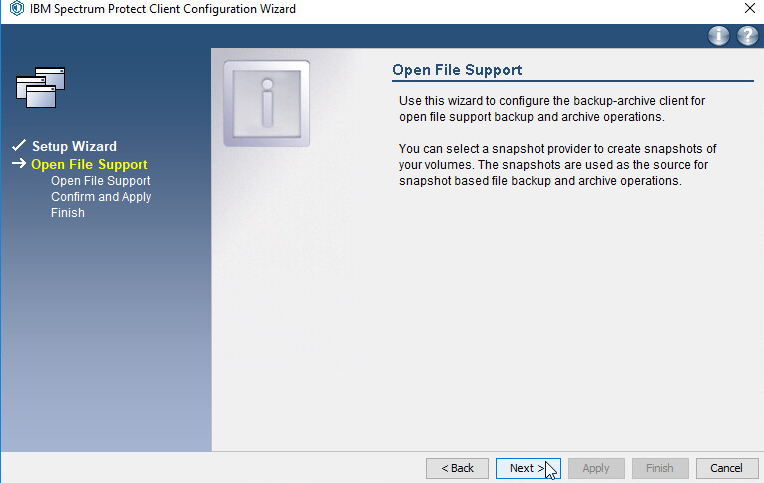
Click Next.
Click Next.
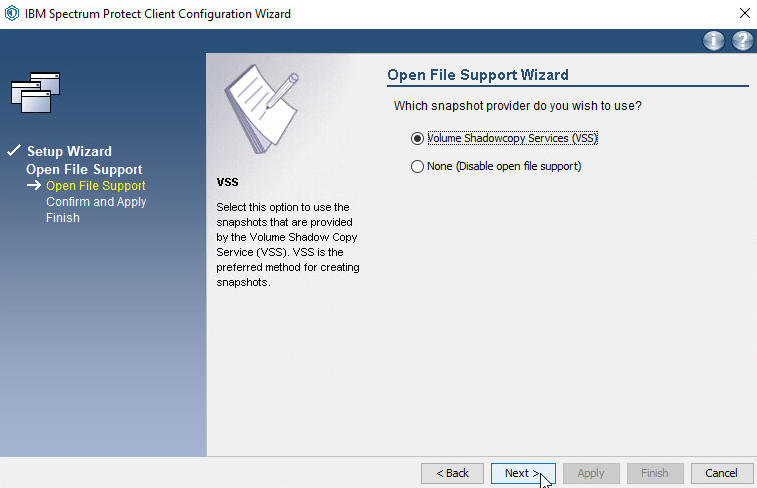
Select Volume Shadowcopy Services (VSS).
Click Next.
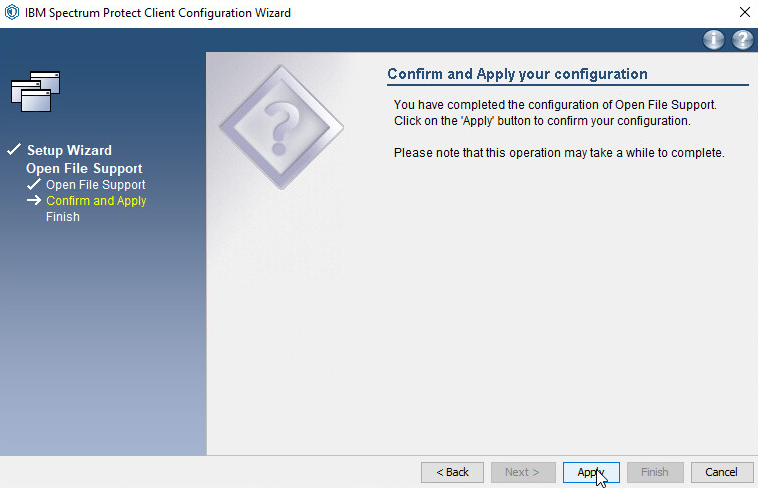
Click Apply.
Click Finish.
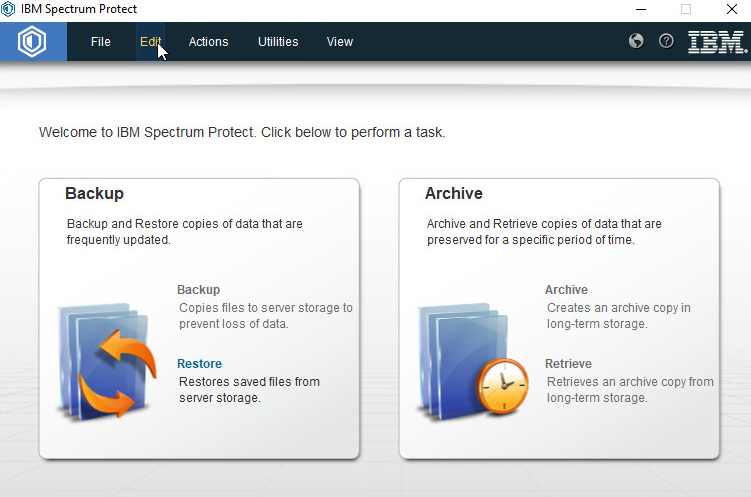
Restart the BA Client.
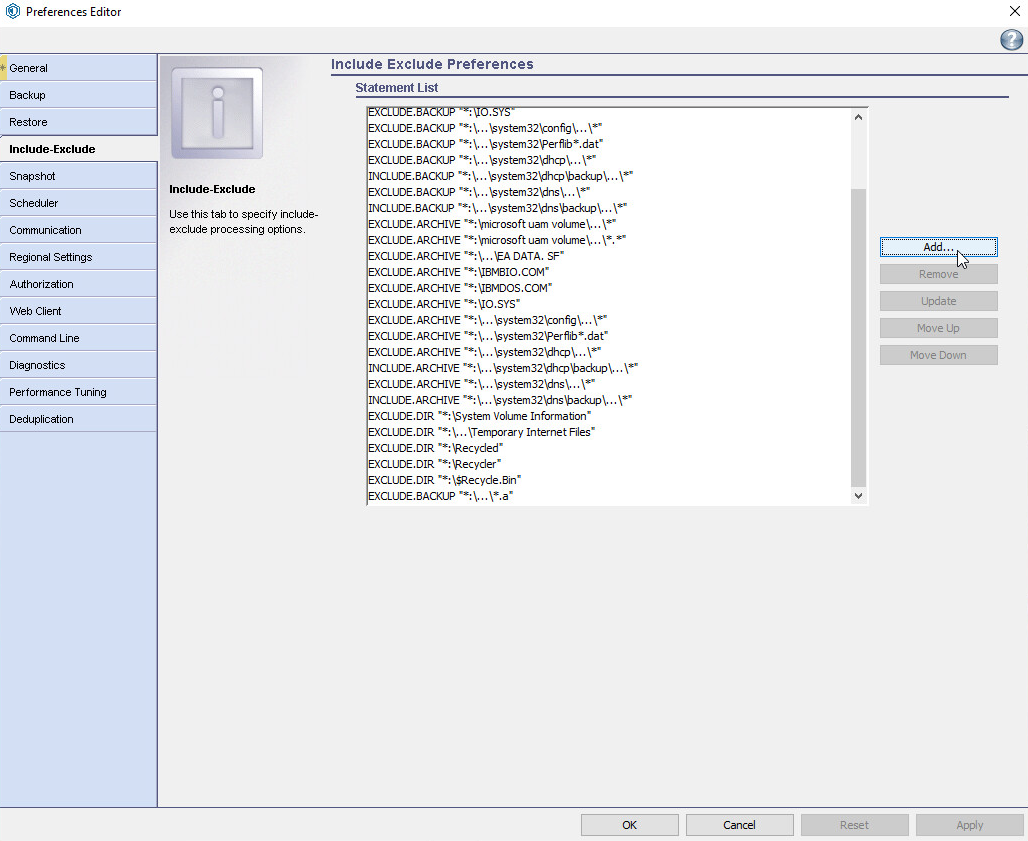
Click Edit > Client Preferences.
Click the Include-Exclude tab.
Click Add.
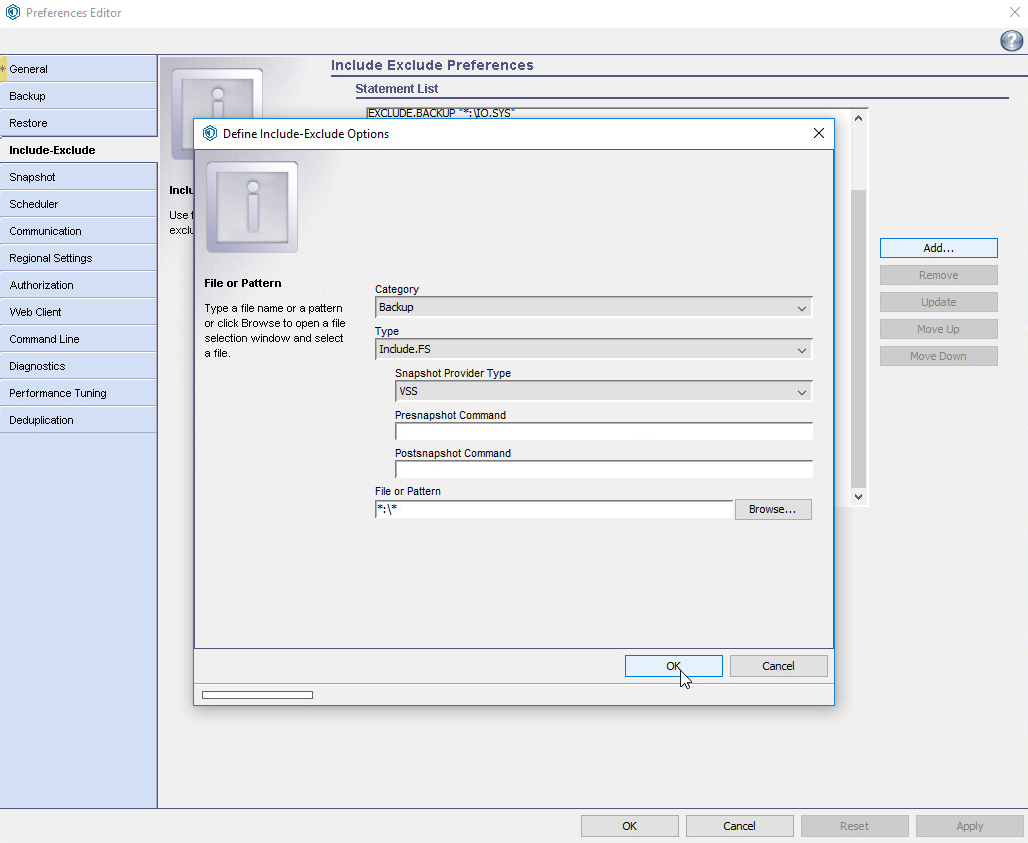
For Category, select Backup.
For Type, select Include.FS.
For Snapshot Provider Type, choose VSS.
For File or Pattern, enter *:\*.
Click OK.
2.13.8. Temporarily Add Client to GreenTec IBM Server
Assuming your GreenTec disks are on a separate IBM server, you will need to connect the client you wish to migrate in order to use the created schedule. On the GreenTec server, click Clients.
Click +Client.
Select the GreenTec server.
Click Next.
Enter the information for the client you are migrating to this server.
Click Next.
Take note of the information presented here, namely the IP and port provided, as you will need it on the client machine to connect to the server.
Click Next.
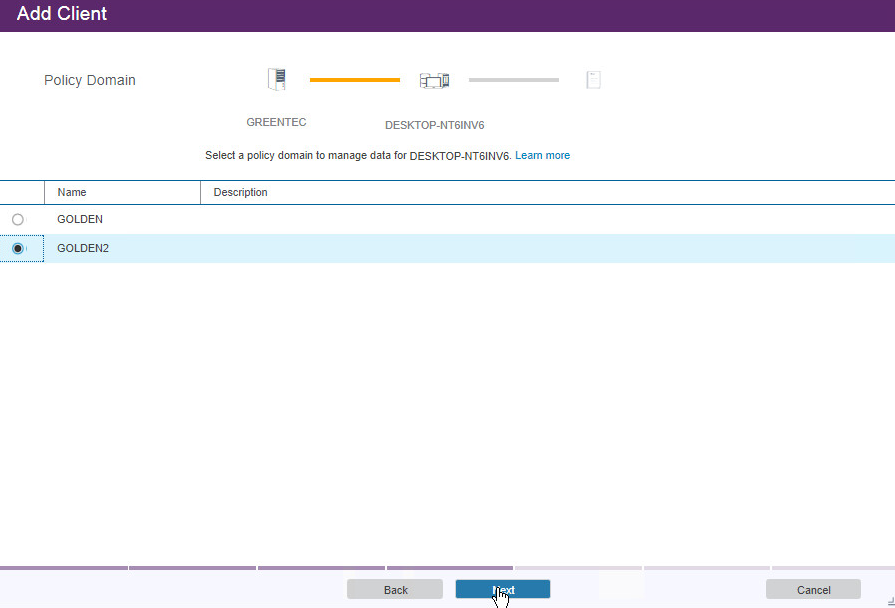
Select the policy domain you created.
Click Next.
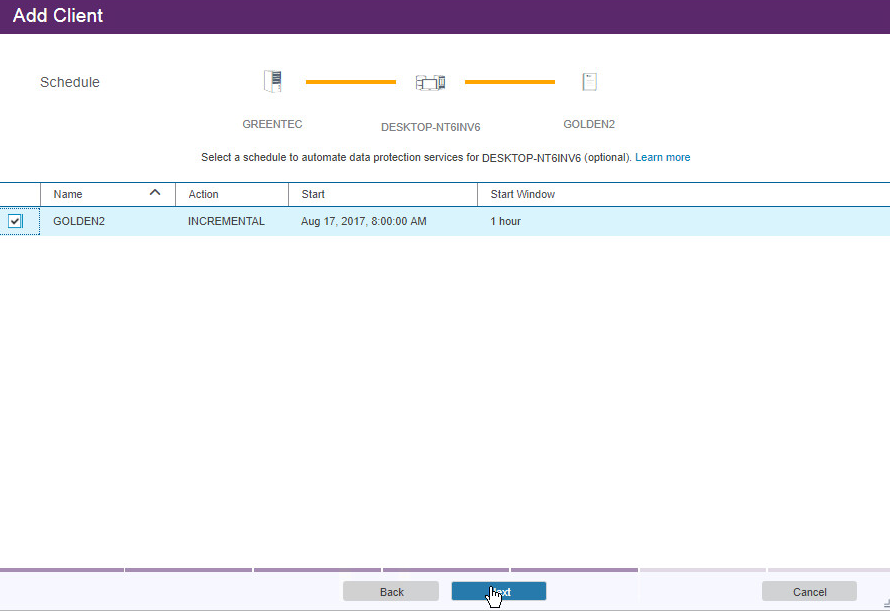
Select the schedule created earlier.
Click Next.
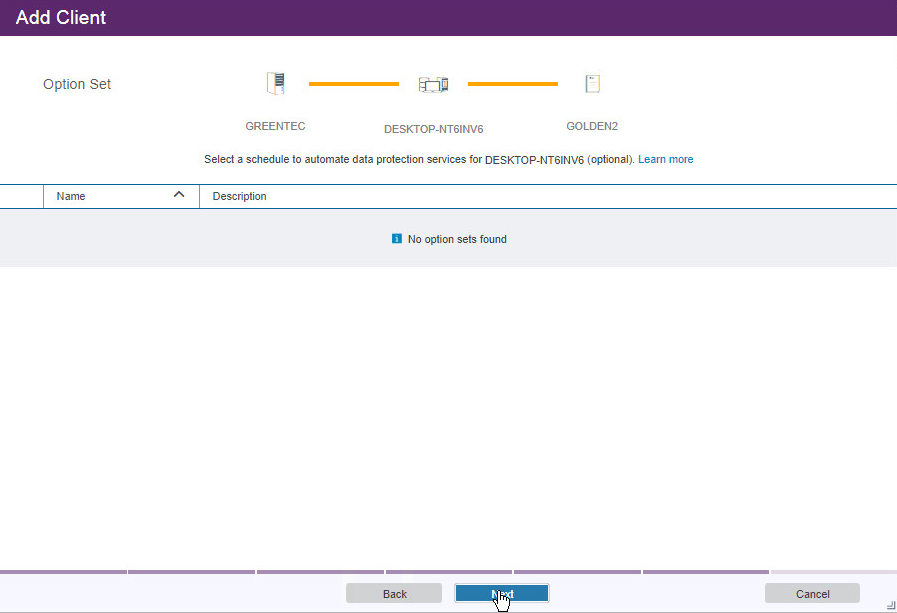
Click Next.
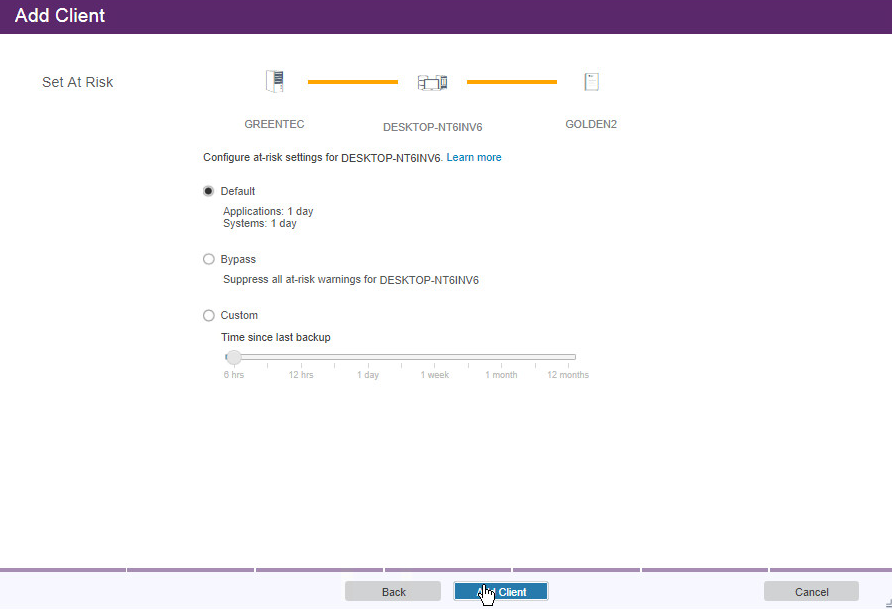
Select the at-risk options per your organization’s needs.
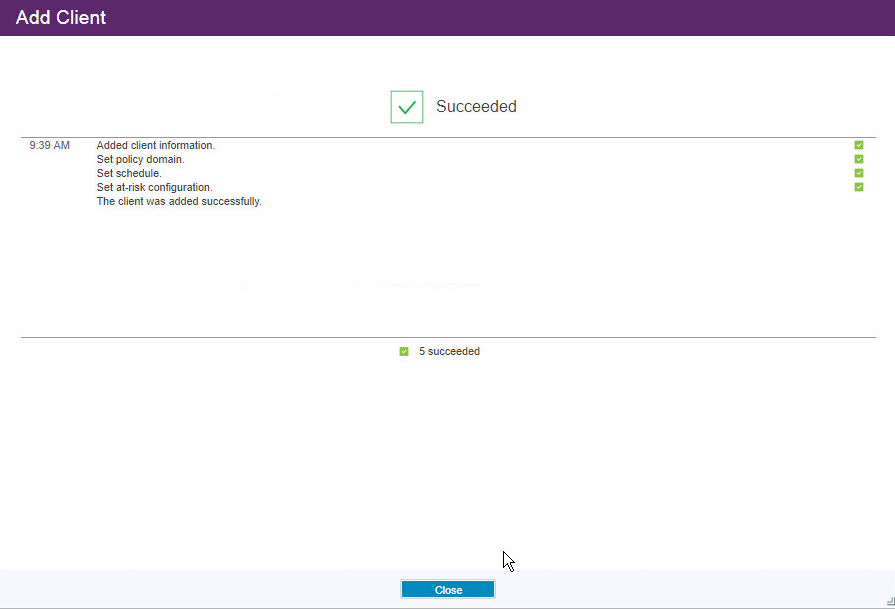
Click Add Client.
Click Close.
On the client machine, open the BA client.
Click Edit > Client Preferences.
Click the Communication tab, and enter the new server address and port. Only leave Use SSL checked if you have set it up for this new server. Similarly, unselect SSL is required if you did not setup SSL on this second server.
Restart the BA client. The client should now connect to the new server.
You may be prompted for a password. Enter the password and press Enter.
To start the schedule, issue the following command in the Operations Center command builder:
update schedule golden golden startdate=today starttime=now
2.14. Integration: Backing Up and Restoring System State with GreenTec
This section covers the process for backing up (and restoring) the Windows System State on a Windows Server with GreenTec as a backup medium. The backup of user information as well as other system state information to a networked GreenTec WORMdisk is intended for the recovery of damage to the Windows system state, such as account permission modification, account creation, account deletion, and various other applicable scenarios.
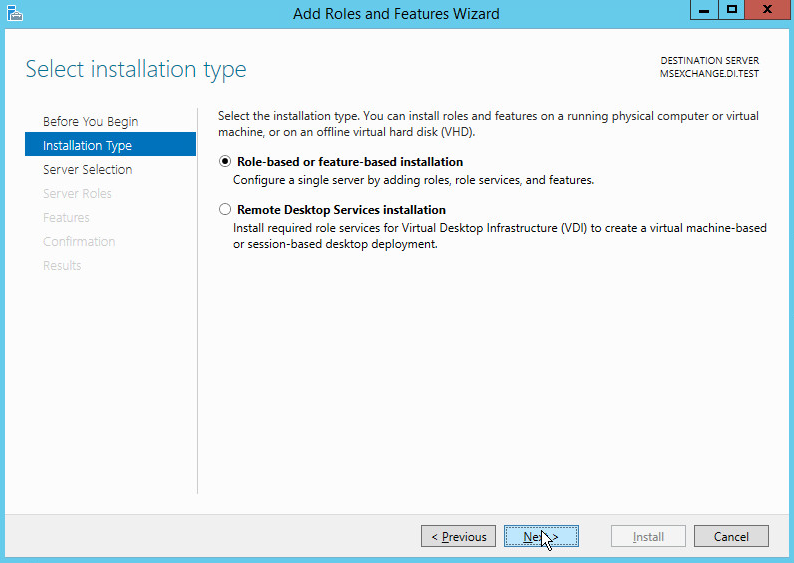
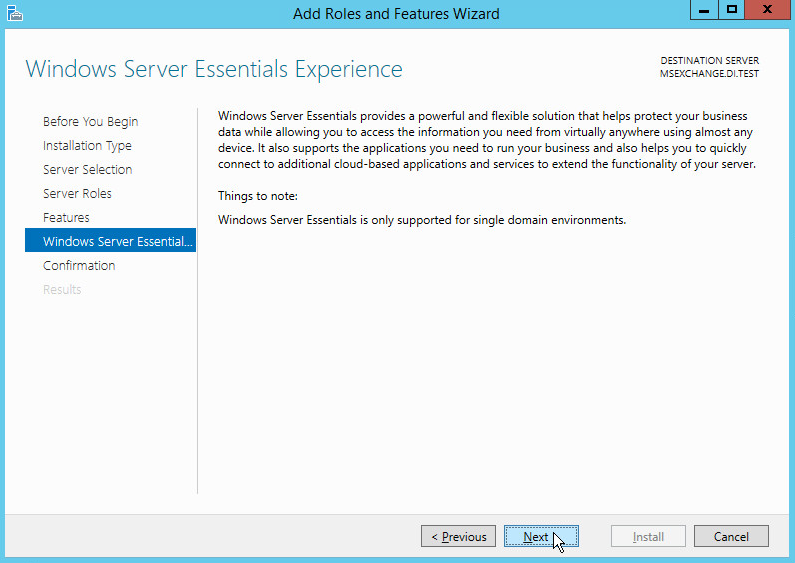
2.14.1. Installing Windows Server Essentials for System State Backup Capability
(NOTE: For older machines, IBM Spectrum Protect’s option to backup SystemState may be sufficient. However, for newer, more complex versions of Windows, such as Windows Server 2012 and Windows 8+, you should use the following procedure.)
Open Server Manager.
Select Manage > Add Roles and Features.
Click Next.
Select Role-based or feature-based installation.
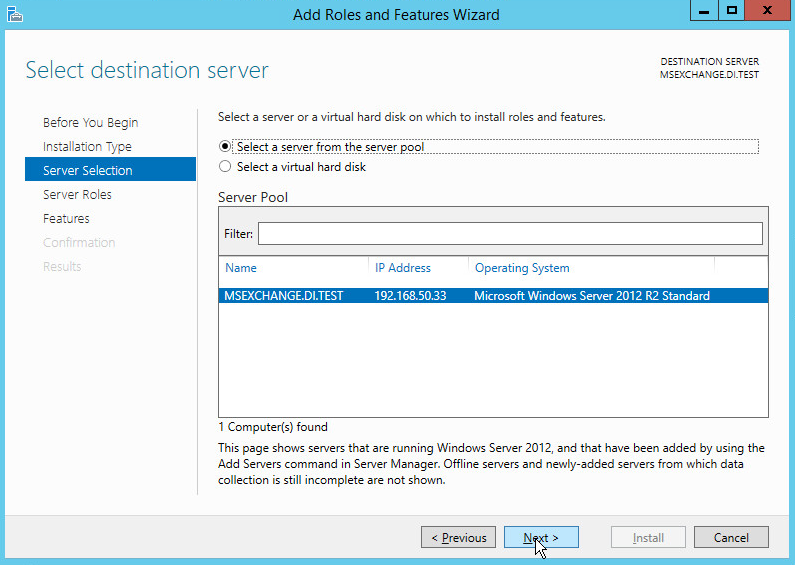
Click Next.
Select the server.
Click Next.
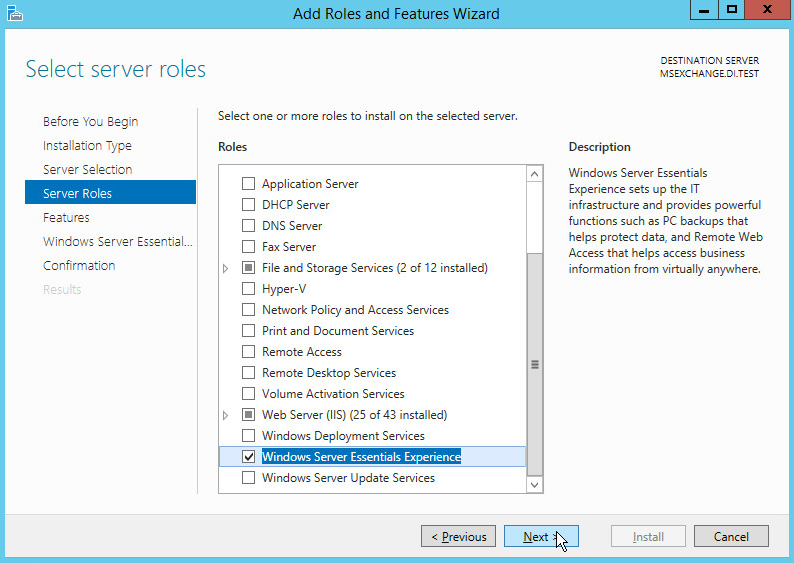
Select Windows Server Essentials Experience.
Click Next.
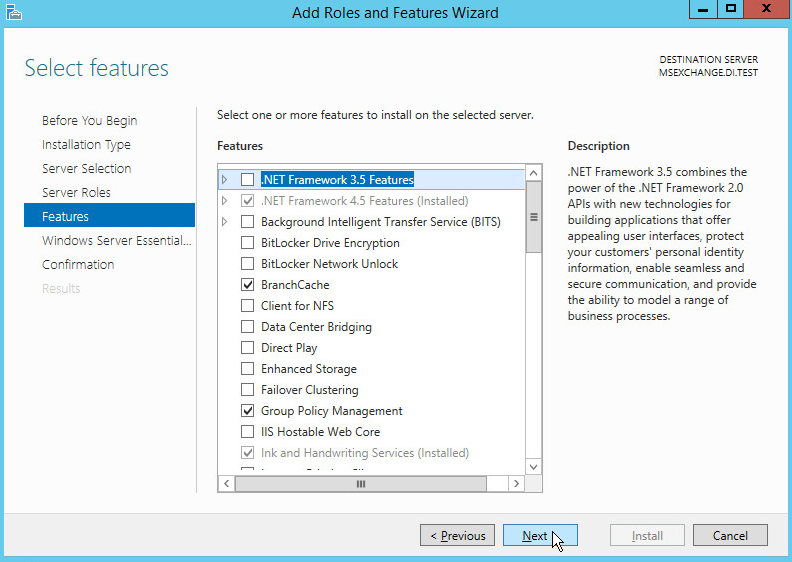
Click Next.
Click Next.
Click Install.
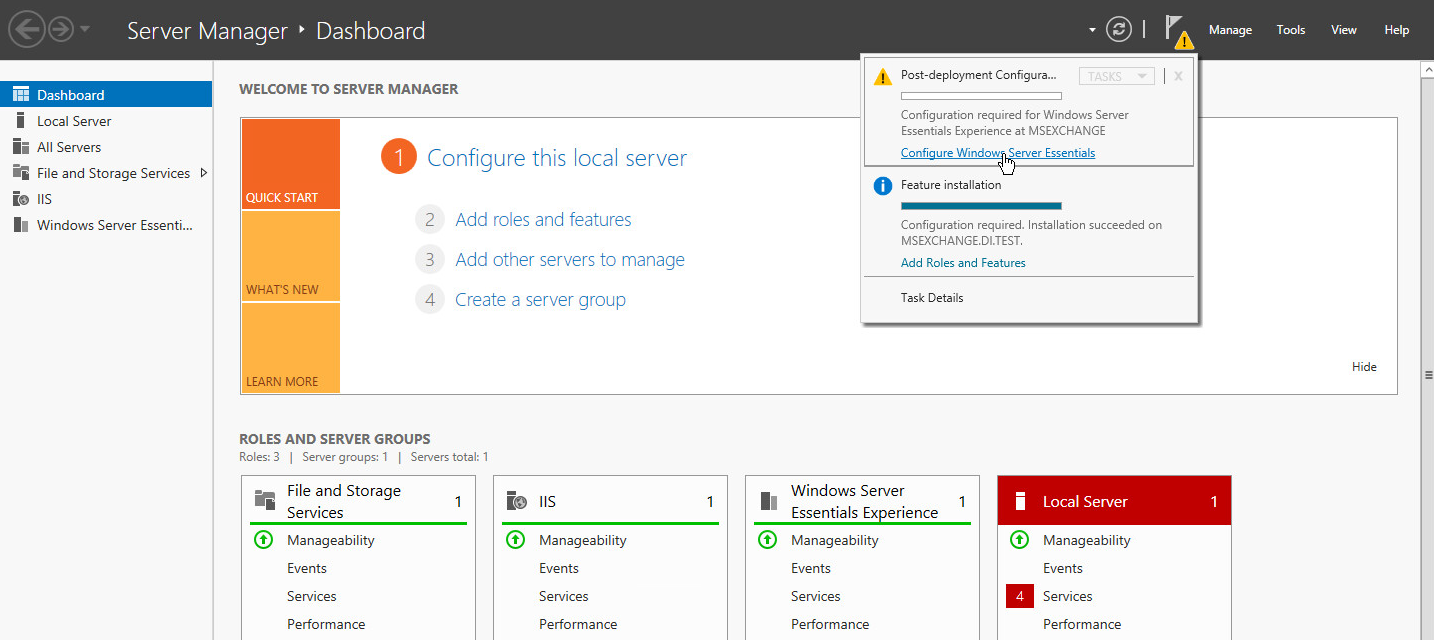
Click Configure Windows Server Essentials Experience.
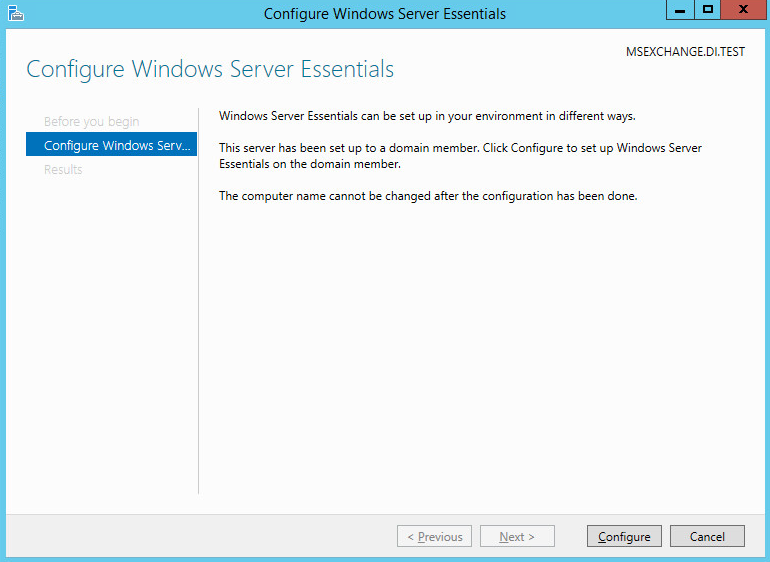
Click Configure.
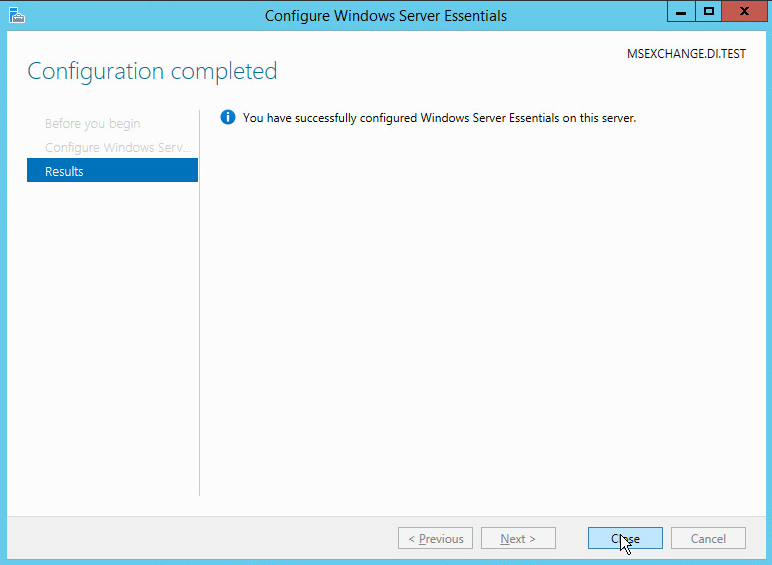
Click Close.
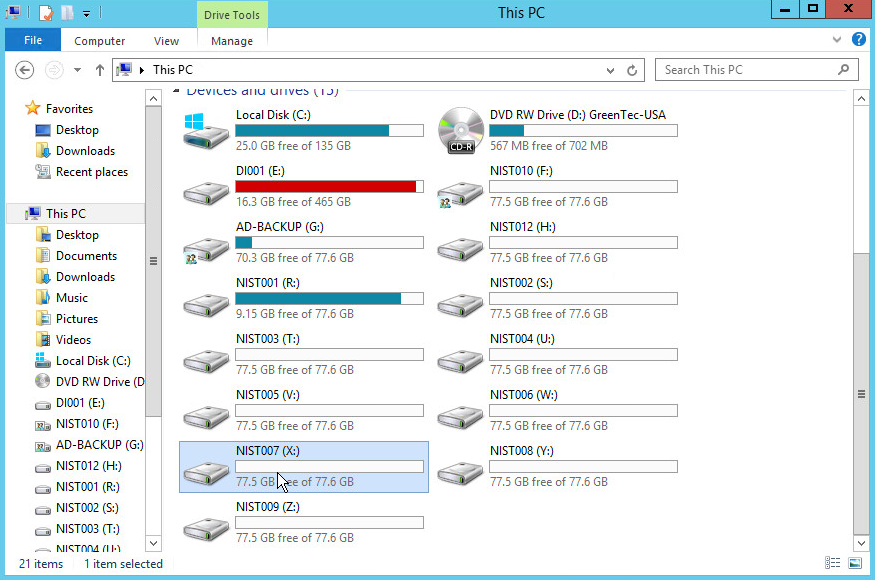
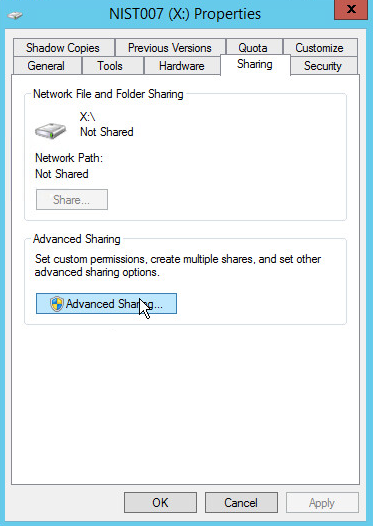
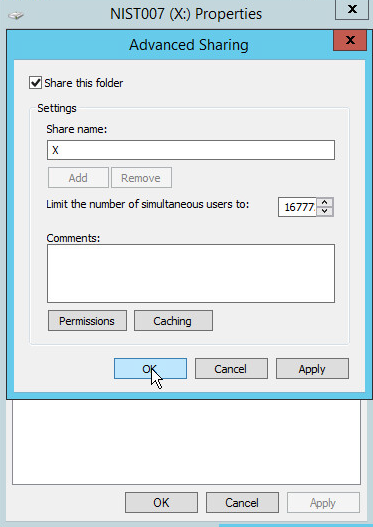
2.14.2. Configure Network Accessible GreenTec Disk
2.14.3. Backup the System State
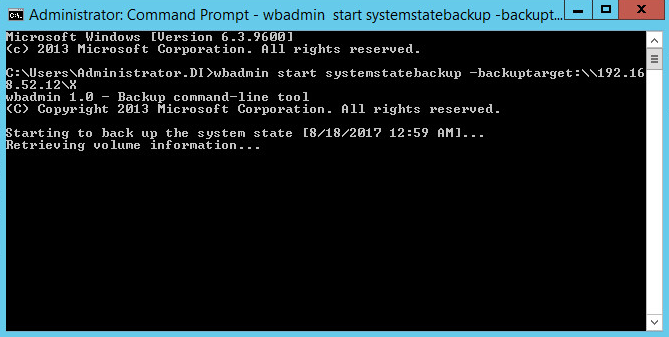
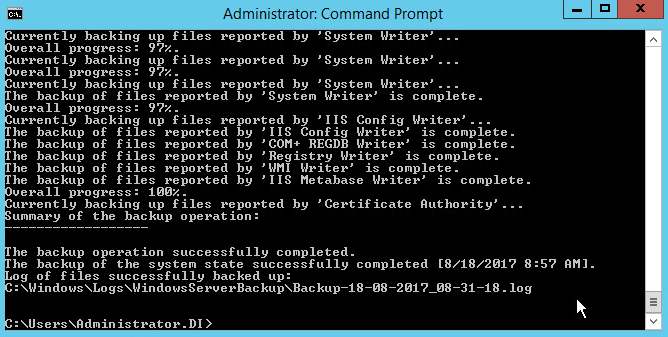
Go to command prompt on the Active Directory server and enter the following command:
wbadmin start systemstatebackup -backuptarget:z:
(Instead of z:, put the location of a disk for the system state backup. You will get an error if you attempt to use the same location as the disc you are trying to backup. Examples of acceptable targets: C:, Z:, \\backup-storage\g)
2.14.4. Restoring the System State
After determining the point in time of a malicious event, restart the Active Directory Server and press F2 > F8 to start the Advanced Boot menu.
Select Directory Services Repair Mode.
Log in as the machine administrator.
Open a command prompt.
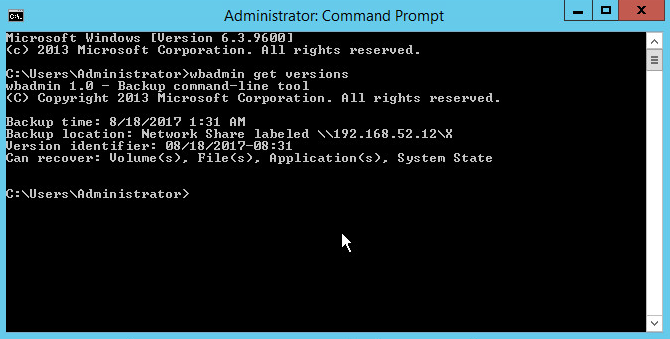
Enter the following command to see the backup versions available:
wbadmin get versions
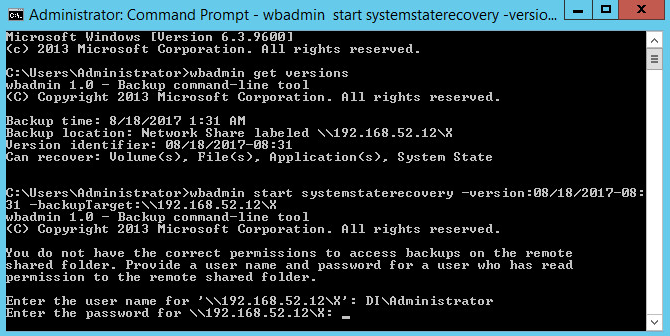
Enter the following command to restore to a specific version (preferably before the malicious event occurred):
wbadmin start systemstaterecovery -version:06/21/2017-15:33 -backupTarget:\\192.168.52.12\g
(Replace the backupTarget with the location of the backup, and the version with the version to restore to.)
The computer will restart when you finish the restore process.
2.15. Integration: Copying IBM Backup Data to GreenTec WORMdisks
This section covers the process for integrating IBM Spectrum Protect with GreenTec WORMDisks. This integration assumes the correct implementation of IBM Spectrum Protect, as well as the existence of GreenTec WORMdisks as described in earlier sections. The result of this integration is the capability to store all backup data created by IBM Spectrum Protect for a single client on a secure WORMDisk.
2.15.1. Copying Backups for a Single Machine to a GreenTec WORMDisk
On the IBM Spectrum Protect server, log on to IBM Spectrum Protect Operations Center.
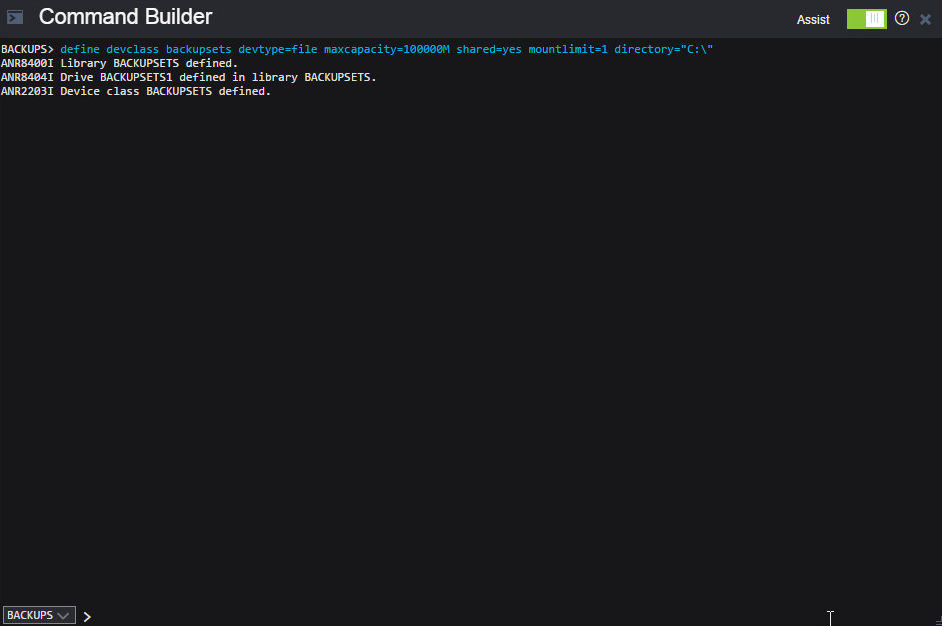
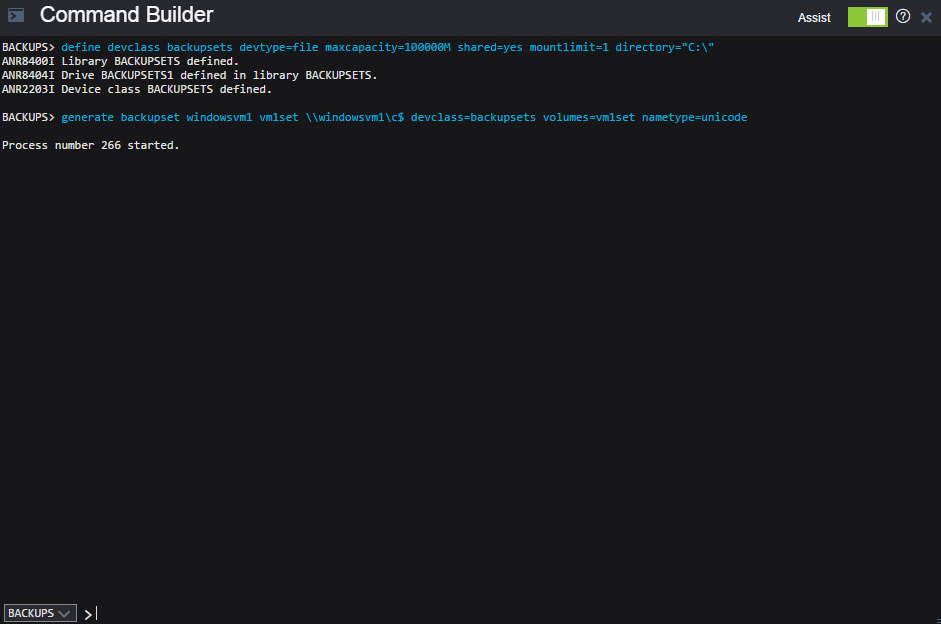
Create a new device class by running the following command in the Command Builder:
define devclass backupset devtype=file maxcapacity=100000M shared=yes mountlimit=1 directory=”C:\”
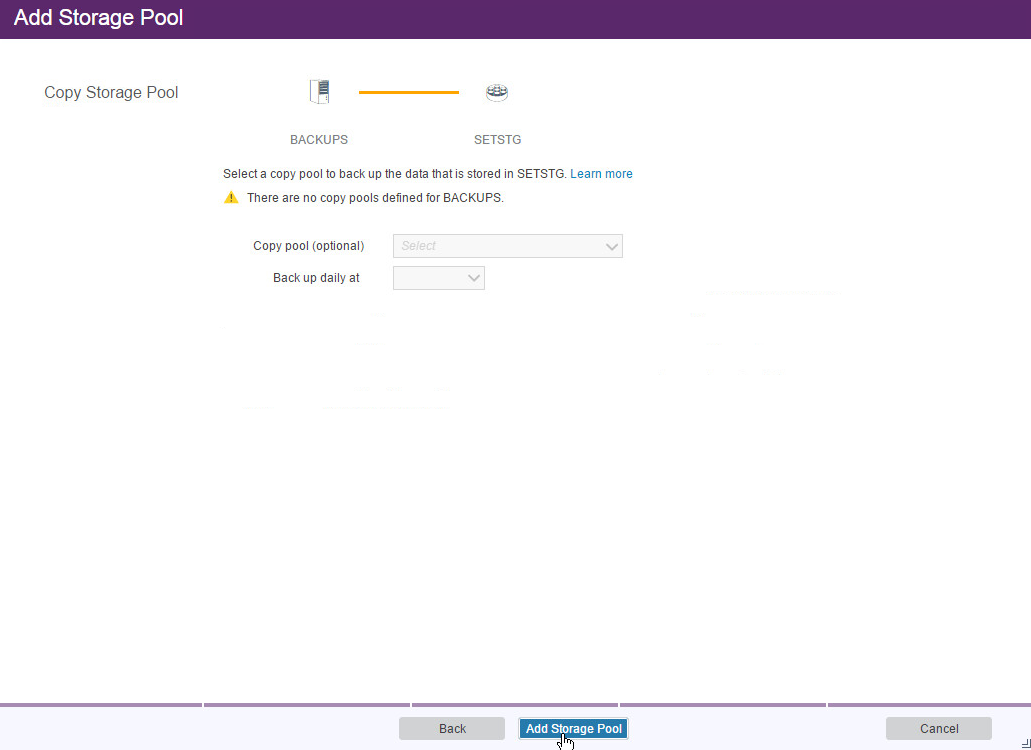
Go to Storage > Storage Pools.
Click +Storage Pool.
Enter a name.
Click Next.
Select Disk (primary).
Click Next.
Click Next.
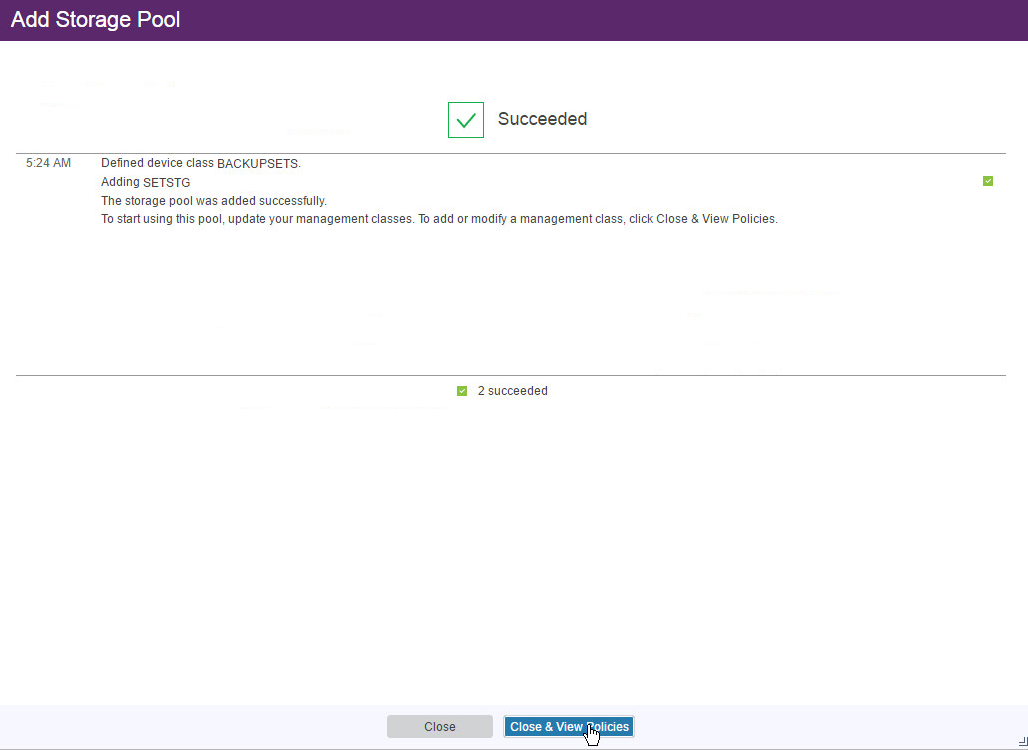
Click Add Storage Pool.
Create a backup set for the client whose data you wish to store securely. Run the following command on Command Builder:
generate backupset <name of client> <identifier> \\<name of client>\c$ devclass=file volumes=backupset1 nametype=unicode
For example:
generate backupset windowsvm1 windowsvm1_backupset \\windowsvm1\c$ devclass=file volumes=backupset1 nametype=Unicode
- This will store all backup data for the client WINDOWSVM1 in a file called backupset1. You can copy this file to a GreenTec disk and store for later use.
2.16. Integration: Tripwire and MS SQL Server
This section covers the process for integrating Tripwire Log Center and Microsoft SQL Server. This integration assumes the correct implementation of Tripwire as described in earlier sections. The result of this integration is the collection of database audit logs in Tripwire, allowing for detection and reporting of events such as specific types of queries, schema modification, and database modification.
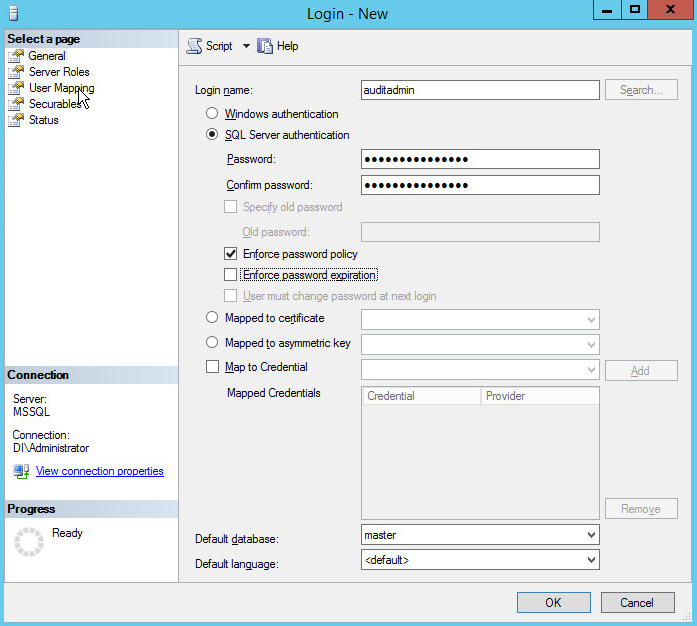
2.16.1. Create a New Account on MS SQL Server
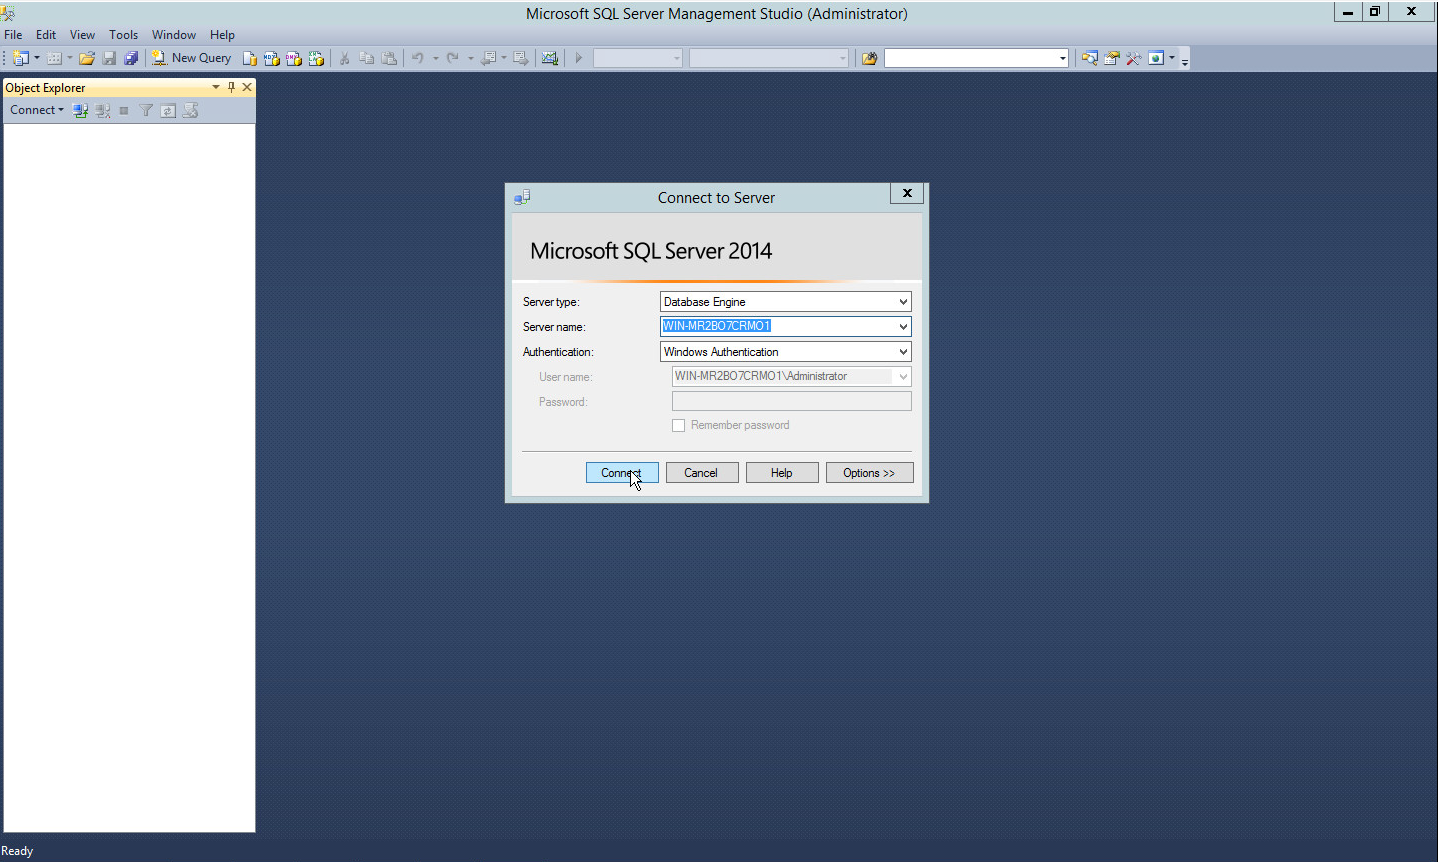
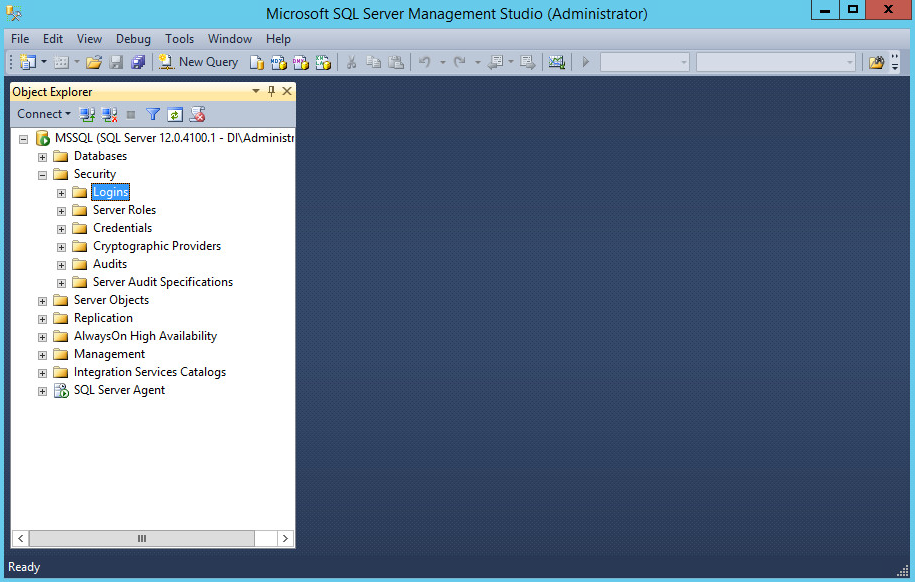
Open SQL Server Management Studio.
Hit Connect to connect to the database.
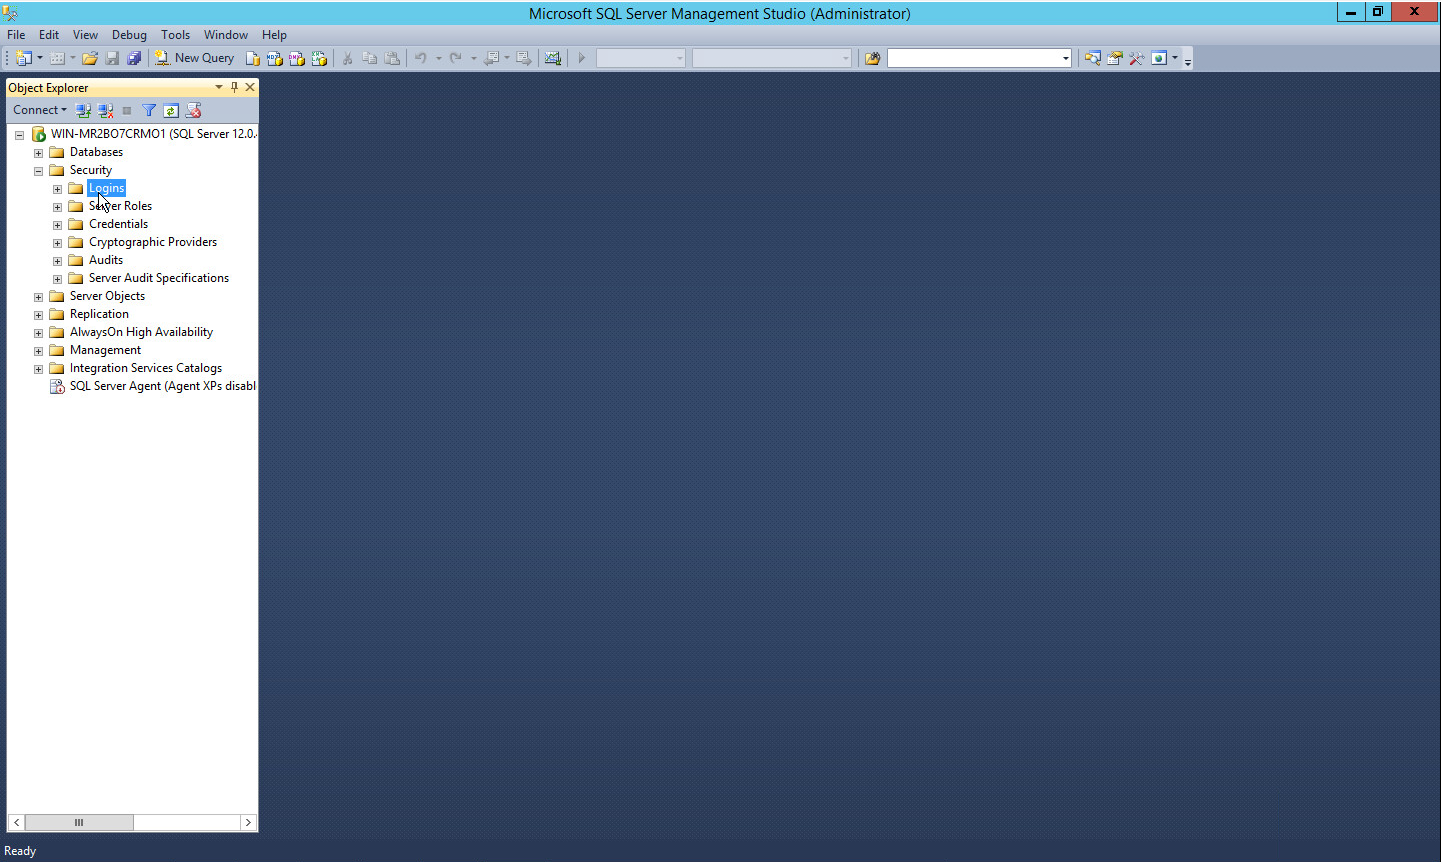
In the Object Explorer window, expand the Security folder.
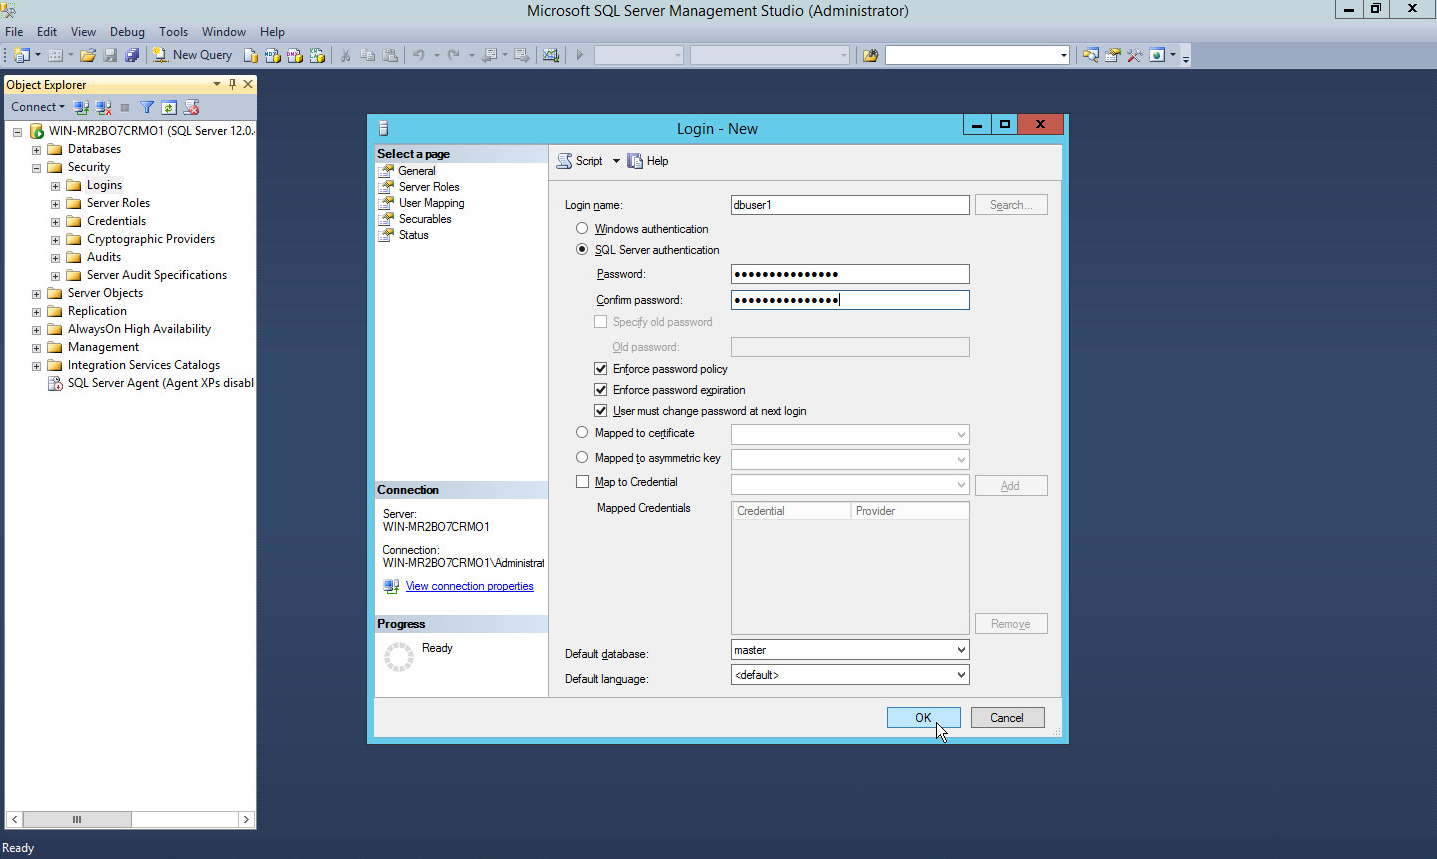
Right click on the Logins folder and click New Login….
Input the desired user.
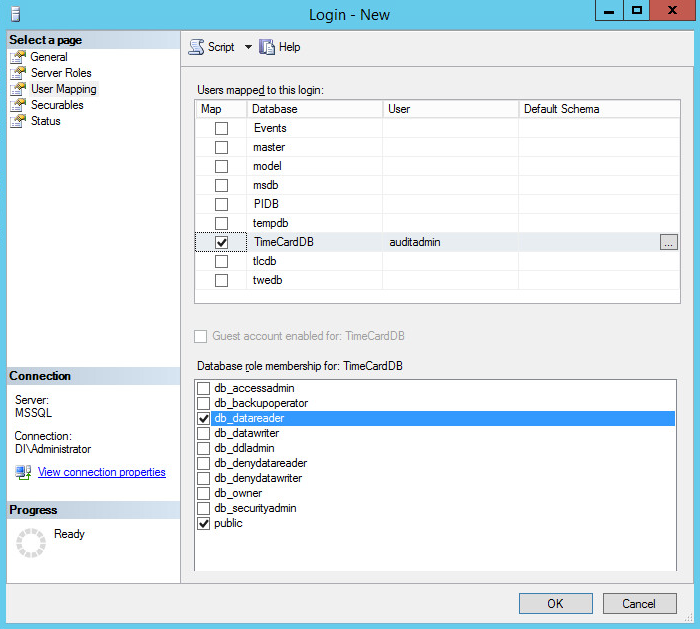
Click User Mapping.
For each database that Tripwire should monitor, click the database and assign the role db_datareader.
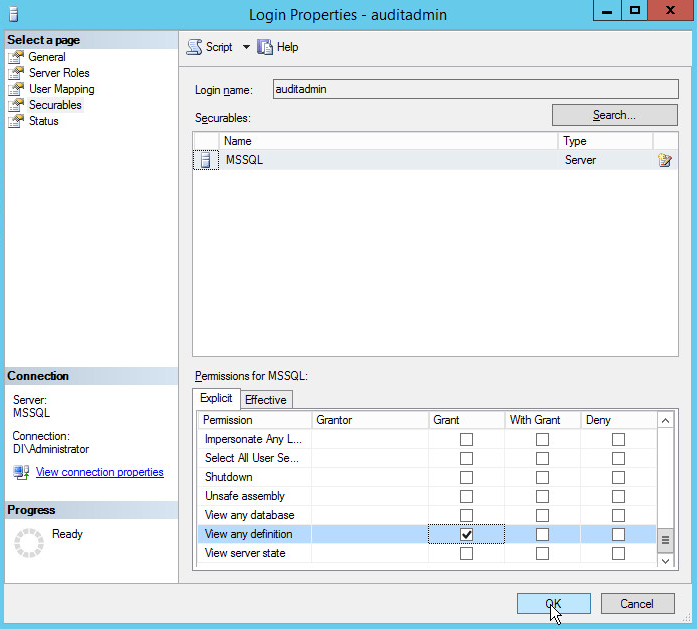
Click Securables.
Under the Grant column, check the boxes next to Alter trace and View any definition (if this is not available, create the user, then edit properties for that user).
Click OK.
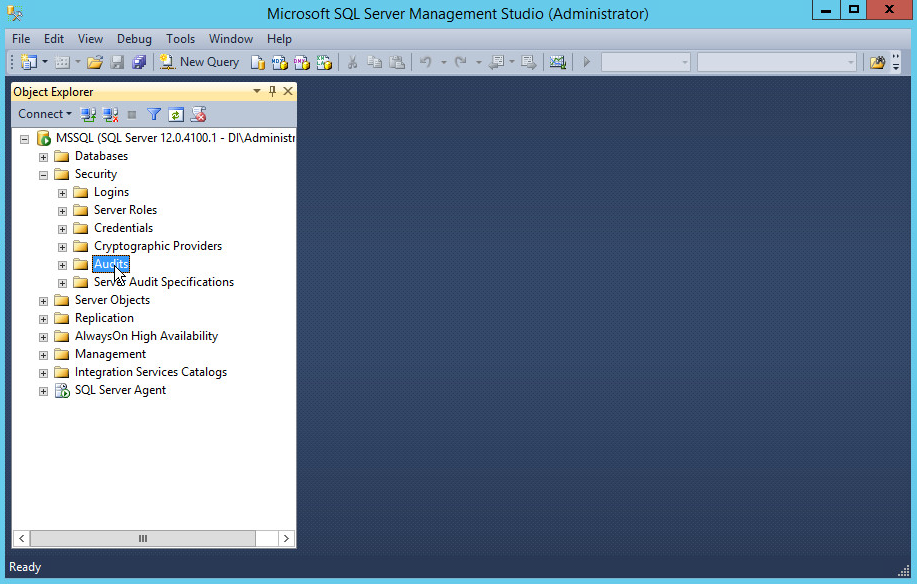
2.16.2. Create a New Audit on MS SQL Server
In the Object Explorer window, expand the Security folder.
Right click on the Audits folder.
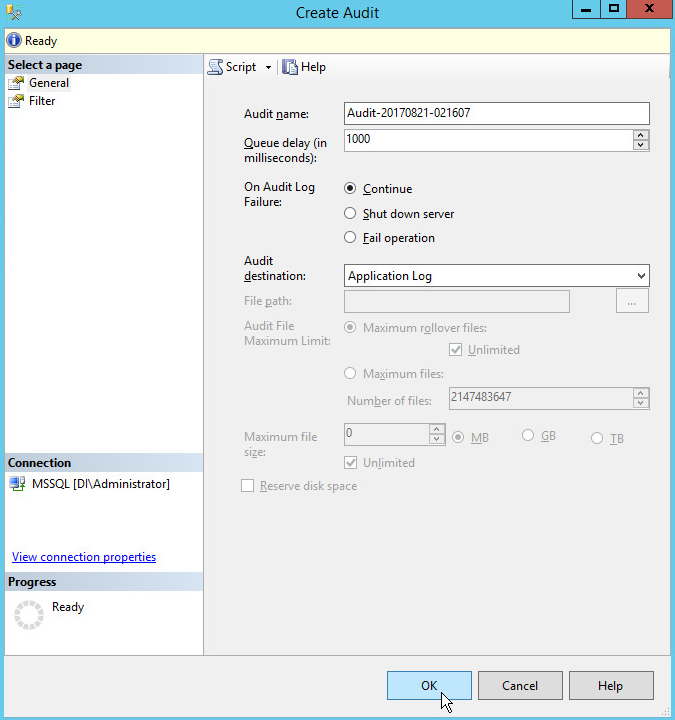
Click New Audit….
Specify a filename or any other settings per your organization’s needs. Note: If you specify a filename, you will be able to view any queries you wish to monitor in this Audit log, but not in Tripwire. However, if you set the Audit Destination to Application Log, the messages will be forwarded to the Microsoft Application Log. This will result in less structured (but still detailed) messages and allows the capability to collect them easily using HPE ArcSight ESM. If your ArcSight Connector is configured to collect Application Logs from the MS SQL server, no further configuration of the connector is required.
Click OK.
Right click Security > Server Audit Specifications.
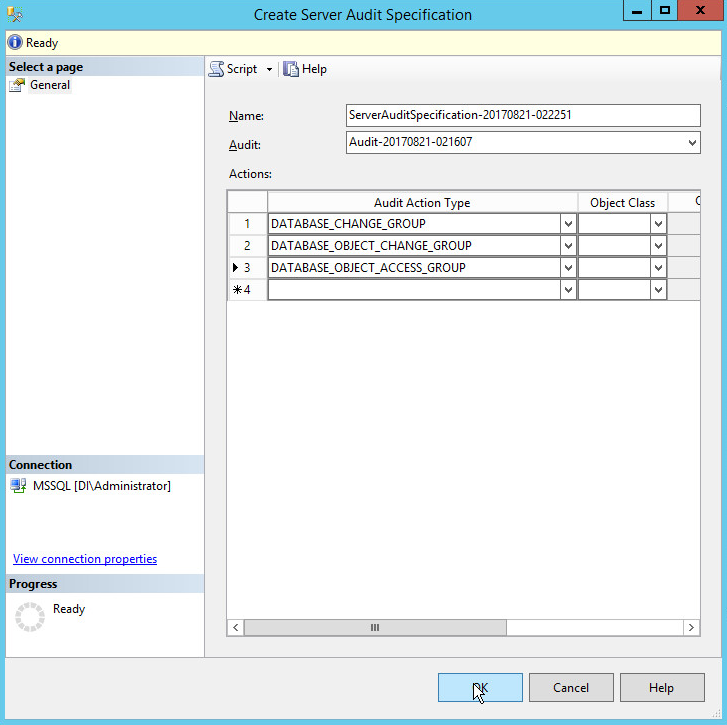
Click New Server Audit Specification….
For Audit: select the audit you just created.
Specify any Audit Action Types that Tripwire should be able to log.
Click OK.
Open a database that you wish to monitor specific objects in.
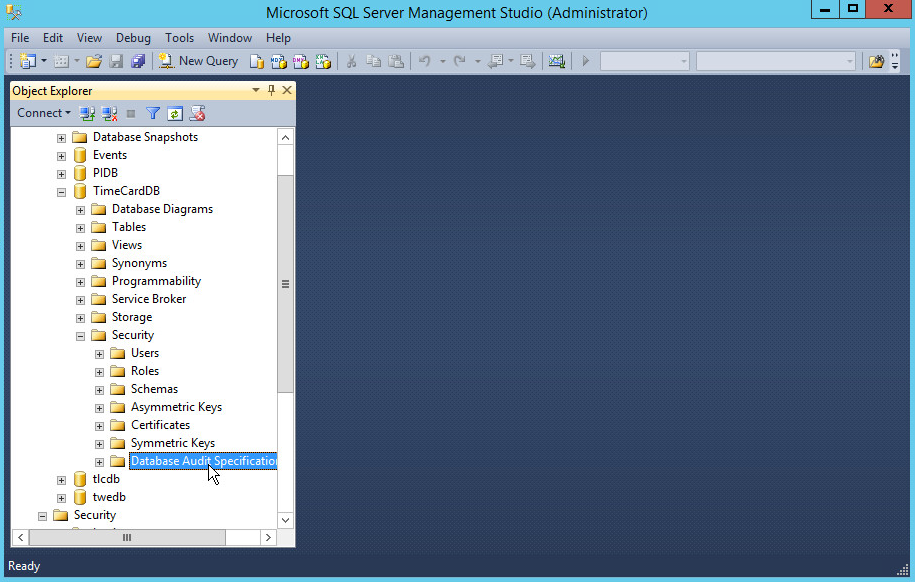
Right click Databases > <Database name> > Security > Database Audit Specifications.
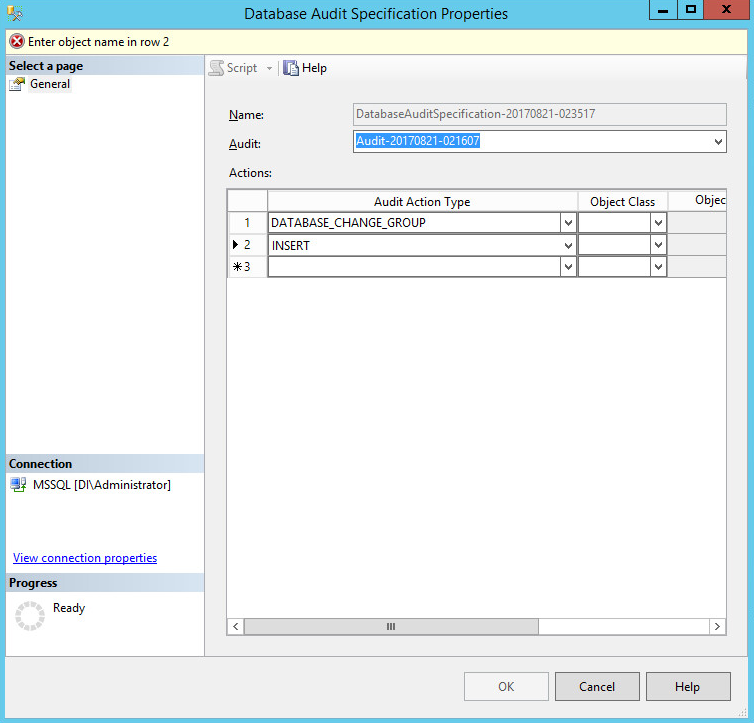
Click New Database Audit Specification….
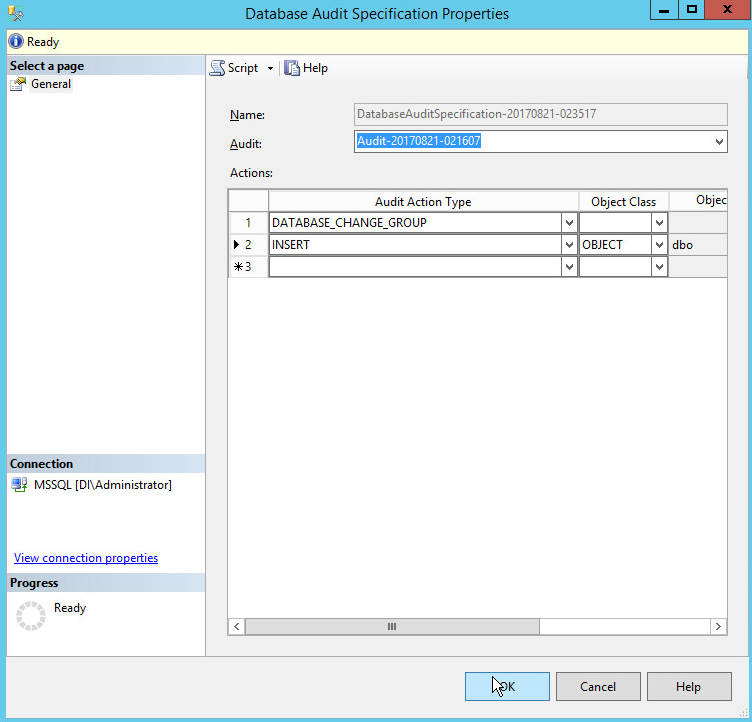
Select an Audit Action Type to monitor.
Select Object for the Object Class.
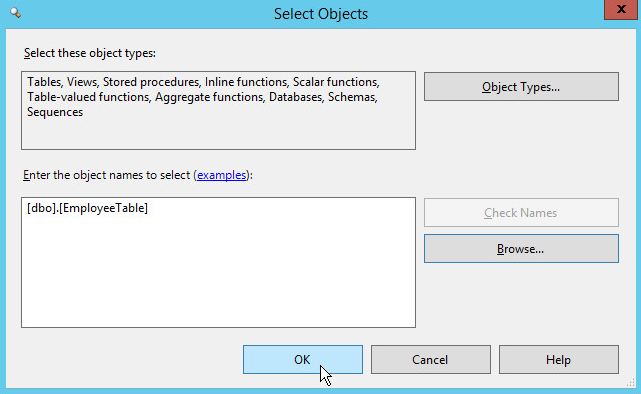
In the Object Name field, use the Browse button to find objects that you wish to monitor for the specified Audit Action Type.
Create as many types as you wish Tripwire to monitor.
Click OK.
Find the audits you just created in the Object Explorer and right click.
Select Enable ___ Audit Specification for each one.
2.16.3. Create a New Node for the MS SQL Server on Tripwire Enterprise
Open the Tripwire Enterprise console.
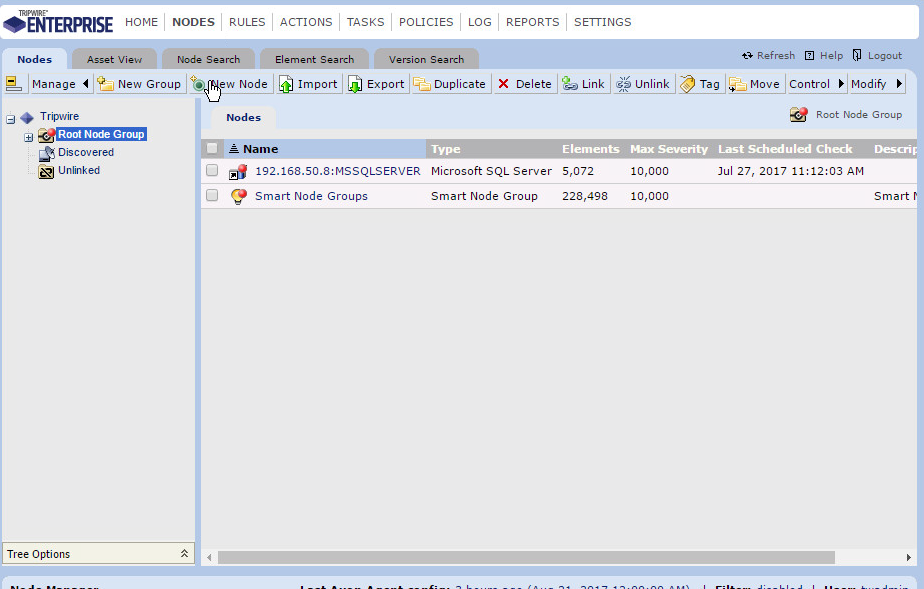
Click Nodes.
Click Manage > New Node.
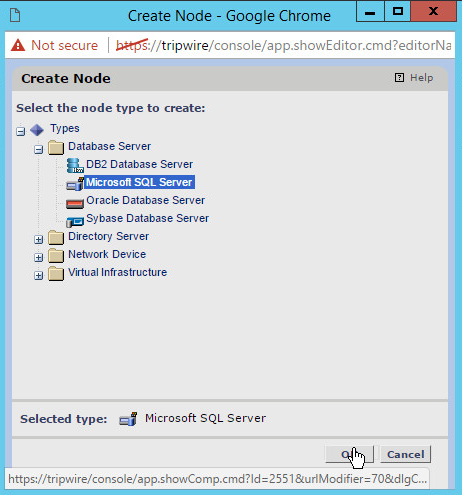
Click Types > Database Server > Microsoft SQL Server.
Click Ok.
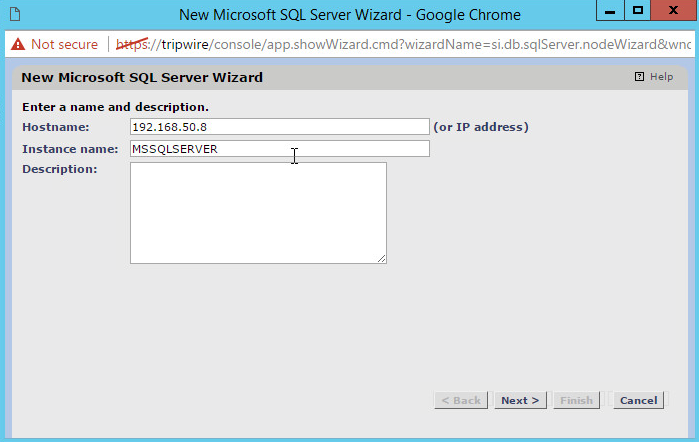
Enter the hostname or IP of the MS SQL Server.
Enter the instance name of the database.
Click Next.
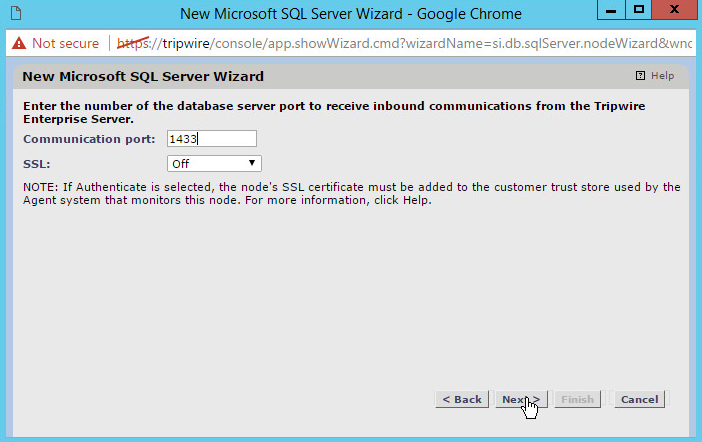
Enter the port the database listens on.
Click Next.
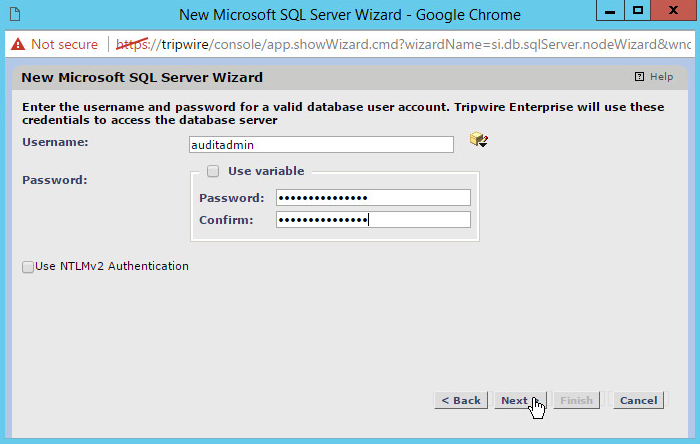
Enter the newly created username and password for the database.
Click Next.
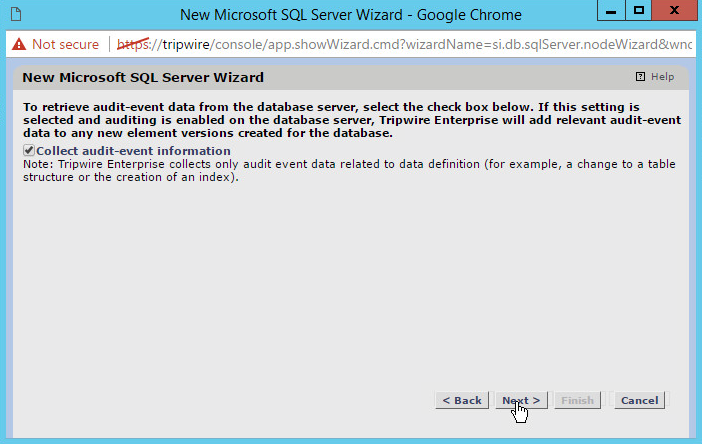
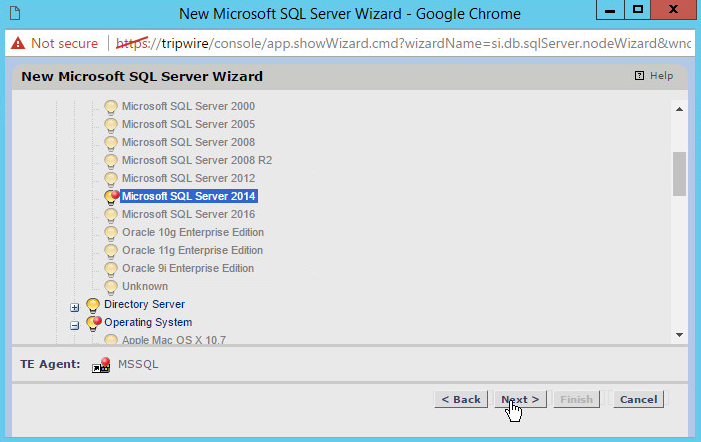
Check the box next to Collect audit-event information.
Click Next.
Find the MSSQL Server on the list.
Click Next.
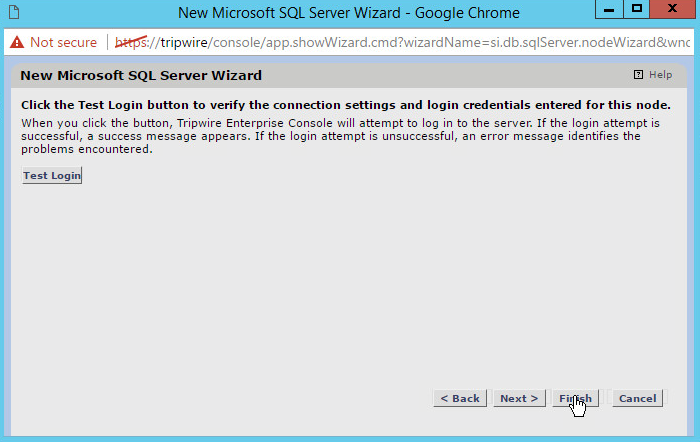
Test Login to ensure the information you entered was correct.
Click Finish.
Appendix A List of Acronyms
AD Active Directory
BA Client Backup-Archive Client
DB Database
DI Data Integrity
DNS Domain Name System
EOF End of File
ESM Enterprise Security Manager
HPE Hewlett Packard Enterprise
IP Internet Protocol
IT Information Technology
LDAP Lightweight Directory Access Protocol
MS SQL Microsoft Structured Query Language
NCCoE National Cybersecurity Center of Excellence
NIST National Institute of Standards and Technology
MS Microsoft
CA Certificate Authority
DSRM Directory Services Restore Mode
IIS Internet Information Services
IP Internet Protocol
SQL Structured Query Language
SDK Software Development Kit
TCP Transmission Control Protocol
SSL Secure Sockets Layer
TLS Transport Layer Security
VSS Volume Shadowcopy Services
VM Virtual Machines
VnE Vulnerability and Exposure
WORM Write Once Read Many

